Recently I started my experiments in baking and I have tried some cakes ( Yet to be posted) n cookies ..I am a big fan of rusk. I love its mild sweetness, flavour and crispness.
When I was having my tea with a rusk, my husband told me about the cake rusk he had in a bakery.He told it was very nice and he loved its taste. From then my search started and it ended up
here and
here. I got attracted by the pictures and tried it. I referred both the recipes and made some changes as per our taste.
I was searching for an eggless recipe but i dint get it. So I used eggs in my kitchen for the first time to try out this yummy stuff. YES, it was a big success. Being a beginner in baking , I felt proud and happy after seeing the result.. Thanks a lot !!
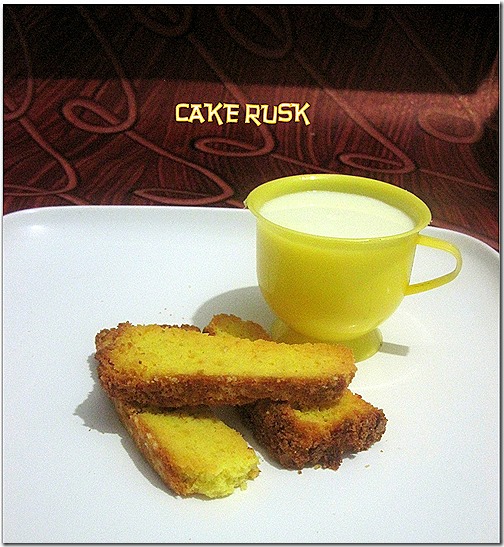
Beginners like me can dare to give this a try. !! This recipe yields nearly 15-20 pieces of cake rusk. But i used half of the cake to make the rusk . So i got only 10 pieces. By the time i clicked , i had only 3 pieces left over in my hand . So the shapes may not look good but believe me it tasted great.
A small intro to cake rusk for those who are not aware of: Cake rusk is an asian dessert and is a kind of double baked cake which goes well with chai/ tea.It is light brown in color & crispy in texture and taste.These crispy browned cake rusks are quite popular in Pakistan.
INGREDIENTS
1cup - 200ml
- All purpose flour / Maida – 1.25 cups (1 + 1/4 cup)
- Sugar – 3/4 cup ( 1 cup minus 3 tbsp)
- Cooking oil – 1/2 cup
- Eggs – 3 nos
- Vanilla essence – 1/2 tsp
- Salt – 1/4 tsp
- Baking powder – 1/4 tsp
- Yellow food color – A pinch ( I used yellow powder. If u have the liquid add few drops in egg mixture)
- Cardamom powder – A pinch ( Optional) ( I dint use)
|
METHOD
Sift maida , baking powder, salt and food color together.Set aside.
  
In a wide bowl take the sugar and cooking oil. Mix well till sugar dissolves.Add the vanilla essence and mix well.
 . . 
Then add the eggs one by one and beat well till u get a fluffy mixture. ( I used hand whisk.But i felt electric whisk would do well)
  
After adding all the eggs beat for another 8-10 mins.Now add the sifted maida slowly and keep stirring the mixture.
  
No need to add water or milk. U’ll get the correct consistency if u follow the same quantity of ingredients as i mentioned.Now transfer the dough into a greased square shaped cake pan.Pat on all the sides of cake pan for even spreading.
 
Pre heat the oven to 180c for 10 mins in convection mode.Then place the cake tray and bake the cake for 30-35 mins . Mine exactly took 35 mins. But it depends on the power of ur MW. So keep an eye after 20 mins. Check whether the cake is done by inserting a knife or spoon .If it comes out clean , ur cake is done.
  
Transfer the cake to a wire rack or a plate and keep as such for 15-20 mins.Then invert the tray , the cake will come out easily.Remove the extra upper crust part and make a square shape cake.
 
After it completely cools down , cut the cake into the desired rusk shape. (ie, Lengthy 1 inch thick slices)
 
Again transfer the slices into a greased cookie tray . Arrange and bake them again in a pre-heated oven in 180c.
 
Bake in convection mode at 180c for 10 mins. Turn it once and bake for another 10 mins.Please keep an eye after 5 mins. If u get the desired brown color , please remove and let it cool.I baked it in two batches.
 |
NOTES
-
If u want to make a eggless version try replacing the eggs by egg substitute powder or follow the eggless sponge cake recipe . Hope it will work. As i tried for the first time i dint want to take risk. So i halved the original recipe and followed as such. Soon i’ll make an eggless version and update it.
-
While baking the cake , keep checking after 20 – 25 mins whether the cake is done.
-
While baking the rusk, keep an eye as it tends to brown faster and it gets burnt. Make sure the center portion should be slightly browned not much like the sides..
-
First keep the rusk for 10 mins and then change the other side. Set another 10 mins.
-
After 10 mins , remove the plate and touch the center portion, If it is too soft , switch off the oven and allow the plate inside the hot oven.
-
It gets roasted by the heat inside the oven . I did the same. If u feel it has to be roasted , again bake it for 5 more minutes.
-
I used half portion of cake as such for my doter and we enjoyed eating it. It was very soft and spongy. Here is a picture of cake. So if u wanna make a sponge cake , u can surely try this recipe

Continue Reading...


 .Friends,do try this bakery style Masala biscuits/Khara biscuits and enjoy your tea time ! Color of this biscuit may vary slightly based on the time of baking and quantity of spices used.But the taste would be gr888 !

 Masala vegetable toast - Iyengar Bakery Style Recipe


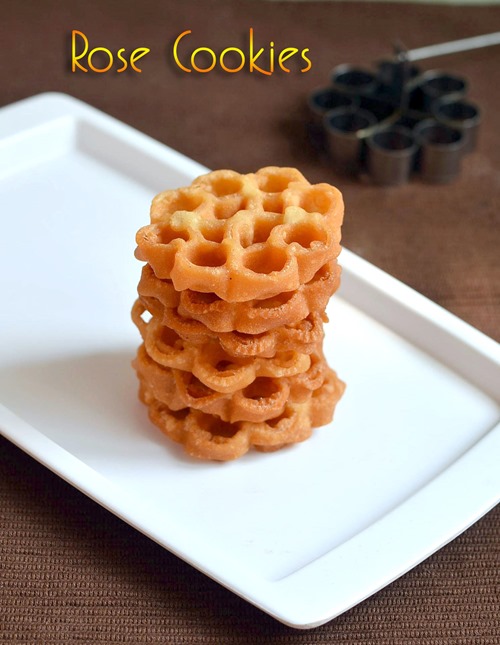
 Eggless achu murukku recipe/Rose cookies recipe for Christmas Celebration.


 Easy,bakery style nankhatai recipe for tea time!


 .
.