Search Chitra's Food Book

Showing posts with label DIWALI RECIPES. Show all posts

October 19, 2016

Tirunelveli Halwa Recipe - Wheat Flour Halwa - Godhumai Halwa - Easy Version

Tirunelveli halwa recipe
Tirunelveli halwa using wheat flour / Godhumai halwa with step by step photos and video. My mom & dad are basically from Tirunelveli, Tamil nadu but settled in Salem. But all our relatives are in & around Tirunelveli. Right from my childhood, we used to travel there at least once in 6 months to my thatha aachi’s house. Most of my summer vacations are spent there. My thatha used to buy the most popular Iruttukadai Halwa and Oma podi from Shanthi sweets for teatime without fail. Having tasted this Halwa for N number of times, I have never imagined myself trying it at home. 

In 2010, I watched few video recipes and tried Tirunelveli halwa recipe for the first time. Though it tasted the same like TVL halwa, I used food color to bring its brown color. At that time, I was not aware of certain tips and tricks to make a perfect Tirunelveli halwa without adding food color. And now after seeing so many websites and video recipes, I came to know its technique. So I wanted to make it again and post it in my blog for this Diwali.


Authentic Tirunelveli halwa calls for soaking and grinding Samba Godhumai ( Whole wheat grains), extracting the milk ( Godhumai paal) and fermenting it overnight. I followed this method for my earlier recipe. But this time, I simplified its procedure by combining the methods of easy wheat flour halwa recipe in Jeyashri's blog & traditional Tirunelveli halwa recipe from Dosa to pizza youtube video recipe. I altered the quantity of ingredients and changed the procedure accordingly. I made it using instant wheat flour( Godhumai maavu), used oil + Ghee to bring its texture and added caramelized sugar to bring its color naturally. Wow, You won’t believe me, it came out very close to original Tirunelveli halwa in both color & texture. There is no compromise in taste with the authentic halwa.

 Generally Thirunelveli halwa is not made into pieces.So you don’t need to look for any sugar syrup consistency. This halwa itself will show you the correct stage to remove it. So beginners can also dare to attempt this recipe at home. But the most important thing you need is “PATIENCE”. Yes, This halwa takes around one hour for preparation & cooking time but the end result will make you forget all the pain and get credits from your family members for sure. I got tempted by the pictures of Halwa kadai online website and clicked my halwa in a leaf. I am very happy to see the ghee dripping hot halwa in the picture as I wished. So here you go, the world famous Tirunelveli halwa recipe using wheat flour in an easy way with step by step photos and a detailed video tutorial just for you all.

If you are looking to try the traditional method, do check this post !


Tirunelveli halwa recipe with wheat flour

Tirunelveli halwa / Wheat flour Halwa


Tirunelveli halwa / Wheat flour Halwa How to make Tirunelveli halwa with wheat flour/ Godhumai halwa
Cuisine: Indian
Category: Sweet
Serves: 1/4-1/2 kg
Prep time: 120 Minutes
Cook time: 60 Minutes
Total time: 180 Minutes


INGREDIENTS
1 cup - 250ml
  • Wheat flour - 1 cup ( I used Pillsburry atta)
  • Water - To make dough + 5 cups for soaking
  • Sugar – 2 to 2.25 cups + 1/4 cup to caramelize 
  • Ghee – 1 cup + 1 tbsp
  • Cooking oil - 1/3 cup  ( Use odourless oil)
  • Cashews – few
** The quantity of oil & ghee mentioned is approximate. This halwa may take more or less. Don’t worry for adding more because we are going to collect all the fat at the end !
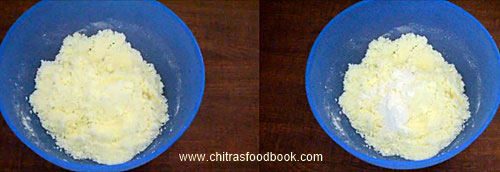
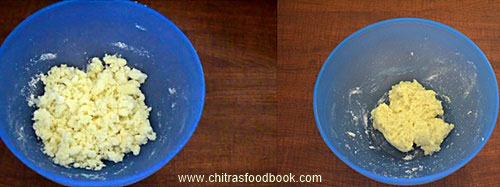
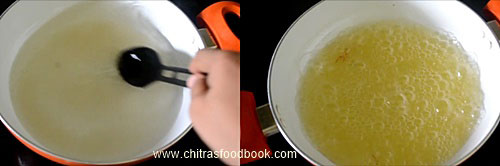
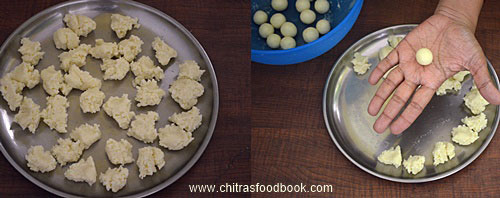
HOW TO MAK TIRUNELVELI HALWA - METHOD

  • Take 1 cup of wheat flour, add water little by little and knead a dough like chapathi dough. Let it be thick and no need to use oil or ghee while making the dough. Place the dough in a big bowl and add 5 cups of water to it.Let it soak for 2-4 hours.
    Tirunelveli halwa recipe
    Tirunelveli halwa recipe
  • After 2 hours, take the dough with milk and mix it well with your hands. Dough dissolves in water and you will get white colored milk.Strain the milk through a cloth strainer and squeeze the fiber like part that comes from the wheat dough. Do not add more water.Use the soaked water to extract the milk. After taking all the milk, discard the residue.Set the milk aside. In a bowl, melt the required ghee and mix with oil. Set aside.
    Tirunelveli halwa recipe
    Tirunelveli halwa recipe
  • In a wide, heavy bottomed kadai ( Non-stick kadai) , heat 1 tbsp of ghee and roast the cashews. After it turns golden brown, add the wheat milk.No need to remove the roasted cashews. Start stirring. Initially the mixture looks very watery. But If you keep stirring for 15 minutes, it becomes slightly thick. Keep the flame medium and stir it well. 
  • If you want, you can keep the flame high to hasten this process. But stay nearby because it will burn at the bottom very soon. After it looks thick like porridge, add 2 cups (2.25 cups for more sweetness, I used 2.25) of sugar and keep mixing.  Keep the flame very low. Now you have to caramelize the sugar in the next step.
    Tirunelveli halwa recipe
  • Sugar Caramelization: In another gas burner, keep a small kadai and add 1 tbsp ghee. After its melted, add 1/4 cup of sugar. Mix well and caramelize it. Do the entire process in low flame because if the sugar is over caramelized, it turns bitter in taste and spoils the taste of halwa. So please be careful. Tirunelveli halwa recipe
  • Sugar will melt in ghee and its color changes to golden brown. Switch off the flame immediately and mix well in the heat. Please refer the video for clear understanding. Add the caramelized sugar to the halwa. It may splutter, so be careful while pouring it.
     Tirunelveli halwa recipe
  • Again start mixing the halwa. Keep the flame medium. After the caramelized sugar is mixed well, color of the halwa will be changed to light brown.Check the taste and add more sugar if needed at this stage itself. Then add 1tbsp of melted ghee + oil and mix well. 
  • Ghee+ oil will be absorbed by the halwa and turns glossy/shiny. Again add 1 tbsp of ghee and mix well. Continue this process at regular intervals. Color of the halwa becomes darker as it cooks. Now it resemble the original Tirunelveli halwa.
    Tirunelveli halwa recipe
  • Halwa will start to leave the sides and thickens. Do not remove at this point. Again add some ghee+Oil and keep mixing in low to medium flame. Never increase the flame because halwa may turn chewy. Halwa will become non-sticky and slide off the ladle. Keep adding ghee. It will be completely non-sticky, becomes soft & rotates with the ladle. Keep adding ghee + oil. Do not lose patience. 
  • At one stage, it will stop taking ghee and starts to ooze out the ghee+ oil in the sides first.  It happens only during the last 5 minutes. Keep mixing. Now you can find ghee oozing out all over the halwa. Collect the ghee that oozes out from the halwa in a bowl. Slide the kadai slightly and take out the ghee. Flame should be low. I collected more than 3/4 of the ghee+oil I added in the halwa. 
  • You can use this ghee for making other sweets or in your regular cooking. It won’t smell or taste sweetish. After collecting the ghee, transfer the halwa to a big bowl and allow it to become warm. Serve it hot or warm as you wish. The entire process took one hour for me.
    Tirunelveli halwa recipe
  • This halwa will release the ghee every time you reheat it.So you can reheat the halwa in microwave for 1 minute or keep it inside idli steamer till it gets heated. Remove the ghee from the halwa and serve hot. Don’t worry, the taste of this halwa will never be changed even after removing the ghee. 
  • You can store this halwa in an airtight box and keep it for more than a week and enjoy. No need to refrigerate too. This halwa will be coated with frozen ghee after its cooled down. It tastes mildly chewy just like original Tirunelveli halwa. If you wish, reheat and serve every time or enjoy as it is !!
    Tirunelveli halwa recipe


Note
  • If you want to follow the traditional method, wash and soak 1 cup of samba wheat for 5 hours. Grind in a mixie jar adding water and grind in batches. Strain and extract the milk. Let the milk ferment over night. The next day, remove the white layer that is formed on top of the milk. Make halwa as mentioned above.
  • The sugar quantity I’ve mentioned gives the required sweetness to the halwa. It won’t taste too sweet as we are adding more ghee. If you like milk sweetness, add 2 cups of sugar.
  • If you are calorie conscious, you can use ghee & oil in equal quantity OR you can use ghee alone to make super rich halwa. But in halwa kadai, they do use some oil. But never use kadalai ennai/ groundnut oil. It will spoil the flavor of halwa.
  • You may not need to use all the ghee+ oil I’ve mentioned here. Sometimes, it may take lesser too.When the halwa starts to ooze out the ghee, stop adding it.
  • Do not remove the halwa until ghee starts to come out.
  • Do not mix in high flame at the end, halwa may become more chewy.


Wheat flour halwa
Try this simplified version of Tirunelveli halwa and do share your feedback with meHappy
Tirunelveli halwa recipe
Continue Reading...


October 18, 2016

Rasmalai Recipe With Readymade Rasgulla – How To Make Instant Rasmalai Under 10 Minutes

Rasmalai with readymade rasgulla
Every year during Diwali, I wanted to share some Bengali sweets.This year too, I tried Rasgolla recipe at home but it din’t turn up as I expectedWorried
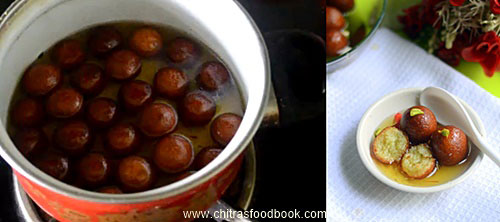
. It came out soft, spongy but became little bit flat after taking out from the sugar syrup. So I am planning to try it again by correcting my mistakes. I hope I could make a perfect rasgolla very soon and share it in my spaceWaiting
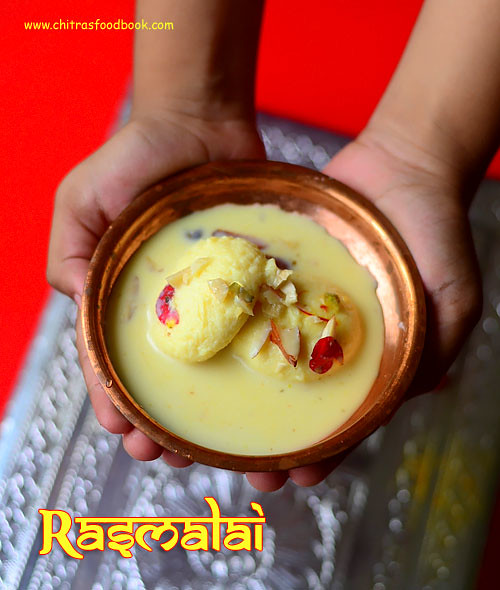
. As I had storebought, readymade rasgulla at home, I wanted to make a rich dessert recipe with it. What else other than this yummy rasmalai recipeCool. Traditional, authentic rasmalai calls for boiling milk & sugar for hours. But this is an easy, instant recipe with just 2 major ingredients. I had some store bought condensed milk and rasagulla in hand. So I made it quickly under 10 minutes. If you have store bought or homemade left over rasagolla, you can make this rich, creamy, yummilicious Indian dessert with milk in the next few minutes. I guess milk powder also works well instead of condensed milk. Friends, Do include this easy sweet recipe in your Diwali 2016 menu and have a great celebration ! Lets see how to make this easy peasy Bengali delicacy, Rasmalai recipe at home with step by step photos !
If you wish to make condensed milk on your own, check out this link.

Also check out my 15 Easy Diwali Sweets for beginners !


Instant rasmalai recipe

Easy Rasmalai Recipe


Easy Rasmalai Recipe Easy rasamali recipe under 10 minutes using milk, readymade rasgulla, condensed milk, nuts and saffron ! - Rich Indian Dessert recipe.
Cuisine: Indian
Category: Dessert recipes
Serves: Serves 5
Prep time: 5 Minutes
Cook time: 5 Minutes
Total time: 10 Minutes


INGREDIENTS
1 cup - 250ml
  • Homemade or store bought Rasgolla - 5-6 nos
  • Boiled full cream milk - 2 cups ( Use full fat milk)
  • Condensed milk - 1/2 cup
  • Chopped nuts - A handful  ( I used cashews, badam and pista)
  • Kewra essence - few drops (optional)
  • Crushed cardamom powder - 1/4 tsp or Rose water - few drops
  • Saffron threads - Few
METHOD

  • In a wide mouthed kadai, take the boiled milk and condensed milk.Mix well and boil for 5 minutes. Keep the flame medium. Collect the milk skin( Malai) that settles in the sides of kadai and add to milk.Now check for taste and add more condensed milk if needed. Mix well and boil for a minute.In the mean time, chop the nuts and set aside.
    Easy rasmalai recipe
  • Add the chopped nuts, few saffron threads, essence & cardamom powder/ rose water. Stir well and switch off the flame. Take the rasgolla and press it gently using your hands to drain the water in it.Do not squeeze hard, it may break. Make it flat and add to the milk mixture. Refrigerate for an hour and serve ! Quick and Easy rasmalai is ready to indulge !!
    Easy rasmalai recipe
    Easy rasmalai recipe
        Easy rasmalai recipe
Enjoy….

Note
  • Add more condensed milk if you have sweet tooth.
  • Add more or lesser quantity of nuts as per your wish.
  • If you don’t have condensed milk in hand, boil 2.5 cups of milk till it reduces to half, add the required sugar, mix well and add the essence and nuts. This is the authentic version of making rasmalai.

Try this Instant, Easy Rasmalai recipe at home and enjoy !!
Instant rasmalai recipe
Continue Reading...


October 17, 2016

Garlic Murukku/Poondu Murukku Recipe - Easy Murukku Varieties

Poondu murukku recipe
Recently when I went to Salem - Tamil nadu, we visited Lakshmi sweet stall to buy some sweets and snacks for Sendhil’s friend.There I saw some interesting murukku varieties like Onion murukku, Poondu murukku, butter murukku and many more. As I had already tried butter murukku and vengaya murukku, I wanted to prepare garlic murukku at home. I browsed few recipes and came across this one. This is the first time I am trying a murukku recipe with garlic.The combination of rice flour, besan and butter worked out very well. It came out white, crispy and mildly spiced with a nice garlic flavor. Its a great teatime snack and we loved it very much.Friends, If you are looking to try a flavored murukku recipe for this Diwali, do try this easy murukku variety and enjoy with your family! Lets see how to make yummy poondu murukku ( Garlic chakli) at home with step by step photos and a video !
Do check out my Ribbon pakoda , Garlic Karasev , other murukku varieties too !


Poondu murukku recipe

Garlic murukku / Poondu murukku recipe


Garlic murukku / Poondu murukku recipe How to make easy garlic murukku with rice flour, besan flour, hot oil and butter
Cuisine: Indian
Category: Snacks
Serves: 12-15 nos
Prep time: 10 Minutes
Cook time: 2 Minutes
Total time: 12 Minutes


INGREDIENTS
1 cup - 250ml
  • Rice flour/Idiyappam flour - 1 cup
  • Besan flour/Kadalai maavu - 1/3 cup
  • Softened butter -  3/4 to 1 tbsp (Unmelted)
  • Hot oil - 1 tsp
  • Salt & water - as needed
  • Cumin seeds - 1/2 tsp ( optional)
To grind
  • Garlic cloves - 5 nos
  • Red chillies - 2-3 nos ( I used 2 spicy chillies)
  • Water – 1 tbsp ( To soak)
METHOD

  • Peel garlic cloves.Soak garlic and red chillies in 1tbsp water ( you can use hot water too).Let it soak for 10 minutes. Then grind it to a paste adding the soaked water.It won’t grind to a smooth paste as the quantity is less. So grind it continuously for a minute, wipe the jar and grind it till it turns smooth.Don’t worry , it looks watery after grinding. But make sure there are no garlic pieces or chilli seeds. It may block the chakli nozzle while squeezing.
    Poondu murukku recipe
    Poondu murukku recipe
  • In a wide bowl, take the rice flour, besan flour, salt and sieve it. To this, add softened butter.Heat oil in a mini pan and add 1 tsp hot oil to the murukku mixture. Add ground garlic paste. Mix well to spread the butter and oil with the flour. Check for salt. Add more if needed. Then add water little by little and make a smooth dough. No problem if the dough is slightly sticky.
    Poondu murukku recipe
    Poondu murukku recipe
  • Take the star mould and keep in the murukku press/Chakli press. Fill the mould with the dough and squeeze it to make a round, concentric circle. You can press the murukku in a butter paper or polythene sheet. Cover the remaining dough with a wet cloth or a plastic cover. This dough may tighten over time.So if needed, sprinkle some water, mix well and press it.
    Poondu murukku recipe
  • Heat oil in a kadai and when it gets heated, drop a pinch of dough and if it rises to the top immediately, oil temperature is right. Drop 2-3 murukku in hot oil and cook both the sides till bubbles cease. Remove in a tissue paper. You can also squeeze the murukku directly in oil, cook them and break into pieces just like butter murukku. Either ways would do. In Lakshmi stall, I saw it as pieces/Thool murukku and not as whole ones. So I made a batch in that way too. 
  • Store in an airtight box after cools down. Enjoy for weeks ! This murukku takes time to lend all its flavor. So try to consume the murukku after few hours of making.
    Poondu murukku recipe
    Enjoy !

Note
  • I am not sure about using ghee instead of butter. The color of murukku may vary.
  • You can use red chilli powder instead of red chillies. But grinding garlic would become difficult. In that case, grind garlic as much as possible and strain it adding some water. Add the garlic water to make the dough.
Try this easy, garlic flavored murukku for this Diwali and enjoy !

Garlic murukku recipe

Continue Reading...


October 13, 2016

Gulab Jamun Recipe With Milk Powder

Last year I shared Gulab jamun recipe with khoya. As it came out very well, I got the confidence to try Gulab jamun with other options. Khoya is not easily available in many places. So Milk powder is the best replacement for khoya to prepare Gulab jamun. 

Recently my reader friend Harini asked me to share milk powder gulab jamun recipe and Gulab jamun with Instant store bought mix as well. As I had bookmarked this recipe already, I tried it yesterday. Milk powder, Fine semolina ( Chiroti rava), maida, milk are the major ingredients used in this recipe. Its easy to make too. It came out really well in my first attempt itself. 

The author of this recipe had given the instructions very clearly which helped me a lot to make perfect Gulab jamun. Thank you so much Savita for the great recipe. I was very happy to see my soft, crack free, well soaked Gulab jamun in sugar syrup. I don’t say it doubled in size but it did puff up. I have shared step by step photos, tips for trouble shooting and a cooking video for beginners understanding. Hope you will try it for this Diwali and share your feedback with me. Lets see how to make yummy Gulab jamun recipe with milk powder & semolina.

Check out my Gulab Jamun with khoya and Jamun Kofta gravy recipes too !

Gulab Jamun With Milk Powder


Gulab Jamun With Milk Powder How to make gulab jamun with milk powder & semolina
Cuisine: Indian
Category: Sweet
Serves: 20 - 25 nos
Prep time: 15 Minutes
Cook time: 15 Minutes
Total time: 30 Minutes


INGREDIENTS
For Gulab jamun dough : 1 cup - 250 ml
  • Milk Powder - 1 cup ( I used Everyday brand)
  • All Purpose flour - 1 tbsp
  • Fine Semolina / Chiroti Rava - 1 tbsp ( Must use fine rava)
  • Baking Powder - 1/4 tsp
  • Unmelted Ghee - 1 tbsp ( thick ghee)
  • Cooking oil - 1/2 tbsp ( Use flavorless oil)
  • Milk - As needed ( I used 1 tbsp)
  • Water - 1.5 tbsp ( To soak semolina)
  • Cooking oil – To deep fry
For Sugar syrup
  • Sugar - 1 cup
  • Water - 1.5 cups
  • Saffron threads - few
  • Crushed Cardamom seeds - 2 nos Or Rose essence - few drops
METHOD

  • Take the fine semolina ( Chiroti rava) in a small bowl and add 1.5 tbsp water to cover it. Let it soak well for 10 minutes. No problem if there is excess water slightly. Mix well and keep it aside. In a wide bowl, take the milk powder.Add ghee and cooking oil. Mix well with your fingers. Make sure fat is well distributed with the milk powder.

  • To this mixture, add baking powder, maida and soaked semolina. Mix well with your fingers. Do not give too much pressure. Just mix gently. Now the mixture will resemble Pea sized granules. Then add boiled, room temperature milk little by little and try to gather the mixture to resemble a dough. Do not use your palm and knead it. Use your fingers alone(  I added 1 tbsp milk). Dough would be very sticky at this stage. Do not panic. Just cover the dough with a cloth ( Dry cloth, not wet ones) and rest it for 10 minutes.

  • In a mean time, lets prepare the sugar syrup.In a deep bowl or kadai, mix sugar + water. Mix well in high flame till sugar melts completely. Then reduce the flame to medium and let the syrup roll boil for 5 minutes. Add cardamom powder or rose essence and saffron thread in the middle. Sugar syrup will become sticky to touch and resembles oil in consistency. Switch off the flame and keep aside. It will become warm.

  • Now take the gulab jamun dough. It would be non-sticky to touch. Make small pinches roughly to make balls. Then shape the balls smoothly without cracks( This point is more important to get crack free gulab jamuns) Cover it with a cloth till use.
  • If you think, dough sticks much to your hand, grease your palm with ghee OR wash your hands in water, wipe it dry and roll it. It will come out well. Just make sure there are no cracks. Do not roll it tightly. Do it gently. If you roll it too tight, jamuns may become hard.
  • Heat oil in a kadai and keep the flame low to medium. When it gets heated, drop a pinch of dough, it should rise slowly and come to top without browning in a count of 5 ( I followed Savita’s instructions and counted up to 5. If the heat of oil is too less, gulab jamun will disperse in oil. If the temperature is high, its color would change quickly but it remains uncooked inside.So please be careful) Now stir the oil once and add the jamun balls. ( If you are a beginner, do a small test. i.e Heat little oil in a mini tadka pan and drop a small peanut sized dough ball. Check whether it disperses in oil, comes out hard etc. Deep fry it, open and check it is properly cooked. After doing this test, proceed for further deep frying) .Do not disturb the jamun for 10 seconds. Then stir the oil without breaking the jamun. Keep stirring the oil  and toss the gulab jamun so that it will get cooked evenly with a nice golden color. Keep the flame low to medium. It should be soft after frying and not too hard. Please refer the video for better understanding.
  • Remove the cooked gulab jamun in a tissue paper and drop it in the syrup. Syrup should be warm not too cold. Let it soak for 2-3 hours to enjoy its best taste ! It looks shiny and soft after soaking well. This Gulab jamun stays good for 2 days without refrigeration. Enjoy !

Note
  • Gulab jamun will disperse in oil if the oil temperature is too low.
  • Gulab Jamun will become chewy if you add less baking powder.
  • No need to add soda for this recipe.
  • Fine semolina is a must. Do not use coarse ones.
  • Beginners try with half the quantity of ingredients mentioned to avoid wastage.
  • I have not used lemon juice in the sugar syrup as I have added more water. It won’t crystallize.
  • If  you have leftover fried gulab jamun, try this Jamun Kofta gravy
Try this easy, yummy Gulab jamun at home for special occasions and enjoy !
Continue Reading...