Search Chitra's Food Book

Showing posts with label LUNCH BOX IDEAS. Show all posts

January 30, 2017

Potato Poori – Aloo Puri Recipe - Alu Ki Puri

Potato poori
Potato poori / aloo puri in Hindi is an interesting kids friendly puri recipe. Poori would be our Sunday breakfast mostly. So I started exploring varieties of poori for a change. I have already shared Palak Poori, Masala poori, Beetroot poori, Tomato poori, chola poori recipes. This Sunday I tried potato poori ( Alu ki puri in Hindi) for the first time. I made the poori dough by mixing wheat flour with boiled, mashed potato and spice powders. 

Puri came out super soft with awesome masala flavor. It stays soft for hours together. So it can be packed for lunch box and ideal for travel as well. Side dish is not required for this puri recipe. Still I served it with tomato sabji and onion raita. Mixed veg kurma also goes well I guess.We loved it a lot. Its a winner recipe in my house. Do try this potato poori recipe for your kids and family. They will love it very much. 

Next I am planning to make methi poori and mint poori. Friends, If you know any other interesting poori varieties, do share them in the comments section. I will make it. As I say in all my poori posts, thickness of poori while rolling and the proper temperature(heat) of oil is the secret to get nicely puffed up poori. I have shared those points below in detail. If you are a beginner, It will sure come by practice. Ok, Lets see how to make Aloo Poori recipe with step by step photos and a video !


Aloo ki puri recipe

Potato Poori - Aloo Ki Poori Recipe


Potato Poori - Aloo Ki Poori Recipe 
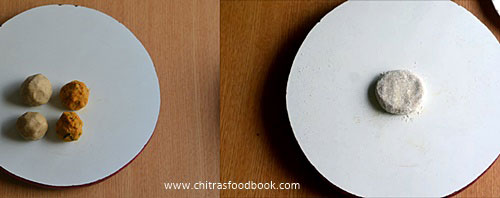
How to make aloo ki puri / Potato poori recipe with step by step photos and video
Cuisine: North Indian
Category: Breakfast
Yields : 12 nos
Prep time: 10 Minutes
Cook time: 2 Minutes
Total time: 12 Minutes


INGREDIENTS
1 cup - 250ml
  • Whole Wheat flour / atta - 1 cup ( I used Aashirvad)
  • Medium sized potato - 2 nos
  • Cumin seeds or Ajwain - 1/4 tsp
  • Red chilli powder - 1 tsp ( I used Kashmiri chilli powder)
  • Dhania powder - 1 tsp
  • Garam masala powder - 1/2 tsp
  • Coriander leaves - 2 tbsp ( finely chopped)
  • Crushed kasoori methi – 1 tsp
  • Salt - as needed
  • Water - as required ( I added 1/3 cup)
METHOD

  • Wash and pressure cook potato in required water in very low flame for 2 whistles.Open the cooker and remove the potato. Peel the skin. Place the potato in a wide plate or bowl and mash it.
  • To the mashed potato, add turmeric powder, red chilli powder, dhania powder, cumin seeds, garam masala powder, salt, finely chopped coriander leaves, crushed kasoori methi, wheat flour and mix well without adding water.
    Aloo ki puri
  • Add wheat flour and mix well without adding water.
    Aloo ki puri
  • Now add water little by little and make a smooth, non-sticky dough. No need to rest the dough. Roll immediately. Grease your hands with oil. Take a portion of dough.Knead for a minute. Make balls roughly. Keep the remaining dough closed till use. Take one ball, roll it well and flatten it. Dust in wheat flour once and roll the poori slightly thick. Make sure corners are thick. Remember it should not be rolled too thin like roti. It won’t puff up.
  • Roll all the poori and arrange in a plate without overlapping each other.
    Aloo ki puri
  • Heat oil in a kadai and when it gets heated , put a pinch of dough. If it rises immediately to the top, oil temperature is right. It should not be smoky. Pat the excess flour in the poori and drop one in the oil. Let it rise to the top.
    Aloo ki puri
  • When it comes to top, pat it gently with the ladle. It will puff up nicely. Flip it after the bubbles cease. Cook the other side too.Press with the ladle for uniform cooking. Drain in a tissue paper and serve hot with raita or any sabji. Do not make any side dish with potato. U can make tomato sabji or mixed veg kurma for this poori.
    Aloo poori recipe
Enjoy !

Note
  • Poori gets puffed up only if its rolled thick evenly and properly. Oil temperature should be perfect. If its rolled thin, it comes like a papad. If the oil temperature is less, poori absorbs lot of oil and it won’t puff up.
  • At the same time, oil should not be smoking hot. Poori will become dark golden. So after you deep fry one poori, reduce the flame completely low. After dropping the next poori, increase the flame to high. By doing this way, heat of the oil can be maintained. If oil becomes smoky hot, switch off the stove for sometime. When the oil comes to right temperature, deep fry again.
  • As I have added Kashmiri red chilli powder, color of my poori was red. If you like white colored poori, add finely chopped green chilli instead of red chilli powder.
  • Do not rest the dough for long time. Poori may drink oil while frying.Try to make puri as soon as u make the dough.
  • No side dish is required for this poori. If you want to make it , mixed veg kurma and tomato onion sabji would be some good options.

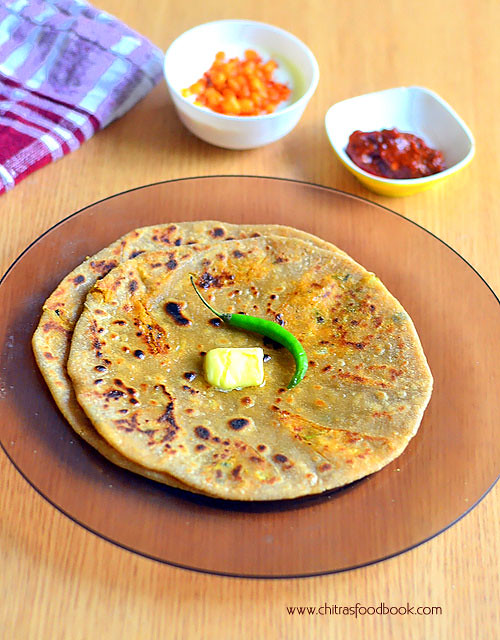
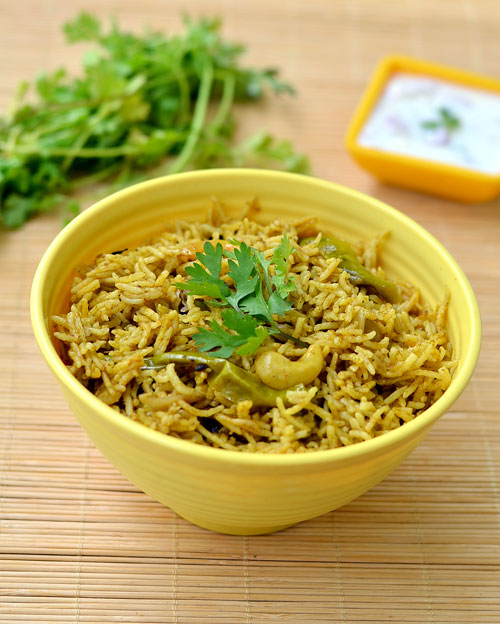
Enjoy this soft, masala flavored Potato Poori at home with raita and sabji !
Aloo ki puri
Continue Reading...


January 6, 2017

Gobi Paratha Recipe–How To Make Cauliflower Paratha With Video Recipe

Gobi paratha recipe with step by step pictures
Gobi Paratha is Sendhil’s most favorite Paratha recipe. After marriage he took me to In-swing restaurant in BDA complex, Banashankari and got this cauliflower paratha for me as he loves it very much. That’s the first time I tasted a stuffed paratha in my life. He told me to try the same at home. As I was a beginner in cooking, I did not have any idea about the stuffing part, how to roll paratha etc. 

When I tried it, all the stuffing came out while rolling and the paratha became a disaster. Still he appreciated me for my attempt and ate well. And that’s my man. Now after so many years of cooking, I can make a good gobi paratha for him. So I wanted to share this recipe in my blog with step by step photos and a detailed video recipe to help beginners. 

You can try this yummy paratha recipe for dinner or lunch box. Even Kids would love this paratha if you cook it adding ghee or butter. It comes out soft and stays good for hours. Lets see how to make Gobi paratha/Cauliflower paratha at home easily !


Cauliflower paratha

Gobi paratha recipe/ Cauliflower paratha recipe


Gobi paratha recipe/ Cauliflower paratha recipe How to make gobi paratha/Cauliflower paratha at home with step by step photos and video !
Cuisine: Indian
Category: main course
Serves:
Prep time: 30 Minutes
Cook time: 10 Minutes
Total time: 40 Minutes


INGREDIENTS
1 cup - 250ml
  • Atta/Wheat flour - 1cup
  • Cooking oil - 1 tbsp
  • Salt & water - as needed
For paratha stuffing
  • Cauliflower - 1 no or Grated cauliflower - 1.5 cups
  • Cooking oil - 2 tbsp
  • Green chilli - 1 no ( finely chopped)
  • Grated ginger - 1 tsp
  • Ajwain/Carom seeds – 1 tsp
  • Red chilli powder - 1 tsp
  • Dhania powder/coriander seeds powder - 1 tsp
  • Garam masala powder - 1 tsp
  • Cumin seeds powder - 1/4 tsp
  • Turmeric powder - 1/4 tsp
  • Aamchur powder - 1/4 tsp ( optional)
  • Coriander leaves - 2 tbsp. ( to garnish)
  • Salt - as needed
METHOD

  • In a wide bowl, take the wheat flour, add required salt and 1/2 tbsp. of cooking oil. Mix well. Add water little by little and make a smooth, non-sticky dough.Knead well, apply a tsp of oil and cover the dough with a dry cloth, leave it for 20 minutes. In the mean time, lets prepare the stuffing.
    Gobi paratha recipe - step by step
    Gobi paratha recipe - step by step
  • Take the cauliflower and remove the leaves, cut into 4. Remove the stem part and separate the florets in a plate. In a wide bowl, boil water and add the florets. Boil for few minutes, parboil and drain the excess water. Remove the half cooked cauliflower florets to a dry kitchen towel/cloth. Pat it dry.
    Gobi paratha recipe - step by step
    Gobi paratha recipe - step by step
  • Grind the florets in a dry mixer jar without water. Wipe the sides of jar and grind in batches. You can also grate it. But grinding is easy. Take in a plate.
    Gobi paratha recipe - step by step
  • Heat oil in a kadai and when it gets heated , add the finely chopped green chilli, grated ginger (If u wish u can add very finely chopped onions at this stage) and saute well. Add the grated cauliflower, salt, red chilli powder, dhania powder, cumin powder, garam masala powder ,aamchur powder and ajwain. Mix well till all the moisture is absorbed. Let the mixture cool down.Divide the stuffing into lemon sized balls.
     Gobi paratha recipe - step by step
    Gobi paratha recipe - step by step
  • Take the chapathi dough and make lemon sized balls. The size of dough ball & stuffing ball should be equal.
  • Take one dough ball, dust it in wheat flour and roll into small poori size.Make the corners thinner than center. Keep the stuffing ball in the center and seal it. Again dust in the flour and roll to a thick or thin paratha as u wish. Sendhil likes it medium thick.So I do it accordingly.
    Gobi paratha recipe - step by step
    Gobi paratha recipe - step by step
  • Heat a dosa tawa, cook the paratha on both the sides till half cooked in medium flame. Brush one side of paratha with ghee or cooking oil and cook for few seconds till brown spot appear.Flip the paratha and brush the other side of paratha.Cook for a minute. Keep flipping and cooking till brown spots appear all over the paratha. Brush with ghee and remove in a plate. Serve hot immediately with raita or pickle OR stack the paratha in a clean kitchen towel or thermal foil for later use. (Remember the more you brush with ghee, softer the paratha would be.) Gobi paratha recipe - step by step
Enjoy !

Note
  • Do not make the chapathi dough very sticky. Rolling will be difficult. You may have to dust the paratha with more flour which leads to dry paratha.
  • You should grease the paratha with cooking oil or ghee for best taste.
  • Cauliflower stuffing should be free from moisture so that paratha won’t become sticky while rolling.
  • Adding aamchur powder gives a mild tangy taste. Skip if you don’t have it.
Gobi paratha

Enjoy this yummy, flavorful gobi paratha with your favorite side dish or simple masala raita.
How to make gobi paratha
Continue Reading...


November 30, 2016

Easy Tomato Rice Recipe In Pressure Cooker – Thakkali Sadam Recipe

Tomato rice recipe - Thakkali sadam in cooker
I am a big big fan of  South Indian tomato rice (Thakkali sadam in Tamil). So I keep trying varieties of tomato rice recipes. Earlier I had posted my version of thakkali sadam in which the spicy tomato paste is mixed with cooked rice. Then I shared my friend Shalini’s tomato rice recipe using electric rice cooker

Today I have shared about how to make tomato rice directly in a pressure cooker. I learnt this recipe from my Thangam Athai ( My dad’s sister). Its a very simple, quick and easy to make rice variety that is ideal for lunch box preparation. 

Bachelors and working women would love this recipe. This tomato rice recipe is prepared with very less whole garam masala ingredients and had a slight spicy taste.So it has become our family favorite.I loved it very much and had the same for my lunch & dinner as well. Simple onion raita and a papad or vadagam would be the best side dish for this tomato rice. 

Friends, Do try this yummy South Indian style Tomato rice recipe for your lunch box. I am sure you will love its taste. Now lets see how to make Thakkali sadam using a pressure cooker easily with step by step photos. I have updated this recipe with a full video, Please check it !

Check out my

1. Tomato biryani recipe

2. Tomato rice using rice cooker

3. Traditional tomato rice


Tomato rice in cooker

Tomato rice recipe / Thakkali sadam


Tomato rice recipe / Thakkali sadam How to make tomato rice / thakkali sadam in a pressure cooker - Easy method !
Cuisine: Indian
Category: Lunch box recipes
Serves: 3
Prep time: 10 Minutes
Cook time: 20 Minutes
Total time: 30 Minutes


INGREDIENTS
1 cup - 250ml
  • Steamed rice / Boiled rice - 1 cup
  • Ripe tomato - 4 nos ( Big)
  • Big onion - 2 nos
  • Green chilli - 1 no ( Long one, Finely chopped, use 3 slit chillies for spicy rice)
  • Turmeric powder – 1/8 tsp
  • Red chilli powder - 1 tsp ( add 1.5 tsp for spicy rice)
  • Cooking oil - 3 tbsp
  • Cinnamon - 2 inch piece
  • Cloves - 2 nos
  • Garlic cloves - 5 nos
  • Curry leaves - few
  • Coriander leaves - a fistful ( finely chopped)
  • Salt – as needed
  • Water – 2 cups
HOW TO MAKE TOMATO RICE IN COOKER - METHOD

  • Wash and chop the onion, tomato, green chilli, garlic cloves, curry leaves and coriander leaves very finely. Wash and soak the rice adding 2 cups of water for 30 minutes. ( If using basmati rice, add 1.75 cups of water)
    Tomato rice in cooker
  • Heat oil in a pressure cooker base, add cinnamon and cloves. Add finely chopped garlic cloves and saute for a second. Then add the chopped onion and sauté till transparent. Add finely chopped green chilli and curry leaves. Saute for few seconds.
    Tomato rice in cooker
    Tomato rice in cooker
  • Add finely chopped tomato pieces and the required salt for rice. Saute until tomato turns pulpy and mushy. Add turmeric powder, red chilli powder and mix well for few seconds. Lastly add the soaked rice along with water. Mix well and check for taste. Add more salt & red chilli powder based on it. Pressure cook in very low flame for one whistle. It takes 8 to 10 minutes. Remove the lid after the steam is released.
    Tomato rice in cooker
    Tomato rice in cooker
  • Mix the cooked rice with a fork. Garnish with finely chopped coriander leaves, mix well and serve hot with raita & papad.
    Thakkali sadam in pressure cooker
Enjoy !

Note
  • Add more chilli powder if you want spicy tomato rice.
  • Adding coriander leaves gives a nice flavor to this rice. So do not skip it
  • You can also add mint leaves along with curry leaves if you like the flavor of mint leaves.
  • I have used steamed rice/ puzhungal arisi. You can use basmati rice or raw rice. But soak the rice in water for minimum 30 minutes to get fluffy, soft and grainy rice.

Enjoy this delicious South Indian style tomato rice recipe and have a quick lunch !
Thakkali sadam in pressure cooker
Continue Reading...


October 3, 2015

Grilled Cheese Sandwich Recipe-Sandwich Recipes For Kids

Grilled cheese sandwich
Grilled Cheese Sandwich is one of the sandwich recipes I make often for my daughter’s breakfast, mostly on Sunday mornings. She loves it a lot. For my daughter I use milk bread and mozzarella cheese whereas I make the same for myself and Sendhil using cheddar cheese & whole wheat bread. My family likes this  sandwich in Indian style adding chopped green chillies, coriander leaves and chat masala powder. Sometimes I add tomato ketchup and mayonaise too. This sandwich can be prepared with many variations as per our family’s preference. Whatever be the stuffing, it’s finally the cheese that make the kids love this sandwich.
Before going to the recipe, I would like to mention a few lines about online grocery shopping. Recent days I have been purchasing groceries Online Via Bigbasket. Mostly I buy the ingredients which are not found near my house. Recently I bought cheddar cheese , blueberries, Flax seeds, millets , millet flour and some organic foods. I am very much satisfied with their customer service. You too give a try.
Lets see how to make this yummy Indian style perfectly grilled Cheese Sandwich recipe. Also check out this comprehensive article on how to choose the grill in Globo surf.  If you don’t own a grill sandwich maker, you can try the same in oven or tawa.

Grilled cheese sandwich

Grilled Cheese Sandwich Recipe


Grilled Cheese Sandwich Recipe How to make grilled sandwich recipe using sandwich maker
Cuisine: Indian
Category: Breakfast
Serves: Serves 3
Prep time: 10 Minutes
Cook time: 5 Minutes
Total time: 15 Minutes

INGREDIENTS

  • Wheat bread or milk bread- 16 nos (Makes 8 pairs)
  • Grated Cheddar cheese or mozarella cheese-2 cups (200gms)
  • Finely chopped Green chillies - 2 nos
  • Chat masala powder - 2 tsp (Adjust as per the taste)
  • Coriander leaves - 2 tbsp
  • Tomato sauce & Mayonnaise - as needed(optional topping)
  • Salt - as needed
  • Butter - to brush the bread
HOW TO MAKE GRILLED CHEESE SANDWICH - METHOD
  • Grate the cheese and mix the chopped chillies, coriander leaves , salt and chat masala powder. Replace green chillies by pepper powder or red chilli powder as per your taste. Add as per your taste.
Grilled cheese sandwich
  • Take 2 bread slices and brush one side of the bread with butter at room temperature.Spread the cheese mixture on the other side of one bread slice.Cover it with another slice.Make sure the buttered side is facing up.
Grilled cheese sandwich
Grilled cheese sandwich  
  • Take the grill sandwich maker and place the sandwich with buttered side touching the hot plate.
Toast the slices till its done.Serve hot !
Grilled cheese sandwich
Note
  • You can add an additional topping of tomato sauce or mayonnaise.
  • You can skip chillies or pepper powder and use chat masala alone if making for kids. 

Enjoy this yummy,cheesy grilled sandwich for your breakfast !
Grilled cheese sandwich

Continue Reading...


June 22, 2015

Coriander Leaves Biryani Recipe|Kothamalli Biryani-Sunday Lunch Recipes Series 20

Kothamalli biryani recipe
In this week’s Sunday lunch recipe series, I am sharing an easy yet interesting biryani recipe using coriander leaves. Generally we all make Green rice/Pulao using mint and coriander leaves for lunch box. But when I came across this biryani recipe in Aval Vikatan’s Kalyana Samayal Supplementary edition, I got tempted to try it immediately. It was titled as “Kovai Kothamalli Biryani”. This recipe was given by a marriage caterer. I had already tried Ennai Kathirikai Poriyal and Mixed Vegetable Poriyal from that book and both of them were super hit in my home. So I tried this biryani confidently. It came out well and satisfactory. You can make this biryani when you run short of vegetables in hand. It’s an easy and good lunch box recipe too. Lets see how to make this simple Coriander leaves biryani in detail.

Coriander leaves biryani recipe

Kothamalli Biryani Recipe


Kothamalli Biryani Recipe Coriander leaves biryani recipe - Coimbatore special
Cuisine: Indian
Category: Lunch
Serves: 2
Prep time: 30 Minutes
Cook time: 20 Minutes
Total time: 50 Minutes

INGREDIENTS

  • Basmati rice - 1 cup ( India Gate)
  • Water - 1.5 cups
  • Salt - as needed
To grind
  • Coriander leaves - a handful small bunch
To saute
  • Cooking oil + ghee - 1 tbsp+1 tbsp
  • Cinnamon- 1 inch piece
  • Cloves – 3 nos
  • Cardamom – 1 no
  • Black stone flower – 1 no
  • Fennel seeds – 1/2 tsp
  • Big onion - 1 no
  • Small onions - 10 nos
  • Green chilli - 2 no ( slitted)
  • G&G paste - 1 tsp
  • Red chilli powder - 3/4 tsp
  • Garam masala powder - 1/2 tsp
  • Turmeric powder - 1/4 tsp
  • Curd - 1/2 cup
  • Green peas - a handful ( optional)
  • Cashewnuts - few
HOW TO MAKE CORIANDER LEAVES BIRYANI - METHOD
  • Wash and soak the basmati rice for minimum 30 minutes. Grind the coriander leaves to a smooth paste adding little water.Set aside. Chop the onions and slit green chilli. Crush the small onions slightly and keep aside.


  • Heat a pressure cooker adding oil+ghee. Put cinnamon, cloves, cardamom, bayleaf, fennel seeds and black stone flower. Add the onions and green chillies. Saute well. Now add the red chilli powder, turmeric powder, salt, garam masala powder and mix well. Now add the ground coriander leaves paste and saute well. Lastly add the curd and mix well.

  • Add the basmati rice, water and let it come to a boil. Close the cooker and cook for one whistle in very low flame.
  • Open the cooker and fluff the rice with a fork after the steam is released. Enjoy with Raita!


Note

  • For variations, you can grind mint+coriander leaves and add to masala.
  • You can also powder the whole garam masala+fennel seeds and add to the oil instead of adding it as such.
  • Add lemon juice at the end before closing the cooker for more tanginess.


Try this simple coriander flavored biryani. Enjoy !

Coriander leaves biryani recipe


Continue Reading...