Search Chitra's Food Book

January 9, 2009

BISIBELEBATH RECIPE


bisibelebhath

We do this rice dish in the weekend.U all know this is Karnataka's special dish.We make sambar and rice separately & mix them..Here is the recipe,
Check out my latest Karnataka style Bisi bele bath recipe

  Ingredients 

Vegetables – ALL or ANY(Carrot,beans,potato,peas,raddish,brinjal,chow-chow,raw banana,drumstick,broad beans etc)        2 cups
Rice      1/2 cup
Water       4 cups
Toor dal      1/3 cup
Tamarind A big gooseberry size
Oil   1 tbsp + 2 tsp (to roast)
Sambar powder    1/2 tsp
Jaggery    A Small piece

To Roast & Grind


Dhania/Dry Coriander seeds 2 tsp
Fenugreek 1/2 tsp
Chana dal 1 tbsp
Red chilly 6 – 8 nos (adjust)
Asafetida/Hing a pinch
Cinnamon 1 small stick 
Cloves 2 nos 
Grated Coconut 2 tbsp

To temper
Mustard seeds 1/4 tsp
Jeera/Cumin seeds 1/4 tsp
Sambar onions/Pearl onions 1/4 cup
Green chilly 1 no
Curry leaves 1 sprig
Oil 1 tsp
Coriander leaves to garnish
Cashew nuts a few

  Method

  1. Wash and Pressure cook rice with required water.Keep it for 2 –3 whistles and till it is overcooked & mushy.Set aside.Cut all the vegetables for 1 inch size.
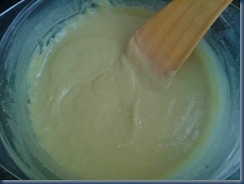
  2. Then pressure cook toor dhal with a drop of oil and a pinch of turmeric powder.Keep it for 2 whistles. Hand blend it. Mix well to become mushy.Soak tamarind in water and extract pulp from it.
  3. Heat a kadai with 1 tsp of oil and roast all the items given under “To roast & grind” table and lastly add the grated coconut , roast it well and grind in a powdered form.Keep it aside.
  4. Heat oil in a pan,add the tempering items,sambar onions and green chilly.Saute till they are transparent.Add the tamarind extract, all the raw vegetables and a pinch of asafetida.Close the pan with a lid .It should boil till the vegetables get cooked.
  5. Now add the cooked toor dal and sprinkle the ground powder. Mix well to avoid lumps.
  6. Let it come to a boil. Finally,add the curry leaves and coriander leaves.
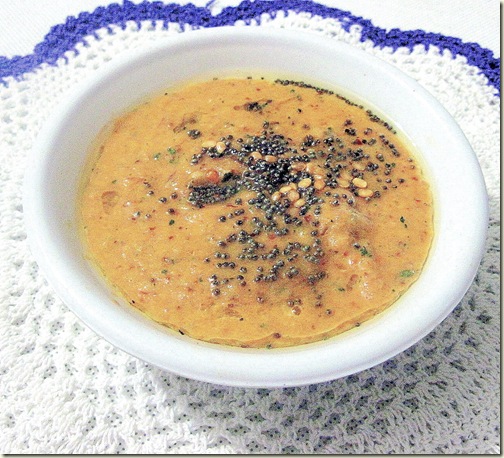
  7. Delicious SAMBAR IS READY !!!
  8. Now take the rice in a big vessel and add the required amount of sambar to it with ghee.Mix it well.
  9. Sprinkle coriander leaves and serve hot with Papad or Vadaam!!!

NOTE:
  1. As we prepare the sambar separately,u can use the same for dinner too!!.It tastes excellent with idly,Pongal & dosa!!So no need to prepare any side dish for dinner.U can take rest and enjoy the weekend!! 
  2. I’ve mentioned 2 cups of vegetables for just 1/2 cup of rice because this is the easiest way to make the children to eat vegetables :).Please reduce the amount of vegetables based on ur wish..
  3. In karnataka, they add cloves and cinnamon while grinding the spices but i don’t add. I make it in our style Smile.So if u need the authentic bisibelebath , roast the cinnamon and cloves along with spices , Powder them and add..
  4. Add more sambar while u mix with rice because the rice absorbs all the sambar by the time u eat. Keep some sambar in reserve.I always mix the rice & sambar just before eating and serve hot..
  5. At last, add little ghee to enhance the taste and flavour.

Technorati Tags: ,,,,,,,,,,,,,
Continue Reading...


January 8, 2009

NELLIKAI THAYIR PACHADI | GOOSEBERRY PACHADI


Gooseberry pachadi / Nellikai pachadi is a very healthy and easy to make pachadi. Most of us have gooseberry pickle. But this one is of a different kind. My MIL always buy gooseberries in lots & cuts them into small pieces, grind it in mixie to get a wet powder (no need to add water).We spread it in a big plate (Thaambaalam) and keep it in sunlight for 2-3 days in day time. Keep in open air under the fan during night. Repeat this until its dried completely.

It will become a dry powder (we call it as “Nelli Mulli). We store this in an air-tight container and use it for months. As we all know, Gooseberry can be taken in any form, we include this at least twice a week in our lunch. This Pachadi can be made with the dried powder or fresh ones.
So here is the recipe,

Ingredients

  • BIG Gooseberry (fresh) – 1 no ( If POWDER, use 2 tsp)
  • Green chilly – 1 - 2 ( use 2 nos if it is small)
  • Grated Coconut – 1 tbsp
  • Asafetida – A pinch
  • Curd – 1/4 cup
  • Mustard seeds & urad dal – 1/4 tsp
  • Curry leaves – 1 sprig
  • Oil – 1 tsp
  • Salt – to taste
Method
  • Cut the gooseberry into small pieces and remove the seed.
  • Now grind it with green chilli, coconut piece and salt with a pinch of asafetida to make it a paste by adding enough water.
  • Then transfer it to a small bowl and add the curd to it.
  • Mix it well and season with mustard, urad dal & curry leaves.
Note: U can do the same with nelli mulli powder. Just replace the fresh gooseberry with 2 tsp of this. Add more chilly if you want it to be spicy.
 
This pachadi serves as a very good accompaniment for dal rice (paruppu saadham) with ghee. It can also be had with plain rice & ghee. That tastes excellent:)

So let us make this easy pachadi at our home & get all its benefits:)

Continue Reading...


January 7, 2009

Tomato onion chilli Chutney For Dosa - Thakkali Vengayam Chutney

Tomato onion chilli chutney is my mother in law's special side dish recipe. It is a Tamil nadu style recipe. This thakkali vengayam and pachai milagi chutney tastes good with idli and dosa. We had a chutney similar to this taste at Adayar Anandha bhavan hotel. Try this. U’ll like it.We do this for breakfast mostly. If you make it spicy, it goes well with dosa ( pulicha maavu dosai ;).
Tomato onion chutney

Ingredients 

  • Tomato – 2 nos
  • Green chilli – 3-4 nos
  • Big onion – 1 no
  • Oil – 2 tsp
  • Mustard seeds & urad dhal – 1/2 tsp
  • Curry leaves –  few.
  • Salt to taste

Method

  1. Heat oil in a kadai and put onion first.
  2. Saute till onions turn light golden brown.
  3. Now add the green chillies and saute for a while.
  4. Finally add the tomatoes and cook till it becomes mushy.
  5. Remove and let it cool down.
  6. Grind it with required salt and water(Grind it little coarse). Season with mustard seeds, urad dal and curry leaves.
Mix with gingely/sesame oil and serve with idly!!

Continue Reading...


January 5, 2009

GARLIC THOGAYAL | POONDU THUVAIYAL RECIPE FOR RICE

poondu thogayal

This garlic thogayal tastes excellent with rice. It doesn't go well with idli, dosa.  Poondu thogayal is a very simple & healthy thogayal recipe. We make it at least once in a week. It tastes great when mixed with hot rice adding few drops of ghee. I  usually pack this for my husband’s lunch box. He loves it a lot. Do try this simple n easy poondu thogayal recipe. U’ll love it for sure.

Poondu thogayal/Garlic thogayal recipe


poondu thogayal
Garlic thogayal recipe for rice.Tastes great when mixed with rice n ghee.
Cuisine: Indian
Category: Thogayal
Serves: Serves 4
Prep time: 10 Minutes
Cook time: 10 Minutes
Total time: 20 Minutes


INGREDIENTS
To saute and grind
  • Garlic bulbs - 2 nos (approx 30 pods)
  • Red chillies - 4 nos ( use 2 for less spice)
  • Tamarind - Small gooseberry size
  • Salt and water - as needed
  • Cooking oil - 1 tbsp
METHOD

  • Heat 1 tbsp of oil in a pan and fry the red chillies and garlic cloves till golden brown and nice aroma arises. Keep it aside.While sauting garlic,u may get the skin of garlic separated from it.Remove them.Soak tamarind in little water.Remove and let it cool down.
garlic thogayal step by step picture
  • Grind everything to a smooth thick paste adding required water.
    Garlic thogayal is ready!! It can be had with hot rice mixed with ghee..


Tastes great mixing with hot rice adding a few drops of ghee with papad as side dish.

poondu thogayal


Continue Reading...


BLACK GRAM DAL DOSA / KURUNAI DOSA WITH CHUTNEY VARIETIES

 My Mom makes this dosa once in a month.It has a nice flavour and a different taste.I love this dosa very much.. It looks black but its taste and health benefits are amazing !! We use Broken Black Gram with skin to make the batter.If u don’t get the broken ones , just run the whole black gram in the mixie once or twice to break it.
It tastes very good with Onion-Garlic Chutney & Coconut Chutney..

Kurunai dosa

Ingredients required for batter

  1. Idly rice/Boiled rice/Puzhungal Arisi – 4 cups
  2. Broken Black gram (with skin) – 1 cup
  3. Fenugreek seeds- 1 tsp
  4. Crystal Salt /Kallu Uppu – As needed

Method of grinding


  • Wash & Soak rice for 2 hrs and black gram(with skin) for an hour .
  • Take fenugreek seeds in a separate bowl and soak it for 2 hrs.
  • Grind black gram(with skin) & fenugreek seeds first by adding enough water (We use the soaked water itself so that the batter will be soft).
  • Grind till it comes out like a ball(should be a paste) (It takes nearly 20 mins in table-top wet grinder).
  • Take the batter.Keep it in a vessel.
  • Add the rice & Salt with required water.
  • Add water in between If necessary.It should become a smooth paste (May take 25-30 mins in table-top)
  • Now take the rice batter and keep it in the same vessel.
  • Mix it  thoroughly with your hand.(This helps for fermentation)
  • Let the batter ferments overnight or at least for 12 hrs.
  • Batter would be slightly black in color. Here is the picture of batter ..
  • DSC00524


  • Take a ladleful of batter and spread out a thin dosa on hot tawa.Sprinkle some oil.Flip it .
  • DSC00523


  • Flavourful , Soft  Kurunai dosa is ready to be served hot with Onion-Garlic chutney & coconut chutney mixed with sesame oil !!


  • Kurunai dosa chutney
    ONION-GARLIC CHUTNEY

    Ingredients required
    1. Sambar onion /Shallot– 10 – 12 nos
    2. Red chilly – 4 nos
    3. Tamarind –Small gooseberry size
    4. Garlic – 4 pods
    5. Salt – To taste
    Method
      1. Soak shallot (Sambar onions) in water for 5 mins so that skin comes out easily.
      2. Peel the skin and grind it with all the items given above with required water to make it a paste. Check for salt.
    This chutney tastes excellent with idly & all type of dosa !!!

    COCONUT CHUTNEY
    Ingredients Required
    1. Coconut – 1/2 cup (grated)
    2. Red chilly – 3 - 5 nos
    3. Garlic pods – 3 nos
    4. Tamarind – Small berry size.
    5. Salt & Water – As needed.
    Method
    1. Grind all the ingredients given above to a smooth paste.
    2. Check for salt.
    Technorati Tags: ,,,,,,,
    Continue Reading...


    Green Peas Halwa|Peas Halwa-Microwave Recipes-Diwali Sweet Recipes

    I tried this halwa in microwave and it came out very well!!
           I took this recipe from a magazine.I did some modifications and tried!! Very simple & easy to do:)Mine is a 700w Power output oven.Here I’ve mentioned the time it took.Based on ur model,Please vary the setting time.
    Cooking time: 24 mins
    Standing time: 2 mins

    Ingredients
    1 cup - 240ml
    • Green Peas or Dried Peas – 1 cup  ( soak if using dried peas for 8 hrs)
    • Water – 1/4 cup (add more if reqd.)
    • Milk – 11/4 cup
    • Sugar – 1cup
    • Milk powder – 2 tbsp
    • Ghee – 3tsp
    • Cashew nut & Dry grapes – To decorate

    Method 

    • Take the Green Peas/Dried peas with water in a microwave vessel and close it .
    • MICRO- HIGH for 8 mins.Stir once in the middle.
    • Take the cooked peas out and let it cool down.
    • Grind the peas to make a paste using 1/4 cup of milk.
    • Dilute the milk powder(I used amulya) in little lukewarm milk so that there will be no lumps.
    • Now take the ground paste,dissolved milk powder & the remaining milk(1 cup) with sugar in a microwave vessel.
    • Stir it well.Make sure there are no lumps.(TIPS: if u find any lumps , just run this mixture in the mixie once or twice)
    DSC00554
    • MICRO-HIGH for 12mins with lid open by stirring once in the middle.
    After 12 mins it looks like this

    DSC00555
    • Now take the thickened halwa out and make a dent in the middle.
    • Pour the ghee and add the pieces of cashew,dry grapes & cardamom powder into it.
    • MICRO-HIGH for 4 mins with lid open.
    • Remove the vessel and keep it as such for 2 mins(standing time).
    • Then stir it well.
    • Grease a plate with ghee and spread the halwa into it.
    Delicious,healthy Peas halwa is ready to eat!!!

    DSC00558

    Technorati Tags: ,,,,,,,,,,,,,
    Continue Reading...