

This is the easiest pickle which we can make in no time and enjoy with curd rice. Though it may take 2-3 days time for all the tastes to be incorporated, you can enjoy it instantly too. We can use the same method for making pickles with Vadu maangai ( Baby raw mango), Nellikai ( gooseberry) & even strawberries. Try this, you’ll love its taste.
INGREDIENTS
METHOD
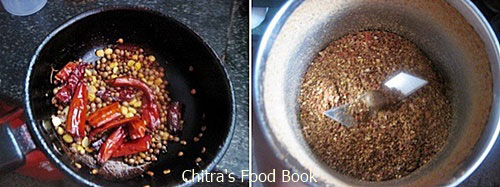
.** For roasted fenugreek seeds powder, dry roast fenugreek seeds in a kadai and powder them nicely. Store it in a box and use it for future. U can use it in idly sambhar , pickles and even for coffee while making decoction.
To temper
|
METHOD
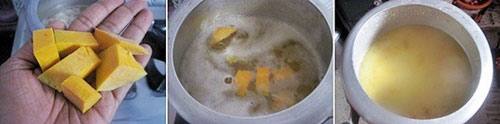
- Cut the raw mango into bite sized pieces.
- Take an air tight container or bottle in which you are going to store the pickle.
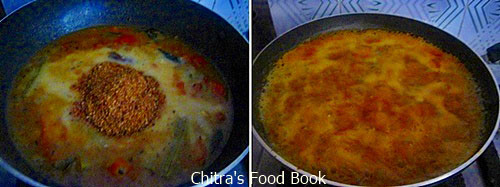
- Add all the mango pieces into it. Then put the chilli powder/coarsely powdered red chillies, turmeric powder, Roasted fenugreek seeds powder, Hing, required salt & water. As I mentioned the water level should be little above the immersed mango pieces.
- Finally temper in gingely oil/Sesame oil and preserve it.
Tips :It stays good for long period when refrigerated. But please use a clean ladle every time to take the pickle. Also dont forget to stir the pickle everyday for all the powders to get mixed otherwise it will settle down and the taste won't get blended quickly. If you are patient enough, start using the pickle after 2-3 days of preparation. Hing , roasted fenugreek seeds powder are the star ingredients. Please dont reduce the quantity or avoid it. They are the flavouring agents !!
If you wish to make the same with gooseberries, just saute the gooseberries in little oil before adding. This makes quick absorption of water into gooseberries. We call this as “Neer nellikai” ..
|
.** For roasted fenugreek seeds powder, dry roast fenugreek seeds in a kadai and powder them nicely. Store it in a box and use it for future. U can use it in idly sambhar , pickles and even for coffee while making decoction.


![bru coffee_thumb[3]](http://lh3.ggpht.com/-dEdrLpSOc0U/Up3gInILaaI/AAAAAAAAXIM/pC1UBrY6hBo/bru%252520%252520coffee_thumb%25255B3%25255D%25255B6%25255D.jpg?imgmax=800 "bru coffee_thumb[3]")


