Search Chitra's Food Book

January 20, 2014

BEANS PEAS PORIYAL | BEANS PEAS CURRY–PORIYAL RECIPES

Beans peas poriyal

Beans green peas poriyal is one of my favourite poriyal recipes. My mom makes this as side dish for keerai sambar and more kuzhambu. Its a very simple and tasty recipe without onion and garlic. Addition of ground coconut and cumin seeds makes this side dish tastier. Do try it !

Beans peas poriyal

Beans peas poriyal for rice - Suji idli with Eno, curd

 Beans peas poriyal recipe for rice
Cuisine: Indian
Category: Poriyal recipe
Serves: Serves 3
Prep time: 10 Minutes
Cook time: 20 Minutes
Total time: 30 Minutes


INGREDIENTS
1 cup - 250ml
  • Beans - 1.5 cups
  • Fresh Green Peas - 1/2 cup
  • Red chilli powder - 1 tsp
  • Turmeric powder - 1/8 tsp
  • Salt & water - as needed
To grind
  • Grated coconut - 1/4 cup
  • Jeera - 1/2 tsp
To temper
  • Cooking oil - 1 tbsp
  • Mustard seeds - 1/2 tsp
  • Urad dal - 1/2 tsp
  • Curry leaves - Few
METHOD

  • Wash and chop the beans finely. Take the chopped beans and fresh peas in a pressure cooker. Add salt, turmeric powder and red chilli powder. Add 1/2 cup of water. (If you are using dried peas, soak it overnight and then pressure cook it.)
  • Pressure cook in high flame for 2 whistles. After the steam is released,open the cooker. Veggies would be perfectly cooked. Do not cook in low flame else it will turn mushy. Make sure peas is not over cooked.
beans poriyal step by step
  • Dry grind the coconut, cumin seeds / jeera and set aside.
Beans peas poriyal step by step
  • In a kadai, heat oil and temper the mustard, urad dal and curry leaves. Add the cooked peas, beans mixture. Keep the flame high and allow the excess water to drain if any.
  • Now add the ground coconut and saute in medium flame for two minutes. Swicth off the flame. 
Beans peas poriyal step by step
Yummy beans peas poriyal is ready to be served with rice !
NOTE
  • For variations, you can also add chopped carrots. U can skip peas if you don’t have them. Use only beans.
  • If using dried peas, soak overnight adding  a pinch of  cooking soda. The next day, drain the soaked water and pressure cook it along with beans. It will get cooked nicely.
  • U can also add 2 small onions while grinding coconut. It adds a nice flavor to this poriyal.

Serve as a side dish for MORKUZHAMBU or KEERAI SAMBAR

Beans peas curry
Continue Reading...


January 17, 2014

APPAM RECIPE WITHOUT YEAST,COCONUT MILK,COOKING SODA – SOUTH INDIAN BREAKFAST RECIPES

aapam plate
Appam is one of the special breakfast recipes like poori which i make only in weekends or for guests. Its my long time wish to make an appam recipe without using yeast, coconut milk and cooking soda. Finally i succeeded in my attempt. I have already posted two varieties, one is the authentic chettinad version and the other one is appam using idli,dosa batter. This version is from my friend Shalini. I made small changes in her recipe as per my mil’s suggestion and also tried with Eno fruit salt instead of cooking soda. So this recipe has no coconut milk, no yeast and no cooking soda. Try this absolutely guilt free, yummy, soft appam recipe for breakfast. U’ll love it.
Check out my other aapam versions if interested
aapam steam

Appam recipe without yeast

Appam recipe


 Appam recipe for breakfast without coconut milk,yeast and cooking soda
Cuisine: Indian Category: Breakfast recipes Yields: Serves 4
Prep Time: 30 Minutes Cook Time: 5 Minutes Total Time: 35 Minutes


INGREDIENTS
1 cup - 240ml
To soak in water and grind
  • Good quality raw rice - 1 cup
  • Idli rice/Boiled rice - 1 cup
  • Urad dal – 3 tbsp
  • Poha/Thick aval OR Cooked rice - 1/4 cup
  • Methi seeds - 1 tsp ( use 1/2 tsp for mild flavor)
  • Salt & water - as needed
To mix in the batter
  • Sugar - 1 tsp
  • Eno fruit salt – 1 tsp
 HOW TO MAKE APPAM WITHOUT YEAST - METHOD

  • Wash and soak the rice together.Wash and soak the urad dal,poha and methi seeds together.( If using cooked rice,no need to soak it.Grind it along with rice).Soak everything for two hours.
  • Grind the urad dal mixture first adding enough water( Add coconut water if u have).Remove in a wide bowl.Then grind the rice ( cooked rice)adding enough salt and water.Remove and mix the batters together using ur hand.
  • Allow it to ferment overnight.The next day batter would have raised well.Add sugar to it and mix well.Add little water to adjust the consistency of batter if it is too thick.
appam step by step picture
  • Just 10-15 minutes before making aapam,add the Eno fruit salt.Mix well and set aside.Make sure Eno is active.U should see some small bubbles in the batter after u add Eno.
  • Heat a non-stick aapam kadai/skillet and pour 1.5 ladle of batter in the center.Swirl the kadai so that the batter spreads evenly in the corners.Make sure the center part is thick and the corners are thin.Drizzle a tsp of cooking oil.Cover the pan with a lid and simmer the flame.
appam step by step picture 1

  • After few minutes,aapam would have cooked well with bubbles on top.Remove with a slotted ladle.
appam step by step picture 2
  • Serve hot with coconut milk,chutney,stew or mixed veg kurma.
NOTE
  • For variations,use 1/2 cup of urad dal for the above recipe without using poha or cooked rice.This is my friend’s actual recipe.I have tried this way too.It comes out well.
  • U can add 1/4 cup of thin coconut milk to adjust the consistency of the batter instead of water.It tastes good with mild coconut flavour.
  • U can also replace Eno with 2 pinches of cooking soda if u don’t have them in hand.
  • Use non-stick appa kadai to make appams easily.


Appam recipe
Continue Reading...


January 15, 2014

KOTHAMALLI THOKKU | CORIANDER LEAVES THOKKU RECIPE


Kothamalli thokku
Kothamalli thokku was in my try list for long time.Last month my in-laws were here.We had a nice time together.Whenever my MIL visits my house,i tell her to make  some of her signature recipes like thogayal,pickles etc.One such recipe is this kothamalli thokku.She brought a big bunch of fresh coriander leaves from salem.We made kothamalli thogayal and this thokku.We enjoyed it for a week.It can be mixed with plain rice and also serves as a good side dish for idli,dosa mixed with gingely oil.Whenever i feel lazy to make side dishes for idli,dosa i keep this as accompaniment.Simple and yummy !!
kothamalli thokku picture

Kothamalli thokku


Kothamalli thokku - Kothamalli thokku recipe dry  Coriander leaves thokku/Kothamalli thokku for rice,idli,dosa
Cuisine: Indian
Category: Sides
Serves: Serves 4
Prep time: 10 Minutes
Cook time: 10 Minutes
Total time: 20 Minutes


INGREDIENTS
1 cup - 200ml

  • Coriander leaves - 1 cup (tightly packed)
  • Round Urad dal - 3 tbsp
  • Red chillies – 6-8 nos
  • Tamarind - Medium gooseberry size ( pinch into small pieces)
  • Cooking oil – 1 tbsp
  • Jaggery-1/2 tsp
  • Salt - as needed
METHOD

  • Wash & cut the coriander leaves roughly using scissors.Spread them in a paper overnight or in shade for 6 hours.If u are not able to do this,follow as given in next step.The point is coriander leaves should be dry without water content.
  • In a kadai,heat oil and roast the chillies,urad dal and set aside. U can fry them separately or together.In the same kadai,saute the coriander leaves and tamarind pieces.Saute till it shrinks in quantity.
kothamalli thokku step by step
  • First grind red chillies,salt .Then add the sauteed coriander leaves & tamarind ,jaggery without adding water.Lastly add the roasted urad dal and grind them together coarsely.
kothamalli thokku step by step picture
  • Remove and store in an air tight box after it cools down.
  • Mix with plain rice or serve as a side dish for hot idli,dosa topped with gingely oil.Tastes yummy.
NOTE
  • If u dry the leaves in shade,u don’t have to saute in oil.Just roast the other ingredients and grind everything together. Otherwise sautéing coriander leaves is a must as it should be dry without water content.
  • Pinch the tamarind into small pieces and then saute.It helps to roast it well and also keep the thokku dry with long shelf life.
  • It can be stored in an air tight box and can be had for more than a week without refrigeration.With refrigeration,u can keep it for more than a month too.Use a clean spoon every time.

coriander --thokku 
Technorati Tags: ,,,,,
Continue Reading...


January 11, 2014

THENGAI THOGAYAL | COCONUT THUVAIYAL RECIPE FOR RICE - KAANUM PONGAL RECIPES

thengai thogayal

In Tamil nadu, Thengai thogayal / Coconut thogayal is served with rice. We love to mix this thogayal with rice adding ghee or it can be had with curd rice too. U may wonder why am I posting this recipe for kaanum pongal. My mom told this story and asked me to post this recipe. In Tamil Nadu, kanu is also known as Virgin Pongal/kanni pongal and is celebrated by unmarried girls by playing in the river banks,making pongal and eating it there.It is like resting day after the 3 days of  pongal festivities.People go out along with family and have a nice day of outing.My mom told when she was young, they go for outing carrying this simple coconut thogayal and
pazhang curry(mixture of left over sambar,kootu,poriyal) for lunch and enjoy the whole day in river banks. Nowadays only some people follow this practice. By sitting at home & watching all the special programmes on TV,we too can make our lunch very simple with this thogayal,sunda curry and papadSmile.Hope u'll try this and enjoy your day.. Wish u all a very happy and tasty pongal !!

thengai-thogayal

Thengai thogayal /Coconut thogayal recipe


Coconut thogayal / Thengai thogayal for rice
 Simple and easy thengai thogayal recipe - Coconut thogayal for rice
Cuisine: Indian
Category: Side dish
Serves: Serves 4
Prep time: 5 Minutes
Cook time: 5 Minutes
Total time: 10 Minutes


INGREDIENTS
1 cup - 250ml
To roast & grind
  • Grated coconut - 1/2 cup
  • Red chillies – 5 - 6 nos
  • Hing – 1/4 tsp
  • Tamarind – Gooseberry size
  • Urad dal – 1 tbsp
  • Salt & water - as needed
METHOD

  • In a kadai ,heat 2 tsp of oil. Roast the urad dal,red chillies,hing. Lastly roast coconut along with these ingredients.
  • Grind them coarsely adding salt and tamarind. Grind it thick without adding water. Coconut will be half ground. Now add very little water and make a thick paste. Remove in a serving bowl.

  • Enjoy mixing with plain rice adding sesame oil/gingely oil or have as a side dish for curd rice !
NOTE
  • To get this nice color,use crushed red chilli.Otherwise u may not get the same color.U can find the chilli in the picture background.
  • Adding urad dal is optional. If you add urad dal, you can use this thogayal as side dish for idli,dosa too. Mostly we make this chutney for travel. It stays good for one to two days without refrigeration if you roast coconut well.
  • Adjust the amount of chillies and tamarind according to your tastebuds.
  • U can also roast coconut at the end and add it while grinding which gives a nice flavor.
  • This thogayal can be refrigerated and had for 2-3 days.
coconut thogayal step by step


coconut thogayal recipe

Continue Reading...


January 9, 2014

MIXED VEGETABLE KOOTU | KOOTU RECIPES FOR RICE

mixed vegetable-kootu
Mixed vegetable kootu is very similar to Avial and pongal kootu. Its a South Indian style side dish for rice. Usually my mom makes avial(her signature recipe) for sambar sadam. After marriage, I started loving my mil’s mixed veg kootu which she makes for vatha kuzhambu. Both are very similar in procedure with minor differences. Sometimes we mix this kootu with plain rice topped with few drops of ghee. It tastes delicious. We usually make this vegetable kootu for guests and occasions like pongal, thiruvathirai etc.

Check out my thiruvathirai vegetable kootu here. It is also known as thalagam. 


mixed-veg kootu

Mixed vegetable kootu recipe


MIXED VEGETABBLE KOOTU FOR RICE
Mixed vegetable kootu recipe -yummy rice accompaniment
Cuisine: Indian
Category: Kootu recipe
Serves: 4
Prep time: 20 Minutes
Cook time: 20 Minutes
Total time: 40 Minutes


INGREDIENTS
1 cup - 250ml
To pressure cook
  • **Mixed vegetables - 2.5 cups (refer notes)
  • Moong dal - 2 tbsp
  • Tomato - 1 no
  • Salt & water - as needed
To grind
  • Grated coconut - 1/3 cup
  • Rice flour - 1 tsp
  • Green chillies - 3-4 nos
  • Small onions - 3 nos (skip onions if making for occasions)
  • Jeera - 1/2 tsp
To temper
  • Coconut oil - 1 tbsp
  • Mustard seeds - 1 tsp
  • Urad dal - 1 tsp
  • Curry leaves - few
HOW TO MAKE MIXED VEGETABLE KOOTU - METHOD

  • Wash and chop all the vegetables of uniform size. In a pressure cooker base add the moong dal, chopped vegetables, finely chopped tomato ,salt and water. Add the required water, a pinch of sugar and pressure cook in high flame for one or two whistles.
  • In the mean time grind all the ingredients given under”to grind” to a smooth paste adding water. First grind the coconut, chillies. Lastly add the small onions, rice flour and jeera. Run it twice. Skip onion if making for festivals.
mixed veg kootu step by step picture
  • After the steam is released, mix the vegetables and add the ground paste. Add little water based on the consistency you need.
  • Allow it to boil for few minutes till the raw smell emanates.
  • Lastly temper all the ingredients given under “to temper” in coconut oil. This is the highlight of this recipe. So do not skip this step. Mix well. Serve with rice.
mixed veg kootu step by step picture 1
NOTE
  • **Use any vegetable like carrot, potato ,beans, cabbage, cauliflower, peas, yam, sweet potato, raw banana, colocasia, field beans etc. For the above recipe  I used 2 small carrots, 8-10 beans, 1/2 raw banana, 2 small potatoes, 5-7 broad beans.
  • Omit small onions if you make it for occasions. Still it tastes great.
  • For variations, you can omit tomato and add few pieces of raw mango or a tbsp of curd at the end like we make for avial. Sometimes we make this way too.
  • U can also add little milk at the end to adjust the thickness.
  • Do not forget to use coconut oil for tempering. It adds a nice flavor.


Enjoy with sambar or vathakuzhambu rice.Tastes yum !


mixed veg kootu

Continue Reading...


January 7, 2014

RICE PORRIDGE RECIPE| ARISI KANJI – BABY FOOD RECIPES

rice porridge recipe
Last week Sendhil was down with stomach upset problem. So my MIL made this rice porridge / arisi kanji for his breakfast. We too had the same. It was so filling, healthy and tasty too.We usually make this kanji when we are down with fever or stomach upset. raw rice or boiled rice, moong dal and cumin seeds combination helps for quick digestion, soothes our stomach, tongue and makes this porridge flavourful too. My MIL told the same can be given for 7-8 months babies too. But give it slightly watery if you are giving for first time.We had given this for Raksha when she was young.So I thought of blogging it under health food as well as baby food (two in one post).

rice porridge recipe

Rice porridge recipe


Rice porridge recipe Rice porridge recipe for babies and for people down with fever & stomach upset
Cuisine: Indian
Category: Health food
Serves: Serves 4
Prep time: 5 Minutes
Cook time: 20 Minutes
Total time: 25 Minutes


INGREDIENTS
1 cup - 250ml
To pressure cook
  • Good quality boiled rice (puzhungal arisi)  or raw rice (sona masoori) - 1/2 cup
  • Moong dal - 1.5 tbsp
  • Roasted & powdered cumin seeds - 1 tsp
  • Salt – as needed
  • Water – 4-5 cups
  • Milk – 1/4 cup
  • Ghee – 2 tsp (only for babies)
METHOD
  • In a pressure cooker base, dry roast the moong dal for a minute. Add the washed rice with the required water and salt. Cook in low flame for one or two whistles. After the steam is released, open the lid and mash it well using a whisk.
rice porridge step by step
  • Add water or little milk or coconut milk based on the consistency you need. Check for salt. Roast the cumin seeds in ghee/oil & coarsely powder it .Add on top of porridge. Mix well and serve.
rice porridge step by step
  • For babies,add powdered cumin seeds in lesser quantity. Add more ghee based on the age.


NOTE

  • Replace ghee by oil or use less ghee if making for sick people. Adding more ghee makes the digestion slow.
  • Addition of moong dal is optional. I usually add it for flavour.
  • Give this porridge only for babies above 7 months.
  • To make it instantly, you can roast moong dal and rice. Powder & store in a box. Mix a tsp of this powder in water and make porridge adding salt or sugar.
  • For adults, roast cumin seeds in oil and then powder them.
  • You can replace boiled rice with raw rice. 
I had with small onions as side dish.It was yummy !
rice-porridge
Continue Reading...


December 31, 2013

Chilli Bajji Recipe / Milagai Bajji - Molaga Bajji Recipe

chilli bajji recipe

Chilli bajji/Molaga bajji in Tamil, Mirchi bajji in Hindi is an yummy snack recipe/ street food which most of us have tasted in exhibition, beach. Long chilli is used to make this bajji. It is also called as bajji milagai/ ooty milagai. Nowadays people make bajji with kudai milagai / Green Capscium too. Recently when I visited my in-laws place, my MIL made this milagai bajji for us. We loved it a lot. Last week I tried the same in my kitchen.We all enjoyed this bajji with hot tea ! It tasted great for this cold weather. Do check out my onion bajji recipe if interested.Friends, I am closing this year with this hot chilli bajji/ Milagai bajji post.

I will meet you all in 2014 with some interesting and easy recipes.Wish you all  a very happy new year.May this new year be filled with happiness,joy and prosperity!!!

Milagai bajji recipe

BAJJI CHILLI

Chilli bajji


Chilli bajji Chilli bajji/Milagai bajji recipe-yummy evening snack !
Cuisine: Indian
Category: Snacks
Serves: Serves 4
Prep time: 10 Minutes
Cook time: 10 Minutes
Total time: 20 Minutes

INGREDIENTS
1 cup - 250ml
To make batter
  • Gram flour - 1/2 cup
  • Rice flour - 1/4 cup
  • Red chilli powder - 1/2 tsp
  • Cumin seeds/jeera - 1 tsp
  • Cooking soda / baking soda – 1/8 tsp
  • Kesari color - 1 pinch
  • Salt - as needed
  • Water - 1/2 cup
  • Bajji chilli – 3 - 5 nos
  • Cooking oil - to deep fry
METHOD


  • Wash the chillies and slit it vertically.Remove the seeds and set aside.
Chilli bajji / Milagai bajji
  • In a wide bowl, take the flours,red chilli powder,kesari color,salt , cooking soda and jeera.Mix well.Add the required water and mix well.I used 1/2 cup of water here.Adjust the quantity by keeping this as reference.
Chilli bajji/Milagai bajji stepwise pcitures
  • The consistency of batter should be slightly thicker.It should coat the chillies well.If it is too watery,tails will form in bajji.If it is too thick,bajji will become hard.
  • Heat oil in a kadai and put a drop of batter.If it raises immediately,oil temperature is right.
  • Now coat the chillies in the batter and drop in oil immediately.
Milagai bajji/Chilli bajji stepwise pictures
  • Deep fry both the sides till golden.Remove,drain in a tissue and serve hot.


Note
  • U can use 1/3 cup of rice flour too if u want bajjis to be in softer side.
  • If the chillies are too spicy,deep fry the chillies alone after discarding the seeds and then make bajji as mentioned above.U can also soak the chillies in buttermilk to reduce the spiciness.
  • Adding Kesari color is optional.But it gives a  nice color as we get in bajji shops.
  • U can add little idli,dosa batter instead of cooking soda.

chilli hot bajji

Serve hot with tea and tomato sauce or coconut chutney

Milagai bajji

Continue Reading...


December 30, 2013

Pirandai thuvaiyal / Thogayal Recipe - Adamant Creeper Chutney For Rice

pirandai thuvaiyal

Pirandai thogayal ( Pirandai thuvaiyal) /Adamant creeper chutney, sounds interesting right?.Yes, I too felt the same when my MIL told about this recipe. I have heard about this plant but I din’t know it is edible. After I browsed its health benefits, I was so happy that I got to know a very useful, healthy recipe from my MIL. Thanks a lot aunty. This thuvaiyal tasted more like thengai/coconut thogayal and I loved its taste very much. I haven't tasted it with idli,dosa. I hope it tastes good.

As pirandai has amazing health benefits, I wanted to share it with you all !
  • Cissus Quadrangularis is the biological name of pirandai. It has high vitamin C and calcium.
  • Pirandai is helpful to cure knee problems and its juice mixed with sesame oil is used in the treatment of fracture and sprain.
  • Its is also helpful for ladies with irregular menstrual problems.
  • Pirandai recipes are useful for people with indigestion issues,flatulence,nausea,cough and piles.
  • Never use your hands for washing pirandai.Just show under tap water.
  • Always grease ur hands with sesame oil to avoid your hands from itching.
  • Use tamarind in all pirandai recipes else it will make your tongue itchy.

Name of Adamant creeper in different languages

  • English: Bonesetter, Devil's Backbone, Veldt Grape.
  • Hindi: Hadjod, Hadjor, Asthisrumgala
  • Malayalam: Changalamparanda-ചങ്ങലംപരണ്ട
  • Sanskrit: Vajravalli, Asthisrinkhala, Kulisa, Asthisamharaka.
  • Tamil: Pirandai-பிரண்டை
  • Telugu: Nalleru, Gudametige, Kokkitaya-ralu 


  • Here is the picture of Pirandai which my MIL brought from our house backyard.
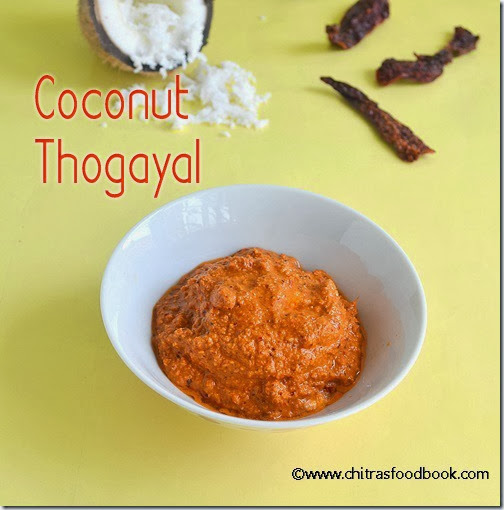
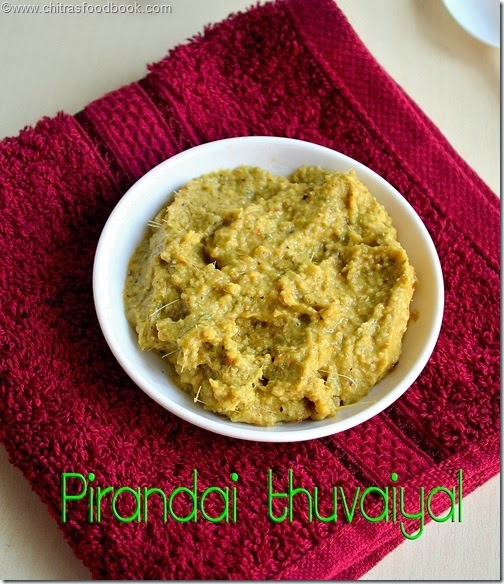
    Pirandai  - Adamant creeper 

    Pirandai thogayal

    Pirandai thogayal


     Pirandai thogayal/Adamant creeper chutney for rice
    Cuisine: Indian
    Category: Thogayal
    Serves: Serves 2-3
    Prep time: 10 Minutes
    Cook time: 10 Minutes
    Total time: 20 Minutes


    INGREDIENTS

    • Pirandai/Adamant creeper - 10 sticks
    • Urad dal - 2 tbsp
    • Red chillies – 4 nos ( Use 6 to 7 for spicy taste)
    • Tamarind – Medium gooseberry size
    • Grated coconut - 1 tbsp
    • Salt & water- as needed
    • Oil - 2 tbsp
    HOW TO MAKE PIRANDAI THOGAYAL - METHOD

    • Grease your hands with gingely oil to avoid itching. Wash pirandai under tap water and peel the outer ridge of pirandai like we do for ridge gourd. Remove the top and bottom part. Chop them into small pieces. Soak tamarind in little water.
    pirandai thogayal step by step
    • In a kadai, heat a tbsp of oil & roast the chillies, urad dal. Remove and in the same kadai, add little more oil and saute the pirandai. Saute till it shrinks and changes its color to white or pale green in color. Saute well else it will make your tongue itchy while eating. Remove, let them cool and grind everything together adding tamarind, salt , coconut and water to make a smooth paste.
    pirandai thogayal step by step picture

    Serve with plain rice topped with ghee or gingely oil. Adding ghee is recommended as pirandai has a tendency to increase the body heat. Ghee helps to subside it.


    Try this healthy pirandai thuviayal for rice, mix with rice & ghee and enjoy !
    pirandai chutney

    Continue Reading...