Search Chitra's Food Book

July 4, 2016

Instant Upma Mix Recipe – Rava Upma Mix

Instant rava upma mix
I have never thought of making Instant upma mix & Podi recipes at home until Sendhil travelled to Norway for an official trip last year. Usually he used to take store bought instant noodles, ready to eat upma mix, pongal mix, paruppu podi/Dal powder, Vathakuzhambu paste from Sakthi masala, Aachi or MTR products. 

Last year, when he travelled abroad, my friend Shalini suggested me to make Instant upma mix, poha mix and Poondu podi on my own as she used to make it for her husband’s travel regularly and she guaranteed more shelf life even though they are homemade & prepared without any preservatives. I made everything as per her recipes and packed them for Sendhil and his colleagues. 

For this upma mix, I referred Radha mam's blog too. Sendhil told the instant mix was very useful for making quick breakfast and late night dinner after coming home tired from the office, everything tasted great and all his friends liked it too. I was elated and thanked my friend Shalini for giving me confidence to try instant mix recipes at home. 

Actually he suggested me to blog this recipe long back. But somehow I kept postponing it. This weekend, I have planned to make a post on “Cooking tips for working women”. Before that, I wanted to blog few recipes related to that post.

Rava upma mix recipe
This upma mix can help bachelors, working women and busy mothers with kids or to treat your surprise guests at home to make quick breakfast or dinner. If you can spare some time on Sunday to make this mix, it will help you to make your food easily without hassles whenever you feel lazy to cook. All you need to do is just boil some water, add 1 cup of mix and cook for few minutes.

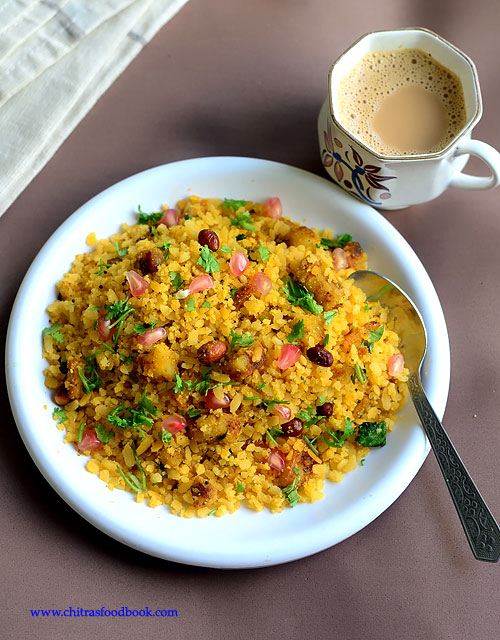
Tadaaa, Hot hot Rava upma is ready to enjoy. We usually like to have it sugar or coconut chutney  as side dish and sometimes with leftover lunch sambar too. You can follow the same recipe and make this mix with Wheat rava, Poha and vermicelli. 

This rava upma mix can be used to make Rava idli , mixed vegetable rava khichdi and Rava dosa as well. I have given the recipes for the same below. Check it out. Lets see how to make this easy, readymade upma mix at home.
 
Instant upma mix recipe

Instant Rava Upma Mix Recipe


Instant Rava Upma Mix Recipe How to make readymade rava upma mix at home for breakfast and dinner
Cuisine: Indian
Category: Breakfast
Serves: Serves 2
Prep time: 10 Minutes
Cook time: 10 Minutes
Total time: 20 Minutes


INGREDIENTS
Rava Upma Mix : 1 cup - 250ml
  • Sooji/ Bombay Rava - 3 cups
  • Cooking oil OR Ghee - 4 tbsp ( I used ghee)
  • Mustard seeds - 1 tbsp
  • Urad dal - 2 tbsp
  • Chana dal- 2 tbsp
  • Cashew nuts - 10 nos ( chopped)
  • Cumin seeds/Jeera - 1.5 tsp
  • Green chillies - 6 nos (( Add 8-9 for spicy upma)
  • Ginger - Small finger size
  • Curry leaves - a handful
  • Salt - as needed ( I used 1 tbsp heaped)
For making rava upma
  • Rava upma mix - 1 cup
  • Water - 2.5 cups
  • Big onion - 1 no (finely chopped, optional)
  • Vegetables - Carrot, peas ( If needed)
  • Coconut oil – 1 tbsp ( Must add)
Rava Khichdi
  • Rava Upma Mix - 1 cup
  • Water - 4 cups
  • Finely chopped Mixed vegetables - 1/4 cup ( carrot, peas, potato)
  • Turmeric powder - 1/4 tsp
  • Ghee - 1 tbsp
For Rava Dosa
  • Rava upma mix - 1/2 cup
  • Rice flour - 1 cup
  • Maida - 1/4 cup
  • Water – 3 cups + 1/4 cup( add 2 tbsp more in the middle)
  • Curd – 1/4 cup ( semi solid)
  • Salt – as needed
  • Pepper – 1 tsp (crushed)
  • Coriander leaves & curry leaves – Few ( finely chopped)
  • Asafetida/Hing – as needed
  • Ghee or cooking oil - as needed to drizzle dosas
For Rava Idli
  • Rava upma mix – 1 cup
  • Sour curd – 1 cup
  • Plain Eno fruit salt – 1 tsp
  • Lemon juice – few drops
  • Water & salt – as needed
HOW TO MAKE INSTANT UPMA MIX - METHOD

  • Heat oil or ghee ( ghee would be better) in a kadai and splutter mustard seeds, urad dal, chana dal and cashew nuts. Saute until dal & cashew starts to turn golden. Take care & roast it properly. Keep the flame low to medium till you roast. Add the finely chopped green chillies, ginger and curry leaves. Saute well till the dals turn golden color completely. Make sure no dals are burnt. Remove the roasted items in a plate.
Instant upma mix recipe
  • In the same kadai, roast the rava for 5-6 minutes in medium flame. Keep mixing and roast the rava properly. Its raw smell should go off. Switch off the flame and let the rava be in the same kadai. Now take the roasted dal mixture, required salt and mix with the roasted rava.
Instant upma mix recipe
  • Let the mixture cool down completely. Store it in an air tight box or ziplock cover and refrigerate it. It stays good for months. 
Instant upma mix recipe

Note : My friend Shalini told me to add finely chopped onions too along with chillies & ginger. She told upma mix will stay good for weeks if onion is well sauteed. You can try it if you wish. I din't add onions in this mix. 

To make Rava upma:

Boil 2.5 cups of water and when the water comes to roll boil, simmer the flame completely and add 1 cup of upma mix. Mix well without lumps and check for taste. Add salt if needed.Cover & cook the upma for 2-3 minutes. Open the lid, mix well and again cover cook for another 2 minutes. Lastly add 1 tbsp of coconut oil.  Do not forget it. Fluff the upma and serve hot with chutney or sugar. Check out my Rava upma post too.

To make Rava kichdi :

Boil 4 cups of water, add finely chopped carrot, potato and peas( if using). Add turmeric powder and let the veggies cook for few minutes. After the veggies are half done, add the upma mix. Mix well and pressure cook the khichdi in low flame for one whistle. Refer my Rava khichdi post.

To make rava dosa :

Take 1 cup of mix, add rice flour, maida, crushed pepper corns and required water, salt. Mix well and check for taste. Refer my Rava dosa recipe for more details.

For Rava idli :

Take 1 cup of mix. Add 1 cup of curd, some water, few drops of lemon juice and 1 tsp of eno fruit salt. Mix well and steam it. Here is my Rava Idli post for reference.

Note
  • Adjust the quantity of green chilli as per your preference.
  • Add more cashews or dals as u like.
  • Roast the rava properly to increase the shelf life of this mix. 
  • Adding ghee for tempering gives a nice flavor for the upma while it cooks.  You can use any odorless cooking oil too.
  • Do not forget to store the rava properly and refrigerate it. Use a clean spoon to handle.

Make this upma mix at home and have a quick breakfast/dinner !!

Instant upma mix recipe
 
Continue Reading...


July 1, 2016

Pineapple Kesari Recipe – Pineapple Kesari Bath

Pineapple kesari bath recipe
Usually I make Pineapple Kesari just by adding Pineapple essence and yellow food color to the normal rava kesari. I have never tried it with Pineapple chunks. Yesterday I bought a small pineapple to try this authentic pineapple kesari served in weddings, functions and Karnataka special Pineapple Gojju recipes.So this morning I made kesari bath for my Thursday Guru pooja. 

I followed my microwave rava kesari procedure and ingredients which I adapted from Revathy Shanmugam mam’s recipe. It came out very well, soft and flavorful. Being a Pineapple lover, I loved each and every bite of it in the kesari. But the only thing I felt was, I chopped Pineapple into big chunks thinking it would mash up in the kesari but it remained as it is. So please chop the pieces very finely or make it a coarse paste to avoiding biting chunks in between the super soft Kesari. 

Friends, do try this different type of kesari using pineapple for your friends & family, Enjoy!! Lets see how to make pineapple kesari recipe with step by step photos.

Check out my basic rava kesari recipe, Karnataka kesari bath recipe, Milk kesari, Semiya Kesari, Microwave rava kesari & mango kesari recipes

Check out the health benefits and more details about Pineapple HERE

Pineapple kesari

Pineapple Kesari Recipe


Pineapple Kesari Recipe Pineapple Kesari Recipe - An easy, Indian dessert recipe !
Cuisine: Indian
Category: Sweet
Serves: Serves 3-4
Prep time: 10 Minutes
Cook time: 15 Minutes
Total time: 25 Minutes


INGREDIENTS
1 cup - 200ml
  • Rava/ Bombay Sooji - 1/2 cup
  • Sugar - 1 cup
  • Small Pineapple pieces - 1/2 cup
  • Pineapple essence - few drops
  • Yellow food color - 2 pinches
  • Water - 2.5 cups
  • Ghee - 2 tbsp + 2 tsp
  • Cooking oil - 2 tbsp ( No flavored oils)
  • Cashews and raisins – few ( optional)
METHOD

  • Wash and chop the pineapple into very small pieces or coarsely grind the pieces ( I chopped it big by mistake). Take them in a bowl and add 2 tbsp of sugar from 1 cup of sugar. Mix well and cover the bowl. Let the pineapple pieces soak in sugar for 20 minutes and becomes soft.
  • Take a wide plate and grease it with ghee.Set aside. In a kadai , heat 2 tbsp ghee + 2 tbsp oil.
Pineapple kesari recipe
  • After its heated, reduce the flame to medium and roast the cashews & raisins.Remove it in a plate after cashews turn golden and raisins bloat. Now add the rava. Rava should sizzle as soon as you add it. Roast the rava well for 2-3 minutes by staying nearby. Make sure you don’t burn the rava or change its color.Switch off the flame and let the rava be in the same kadai.
Pineapple kesari recipe
  • In a bowl, roll boil 2.5 cups of water adding yellow food color and soaked pineapple pieces. Do not add the sugar water in the pineapple pieces. Add the fruit alone. Cover & cook the pineapple pieces. Add this water to the roasted rava. Take care, water will splash. Now switch on the flame and keep stirring. As soon as rava becomes thick, close the kadai with a lid & simmer the flame completely. Cook the rava for 3-4 minutes.
Pineapple kesari recipe
  • Open the lid and mix the cooked rava. Add sugar and stir it without lumps. Do it fast, Sugar will melt, mixture will become thin and watery. Add pineapple essence.
Pineapple kesari recipe
  • Keep stirring till the kesari starts to leave the sides of pan. As soon as kesari starts to leave the sides of pan, add 2 tsp pf ghee, mix well & switch off the flame. Transfer to the ghee greased plate. No problem if the kesari is not thick, it will thicken as it turns warm.
Pineapple kesari recipe
    Enjoy !
Note
  • I used rava and sugar in the ratio of 1:2. You can reduce to 1.5 cups if you want mild sweetness.
  • Adding more water makes the kesari soft. So I used 1:5 rava and water.
  • Oil helps to maintain the texture of kesari and prevent its from hardening. So do not skip it. Use unflavored oils like refined oil or olive oil. Never use groundnut oil/Kadalai ennai.
  • If you don’t like eating pineapple pieces in the kesari, chop it very finely so that it will mash up while cooking and you won’t get pieces in your mouth. You can also try grinding them coarsely.
  • If you don’t have pineapple essence, skip it or add cardamom crushed seeds if you like.

  Yummy , flavorful kesari is ready to enjoy !
Pineapple kesari recipe
Continue Reading...


June 29, 2016

Ridge Gourd Curry – Beerakaya Curry–Turai Ki Sabji

Turai ki sabji
I started to explore varieties of ridge gourd recipes (Ridge gourd in English, Turai/Luffa/Torai in Hindi, Peerkangai in Tamil, Beerakaya in Telugu, Hirekai in Kannada, Peechinga in Malayalam, Ghiya Tori in Urdu ) in my kitchen. Recently I shared Andhra style Ridge gourd dal / Beerakaya pappu recipe for rice.Today I have posted a North Indian style Ridge gourd curry. I followed this recipe from Mullai’s blog. It is known as Turai Ki Sabji/Sabzi in Hindi. It tastes good with rice and roti as well. Yesterday I prepared this sabzi and dal for my lunch. It was simple yet comforting. I ate this curry with plain rice adding ghee. You can make this as a side dish for roti. I am sure it tastes better with roti. Lets see how to make this easy, yummy and healthy Ridge gourd sabji recipe.
Check out my South Indian Peerkangai chutney( gravy )for rice.

Continue Reading...


June 27, 2016

Muslim Khichdi Recipe – Dal Khichdi

Muslim khichdi recipe
I got this recipe from Captain TV cookery show. It was demonstrated by a Muslim lady, Mrs. Humayun ( Sorry I don’t remember her name exactly) and she told its one of the traditional breakfast recipes of Tamil Muslims. This is an entirely different version from our usual dal kichdi recipes served in hotels. Its cooking procedure and ingredients are more like biryani. So I got impressed with the recipe and thought of trying out this authentic version. I made it for our Sunday lunch along with curd rice and fruit custard. It was mildly spiced and tasted yummy with nice flavor of moong dal and masala .I served this khichdi with Mint leaves chutney/Pudina chutney as suggested by her. Sendhil & Raksha loved it and told me prepare this for their lunch box too . Its a very easy, quick, one pot meal ideal for breakfast and lunch box. Try this once. Ok, lets see how to make this easy, one pot Muslim style Khichdi recipe for breakfast/ lunch!
Check out my Muslim Veg Dalcha and ghee rice recipes too !
Muslim khichdi

Muslim Khichdi Recipe


Muslim Khichdi Recipe Muslim khichdi recipe using rice, moong dal and vegetables served with Mint chutney - A healthy breakfast recipe with a side dish !
Cuisine: Indian
Category: Breakfast recipes
Serves: Serves 3
Prep time: 10 Minutes
Cook time: 20 Minutes
Total time: 30 Minutes


INGREDIENTS
1 cup - 240ml
  • Basmati rice - 1 cup
  • Moong dal - 1/4 cup
  • Mixed vegetables - 1/2 cup (1 carrot, 1 potato, a handful of green peas)
  • Water - 1.5 cups
  • Salt - as needed
To saute
  • Cooking oil - 3 tbsp
  • Cinnamon, cloves, cardamom - 2 each
  • Big onion - 1 no
  • G&G paste - 2 tsp
  • Green chillies - 2 nos ( use 4 nos for more spicy)
  • Tomato - 2 nos ( small)
  • Mint + coriander leaves - a handful
  • Turmeric powder - 1/4 tsp
  • Ghee - 2 tsp
METHOD

  • Wash and soak basmati rice for 30 minutes. Wash and soak the dal in another bowl separately. In the mean time, chop the onion, tomato, mixed vegetables.
Muslim khichdi recipe
  • Heat oil in a pressure cooker base and saute cinnamon, cloves and cardamom. Now add the sliced big onion,g&g paste slitted green chilli and saute until onion turns transparent and raw smell goes off.
Muslim khichdi recipe
  • Now add the chopped tomato pieces, mint + coriander leaves, turmeric powder, salt. Saute till tomato turns pulpy. Drain the excess water from the soaked dal and add the dal to the cooker. Saute for a minute. Add the chopped vegetables and mix well.
Muslim khichdi recipe
Khichdi recipe
  • Add 1.5 cups of water and check for taste after the water starts to boil Add more salt or put some slit green chillies if you want to add more salt or make it more spicy.Mix well and add the soaked, drained rice. Mix well and pressure cook in low flame for one whistle. Remove the lid after the steam is released. Fluff the rice with a fork. 
Khichdi recipe
  • Serve hot with Mint chutney and onion raita .Enjoy !
For Mint chutney
Take a handful of mint leaves + coriander leaves in a mixie jar. Add 3 tbsp of grated coconut, 2 green chillies, 1/2 tsp of cumin seeds, salt , a pinch of turmeric powder and a small piece of tamarind. Grind everything to a smooth paste. Serve it with khichdi.

Note

  • Add 3-4 green chillies for spicy taste.
  • Do not forget to use mint+coriander leaves as it gives a nice flavor. Add Mint leaves at least.
  • Adding ghee at the end gives richness and nice flavor. Skip it if you don’t want to increase the calorie.
Try this easy, healthy one pot meal at home and enjoy !
Muslim khichdi recipe
Continue Reading...


June 24, 2016

Batata Poha Recipe Without Onion – Gujarati Aloo Poha – How To Make Potato Poha

Batata poha without onion
Batata poha ( Batata – Potato, Poha – Rice flakes in English, Aloo Poha in Hindi) is a quick breakfast and teatime snacks recipe which is very popular in Gujarat and Maharashtra. Recently I posted Maharashtrian Kanda pohe recipe( Onion poha). Following that, I tried this Gujarati style Batata poha recipe without onion and garlic for our breakfast.There is no much difference between ingredients of Gujarati & Maharashtrian style batata Poha recipes. So I don’t want to follow the same recipe with slight variations instead I tried this recipe in which spice powders and Garam masala powder were used. I am really not sure whether this is the authentic Gujarati version but it came out very flavorful and definitely tastier than our usual Kanda batata poha. Working women and bachelors can try this for making quick breakfast or dinner and enjoy it with a hot chai. You will find it tummy filling and healthy too ! Lets see how to prepare Gujarati Batata poha/ Aloo Poha recipe without onion with step by step photos !

Check out my Karnataka style Chitranna & Tamilnadu Lemon Aval upma, Milagu Jeeraga Aval recipes too.

Batata poha -Gujarati Aloo poha

Batata poha recipe - Gujarati Aloo Poha Recipe


Batata poha recipe - Gujarati Aloo Poha Recipe How to make aloo poha - Gujarati Batata poha without onion and garlic for quick breakfast !
Cuisine: North Indian
Category: Breakfast/ snack
Serves: Serves 2
Prep time: 10 Minutes
Cook time: 10 Minutes
Total time: 20 Minutes


INGREDIENTS
1 cup - 250ml
  • Thick poha - 1 cup
  • Potato - 1 no ( medium. peeled and sliced thinly)
  • Peanuts - 2 tbsp
  • Cooking oil - 3 tbsp
  • Mustard seeds - 1/2 tsp
  • Cumin seeds - 1/2 tsp
  • Curry leaves - few
  • Asafetida/Hing - a pinch
  • Red chilli powder - 3/4 to 1 tsp
  • Dhania powder -1 tsp
  • Garam masala powder - 1/2 tsp
  • Sugar – 1 tsp
  • Salt & water - as needed
  • Turmeric powder - 1/4 tsp
To garnish
  • Coriander leaves - few
  • Pomegranate seeds - a handful
  • Lemon juice - few drops
  • Raw onion - finely chopped ( optional, I din't use)
METHOD

  • Wash the thick poha at least twice to remove the dust. Soak it in enough water. i.e the level of water should be just 1/2 inch above poha. Close the bowl with a lid and let it sit for 10 to 15 minutes. In the mean time, wash & peel the skin of potato. Chop it into thin slices as shown in the picture so that it can cook quickly.

  • Heat 1 tbsp oil in a kadai and roast the raw peanuts first. In the same kadai, add another 2 tbsp of oil and splutter mustard seeds, cumin seeds and turmeric powder along with roasted peanuts.
Batata poha recipe
  • Add the chopped potato pieces, curry leaves and mix well ( If using boiled potato cubes, add it at the end along with Poha, no need to saute it).Add turmeric powder and salt for the potato to saute & cook quickly. Cover the kadai for sometime, simmer the flame and let the potato pieces cook till soft. Now add the red chilli powder, dhania powder, garam masala powder , sugar and if needed some turmeric powder. Mix well till all the spices well blend with cooked potato.
Batata poha recipe
Batata poha recipe
  • Lastly add the soaked poha and mix well till all the masala coat well. Check for taste and add more salt or spice powders as per your need.
Batata poha recipe
    Gujarati batata poha


  • After the poha is heated well, switch off the flame and garnish with finely chopped coriander leaves, sprinkle some lemon juice. Add some pomegranate seeds if you wish. Serve hot with a cup of Chai/Tea. Enjoy !!


  • Note
    • You can saute finely chopped onions along with potato pieces if you wish.It is known as Kanda batata poha in Hindi i.e Onion Potato Poha
    • Do not reduce the quantity of oil. Oil is more important to make a tasty poha. It doesn’t look dry !
    • Adjust the quantity of spices as per your taste
    • Adding sugar gives a mild sweetness to the dish. So skip it if you don’t like.
    • Using thin poha is also OK but soak it adding correct amount of water else the dish will become mushy.
    Try this easy, yummy Gujarati breakfast dish at home and enjoy with a cup of chai !
    Gujarati batata poha
    Continue Reading...


    June 23, 2016

    Eggless Digestive Cookies Recipe – Whole Wheat,Oats Cookies Without Butter

    eggless digestive biscuits
    We buy digestive biscuits regularly even though its costly.Every time I used to see the list of ingredients on the back of pack to try on my own.And I kept searching some good recipes for homemade digestive biscuits aka whole wheat,oats cookies. In Raksha’s school, this year they have strictly restricted store bought cakes, cookies and packed juices for snacks box. Only homemade digestive cookies are allowed. Finally time hath come to try my hands on itWinking.I followed this recipe & I baked an eggless, butter less digestive cookies using whole wheat flour, quick cooking oats and plain milk.For Vegan version, use almond milk instead. Actual recipe had butter in it. But I substituted butter with cooking oil and tried it today.You can call this as oats cookies too.It came out very well, perfect with a crunchy texture. We loved it very much & ate 2-3 cookies without any guiltLove Struck
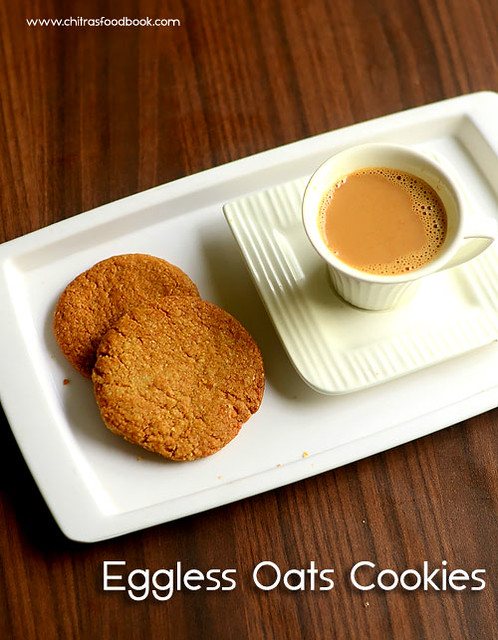
. Its so easy to make and a good tea time cookies for weight watchers.For kids, you can use butter, add some Choco chips, M&M etc for variations. After tasting these cookies, Raksha told its taste is similar to UNIBIC digestive biscuitsHappy . I felt very happy and proud with my baking Dancing.Friends, do try this easy, simple oats cookies without eggs and butter at home & enjoy it for your tea time with your loved ones. Even beginners can dare to try it. Ok, lets move on to the recipe !

    Continue Reading...


    June 21, 2016

    Pumpkin Sambar Recipe – Poosanikai Sambar–Parangikai Sambar

    pumpkin sambar
    Pumpkin sambar is my recent try in pumpkin recipes. Usually I make red or yellow Pumpkin gravy or pumpkin poriyal ( Manjal Poosanikai/Parangikai in Tamil, Mathanga in Malayalam, Kumbalakayi in Kannada, Kaddoo in Hindi) – My mil’s recipes for our lunch. Both are my favorite recipes. But Sendhil doesn’t like them. So I have to make some other kuzhambu or side dish specially for him whenever I cook Pumpkin.  Recently he suggested me to try pumpkin sambar for rice instead of making other dishes with it. Usually I add few pieces of yellow pumpkin in my hotel idli sambar recipe to get the mild sweetness. But this is the first time, I am making manjal poosanikai sambar for rice. So I asked the recipe from my MIL, combined it with my mixed vegetable sambar recipe and made it for our lunch along with Vendakkai poriyal. Sendhil liked it very much and ate all the pumpkin pieces happily.He told sambar tastes much better than pumpkin chutney and poriyalHappy. Abbaaa, I am feeling relieved that I can make him eat pumpkin with this sambar recipeWinking. Friends, do try this easy and yummy poosanikai sambar/pumpkin sambar for your lunch. You can have this sambar with idli,dosa too. Ok, lets see how to make it with step by step photos !
    Parangikai sambar

    Pumpkin sambar recipe


    Pumpkin sambar recipe Pumpkin sambar/poosanikai sambar recipe for rice
    Cuisine: South Indian
    Category: Sambar recipes
    Serves: Serves 3
    Prep time: 10 Minutes
    Cook time: 20 Minutes
    Total time: 30 Minutes


    INGREDIENTS
    1 cup - 200ml
    To pressure cook
    • Toor dal - 1/3 cup
    • Turmeric powder - 1/4 tsp
    • Cooking oil - few drops
    • Water - 2 cups
    • Poosanikai/Pumpkin pieces - 12 cubes
    To temper & saute
    • Cooking oil - 1 tbsp
    • Mustard seeds - 1/2 tsp
    • Methi seeds/Vendhayam - 1/4 tsp
    • Urad dal - 1/2 tsp
    • Cumin seeds - 1/2 tsp
    • Red chilli – 1no ( pinched)
    • Curry leaves - few
    • Hing/Asafetida - 1/8 tsp
    • Big onion or small onion – 1 no / 10 nos
    • Green chilli - 2 nos (slitted)
    • Sambar powder - 2 tsp
    • Dhania powder - 1 tsp
    • Red chilli - 1 no
    • Ghee - 2 tsp ( to add at the end)
    • Coriander leaves – few ( to garnish)
    METHOD

    • Soak tamarind in 1 cup of warm water for 15 minutes.Wash and soak toor dal adding 2 cups of water, turmeric powder and cooking oil. Wash and peel the skin of pumpkin and cut into big sized cubes as shown in the pic below. You can also chop it with skin because skin becomes soft after pressure cooking. Take the pieces in a small bowl that fits in the cooker and keep it inside the cooker without adding water. Let the dal pressure cook for one or two whistles in very low flame. Open the cooker after the steam is released and remove the pumpkin bowl. Mash the dal well with a ladle.
    Pumpkin sambar recipe
    • Chop the onions, slit green chillies and keep it ready. In a kadai, heat oil and temper mustard seeds, methi seeds.Once they start to splutter, add the urad dal, cumin seeds, pinched red chilli and curry leaves. Add sliced onion, slitted green chillies and saute until onion turns transparent.
    Pumpkin sambar recipe
    • Now add 1 cup of tamarind extract, sambar powder, dhania powder, turmeric powder, salt and cooked pumpkin pieces. Add raw hing and few torn curry leaves while the sambar boils. Let it boil for 5 minutes. Add 1/2 cup of more water in the middle if needed.
    Pumpkin sambar recipe
    • Now add the cooked & mashed toor dal. Mix well and let the sambar boil for another 3-4 minutes or till the desired thickness is reached. Switch off the flame and transfer the sambar to a bowl.Garnish it with coriander leaves and add 2 tsp of ghee.Cover it with a plate and serve after 30 minutes standing time. Mix with hot rice and enjoy with any poriyal and appalam !
    Pumpkin sambar recipe

    Pumpkin sambar recipe
      Enjoy !

    Note
    • The spiciness level would be normal for this sambar. If you want more spicy sambar, add more green chillies or some red chilli powder along with dhania powder.
    • You can use red pumpkin or white pumpkin too. But chop them into big pieces so that it doesn’t become mushy while pressure cooking. Never cook pumpkin pieces along with dal. Keep them in a separate box inside cooker but do not add water. This helps to cook the pumpkin soft and it retains its shape too.
    Enjoy this yummy yellow pumpkin sambar with plain rice and poriyal.Tastes yumm !!
    Pumpkin sambar recipe
    Continue Reading...