Lemon sevai is our family favorite breakfast recipe. Sevai also known as Idiyappam sevai is one of the popular South Indian breakfast. Making soft idiyappam at home needs some practice and expertise. So to ease our job, readymade rice vermicelli ( Rice sevai or rice idiyappam in Tamil, Rice vermicelli in English) is available in the market.Though there are many brands, I have tried Anil rice vermicelli and Concord rice sevai. Basically rice sevai is cooked by soaking in hot water for 15 minutes and made instantly just like noodles. Once we know how to cook the rice sevai properly, we can make varieties of sevai recipes by adding different flavors and prepare lemon sevai, tamarind sevai, tomato sevai, coconut sevai, masala vegetable sevai and even sweet sevai by adding sugar or jaggery. Usually I make lemon sevai and sweet sevai as both are our family favorite. I make this dish mostly for breakfast during busy weekday mornings as it saves lot of time when compared to our traditional idiyappam. So today I have shared this post on how to cook the instant rice sevai and make this flavorful, yummy lemon sevai with it. Lets move on with step by step photos !
Do check my homemade basic idiyappam recipe, lemon idiyappam recipes, side dish for idiyappam.
Lemon sevai recipe - Instant lemon sevai using rice vermicelli
How to make lemon sevai using instant rice vermicelli/rice noodles for easy breakfast or dinner
Rice vermicelli - 200gms packet ( I used Anil rice vermicelli)
Water - approx. 4 cups
Salt - as needed
Cooking oil - Few drops
To prepare lemon sevai
Cooking oil or gingely oil - 2 tbsp
Mustard seeds - 1/2 tsp
Urad dal - 1 tsp
Chana dal - 1/2 tbsp
Peanuts - 2 tbsp ( optional)
Curry leaves - few
Red chilli - 1 no ( Pinched )
Green chilli - 2 nos ( slit)
Hing - a pinch
Turmeric powder - 1/4 tsp
Lemon juice - 2 tbsp or as needed
Salt - as needed
Water - 1 tbsp to add in lemon juice
Coriander leaves - to garnish ( optional )
HOW TO MAKE LEMON SEVAI
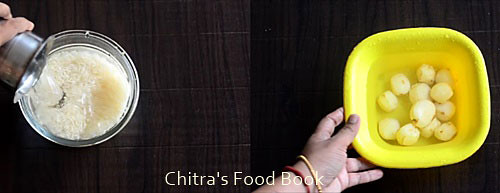
Roll boil 4 cups of water adding few drops of cooking oil. In the mean time, squeeze two small lemon and take the juice.Discard the seeds. Add 1 to 2 tbsp water to it. Mix well and keep aside.
Take the vermicelli in a wide bowl and add the boiled water. Level of water should be 1 inch above the vermicelli. Cover & soak it for 20 minutes.
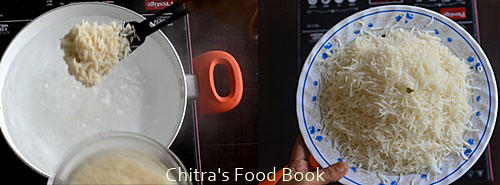
After soaking, drain the excess water completely using a colander and keep the cooked rice vermicelli ready. Make sure there is no trace of water. It should be fluffy and separate.
Spread the vermicelli in a greased idli plate. Boil water in an idli pot. Place the idli plate and steam it for 5 to 10 minutes. Remove and fluff the cooked sevai in a plate. (This step is optional). You can proceed without steaming too.
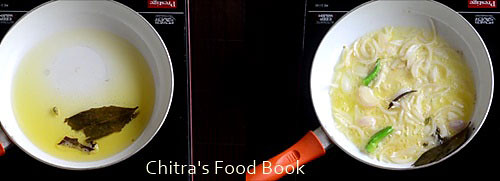
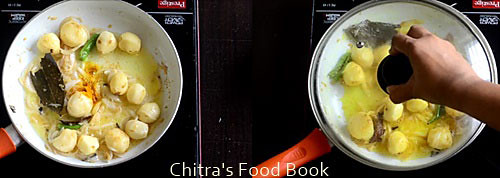
Heat oil in a kadai,splutter mustard, urad dal, chana dal, peanuts, red chilli, green chilli and curry leaves.Saute till dals become golden. Add the turmeric powder, required salt, lemon juice.Mix well and switch off the flame.
Add the cooked rice vermicelli to it. Mix gently using a fork like ladle. Check for taste and add more lemon juice if needed. Cook in very low flame for 2 minutes till all the moisture goes off. Garnish with coriander leaves and serve hot for best taste !
Enjoy !
Note
The quantity of lemon juice and chilli varies as per the sourness of lemon.
If you want, you can use a part of cooked vermicelli to make sweet sevai adding sugar or jaggery syrup, grated coconut and cardamom powder.
Do not add more water to soak the vermicelli because it may become mushy.
Make sure, you drain all the excess water completely without even a single drop left out. It helps to keep the vermicelli soft and looks fluffy too.
Steaming the soaked vermicelli makes it soft like homemade idiyappam. You can try this way for variations.
Enjoy this easy, instant lemon sevai using rice vermicelli for your breakfast or dinner.
I have few snacks recipes using bread in my try list for long time. So I started with this bread roll recipe and thought of trying them one by one to share in my blog. This potato stuffed bread roll recipe is a yummy, kids friendly snack with their 2 favorite major ingredients – Potato and bread. Recently I tasted this bread rolls in a simple birthday party conducted in my neighbor’s house.It was a snack party.So she had served this bread roll with tomato sauce/ketchup,a cake slice, store bought potato chips and a glass of store bought drink. Bread roll was crispy outside and soft inside. When I asked about the recipe, she gave a gist about it. After getting the idea from her, I watched a chicken bread roll video in YouTube to find out how to make it crispy. I tried it last week for Raksha and her friends. I made some lemon popsicle too. All of them loved it. Myself and Sendhil stopped with one as its deep fried. I guess these aloo bread rolls can be baked as well. Friends, Do try this easy, kids friendly evening snack & party snack – Indian style Stuffed bread roll at home and enjoy. Lets see how to make bread roll recipe with step by step photos and video.
You will not believe if I say this is the first time I am trying North Indian style Chana masala recipe using a pressure cooker. Usually I make South Indian hotel style chana kurma for chapathi. Even though I have tasted chana masala ( Kabuli chana curry) in Punjabi and other North Indian restaurants, I haven’t tried at home.
Recently my friend Shalini was suggesting me to try this easy chana masala recipe using Everest Chana masala/Chole masala spice mix powder. She told me to follow the recipe given on the pack. As I had already tried Chole recipe using homemade chole masala powder in my Punjabi thali post, I wanted to find the taste of chana masala using store bought powder.So I tried Chana bhatura for our weekend breakfast. I prepared few poori as well. We all loved its taste and I prepared again for their lunch box too.
Actually I wanted to post both Chana masala and bhatura recipes today but bhatura din’t come out so well as expected. I will try to make a perfect bhatura recipe and share it soon. So today I am sharing this easy, one pot chana masala gravy using a pressure cooker. If you have homemade or store bought chana masala powder and cooked chickpea in hand, making this recipe is a breeze. This is a perfect bachelor style recipe.
As a disclaimer, I would like to mention that this is not the authentic chana masala recipe or restaurant style one. This is just a simple, no grind version that would help working women, busy housewives and bachelors to make a quick side dish for chapathi, poori and bhatura. If you like, you can have it mixed with rice as well.
Lets see how to make easy chana masala at home with step by step photos and video.
Finally, do check out my Kabuli biryani recipe ( chana dal biryani) and chana sundal recipes if interested !
Chana masala recipe - Easy chana masala in a pressure cooker
Easy chana masala/chole masala recipe in a pressure cooker using storebought chana masala spice mix powder.
Kabuli chana/ white chickpeas - 3/4 cup ( soaked for 8 hours)
Cooking oil + ghee - 1 tbsp + 1 tbsp
Big onion - 1 no ( finely chopped)
Ripe tomato - 3 nos ( finely chopped)
Red chilli powder - 1 tsp
Dhania powder - 1 tsp
Chana masala powder - 2 tsp ( I have tried Everest & MDH brand, Both are good)
Green chilli - 1 no
Ginger - 1 inch piece
Chat masala powder - 1/2 tsp
Kasoori methi - 1/2 tsp ( crushed)
Coriander leaves - to garnish
HOW TO MAKE CHANA MASALA IN A PRESSURE COOKER - METHOD
Wash and soak white chickpeas/kabuli chana in water for 8 hours or overnight. It gets doubled after soaking. Pressure cook in low flame for 3 whistles adding required salt and water. Take 1/4 cup cooked chana and mash it well. Set aside. Heat oil + ghee in a pressure cooker. Saute finely chopped onion, slit green chilli and thinly sliced ginger. Saute for a minute. Add finely chopped tomato and salt ,saute until mushy.
Now add the red chilli powder, dhania powder, chana masala powder. Mix well. Add 1 cup of water, 1/4 cup mashed chana, 1 cup cooked chana and mix well. Note that you can also add uncooked chana directly after soaking but chana won;t cook soft.In that case, you should add a big pinch of baking soda in the gravy.
Pressure cook in low flame for 2 whistles.Remove the lid after steam is released. Add chat masala powder, crushed kasoori methi. Mix well.Garnish with coriander leaves if you like.
Mix well and serve with poori, chapathi or bhatura ! Enjoy !
Note
Adjust the quantity of spice powders as per your taste.
You can add the spice powders after sauting onion, then add tomatoes. This was given in the Everest pack.But I added the masala powders after adding tomato.
If you want to replace chana masala powder, add 1 tsp garam masala powder + 1/2 tsp aamchur powder.
Try this easy, one pot chana masala for poori/bhatura or Chapathi !
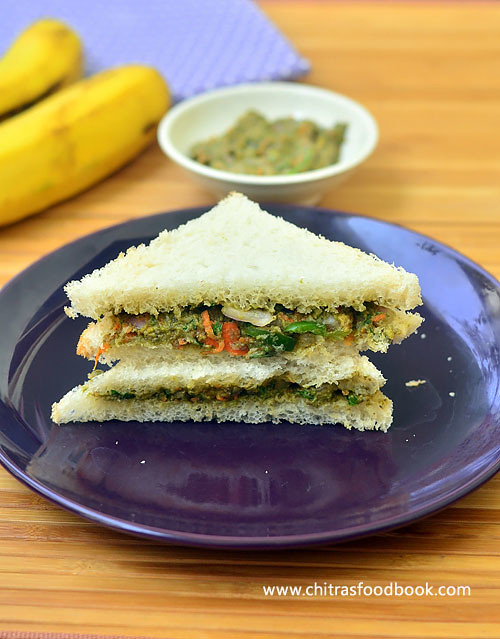
After a long gap, I am sharing a recipe with avocado because this healthy fruit is very rarely available in my place. So whenever I see it in Reliance fresh, I take one to try some interesting recipes with it. Avocado is popularly known as “Butter fruit” in India. So far I have tried and posted avocado paratha, avocado milkshake and Guacamole recipes and that too very long back. So this time I made Indian style, vegetarian avocado sandwich for a change. This no cook sandwich is a quick and easy breakfast/dinner recipe. Its a vegan recipe as well. You can use whole wheat bread to make it healthy and low in calorie. I don’t think kids would like this sandwich. If you use milk bread, add lots of grated cheese to the sandwich filling and toast it with butter, kids may like to have it. But this is an ideal recipe for adults who look for weight loss. One sandwich, a banana and a glass of milk was very much filling for me. You too give a try ! Lets see how to make this easy and quick Indian style vegetarian Avocado sandwich recipe with step by step pictures.
Indian Avocado sandwich recipe
Indian vegetarian style avocado sandwich recipe - A very healthy breakfast/dinner recipe !
Chat masala powder - 1/2 tsp ( add more if needed)
Olive oil or cooking oil - 1 tsp
METHOD
In a plate, wash and cut the avocado into two pieces vertically.Remove the seed with a knife. Scoop out the pulp and discard the skin.
In a wide bowl, take the paste, grated carrot, finely chopped green chilli, onion, tomato, coriander leaves, required salt, chat masala and pepper powder. Mix well.
Take two bread slices, trim off the sides if needed. Apply butter on one bread if needed.Apply the sandwich filling on the other bread.Cover it and grill or toast the sandwich if needed. I served it raw.
Enjoy!
Try this easy, healthy avocado veg sandwich for your breakfast or dinner. You will like it for sure !
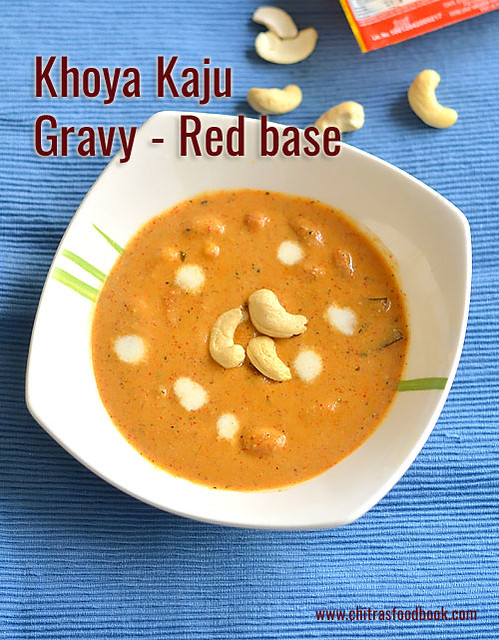
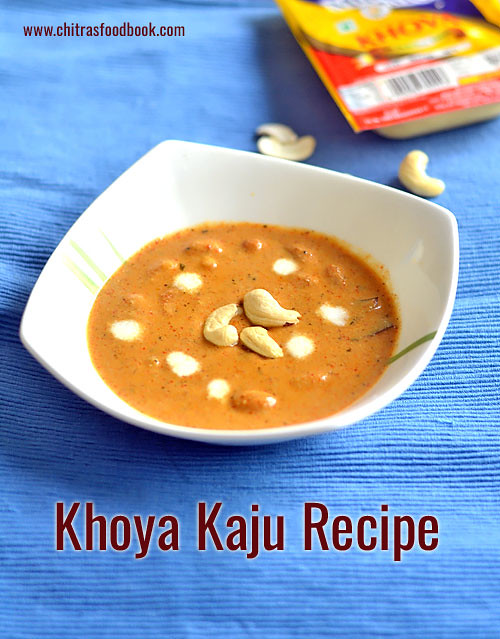
I have never heard about khoya kaju gravy until my reader friend Dheepika requested me to try this recipe after having in an Indian restaurant. When she told me about this recipe, I browsed and shared the recipe links from 2 different websites to her. She went through them and told me about the color & texture of the gravy along with a picture of one she had in the restaurant.When I browsed for the recipe, I found khoya kaju gravy tastes sweets with mild spices basically.But Dheepika told the restaurant people made it red in color by adding red chilli powder as they asked for a spicy version. Based on her inputs, I followed the recipe of white based khoya kaju curry from spice up the curryand I used red chilli powder in place of green chillies.I tried it yesterday for our dinner.After tasting this, Sendhil told Khoya kaju curry would be white in color in most of the hotels. Some people may add food color to present it red in color, he added. Whatever it is, gravy came out delicious and very flavorful.We loved it with roti. Thanks to you Dheepika for making me try this restaurant style gravy. Soon I will try to share the recipe of khoya kaju white gravy. Though this gravy is very high in calories with full of ghee, cashews and khoya, everyone must give a try at home as it tastes so good & delicious . We can indulge in these type of gravies at least once in a while for celebrations and occasions.So friends, do try it and share your feedback with me .Lets see how to make this restaurant style khoya kaju gravy with step by step pictures and video !
Khoya Kaju Gravy Recipe
Khoya kaju gravy recipe - Side dish for roti, naan, kulcha
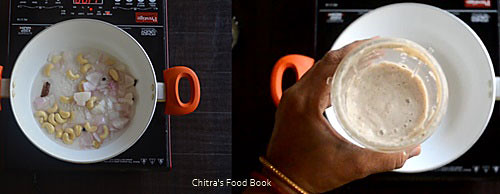
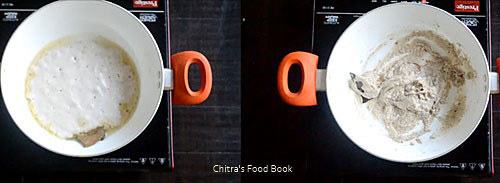
In a wide bowl, take the chopped onion, cashews, pepper corns, cinnamon, cloves along with water. Boil and cook for 5 minutes till onion turns soft. Grind everything to a smooth paste and keep aside.
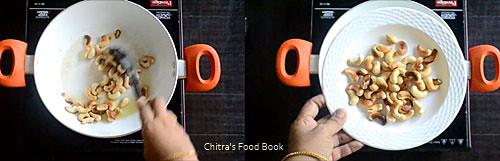
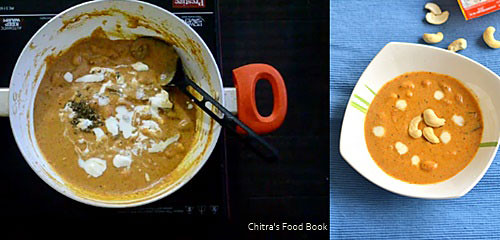
Heat oil + ghee in a good non-stick pan and roast the cashews till golden.Remove in a plate. In the remaining oil+ghee, saute bay leaf and add the ground onion paste. This paste gets stuck to the bottom easily as it has cashews.So keep the flame very low and mix it till thick. Scrape the bottom and sides if needed and mix well.
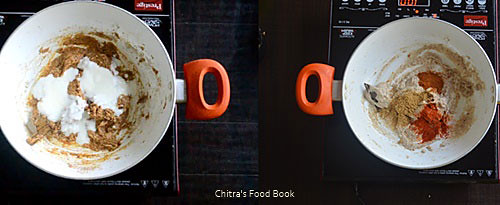
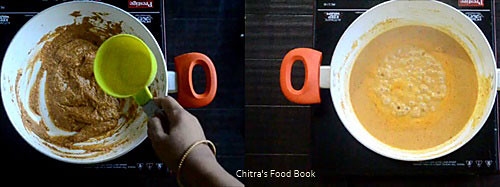
Add red chilli powder, coriander powder, salt, sugar, cardamom powder and garam masala powder. Mix for a minute in low flame. Then add curd and mix well. Add 1 cup of water and boil the gravy till oil starts to float on top.
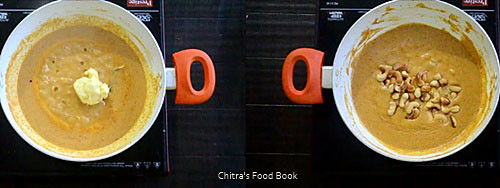
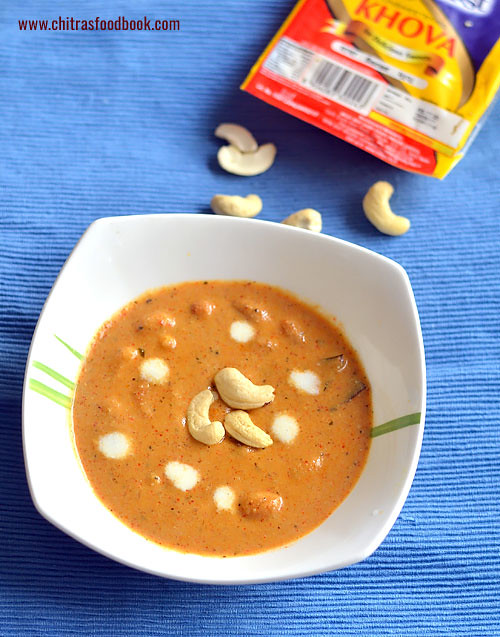
Lastly add the crumbled khoya and mix well. Gravy look orange in color. Add the roasted cashews,mix well and switch off the flame. Then add crushed kasoori methi, fresh cream and mix well. Serve with roti, naan or kulcha !
Enjoy !
Note
Reduce the quantity of red chilli powder if you want mildly spiced gravy.
Skip red chilli powder, dhania powder, garam masala powder and add green chillies while boiling onions to make a white based gravy.
You can add more khoya if you want more creamy gravy.
Adding kasoori methi is optional. But it adds flavor.
Try this yummy, creamy, rich & delicious Khoya kaju gravy at home !
In my veg biryani series, I had already shared a Chettinad style baby potato biryani in pressure cooker. But this baby potato Dum biryani is a completely different version. I tried this recipe after watching this video. Usually aloo Dum biryani is prepared by shallow or deep frying sliced potatoes, marinated in curd+ spices mixture, made into a gravy and then layered with parboiled basmati rice.
When I was browsing for various small potato biryani recipes, I was scared to see the tedious process because I had very less time in hand to prepare our Sunday lunch. But convincingly, I got this recipe. Feedback from readers made me try this recipe without any second thoughts. I loved the idea and simplicity of this recipe.
Yes, This baby potato biryani is a much simplified version when compared with the traditional ones. This recipe involves no marination, no frying and taste wise there is no compromise at all. It tasted great just like Hyderabadi Veg Dum biryani. We all loved it & relished with onion raita.
You can try this biryani for any special occasions like birthdays, wedding anniversary to treat your family. Kids would love this biryani for sure as it has their most favorite vegetable – Potato. You can try this biryani in a pressure cooker using regular potato as well. Lets see how to make aloo dum biryani recipe using baby potato with step by step pictures and video !
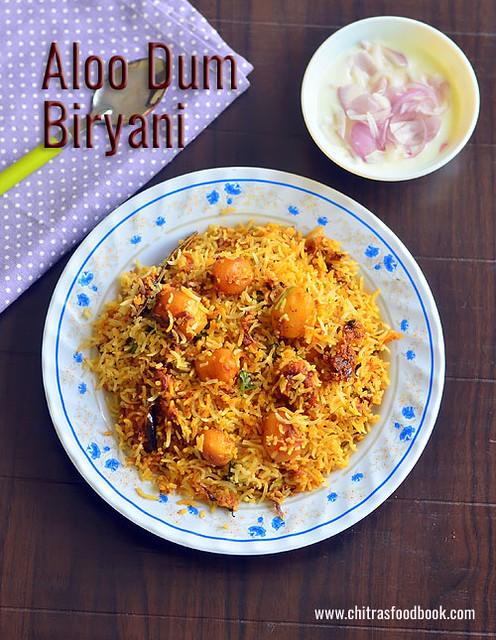
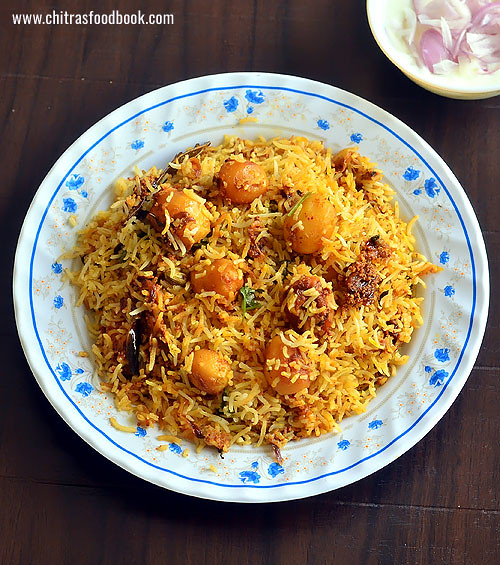
Aloo Dum Biryani Recipe - Baby Potato Biryani Recipe
How to make Aloo Dum Biryani using baby potato - An Easy version !
Wash and soak basmati rice for 15 minutes. In the mean time,wash and peel the baby potato or normal potato, cut into big slices or cubes if using big potatoes. Keep them in a bowl of water to avoid discoloration.
Boil 6 cups of water in a bowl. Add the soaked basmati rice, whole garam masala and required salt for rice. Let it roll boil in high flame till its 80% cooked. While the rice is boiling, you can make the gravy part. Remove the rice to a plate using a colander and drain the excess water. Spread the rice in a plate. Add a tsp of oil and fluff with fork if needed. Set aside.
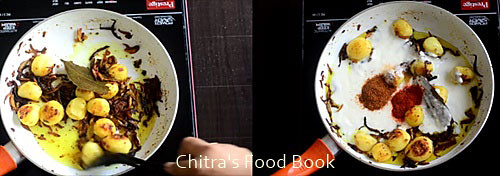
Heat oil + ghee in a wide kadai. Saute the whole garam masala ( Cinnamon, cloves, cardamom, bay leaf and black stone flower) for a minute. Add the turmeric powder, sliced onion, green chilli. Saute for a minute. Add baby potato, ginger-garlic paste and required salt. Saute till raw smell of gg paste goes off. Take care it splutters everywhere.
Cover the kadai with a lid tightly and cook for 10 minutes in very low flame.Stir it once or twice in the middle. In this 10 minutes, onions would be caramelized and potato will be cooked soft. Onion should not be burnt or charred. It will spoil the flavor of biryani. So please be careful till this step.
Now add curd/yogurt, red chilli powder and garam masala powder. Mix well. Mixture will become watery.So boil for 2 to 3 minutes in medium flame till it becomes semi gravy with little moisture in it. You can cover & cook if needed. By this time, potato would have cooked soft. You can check it by breaking the potato with a spoon.
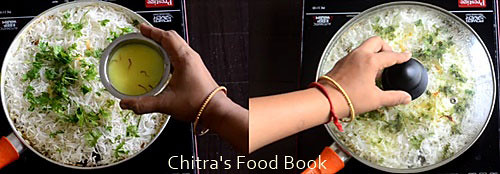
Then spread the potato mixture in the kadai. If needed add 2 to 3 tbsp water to it. Layer the cooked basmati rice evenly over the potato gravy, chopped coriander leaves and sprinkle saffron soaked milk. Cover with a lid tightly and keep the flame very low. Put in DUM for 10 minutes. Make sure you don’t burn the gravy.
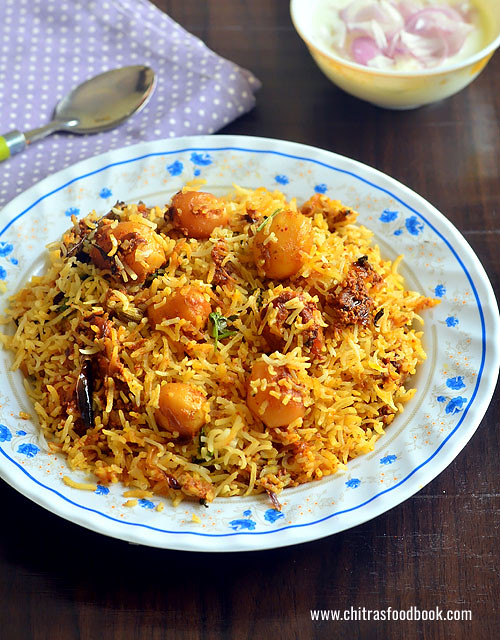
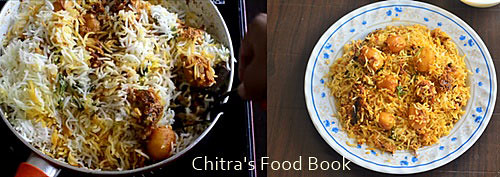
Open the lid after putting DUM and fluff the rice gently with a fork. I had mixed the rice very well as Sendhil doesn’t like to see white rice anywhere in Dum biryani. Serve hot with raita and chips ! Enjoy !
Note
Adjust the quantity of chillies and chilli powder as per your taste.
Original recipe called for 3/4 cup basmati rice. But I used 1 cup. So I had increased the quantity of curd.Do not use sour curd.
If using too sour curd, add 1/4 cup and adjust the quantity of chilli powder accordingly.
Yummy kids friendly baby potato dum biryani is ready to serve !


 How to make lemon sevai using instant rice vermicelli/rice noodles for easy breakfast or dinner


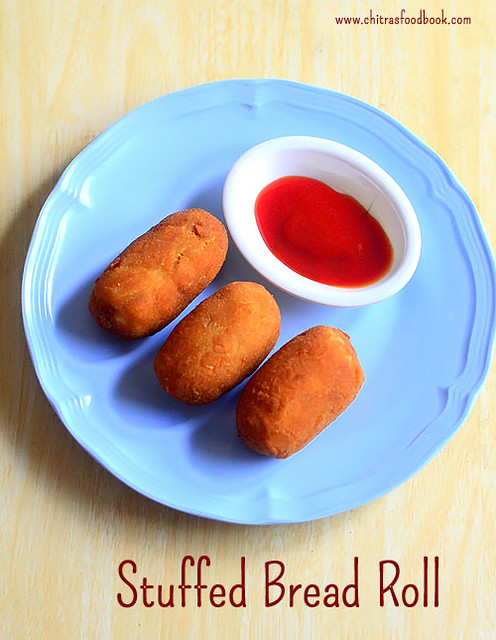
 . This potato stuffed bread roll recipe is a yummy, kids friendly snack with their 2 favorite major ingredients – Potato and bread. Recently I tasted this bread rolls in a simple birthday party conducted in my neighbor’s house.It was a snack party.So she had served this bread roll with tomato sauce/ketchup,a cake slice, store bought potato chips and a glass of store bought drink. Bread roll was crispy outside and soft inside. When I asked about the recipe, she gave a gist about it. After getting the idea from her, I watched a chicken bread roll video in YouTube to find out how to make it crispy. I tried it last week for Raksha and her friends. I made some lemon popsicle too. All of them loved it
 . Myself and Sendhil stopped with one as its deep fried
 . I guess these aloo bread rolls can be baked as well. Friends, Do try this easy, kids friendly evening snack & party snack – Indian style Stuffed bread roll at home and enjoy. Lets see how to make bread roll recipe with step by step photos and video.
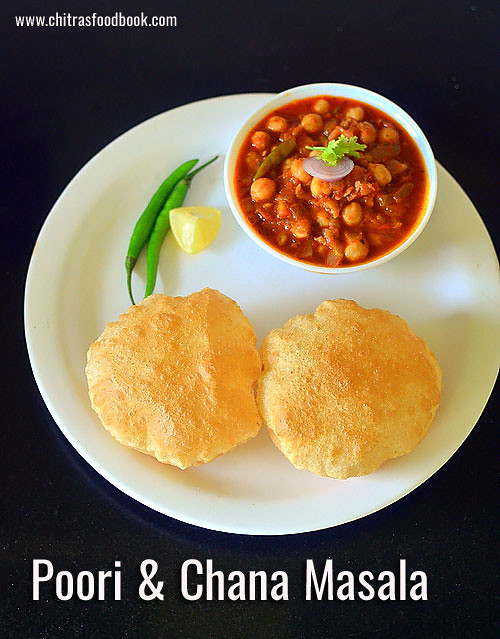


 . So whenever I see it in Reliance fresh, I take one to try some interesting recipes with it. Avocado is popularly known as “Butter fruit” in India. So far I have tried and posted avocado paratha, avocado milkshake and Guacamole recipes and that too very long back. So this time I made Indian style, vegetarian avocado sandwich for a change. This no cook sandwich is a quick and easy breakfast/dinner recipe. Its a vegan recipe as well. You can use whole wheat bread to make it healthy and low in calorie. I don’t think kids would like this sandwich. If you use milk bread, add lots of grated cheese to the sandwich filling and toast it with butter, kids may like to have it