Search Chitra's Food Book

Showing posts with label BISCUITS / COOKIES. Show all posts

March 27, 2015

Eggless Jam biscuit Recipe - Eggless Thumbprint Cookies Recipe

Eggless jam biscuit recipe
Jam biscuits also known as thumbprint cookies is a kids friendly cookies recipe.Summer Vacation is started for my daughter Raksha.She keeps asking me to make some snacks to munch while watching TV.So I baked these cookies for her yesterday.I tried these biscuits for the first time and it came out really well.With melt in mouth texture and awesome vanilla flavour, these jam drop cookies were yummy.Its taste was close to butter biscuit/Nankhatai.So this biscuit would be surely a hit among the kids and elders as well.No doubt my daughter liked it to the core and finished one batch of cookies in few minutes.She called it as "Jim Jam" biscuits.You can try this cookies for small parties,get together and for picnic as well. You can make & store these cookies well in advance.I hope it stays good for a week in an air tight box because mine got over in an hourTongue.Try these yummy jam biscuits for your kids and take the creditsHappy.Lets see how to make this melt in mouth,eggless thumbprint cookies/jam filled cookies recipe in detail.
Eggless jam filled cookies

Eggless jam biscuit/ Eggless Thumbprint cookies


Eggless jam biscuit/Thumbprint cookies Eggless jam filled biscuits for kids evening snacks !
Cuisine: Indian
Category: Cookies
Serves: 40 small
Prep time: 10 Minutes
Cook time: 20 Minutes
Total time: 30 Minutes


INGREDIENTS
1 cup = 200 ml
  • All purpose flour/maida – 1 cup
  • Sugar - 1/4 cup
  • Custard powder – 1/2 cup
  • Corn flour – 1 tbsp
  • Curd – 1 tbsp (semi solid)
  • Butter – 1/2 cup
  • Vanilla essence – 1 tsp
  • Mixed fruit jam - as needed
METHOD

  • Powder 1/4 cup of sugar and take in a wide bowl.U will get 1/4 cup + 1 tbsp pwd sugar.Add softened butter( at room temperature) and vanilla essence to it.Whisk it well till creamy.In a bowl,take maida,corn flour and custard powder.
Eggless jam biscuit recipe
  • Mix well and add this to the beated butter,sugar mixture.Fold it well and try to make a dough.Add 1 tbsp of curd and mix well.Make a stiff dough.No problem if there are mild cracks in the dough.No need to knead or beat the dough.Handle it gently.
Eggless jam biscuit recipe
  • Melt the jam in microwave high power for 30 seconds to 1 minute.I kept in 800w power for 1 minute.
Eggless jam biscuit recipe
  • Now take an orange sized ball from the dough.Roll it into 1/2 inch thick chapathi using a rolling pin.Dust it with maida if needed.Cut the cookies into desired shape using mould.Remove the cookies and arrange in a greased baking tray.( I greased the tray with few drops of oil) Make a small dent in the center of cookies using your forefinger, thumb finger or a bottle cap.Fill the dent with the jam.Put only few drops of jam because it may melt while cooking and spill in the sides.You can also put the jam just before 2 minutes at the end of baking .Its your choice.
Eggless jam biscuit
Eggless jam biscuit recipe
  • Preheat the oven in convection mode in 180c.Bake these cookies in 180c for 18-20 minutes till the sides turn light golden brown color.Remove the tray and let it cool.
Eggless jam biscuit recipe

Take the cookies and store in a box.Enjoy !

Note
  • For variations,u can try with wheat flour.
  • I am not sure of replacing butter with oil.Instead u can replace half of the butter with apple sauce.
  • I used mixed fruit jam.It gives the best taste than other flavors i guess.
  • I baked half of the cookies by filling jam in the beginning and half the batch by adding jam at the end.Both tasted good.

Eggless jam biscuit recipe
Enjoy these yummy cookies with coffee/tea/Milk.Melts in mouth.Tastes yum !
Eggless thumbprint cookies
Continue Reading...


December 23, 2014

Eggless Rose Cookies/Achu Murukku Recipe - Kerala Achappam Without Egg

achu murukku recipe

As far as I know achu murukku/rosette cookies/rose cookies is very popular in Kerala and is called as achappam in Malayalam. Recently when I was browsing for some Christmas special recipes, I found achu murukku without egg is made for Christmas by people in and around Nagercoil. And this is my most favourite snack too. I just love its mild sweetness with flavour of coconut milk.

Whenever my neighbour Mrs. Prema visits her native place in Kerala, I tell her to buy a packet of achappam and coconut oil halwa especially for me. As a big fan of this achappam, I wanted to try them in my kitchen for long time and bought achu murukku mould from Salem, Tamil nadu long back. I tried once some months ago but I couldn’t make it properly. 

Yesterday I tried it again after referring this and this recipe. I made some slight changes in ingredients as per my convenience and taste. To my surprise, it came out really well and I was so happy and proud that I could make it well without eggs.

To make a perfect eggless rose cookies, the consistency of batter and heating point of oil is more important. I have explained them in Method section below. Also go through my notes before you start if you are a beginner. Ok, Lets see how to make this eggless rose cookies/Achu murukku/Kerala achappam without egg at home easily.

achu murukku


Eggless achu murukku recipe/Rose cookies recipe


Eggless achu murukku recipe/Rose cookies recipe Eggless achu murukku recipe/Rose cookies recipe for Christmas Celebration.
Cuisine: Indian
Category: Sweet
Serves: 15 nos
Prep time: 5 Minutes
Cook time: 5 Minutes
Total time: 10 Minutes


INGREDIENTS
1 cup - 250ml
  • Raw rice flour - 1/2 cup
  • Maida - 2 tbsp
  • Powdered sugar - 3 tbsp ( use 1/4 cup for more sweetness)
  • Salt - a pinch
  • Cardamom - 2 nos
  • Water + Coconut milk - 1/2 cup +1/4 cup ( 1-2 tbsp more of water)
HOW TO MAKE ACHAPPAM - METHOD

  • Powder 1/4 cup of sugar and 2 cardamom seeds together. Measure 1/4 cup from it and set aside. In a deep bowl, sieve the maida, rice flour, salt and sugar powder. Mix water + coconut milk and add it to the sieved ingredients.
achu murukku 1
  • The consistency of batter should be slightly thinner than dosa batter. Add little more water to adjust the consistency if needed. Heat oil in a kadai and dip the mould in oil till use. The mould should be hot.
achu murukku 2
  • Add a pinch of batter to check the heat of oil and as soon as it rises, keep the flame completely low and dip 3/4th of the mould in the batter. When you dip the mould in batter,u should get a ssshhh sound. Immediately keep the mould in oil. Do not touch the mould till bottom of kadai as it may stick.
achu murukku 4

  • As soon as you keep the mould inside the oil, it will become foamy and the batter starts to cook. Leave it for 30 seconds in very low flame. Do not wait for the murukku to half cook because you may not be able to release it. You can shake the mould and release the murukku OR hold the mould in one hand and release the corners of murukku from the mould using a knife in other hand. You need to do this way for 3 to 4 murukku. After that Murukku will release in oil and gets cooked. Cook for 30 seconds and flip the murukku.
  • Again cook for 30 seconds till bubbles cease n murukku turns golden brown lightly. Murukku will be soft while you remove but it turns crispy and hard as it cools down. Remove in a tissue paper and drain the oil. Store in an air tight box after it cools down. Again keep the mould in hot oil and increase the flame. Keep it for few seconds and dip in batter. Reduce the flame and cook it as mentioned above. Repeat the same process.
  • Remember to cook in low flame to get nice color. Also increase the flame as soon as you remove the murukku from the flame. By doing this way, you can adjust the heating level and murukku cooks uniformly. I would like to mention one more point here..i.e the top portion takes more time than the bottom. So cook the top portion for more time, 45 seconds and then flip, cook the other side. 
  • It stays good for weeks but I bet the box would be empty before that.
achu murukku 5


Note

  • Adding the correct quantity of water/coconut milk is more important to make perfect achu murukku. If you add less water,batter will be thick and rose cookies will be hard n chewy. If you add more water, batter will become thin and it won’t coat properly in the mould. So the consistency of batter is much more important.
  • The heating point of oil is also more important. If it is too hot, color of achu murukku turns dark brown. So you should cook in low flame at perfect heating point.
  • Some recipes have suggested to shake the mould after dropping in oil to release the murukku. But I felt the shape of murukku gets changed while shaking the mould. So I followed knife method.
  • The batter won’t coat the mould if the mould is not hot. So don’t forget to heat the mould every time before dipping in batter.

eggless rose cookies

Do try these yummy eggless rose cookies for this Christmas and have a great celebration !!
Eggless achu murukku recipe


Continue Reading...


August 22, 2014

BENNE BISCUIT RECIPE - KARNATAKA IYENGAR BAKERY STYLE BISCUITS

Benne biscuit recipe
Nankhatai( Indian butter cookies) is called by different names in different languages. In Tamil nadu, we call it as”shrewsbury biscuit”. In Karnataka, it is called as “Benne biscuit”. But whatever be the name its a very popular biscuit all over India which you can find in all the bakeries. Here in Bangalore, Iyengar bakery is very famous for Benne biscuit, Khara biscuit, open sandwich, khara bun and many more.

 Though Iam in Bangalore for more than 10 years, I had tasted these bakery stuffs only a few times. But every time when I come across Iyengar bakery style recipes in my fellow bloggers blog, I feel like trying them immediately but somehow I didn’t. Yesterday I was tempted very badly by seeing this recipe. The comments & feed backs from the readers made me try the recipe immediately. Actually it was titled as Benne biscuit(butter cookies) but ghee was used in the recipe. I doubted & browsed through so many benne biscuit recipes and most of them had ghee or oil. And finally I got the explanation for its name from here.  

As this biscuit has a smooth & melt in mouth texture like butter, it is called Benne biscuit & not that its made of butter (Benne means butter in Kannada). Of course in bakeries they do use dalda or vegetable shortening. So without researching further, I just tried it. In the next 20 minutes, biscuits were ready in my hand & Yes, it was a big hit in my home & among my Kannadiga friends too. But my friends told cardamom is optional to use otherwise it is perfect ! My in-laws and myself loved it very much. I had already posted Multi grain Nankhatai recipe with oats,ragi & wheat flour using oil. But this recipe uses ghee. How come it tastes bad when you add so much of ghee??. Even Beginners in baking can dare to try this recipe. U will get the perfect result , Iam sure..

Ok, lets see how to make this iyengar bakery style eggless benne biscuit/Nankhatai at home easily.

Benne biscuit recipe


Benne biscuit/Nankhatai recipe


Benne biscuit/Nankhatai recipe Easy,bakery style nankhatai recipe for tea time!
Cuisine: Indian
Category: Baking
Serves: 10 
Prep time: 10 Minutes
Cook time: 12 Minutes
Total time: 22 Minutes


INGREDIENTS

  • Homemade ghee - 3.5 tbsp ( use 4 tbsp max) 
  • Maida/All purpose flour - 1/2cup
  • Powdered sugar – 1/4 cup
  • Crushed cardamom + clove – 2 + 1 no (optional)
  • Baking powder - 1/4 tsp
HOW TO MAKE BENNE BISCUIT - METHOD

  • Powder sugar adding cloves & cardamom very finely. Melt ghee & bring it to room temperature. In a wide bowl, take the flour,powdered sugar, baking powder. Mix well. Add melted ghee at room temperature little by little and make a dough.
Benne biscuit 1
  • Dough should be non-sticky and soft without cracks . But it won’t be too soft & pliable like chapathi dough. So no need to add more ghee. Initially dough would look crumbly but as you roll it tightly, you will be able to make a soft dough.
Benne biscuit 2

  • Now take a cookie tray & grease it with little ghee. Take big gooseberry sized ball and press it lightly. Do not press it flat. These biscuits are meant to be small & round. Hope you know it. But by mistake, I flattened it bit more. Cracks may form. Pat it and seal the cracks. Arrange all the biscuits in the tray.
Benne biscuit 3
  • Preheat oven in convection mode for 10 minutes in 180c. Then keep the cookie plate and bake the cookies in 180 c for 12 minutes. Switch off, remove and set aside for 5 minutes. Now try to move the cookies. If they move, it is done. Else cookies will be sticking to the plate and it will break.
  • Let it cool completely. When the cookies are hot, it would be very soft. Cracks are unavoidable. It shows the cookies are done. May be if  you add 4 tbsp ghee, cracks might be less. Do not brown it. It will be cooking even after you remove from oven. So be patient & allow it cool completely. Remove, Serve & Enjoy with tea !
Benne biscuit 4

Note
  • I used ghee with sediments.So mine turned out slightly yellow in color. Otherwise it should be white.
  • No problem if the cookie dough is slightly crumbly. Just roll it tight and make balls. If you feel the dough is cracking too much, add little more ghee say 1/2tbsp.
  • In the actual recipe, it was told to rest the dough for 2 hours before baking but I din’t do it.
  • U can always replace ghee with oil or butter.But quantity may vary.
  • Never add frozen ghee. It won’t work. U should use melted ghee but it should not be hot. It should be in room temperature.

Enjoy this bakery style melt in mouth benne biscuit with hot milk or tea !
Benne-biscuit-recipe
Continue Reading...


June 18, 2012

ALMOND COOKIES – NO EGG NO BUTTER - BADAM BISCUIT

aLMOND COOKIES 1

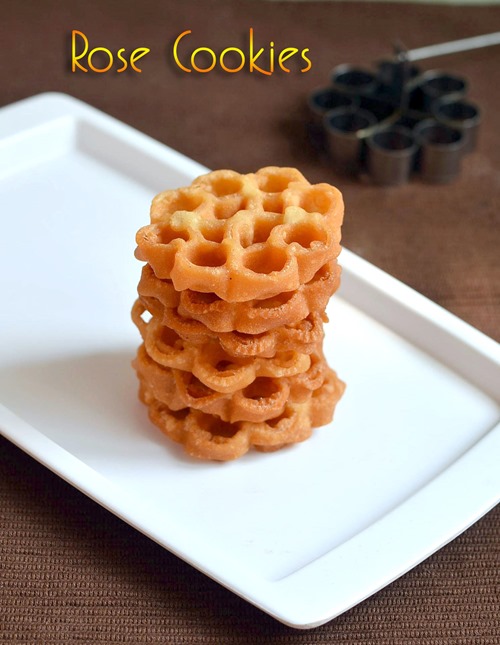
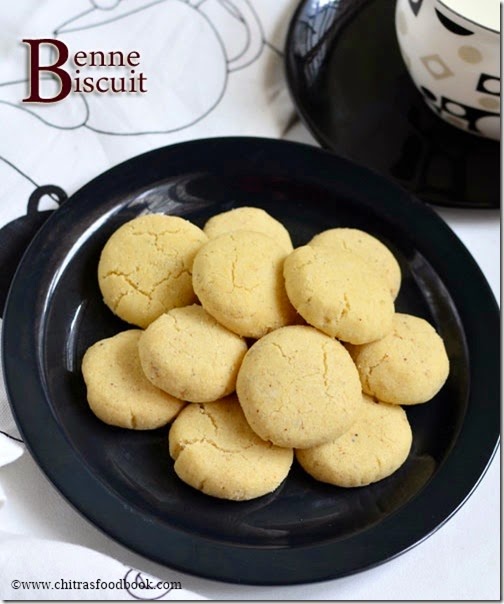
This is my second post on cookies/ biscuits. After trying 
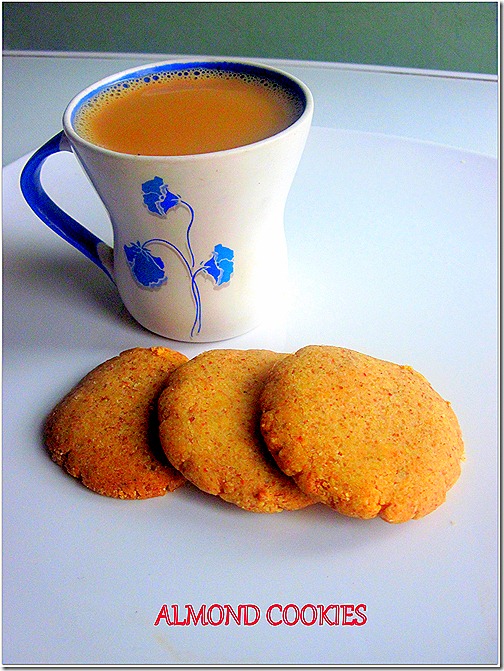
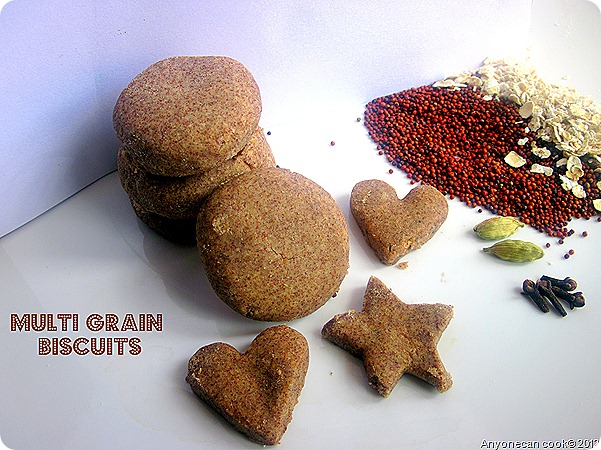
multi grain nankhatai , I got the confidence of making varieties of cookies. I got this eggless almond cookies recipe from here.. Thanks a lot Anu, it tasted great. We loved it so much. I have done this badam biscuits thrice so far. When I tried this recipe for the first time i dint have butter in hand. So i just replaced the butter with cooking oil doubtfully. But to my surprise, it tasted great.

I started making it with cooking oil every time. I halved the original recipe and tried for the first time , but then I adjusted the recipe for smaller quantity. Here I’ve given the recipe for small quantity which yields around 10 biscuits. It will finish off in no time, try this. U’ll come to know.

 Two readers from Sweet n Spicy mobile app tried this biscuit with wheat flour and liked it very much. Here is what they quoted:

"amazing.. yummy n awesome... evryone loved it... made two batches on first day itself... 4 stars" -  Ayfoona311


"Tis s my 1st cookies.. luckily  dnt ve maida @home.. i substitue wit wheat flour i added raisins too.. came out crispy n tasty.. i cant believe myself.. really wonder tat my hand done a cookies... :-):-) 5 stars" -  Krithiga2232 

INGREDIENTS
1 cup - 200ml
  1. All purpose flour /Maida – 1/2 cup
  2. Almond / Badam – 1/3 cup
  3. Sugar – 1/2 cup
  4. Cooking oil – 1/4 cup + 1 tbsp
  5. Honey – 1 tsp (optional)
  6. Vanilla essence – 1/4 tsp
  7. Salt -  a pinch
  8. Cooking soda – a pinch

HOW TO MAKE ALMOND COOKIES - METHOD
  • Take the all purpose flour in a wide bowl and mix the salt , Baking soda / cooking soda & vanilla extract.
  • Microwave almonds for 1- 2 mins to roast it. Almonds start to crackle and nice aroma wafts around.
  • Remove the almonds and allow it to cool. Powder it nicely. U can powder the sugar along with almonds. (i.e. run the almonds and make it to a coarse powder, then add the sugar and grind it well ..)
  • Mix this mixture to the all purpose flour and add the cooking oil.
  • Make it into a soft , non sticky dough. This dough would be crumbly in texture.
  • Roll it tightly. Pinch a small ball sized dough and flatten it with your palm. Cracks may appear. Just seal the cracks with your fingers by patting it in the sides.
  • In the meantime preheat the oven for 10 mins in 180c convection mode.
  • Take the baking tray or cookie pan and arrange the cookies with an inch gap. Cookies will raise and spread well. So leave some gap between each cookies. 
  • Bake it in convection mode at 180c for about 20 – 22 mins. Time depends upon your oven setting. Please have an eye after 10 mins. Remove once the top starts browning.
  • It will be very soft to touch immediately after baking. Take out the tray. Don’t try to remove the cookies. Let it cool down completely in the tray itself. Then remove it. It would become crispy and hard.
  • Keep the remaining dough covered. Do the same procedure from steps 7-9.
  • Store it in an air tight container after it cools down.
Enjoy the cookies with tea/ coffee !!

My first attempt picture :)
almond cookies


TIPS
  1. Honey is optional to use. I used honey for the first time but then I completely forgot it the next time. There is no difference in taste or texture.
  2. U can replace honey with golden syrup as mentioned in the original recipe.
  3. If you want to use butter in place of cooking oil, add 4 tbsp ( 60 gms) of melted butter or soft butter at room temperature.
  4. U can reduce the oil and add little water if necessary. 
  5. Please do not add milk because the cookies turns soggy the next day.
  6. Mild cracks will be there in the cookies. Its unavoidable. So don’t panic.
  7. Here I’ve mentioned the almonds to grind nicely. U can also coarse grind the almonds as given in the original recipe. U’ll get small pieces of almonds while eating which also tastes good. I had tried in that way too. U can see the cookies in the second picture in which I coarse ground the almonds.
  8. I added equal amount of roasted walnuts and almonds and tried once. Try if you wish. 


almond cookies

Continue Reading...


May 14, 2012

Ragi Biscuits - Eggless, Butterless Finger Millet Cookies

RAGI BISCUITS
Ragi biscuits with wheat flour & oats / eggless, butter less Ragi cookies (foxtail millet cookies) is my first post on baking recipes. Thanks a ton to my neighbor for teaching me this wonderful biscuit recipe. I had tried this so many times. It never flopped. Its a keeper recipe. Usually nankhatai is made with maida & vanaspathi/dalda in most of the Indian bakery. 

First time I too tried only with maida & ghee. It tasted great, just melted in my mouth. But we all know maida and dalda  are not advisable to eat.So I thought of using a combination of wheat flour, ragi flour , powdered oats and I replaced vanaspathi with cooking oil . It was excellent in taste. I couldn’t find any difference in the taste & texture. 

Do try this ragi, wheat flour nankhatai , I am sure you’ll love this. Its a fool proof recipe. I’ve tried to give the exact measurements. Please adjust the amount of oil if necessary. Also you can see the picture of the biscuit I made just with wheat flour and little maida.Try whichever u like :)

wheat flour nankhatai

Ragi biscuits / Ragi cookies with wheat flour


Ragi biscuits / Ragi cookies with wheat flour
Ragi, wheat flour, oats biscuits - I call it as multigrain cookies/ nankhatai

Cuisine: Indian
Category: Cookies Recipes
Serves: 15 to 20 nos
Prep time: 10 Minutes
Cook time: 20 Minutes
Total time: 30 Minutes


INGREDIENTS

1 cup - 200ml
  • Ragi flour – 1/2 cup
  • Wheat flour – 1/2 cup
  • Oats – 1/4 cup
  • Maida – 1/8 cup (just for binding) (half of 1/4 cup)
  • Plain Corn fakes – fistful (crush it and add ) (optional)
  • Sugar – 1/2 cup + 2 - 3 tbsp ( usually flour & sugar ratio is 2:1)
  • Elachi / cardamom seeds – 2 nos
  • Cloves – 3 nos
  • Cooking oil – 1/4 cup + 1/8 cup
  • Baking powder – 1/2 tsp

RAGI BISCUITS/NANKHATAI - STEP BY STEP PICTURES

  • Powder the sugar in the mixer along with elachi seeds & cloves. Sieve and set aside.
    Ragi biscuits
  • Powder the oats and mix all the flours together. Heat it in the oven for 1-2 minutes. This is the most important step . If you forget to roast the flours , you get a raw smell in the biscuit.
    Ragi biscuits Ragi biscuits

  • Now take the cooking oil in a wide bowl and add the baking powder. Whisk well with your hands for 10 mins.
    Ragi biscuits

  • Then add the sugar mixture and flour. Crush the cornflakes with ur hands into small pieces and add it to the flours before kneading. ( This gives a crunchy taste here and there while eating. But this is optional. Mix it well and knead a soft , pliable, dough like chapathi dough. Dough should not be hard. It may crumble a little but no problem but if you knead well, it will be soft & it’ll be tight.
    Ragi biscuits

  • Now take little dough and make small , flat balls out of it. If you have cookie cutters,shape it as you desire.
  • Preheat the oven in convection mode at 180c.Arrange all the nankhatai in the baking tray and bake it for 20-25 mins in 180c convection mode..

    Ragi biscuits Ragi biscuits

  • The biscuits will raise slightly and the color turns.
  • Give a standing time of 10 minutes inside the oven and take the biscuits out. Allow it to cool completely. Store in an air-tight box.
    Ragi biscuits

    Enjoy!

Note

  1. Roast the flours together in oven for 1- 2 minutes in microwave mode. U’ll get a nice aroma. Mix well, break lumps if any and then add it to sugar.
  2. Adjust the baking time as per your oven. Mine took exactly 25 minutes. Keep an eye after 15 minutes of baking. Over baking may lead to hard , burnt biscuits. Also under baking  gives a raw , uncooked smell.It wont come out of the tray easily. It will break. In this condition, keep it for 5-10 more minutes. U’ll get it right.Little cracks may come, no problem.
  3. If you want to add ghee or vanaspathi , just replace the cooking oil with it. The  quantity would be the same ( may be little less).
  4. Usually in bakeries, they add vanaspathi/ Dalda.
  5. While kneading the dough , it shouldn’t be too crumble in nature. Add more oil if necessary. U should be able to make the flat balls without cracks. Roll it tight and make balls. (The procedure is the same as we make for gulab jamun.)
  6. Don’t forget to add cloves.This gives the bakery flavour.
  7. Adding cornflakes is purely optional .
  8. I have added oats .So you may feel the biscuits are too soft. If you want , skip the oats and use wheat & ragi flour with little maida.
  9. Store the biscuit in an air tight container.Its shelf life is 15 days.
Continue Reading...