Search Chitra's Food Book

Showing posts with label CHETTINAD RECIPES. Show all posts

April 28, 2018

Chettinad Kalkandu Vadai Recipe - Sweet Medhu Vada / Sweet ulundhu vadai With Video

Kalkandu vadai
Kalkandu Vadai (Sugar candy vada) is a Chettinad Special Sweet Medhu Vada Recipe/ sweet ulundhu vadai made especially for Diwali and Thirukarthigai Deepam festivals. Recently we had a 2 days trip to Karaikudi, Chettinad just to explore its food and other specialties. We relished an elaborate, traditional Chettinad lunch at “The Bangala” and had a pleasant stay at “Chidambara Vilas” heritage hotel. In this trip, I got a chance to taste most of the Chettinad special delicacies like Kandarappam, Vellai paniyaram with kara chutney, Thalicha idiyappam, Kosumalli, Kondakadalai Mandi, Getti kuzhambu, Paruppu urundai kulambu, More kulambu, Milagu kulambu, Payasam, some poriyal , pachadi and kootu varieties. 

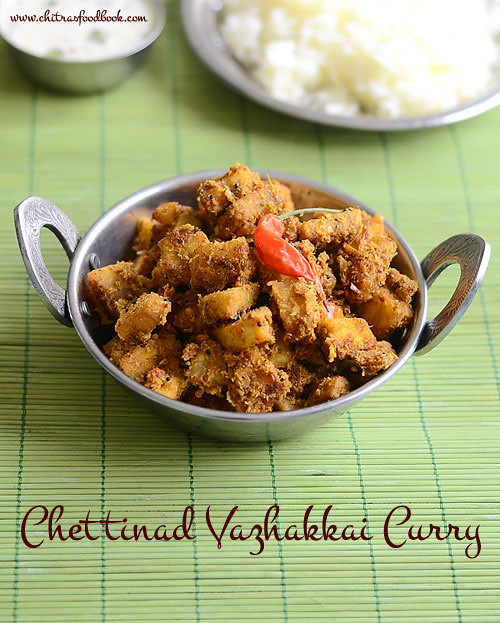
We bought all the Chettinad specialty snacks from Soundaram Aachi stores. I also bought a kg of white raw rice / Maavu arisi and murukku press near Koppudai amman temple street for making Chettinad thenkuzhal by enquiring the staffs in Soundaram aachi kadai. I visited the antique stores to buy some props for blog but I din’t buy anything as I found them too costly and not worthy for its price. Finally I bought 2 Chettinad Cotton sarees as well. Totally it was a memorable one to cherish for years. Soon I will try to make a separate post about our trip in detail with all the pictures. 

After this trip, I got tempted to try some Chettinad recipes in my kitchen and share with my readers. So I bought “100 Chettinad recipes cookbook “ and started trying them one by one. Last week Sendhil’s friends visited us. Luckily I came to know that they are from Chettinad . I became very happy and passed this book to her to know the authenticity of the recipes given in the book. Thanks a lot Mrs. Inba Venkatesh. She explained each and every recipe along with few corrections. She told me to try this Kalkandu vada as its one of the most special snacks recipe of Chettinad. So I tried this recipe referring the cookbook and few Youtube videos. Even though its my first attempt, it came out really well. I am very happy with the result. It tasted crispy outside and very soft inside. Its so easy to make too. Lets see how to make Chettinad special Kalkandu vadai with step by step pictures.

Check out my other Chettinad recipes in this LINK.


Kalkandu vadai recipe

Kalkandu Vadai Recipe - Sweet Medhu Vada


Kalkandu Vadai Recipe - Sweet Medhu Vada

Kalkandu vadai - Sweet medhu vada made with urad dal and sugar candy.


Cuisine: South Indian
Category: Sweet
Serves: 6
Prep time: 60 Minutes
Cook time: 10 Minutes
Total time: 70 Minutes


INGREDIENTS

1 cup = 250ml
  • White round Urad dal - 1/2 cup
  • Raw rice - 1 tbsp
  • Sugar candy / Kalkandu - 1/3 cup ( I used diamond kalkandu)
  • Salt - A pinch
  • Cooking oil - to deep fry vada

HOW TO MAKE SWEET ULUNDHU VADAI - METHOD


  1. Wash and soak urad dal and rice in a bowl adding water for one hour.
  2. In a mixie jar, grind sugar candy to smooth powder. 
  3. To this powder, add the soaked dal +rice by draining the water completely.
  4. Grind to a smooth paste without adding water.
  5. Add salt to the batter, mix well and keep aside.
  6. Heat oil and make vada. Deep fry both sides till golden.
  7. Remove and enjoy hot !

METHOD - STEP BY STEP PICTURES


  • Wash and soak urad dal and raw rice in a bowl adding enough water. Soak for one hour. 


  • In a big mixie jar, powder the sugar candy/ kakandu smoothly. Alternatively you can use sugar instead of sugar candy. Take the soaked dal+rice and drain the water completely. Add the soaked dal+ rice to mixie jar. Grind to a smooth paste without adding water. Powdered kalkandu helps to grind the dal smooth without water.  So do not add water, just wipe the sides of mixie jar and grind continously to make a smooth batter. 
  • Kalkandu vadai recipe
    Kalkandu vadai recipe

  • Transfer the batter to a bowl, add salt just before making vada. Mix well with a spoon to prevent batter becoming watery.Keep aside. Add 1/2 cup of water to the mixie jar and grind it to wash the jar. Transfer to another bowl and use this water for dipping your hands while shaping the vada. If you fry the vada later, you can refrigerate the batter till use. 
  • Kalkandu vadai recipe

  • Heat oil in a kadai and when it gets heated , drop a pinch of batter to check the heat of oil. If the batter rises to the top immediately, oil temperature is correct. Now lower the flame to medium and drop the vada. 
  • Dip your fingers in water and take a small portion of batter from one corner of the bowl. Make a ball, flatten it slightly and make a hole in the center. Turn your hand upside down. Drop the vada in oil by slightly tilting your fingers. Make 2 to 3 vada per batch. Cook in medium flame by flipping it whenever needed. Cook till golden brown on both the sides. 
  • Kalkandu vadai recipe

  • Do not cook these vada in high flame because vada turns black quickly because of sugar candy.So cook patiently in low to medium flame. .Remove the vada in a tisue paper and serve hot. You can refrigerate the remaining batter for 2 days and make vada at your will.

  • Kalkandu vadai recipe
    Enjoy ! This vada stays good for 2 to 3 days.

Note

  • If you don't have sugar candy, you can use sugar.
  • Never use water for grinding the batter.
  • Cook in low to medium flame patiently.
  • If the vada absorbs more oil, add 1 to 2 tsp of rice flour to the batter.
  • Do not add salt while grinding the batter. It makes the batter watery.

Try this easy, yummy, sweet urad dal vada / Kalkandu and enjoy !

Chettinad kalkandu vadai

Continue Reading...


February 18, 2016

Chettinad Vazhakkai Curry – Chettinad Raw Banana Fry Recipe

Chettinad Vazhakkai curry
Raw banana / Vazhakkai is our family favorite vegetable. So I keep trying varieties of curry/fry recipes with it. Recently I came across this Chettinad style vazhakkai masala curry recipe in this blog. As it had fennel seeds/soambu, I got tempted to try it. I made it as a side dish for mor kuzhambu. It was a yummy combo. We all loved it. 

Though I made it less spicy, it was very flavorful and tasty with rice. I have included this curry in my routine lunch menu too. Sure, its a welcome change from my usual Raw banana poriyal. Next I am eyeing on Chettinad varuval /roast without coconut. I will try to make it soon and upload here. Now Lets see how to make Chettinad Vazhakkai curry recipe for rice with step by step pictures. Check out my other raw banana recipes
  1. Raw banana chips
  2. Raw banana bajji/fritters
  3. Raw banana kootu
Chettinad Vazhakkai curry

Chettinad Vazhakkai Curry Recipe


Chettinad Vazhakkai Curry Recipe Chettinad style raw banana fry recipe using freshly ground masala
Cuisine: Indian
Category: Side dish
Serves: 2
Prep time: 10 Minutes
Cook time: 20 Minutes
Total time: 30 Minutes
INGREDIENTS

  • Raw banana / Vazhakkai - 1 no
  • Big onion - 1 no ( chopped finely)
  • Tomato - 1 no
  • Green chilli - 1 no ( slitted)
  • Garlic cloves - 4 nos ( chopped)
  • Turmeric powder - 1/4 tsp
  • Red chilli powder - 1/2 tsp ( i used Kashmiri chilli pwd)
  • Salt - as needed
To temper
  • Cooking oil - 1.5 tbsp
  • Mustard seeds - 1/2 tsp
  • Curry leaves - few
To grind
  • Grated coconut - 1/4 cup
  • Fennel seeds/soambu - 1 tsp
  • Coriander leaves - to garnish
METHOD

  • Wash & peel the skin of raw banana. Chop into cubes & keep inside water to avoid discoloration. Grind the coconut + fennel seeds to a smooth paste adding enough water.
Chettinad vazhakkai curry
  • In a kadai,heat oil and splutter mustard seeds,curry leaves. Saute onions,green chilli & garlic pieces until  onion becomes transparent. Add chopped tomato pieces and saute till mushy.
Chettinad vazhakkai curry
  • Add turmeric powder,red chilli powder and required salt. Mix well and add the raw banana cubes. Mix well. Add some water & cover cook till the raw banana is cooked well. Make sure it is not mushy. It should be firm.
  • Now add the ground coconut masala and mix well. Keep the flame medium and saute until you get a nice masala smell and raw banana gets coated with masala.Switch off the flame and garnish with coriander leaves.
    Enjoy ! Chettinad vazhakkai curry

Chettinad vazhakkai curry
Check out my other raw banana recipes
  1. Raw banana chips
  2. Raw banana bajji/fritters
  3. Raw banana kootu


Note
  • Original recipe called for using 2 green chillies. But I used only one to make it less spicy. So add more for spicy fry.
  • You can also add more red chilli powder instead.
  • You can replace raw banana with arbi/Seppankizhangu but you should cook the arbi before adding in masala.
Enjoy this yummy, flavorful vazhakkai curry with ricekuzhambu and papad !

Raw banana curry
Continue Reading...


June 1, 2015

Spinach Biryani Recipe/Palak Biryani(Keerai Biryani)-Sunday Lunch Recipes-17

Spinach biryani recipe
I tried this Chettinad style Keerai biryani recipe adding palak leaves after watching Captain TV Cookery show. It came out really well. We loved it. My daughter Raksha had a plateful of this biryani happily. As this was my first attempt of making a biryani adding greens/keerai, I was doubtful about its taste. So I made Drumstick poricha kuzhambu and Rasam along with it. But biryani bowl got emptied first. I am sure this would be a healthy choice for fussy kids who don’t eat green leaves.

Here I have used spinach/Palak as it is easy to clean & chop. You can use Arai keerai, Mulai keerai(Amaranth leaves), siru keerai, methi leaves/ vendhaya keerai as suggested in the TV show. Try this healthy biryani recipe for your kids and Husband’ lunch box. This recipe gets thumbs up from everyone in the family.

Ok, Lets see how to make this Indian Palak biryani recipe in detail.

Please check my other biryani & pulao recipes here :)

Spinach biryani recipe

Palak biryani/Spinach biryani recipe


Palak biryani/Spinach biryani recipe Healthy,easy spinach biryani recipe - Sunday Lunch Recipes series -17
Cuisine: Indian
Category: Lunch menu
Serves:3
Prep time: 10 Minutes
Cook time: 20 Minutes
Total time: 30 Minutes


INGREDIENTS

  • Spinach/Palak leaves/Keerai - 1 cup ( 1/2 bunch)
  • Basmati rice - 1 cup ( I use India Gate)
  • Salt - as needed
  • Water - 1.75 cups
To saute
  • Cooking oil + ghee - 1 tbsp + 1 tbsp
  • Cinnamon - 1 inch
  • Cloves - 2 no
  • Cardamom - 1 no
  • Black stone flower/Kalpasi - 1 no
  • Bayleaf - 1 no
  • Big onion -1 no
  • Small onion -5 nos
  • Green chilli - 1 no
  • Mint leaves – 2 tbsp
  • Tomato – 1 no
  • Curd – 1 tbsp
  • Lemon juice – few drops
To grind
  • Red chillies - 3 nos
  • Ginger - 1 inch piece
  • Garlic cloves - 5 nos
  • Pepper corns - 1/4 tsp
HOW TO MAKE KEERAI BIRYANI - METHOD
  • Grind all the ingredients given under “to grind” to a smooth paste. Set aside. Wash & soak the basmati rice for 30 minutes.

  • Wash and chop the palak leaves. Chop the onions, mint leaves and tomato into fine pieces. Slit the green chilli.
Spinach biryani recipe
  • Heat oil+ghee in a cooker base. Saute the whole spices and add the slitted green chilli and onions. Saute till transparent. Add the ground paste and saute till raw smell goes off. Add tomatoes and saute till it becomes mushy.
Spinach biryani recipe
  • Lastly add the mint leaves. Mix well and add the finely chopped palak leaves. Add rice, salt, curd, water and lemon juice. Give a boil. Mix well and close the cooker. Cook in very low flame for one whistle. After the steam is released, remove the lid and fluff the rice with fork. Enjoy !
Spinach biryani recipe
Note
  • You can replace palak with Arai keerai, mulai keerai or vendhaya keerai/Methi leaves.
  • Add more number of red chillies for spicy biryani.
  • You can also powder the whole spices and add to this biryani for variation.
  • Adding ghee gives a nice flavor. So don’t skip it.


Try this healthy, kids friendly Keerai biryani. You will enjoy it !
Spinach biryani recipe
Continue Reading...


April 20, 2015

Anjappar Biryani Recipe In Rice Cooker-Sunday Lunch Recipes Series-14

Anjappar biryani recipe
“Evalavo Pannitom Itha Panna MatomaWinking “ haha,This is how i thought when my friend Megha suggested me to try “Anjappar style biryani recipe” using vegetables.I browsed through few Anjappar style chicken biryani recipes and got it from here & here.I mixed up both the recipes and tried it using potato & peas.I usually make biryani using pressure cooker.This time i tried using rice cooker and made it little more spicy as it belongs to Chettinad.The result was yummy and we loved it.After i made this biryani successfully i became very happy & contented that i had tried and shared almost all the popular Tamil nadu biryani recipes like Ambur star biryani, Dindigul Thalappakatti biryani, Coimbatore Angannan biryani, Muslim wedding biryani, Kuska in vegetarian version which was my long time dream.In the line of those yummy biryani recipes,here is yet another interesting and the most popular Anjappar biryani recipe.Friends,do suggest me if u know any other popular biryani recipe across Tamil Nadu.I am eager to try that too.Lets see how to make this flavourful and easy to make Anjappar Biryani Recipe in detail.
Before going to the recipe,I would like to tell something.As I am bit tied up with some personal work, i will try to make a post whenever i find time.Please bear with my irregular postings just for a week.Thanks for understanding.
Check out my other popular Tamil Nadu Biryani recipes

Ambur star biryani

Dindigul Thalappakatti biryani

Coimbatore Angannan biryani

Muslim wedding biryani

Kuska

Anjappar biryani recipe

Anjappar biryani recipe using vegetables


Anjappar biryani recipe using vegetables Anjappar biryani recipe with potato & peas - Sunday special lunch menu series - 14
Cuisine: Indian
Category: Lunch
Serves: Serves 2
Prep time: 20 Minutes
Cook time: 15 Minutes
Total time: 35 Minutes


INGREDIENTS

  • Basmati rice - 1 cup ( India Gate)
  • Potato - 3 nos
  • Green peas - a fistful
  • Green chillies - 2 nos
  • Red chilli powder - 1/2 tsp
  • Salt - as needed
  • Water - 2 cups
To roast rice
  • Ghee – 2 tsp
To saute
  • Cooking oil - 2 tbsp
  • Ghee - 1 tbsp
  • Cinnamon - 1 inch piece
  • Cloves - 2 nos
  • Cardamom - 1 no
  • Biryani leaf - 1 no
  • Big onion -1 no ( sliced)
  • Tomato - 1 no
To grind (optional)
  • Big onion - 1/2 no or Small onions - 8 nos
  • Green chillies - 2 no
  • Ginger - 1 inch piece
  • Garlic - 5 cloves
  • Fennel seeds – 1/4 tsp
To Garnish
Mint + coriander leaves – 3 tbsp ( finely chopped)
METHOD

  • Wash and soak the basmati rice for 20 minutes.In the mean time,peel the potatoes and chop into cubes.Slices the onions,cut the tomatoes into small pieces.Slit the green chillies.Grind the ingredients given under”to grind” to a smooth paste adding enough water.(If u don’t want to grind them add 1.5 tsp of g&g paste along with crushed fennel seeds in oil while sauting onions and whole spices)
Anjappar biryani recipe
  • Now drain all the water in soaked rice.Heat ghee in a kadai and roast the rice for 2 minutes without breaking them.
Anjappar biryani recipe
  • Now heat the rice cooker in cooking mode and add oil + ghee in the center of serrated plate.Add cinnamon,cloves,cardamom and biryani leaf.Saute for a second.Now add the sliced onions and slitted green chillies.Saute till transparent.Now add the ground paste and saute until raw smell goes off.Add red chilli powder and mix well.The rice cooker mode may switched into warm mode.No problem,just keep sauting in the heat of plate.Now add the tomatoes and salt.Mix until tomato turns pulpy.Turn the rice cooker to cooking mode and add water.
Anjappar biryani recipe
  • Add finely chopped mint+coriander leaves in water.When the water comes to a boil,add rice.Cook it till done.
    Anjappar biryani recipe
    Enjoy with raita !


Note

  • You can make this biryani using pressure cooker too but change the quantity of water to 1.5 cups.
  • Adjust the quantity of chillies based on your need.
  • You should not add mint+coriander leaves while sauting.Add them only in the water before adding rice.
  • Roasting rice helps to give firm and long grain rice.

Try this yummy Anjappar style biryani recipe in a weekend and Enjoy with your familyHappy
anjappar style biryani
Continue Reading...


January 25, 2015

Chettinad Baby Potato Biryani Recipe-Sunday Lunch Recipes-4


Baby potato biryani
Actually i wanted to try some Chettinad biryani recipe for Sunday's lunch recipes & browsed for Anjappar Hotel style biryani to try with vegetables.But ended up making this chettinad baby potato/Kutti Urulai kilangu(in Tamil) biryani recipe.This is the first time i made a biryani using baby potatoes.I referred Jeyashri’s blog for the recipe but modified it slightly to suit our taste buds.I am very happy & completely satisfied with its flavor & taste.Now i can confidently try this recipe for my guests too.Lets see how to make this yummy potato biryani recipe in my Sunday Special Lunch Recipes Series-4.
Small potato biryani

Baby Potato Biryani Recipe


Baby Potato Biryani Recipe Baby Potato Biryani Recipe - Chettinad style
Cuisine: Indian
Category: Lunch
Serves: Serves 3
Prep time: 60 Minutes
Cook time: 15 Minutes
Total time: 75 Minutes


INGREDIENTS

  • Basmati rice - 1 cup ( I used India Gate)
  • Water - 1.5 cups(I used 1.75 cups )
  • Salt - as needed
To grind & Marinate
  • Boiled & Peeled Baby potatoes/small potato - 15 nos
  • Cooking oil - 1 tsp
  • Big onion - 1no
  • Green chillies - 3 nos
  • Mint leaves - 1/4 cup
  • Curd/Yogurt - 1tbsp
  • Cashewnuts - 5 nos
  • Soambu/Fennel seeds - 1/2 tsp
  • Ginger - 1 inch piece
  • Garlic cloves - 5 nos
  • Cloves/Krambu - 2 nos
  • Cardamom - 2 nos
  • Kalpasi/Black stone flower/Kallu hoova - 4 nos( small)
To saute in oil
  • Cooking oil - 2tbsp
  • Ghee - 1 tbsp
  • Biryani leaf - 1 no
  • Cinnamon/Pattai - 1 no
  • Big onion - 1 no
  • Tomato - 1 no ( optional,i dint use)
  • Red chilli powder - 1/4 tsp
  • Coriander powder/Dhania powder - 1/4 tsp
  • Turmeric powder - 1/4 tsp
METHOD

  • Wash the rice well & drain the water.Add 1.75 cups of water to it & soak the rice for 1 hour.
  • In the mean time,wash & pressure cook the baby potatoes in high flame for 3 whistles.Peel the skin and set aside.
  • Heat a kadai with 1 tsp of oil and saute the big onion slices.Remove & take this in a mixie jar.Add green chillies and other ingredients given under “ To grind & marinate” & grind everything to a smooth paste adding enough water.
Potato biryani-1
  • Take the peeled potatoes & add the ground paste to it.Prick the potatoes with a fork & mix well.Let it marinate for 20 minutes.
Potato biryani-2
  • Heat oil + ghee in a pressure cooker base and saute the biryani leaf & cinnamon.Then add the onion slices.Saute well till it turns transparent.Then add the finely chopped tomatoes if using.Saute well till mushy.Now add the marinated potatoes along with masala.Add chilli powder,dhania pwd & turmeric pwd.Saute well till raw smell goes off.
Potato biryani-3
  • Now add the soaked rice along with water & required salt.Mix well & cover cook in low flame for one whistle.It takes 10-12 minutes.Remove the lid after the steam is released.Fluff it with a fork.
Potato biryani-4

Enjoy !
Note

  • If u don’t have small potatoes in hand,use big potatoes but cook it & chop them into bite sized pieces before marination.
  • You can also add the combination of coriander & mint leaves in equal ratio while grinding.
  • Skip adding kal pasi if u don’t have in hand.But please use it if u have because it gives a great smell to the biryani.
  • You can also sprinkle some lemon juice at the end before closing the cooker.Its optional.


Try this Chettinad baby potato biryani for this weekend ! I served with homemade potato chips.It was yummy to tummy Drooling
Small-potato-biryani
Continue Reading...


August 25, 2014

EASY PAAL KOZHUKATTAI RECIPE WITH COCONUT MILK, SUGAR

Paal kozhukattai recipe
As u all know,Paal kozhukattai is an yummy Chettinad dessert recipe.It is loved by all irrespective of ages.I should have made this post for Gokulashtami but I din’t.Now I am posting this easy paal kozhukattai recipe for my Bachelor friend , Jayagopal.He wanted to make it for potluck party in his office this week.So he told me share this recipe as soon as possible.This is not the authentic chettinad version though.I must learn that and post here soon. Actually I had planned to post some Ganesh chathurthi recipes as the festival is around. But then I thought, this is also a variety of kozhukattai which we can make easily and offer Lord Ganesh.  So I prepared this easy paal kolukattai version using milk, coconut milk powder and sugar as Vinayagr chathurthi special recipe. It was tasting great. I had already shared my MIL’s Paal kohukattai recipe with jaggery which is Sendhil’s most favourite recipe. But I love this version more than that Love Struck.So I usually make it more often for myself and Raksha as evening snack or dessert for your guests.Special thanks to my friend Jayagopal, otherwise i would not have done this post even now Happy.Ok,Lets see how to make this yummy and easy paal kozhukattai recipe.

Easy paal kozhukattai recipe

Easy paal kozhukattai recipe


Paal kozhukattai recipe Easy paal kozhukattai recipe using coconut milk powder,milk and sugar
Cuisine: Indian
Category: Sweets
Serves: 2 persons
Prep time: 10 Minutes
Cook time: 15 Minutes
Total time: 25 Minutes


INGREDIENTS
  • Store bought rice flour - 1/2 cup
  • Water - 1/2 cup + 2-3 tbsp (for dough)
  • Gingely oil – a drop
  • Salt – a pinch
  • Sugar – 2 tbsp
  • Boiled milk – 1/2 cup
  • Coconut milk powder - 1.5 tbsp or thick coconut milk - 1/2 cup
  • Cardamom seeds - 1 no (crushed)
  • Saffron threads - few
METHOD

  • In a wide bowl , take the rice flour.Add a pinch of salt ,mix well & set aside.
  • Boil water adding a drop of gingely oil.when the water starts to boil,initially u can see some small bubbles on the bottom and sides of vessel.After few minutes,water will start to roll boil with big bubbles.Switch off the flame as soon as water starts to roll boil with big bubbles.
Paal kozhukattai 1
  • Add the boiled water to the rice flour little by little and mix well.Rice flour may not take all the water.Stop adding water as soon as u get a non-sticky dough.If u feel the dough is dry,add little more hot water.Make sure the dough is not sticky.Knead the dough when it is warm.Make small balls of seedai size by greasing your fingers.Cover it till use.
Paal kozhukattai 2
  • Now boil water in idli pot or in a kadai.Grease the idli plate with oil and spread the balls.If u are using kadai,keep the balls in a small plate.Place a small wide bowl and keep the plate over the bowl.Cover the kadai and cook for 5 – 10 minutes.
Paal kozhukattai 3
  • In the mean time,mix 1.5 tbsp of coconut milk powder in 1/2 cup of boiled n cooled milk without any lumps.To this add sugar, saffron thread and cardamom powder.Stir well.
Paal kozhukattai 4
  • Allow it to boil for 2 minutes in medium flame.Milk will thicken slightly.To this, add the cooked rice balls and boil for few seconds.
  • Remove and serve warm or cold.

Note
  • U can cook the rice balls directly in milk instead of cooking in idli pot.In that case,use 1/2 cup of milk + 1/2 cup of water.Cook till rice balls float on top.Now mix 1 tbsp of coconut milk powder in 1/4 cup of milk and add to the cooked rice balls.Boil for a minute and switch off the flame.Add cardamom powder & few saffron threads. Mix well and serve !
  • I cooked the rice balls in idli plate to ensure proper & easy cooking.Also balls won’t break or dissolve.
  • The consistency of dough is important for getting soft rice balls. No problem even if u make the dough little sticky.U can grease ur hands with oil and make balls.But if u make the dough hard and dry,u will never get soft balls.so please add water carefully.
  • If u don't have coconut milk powder in hand,use 1/2 cup of grated coconut.Grind & take thick coconut milk adding 1/2 cup of water.Add to the milk at the end.Give a boil in low flame & switch off.


Make this easy paal kozhukattai and offer to GOD Smile
Paal kozukattai

Continue Reading...