Search Chitra's Food Book

Showing posts with label COOKING ESSENTIALS. Show all posts

September 2, 2014

Medhu Vadai Recipe | How to make Urad Dal Vada In Grinder

Medhu vadai
Medu vada aka Urad dal vada / Ulundu vadai is a famous South indian snacks and breakfast recipe especially in Tamil nadu. We generally make medhu vadai for festivals or for guests. Last month I got a request from a reader to post crispy medhu vadai recipe using grinder. As I myself have not tried medu vada using grinder, I was hesitant to make this post. 

Usually I make medu vada only using mixie. But then I took this as an opportunity to try out vada batter using grinder & I did it. But my vada drank so much of oil but still it was light n crispy.Then I found I have added more water which made my vada absorb more oil. So I tried it confidently for the second time and got it perfect. For some recipes, I feel video would give better understanding. So I wanted to capture vada batter making.

Last week my in-laws were with us. I told my MIL to grind vada batter and I captured it. Hope the video looks good & clear. But the vadas in the pictures what you see here are made by me. If I can make a good shaped vadas, then anyone can make it easily. So do follow this recipe carefully. U will get it right. To make a perfect medu vada, there are some points to be noted while grinding the batter. I have shared them below. Do read it before watching the video or trying this recipe. Hope these points would help all the beginners. Lets see how to make crispy medu vada at home with some tips & tricks!


Urad dal vada

TIPS & TRICKS TO MAKE CRISPY VADA
  • Always soak the white, round urad dal for 45 to 60 minutes maximum. If you are grinding in mixie, then you can soak it for 2-3 hours.
  • When you are grinding the batter using grinder, do stand nearby. U have to spend 12-15 minutes near the grinder by sprinkling water and wiping the sides every now and then which is most important.DO NOT ADD SALT WHILE GRINDING. Add salt just before frying the vada.
  • Never pour all the water in one stretch. Just add little water every 2-3 minutes by wiping the sides of grinder with a spatula. Batter should not get stuck in the sides.
  • Vada batter should not be too light & airy. It should be tight to hold. If the batter is too light,vada will absorb more oil.
  • Also the batter should be non-sticky when u touch it by dipping your hands in water.
  • To check the right consistency of vada batter,drop a small ball of batter in a bowl of water. It will float to some extent. Also when you try to drop the batter, it should form a stiff peak ( Refer picture ).
  • Keep the batter covered in refrigerator till use. Add salt & onions only before frying the vada. Beat the batter before frying to provide aeration which is very important to get crispy, light vadas. Then add onions and other spices.
  • Add 1/2 tsp of toor dal for 1/2 cup of urad dal while soaking. It helps the vada to prevent oil absorption.
  • U can also add 1 tsp of rice flour to get super crispy vadas like in restaurants.
  • But if you grind vada batter properly, then no need to add rice flour or toor dal. Vada will come out super crispy by itself.
  • To keep the vada crispy for hours,just pre heat the oven in the least temperature & place your vadas in a tray inside the oven. By this way,vada stays crispy. I got this tip from Vahchef’s site but I have not tried it personally though.
Medu vadai batter tips

Medhu vadai recipe/Urad dal vada


Medhu vadai recipe/Urad dal vada South Indian breakfast special Urad dal vada aka Medhu vadai recipe with stepwise pictures & video !
Cuisine: Indian
Category: Snacks
Serves: 10
Prep time: 60 Minutes
Cook time: 15 Minutes
Total time: 75 Minutes


INGREDIENTS
1 cup - 250ml
To soak
  • White round urad dal - 1/2 cup
  • Toor dal - 1/2 tsp (optional )
  • Water - as needed
To mix in the batter
  • Small onion - 10 nos or big onion - 1 
  • Curry leaves - few
  • Green chillies - 1  ( finely chopped)
  • Hing/Asafetida - 1/8 tsp
  • Crushed pepper - 1/2 tsp
  • Cumin seeds/Jeera - 1/2 tsp (optional)
  • Salt - as needed
  • Cooking oil - to deep fry
Rice flour – 1 tsp, to add in the batter before making vada ( optional )
METHOD

  • Wash and soak the urad dal & toor dal ( if using ) in enough water for 1 hour minimum and 4 hours maximum. Keep the soaking urad dal inside the refrigerator. Drain all the water completely and use this water for grinding. Add the soaked urad dal to the grinder. Switch on & start running. Do not add water.
How to make medu vada
  • Do not add water in the beginning. Let the grinder run for few seconds without water. When the dal starts to stuck in the sides,add little water ( say 1/8 cup ). Take a spatula and wipe all the sides and center part. Again sprinkle little water and stand nearby wiping the sides. Make sure there are no dals visible or stuck up in the sides. Repeat this by adding water & wiping sides for 12-14 minutes. Batter will become fluffy and the quantity would be more.
How to make medu vada recipe
  • Now remove a small portion of batter in the spatula, when you drop the batter, it should form a pointed tip. Also check the batter by dropping a small ball in a bowl of water. It should not settle down or dissolve instead it should float.
How to make medu vada crispy
  • Remove the batter from the grinder completely and keep in a vessel. If you are making vada immediately proceed OR store the batter in the refrigerator till use. Do not keep it outside.
  • Before deep frying the vada,remove the batter from the refrigerator. Beat the batter well with your hands. It provides aeration and helps to give you crispy & light vada.
  • Now add salt , finely chopped onion, hing, chillies, curry leaves, pepper corns & cumin seeds. Mix well.
How to make medu vada 1
  • Heat oil in a kadai , check the temperature of oil by dropping a pinch of batter. If it rises immediately, oil is just right. Shape the vada using your palm. Make a hole in the center using the thumb finger. Drop the vada into the oil by slightly tilting your fingers. Flip both the sides and cook the vada till the bubbles ceases. Remove & drain in a tissue paper.
How to make medu vada 2
Serve hot & Enjoy !


Medhu vadai recipe

Enjoy this hot & crispy medu vada as breakfast or as an evening snack with coconut chutney !

Medu vada recipe

Continue Reading...


July 28, 2014

HOMEMADE PANEER RECIPE–INDIAN COOKING BASICS


homemade paneer recipe

I would like to share some yummy paneer recipes in the upcoming weeks.Before that,i wanted to post this basic homemade paneer recipe.As u all know,making homemade paneer is very easy,healthy,hygenic,nutritious as well as low in cost when compared to store bought paneer.All u need is just a litre of milk,two lemons and a cheese cloth.Generally i use low fat milk to make paneer.It comes out super soft and stays good for a week when refrigerated in an air tight box.I have been following this method from Mrs.Mallika badrinath’s cook book for long time.I have tried with curd,vinegar and lemon juice too.Every time it comes out perfect.I am yet to try with citric acid.I have shared all the tips & tricks i learnt from my experience and observation. I hope it would be useful for beginners in cooking.I will try to upload a full video recipe soon.Lets see how to make paneer at home easilySmile.

Homemade-paneer


Homemade paneer recipe


Homemade paneer recipe Homemade paneer recipe using lemon juice
 
Cuisine: Indian
Category: Cooking basics
Serves: 15 cubes
Prep time: 15 Minutes
Cook time: 2Hours
Total time: 2H15Mins


INGREDIENTS

  • Low fat milk - 4 cups
  • Lemon juice - 2 to 3 tbsp + equal quantity of water
  • Salt - a pinch
  • Cheese cloth or muslin cloth or any cotton cloth - 1 no
  • Water - 1 cup or ice cubes – few
  • Maida – 1/2 tbsp (optional)
METHOD

  • Squeeze lemon juice from 2 lemons and add equal quantity of water & set aside.
  • Boil milk till it froths & rises to the top.As soon as it starts to boil,switch off the flame and leave it untouched for 30 seconds.

homemade paneer step1

  • Now add 1 tbsp of lemon juice and stir the milk.Milk will start to curdle.Again add another 1 tbsp of lemon juice and keep stirring the milk.Milk will completely curdle and u could see the greenish whey separating from the milk.
  • To this,add 1 cup of plain water or few ice cubes and let it sit for few minutes.Whey will float on top and the chenna settles down.

homemade paneer step2

  • Take a colander and cover it with the cheese cloth or cotton cloth.I used my cotton dupatta.Pour the curdled mixture & strain it by keeping a bowl underneath the colander.Collect the whey water & set aside.U can use this whey for curdling the milk,making rotis etc.

homemade paneer step3

  • Now tie the cloth & squeeze it lightly.Be careful,it would be hot.Hang the cloth under the cupboard or in a closed tap for about 30 minutes.Now all the excess water would be removed.
  • Remove the chenna & add 1/2 tbsp of maida.Knead it well for 2-3 minutes.Paneer will become very soft.Make a square share or round shape as u desire.

homemade paneer step4homemade paneer step5

  • Keep it in the cloth again & close it.Place the cloth on a plate and keep some weight( a bowl of water) over the cloth and set aside for one hour.When u remove after one hour,paneer would be well set.Remove the extras,cut into cubes and store in a box.Stays good for a week when refrigerated !

homemade paneer step6


Note

  • U can use curd in place of lemon juice.In that case,use 1/4 cup of slightly diluted curd.Remaining procedure is the same.
  • We should add equal quantity or even little more water to the lemon juice.By doing this way,the sourness of lemon would be reduced and the paneer wont taste sour.U don’t have to wash the paneer after straining.Its optional.
  • U can follow the same procedure for vinegar too.But i guess u may have to wash the paneer after straining as the vinger smell is powerful than lemon.
  • Do not boil the milk after u add lemon juice because paneer may become hard when u over boil the milk.
  • And u must add some plain water at room temp or ice cubes after the milk is curdled completely.This will help the whey and chenna to separate.This is optional though.
  • Do not use polyester cloth for straining paneer.Its better to use thin cotton cloth.
  • Adding maida is optional while kneading.U can skip it if u don’t like.
  • I usually make paneer using 2-3 days old boiled milk by refrigerating it.


homemade paneer


Continue Reading...


July 15, 2014

Millet - Types Of Millets, Health Benefits, Glossary(Kambu, Thinai, Saamai, Varagu, Kuthiraivali, Ragi)

Different types of millets
Different types of millets in India

Today's post is about different types of millets (Siruthaniyam vagaigal in Tamil) varieties, its health benefits, nutritional information/calories for millets and its names in different languages like English, Tamil, Telugu, Hindi, Malayalam, Kannada that are available in India. I must thank my in-laws for giving me knowledge about these millets (Siruthaniyam in Tamil). Nowadays people are becoming more and more health conscious. We all started looking for some better alternatives for rice and wheat to reduce its daily consumption. For those people, millets are really wonder grains or miracle grains I should say.

Millets are the power house of fiber, calcium, minerals & Iron. When my in-laws told me about these millets I had no idea of how it looks, where to buy & how to cook them too. So my FIL bought me 1/2 kg in each variety from Lee bazaar, Salem – Tamil nadu. I tried some recipes with it and everything came out very well. Then I started buying some varieties like kambu, thinai & varagu from a shop nearby my house in Bangalore.

Before sharing all those recipes, I wanted to make a post mentioning about the different types of millets, How to identify them, How to name it in different languages, where to buy & its health benefits . I have made a separate post on “How to cook Millets”. This post would be more of essays/stories with pictures. This is just an introductory post for millets. I will share some interesting recipes from next week. Thanks for visiting this page. Hope it would be useful for beginners. Start including millets in your daily cooking. Have a happy and healthy life !

U can find these topics below

What is millet

Names of millets in different languages

Where to buy millets in Bangalore

Health benefits of millets

Foxtail millet

Pearl millet

Barnyard millet

Little millet

Finger millet

Kodo millet


Disclaimer : All the nutritional information given here is from a millet book and www.milletindia.org

Check out my "HOW TO COOK MILLETS" in 3 different ways if interested !


Also see my varieties of  MILLET RECIPES to include in your regular cooking. 

Check out my MILLET POWDER / SATHUMAAVU  and MILLET LADOO RECIPE

Millets in India
Millet varieties in India

WHAT ARE MILLETS

Millets are a group of highly variable small-seeded grasses, widely grown around the world as cereal crops or grains for both human food and fodder. Its not just a type of bird seed. It can be consumed by humans in the form of pilafs, snacks and cookies too. It has a sweet nutty flavor. Millets are widely grown in Africa and Northen China. It is gluten free & rich in calcium, fiber, protein and minerals. It has high nutritional values when compared with rice and wheat. Millets are called as miracle grains or wonder grains. It is a great food for people looking for weight loss, diabetic and cardiac patients.


Should anyone avoid eating it?

People with thyroid problems should avoid eating millet on a daily basis as it is believed to contain some goitrogen properties. Some people may also experience indigestion. So consume in moderation. Its better to pre soak millets for 6 hours, drain the soaked water and then use it. It helps to avoid indigestion and stomach problems. 

Source : Wikipedia


GLOSSARY- NAMES OF MILLETS IN DIFFERENT LANGUAGES
Source: Google and Wikipedia

MILLETS NAME IN TAMIL

English Tamil
Finger Millet Kezhvaragu
Kodo Millet Varagu
Foxtail Millet Thinai
Little Millet Samai
Barnyard Millet Kuthiravali
Pearl Millet Kambu
Sorghum Cholam

MILLETS NAME IN HINDI

English Hindi
Finger Millet Nachani /mundua
Kodo Millet Koden/Kodra
Foxtail Millet Kangni/Rala
Little Millet Kutki
Barnyard Millet Jhangora
Pearl Millet Bajra
Sorghum Jowar

MILLETS NAME IN TELUGU

English Telugu
Finger Millet Ragula
Kodo Millet Arikelu
Foxtail Millet Korra
Little Millet Sama
Barnyard Millet Odalu
Pearl Millet Sajjalu
Sorghum Jonna

MILLETS NAMES IN KANNADA

English Kannada
Finger Millet Ragi
Kodo Millet Harka
Foxtail Millet Navane
Little Millet Saame
Barnyard Millet Oodalu
Pearl Millet Sajje
Sorghum Jola

MILLETS NAMES IN MALYALAM

English Malayalam
Finger Millet Panji pullu
Kodo Millet Koovaragu
Foxtail Millet Thina
Little Millet Chama
Barnyard Millet Kavadapullu
Pearl Millet Kambam
Sorghum Cholam


WHERE TO BUY MILLETS IN BANGALORE

You can find millets in most of the organic stores, online organic shops and departmental stores like Big bazaar, Metro cash and carry, Nilgiris, Dmart in metro cities like Bangalore, Chennai, Hyderabad and Mumbai.

There are some other shops who supply millets from farmers to the end users. Here is the list.

For more details on organic stores in Bangalore, You can try Organic mandya in HSR layout. Dmart Healthy choice brand is good. Manna Millet is really bad. Most of the time it has dust and sand in it.  
 
Earth360www.earth360.in, [email protected] +919440870875

Sahaja OrganicsNew No. 19, Old No. 665, 1st floor, Opp: Times of India, Sajjanrao road, VV Puram 080 26612315/ 26661420

Timbuktu OrganicsYou can buy their products across outlets in Bangalore.

Era Organics – No. 348, Dollars Colony, RMV Club Double Road, RMV Second Stage Ph: 80- 41606003/41606004

Navadarshanam, stocked in Mother Earth, Namdhari and other retail stores across the city.

Nativefoodstore for Chennai people and online purchase. 

Nowadays Millets are widely available in all over India. You can find in big departmental stores like Dmart, Metro cash n carry, Big bazaar, Nilgiris etc or in online like big basket, Amazon.in etc.

HEALTH BENEFITS OF MILLETS

These are some of the general health benefits of millets when consumed everyday!

Source: Whfoods.com
  • Millets are generally rich in Protein, Fibre, Calcium, Iron & Minerals especially Magnesium, copper & phosphorous.
  • It helps to reduce cholesterol, lowers blood pressure. It helps in the development, repair of body cells and tissues.
  • It helps to lower the risk of Type 2 Diabetes especially for women.
  • Its high insoluble fibre helps to prevent Gallstones formation.
  • Pre-menopausal women eating millets have a reduced breast cancer risk.
How to select and buy

Millet is generally available in its hulled and whole-grain form. It is available in pre-packaged as well as in bulk containers. Just as with any other food that you may purchase in the bulk section, make sure that the bins containing the millet are covered to ensure its maximal freshness. Whether purchasing millet in bulk or in a packaged container, make sure that there is no evidence of moisture.
Store millet in an airtight container in a cool, dry and dark place, where it will keep for several months.
Millet is not a commonly allergenic food and is not known to contain measurable amounts of oxalates or purines.

Check out my "HOW TO COOK MILLETS" in 3 different ways if interested !

Check out my Millet Energy mix powder / Millet sathumaavu too. 

KAMBU/PEARL MILLET


Pearl millet /kambu
Kambu/Pearl millet

Pearl millet known as Kambu in Tamil, Bajra in Hindi, Sajje in Kannada, Sajjalu in Telugu and Kambam in Malayalam is a miracle millet which has iron that is 8 times of rice. It is very rich in Calcium, Protein, Iron and Magnesium. It helps to reduce the bad cholestral level in our body. Its a great body coolant. Its consumed as porridge during summer. It helps to improve the digestion power & heals stomach ulcers too. It helps to improve bowel movements and prevents constipation. It makes our body strong. It helps to increase the secretion of milk for lactating mothers !


Nutrition Information Per 100gm

Serving Size The serving size, in terms of the number of volume or mass
Calories 378kcal for 100gm


Minerals (grams) 2.3
Iron(mg) 16.9
Calcium (mg) 38
Protein (grams) 10.6
Fiber (grams)

1.3

Check out my Kambu recipes to make kids eat them.


FINGER MILLET/RAGI

Finger millet popularly known as Ragi in Kannada, Keppai in tamil, Ragula in Telugu & panji pullu in Malayalam, Nachani/mandua in Hindi is a well known millet & consumed widely by the people all over the world.Ragi has the highest mineral & calcium content when compared to all whole grains & minerals. It is called as wonder grain. It is a powerhouse of protein & amino acids. It helps to reduce the heat of the body. It also helps to heal ulcers & anemia. Its a great replacement for rice & wheat especially for diabetic patients.

Nutrition Information for 100gm


Serving Size The serving size, in terms of the number of volume or mass


Iron (mg) 3.9
Calcium(mg) 344
Fat (grams) 8.4
Protein (grams) 7.3
Fiber (grams) 3.6
Minerals (grams) 2.7

Check out my various RAGI RECIPES too !

FOXTAIL MILLET/THINAI

foxtail millet- thinai
Foxtail millet/ thinai

Foxtail millet known as thinai in Tamil, Kangni/Rala in Hindi, Navane in Kannada, Korra in telugu and thina in Malayalam is first of millet varities that was used in ancient days. Foxtail millet is high in carbohydrates. It is rich in dietry fiber and minerals such as Copper and Iron. It helps us to keep our body strong and immune. It helps to control blood sugar and cholesteral levels.

Nutrition Information for 100gm


Serving Size The serving size, in terms of the number of volume or mass
Calories 364
Minerals(grams) 3.3
Iron(g) 2.8
Calcium (Milli grams) 31
Fat (grams)4.3
Protein (grams) 12.3
Fiber (grams) 8


Check out my 

THINAI IDLI RECIPE


KODO MILLET/VARAGU


KODO MILLET
Kodo millet/ Varagu

Kodo millet known as varagu in Tamil, Harka in Kannada, Koovaragu in Malayalam, Kodra in Hindi and Arikelu in Telugu. Its basically a digestion friendly millet. It is rich in phytochemicals, Phytate that helps in reduction of cancer risks. It helps to reduce the body weight which is most needed for obese people. It helps to overcome irregular period problems in women. It helps to reduce knee & joint pains. Also it is good for diabetic people. It reduces nervous disorders especially in eyes.

Nutrition Information Per 100gms


Serving Size The serving size, in terms of the number of volume or mass
Calories 309
Fat (grams) 2.2
Iron (mg) 0.8
Calcium (milligrams) 14
Minerals(grams) 1.9
Protein (grams) 12.5
Fiber (grams) 2.2

Check out my


BARNYARD MILLET/KUTHIRAIVALI


BARNYARD MILLET
Barnyard millet - Kuthiravali

Barnyard millet known as kuthiraivali in Tamil, Oodalu in Kannada, odalu in Telugu, Jhangora in Hindi and Kavadapullu in Malayalam which has 6 times high fiber content when compared with wheat. Its a gluten free millet with high calcium, phosporous & fiber. It is high in carbohydates & fat too. It helps to maintain the body temperature. It acts as a good anti oxidant too.

Nutrition Information Per 100gms


Serving Size The serving size, in terms of the number of volume or mass
Calories 342
Iron(mg) 15.2
Fat (grams) 4
Calcium(Milli grams) 11
Protein (grams) 11.2
Fiber (grams) 10.1
Minerals(grams) 4.4

Check out my 


LITTLE MILLET/SAMAI


Little millet - Saamai

Little millet known as saamai in Tamil, Kutki in Hindi, Saame in Kannada,Sama in Telugu & chama in Malayalam is a wonderful millet which is suitable for people of all age groups. It helps to prevent constipation & heals all the problems related to stomach. It improves the semen counts of men. It also helps for women with irregular periods problems. Its high fiber helps to reduce the fat depositions in the body.

Nutrition Information Per 100gms


Serving Size The serving size, in terms of the number of volume or mass
Calories 207
Minerals(grams) 1.5
Protein (grams) 7.7
Fiber (grams) 7.6
Iron(mg)
Calcium(mg)
9.3
17

You may like to see

 SAMAI BIRYANI

SAMAI SWEET PONGAL

Check out my "HOW TO COOK MILLETS" in 3 different ways if interested !

Also see my varieties of MILLET RECIPES to include in your regular cooking.

Check out my Millet Energy mix powder / Millet sathumaavu  and a sweet ladoo recipe with millet powder. 


Technorati Tags: , , , , , , , , , , , , ,

Continue Reading...


June 8, 2014

HOW TO CHOOSE, CLEAN AND STORE MUSHROOM

 Mushrooms 
This is a very basic post on “"How to choose, buy and clean mushrooms before cooking “. Though most of you know this, I wanted to share this post for beginners who use mushrooms for the first time .Mushrooms have many health benefits.They are a good source of proteins, minerals, vitamins, amino acids and anti-oxidants. They are low in calories but high in fiber. It helps to reduce high cholesterol levels, improves immune system, aids weight loss and relief for diabetes too. But all these benefits are applicable only for edible mushrooms. Some mushrooms are poisonous which may lead to coma and several ill effects. Hence we should be careful while choosing and buying mushrooms. It is always better to buy mushrooms from well known brands and well sealed. It should be fresh and white in color. Read on to see the tips to choose and buy good quality mushrooms and how to clean them before cooking. Hope it would be useful.

Do check out this link to know about the different varieties of mushrooms.

How to buy mushrooms

HOW TO CHOOSE MUSHROOM
I have shared some tips for choosing a good quality mushrooms if you are a first time buyer.I got these tips from here and here
  • Look for firm, white mushrooms without any discoloration or bruises.
  • Choose the mushrooms that are free from spots and decay.The whiter the fresher it would be.
  • Button mushrooms have white caps but other mushroom varieties come in varying shades of brown and cream.
  • Choose the ones with with short,clean-cut stems and caps that are either closed around the stems or slightly open ( as shown in the above picture), and with pink or light-tan gills.
  • On the underside of the mushroom, the gills(black part) should be tight.Gills will spread open as mushrooms age.So buy closed ones.
HOW TO STORE MUSHROOM
  • For storage, refrigerate your mushrooms in a paper bag to make them last longer.Keep them covered. 
  • Use within a few days of purchasing.(1-2 days)
  How to clean mushrooms
HOW TO CLEAN MUSHROOMS
Though the cleaning process seems longer, it can be done in minutes. I referred sharmis passions and some more websites for this topic.
Mushroom outer layer peel

Mushroom gills


How to clean mushroom


How to clean mushrooms How to clean mushrooms before cooking
Cuisine: Indian
Category: How to
Serves: --
Prep time: 10 Minutes
Cook time: --
Total time: 10 Minutes


INGREDIENTS

  • Edible Mushrooms - 1 packet
  • Tissue paper
  • Water
METHOD


    • Take a mushroom and wipe it with a clean towel or tissue to remove the mud and dirt.
    How to clean mushrooms
     
    • Then remove the stem part which u can in the middle.When u look into the mushroom,u can c black hair like thing which are called Gills. If u wish, u can remove it using a knife. But this step is optional.
    How to clean mushrooms
     
    • Then peel the outer layer completely till u see the white cap.Mushroom will look white and clean.
    How to clean mushrooms
    • Now wash it under the running water and make sure all the dirt is washed off.Then cut into small pieces and use it as desired.
                     How to clean mushrooms


Button mushroom


Mushrooms are ready for cooking !
Mushrooms after cleaning

Do check out my MUSHROOM BIRYANI recipe if interested !

Continue Reading...


August 20, 2013

SWEET BEEDA RECIPE


beeda picture

I am a big fan of sweet beeda.My lunch in restaurants never completes without a beeda.In some hotels , beeda is not served in thali .So we used to roam(me & my father) around in search of beeda shops..Now after marriage,Sendhil buys beeda specially for me though he don’t like it much..Recently my MIL gave me a box of gulkand.Though there are many yummy gulkand recipes , beeda flashed in my mind ;)..But never thought i could make beeda at home until i saw this video. Thank u so much vidya lakshmi.From now on I can have yummy home made beedas happily Smile 
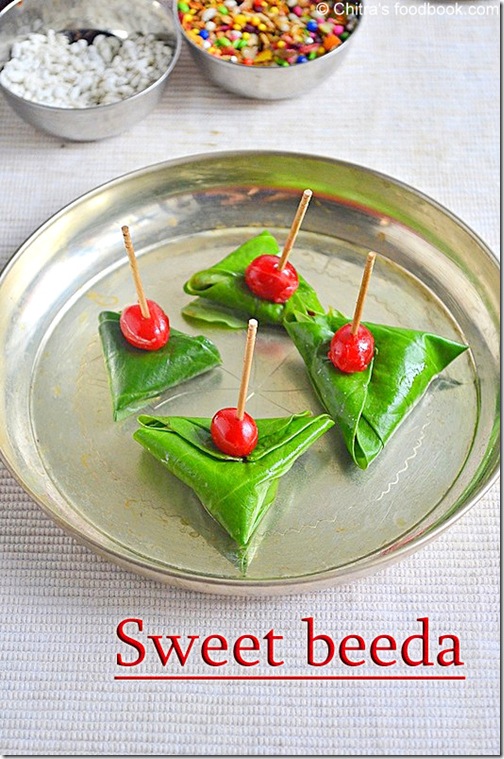
.This beeda is not only tasty,but also helps to digest food easily. Edible calcium paste is helpful for daily dose of calcium needs..So friends , if u have betel leaves in hand ,try this beeda recipe & let me know ur feedback. I hope step by step pictures gives u a clear idea.Surprise ur guests & elders at home with this beeda after a heavy lunch menu.For a simple beeda recipe , please refer “Notes” section..

beeda ingredients


INGREDIENTS
To make one beeda
  • Beetal leaves/ vettrilai /paan leaf – 1 no
  • Sunnaambu /Edible calcium paste – a trace
  • Supari / paakku – 1/4 tsp
  • Paan masala – 1/4 tsp (optional)
  • Sweetened dry ginger or amla – 1 small piece (optional)
  • Colored dessicated coconut strands – few
  • Gulkand – 1/2 tsp
  • Sweet saunf – 1/4 tsp
  • Cloves – 1 no (optional)
  • Cherries – few
  • Plum – 1 no
  • Tooth pick – 1 no

METHOD
  • Wash the beetle leaf , pat dry with a cloth. Fold the leaf & cut it half way through the stalk part(kaambu) ..
beeda tile1
beeda tile2
  • Apply less than a pinch of sunnambu/lime on the back side of leaf. pinch. Adding more burns the tongue , take care..
beeda tile3
  • Now roll one edge of the leaf to cone shape..Roll the other edge similarly & make a cone (pouch shape)to keep all the ingredients inside.
beeda tile4
  • First add the supari , then keep the dessicated coconut ,pan masala , sweet saunf , gulkand. At last keep a clove & cherries . U can also add a pinch of cardamom powder..Close it.
 beeda tile5
beeda tile6
  • Place a plum on top of beeda & insert a tooth pick OR use a clove to seal it..Serve &enjoy !!
beeda tile7

beeda closeup open - beeda


NOTE
  • To make a simple beeda recipe , wash the betel leaf & apply sunnambu on both the sides.Use supari , saunf , sugar , cardamom powder ,little honey and make beeda as mentioned above..Seal the beeda with a clove..

Finish ur lunch with a banana & homemade beeda ! It tastes delicious :)

beeda--plate final copy

Continue Reading...