When I posted North Indian Navratri recipes for 9 days, I found Rice kheer recipe (Chawal ki kheer in Hindi) is one of the most important prasad recipes offered on Navratri 3rd day for Mata Chandraghanta & 8th day for Maa MahaGauri & Kanya puja. So I wanted to try rice kheer and post in my food book. Usually I make South Indian rice kheer (Paal payasam in Tamil) by roasting and pressure cooking rice in milk. But North Indian kheer is prepared in a different method. Authentically, basmati rice or long grain rice (Chawal) is soaked in water, cooked in full fat milk in an open kadai simmering in low flame for long time. As the rice gets cooked, quantity of milk is reduced. It becomes thick and creamy. Kheer gets a natural color & sweetness from rice & milk. Then cooked rice is sweetened with sugar, boiled till thick and then flavored with cardamom & garnished with nuts. It can be served warm or chilled as you like. It tastes finger licking delicious. I saw few recipes with condensed milk (Milk maid) instead of sugar but I went with the traditional procedure & used sugar. Some people also made it with left over rice.
As I had already posted Bengali Chaler Payesh, making this North Indian rice kheer was not so difficult for me as the procedure is similar. After watching many video recipes and websites, I could do it confidently. It came out really well and tasty. Even though the quantity of rice is less, the yield of this kheer is more. Sendhil & myself enjoyed it taking 2 to 3 servings. Do try this simple and easy rice kheer during this navratri, offer God and get her blessings. Soon I till try to post an easier version of this kheer by using pressure cooker & condensed milk. Now Lets see how to make rice kheer recipe with step by step pictures and video !
Wash and soak rice in water for 30 mins to 1 hour.
Roll boil milk in a pan.
Add soaked rice, boil in medium flame.
Stir at regular intervals and boil till rice is cooked soft.
Add sugar, cardamom powder and boil till slightly thick.
Garnish with chopped nuts and serve warm or chilled.
Rice Kheer Recipe / Chawal Ki Kheer - Step by step photos
Wash and soak rice in water for 30 minutes to 1 hour.
Boil milk in a wide pan. When it roll boils, simmer the flame. Add the soaked rice.
Cook rice in medium flame by stirring at regular intervals to avoid burnt bottom. It takes nearly 20 to 25 minutes for rice to cook. You can also cover cook for last 5 minutes to make the rice soft. But keep the flame very low.
After rice is cooked, add sugar, cardamom powder.Sugar melts and kheer becomes watery.
Boil till kheer becomes slightly thick.i.e when you pour, rice & milk should not separate. They should be well blended but pourable. This is the right consistency. Remember this kheer thickens when cool down. So add more boiled milk, adjust sugar if needed. Garnish with chopped nuts, saffron threads and serve warm or chilled by refrigerating it.
Notes
Soaking helps the rice to cook quick & soft. If you don't have time, you can wash and cook the rice without soaking too.
Add more sugar if you have sweet teeth, but not more than 1/3 cup.
I have not used ghee. If you wish, you can roast the nuts in ghee and add to kheer.
To make a quick version, you can cook rice & milk in a pressure cooker.
You can also use condensed milk instead of sugar.Add 3 tbsp. Guess it will be enough.
If you like kesar flavor, add saffron soaked milk.But color of kheer becomes yellow.
Easy to cook, delicious, festival special rice kheer is ready to enjoy !
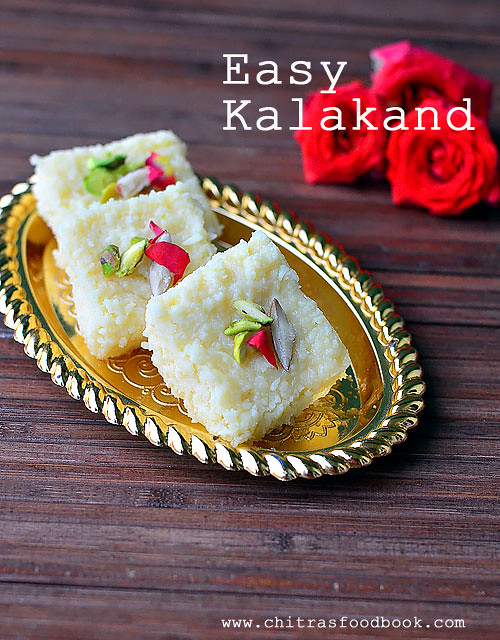
Last year during Diwali, I tried this easy kalakand recipe using paneer and condensed milk ( Milk Maid) by watching YouTube video. Kalakand recipe is nothing but a rich milk cake. It is one of the popular desserts in West Bengal, Rajasthan, Delhi and some places in North India. Traditionally it is prepared by boiling and thickening milk with sugar. It takes hours to prepare.
This easy and instant kalakand recipe calls for just 3 ingredients namely Paneer/Chenna, Condensed milk and cardamom powder. For variations, it can be prepared with ricotta cheese instead of paneer and rose water or kewra essence can be added instead of cardamom powder. It can be prepared so easily and quickly. Its ideal for beginners. In North India, I heard people make Kalakand for Janmashtami as it is a milk based sweet. So I thought of sharing this easy and instant kalakand recipe for this Gokulashtami. Do try this easy, Instant Kalakand recipe using condensed milk and store bought paneer. Lets see how to make it with step by step photos.
Kalakand recipe with condensed milk
Easy, instant kalakand recipe with condensed milk / milk maid
Paneer / Indian Cottage Cheese - 1 cup ( I used Milky mist brand)
Milk maid or Amul condensed milk - 200 ml tin
Cardamom powder - 1/2 tsp
Butter or ghee - 1 tsp
HOW TO MAKE KALAKAND
Crumble or grate the paneer.
In a kadai, heat 1 tsp ghee and add the condensed milk. Mix well.
Add grated paneer, cardamom powder and mix well.
When the mixture thickens and leaves the sides of pan, switch off flame.
Transfer to a greased or butter paper lined bowl. Refrigerate for an hour. Cut into pieces.
Garnish with chopped nuts. Serve !
METHOD - STEP BY STEP PICTURES
Take the store bought paneer and grate it. Measure 1 cup from it ( loosely packed) and keep aside.Line a pan with butter paper or grease it well with ghee and set aside.
Heat ghee in a non-stick kadai and add the condensed milk. Mix well in very low flame.
Add grated paneer, cardamom powder or rose water and mix well. Paneer absorbs condensed milk and it will thicken initially. But if you keep mixing in low flame, mixture will become loose and watery.
Keep the flame medium and stir well. After 3 to 4 minutes, it will start to thicken and leave the sides of pan. Mix for a minute. You will see the mixture becoming grainy and thick. Switch off the flame and remove the pan immediately.
Pour it to the butter paper lined pan for 2 inch thickness. Level it and refrigerate it for 1 to 2 hours till its well set. Garnish with chopped nuts and stud it well. Cut into pieces and serve chilled for best taste.
Enjoy !
Note
You can add some sugar ( say 1tbsp) if you feel sweet is less.
Fresh chena tastes the best. But I used store bought paneer.
If you mix for long time, kalakand may become chewy.So remove at the right time.
If you are not able to cut into pieces, refrigerate for more time.
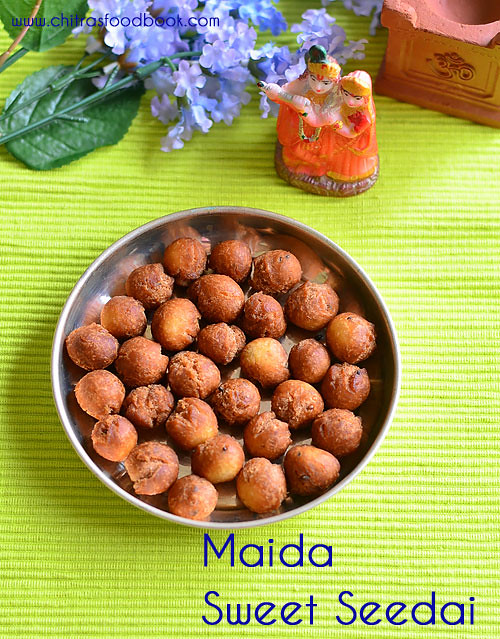
I wanted to post no burst Maida seedai recipe during last year Gokulashtami but I couldn’t. So this year I thought of starting my Gokulashtami recipes with some interesting seedai varieties. For Krishna Jayanthi, we make seedai recipes using rice flour. I came to know about this maida sweet seedai ( Inippu seedai) and maida kara seedai recipes when my fellow bloggers posted it. When I read this seedai is a no burst, fool proof recipe that is ideal for beginners, I was very happy and confident to try it.
I thought maida has to be steam cooked to make this cheedai. But when I saw this easy, instant sweet seedai recipe in Sharmis passions, I tried it immediately. But I used less milk. Even though its my first try, it came out really well. It had cracks but still I was happy with the results as it tasted great. My MIL usually says sweet seedai have mild cracks. The taste of this sweet maida seedai reminded me tea kadai vettu cakeand sweet maida biscuit. This seedai tastes crispy outside and soft inside. You can store this seedai for a week and enjoy. If you trying for the first time, do follow the same quantity mentioned in this post. Once you get them perfect, you can make in bulk quantity. Friends, do try this interesting seedai variety for Gokulashtami and enjoy. Lets see how to make Maida sweet seedai with step by step photo and video !
Add milk gradually and make a slightly sticky dough.
Grease your fingers with ghee or oil and make small balls.
Spread them in a dry cloth and rest for 10 minutes.
Deep fry till golden in low to medium flame. Remove and store after it cools down.
Maida sweet seedai recipe - Step by step photo
Powder 1/4 cup sugar along with 2 cardamom. Remove in a bowl and measure 1/4 cup from it.
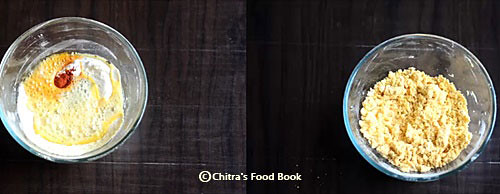
In a wide bowl, take 1 tsp melted ghee. Add cooking soda, powdered sugar, all purpose flour, sesame seeds.
Mix well till crumbly to spread the ghee in flour. Add milk little by little and make a slightly sticky dough. Take care you add the milk slowly else dough will become very sticky. Don't worry if its too sticky, add 1 tsp more maida and try to bring the dough slightly sticky. No need to rest the dough. Roll the balls immediately.
Grease your fingers with ghee or oil and roll the seedai. Make small sized, smooth balls without cracks using three fingers.Do not roll tight. Spread them in a dry cloth. Let it rest for 10 minutes.
Heat oil in a kadai. Drop a pinch of dough. If it comes to the top immediately, oil temperature is right. Lower the flame completely. Take the balls and make a perfect round if its flat.
Drop 10 to 15 seedai per batch by standing a feet away( Just for precaution) But don't scare, this seedai never burst. Do not disturb the seedai in oil till it starts to float on top. Then toss the seedai with a ladle and cook till golden in color uniformly. Keep tossing whenever needed. Flame should be low to medium for uniform cooking else seedai will become dark brown quickly.
Remove when the bubbles reduces. Do not wait for the bubbles to stop completely. This seedai becomes slightly bigger in size after frying. It tastes soft when hot. It becomes crunchy when it cool down. Store it after they cool down. Enjoy. It stays good for weeks together.
Notes
Do not add more cooking soda. Seedai may disperse in oil.
Do not make the dough too sticky and loose. Seedai will dissolve in oil.
If the dough is too sticky, you can add 1 to 2 tsp more flour to achieve the right texture.
After rolling, if the balls flatten, it shows moisture is more in the dough. In that case, roll it again and then drop in oil.
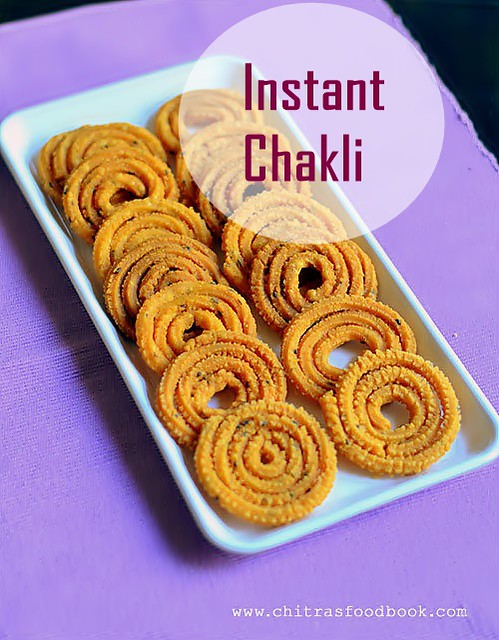
Instant chakli recipe / Simple murukku recipe with step by step and video. This Karnataka style easy and simple murukku recipe (Chakli in Kannada) using store bought rice flour and besan flour was in my to do list for long time. Recently I got a pack of bull driven cold pressed (Chekku ennai) sesame oil, groundnut oil and coconut oil from Gramiyum – An online store. Product & packaging was too good and its professional too. If you are looking for original cold pressed oils, you can buy them online from Gramiyum. They also have organic honey, natural nuts at a reasonable price.
My MIL usually says snacks fried in groundnut oil is more flavorful. So I thought of making this easy, Karnataka style chakli/ murukku by frying in cold pressed groundnut oil ( Kadalai ennai).This instant chakli recipe which I had bookmarked years ago from Savi ruchi blog came to my mind. Its an easy, instant chakli recipe made with easily available ingredients. It came out very well with the awesome flavor of groundnut oil. I have tasted this Chakkuli/Chakri ( My friends tell this way) in my friends place. All my friends here make it during Ganesh Chaturthi, Diwali and Gokulashtami festivals.
Basically I love this Karnataka style chakli a lot and got the recipe for homemade chakli powder from my friend Priya. I will share that recipe later. This chakli is made with rice flour and besan flour. Its prepared without butter or ghee. Hot oil is used to bring crunchiness. So it doesn’t have a melt in mouth texture just like butter chakli but tastes crispy and crunchy. It tastes the best with full flavor by the next day. We enjoy this chakli with our evening tea/ chai.
As its summer vacation in India, Kids must be nagging you for some evening snacks. Do try this easy chakli recipe at home for your kids!They will like it. Please excuse me for the non uniform shapes. I am not so good or patient enough in pressing
murukku. But my MIL says everything comes by practice. So this year, I am planning to try more murukku
recipes. Hope I can make perfect swirls in future.
Lets see how to make Karnataka style Instant chakli recipe with step by step pictures and VIDEO.
Red chilli powder - 1 tsp ( I used Kashmiri chilli powder)
Sesame seeds - 1/2 tsp (I used black. You can use white too)
Asafetida/Hing - 1/4 tsp
Hot cooking oil - 3 tbsp
Water - As needed
Salt - As required
Cooking oil or Groundnut oil - To deep fry
HOW TO MAKE CHAKLI - METHOD
In a wide bowl, sieve the rice flour + besan flour.To the sieved flour, add salt, red chilli powder, sesame seeds and hing.
Heat cooking oil and add it to the flour. Mix with a spoon till oil spreads well in the flour.
Add water gradually and make a smooth dough.Make the dough slightly sticky. If the dough is too hard, chakli will break while pressing. Cover the dough with a wet cloth till use. Besan flour in the dough absorbs more water and dough becomes thick over time. So if the chakli breaks while pressing, sprinkle little water to the dough and try again. You will get it right. Sprinkle water whenever needed.
Take the chakli maker with star mould, fill with the dough. Press it on a butter paper or cotton cloth. Make shapes. Cover it till use else dough will become dry and murukku breaks while frying.
Heat oil in a kadai to deep fry the chakli. When the oil is heated, drop a pinch of dough. If it rises to the top immediately, oil temperature is right.
Drop 2-3 chakli for one batch. Keep the flame medium. Do not touch the chakli for one minute. Let it cook in the hot oil. Then flip it and cook the other side. Keep the flame medium. Cook the chakli till 90% of bubbles cease and becomes golden. Remove in a tissue paper. Repeat the same & fry all the chakli. Store in an air tight box after it cools down completely. Tastes best the next day ! Enjoy !
Note
Besan absorbs all water in the dough. So you may need to add sprinkle more water whenever needed while pressing.
Do not reduce the quantity of hot oil else chakli may turn hard.
Make sure oil temperature is right else murukku absorbs more oil.
Try this easy, instant chakli for your kids and family’'. They will love it !
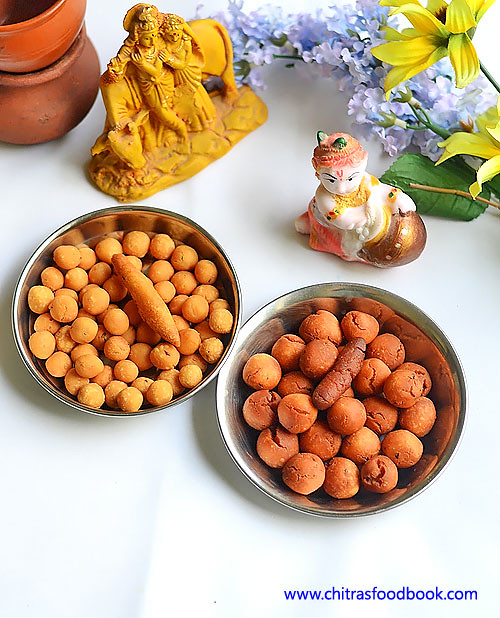
Uppu Seedai/Salt seedai and Vella seedai/Sweet seedai recipes using store bought rice flour with tips and tricks to avoid bursting. Seedai is one of the most important Neivedyam recipes for Krishna Jayanthi @ Gokulashtami festival in Tamil nadu. Usually we make seedai recipes with homemade processed rice flour and roasted urad dal flour. I have already shared our traditional uppu Cheedai and vella cheedai recipes long back. This year, I tried cheedai using store bought rice flour as it is easy and quick to make. I used Anil Kozhukattai flour.
I guess Idiyappam flour works well too. I won't say this seedai will melt-in-mouth like Adayar Ananda bhavan seedai, but it came out equally crispy and crunchy when compared with the traditional ones. Above all, It din’t burst. Cracks in the sweet seedai is unavoidable though. If you are a beginner, use the same quantity I mentioned here. Once you got them right, you can go for doubling the quantity. Friends, If you don’t have enough time to make processed rice flour but still want to make seedai, try this easy version with store bought rice flour. Follow the steps carefully if you are a beginner. You can make it really well.
Have a great Krishna Jayanthi celebration. Check out my other Gokulashtami recipes in THIS LINK. Lets see how to make uppu seedai and vella seedai with rice flour ( Kozhukattai flour) and tips to make it without bursting.
Please watch the video below for all the Gokulashtami recipes.
Uppu seedai and Vella seedai recipes
Uppu seedai and vella seedai recipe with store bought rice flour/Kozhukattai flour
Grated jaggery - 1/4 cup + Water – 2 tbsp ( to melt jaggery)
Cardamom seeds - 1 no
Water - as needed
For Uppu seedai
Idiyappam flour OR Kozhukattai flour - 1/2 cup
Roasted urad dal flour or Powdered gram flour – 1 tbsp
Softened butter – 2 tsp ( at room temperature)
Finely grated coconut – 1 tsp (optional)
Sesame seeds or cumin seeds - 1/2 tsp
Asafetida/Hing - 1/8 tsp
Salt & Water - as needed
Cooking oil – to deep fry
HOW TO MAKE SEEDAI USING RICE FLOUR - METHOD
Dry roast 1 cup ( 250ml cup) of rice flour till it starts to emit vapour. Keep roasting in medium flame for few minutes to see the vapour. Try to draw a line to check if the flour is roasted well. Do not burn the flour. Let the flour cool down. Follow the same steps for Idiyappam flour as well. If you have dry rice flour, you don't have to roast it.
For Vella Seedai / Sweet seedai
Measure 1/2 cup of roasted rice flour in a sieve. To this, add either roasted urad dal flour OR roasted gram flour (Pottukadalai maavu). Sieve them very well in a bowl. This step helps to avoid bursting. So do not skip this step. Add sesame seeds or cumin seeds, salt, hing, ground coconut (optional) and softened butter ( unmelted butter). Mix well with your fingers. Make sure butter is well spread with the flour. Set aside.
In a kadai, take the grated jaggery. Add 2 tbsp of water and melt the jaggery by boiling it. Strain the syrup through a metal strainer. Mix this syrup, cardamom powder with the sieved rice flour mixture. Mix well. Add little water and make a non-sticky smooth dough.
Make small balls out of it and spread them in a newspaper. Make one or two small cylindrical shaped Seepankuzhal too ( Refer main picture). Let it air dry for 20 minutes. ( If you are a beginner, go for frying seedai in a mini kadai ( tadka pan) with little oil to check whether seedai burst or disperses in oil. Put just 2 balls and stay a feet away.
Check if the seedai burst or disperses in oil. If seedai disperses in oil, either oil temperature may be too low or jaggery syrup or butter may be more. In that case, add little more rice flour and make a non-sticky dough. Make balls and again fry them in little oil. If it works fine, go ahead with batch frying.
Heat oil in a kadai and when it gets heated, put a pinch of seedai dough and check the oil temperature. If it comes up immediately, oil temperature is correct. Now simmer the flame to medium and drop seedai balls. Stay 2 feets away for safer side. Do not disturb for a minute. Then toss the balls and put the balls and deep fry for few minutes. Keep turning both the sides for even cooking.
Remove after it turns golden brown. Do not wait for all the bubbles to stop. Drain them in a tissue. Cracks are unavoidable in sweet seedai. Store after it cools down. It may turn soft the next day. So to enjoy crunchy seedai, consume it on the same day !
For Uppu Seedai Recipe / Salt seedai
In a wide bowl, take 1/2 cup of roasted rice flour, roasted urad dal powder or fried gram flour ( pottukadalai maavu). Sieve twice to avoid bursting. Add cumin seeds, asafetida, salt and mix well. Add in soft butter and mix well with your finger tips. Make sure butter is well spread with the flour.
Add water little by little and make a dough. Make small balls using three fingers. Do not give pressure while rolling. Let the balls dry in a newspaper for 15-20 minutes.
Heat oil & check the oil temperature by dropping a pinch of dough. When it rises to the top, simmer the flame to medium & put a handful of seedai balls. Stay 2 feet away. Do not disturb the balls for few seconds.
Then toss the seedai & cook till bubbles cease to 90%. Remove when the seedai turns golden. Let it cool down completely & then store in an air tight box. Enjoy for a week!
Note
First important thing to avoid bursting is to “SIEVE” the flour once or twice. U should sieve all the flour ( urad dal flour, rice flour). Sieving the flour properly reduces 90% of bursting.
Second thing, you should not roll the seedai very tightly. U should roll it to a loose ball using three fingers. No problem if its not a proper round.
One more tip is to prick the seedai with a small needle to avoid bursting. Dry the seedai in a paper or towel for 20 mins before frying.This is also very important.
Dry roast the flour till it starts to release vapour. Try to draw a line using the roasted flour.
Beginners can try deep frying few seedai in “small tempering kadai” .If it comes out well , proceed in a big kadai. Color variations may be there slightly. But u can check whether it bursts or disperses in oil.
If sweet seedai breaks or dissolves in oil , it means jaggery may be more or oil temperature is too high or too low.
If Seedai bubbles too much after u drop into oil ,it shows the fat ( ghee or butter or oil) content is more.So add more rice flour to the dough & make again.
The color of seedai depends on the color of urad dal flour. If u roast the dal to golden brown, seedai will also turn brown.
Uniform heating is also important. In my observation, I feel medium flame is enough to get a nice colored and crispy seedai.
Vella seedai turns soft the next day.So consume it on the same day to enjoy its best taste.
Adding coconut to seedai dough may reduce its shelf life.
Try this easy seedai recipes for this Krishna jayanthi and have a great celebration !

 As I had already posted Bengali Chaler Payesh, making this North Indian rice kheer was not so difficult for me as the procedure is similar. After watching many video recipes and websites, I could do it confidently. It came out really well and tasty. Even though the quantity of rice is less, the yield of this kheer is more. Sendhil & myself enjoyed it taking 2 to 3 servings. Do try this simple and easy rice kheer during this navratri, offer God and get her blessings. Soon I till try to post an easier version of this kheer by using pressure cooker & condensed milk. Now Lets see how to make rice kheer recipe with step by step pictures and video !