Search Chitra's Food Book

Showing posts with label HEALTH FOOD. Show all posts

December 21, 2021

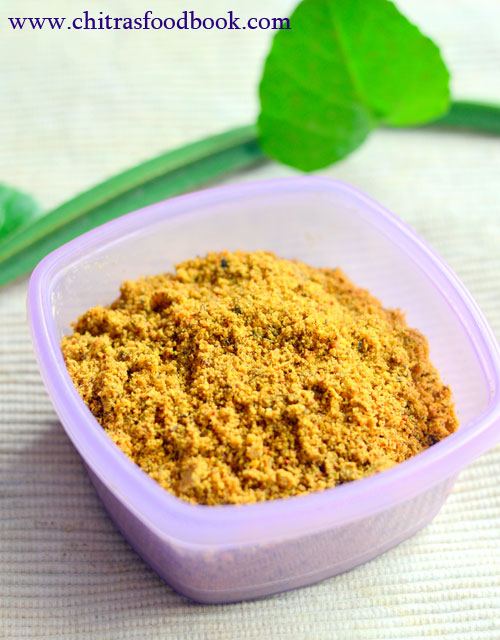
Pirandai podi–Adamant Creeper Chutney Powder for Rice

Pirandai podi

I have kept an adamant creeper plant (Pirandai chedi in Tamil) in my balcony garden. Usually I make Pirandai thogayal or Pirandai kuzhambu. Sometimes, I make Pirandai dosa OR Red rice Pirandai dosai too.  This time, I tried Pirandai podi for a change. It came out so tasty and flavorful. We enjoyed it mixing with plain rice adding ghee. I personally liked this podi with idli, dosa too.

Friends, do try this Pirandai podi at home / Adamant creeper chutney powder recipe and store up to 2 weeks, enjoy with plain rice, idli, dosa if you like.

pirandai podi recipe

Pirandai podi / Adamant creeper chutney powder for rice


Pirandai podi / Adamant creeper chutney powder for rice

Pirandai podi / Adamant creeper chutney powder for rice


Cuisine: Indian
Category: side dish
Serves: 1/2 cup
Prep time: 10 Minutes
Cook time: 20 Minutes
Total time: 30 Minutes


INGREDIENTS

  • Pirandai / Adamant creeper sticks - 10
  • Urad dal - 2 tbsp
  • Chana dal - 2 tbsp
  • Sesame seeds - 1 tsp
  • Red chilli - 3
  • Pepper - 1 tsp
  • Cumin seeds - 1 tsp
  • Tamarind - Gooseberry size
  • Cooking oil / Gingely oil / Sesame oil - 2 tbsp
  • Salt - as needed
HOW TO MAKE PIRANDAI PODI
  1. Grease your hands with sesame oil generously to avoid itching.
  2. Wash and peel the ridges of Pirandai. Chop into small pieces and set aside.
  3. Heat oil and saute pirandai pieces till it shrinks in size and color turns light green or whitish.
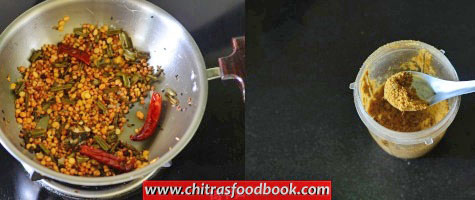
  4. Remove in a plate. In the same oil, saute urad dal, chana dal, red chilli, sesame seeds, pepper and cumin seeds in medium flame till dals turn golden in color.
  5. Lastly add tamarind, salt and sauteed pirandai sticks. Mix well and let it cool down. 
  6. Grind everything to a smooth powder. Transfer to an air tight box.
  7. Store and use for 2 weeks.
METHOD - STEP BY STEP PICTURES
  • Wash the Pirandai sticks and set aside. Grease hands with sesame oil / Gingely oil generously. Peel the ridges of Pirandai sticks and chop into 1 inch pieces.

  • Heat oil and saute Pirandai sticks till it shrinks in size and changes in color to light green. Remove in a plate.
  • pirandai podi recipe
  • In the same oil, saute urad dal, chana dal, sesame seeds, pepper corns, cumin seeds and red chilli in low to medium flame patienly till the color of dal changes to golden.

  • Lastly add tamarind, salt and sauteed Pirandai sticks. Mix well and let everything cool down. Grind to smooth powder and store in an air tight box. Serve with plain rice adding ghee. pirandai podi recipe

Note

  • Pirandai podi can be prepared with many variations.
  • You can skip tamarind if you wish but I recommend using it as it helps to reduce the itchiness of Pirandai while eating it.
  • You can use either chana dal or Urad dal for variations.


  Healthy, tasty Pirandai podi is ready to use with plain rice, idli, dosa!
pirandai podi recipe


Continue Reading...


December 11, 2021

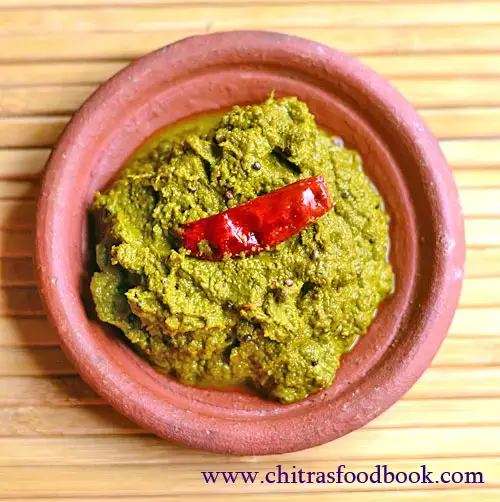
Murungai keerai thogayal - Drumstick leaves Chutney Recipe

drumstick leaves thogayal

Murungai keerai thogayal is a super healthy and interesting thogayal recipe with drumstick leaves. Recently I started making drumstick leaves recipes regularly in my kitchen. Most of the time, I am making this soup recipe. Sometimes I try kootu, sambar, poriyal and this thogayal with it.

Among sambar, kootu, poriyal and thogayal, my choice is this thogayal. Then comes sambar. This drumstick leaves chutney / murungai keerai thogayal tastes so good even the kids in your house would love to have with plain rice adding ghee. Raksha who is a fussy eater when it comes to keerai recipes, loved this thogayal a lot.

Friends, do try this healthy and yummy murungai keerai thogayal / drumstick leaves chutney for rice and enjoy !. You can also try with idli, dosa if you like.

Murungai keerai thogayal / Drumstick leaves chutney for rice


Murungai keerai thogayal / Drumstick leaves chutney for rice

Murungai keerai thogayal / Drumstick leaves chutney for rice, idli, dosa


Cuisine: Tamil nadu
Category: Side dish
Serves: Serves 3
Prep time: 10 Minutes
Cook time: 20 Minutes
Total time: 30 Minutes


INGREDIENTS

  • Murungai keerai / Drumstick leaves - 1 cup
  • Big onion - 1
  • Tomato - 1
  • Tamarind - Small gooseberry size
  • Garlic cloves - 5
  • Red chilli - 3 to 4
  • Coconut - 2 tbsp
  • Turmeric powder - 1/4 tsp
  • Urad dal - 2 tsp
  • Chana dal - 2 tsp
  • Hing / Asafetida - a pinch
  • Salt & water - as needed
To temper
  • Sesame oil - 1 tbsp
  • Mustard seeds - 1/2 tsp
  • Red chilli - 1
HOW TO MAKE DRUMSTICK LEAVES CHUTNEY
  1. Wash the drumstick leaves. Set aside.
  2. Heat oil and roast urad dal, chana dal, red chilli, hing.
  3. Lastly add coconut, roast for a minute. Switch off. Remove in a plate.
  4. Add 1 tbsp oil again. Saute onion, tomato till tomato becomes mushy.
  5. Add drumstick leaves and saute for 5 to 10 minutes. Switch off the flame.
  6. Cool down and grind everything together to make a smooth paste.
  7. Heat oil in a kadai. Splutter mustard seeds. Add red chilli and the ground paste.
  8. Mix well and boil till thick. Remove and serve with plain rice adding ghee.
METHOD - STEP BY STEP PICTURES
  • Wash the drumstick leaves and set aside. Heat oil in a kadai. Saute chana dal, urad dal, red chilli and hing till dals turn golden in color. Lastly add coconut, mix well and switch off the flame.

  • Remove in a plate. Heat oil in the kadai. Saute onion, garlic and tomato till tomato becomes mushy. Add drumstick leaves and saute for 5 to 10 minutes till it becomes soft and shrinks in quantity. Switch off the flame.

  • At last grind everything together adding little tamarind to a smooth paste adding water and salt.

  • Heat oil in a kadai, splutter mustard seeds, red chilli. Add the ground paste and saute for few minutes till it becomes thick. Remove and serve with plain rice adding ghee.

Enjoy !

Note

  • Adjust the quantity of chilli as per your taste.
  • You can skip tomato and use tamarind alone. In that case, add BIG gooseberry sized tamarind.
  • To make it more healthy, you can add 1 tbsp of dry roasted sesame seeds too.


Healthy Drumstick leaves thogayal is ready to serve with plain rice.
Murungai keerai thogayal


Continue Reading...


December 1, 2021

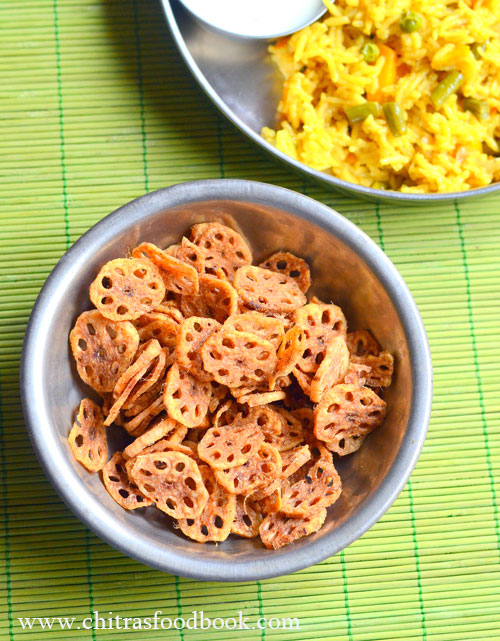
Lotus Root Chips | Kamal Kakdi Chips | Lotus stem chips recipe

Lotus stem chips

Lotus root chips is a super crispy and healthy snacks for adults and kids. Lotus stem also known as Lotus root is a nutritious vegetable. It is known as Kamal Kakdi / Kamal kakri in Hindi, Thamarai thandu / Thamarai kizhangu in Tamil, Nadru In Kashmiri, Renkon in Japanese, Thamara thant in Malayalam, Tavare dantu in Kannada, Tamara kada in Telugu. It is widely used in Indian and Japanese cuisine. It has a mild sweet and crunchy taste. However eating raw is not advisable as it is grown under the mud.

When I was pregnant, my doctor advised me to eat thamarai thandu vathal for my lunch as its rich in fiber, good for diabetes, controls stress and regulates blood pressure. It is also rich in Vitamins and minerals. So I used to get the dried lotus stem chips from Salem Home foods shop. My mom fries it along with papad and give me for lunch everyday. I love its taste. I never thought lotus root chips can be made at home with fresh lotus stem. Last week I bought some fresh Lotus stem online from FTH – Vegetable and grocery delivery app.

I tried this crispy and crunchy lotus stem chips yesterday for our weekend lunch along with vegetable biryani. It came out so well. Making lotus root chips at home is very easy. All you have to do is to wash and peel the skin. Slice thinly and deep fry. To make in Indian style, I added some red chilli powder and chat masala to the deep fried chips. It tastes so good with mild sweet taste ! We all loved it. In fact, this homemade lotus stem chips tastes much better than the ones I had during my pregnancy.

Friends, if you get fresh lotus stem in your place, do not forget to buy it and try this chips. Everyone will love it instantly. This chips also stays good for a week when stored in an air tight box. Ok, Lets see how to make Indian style lotus stem chips recipe/ Thamarai thandu chips with step by step pictures.

Lotus root chips

Lotus stem chips | Lotus root chips - Kamal Kakdi chips


Lotus stem chips | Lotus root chips - Kamal Kakdi chips

Lotus stem chips | Lotus root chips - Kurkuri Kamal Kakdi / crunchy chips recipe.


Cuisine: Indian
Category: Snacks
Serves: 2 cups
Prep time: 10 Minutes
Cook time: 20 Minutes
Total time: 30 Minutes


INGREDIENTS

  • Lotus stem / Lotus root - 2
  • Cooking oil - to deep fry
  • Red chilli powder - 1 tsp
  • Chat masala - 1/2 tsp
  • Salt - if required.
  • Water - to wash the lotus root
HOW TO MAKE LOTUS STEM CHIPS RECIPE
  1. Wash and peel the skin of lotus stem. Slice thinly.
  2. Wash again and spread in a cotton cloth. Let it dry.
  3. Heat oil and deep fry in batches. Toss and cook both sides.
  4. Remove when golden in color. Drain in a tissue paper.
  5. Take a bowl. Add the lotus stem chips. Sprinkle chilli powder and chat masala powder, salt if required.
  6. Mix well and serve. Store in a tight box and enjoy up to a week. Stays crispy !
METHOD - STEP BY STEP PICTURES
  • Wash and peel the skin of lotus stem. Slice thinly.
  • lotus stem chips recipe
  • Wash again and spread the sliced lotus stem in a cotton cloth. Let it dry for 10 minutes.
  • lotus stem chips recipe
  • Heat oil in a kadai to deep fry. Add the sliced lotus stem in batches. Toss and fry both the sides till it turns golden brown in color. Remove in a tissue paper and sprinkle chilli powder, chat masala powder and salt ( if necessary). Mix well and serve with hot coffee or tea ! Store in an air tight box and enjoy upto a week.
    Enjoy !
  • lotus stem chips recipelotus stem chips recipe

Note

  • You can skip chat masala and use chilli powder alone.
  • You can bake the chips in oven or air fryer instead of frying in oil. Bake at 180c for 10 to 15 minutes till it turns crispy.


  Easy, healthy, Lotus stem chips is ready to munch. Enjoy with rice, tea or coffee!
lotus stem chips recipe

Continue Reading...


November 10, 2021

Drumstick Leaves Soup – Murungai Keerai Soup Recipe

murungai keerai soup
Drumstick leaves is a super healthy green variety. Its called as Murungai keerai in Tamil, Nugge soppu in Kannada, Moringa leaves in English, Sahajan ke patte in Hindi, Murinna ila in Malayalam. It has amazing health benefits. So I wish to include in our diet at least once in a week. Usually we make sambar, poriyal or adai with murungai keerai.

Recently I tried Murungai keerai kootu and this soup recipe. Both came out very well and tasty. In fact we loved this soup more than kootu and poriyal as it tastes tangy and spicy like rasam. More than soup, you can call it as murungai keerai rasam. Murungai keerai soup has lots of health benefits. It is easily digestible when compared with cooked whole greens. This soup is rich in Calcium, Iron, Pottasium and Vitamin A.

For healthy variations, people add boiled moong dal, coconut milk etc. But I made a simple version as suggested by my neighbor. I also referred Sharmis passions. For some people, drumstick leaves may be hard to digest. It increases the Pitta of our body and leads to vomiting and diarrhea. Even I have this issue. So for people like me, this soup is a boon. Its easy to digest and you can reap all the benefits of drumstick leaves.

Check out my Drumstick leaves sambar recipe

Drumstick leaves poriyal

Drumstick leaves soup recipe

The best time to consume this soup is around 11 am or in the early evening around 3pm. It helps for easy digestion and absorption. You can take this soup twice in a week or in alternate days if you like.

Friends, do try this easy and yummy Drumstick leaves soup recipe. I am sure you will love it !

 drumstick leaves soup recipe

Drumstick leaves recipe - Murungai keerai soup recipe


Drumstick leaves recipe - Murungai keerai soup recipe

Drumstick leaves recipe - Murungai keerai soup recipe


Cuisine: South Indian
Category: Soup
Serves: 2
Prep time: 10 Minutes
Cook time: 20 Minutes
Total time: 30 Minutes


INGREDIENTS

  • Drumstick leaves - 2 cups
  • Ghee - 2 tsp
  • Cumin seeds - 1/2 tsp
  • Crushed garlic - 10 cloves
  • Small onion - 10
  • Tomato - 1
  • Pepper powder - 1/2 tsp ( as needed)
  • Salt & water - as needed
HOW TO MAKE DRUMSTICK LEAVES SOUP
  1. Clean the drumstick leaves by removing its stem. Wash it thrice. 
  2. Heat ghee and splutter cumin seeds, crushed garlic.
  3. Saute finely chopped onion till transparent. Add tomato and saute till mushy.
  4. Now add the washed and squeezed drumstick leaves. Mix well for a minute.
  5. It shrinks in size. Add little turmeric powder and sugar to maintain its green color.
  6. Add 3 cups of water and let everything boil till leaves are cooked and water reduces to 1 cup.
  7. Remove and add pepper powder. Serve hot. You can also filter the soup through metal strainer and enjoy the stock.
  8. Healthy and tasty Drumstick leaves soup is ready.
METHOD - STEP BY STEP PICTURES
  • Clean the drumstick leaves by removing its stem. Wash it thrice and set aside. Wash and chop onion, tomato finely and crush garlic.
  • murungai keerai soup
  • In a kadai or bowl, heat ghee. Splutter cumin seeds and crushed garlic. Add chopped onion and saute till transparent.
  • murungai keerai soup
  • Add tomato and saute till mushy. Now add the washed and squeezed drumstick leaves. Mix well for a minute till it shrinks in size. Add a pinch of turmeric powder and sugar to maintain its green color if you like.

  • Lastly add 3 cups of water and allow everything to boil in medium flame and cook together till water reduces to 1 cup. By this time, keerai will be cooked soft too.
  • murungai keerai soup

  • Switch off the flame and serve as such adding some pepper powder OR you can strain the soup in a steel filter and serve the stock adding pepper powder. Healthy and tasty drumstick leaves soup is ready.
  • murungai keerai soup

Note

  • Adjust the quantity of pepper powder as per your taste.
Try this easy, yummy Drumstick leaves soup recipe. You will love it !

murungai keerai soup


Continue Reading...


September 28, 2021

Vazhaithandu Poriyal – Banana stem poriyal recipe

How to make Vazhaithandu poriyal

This is my MIL’s style Vazhaithandu poriyal recipe (Banana stem curry) which is a super healthy and excellent side dish for sambar rice. We try to include Banana stem in our diet at least once in a week as it is a rich source of fiber, Potassium and Vitamin B6. It helps to ease constipation and is good for treating and preventing Kidney stones.

Mostly I make banana stem juice with buttermilk and salt. Sometimes I make poriyal, kuzhambu, thayir pachadi or add in sambar. Recent days I started to make Vazhaithandu dosa as well. Soon I will try to post a collection of all the Vazhaithandu recipes in my blog for easy reference.

Today’s recipe is a very easy and simple Tamil nadu style poriyal recipe with Vazhaithandu. My MIL makes it without onion and garlic but I used garlic today. Also she uses red chilli for spicy taste whereas I used sambar powder for variation. It came out so well. We all loved it. Even Raksha who eats only dosa with Vazhaithandu ate this poriyal today without complaints.

Friends, do try this yummy and healthy raw banana stem poriyal for rice and enjoy with your family. But make sure you use tender and fresh banana stem for best taste.

vazhaithandu poriyal recipe

Vazhaithandu poriyal / Banana stem curry for rice


Vazhaithandu poriyal / Banana stem curry for rice

Vazhaithandu poriyal / Banana stem curry for rice - Easy and healthy side dish using Banana stem.


Cuisine: Tamil nadu
Category: Side dish
Serves: Serves 4
Prep time: 10 Minutes
Cook time: 20 Minutes
Total time: 30 Minutes


INGREDIENTS

  • Vazhaithandu / Banana stem - 1
  • Moong dal - 1 tbsp
  • Sambar powder or red chilli powder - 1/2 tsp
  • Turmeric powder - 1/4 tsp
  • Salt - as needed
  • Water - to cook
  • Grated coconut – 1/4 cup
To temper
  • Coconut oil - 1 tbsp
  • Mustard seeds - 1/2 tsp
  • Urad dal - 1 tsp
  • Chana dal - 2 tsp
  • Cumin seeds – 1/2 tsp
  • Curry leaves - few
  • Garlic - 5 cloves
  • Coriander leaves - to garnish
HOW TO MAKE BANANA STEM PORIYAL
  1. Remove the outer sheath of Banana stem.
  2. Wash and chop into circles and dip in thin buttermilk.
  3. Chop finely and keep it immersed in buttermilk till use.
  4. Take the chopped banana stem in a plate and add salt, moong dal.
  5. Mix well and keep the plate in a slanting way for 15 minutes. Water drains out. Discard the water. 
  6. Heat oil in a kadai. Splutter mustard seeds, urad dal, chana dal, cumin seeds and curry leaves. 
  7. Add garlic cloves and saute for a minute. Squeeze the banana stem and add to kadai.
  8. Add turmeric powder and mix well. Sprinkle some water and cover the kadai. Keep the flame low and cook till moong dal and banana stem turns soft.
  9. Lastly add the sambar powder and grated coconut. Mix well and cook for few more minutes.
  10. Switch off the stove and garnish with coriander leaves if you like.
  11. Serve with sambar and rasam rice. Enjoy !
METHOD - STEP BY STEP PICTURES
  • Remove the outer sheath of the banana stem and chop into thin roundels. Keep in buttermilk till use.

  • Now take the roundels and chop finely into small cubes. Keep them immersed in buttermilk.
  • vazhaithandu poriyal recipe
  • Take the chopped banana stem in a plate. Add salt, moong dal and mix well. Keep the plate in a slanting way so that banana stem leaves water which collects in the plate. Discard the water.
  • vazhaithandu poriyal recipe
  • Heat oil in a kadai and when it gets heated, splutter mustard seeds, urad dal, chana dal, cumin seeds and curry leaves. Add chopped garlic and saute for few minutes.

  • Squeeze the banana stem and add to the kadai. Keep the flame low and saute for few minutes. Add turmeric powder and mix well.
  • vazhaithandu poriyal recipe

  • Sprinkle some water and cover cook till dal and banana stem turns soft and cooked well. Lastly add the grated coconut, sambar powder or red chilli powder. Mix well and cook for few minutes in low flame till raw smell goes off. Switch off the flame and garnish with coriander leaves (optional).vazhaithandu poriyal recipe
    Enjoy !

Note

  • You can saute red chilli along with garlic and skip chilli powder / sambar powder for less spice.
  • For variations, you can skip garlic and make it without onion and garlic.
  • If you like, you can add one finely chopped onion along with garlic and make this poriyal.
Healthy and tasty Vazhaithandu poriyal is ready !
Vazhaithandu poriyal

Technorati Tags: ,,,,,

Continue Reading...

September 6, 2021

Green Gram Laddu With Jaggery | Pasi Payaru Urundai

Green gram ladoo

Green gram laddu / Pasi payaru urundai (in Tamil) is a super healthy and easy sweet cum snack recipe. Last week I prepared this for my Guru pooja neivedyam. It can be prepared instantly under 15 minutes. I used Organic powdered jaggery / Naatu sakkarai. You can use sugar too.

Friends, you can pack this healthy green moong  ladoo for yours and kids snacks box. You can also prepare this ladoo as prasadam for festivals like Diwali, Gokulashtami, Navarathri and Ganesh chaturthi as its easy, healthy and quick to prepare. Ok, Lets check out how to make this easy and yummy Green gram laddu with jaggery with step by step pictures.

Green gram laddu


Green gram laddu with jaggery / Pasi payaru urundai recipe


Green gram laddu with jaggery / Pasi payaru urundai recipe

Green gram laddu with jaggery / Pasi payaru urundai recipe for Kids snacks box and festivals.


Cuisine: Indian
Category: Sweet
Serves: 10
Prep time: 10 Minutes
Cook time: 20 Minutes
Total time: 30 Minutes


INGREDIENTS
1 cup = 250ml
  • Green gram - 1/2 cup
  • Powdered jaggery - 1/3 cup to 1/2 cup
  • Cardamom - 2
  • Cashew nuts - few
  • Ghee - 2 tbsp
HOW TO MAKE GREEN GRAM LADOO WITH JAGGERY
  1. Heat a kadai and dry roast the green gram in low to medium flame till reddish brown with nice aroma.
  2. Cool down completely. Grind to a fine powder along with cardamom.
  3. Lastly add powdered jaggery to it and grind again to smooth powder.
  4. Collect in a plate. Heat ghee and roast broken cashews. Add to the mixture.
  5. Mix well and shape ladoo. Store in an air tight box. You can use up to 1 week.
METHOD - STEP BY STEP PICTURES
  • To make green gram ladoo with jaggery, firstly heat a kadai. Lower the flame and add the green gram. Roast it till it leaves a nice aroma and turns reddish brown color. Roast patiently in low to medium flame else laddu tastes raw.

  • Switch off the flame and remove in a plate. Let it cool down completely.

  • In a mixie jar, take the green gram, cardamom and grind to a fine powder.

  • Lastly add the powdered jaggery to the mixie jar. Powder it nicely. Remove and collect in a plate.

  • Heat ghee in a small kadai and roast the broken cashew pieces till golden in color. Add to the green gram jaggery mixture.

  • Mix evenly with a spoon as the ghee is hot. Once it turns warm, mix well with your hands and shape balls. Make ladoo and store in an air tight box. Enjoy up to 1 week.


Note

  • For variations, you can roast the powdered green gram in melted ghee, cashew mixture and shape ladoo once it cools down. Ladoo looks little moist and shiny.
  • You can use powdered sugar instead of jaggery.
  • Make sure you roast the green gram without raw smell.

Easy, super healthy and instant green gram ladoo is ready to relish !

Pasi payaru urundai


Continue Reading...


August 13, 2021

Akki Tambittu | Akki Hittina Thambittu | Karnataka Rice thambittu recipe

Akki thambittu

Nagara Panchami and Maha Shivaratri is one of the most popular festivals in Karnataka. Every year during Nag Panchami and Shivaratri, my neighbor used to pass this akki tambittu recipe as pooja prasadam. We all love it. I wanted to get the recipe from her and blog it for long time. Due to this pandemic situation, we are not able to get this prasadam from her for the past two years.

This year, I got the recipe from her and made it in my kitchen. I also offered this laddu / unde as prasad for my Thursday Guru pooja. My neighbor makes it big in size but I made it small as per my family’s liking. Friends, this tambittu is a super healthy ladoo recipe with all the goodness of jaggery, roasted rice, roasted gram, sesame seeds, peanuts, poppy seeds and desiccated coconut. You can give it to your kids snacks box as well.

Apart from this akki thambittu recipe, people also make Chigali ladoo/ sesame seeds laddu, hurigadale tambittu on this occasion. Soon I will try to share those recipes here.

Now lets see how to make Karnataka special akki tambittu recipe with step by step pictures. Prepare this special recipe for Nagara Panchami festival tomorrow and enjoy !

akki thambittu recipe

Akki thambittu recipe / Akki tambittu recipe


Akki thambittu recipe / Akki tambittu recipe

Akki thambittu recipe / Akki tambittu recipe for Nagara panchami and Maha Shivaratri festival prasada.


Cuisine: Karnataka
Category: Sweet
Serves: 8
Prep time: 10 Minutes
Cook time: 20 Minutes
Total time: 30 Minutes


INGREDIENTS
1 cup = 250ml
  • Raw rice / Sona masoori rice - 1/2 cup
  • Grated jaggery - 1/2 cup  (Use 3/4 cup for more sweetness)
  • Roasted gram dal / Hurigadale - 1/4 cup
  • Peanuts - 1/4 cup
  • Sesame seeds - 2 tbsp
  • Khus khus /Poppy seeds - 1 tbsp
  • Cardamom powder - 1/2 tsp
  • Ghee - 1 tbsp
  • Desiccated coconut - 2 tbsp (Grated)
  • Water – 1/3 cup
HOW TO MAKE AKKI THAMBITTU RECIPE
  1. Heat a kadai and dry roast the rice till puffy. Transfer to a plate.
  2. Dry roast sesame seeds and poppy seeds till they splutter.
  3. Add roasted gram dal and roast for a minute. Reserve half and transfer to the rice plate.
  4. Dry roast peanuts till skin crackles. Remove the skin and keep aside.
  5. Dry roast coconut and set aside. 
  6. Grind the rice, sesame seeds, roasted gram dal mixture to a fine powder.
  7. Transfer to a plate. Grind peanuts coarsely and add to the plate.
  8. Now add the roasted coconut, cardamom powder, reserved poppy+sesame seeds+gram dal and ghee. Mix well.
  9. Melt jaggery adding water and boil till frothy. Let it cool down. Filter it and add to the rice mixture.
  10. Mix evenly and make balls. Karnataka Akki thambittu is ready !
METHOD - STEP BY STEP PICTURES
  • Heat a kadai and roast the rice in low to medium flame till puffy. Remove in a plate.
  • akki thambittu recipe
  • Dry roast sesame seeds and poppy seeds till it starts to splutter. Add the roasted gram dal and roast for a minute. Switch off the flame.
  • akki thambittu recipe
  • Reserve half of this mixture in a plate and add the remaining in the rice plate. Cool down and grind to a fine powder.
  • akki thambittu recipe
  • Transfer to a plate. Dry roast desiccated or fresh coconut for few minutes and add to the rice flour plate.

  • Dry roast peanuts till its skin crackles. Cool down and remove the skin. Grind coarsely.
  • akki thambittu recipe
  • Add the powdered peanuts to the rice flour mixture. Add cardamom powder, ghee and the reserved poppy seeds, sesame seeds and roasted gram dal. Combine and mix everything well.
  • Take jaggery in a kadai. Add water to cover it. Boil and melt the jaggery. Boil for few minutes in medium flame till it becomes frothy and slightly thick. No need to look for any consistency. But make sure, jaggery syrup is not too thick. Thambittu will become hard to bite after it sets. So keep the syrup slightly thick like oil. Let it cool down completely.
  • akki thambittu recipe
  • Now filter the syrup and add to the rice flour mixture. Mix well to coat the rice flour. No problem if the mixture looks wet and loose. Shape ladoo and arrange in a plate.akki thambittu recipe
  • This ladoo becomes hard after its set in few hours. So make sure the ladoo is soft to handle while shaping.akki thambittu recipe

  • Enjoy !

Note

  • For variations, you can skip grinding sesame seeds and poppy seeds. You can add the roasted ones as such.
  • You can skip desiccated coconut or use fresh coconut instead. In that case, roast the fresh coconut till its dry.


Try this easy, healthy akki thambittu recipe for festivals and enjoy !

thambittu recipe


Continue Reading...