Search Chitra's Food Book

Showing posts with label LUNCH BOX IDEAS. Show all posts

September 4, 2018

Paneer Noodles Recipe – Maggi Paneer Masala Noodles

Paneer noodles
Recently I tasted this Maggi paneer masala noodles in Bannerghatta Meenakshi mall food court. Its a popular street food. In the restaurant menu card, this dish was titled as Paneer noodles delight. I was expecting hakka noodles with paneer masala. But they served Instant Maggi noodles with onion, tomato masala and paneer. Sendhil and Raksha were kidding me that I spent 100rs to eat 10 rs Maggi 😉. 

Yes, even though it was a bit disappointing I really liked the way they dressed up a simple Maggi to a spicy, tasty paneer masala noodles. I tried to recreate the same at home for our Sunday breakfast. It came out very well and similar to the one I tasted. If you feel, Maggi noodles is unhealthy, you can try the same with any other instant noodles like Top Ramen, Yipee or use plain noodles too. Finally it is your choice. 

I used Maggi veg atta noodles. So I did not add carrot, green peas or capsicum. I made it in a simple way by adding onion, tomato masala and paneer soaked in water.  I did not even roast the paneer pieces in oil as it may make the paneer chewy and hard. So this version of Maggi paneer masala noodles is very easy and quick to prepare in busy mornings just like restaurant ones. 

Bachelors and working women who loves to eat Maggi can try this yummy version. Make your own variations by adding more vegetables or tofu instead of paneer. to make it vegan and healthy.  If you don’t want to use tastemaker, you can add garam masala powder and some chat masala powder. You can pack this masala noodles for lunch box as well. It stays good. Ok friends, lets see how to make Maggi paneer masala noodles with step by step pictures.

Check out my Maggi Noodles Patties recipe too.


Maggi paneer masala noodles


Maggi paneer masala noodles recipe


Maggi paneer masala noodles recipe

Instant Maggi paneer masala noodles recipe for breakfast / dinner and lunch box


Cuisine: Indian
Category: Maggi recipes
Serves: 3
Prep time: 10 Minutes
Cook time: 20 Minutes
Total time: 30 Minutes


INGREDIENTS


  • Maggi veg atta noodles packet - 3 small ( Use any instant noodles)
  • Paneer / cottage cheese - 100gms ( chop into small cubes)
  • Cooking oil  or butter - 2 tbsp
  • Cumin seeds - 1/2 tsp
  • Big onion - 1 (Finely chopped or thinly sliced)
  • Ripe tomato - 2 (Finely chopped)
  • Red chilli powder - 1/2 tsp
  • Maggi taste maker powder - 3 packets
  • Turmeric powder - 1/4 tsp
  • Sugar - a pinch
  • Salt - little for masala
  • Water - 3.5 cups ( 3 + 1/2 cup)
  • Coriander leaves – to garnish

HOW TO MAKE MAGGI PANEER MASALA NOODLES

  1. Chop paneer into small cubes. Soak in hot water till use.
  2. Heat oil and splutter cumin seeds. Add chopped onion, tomato and saute well.
  3. Add chilli powder, turmeric powder and little salt, sugar.
  4. Add water, noodles tastemaker powder and bring to boil.
  5. Break the noodles and to boiling water. Cook till soft.
  6. Lastly add paneer cubes and chopped coriander leaves. Mix well and switch off the flame.
  7. Remove and serve hot immediately.

MAGGI PANEER MASALA NOODLES - STEP BY STEP PICTURES

  • Boil 2 cups of water. Switch off the flame. Chop paneer into small cubes as shown in the cover picture. Soak the paneer pieces in hot water till use. It helps to keep the paneer soft. Alternately you can shallow fry paneer cubes in little oil and add to the noodles at the end. 

  • Take 3 packets of any instant noodles along with taste maker powder. Finely chop onion, tomato into small pieces.
  • Maggi paneer masala noodles
  • In a wide kadai, heat oil. Splutter cumin seeds. Add finely chopped onion and saute till it becomes transparent. Add tomato pieces, required salt, sugar, turmeric powder, red chilli powder, garam masala powder(optional) and saute till tomato becomes mushy.
  • Maggi paneer masala noodles
  • Now add water and tastemaker powder. Let it roll boil. Now break the noodles into two parts and add to the boiling water.
  • Maggi paneer masala noodles
  • Keep the flame medium and let the noodles boil in open flame for 5 to 10 minutes till 80% of water is drained off. Toss in whenever needed to avoid burnt bottom. Now cover the noodles with a lid and cook in low flame for 2 minutes to cook till soft. But make sure it doesn’t become mushy.

  • Lastly add the soaked paneer pieces and finely chopped coriander leaves. Mix gently, switch off the flame and serve immediately. Enjoy !  ( I cut the paneer pieces into small cubes after adding to the noodles. So paneer looks big in step by step pictures than main picture)Maggi paneer masala noodles

Note

  • Adjust the quantity of chilli powder as per your taste.
  • You can also add 1/2 tsp garam masala powder for more masala flavor.
  • If you are using plain noodles instead of Maggi, you can replace tastemaker with more red chilli powder, coriander powder, garam masala powder and chat masala powder. 
Enjoy Paneer masala Maggi noodles at home. Kids would love it !
Maggi paneer masala

Continue Reading...


August 17, 2018

Cabbage Peas Biryani Recipe – Cabbage Rice Recipe

Cabbage biryani recipe

Cabbage peas biryani (Muttaikose pattani biryani in Tamil ) is an interesting biryani recipe that many of us never thought of making it. In my family, both Sendhil and Raksha are not a big fan of cabbage just because of its smell. So I always look for some flavorful recipes like cabbage kurma, cabbage vada, cabbage sambar where the smell of cabbage should not be dominant.

This Indian cabbage peas biryani is one such recipe. Its a very simple recipe that can be prepared in a pressure cooker directly. I tried it for our Sunday lunch. It came out so well. Everyone liked and had it without any complaints. The best part is you cannot even find a trace of cabbage’s raw smell in this biryani. Working women and bachelors can make this cabbage rice for your lunch box easily. Lets see how to make South Indian cabbage biryani recipe with step by step pictures.

Check out my Purple cabbage poriyal, Purple cabbage salad, Cabbage stir fry, Cabbage kootu recipes too.

Cabbage biryani recipe

Cabbage Peas Biryani Recipe - Cabbage Rice Recipe


Cabbage Peas Biryani Recipe - Cabbage Rice Recipe

How to make cabbage peas biryani recipe for lunch box.


Cuisine: South Indian
Category: Biryani Recipes
Serves: 3
Prep time: 10 Minutes
Cook time: 20 Minutes
Total time: 30 Minutes


INGREDIENTS

1 cup - 250ml
  • Chopped or grated Cabbage – 1 cup
  • Basmati rice – 1 cup
  • Water – 1.75 cups
  • Big onion – 1 (Sliced thinly)
  • Green chilli- 1 to 2 nos (adjust)
  • Ginger garlic paste – 1/2 tsp
  • Mint + coriander leaves – fistful
  • Turmeric powder - 1/4 tsp
  • Red chilli powder – 1/2 tsp
  • Garam masala powder – 1/2 tsp
  • Salt- as needed
  • Curd – 2 tbsp
  • Lemon juice – Few drops (optional)
To Saute in oil
  • Cooking oil + ghee - 2 tbsp + 1 tbsp
  • Cinnamon - 1 inch piece
  • Cloves - 2 nos.
  • Cardamom - 1
  • Star anise - 1
  • Bay leaf - 1
  • Black stone flower / Kalpaasi - 2 nos

HOW TO MAKE CABBAGE PEAS BIRYANI

  1. Wash and soak basmati rice. Wash and chop cabbage, onion and set aside.
  2. In a pressure cooker base, heat oil , ghee. Saute the biryani masala spices.
  3. Add sliced onion, gg paste and green chilli. Saute till onion becomes transparent.
  4. Add chopped cabbage , green peas and saute till it shrinks. Then add spice powders and salt.
  5. Saute for a minute. Add mint + coriander leaves. Mix well. Add soaked rice, water, curd.
  6. Mix well and pressure cook in low flame for one whistle.
  7. Fluff the rice gently with a fork without breaking the rice.
  8. Serve cabbage peas biryani with onion raita !

METHOD - STEP BY STEP PICTURES


  • Wash and soak 1 cup of basmati rice in 1.75 cups of water for 15 to 30 minutes . Wash and chop cabbage into thin slices. Chop onion, green chilli and set aside.
    Cabbage biryani recipe
  • Heat oil + ghee in a pressure cooker base. ( I used a kadai and transferred to a pressure cooker later). Splutter cinnamon, cloves, cardamom, bay leaf, star anise and black stone flower. Add onion, green chilli and ginger garlic paste. Saute till onion becomes transparent and raw smell of ginger garlic emanates.
    Cabbage biryani recipe
  • Add cabbage, frozen green peas and saute till it shrinks. Add red chilli powder, turmeric powder and garam masala powder. Add mint + coriander leaves and saute for a minute. Add curd and mix well.
    Cabbage biryani recipe Cabbage biryani recipe
  • Add soaked rice, water, salt and lemon juice (optional). Mix well and pressure cook in low flame for one whistle. Open the cooker after the steam is released. Mix gently with a fork without breaking the rice. Serve hot with onion raita !
  • Cabbage biryani recipe Cabbage biryani recipe
  • Enjoy ! 
Note
  • Adjust the quantity of spice powders as you like.
  • You can add 1 chopped tomato instead of lemon juice but color of biryani changes slightly.
  • You can also use jeera rice / seeraga samba rice instead of basmati rice.

Try this easy, yummy cabbage peas biryani and share your feedback with me !
Cabbage peas biryani

Continue Reading...


March 5, 2018

HomePuff Insulated Lunch Box Review


Last week I got Home Puff's Double Wall Vacuum Insulated, leak proof, Stainless steel Lunch Box of 1700ml capacity. I am sharing my reviews on this product after using it for one week. I have been using it regularly for packing Sendhil & Raksha’s lunch. Food stayed warm for more than 4 hours If you pack them really hot. I have tried packing Idli & sambar, Ven pongal, Sambar rice, Veg fried rice, Kuzhambu, Kootu, Dal tadka with rice and Veg biryani. Everything stayed warm for more than 4 hours. More over its completely leak proof which is a big relief for me. This insulated lunch box is much much better when compared with my old M****n steel lunch box. Friends, If you are looking for a good Insulated lunch box, you can go for Homepuff’s product. This product would be ideal for gifting too. I have also shared all the PROS & CONS based on my opinion. Have a look at them.


Home Puff Double Wall Vacuum Insulated - Stainless Steel Lunch Box With 3 Leak Proof,1700 Ml - Grey

PROS & CONS:
  1. Looks so good and professional.
  2. Its containers are with top grade stainless steel interior (304-Grade Stainless Steel) and exterior with Double Walled Vacuum Insulation for temperature control and durability over time. High Quality Lid with Silicone lining for heat insulation, BPA-free, non-toxic.
  3. Well Designed with 3 separate Leak proof food containers with silicone gasket rings to keep dry and wet food hot in the same. I have tried packing sambar, Dal tadka as well.
  4. Easy and comfortable to handle with good grip. Easy to carry too.
  5. Every HomePuff lunch box comes with bag which unzips into a tablemat. This bag is made up of specially coated aluminium material which repels water and food stains.
  6. Quantity of food would be enough for one adult/ 2 children.
  7. Food stays hot for 2 hours and becomes warm for more than 6 hours. Similarly cold foods remain cold for 2 to 3 hours.
  8. Warranty Details : 12 MONTH WARRANTY UNDER MANUFACTURING DEFECTS ONLY. DOES NOT COVER PHYSICAL DAMAGE, LIQUID DAMAGE & BURNT DAMAGES.
CONS :
  1. This product is a bit pricey.
  2. Looks big in size.
  3. It would be better if there is some partition in one of the containers. It helps to pack more dishes. 
  4. Please do not expect the food to be to hot. It stays warm around 60 to 70c upto 5 hours.
     

    Homepuff lunch box reviews
Continue Reading...


February 20, 2018

Vegetable Brinji Rice Recipe – Seeraga Samba Rice Pulao Recipe

Vegetable brinji rice
Brinji rice is a very popular rice variety in small hotels in Chennai. Long back I had shared a plain brinji recipe with coconut milk. Recently I came across a vegetable brinji rice recipe(Brinji sadam in Tamil) in Eesha’s kitchen YouTube video which is completely different from my earlier version. So I tried it for our Sunday lunch. I am not sure if this the original Chennai brinji rice. But it came out well and tasted more like biryani/ pulao made with coconut milk. We all loved it. But I felt there is no much difference between the taste of this veg brinji and biryani. There are many versions available for this particular recipe.

Some recipes call for using freshly ground masala. As I had already shared a plain brinji sadam recipe, I wanted to prepare it with vegetables. Friends, If any of you know the authentic Chennai brinji rice recipe, please let me know. I am ready to try again and update this post. I have used jeera rice as its popularly known as brinji rice. So you can call this rice as Seeraga samba pulao as well.

In the original recipe, it is prepared with basmati rice. So you can also use basmati or even Sona masoori raw rice to make this brinji. But the flavor and the quantity of water varies. For variations, you can add fried bread pieces at the end. As this recipe has no grinding job and done directly in a pressure cooker bachelors can give a try and pack it for your lunch box.

Ok, Lets see how to make Tamil nadu style Vegetable brinji rice with step by step pictures.

Check out my Plain brinji rice recipe, Jeera rice veg biryani and my 40+ veg biryani varieties.

I used my Preethi Zodiac mixer grinder for extracting coconut milk easily. So I have shared separate step by step pictures for the same. Please check it out if interested. Preethi zodiac has really made my cooking much easier by helping me in chopping, grinding, atta kneading etc. Friends, you can think about buying this product if you are planning to change your old mixer. 


COCONUT MILK EXTRACTION USING PREETHI ZODIAC
  • Take the coconut and cut into small pieces. You can also use grated coconut.Preethi zodiac coconut milk extractor
  • Now take the super extractor jar and fit the blade. Cover the spout with the cap. Put the coconut pieces and grind to a coarse paste without adding water.
Preethi zodiac coconut milk extractor
  • Now add the required warm water ( 1:1 ratio of coconut and water for thick milk) and grind continuously.Coconut milk collects in the jar.
Preethi zodiac coconut milk extractor
  • Pour into a bowl and use as required.
Preethi zodiac coconut milk extractor

Vegetable Brinji Rice Recipe


Vegetable Brinji Rice Recipe

How to make Chennai special Brinji rice with vegetables & coconut milk


Cuisine: South Indian
Category: Main course
Serves: Serves 2 to 3
Prep time: 5 Minutes
Cook time: 15 Minutes
Total time: 20 Minutes


INGREDIENTS

1 cup = 250ml
  • Mixed vegetables - 1/2 cup ( 1 small carrot, 2 beans, handful of green peas, 1 potato)
  • Basmati rice / jeera rice/ Raw rice - 1 cup
  • Cooking oil + ghee - 2 tbsp + 1 tbsp
  • Cinnamon - 1 inch piece
  • Cloves - 2 nos
  • Cardamom - 1 no ( crushed)
  • Bay leaf - 1 no
  • Black stone flower / Kalpasi- 1 no
  • Big onion - 1 no
  • Ginger garlic paste - 1/2 tbsp ( Use freshly ground paste for best taste)
  • Green chillies - 2 nos. ( Use 3 to 4 for spicy brinji)
  • Mint leaves - 2 tbsp
  • Ripe tomato - 1 no ( big, chop finely)
  • Coriander leaves - Few
  • Turmeric powder - 1/8 tsp
  • Red chilli powder - 1/2 tsp
  • Salt - as needed
  • Curd - 1 tbsp
  • Water + coconut milk - 1 cup + 3/4 cup
Fried bread pieces – Few (Optional)

METHOD

  1. Wash and chop all the vegetables into small cubes. Set aside.
  2. Heat oil + ghee in a pressure cooker. Saute the whole garam masala.
  3. Add sliced onion and saute till transparent.Saute GG paste till raw smell goes off.
  4. Add green chillies + mint leaves. Saute for a minute.
  5. Saute tomato + coriander leaves till mushy.
  6. Add spice powders, salt, curd and mix well.
  7. Lastly add water, coconut milk and let it roll boil. Add washed rice and pressure cook in low flame for one whistle.
  8. Remove the lid after steam is released. Fluff the rice and serve hot with raita, kurma or brinjal gravy as side dish.

METHOD - STEP BY STEP PICTURES

  • Wash the rice, drain the water completely and keep aside. No need to soak if using Jeera rice/ seeraga samba rice. If you are using basmati rice or raw rice, soak for 30 minutes.

  • Wash and chop vegetables into small cubes, slice onions, finely chop tomato. Heat oil in a pressure cooker base. Saute cinnamon, cloves, bayleaf, black stone flower and crushed cardamom.
    Vegetable brinji rice
  • Add onion, gg paste and saute till onion turns transparent. Add slit green chilli and mint leaves. Saute for a minute. Add tomato pieces, coriander leaves and saute till tomato becomes mushy.
    Vegetable brinji rice recipe
  • Add turmeric powder, red chilli powder and salt. Saute well and add curd. Mix well. Add water and coconut milk.
    Vegetable brinji rice recipe
  • After it comes to roll boil, add washed rice. Mix well and cover the cooker with a lid. Pressure cook in low flame for one whistle. Remove the lid after steam is released. Mix gently and serve hot with onion raita, vegetable kurma, Biryani brinjal gravy, tomato gravy etc.
    Vegetable brinji rice recipe
  • Enjoy !
Vegetable brinji rice recipe

Note

  • Adjust the quantity of green chillies as per your taste.
  • You can also use basmati rice or raw rice. In that case, soak the rice for minimum 30 minutes and use 1: 1.5 cups to 2 cups of water.  
  • You can skip red chilli powder and use green chillies alone. 

Yummy Tamilnadu style vegetable brinji rice is ready ! Try at home and relish with your favorite side dish !!
 Vegetable brinji rice recipe
Continue Reading...


November 26, 2017

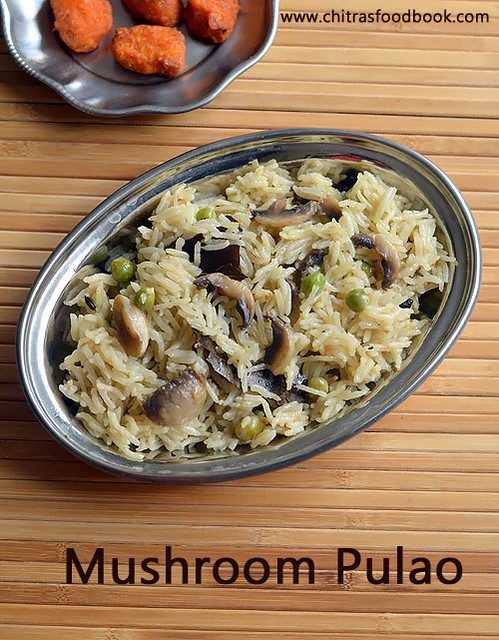
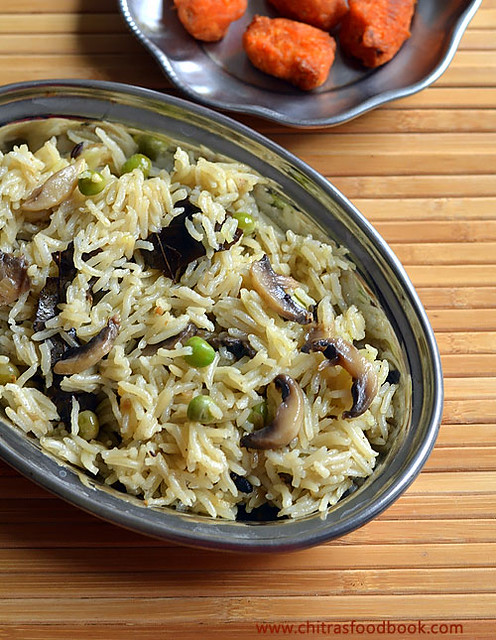
Mushroom Peas Pulao Recipe In Pressure Cooker – Indian Style Mushroom Rice Recipe

Mushroom peas pulao recipe
Last Sunday I prepared this Indian style mushroom peas pulao with some leftover mushrooms and fresh green peas in a pressure cooker. Its a very simple and easy pulao recipe just like my vegetable pulao. It can be prepared directly in an Indian pressure cooker. So it gets ready under 15 minutes. No grinding or big chopping works needed. You can prepare it for your lunch box easily and quickly. Since its a mild pulao recipe without much of garam masala powders, you can enjoy it with any spicy kurma as side dish. But my family liked it with simple onion raita. Usually people add coconut milk instead of water. But I used only water to cook the rice. Still it was good with nice flavor. Lets see how to make this simple and quick mushroom peas pulao with step by step pictures.

Check out my crispy mushroom 65


mushroom pulao

Mushroom Peas Pulao Recipe


Mushroom Peas Pulao Recipe

Mushroom Peas Pulao - Easy Pulao Recipe using a pressure cooker


Cuisine: Indian
Category: Mushroom Recipes
Serves: 3
Prep time: 10 Minutes
Cook time: 20 Minutes
Total time: 30 Minutes


INGREDIENTS

1 cup - 250ml
  • Mushroom - 10 nos
  • Green peas or dried peas - 1/4 cup
  • Basmati Rice - 1 cup
  • Water or coconut milk - 1.75 cups
  • Cooking oil+ Ghee - 2 tbsp + 1 tbsp
  • Cinnamon - 1 inch
  • Cloves - 2 nos
  • Cardamom - 1 no
  • Black stone flower/ Kalpasi - 2 small
  • Fennel seeds - 1/4 tsp
  • Bay leaf – 1 no
  • Big onion - 1 no
  • Ginger Garlic Paste - 1.5 tsp
  • Green chilli - 3 nos ( Use 2 for less spice)
  • Mint leaves - a handful
  • Salt - as needed
  • Lemon juice – Few drops

HOW TO MAKE MUSHROOM PULAO

  1. Wash and clean mushroom. Slice it and set aside.
  2. Heat oil + ghee in a cooker. Saute whole garam masala.
  3. Add onion, gg paste, green chilli, mint leaves and saute till transparent.
  4. Add mushroom, peas and saute for a minute. Add rice, saute for a minute.
  5. Lastly add water or coconut milk and mix well.
  6. Pressure cook in low flame for one whistle.

METHOD - STEP BY STEP PICTURES

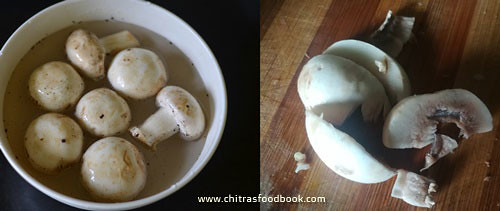
  • Wash and clean mushroom with a cloth. Remove the stem and slice it. Keep aside.Finely chop onion and slit the green chilli. Wash the basmati rice and set aside. No need to soak it.
    Mushroom peas pulao
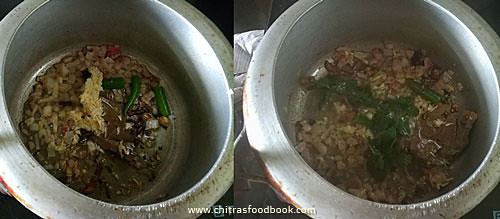
  • Heat oil + ghee in a pressure cooker base. Saute cinnamon, cloves, bay leaf, cardamom and black stone flower. Add fennel seeds, big onion, gg paste and green chillies. Saute in medium flame till onion turns transparent.
    Mushroom peas pulao
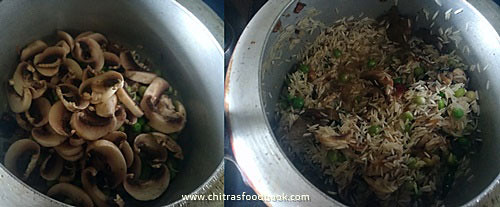
  • Add mint leaves, mushroom and peas. Mix well. Lastly add the washed rice and saute for a minute.
    Mushroom peas pulao
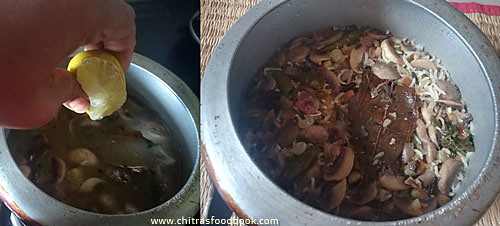
  • Then add 1.75 cups of water or thin coconut milk. Sprinkle few drops of lemon juice. Mix well and pressure cook in very low flame for one whistle. Remove the lid after the steam is released.
    Mushroom peas pulao
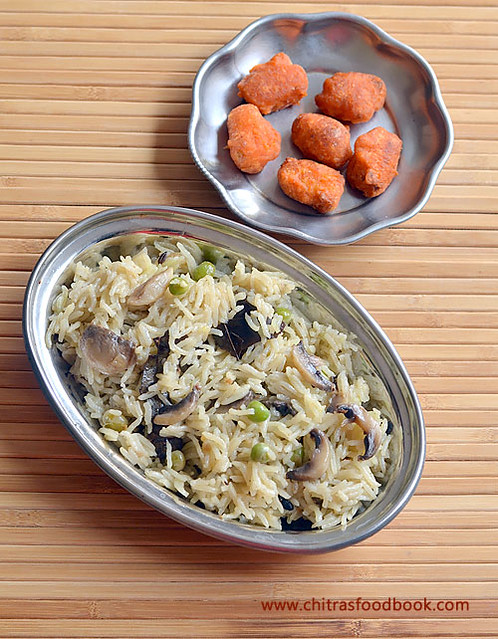
  • Mix gently, fluff the rice and serve hot with any spicy kurma or raita !
    Enjoy !

Note

  • Adjust the quantity of green chilli as per your taste.
  • You can use thin coconut milk instead of water.
  • I used lemon juice. You can saute one finely chopped tomato along with onion.

Try this easy, yummy, healthy mushroom pulao and enjoy ! I served with raita and Paneer 65.
Mushroom pulao recipe in pressure cooker
Continue Reading...


September 12, 2017

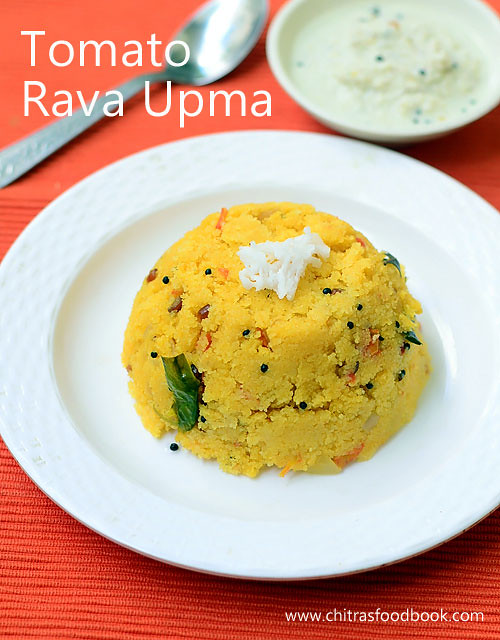
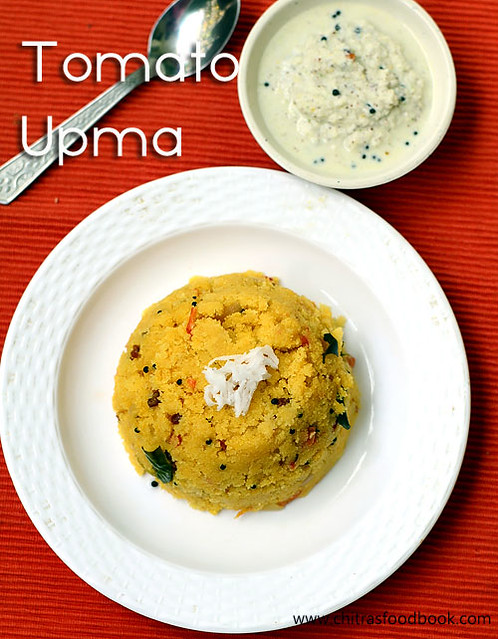
Tomato Rava Upma – Rava Upma Recipe With Tomato–How To Make Tomato Upma

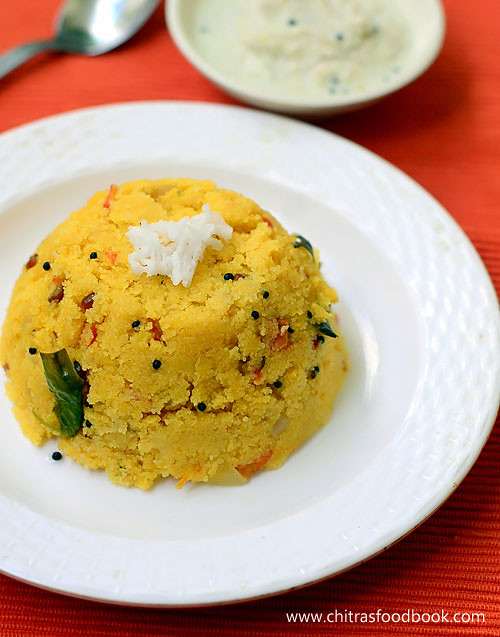
Tomato rava upma recipe / Rava upma with tomato with step by step pictures - Tomato rava upma is an yummy, instant, South Indian breakfast recipe with a nice variation from our regular rava upma. Usually I add tomato and vegetables only for rava kichadi but this morning I prepared rava upma with tomato just for a change. Basically I am a big fan of tomato based recipes. Even though I don’t like rava upma, I loved this tomato rava upma a lot. It tastes tangy and spicy as well just like rava kichadi. If you wish you can add green peas in this upma to make it look colorful.
Tomato rava upma
I had some leftover upma for my dinner too. It was good and stayed soft. So you can pack it for lunch box as well. Friends, If you are bored of making rava upma, do try this tomato upma for your breakfast or dinner. It tastes good with coconut chutney as side dish. Try and let me know your feedback . My School moms friends make Karnataka style tomato rava bath. I will ask them and share that recipe later. Now lets see how to make this Tamil nadu style tomato upma recipe with step by step photos.

Do check out my Basic Rava Upma, Rava kichadi, Masala Rava Kichadi, rava upma mix, rava pongal, Karnataka Khara bath recipes too !

Tomato upma recipe


Tomato rava upma - Tomato upma recipe

Tomato rava upma

How to make Tomato rava upma recipe

South Indian
Main Course
2-3

Ingredients (1 cup - 250ml)

  • Coarse rava/Sooji/Semolina - 1 cup
  • Cooking oil - 3 tbsp
  • Mustard seeds - 1 tsp
  • Urad dal - 1/2 tbsp
  • Chana dal - 1 tbsp
  • Ginger - 1/2 inch piece (Finely chopped)
  • Green chilli - 2 nos(Slit)
  • Big onion - 1 no (Finely chopped)
  • Curry leaves - Few
  • Ripe tomato - 2 nos(Finely chopped)
  • Sambar powder or Red chilli powder - 1 tsp
  • Turmeric powder - 1/8 tsp
  • Salt - as needed
  • Water - 2.5 cups
  • Coconut oil or ghee - 1 tbsp (to add at the end)
  • Coriander leaves - 1.5 tbsp(to garnish)
  • Grated coconut - 2 tbsp (to garnish, optional)

How to make the recipe

  1. Wash and chop tomato, onion into small pieces.
  2. Roast rava till nice aroma arises.
  3. Heat oil, Temper mustard, dals.Saute the vegetables adding salt.
  4. After tomato becomes mushy, add spice powders.
  5. Mix well and add water. After water comes to boil, add rava.
  6. Mix well, cover cook for 5 minutes.
  7. Add coconut oil / ghee.Garnish with coriander leaves and serve with coconut chutney.

Tomato Rava Upma Recipe - Step by step photos

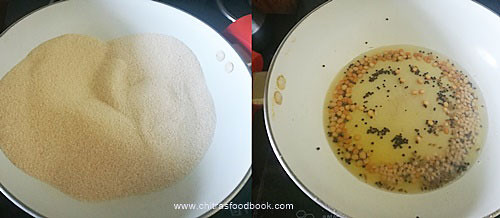
  • Wash and chop the tomato, onion, chilli.Set aside.Dry roast rava for 7 minutes in medium flame without burning it.Keep in a plate.
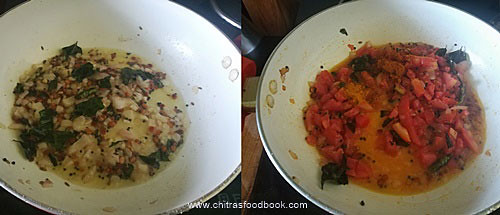
  • Heat oil in a kadai.Splutter mustard seeds, urad dal, chana dal and curry leaves. After it turns golden, add finely chopped onion and slit green chilli.
    Tomato rava upma recipe
  • After onion becomes transparent, add finely chopped tomato.Saute till tomato becomes mushy. Add salt to cook tomato quickly.
    Tomato rava upma recipe
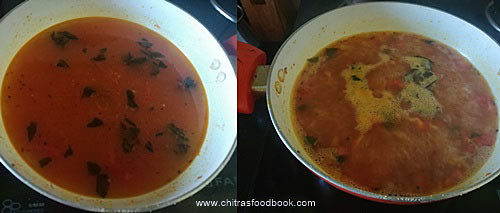
  • Add red chilli powder or sambar powder and turmeric powder. Mix well till raw smell goes off.Add water and let it roll boil.
     Tomato rava upma recipe
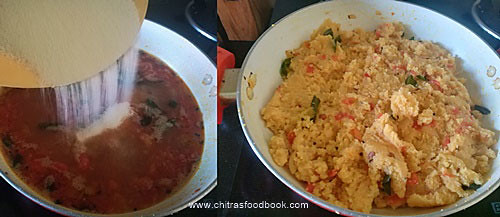
  • Lower the flame completely.Add the roasted rava in a sprinkled way using one hand while stirring constantly with other hand. It helps to avoid lumps.Once all the rava is added, it absorbs the water and becomes thick. Cover it with a lid and cook for 5 minutes in low flame.Mix once in the middle.
    Tomato rava upma recipe
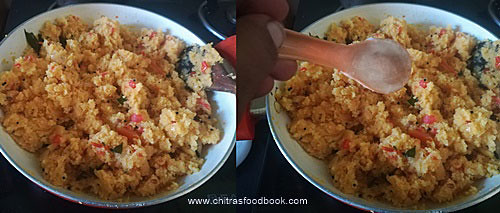
  • Switch off the flame after rava is cooked soft. Add coconut oil or ghee. Garnish with coriander leaves.Mix well and serve hot with coconut chutney!
    Tomato rava upma recipe

Notes

  • Adjust the quantity of chillies as per your taste.
  • For variations, you can add 1/2 tsp garam masala powder for masala flavor.
  • Remember to add rava in a sprinkled way to avoid lumps.
  • No need to add more water. Adding more water makes it  like kichadi.
  • You can use wheat rava instead of semolina and make the same. But add 3 cups of water.
  • Color of this upma varies as per the chilli powder you use. Use Kashmiri chilli powder for bright red color.
Tomato rava upma tastes the best with coconut chutney. Do give a try !

Tomato rava upma recipe
Continue Reading...