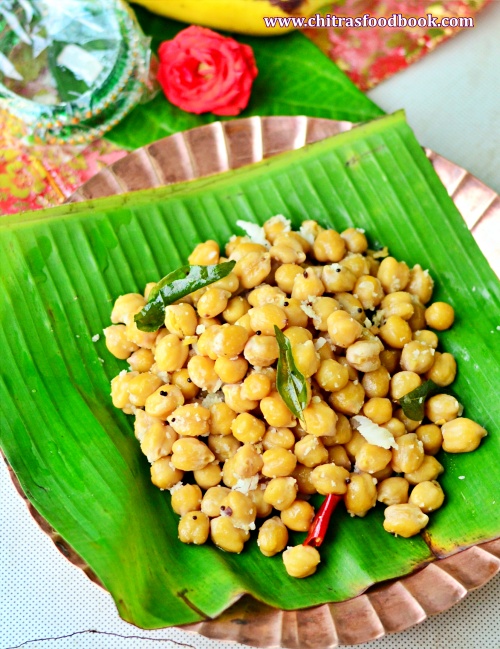
Every year during Varalakshmi Vratham, I post some Andhra special recipes. So today’s post is an Andhra style sundal recipe which is called as guggillu in Telugu. Here I have used brown chana / black chana ( Sengalau in Telugu, Chickpeas in English) to make this sundal for varalakshmi pooja vrat and neivedyam. You can use white chickpeas / kabuli chana to prepare this dish. It is also prepared in most of the temples and served as prasadam. In Telugu, chana sundal recipe is called as Senaga Guggillu. Its not only a healthy and simple recipe but tastes delicious. In Tamilnadu, we call this as karuppu konda kadalai sundal. Both the recipes are almost similar in preparation with slight variations in ingredients. Friends, do check out the Senaga guggillu recipe with step by step pictures and prepare this for Varalakshmi Vratham festival tomorrow.
Black chana / Brown chana / Senagalu / Konda kadalai - 1 cup
Water - to soak chana
Salt - as needed
To temper
Cooking oil - 1 tbsp
Mustard seeds - 1 tsp
Urad dal - 1 tsp
Chana dal - 2 tsp
Cumin seeds - 1/2 tsp
Curry leaves - Few
Ginger - 1 tsp (finely chopped)
Red chilli - 1 (Pinched into two)
Green chilli - 1 (Slit into two)
Asafetida/ Hing - 1/4 tsp
Turmeric powder – 1/4 tsp
To Garnish
Coriander leaves - 2 tbsp
Grated coconut - 1/3 cup
HOW TO MAKE SENAGA GUGGILLU / BROWN CHANA SUNDAL
Wash and soak chana/ chickpeas overnight or for minimum 6 hours.
In a pressure cooker, cook the chana adding required water.
Cook in low flame for 2 whistles. Open the cooker, drain the excess water.
Heat oil in a kadai. Temper mustard seeds, urad dal, chana dal, red chilli, green chilli, curry leaves and hing.
Add cooked chana, turmeric powder, required salt and mix well. Boil for few minutes.
Lastly add the grated coconut, chopped coriander leaves and mix well.
Cook for a minute and remove in a plate. Offer to God and serve as prasadam.
METHOD - STEP BY STEP PICTURES
Wash and soak brown chana/chickpeas in water overnight or for minimum 6 hours. TIP : If you want to make soft sundal, add a pinch of baking soda while soaking the chana. Drain the water before cooking. Add fresh water, wash it once and then pressure cook it.
Take a pressure cooker, add the soaked chana. Add required water to cover it. Close the cooker and keep in high flame till steam / vapour starts to come out. Lower the flame immediately. Cook for 2 whistles in low flame. Switch off the flame.
Open the cooker and drain the excess water. Reserve the cooked chana in a plate.
Heat oil in a kadai and when it gets heated, splutter mustard seeds, urad dal, chana dal, hing, curry leaves, red chilli, green chilli, chopped ginger. Saute till dal turns golden in color.
Add the cooked chana/ senagalu, turmeric powder and required salt along with little water. Mix well and boil till all the water is evaporated.
Lastly add the grated coconut, finely chopped coriander leaves. Mix well and offer as prasadam/ naivedaym to God. Later you can serve everyone. Enjoy !
Note
For variations, you can skip green chilli and use more red chillies.
Don’t skip hing / asafetida as it helps to prevent gas trouble from boiled chana.
You can also use white chana instead of brown ones.
If you like, you can sprinkle lemon juice at the end to get a mild tangy taste.
Andhra style brown chana sundal recipe is ready to relish !
I prepared pottukadalai urundai with jaggery for Karthigai deepam festival. Even though It was my first trial, it was so easy to make. It came out very well. Its cooking procedure is similar to kadalai mittai/ peanut chikki. Roasted gram dal also known as chutney dal( pori kadalai / pottukadalai in Tamil) should be fresh and crispy. The consistency of jaggery syrup is important to make this urundai perfect. Its a healthy snack for kids. Friends, do try it and share your feedback with me. Lets see how to make pottukadalai urundai with jaggery with step by step pictures.
Pottukadalai urundai recipe with jaggery
Pottukadalai urundai recipe with jaggery - It can be prepared for Karthigai deepam, Navaratri festival.
Pottukadalai / roasted gram dal / chutney dal - 1 cup
Powdered jaggery - 1/2 cup
Cardamom powder - 1/4 tsp
Water - 1/4 cup
Ghee or rice flour - to grease the hands
HOW TO MAKE POTTUKADALAI URUNDAI
Heat a kadai and roast the pottukadalai till its hot. Switch off and cool down.
Melt jaggery in a kadai adding water. Strain the syrup.
Boil the jaggery syrup till frothy. Pour few drops of syrup and gather with fingers.
It should form a hard ball with firm shape. Switch off the flame at this consistency.
Add the fried gram dal and mix quickly. Grease hands with ghee and make balls.
Arrange in a plate. Store in an air tight box and enjoy.
METHOD - STEP BY STEP PICTURES
Heat a kadai and roast the pottukadalai for 2 minutes without changing the color. Switch off the flame and let it cool down. Transfer to a plate.
Take jaggery in a wide kadai. Add water and melt it. Strain the syrup using a wire mesh.
Wash the kadai and add the syrup. Boil till frothy and thick. Take little water in a plate. Add few drops of syrup. Try to gather using your fingers and make a hard ball. It should make a “tong” sound when your drop it.
Switch off the flame and add the cardamom powder, fried gram dal / pottukadalai. Mix quickly to coat the syrup.
Grease your hands with ghee or rice flour. Make balls roughly when hot. Roll it tightly once it becomes warm. Arrange in a plate. After making the balls, you will find some dal sticking to the kadai. To remove the dals that is sticking to the kadai, heat the kadai slightly. Remove with a ladle and make the balls.
Store in an air tight box. Stays good for a week.
Enjoy !
Note
Pootukadalai should be crispy. So do not skip the roasting part else urundai may turn soggy.
The consistency of jaggery syrup is important to get the perfect urundai. It should make a hard ball.
Try this easy, healthy pottukadalai urundai with jaggery and give your kids. They will love it !
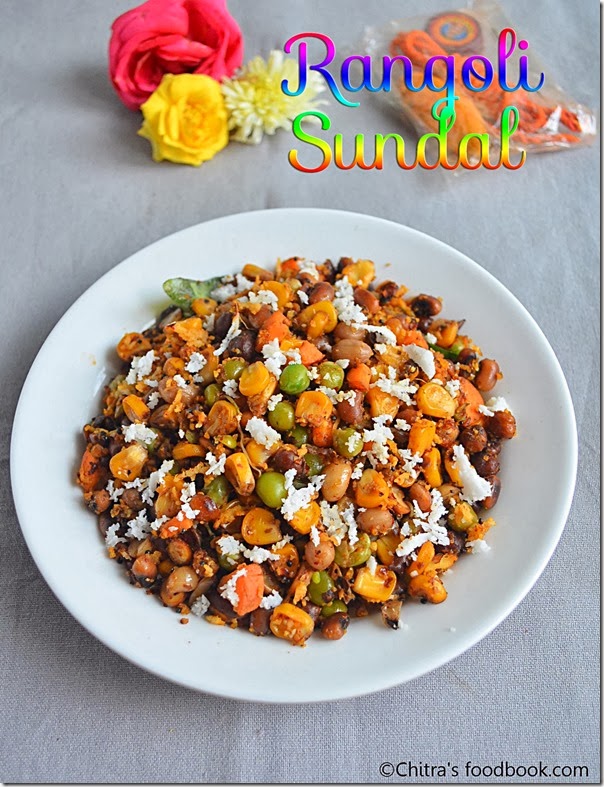
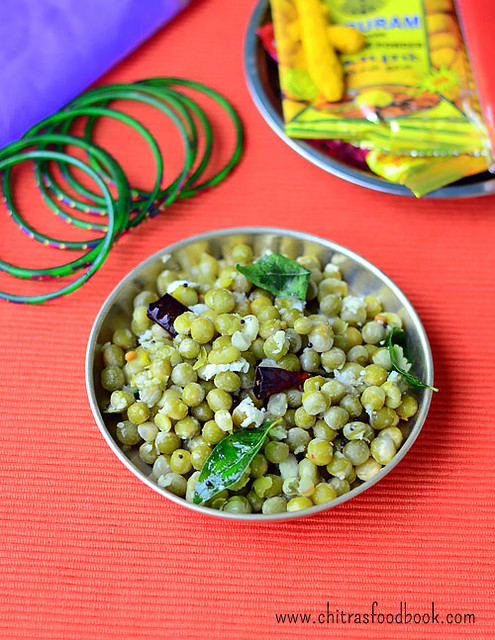
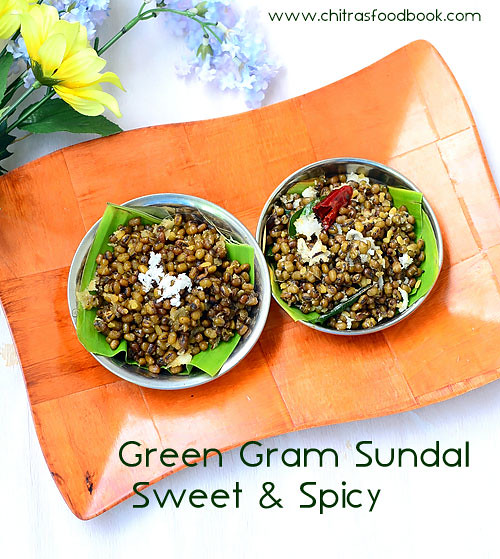
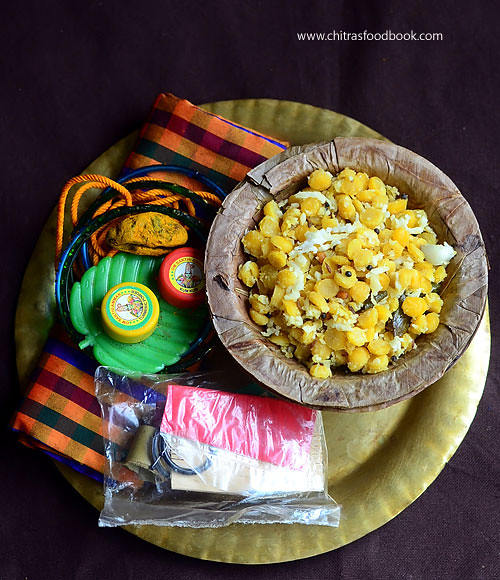
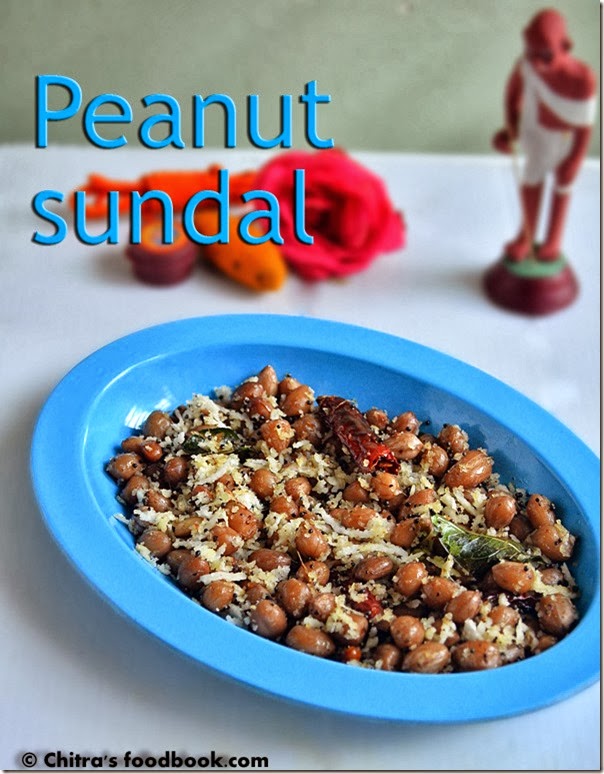
In South India, Sundal is the most important and must prepare prasadam recipes during Navaratri. 9 varieties of sundal is prepared during these nine days / 9 sundal vagaigal (Nava means 9 , ratri is night) festival in Tamil nadu. Apart from tradition, there are some scientific reasons to consume legumes / navadhaniyam during Navratri days. Though we can make varieties of sweets and snacks, sundal recipes are mainly prepared and distributed as prasad to friends and relatives who visit our house Golu.
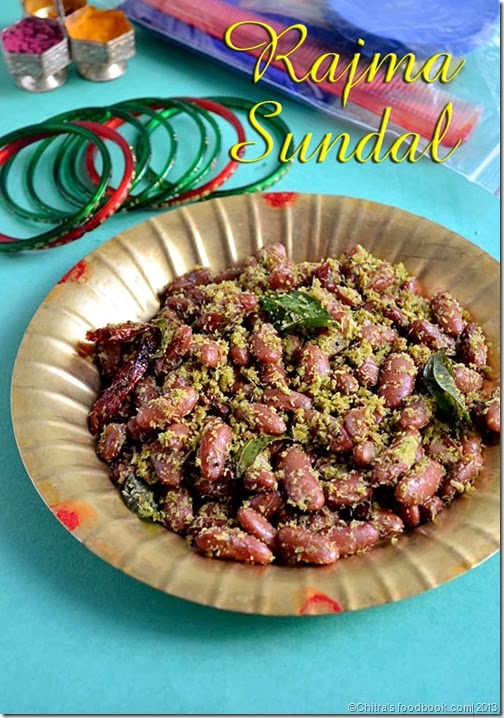
The most common sundal varieties are chana /chickpeas/ kondakadalai sundal using white and brown ones, peas/ pattani sundal, green gram dal / pachai payaru sundal, Cowpeas / karamani sundal, Field beans/ mochai sundal, Kidney beans / rajma sundal, moong dal/ paasi paruppu sundal, and 9 mixed legumes / navadhaniyam sundal.
The basic preparation of sundal recipes is very simple. For this, legumes are soaked overnight, pressure cooked, tempered with spices and finally garnished with grated coconut. Some sundal recipes like chana dal sundal, sweet corn, green gram, cowpeas, moong dal sundal recipes can be prepared instantly without soaking.
All sundal recipes should be prepared without onion and garlic as we are offering to God. But nowadays people make variations by adding garam masala, sundal powder etc. So far I have shared more than 15 different types of sundal recipes in my blog. Lets see the list of all sundal recipes under one page in this post.
Kara seedai / Spicy seedai recipe is one of the easy and interesting seedai varieties. Recently we bought this seedai in a shop and loved its spicy taste. For every Gokulashtami /Krishna jayanthi, we get varieties of seedai in Salem Lakshmi sweets. I have seen masala seedai, mint seedai, kara seedai, vennai seedai in the menu. I wish to try all of them and share in my blog. To begin with, I started with this kara seedai recipe.
Traditionally seedai recipe is prepared using processed rice flour/ homemade rice flour by soaking and grinding raw rice/ maavu arisi. But its a time consuming process to make a small batch. So I started using store bought idiyappam flour or kozhukattai flour to make sweet seedai and spicy seedai.
I have tried Double horse, Nirapara, Anil brands so far. All are good. Even if we use store bought dry flour, we must roast it to make crunchy seedai. If you make seedai without roasting the rice flour, seedai may stick to the tongue while eating. It won’t be light and crunchy as well. Also this seedai takes more time to cook. So you have to fry it patiently. Please keep this point and try this recipe. I am sure you won’t be disappointed with the results. I have also used pottukadalai maavu instead of roasted urad dal flour/ uluthamaavu. Color of the seedai may vary based on the quantity of chilli powder. Mine was not so dark in color but it tasted spicy and flavorful just like store bought ones.
Friends. do try this kara seedai recipe for this Krishna jayanthi festival and share your feedback with me.
Store bought idiyappam flour / kozhukattai flour - 1/2 cup
Roasted gram flour / Pottukadalai maavu - 1 tbsp
Soft butter - 2 tsp (at room temperature)
Red chilli powder - 1/2 tsp
Hing/ asafetida - 1/4 tsp
Powdered coconut - 1/2 tsp (optional)
Cumin seeds or black sesame seeds - 1/2 tsp
Salt - as needed
Cooking oil - to deep fry
HOW TO MAKE KARA SEEDAI RECIPE
Heat a kadai and dry roast the rice flour in medium flame for few minutes.
Remove the flour as soon as it starts to fume slightly.
Cool down the flour, Sieve and take rice flour, roasted gram flour. Add other ingredients except cooking oil and water.
Mix well to spread the butter evenly. Add water gradually and make a soft, smooth, non-sticky dough.
Roll seedai and spread in a cotton cloth, rest for 5 minutes and deep fry in oil.
Fry in batches by tossing them till bubbles cease. Remove and drain in a tissue.
Cool down and store in a box. Enjoy for a week !
KARA SEEDAI RECIPE - STEP BY STEP PICTURES
Heat a kadai and dry roast the idiyappam / kozhukattai flour for few minutes in medium flame without burning. Remove as soon as the flour starts to fume. Switch off the flame and draw a line to check it. Cool down.
Sieve the rice flour and roasted gram flour to a avoid bursting( most important step). Add chilli powder, salt, hing and powdered coconut. Add soft butter at room temperature. Mix it well to spread the butter evenly.
Add water gradually and make a smooth, non-sticky , soft dough. Roll seedai and spread in a cotton cloth. I got around 100 seedai. Make 2 rod shapes for baby Krishna. Let it dry for 5 minutes.
Heat oil to deep fry. Drop a pinch of dough. If it rises to the top immediately, oil temperature is right. Fry a batch of seedai in medium flame. Do not disturb or stir the seedai as soon as you drop them. Leave for a minute and then toss the seedai gently. (If you are a beginner and afraid of seedai bursting in oil, try this tip. Heat oil in a small tadka kadai. Drop one or two seedai and check it it burst or disperse in oil, If not, you can proceed for frying in big batches).
This seedai takes more time to cook. So cook it patiently in medium flame by tossing it in between. Remove the seedai after the bubbles cease. Do not burn them.
Remove in a tissue paper and drain the oil. Seedai becomes slightly darker in color as it cools down. It becomes more crunchy the next day. Store in an air tight box once the seedai cools down completely. It stays good for a week.
Enjoy !
Note
Adjust the quantity of red chilli powder as per your taste.
Do not forget to sieve the flour to avoid bursting.
Dry roast the rice flour for best seedai. Do not skip it.
Try this easy, yummy, Kara seedai recipe and share your feedback with me.
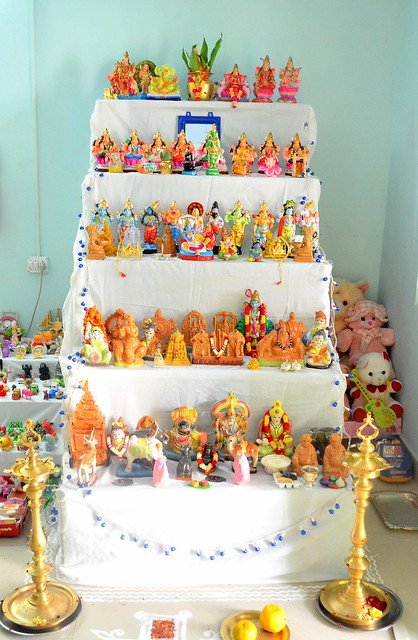
In this post, you can find the list of naivedyam / varalakshmi pooja prasadam recipes of Tamil nadu, Andhra pradesh and Karnataka for Varalakshmi viratham. Varalakshmi Vratham/Varamahalakshmi festival (Varalakshmi poojai in Tamil) is the most auspicious festival celebrated by married woman (Hindu) to commemorate Goddess Mahalakshmi. "Vara" means "boon" and Goddess Lakshmi grants all boons to those who performs pooja with utmost devotion on this day. People of South Indian states like Tamil nadu, Andhra and Karnataka and North Indian states like Maharashtra and Orissa celebrate this festival in a grand manner. This festival usually falls on the second Friday of August/ Sravana masam (Avani in Tamil). In 2023, its on August 25, Friday.
Goddess Lakshmi loves special dishes prepared with milk, jaggery, rice, coconut, dal and ghee. So people offer 3, 5, 7 or 9 dishes for Varalakshmi pooja naivedyam / prasadam with these ingredients as major ones. Sweet pongal, Payasam, tamarind rice, lemon rice, curd rice, kesari, vada, panakam, sundal, nombu kozhukattai, sundal are the major neivedyam recipes prepared in Tamil nadu for varalakshmi nombu. Apart from this, people also offer white rice (cooked raw rice), cooked dal (paruppu) and little ghee for Mahanaivedyam. Some people also make raw rice idli.
In Andhra, people offer boorelu, bellam paramannam, pulihora, garelu, chakkara pongali, guggillu, panakam, pappu unta, daddojanam, perugu vada and sundal. In Karnataka Chitranna, bele holige, vada, kosambari, shavige payasa, panaka, sihi pongal, chakli, kodubele are offered to Goddess. In all these states people make similar naivedyam recipes but the preparation method and ingredients are slightly different. I have listed all the possible Varalakshmi festival special dishes for each state. Hope you will find this list useful to choose and prepare naivedyam.
Wish you all a very happy Varalakshmi pooja. May the Goddess bless us with all the goodness of life !
Carrot kheer is our family favorite Indian dessert recipe. We call it as carrot payasam in Tamil. Sendhil likes to eat carrots either raw or in the form of halwa, kheer more than kootu, poriyal. So I try to make this Indian style dessert at least once in a month for my Thursday Guru pooja or Friday Lakshmi pooja neivedyam. Usually I make carrot kheer by grating the carrot, saute in ghee and cook in milk. Mostly I make it in a kadai and its time consuming too.
Recently I came across this carrot kheer recipe in a pressure cooker in a YouTube video and tried it for Thursday Guru pooja prasad. It came out very well and finger licking good. We loved it. Its easy and quick to prepare too. All you need is just to pressure cook sliced carrots, grind to a puree. Add sugar, milk and cardamom powder. Boil for few minutes and serve. The entire work gets over under 15 minutes. I made this kheer in a simple way without using condensed milk.
For variations, you can use condensed milk in place of sugar. It tastes more rich and creamy. This carrot kheer is a crowd pleaser and party friendly recipe. It can be served both warm and cold. I am sure everyone will love it. Friends, do try this easy carrot kheer recipe in a pressure cooker and share your feedback with me. Please check the video below.
Pressure cook the carrot adding water, cashews and almonds in low flame for one whistle.
Grind the carrot and nuts to smooth paste. Add to cooker.
Add milk, sugar and cardamom powder. Boil for few minutes.
Garnish with saffron threads. Roast chopped cashews in ghee and add to carrot kheer.
Serve warm or hot. Enjoy !
METHOD - STEP BY STEP PICTURES
Wash and peel the carrot. Trim the top and bottom part. Cut into roundels.
Take the chopped carrot in a pressure cooker. Add 1 cup of water, 5 cashewnuts and 5 almonds. Pressure cook in very low flame for one whistle. Open the cooker after the steam is released.
Grind to a smooth batter after carrot cools down. Take the pureed carrot in the pressure cooker or a kadai. Add 1.5 to 2 cups of milk, required sugar and cardamom powder. Mix well and boil till sugar dissolves completely.
In the mean time, heat a small kadai. Roast chopped cashewnuts till golden brown. Add to the carrot kheer and switch off the flame. Garnish with saffron threads. You can serve it warm or chilled by refrigerating it for few hours.
Enjoy this yummy carrot kheer. Its a crowd pleaser. You can make it for parties or get together. It stays good for 2 days in refrigerator. So you can make it in advance and serve chilled. Tastes creamy and delicious.
Note
You can adjust the quantity of sugar as per your taste.
Quantity of milk can also be reduced or increased based on the thickness you need. I made it slightly watery.
This kheer thickens as it cools down. So you can add more water or boiled milk and bring to serving consistency.


.jpg)