Yesterday I prepared carrot halwa with khoya in pressure cooker (Gajar Ka Halwa With Khoya) without using milk/condensed milk for the first time. I made it for my Thursday Guru Pooja prasad. It came out very well. As I made in pressure cooker, I made it very quickly and easily. Carrot halwa is my favorite dessert in restaurant.
My Lunch buffet in restaurants would be incomplete without tasting hot
carrot halwa with a scoop of cold vanilla ice cream. Its a divine combo. Long back I had shared
carrot halwa (Gajar halwa in Hindi) recipe without khoya in pressure cooker. In that recipe, I used milk to cook carrot. But here I made it without milk as we are adding khoya in it. I used water instead of milk. So the color of my halwa came out bright in color.It tasted like the one we get in sweet shops and hotels. I was very happy with the results. You too give this recipe a try and share your feedback with me.
I have also shared some tips and variations in the method with step by step pictures section for better understanding. Hope beginners would try this carrot halwa recipe and make it easily. So, lets see how to make Carrot halwa/Gajar ka halwa with khoya in a pressure cooker.
Also check out my
easy beetroot halwa in a pressure cooker which is a super hit recipe in this website. If you want make carrot halwa in a kadai instead of cooker, you can looks at
THIS RECIPE.
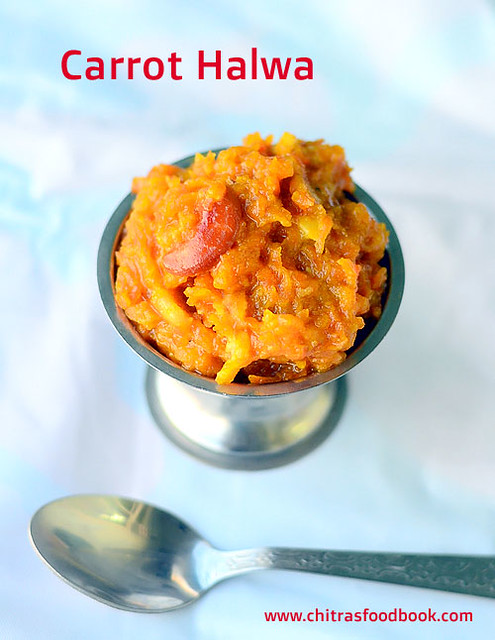
Carrot halwa with khoya in pressure cooker - Gajar Ka Halwa Recipe

How to make carrot halwa with khoya / Gajar halwa with khoya in pressure cooker
Cuisine: Indian
Category: Sweet
Serves: Serves 2
Prep time: 10 Minutes
Cook time: 10 Minutes
Total time: 20 Minutes
1 cup - 250ml
- Grated carrot - 2 cups ( I used 4 medium sized carrots)
- Sugar - 1/3 cup (Granulated crystal sugar)
- Grated or crumbled khoya - 1/3 cup ( I used milky mist brand)
- Cardamom powder - 1/2 tsp
- Water - 5 tbsp ( You can also use boiled milk)
- Ghee - 2 tbsp
- Cashews - Few
|
HOW TO MAKE CARROT HALWA WITH KHOYA
- Crumble or grate khoya, set aside.
- Wash,peel skin and grate carrot in big holed grater.
- Heat ghee in pressure cooker base and roast cashews. Saute carrot till raw smell goes off.
- Add water and cook in high flame for 2 whistles. Carrot cook well and becomes soft.
- Add sugar and mix till halwa starts to leaves the sides. Add khoya,cardamom powder. Switch off the flame immediately.
- Mix well till Khoya combines with carrot. Remove and let it cool down.
- Halwa becomes non-sticky when it becomes warm. Serve warm & enjoy with ice cream.
METHOD - STEP BY STEP PICTURES
Note
- If you want carrot to be visible in the halwa,you must use a grater with big sized holes.
- Carrot halwa smells raw if you don’t saute it well. By the time you saute, carrot gets half cooked.
- Pressure cooking helps carrot to cook quickly. I added little water to cook carrot as I wanted bright colored halwa. Adding milk makes the halwa pale orange in color.
- As we are adding khoya,there is no need to add milk for cooking carrot. But cooking in milk makes the halwa more rich.
- Do not add more khoya than the mentioned quantity. It makes the halwa sticky.
- Do not add less sugar. It makes the halwa smell raw. Do not stir the halwa for long time after adding sugar. Sugar caramelizes and halwa becomes chewy.
|
Try this easy, yummy Carrot halwa with khoya and enjoy with ice cream!
Technorati Tags:
carrot halwa with khoya,
carrot halwa with khoya in pressure cooker,
gajar ka halwa with khoya in pressure cooker,
gajar ka halwa with khoya without milk,
gajar halwa with khoya step by step,
gajar ka halwa without milk,
carrot halwa with khoya recipe,
carrot halwa without milk,
carrot halwa pressure cooker,
carrot halwa without condensed milk,
gajar halwa with khoya
Continue Reading...