Search Chitra's Food Book

December 3, 2012

CHILLI GARLIC FRIED RICE | CHINESE RECIPES


I took this recipe from a magazine & made in a weekend along with veg momo. Its a very simple recipe and tastes good. If u r a garlic lover and if u want to try chinese cuisine, then this recipe is for u.. It tastes great with tomato sauce …Smile with tongue out
INGREDIENTS
  • Basmati rice – 1/2 cup
  • Garlic cloves – 4 nos (Small)
  • Red chillies – 3-4 nos
  • Finely chopped spring onion – 1/8 cup ( i used stem of coriander leaves )
  • Ajinomotto – 1/4 tsp
  • Soya sauce – 1/2 tsp
  • Cooking oil – 2-3 tbsp
  • Salt – as needed
  • Water – 1 cup (to cook the rice)
METHOD
  • Wash and soak the rice for 30 minutes in 1 cup of water . Add little salt and cook till its done.Spread the rice in a plate..
  • Grind 2  red chillies along with garlic cloves with little water & set aside. ( It may not ground smooth , but try the max)
  • Heat oil in a a kadai and add the remaining 1 or 2 red chillies ( pinch into two)  and the ground paste. Saute till raw smell leaves it..
  • Now add the cooked rice ,ajino motto , soya sauce & the required salt ..Mix well for few seconds. Add the finely chopped spring onions , mix well and switch off the flame.
  • Serve hot with sauce/ketchup !!
NOTE
  • U can also try the same adding finely chopped vegetables to make it healthy..
  • Adjust the amount of red chillies according to ur taste buds.
  • U can also replace sesame oil instead of cooking oil.

Continue Reading...


December 1, 2012

Kathirikai Gothsu - Chidambaram Brinjal Gothsu - Side Dish For Idli Dosa


Chidambaram Kathirikai gothsu
(Updated picture)
I got this Chidambaram Kathirikai gosthu / brinjal gosthu recipe from my friend Swarna. She had learnt it from a Chidambaram cook. I have tried this 3 times so far. Recipe for Kathirikkai gothsu powder is so simple. We can make it once & store for weeks. 

Basically I am a big fan of brinjal but my husband hates it. But the good thing about this recipe is he liked it a lot and gave approval to make it often. The consistency of this gothsu should be very thick like a paste but we love to have it in semi gravy consistency. As I haven't tasted the original authentic gosthu in hotel & temple style gosthu, I tried in both the ways and shared the pictures here. Please make it as you like. It tastes the best when made with sambar onions. So use small onions only. I heard this is the best side dish for Pongal. But we like to have it with idli. 

For gothsu powder, I followed my friend’s recipe but I saw so many variations in this recipe like adding methi seeds, toor dal etc. Anyways it tasted great. Please have a look at the notes section too. Do try and let me know how u like it. Lets see how to make Chidambaram special Kathirikai gothsu.

Check out my another easy, one pot brinjal gosthu version HERE.

Here is the old picture !
 Chidambaram brinjal gothsu

Chidambaram special Kathirikai gothsu / Brinjal gothsu


Chidambaram special Kathirikai gothsu Chidambaram special Kathirikai gothsu recipe for idli, dosa. 
Cuisine: Indian
Category: Side dish for idli pongal
Serves: Serves 3
Prep time: 10 Minutes
Cook time: 20 Minutes
Total time: 30 Minutes
INGREDIENTS

  • Brinjal – 5 nos (medium sized)
  • Tamarind – Big gooseberry size (adjust)
  • Small onion – 15 to 20 nos
  • Salt & water – As needed
For gothsu powder ( to dry roast & powder)
  • Coriander seeds – 1 tbsp
  • Red chillies – 4-6 nos ( long variety)
  • Chana dal - 1/2 tbsp
For large quantity (to grind n store)
  • Coriander seeds - 1/4 cup
  • Red chillies - 12-15 nos (long variety)
  • Chana dal - 1.5 tbsp
To temper
  • Cooking oil – 1 tbsp
  • Mustard seeds – 1/2 tsp
  • Urad dal – 1 tsp
  • Hing – 1/8 tsp (optional)
  • Curry leaves – few ( pinched)
Gingely oil/Nalla ennai – 1 tbsp( to add at the end)
HOW TO MAKE CHIDAMBARAM GOSTHU - METHOD

  • Dry roast dhania , chana dal & red chillies (1/2 tsp methi seeds – optional) in low flame for 2-3 mins till dhania starts to splutter. Make sure you dont burn them. Then grind them to a fine powder and set aside. Please add the mentioned amount of red chillies while making gotsu powder because if you reduce the chillies, gothsu powder may taste bitter and it will spoil the taste of gothsu. 
  • In that case , add little red chilly powder and proceed. Cut brinjal into small pieces and keep in water to avoid brinjal turning black in color. Cut small onions into cubes and set aside. Soak tamarind in little water.brinjal gothsu
  • Heat a kadai with oil and add mustard seeds, urad dal and curry leaves & hing. Now add the small onions and saute till it turns transparent.. Then add the finely chopped brinjal pieces.  Add the required salt. Saute till it shrinks and becomes mushy. Add little water if needed and cover cook the brinjal for sometime. brinjal gothsu
  • Add the tamarind extract and cover cook till the brinjal is cooked well. Mash the brinjal with ladle but still some pieces should be visible.Now add 2 tsp of gotsu powder,mix well. Add little water if necessary. Boil it for sometime. The gravy thickens. yoAdjust the water if u want in thin consistency OR enjoy as it is !!  Add coriander leaves for garnishing but it is not needed. Lastly add 1 tbsp of sesame oil on top of gravy. Close it with a lid to retain the aroma.brinjal gothsu
    Enjoy with hot idlies / pongal adding sesame oil/ ghee. Sesame oil enhances the taste. For pongal , no need to add sesame oil. Check out my easy Brinjal gosthu recipe HERE 
Note
  • I’ve given the gothsu powder for larger amount which you can store and use. U can use 2 tsp of this powder for one time..
  • My friend told that the authentic version calls for burning the brinjal in flame with skin and they mash it & add. But nowadays everybody follow this easy method.
  • If you feel the gravy is bitter, you can try adding more tamarind extract because the bitterness completely depends on the brinjal we use.

Enjoy this yummy side dish with Idli or pongal. Tastes yumm !!
Kathirikai gosthu
Continue Reading...


November 28, 2012

Coriander Leaves Chutney - Kothamalli Chutney Tamilnadu Style


Tamil nadu hotel style coriander chutney( Kothamalli Chutney) is a popular side dish for idli, dosa. This green chutney can be prepared with coriander leaves or mint leaves( pudina). I have already posted a green chutney similar to restaurant style. This is my second version. I usually make this for idli. I use mint leaves or coriander leaves and sometimes with both. You can call this as kothamalli pudina chutney. It tastes great in all the way..I got this recipe from a restaurant style recipes book..U’ll get a nice green color and i am sure u’ll like this a lot..

INGREDIENTS
1 cup - 250ml

  • Grated coconut  - 1/2 cup
  • Green chillies –   3-4 nos ( add more if u want spicy)
  • Tamarind  - A small piece ( Half seed )
  • Coriander leaves or Mint leaves – 1/2 – 1 cup ( 1 small bunch)
  • Turmeric powder – 1/8 tsp
  • Cooking oil – 1.5 tsp
  • Salt & water – as needed
To temper:
  • Mustard seeds – 1/2 tsp
  • Urad dal – 1/2 tsp
  • Red chilly – 1  no (optional)

METHOD

  • Heat oil in a kadai and saute the green chillies  and coriander/ mint leaves. Add turmeric powder , salt , tamarind and saute for a minute.
green chutney 1
  • Finally add the grated coconut, mix well and switch off the flame.Grind to a smooth paste after it cools down..
green chutney 2
  • Temper with the above said ingredients..Serve with hot idli /dosa !!

NOTE
  • This chutney can be made with mint leaves alone or with the combination of both the leaves in equal ratio..It can be made without seasoning too.
  • Turmeric powder gives the green color..Dont forget to add it..


Continue Reading...


November 26, 2012

Aval Pori Urundai, Sweet Appam Recipe | Karthigai Deepam Recipes

Aval pori urundai

Pori urundai and sweet appam are prepared for karthigai deepam in every house.I learnt both these recipes from my MIL. In bangalore, we don’t get aval pori or nel pori . So we used to dry roast the thick aval and make pori urundai.This urundai can also be made using the ordinary puffed rice. It tastes great with both. Recipe & method are almost the same. The ratio of aval pori and jaggery is 8:1.Some people used to add the puffed rice to the jaggery syrup and some do the reverse. My MIL usually adds the jaggery syrup to the roasted poha. Sometimes we keep it as such without making balls ( pori kilari vaipathu).
Sweet appam can be made in many ways.It can be made using rice & coconut OR maida & rava OR wheat flour and rice flour. Here i’ve given the recipe using wheat flour and rice flour which makes the job easier and healthy too.Actually appam has to be deep fried but i make in paniyaram pan due to calorie consciousness ;). It stays soft for long time.
Update: This year I bought aval pori from Gandhi bazaar,Bangalore and made pori urundai. U can find that picture above.


Do try these recipe and share ur thoughts. Happy karthigai deepam :)

Aval pori urundai recipe


Aval pori urundai recipe Pori urundai using aval/poha for karthigai deepam
Cuisine: Indian Category: Sweet Yields: Serves 4
Prep Time: 10 Minutes Cook Time: 10 Minutes Total Time: 20 Minutes
INGREDIENTS
1 cup - 240ml
  • Aval pori –  3.5 cups
  • Grated jaggery - 3/4 cup
  • Water - 1/2 cup
  • Cardamom – 2 seeds ( powdered)
  • Black sesame seeds – 1.5 tsp
  • Fried gram dal – 1.5 tsp
  • Dry Coconut bits – 1 tbsp
  • Dry ginger powder – A pinch ( optional)
  • Rice flour/ghee - for greasing ur hands
HOW TO MAKE AVAL PORI URUNDAI - METHOD
  • In a heavy bottomed kadai , dry roast the fried gram dal , sesame seeds .Roast coconut pieces in a tsp of ghee..If u are using poha/aval,dry roast thick poha in low flame carefully without changing the color.It may take around 10-15 mins. I roasted it in two batches ( 1/4 cup in each batch)..Roasting in batches helps uniform roasting. Aval will puff up and becomes crispy./Remove and keep it in a broad plate.\
  • If u are using ready made aval pori , u don't have to roast it. Roast coconut bits in a tsp of ghee and set aside.
pori urundai step by step
  • Now put the grated jaggery & the water in the bowl and after the jaggery is melted , strain it to remove the impurities.. Boil the jaggery syrup till it reaches the soft ball consistency. U should be able to make a soft ball out the syrup..Please be careful and dont miss this consistency.(suppose if u miss this stage,just add little water to syrup and boil again.wait for right consistency and Proceed)Switch off the flame immediately. Add cardamom powder & dry ginger powder to it.Mix well.

  • Now in a broad kadai, take the roasted poha, sesame seeds & fried gram dal & coconut bits. Add the syrup to this mixture and mix well. When the mixture is warm, grease ur hands withe ghee or rice flour and make balls.Roll it tightly to make a perfect round.Give a setting time of 30 minutes.

  • Crispy aval pori urundai is ready , Enjoy !!

Note
  • For making pori urundai with puffed rice , follow the same procedure. If ur puffed rice is soggy , Heat a kadai and then put the soggy puffed rice , mix well and switch off the flame. Allow the puffed rice to remain in the kadai and mix it in regular intervals. Puffed rice will become crispy..
  • Jaggery syrup consistency is very important here. Soft ball should be made out of jaggery..syrup will be frothy & thick to look.
  • Adjust the amount of jaggery as per the sweetness u require..The color of the pori urundai depends on the color of jaggery and the amount of jaggery u use.


Appam recipe

Appam recipe Appam using wheat flour and jaggery for karthigai deepam
Cuisine: Indian Category: Sweet Yields: Serves 4
Prep Time: 10 Minutes Cook Time: 20 Minutes Total Time: 30 Minutes

INGREDIENTS

  • Wheat flour – 1/2 cup
  • Rice flour – 1 tbsp
  • Powdered jaggery – 1/4 cup + 1/8 cup ( the ratio of wheat flour & jaggery should be 1:3/4)
  • Banana – 1 no ( small)
  • Cardamom powder – 2 pinches
  • Cooking soda – 1 big pinch
  • Water – 1/2 cup + 2 tbsp
METHOD
  • Grind the banana to a smooth paste adding little water in a mixie.
  • In a bowl take the flour , powdered jaggery , cardamom powder , ground banana and mix well. Add water to make a smooth batter. Finally before making the appam add the cooking soda , mix well.
karthigai appam recipe
  • Place the paniyaram pan  , add little oil/ghee and pour the batter. Cover & cook for sometime. flip it and again cook for sometime.I wanted mine to be brown in color and i kept in high flame for few seconds before removing it..
    appam step by step
  • Remove and serve.. Hot n soft appam is ready!!
Note

  1. Adding mashed banana gives the softness to the appam
  2. If desired coconut gratings can also be added.
  3. Ghee  can used to make this appam to make it more rich n flavourful.
  4. U can also deep fry this appam instead of making in paniyaram pan ..
  5. For getting nice round shape, use less oil while u deep fry and make it one by one…

Continue Reading...


November 21, 2012

SATHU MAAVU | HEALTH MIX POWDER RECIPE


SATHU MAAVU NEW
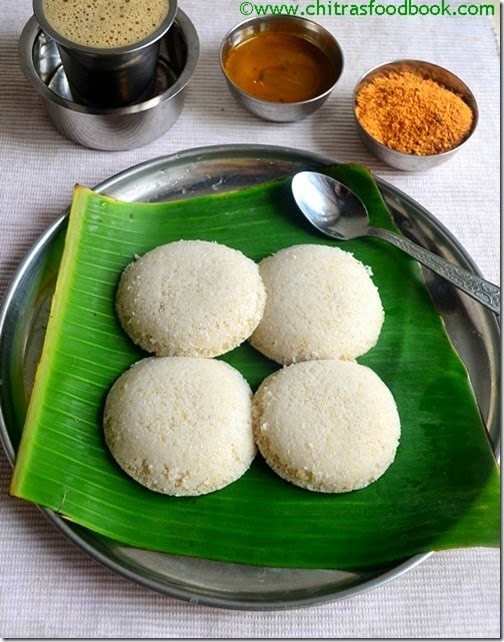
Health mix powder may not be new to u. Everybody will have their own recipe with the combo of grains and nuts. I  make it very simple with just 5 ingredients. I got this recipe from my friend swarna. I make porridge using this powder with salt & curd for my daughter. She loves this a lot.Even I too have this porridge at the time of fasting. My daughter was very lean and she was getting infected by cold and cough very often. My friend suggested me to give this porridge to gain weight & immunity.Now my daughter is feeling better and she has gained weight considerably.I started giving this porridge to her at the age of 2. My friend told this can be given for 10 months baby too but in small amount. I use 2 tbsp of this powder to make porridge for my daughter’s breakfast which is very filling for her..If u r planning to make for infants/ kids , do try with small amount say 1 tsp , make it watery first , then slowly increase the quantity and thickness.In the initial stages, i used to add more dal and rice compared to other ingredients. Nowadays i am using this proportion to make the powder in large quantity and store in an air tight box for 3 months.Click here for my version of sathu maavu dosa for adults if u r interested..
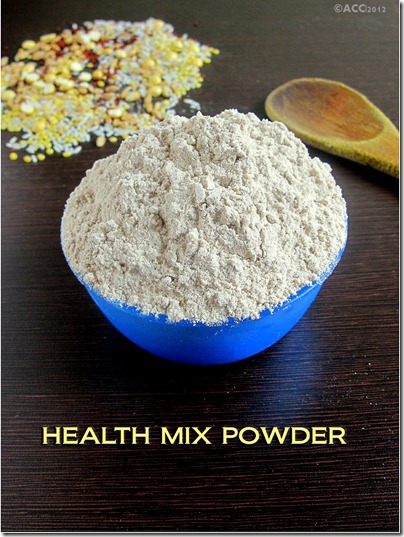
INGREDIENTS

  • RICE ( PUZHUNGAL ARISI / STEAMED RICE ) – 1 CUP
  • WHOLE WHEAT – 1 CUP
  • YELLOW MOONG DAL – 1/2 CUP
  • RAGI / FINGER MILLET – 1/4 CUP
  • FRIED GRAM DAL/ POTTUKADALAI – 1/4 CUP

METHOD

  • Dry roast all the ingredients in a kadai one by one in medium flame till nice aroma arises..
  • No need to roast the fried gram dal, just add it to the other hot , roasted ingredients , mix well and allow it to cool..
  • Allow it to cool and grind in mill. After the powder cools down , store it in an air tight box.
  • Transfer the required amount of powder in a small box for daily use .Handle with a clean spoon..It stays good for months.

sathu maavu NEW1

NOTE

  • For infants , dry roast rice and dal alone in 2:1 ratio , powder it in small quantity and make porridge using 1 tsp of this powder with salt or sugar by adding lots of water or milk.. When it suits ur kid , start to increase the amount gradually..
  • Slowly introduce ragi & wheat to the powder and practice them..
  • At the age of 2 u can follow the above said measurements…

Continue Reading...


November 18, 2012

Brown Rice Idli Recipe - How To Make Soft Idli, Dosa With Brown Rice

Brown rice idli

Brown rice idli is a healthy idli variety which I started making at home recently. We all know the amazing health benefits of brown rice but we don’t use it in our regular cooking. So I wanted to start with idli. There is no much difference between this idli and our usual white rice idli. Colour of this idli will be slightly yellow. Do try this recipe , you’ll love for its softness..I also made dosa the next day which tasted good. The only thing which I feel bad is that the batter becomes sour very soon even refrigerated. So we have to make in lesser quantities & keep it for one day. 

Try the quantity I mentioned here. This will be enough for three to four people. U can make idli for breakfast & dinner the same day and dosa the next morning. I used poha to reduce the quantity of urad dal. U can make this idli more healthy by adding oats along with the other ingredients. Brown rice has lot of health benefits. Do try this idli recipe. If you are interested, have a look at this oats barley idly recipe as well. Lets see how to make this healthy brown rice idli dosa recipe.

Brown rice


Brown rice idli recipe


Brown rice idli recipe Brown rice idli - Healthy breakfast recipe to kick start ur day :)
Cuisine: Indian
Category: Breakfast
Serves: 4
Prep time: 4 hours
Cook time: 20 Minutes
Total time: 4h20m


INGREDIENTS
  1 cup = 250ml
  • Brown rice - 2.5 cups
  • Urad dal - 1/2 cup
  • Aval/poha-1/4 cup
  • Methi seeds - 1/2 tsp
  • Salt & water - as needed 
HOW TO MAKE BROWN RICE IDLI - METHOD
    • Wash the brown rice 2-3 times to remove the debris.Soak rice, urad dal,methi seeds,poha together for 5 hours.
    • Now drain the water and grind them in the grinder adding salt & water. Add water in regular intervals. This takes nearly 20-25 minutes for grinding. It too 2.5 – 3 cups of water ..Remove the batter and allow it to ferment for 8 hours or overnight.
    brown rice idli tile1
    • The next day, batter would have raised well. Mix the batter and make idlis.. It takes around 15-18 mins to cook. Check with the spoon or wet your finger and make a hole in the center of the idli , if your finger comes out clean, idli is cooked..Serve hot with chutney or sambar !!
    brown rice idli tile2


Note
    • Please wash the rice 2-3 times. Otherwise the color of idlis will be brown ..
    • If you are planning to use mixie to grind the batter, use ice cold water. Use 2 cups of idli rice else softness may be less.
    • Do not make the batter too thick or too thin. The consistency should be like our usual idli batter. 
    • For making dosas, add little water,  dilute the batter to get crispy dosas.

brown rice idli recipe


A picture of dosa I made with this batter. 
Brown rice dosa

Technorati Tags: ,,,,,
Continue Reading...


November 16, 2012

KEERAI SAMBAR & RAW BANANA PORIYAL– LUNCH RECIPES


I learnt both keerai sambar & raw banana curry recipes from my MIL. Its a nice combination. I usually make this sambar once in a week as its healthy. We love this combo. My MIL says , keerai sambar needs less tamarind and more dal. This sambar should be little bit thicker than our usual sambar. I used Arai keerai ( Amaranthus) here.U can try Mulai keerai & siru keerai , karisilankanni keerai too..If u r using siru keerai or karisilankanni keerai  add little more tamarind as those leaves tastes slighlty bitter..
INGREDIENTS
  • Arai keerai (Amaranthus) – 1 cup
  • Tamarind – Big gooseberry size
  • Toor dal – 1/2 cup
  • Green chillies – 2 nos
  • Sambar powder – 2 tsp
  • Sambar onions – 12 nos ( use whole onions, no need to chop)
  • Turmeric powder – 1/2 tsp
  • Hing – 1/2 tsp
  • Salt & water – As needed
To temper:
  • Oil – 2 tbsp
  • Mustard seeds – 1 tsp
  • Methi seeds –3/4 tsp
  • Urad dal – 1/2 tsp
  • Red chilli – 1 no ( pinch & add) 
METHOD
  • Wash & chop the keerai ( use the stem too ) roughly. Pressure cook toor dal along with greens , 1/4 tsp of turmeric powder & a drop of oil till the dal is nicely mashed and set aside. You can also pressure cook dal & keerai separately. 
  • Extract the juice from the tamarind and set aside.
  • Now in a kadai ,heat oil and all the tempering items one by one  in the same order. Add the sambar onions & green chillies and saute till it turns transparent.
  • Now add the tamarind extract , 1/4 tsp of turmeric powder ,sambar powder , salt & hing. Let it boil well for few minutes with a nice aroma. Then add the mashed dal & greens mixture.Add little water if the sambar is too thick. Boil for 3 –4 minutes and serve hot.

NOTE: Greens can be cooked in the tamarind extract instead of  cooking with dal. But I follow this  method to reduce the cooking time.Sometimes my MIL adds only red chillies .
Adding sambar onions is a must for this sambar. This gives a great smell & taste. If u dont have sambar onions in hand, u can use roughly chopped big onions too..

RAW BANANA PORIYAL / VAZHAKAI PORIYAL

INGREDIENTS
  • Raw banana – 1 no ( big)  OR 2 nos ( if very small)
  • Sambar powder – 1 – 1.5 tsp
  • Turmeric powder – 1/4 tsp
  • Tamarind – Berry sized ( less than small gooseberry size)
  • Salt – as needed
To grind
  • Grated coconut – 3 tbsp
  • Big onion – 1 no
  • Jeera – 1 tsp
To temper
  • Oil – 2 tbsp
  • Mustard seeds – 1/2 tsp
  • Urad dal – 1/2 tsp
  • Curry leaves – few
METHOD
  • Wash , peel the skin and chop the raw banana in circles and soak in water. ( to avoid color change)
  • In a vessel, cover cook the raw banana along with salt , a piece of tamarind, sambar powder , turmeric powder , salt with required water.Cook for 5 mins & check the banana is done.Do not over cook them..
  • Now drain the excess water & set aside.Grind the coconut in a mixie, then add the big onion & jeera and run the mixie once or twice to crush the onions.( Onion pieces will be visible)
  • In a kadai , temper all the items given above and add the cooked raw banana pieces & the coarsely ground coconut- onion mixture..Saute in a low flame till u get nice aroma and the golden brown layer forms at the bottom.Add oil if needed..
  • While sauting make sure u don’t break the banana pieces and becomes mushy.
  • Serve with sambar rice !


Continue Reading...


November 9, 2012

KAJU LOTUS | KAJU FLOWER – DIWALI SWEET RECIPES

Kaju lotus/ Kaju flower recipe with step by step. Whenever I go to restaurants, I never forget to look at the sweets section. Some sweets would be really eye-catchy. One such sweet which caught my attention is Kaju lotus. I wanted to try this for long time but I dint have any clue about it. Last year, during diwali we bought aval vikatan magazine and i got Menu rani chellam’s diwali sweet recipes as supplementary..She had given the recipes of most popular sweets which had the recipe of kaju lotus too. If you are able to make kaju katli , you can easily try this sweet. Its the same procedure with slight variations in the end.

Do watch my video (A small attempt) for making this shape). U can try making Kaju mango, Kaju apple, Kaju strawberry like in sweet stalls using the same dough. Hope mine looks like Kaju lotus. Try to make 6 petals as given in the original recipe. I had cut around 8.. I guess I’ll get the perfect shape in future. I am happy with the result as this is my second attempt. I’ve given the tips to overcome the problems you get while making this sweet. Hope this post would be useful.. Do try and let me know friends. Surprise your family with this colorful sweet for diwali. 


Kaju lotus/Kaju flower recipe


Kaju lotus/Kaju flower recipe Colorful Kaju lotus/Kaju flower recipe - A welcome change from usual kaju katli !
Cuisine: Indian
Category: Sweet
Serves:
Prep time: 10 Minutes
Cook time: 10 Minutes
Total time: 20 Minutes


INGREDIENTS

  • Cashewnuts - 1/2 cup
  • Food color - Red & Green ( a pinch)
  • Ghee - 1 tsp ( to grease the plate)
  • Milk - 1 tsp ( optional,to troubleshoot)
For syrup
  • Sugar - 1/4 cup
  • Water – 2.5 tbsp
METHOD

  • Powder the cashews at room temperature by stopping the mixie at regular intervals. Wipe the sides & bottom of jar every time while grinding. Use pulse option if needed.  ( I felt this as easy. One more way is run the mixie continuously till you get a fine powder, follow any based on your wish.But do not grind it for long time. Cashews will become a sticky paste)
Kaju-lotus
  • Keep the food color and the ghee greased plate ready. ( I dint have liquid food color , so I added a pinch of food color in 1/2 tsp water and used a few drops)
  • In a vessel, add sugar and cover with water. Heat till it reaches ONE STRING CONSISTENCY .i.e Take a drop of syrup from the back of ladle. Keep it between your thumb & forefinger. When you release you finger,it will form a thin string of 1 inch.This is called one string consistency.
kaju-katli-tile2_thumb1

  • Now add the cashew powder immediately,keep the flame low and stir continuously till it leaves the sides and becomes a thick, non-sticky dough.  After adding the powder, it takes just 3-4 mins in low flame to reach this stage. Be alert.( This is the procedure for kaju katli. U can knead the dough, roll it to make shape ) Stop here if you are making kaju katli . Proceed for kaju lotus..
kaju-katli-tiile3_thumb3

  • Now put the cashew dough in the greased plate and divide the dough into two parts using a spoon. Add few drops of red & green food color in each dough, mix it with spoon for uniform distribution.No problem even if it dint mix properly. We are going to knead it .. Leave it for 5 mins. Let it become warm. If you remove the mixture ( a few seconds before) when it is like slightly sticky chapathi dough, you dont have to add milk. The dough will harden in few mins. If you miss this stage, no worries. If you feel the mixture is dry & crumbly, add 1/2 tsp milk in each half of the dough along with food color (I added 1/2 tsp milk in each dough before kneading.)
    • After it is warm , apply ghee in ur hands & start kneading the dough to make it soft & non-sticky. Do the same for the other dough and start making the shape. Cover the dough while you make the shape to avoid drying.
kaju-katli-tile3_thumb3
kaju lotus tile4
  • Make a big gooseberry sized ball with green dough and make it flat by pressing with your palm.Take a ball of red dough and keep it in the center of green dough. Bring all the corners together and close it to make a ball.( Use the procedure of stuffing kozhukattai & paratha). ( while doing this you may get cracks, don't panic. If you roll tightly , it will become smooth OR Add little more milk and knead the dough. But 1/2 tsp would be enough ). 
kaju lotus tile5
  • Make all the balls, cover it and give a setting time of 30 minutes. Now, using a sharp Knife cut the ball to make a flower shape. While you make the shape, the mixture may leave oil. No problem ( Hope this video helps for better understanding) I have given two videos. Use whichever is convenient. Adjust the number of petals as you like.. As per the original book, the number of petals is 6. I made 7- 8. Use silver warq while rolling the balls if necessary..
  • kaju lotus tile6
Enjoy !


Note

    • The consistency of sugar syrup is very important here. One string should be compulsory.
    • After adding cashew powder, keep on stirring till the cashew gets cooked and makes a dough.. To know the correct consistency, you can check by making a small ball which will be non-sticky. Dough will slide from the pan without sticking.
    • Try to knead the dough when it is warm.  If you feel the dough is dry and crumbly, add little milk.
    • If the dough is correct, you may not need milk. U can directly start kneading and rolling. Adding milk may reduce the shelf life of the sweet, flatten the balls you may not get the exact shape too.
    • Setting time of 30 mins is necessary for the balls. If you have added more milk to knead the dough, the milk will settle in the bottom of the ball after the setting time. No problem, just wipe it with a tissue and start cutting the shape.
    • This sweet will come out well for sure if you have practice in making kaju katli. Beginners can also dare to give a try because if I make it, anyone can.
    • Try making the balls slighlty oval in shape to get the exact shape of kaju lotus as in sweet stalls.


METHOD–1


Try this sweet and make this diwali a colorful one :)


Try this sweet stall style Kaju lotus and make this diwali a colorful one !
kaju lotus piece
HAVE A SAFE AND HAPPY DIWALI, BYE..


Continue Reading...


November 5, 2012

Nei Urundai - Pasi Paruppu Urundai - Moong Dal Laddu


Nei urundai / Payatham maavu urundai ( Moong dal ladoo in English) is the one & only sweet my aachi (grandma) & mom makes for every diwali.This is one of the easiest & healthy sweets.. We call this as “Nei vilangai “in Tirunelveli . People from tirunelveli may know this name. But the common name is Payatha maavu urundai. Maa ladu is also similar to this. But Fried gram dal / Daliya (Pottukadalai) is used in maaladu whereas moong dal is used here. Otherwise its the same procedure. It can be made in ten minutes. Include this easy, healthy, South Indian laddu in your diwali sweets menu. Try and let me know how it turned out. Do check out my Maa ladoo recipe too !


INGREDIENTS
Yields 10 medium sized laddu.
1 cup - 250ml
  • Yellow Moong dal / Paasi paruppu – 1/2 cup
  • Sugar – 1/2 cup
  • Cardamom - 2 
  • Ghee – 1/4 cup ( Use 2 tsp less as per need) 
  • Fried cashew nuts – few

METHOD
  • Dry roast moong dal in low flame till you get a nice smell. Powder it nicely. Sieve the flour. U’ll get 1/2 cup + 1 tbsp powder. Fry cashews in little ghee ( say a tsp ) and set aside.
IMG_7907IMG_7908IMG_7909IMG_7910IMG_7911
  • Now powder the sugar along with cardamom. You’ll get around 3/4 cup. The ratio of powdered moong & sugar should be 1:1.5. If you like mild sweetness , you can add 1:1 too..
IMG_7912IMG_7913IMG_7914
  • Mix  & add the fried cashews. Melt 1/4 cup of ghee and add to the mixture. Make balls tightly when it is warm.. Enjoy!!
IMG_7917IMG_7918IMG_7919
  • Store in a box and u can have it for 10 days.

NOTE
  • U can adjust the sugar quantity as per your taste buds. But 1:1.5 would be enough. If you like very mild sweet, 1:1 will be enough.
  • Always add melted hot/ warm ghee. Initially mix with a ladle and when it is warm use your hands to mix well.
  • Add the mentioned quantity of ghee. If you want to increase u can add 1- 2 tbsp more. Adding more ghee reduces the sweetness. Add ghee little by little until you are able to make the ball. If the mixture is too dry , you cant shape the balls. U'll get cracks too. In that case, add little more hot ghee and proceed.
  • Do not use cardamom powder.
  • After adding ghee, the color of laddu will be changed. This shows the correct form.
For Maa ladu : 

Powdered Roasted gram dal / pottu kadalai - 1 cup
Powdered sugar - 1/2 - 3/4 cup
Ghee - 1/3 cup ( takes less than this quantity)
Cardamom seeds - 3 nos ( powdered)
Fried cashews - few

Dry roasting the dal is optional. I don't roast it. Powder the dal first and then sugar.. Mix them well.  Add hot melted ghee little by little.  Spare some ghee. Once warm, mix with ur hands and make balls. If you are not able to shape it or if you get cracks, add little more ghee.


Continue Reading...