Karadaiyan nombu adai recipe - Learn how to make Karadaiyan nombu sweet adai (vella adai) and salt adai recipes (uppu adai) with step by step pictures and video. This adai can be prepared with homemade rice flour or store bought rice flour/ idiyappam flour. Only difference lies in the quantity of water used to make adai. Here I have discussed vella adai and uppu adai recipe using homemade rice flour. Usually for making this adai , we make processed rice flour at home. U can also use good quality store bought idiyappam flour. I have tried using both and they came out equally well in softness & texture. Usually people make a hole in adai like urad dal vada for even cooking. As my MIL don't do that, I too don't put a hole in my adai ;)
Karamani /black eyed peas is the main ingredient for this adai. But my MIL adds other grains like ragi , mochakottai ,chana , green gram , black gram , unpolished rice (nel) , wheat germs , toor dal to make it a mix of nine grains in very little quantity, roast and cook it. But many people use only karamani / thatta payaru for this adai. So its our choice finally! Below you can find a picture of adai with hole in the center. The color of sweet adai depends on the color of jaggery you use. Ok, lets see how to make karadaiyan nombu adai recipe with step by step pictures and video.
Karamani /black eyed peas is the main ingredient for this adai. But my MIL adds other grains like ragi , mochakottai ,chana , green gram , black gram , unpolished rice (nel) , wheat germs , toor dal to make it a mix of nine grains in very little quantity, roast and cook it. But many people use only karamani / thatta payaru for this adai. So its our choice finally! Below you can find a picture of adai with hole in the center. The color of sweet adai depends on the color of jaggery you use. Ok, lets see how to make karadaiyan nombu adai recipe with step by step pictures and video.
Please click THIS LINK for Karadaiyan Nombu Pooja Procedure with more details!

SIGNIFICANCE OF KARADAIYAN NOMBU
Karadaiyan Nonbu or Savitri Vratham is a traditional Tamil nadu festival of fasting wherein married women pray for the wellness and long life of their husbands. This nombu should be done in the time when tamil month 'Masi' ends and the next month 'Panguni' starts. The reason why this fasting is carried out is that “ Savithri fought with yema (the God of Death) to save her husband's (Satyavan) life", the same way the married women should fast on this auspicious day for long life of their husbands. Unmarried woman can also observe Karadayan Nombu and pray to Goddess Shakti to get good men as their husband.
Source : http://chandra.subramanianfamily.com/2009/03/karadiyan-nombu.html..
Before marriage , I have not celebrated this festival as my mom don’t have this practice. I heard about this celebration from my MIL only after my marriage. Initially I used to watch my MIL making nombu adai. She makes Sweet adai/Vella adai and Salt adai/Uppu adai for neivedyam. But now I can confidently make it on my own. It comes out very well. What I love in this festival is tying the yellow rope. More than me, my daughter is more curious about tying the yellow rope in her hand ;) Also we chant a few lines/sloka in front of the lamp while tying the rope.
"Urugadha Vennaiyum oru adaiyum vaithu nonbu notren oru naalum en kanavar enai piriyamal iruka vendum".
Please click THIS LINK for Karadaiyan Nombu Pooja Procedure with more details!
Please click THIS LINK for Karadaiyan Nombu Pooja Procedure with more details!
Karadaiyan nombu adai video ↓↓

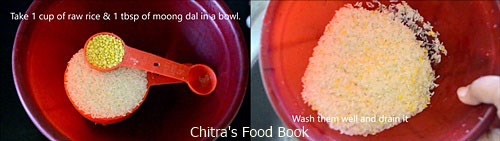
HOW TO MAKE PROCESSED RICE FLOUR
After roasting, try to draw a small kolam with it. If you able to draw it without cutting, flour is roasted well ( Kolam maavu padham). Sieve or grind once in a mixie if there are lumps after roasting. This is called processed rice flour. We use this flour for making adai.   Usually I make the flour in the previous day and make adai the next day . For 1 cup of raw rice , we get approx 1.75 - 2 cups of flour. You can also use store bought idiyappam flour instead of homemade processed rice flour. ** For store bought rice flour/idiyapam flour, you don't have to roast the flour. |

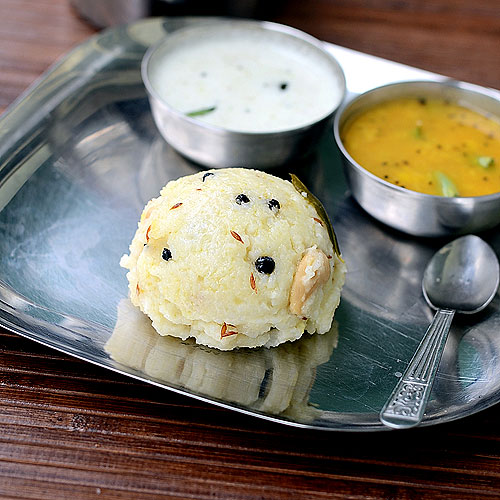
Karadaiyan nombu vella adai / sweet adai and Salt adai / Uppu adai
Karadaiyan nombu special adai recipe using rice flour, karamani as major ingredients. Both sweet adai and salt adai recipes are discussed below.
Cuisine:
Indian
Category:
Karadaiyan nombu recipes
Serves: 4
Prep time:
20 Minutes
Cook time:
20 Minutes
Total time:
40 Minutes
INGREDIENTS
FOR SWEET ADAI (1 cup = 250ml)
- Homemade Rice flour or store bought idiyappam flour – 1 cup
- Grated jaggery – 1 cup
- Cooked karamani / Lobia / Black eyed peas – 1/4 cup + 1 tbsp navadhaniyam (optional)
- Water – 1.5 cups ( Some Store bought rice flour may take just 1 cup too )
- Cardamom seeds – few
- Coconut bits – 2 tbsp
- Ghee - 1 tsp ( to prevent drying)
- Oil - to grease the palm
** Its completely optional to use navadhaniyam.
FOR SALT ADAI / UPPU ADAI
- Homemade Rice flour – 1 cup ( you can also use store bought Idiyappam flour)
- Cooked Karamani / Lobia / Black eyed peas – 1/4 cup + 1 tbsp navadhaniya (optional)
- Water – 2 cups (adjust as per the flour)
- Coconut bits – 2 tbsp
- Salt – As needed
- Coconut oil or Cooking oil – 1 tbsp
- Mustard seeds – 1/2 tsp
- Urad dal – 1 tsp
- Hing - 2 generous pinches
- Curry leaves – few
- Green chilli – 2 - 3 nos
- Ginger – 1 inch piece (finely chopped)
** For store bought rice flour/idiyapam flour, you don't have to roast the flour. For homemade processed rice flour, please check it above.
HOW TO MAKE KARADAIYAN NOMBU ADAI
- In a pressure cooker base, roast karamani in 1 tbsp oil till it emits nice aroma. Add water and pressure cook in low flame for one whistle.
- Divide the karamani into 2 portions.
- FOR SWEET ADAI / VELLA ADAI : Melt jaggery in water and strain the syrup.
- Add cooked karamani, coconut bits and cardamom powder in jaggery water. Let it roll boil. Lower the flame and add the rice flour (Homemade or store bought idiyappam flour).
- Mix well in low flame to make a soft dough. Switch off the flame. Let it become warm. Grease hands and make shapes. Make a small hole in the middle and arrange the sweet adai in a plate. Make salt adai next. We are going to steam both sweet and salt adai together.
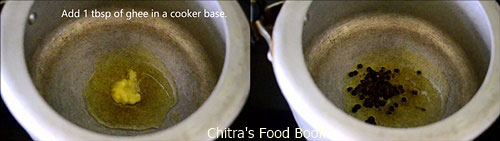
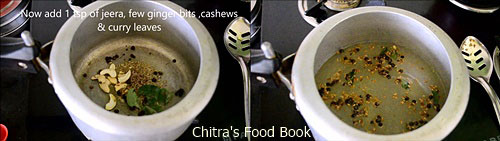
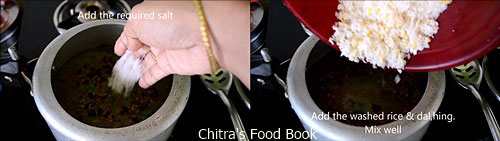
- FOR SALT ADAI / UPPU ADAI : Heat coconut oil in a kadai and splutter mustard, urad dal, curry leaves, hing, green chilli and ginger. Add water, salt, coconut bits and cooked karamani.
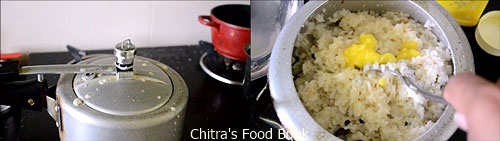
- Let the water come to roll boil. Lower the flame completely. Add rice flour and mix well to make a soft dough. Grease hands and make shapes after it becomes warm. Keep in a plate.
- Boil water in a idli pot and arrange the sweet adai and salt adai in greased idli plate. Steam it for 15 to 20 minutes till adai becomes non-sticky to touch.
- Switch off the flame. Remove the idli plate. Keep in the counter. Let it rest for 5 minutes before removing the adai. Take the adai carefully and arrange in a plate. PLEASE WATCH THE VIDEO FOR BETTER UNDERSTANDING.
KARADAIYAN NOMBU ADAI - STEP BY STEP PICTURES

    Please click THIS LINK for Karadaiyan Nombu Pooja Procedure ! Enjoy ! |
Note
|
Try this easy, yummy Karadaiyan nombu sweet adai and salt adai. Offer with unmelted butter to GOD. Enjoy the festival !
|

Technorati Tags: Karadaiyan nombu adai,Karadaiyan nonbu adai recipe,karadaiyan nombu sweet adai,karadaiyan nombu uppu adai,festival recipes,karadaiyan nombu 2014,karadaiyan nombu adai recipes,karadaiyan nombu adai,karadaiyan nombu 2013,karadaiyan nombu adai recipe