
Recently my in-laws visited my place and with the help of my MIL I took this video by keeping beginners in mind. The batter yield will not be good when we grind in mixie as compared to grinder. But I am sure you’ll get the taste & crispness equal to grinder batter. Please bear the mistakes in this video as this is my first attempt. I hope I can do it better in future & update here. I am also a beginner and Iam still in the learning and experimenting phase. Most of us miss the batter consistency adding more water. So I have tried to give the exact water quantity I used . The quantity of water slightly differs as per the quality of urad dal. So keep this video as reference and adjust the water quantity. I have also given some tips in the “Note” section to adjust the consistency of batter if it is watery. Experts, do share your tips in the comments section.
Recently I had vada for breakfast in Adayar Ananda Bhavan restaurant (A2B). I found jeera, pepper corns, onions and curry leaves. So I too started making in that way as my husband loves pepper more than onions. Here I have mentioned pepper & jeera in the ingredients list. For poojas & festivals we add only pepper. Add onions alone or both onion & pepper as per your wish. But remember to add onions just before frying vada else onions will leave water and make the batter watery.
Always keep the batter refrigerated till use. No problem if one or two tsp of water goes extra. Batter will thicken if u refrigerate it. If you find the batter too watery, add few tsp of rice flour to make it thick & to make a proper shaped vada. But you should serve it hot . Otherwise vadas won’t be crispy in room temperature. Also if you add less water to grind the batter, vada will be hard. If you add the correct water & grind the batter , vadai will stay crispy even after it cools down. Vada won’t drink much of oil if the batter is right. My MIL used to add a tsp of toor dal while soaking urad dal to avoid oil absorption.
Beginners can follow this method. Some people soak little raw rice along with urad dal or add a tsp of rice flour to the batter. All these are not necessary if you grind the batter in right consistency.
Ok friends, let me know your comments if you try this method. Good luck.
Don't forget to check out my latest post with video about medhu vadai recipe using grinder
Do check out my mixed vegetable vada if interested.

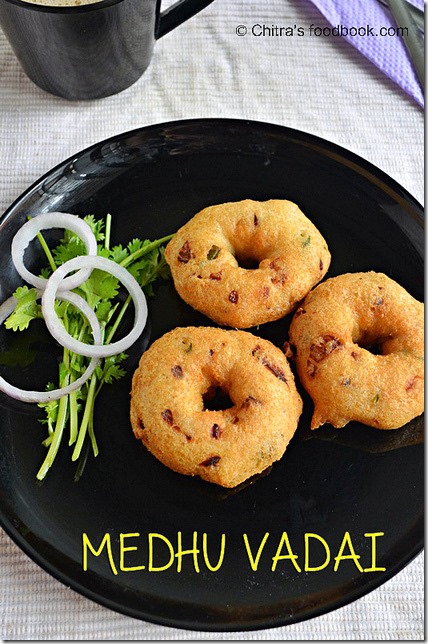
Medhu vadai / Urad dal vada batter in Mixie

Let check how to make Medhu vadai / Urad dal vada batter in Mixie
Cuisine: Indian
Category: Snacks
Serves: 10
Prep time: 10 Minutes
Cook time: 20 Minutes
Total time: 30 Minutes
INGREDIENTS
1 cup = 250ml
|
HOW TO MAKE MEDHU VADAI
- Wash and soak urad dal for 1 hour minimum. Refrigerate it.
- Drain all the water and reserve in a bowl.
- Take a big mixie jar and grind the chilli, ginger coarsely without salt, water.
- Add the soaked urad dal and grind to the maximum without adding water by wiping the sides.
- Add 1/4 cup of water and grind again. If needed add more water in tbsp or tsp.
- Make a thick, smooth, fluffy paste and collect in a bowl. Add rice flour and beat the batter well.
- Lastly add the chopped onion, curry leaves, hing, pepper, cumin and salt. Mix well.
- Heat oil and fry the vada in both the sides till golden in color.
- Remove and serve hot with coconut chutney and sambar !
METHOD - STEP BY STEP PICTURES


 |
NOTE
Don't forget to check out my latest post with video about medhu vadai recipe using grinder
|
Enjoy eating hot with coffee or tea !!

Technorati Tags: MEDHU VADA,MEDU VADA,MEDHU VADAI,ULUNDHU VADAI,ULUNDHU VADA,URAD DAL VADA,URAD DAL VADAI,VADA,VADAI,HOW TO MAKE CRISPY VADA,HOW TO MAKE FLUFFY VADA,HOW TO SHAPE VADA,urad dal vada recipe,urad dal vada,ulundhu vadai,how to make urad dal vada,medu VADA,medhu vada,urad dal vada varieties,urad dal vada recipes,ulundu vadai,medhu vadai recipe,medhu vadai in mixie