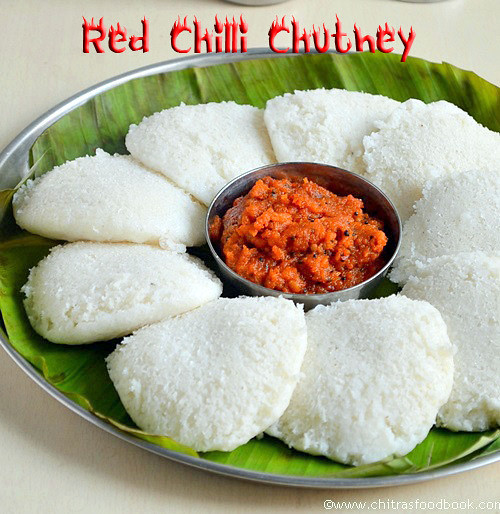
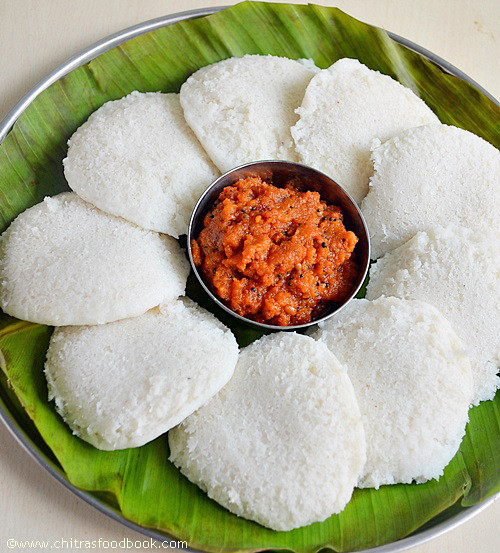
Vara milagai chutney is a popular side dish for idli, dosaandpaniyaram in Karaikudi - Chettinad region. This is one of the easiest chutney recipes & ideal for travel as it is without coconut. I think chettinad kara chutney and vara milagai thuvayal are the same because both have the same ingredients.
Friends from Chettinad, please tell me if there is any difference. I would love to try that too. Sendhil doesn’t like spicy side dishes. So I was waiting for a good chance to try this chutney for me. Yesterday my parents were in my house. As my dad is fond of kara chutney, I tried this spicy red chilli chutney for him.
He loved it a lot and told me to pack this chutney with idli for his travel to Hyderabad. Whenever we go to hotels, myself and my dad ask for more servings of kaara chutney than coconut chutney & sambar. We are a big big fan of this. People looking for spicy side dishes must try this chutney. I am sure you will have at least 2 idlies more than your regular intake.
Chettinad Kara chutney recipe
Kara chutney recipe - Chettinad style - Tastes great with idli, dosa & paniyaram
Cuisine:Indian
Category:sidedishes
Serves:Serves 3
Prep time:10 Minutes
Cook time:10 Minutes
Total time:20 Minutes
INGREDIENTS
Tomato - 1 no
Small onions - 20 nos or big onion - 2 no
Red chillies – 5 nos
Tamarind - a small piece(a big pinch)
Garlic cloves - 3 nos
Salt & water - as needed
To temper
Gingely oil - 3 tbsp
Mustard seeds - 1/2 tsp
Urad dal - 1 tsp
Curry leaves - few
HOW TO MAKE CHETTINAD KARA CHUTNEY - METHOD
Grind tomato,red chillies,small onions, garlic cloves, tamarind with salt & water to a slightly coarse paste. (Tips Tips: Always pinch the tamarind into small pieces and use for grinding. It helps to grind smoothly)
Heat gingely oil in a pan and temper with mustard seeds, urad dal & curry leaves. Pour this chutney in hot oil and allow it to boil till raw smell emanates completely.Chutney thickens as well.
Remove & serve with idli, dosa or paniyaram.
Note
Do not reduce the oil quantity for tempering as it helps to suppress the body heat developed by red chillies. It is good for your tummies too.
Use one big onion if you don’t have small onions in hand.
If you like the raw smell of onions & want more spicy, just temper & pour it on the chutney. No need to boil the chutney.
Malligai poo idli with spicy hot vara milagai chutney for breakfast is a total bliss, Right??
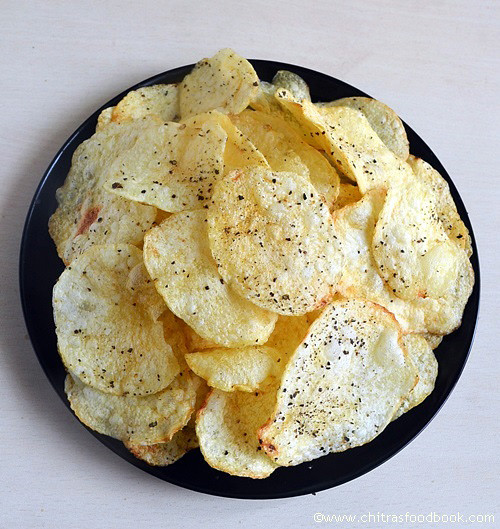
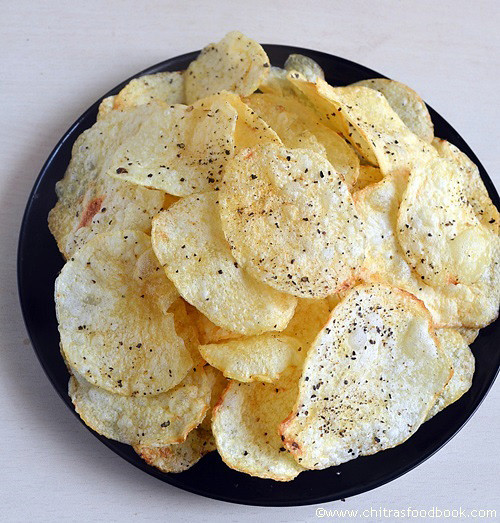
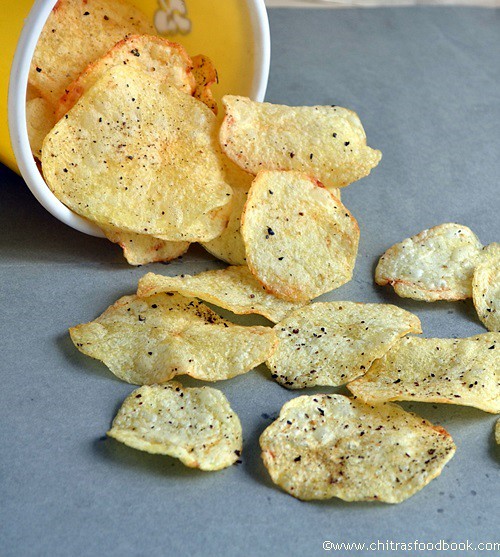
In this post, I have shared how to make crispy, white colored potato chips at home easily just like store bought ones. As you all know, crispy potato chips is loved by all irrespective of ages. Its our family favourite too. My Mil is an expert in making potato chips. She makes super crispy & white colored chips like in shops.
By watching her, I have tried many times in my kitchen. It comes out crispy but turns reddish brown every time Initially I was thinking it was due to over heated oil. But then I found, the secret of making white colored chips lies in the variety of potato we use.
Generally, there are two varieties of potato available in the Indian market. One is the normal cream colored potatoes we use for potato curry and the other one is red colored covered with mud. The second variety is mostly used for making chips. It is called as “chips potato”. I have shared the picture of both the potatoes to differentiate them.
When you use this chips potato, your chips won’t turn brown even if you deep fry for long time. So Friends, if you plan to make potato chips at home, first ask for chips potato. Vendors would know better. Also, do follow the technique I have given below. U’ll get it perfect ! I will try to share a detailed video for the same. Hope it will be useful for beginners like me.
U can make this easy, Indian style crispy potato chips for parties in advance & store them in a box. Refer "Notes" section for tips. Also check out the video below for more details.
If you are looking for baked or microwave potato chips recipe, do visit this link.
Video: Potato chips recipe
Check out homemade, crispy, white colored potato chips like store bought ones.
As Sendhil is fond of pepper flavoured chips, my MIL always add coarsely ground pepper powder for her son. But I love the one with chilli powder like we get in shops. So she reserves last 2 batches for me for adding red chilli powder, how sweet !
Homemade Potato chips
How to make crispy and white potato chips at home.
Cuisine:Indian
Category:Snacks
Serves:50nos
Prep time:10 Minutes
Cook time:10 Minutes
Total time:20 Minutes
INGREDIENTS
Potato - 3 nos
Salt - as needed
Water - to wash and soak
Oil - to deep fry
Pepper powder or chilli powder – as needed to sprinkle ( 1 tsp)
HOW TO MAKE POTATO CHIPS - METHOD
Wash and peel the potatoes. Take water in a wide bowl and slice the potatoes directly in the water. Keep the slices immersed in water to avoid discoloration. Rinse it well till the color of water changes to white. (You should remove the starch in potatoes).i.e Discard the water and again wash the potato slices. Repeat this for 2-3 times.
Spread the slices in a paper or cotton towel for 10 to 15 minutes. Pat it dry by covering with another paper or towel. Make sure there is no moisture in the slices.
In a bowl, take the salt. Dissolve it by adding little water. Set aside.
In a kadai, heat the oil required for deep frying. Check the temperature by dropping a piece of potato slice. If it raises to top immediately, oil is just right.
Keep the flame medium & drop the potato slices in batches. Do not dump more in one batch. Keep tossing & pressing with a ladle till bubbles cease. Once the bubbles reduce & potato slices turns crispy, reduce the flame completely & carefully sprinkle the salt water standing a feet away.( If you are scared to do this step, skip it and sprinkle salt at the end after removing the chips from oil)
As soon as you sprinkle the salt water, oil bubbles with crackling sound. Keep tossing the chips for salt water to get coated evenly. The noise is completely suppressed after a minute. Bubbles will cease completely. Flip the chips. Remove in a tissue paper.
Sprinkle pepper powder or red chilli powder, mix well and enjoy with variety rice. Store in an air tight box when it is cooled down completely.
Note
U can make this chips in advanced for birthday parties. Make the chips the previous day. After it cools down completely, keep it in a zip lock bag or polythene cover and store in a box. It stays crispy.
If you don’t want to sprinkle water directly on fire, deep fry the chips till crispy. Remove in a bowl. Mix salt with pepper powder or chilli powder. Sprinkle when the chips is hot. Toss well and serve !
Always deep fry the chips in correct flame. If you drop a pinch of potato, it should rise immediately. Reduce the flame to medium & then deep fry. Adjust the flame whenever necessary. Do not let the oil fume or smoke at any point. Then chips will become dark brown even if you use chips potato.
If you feel, the oil is overheated switch off the stove for sometime and let the oil cool down a bit. Then proceed again. By doing this way, you will get all the chips in uniform color.
Stay Connected -
Enjoy potato chips with rice varieties or as evening snacks .U can’t stop munching !!
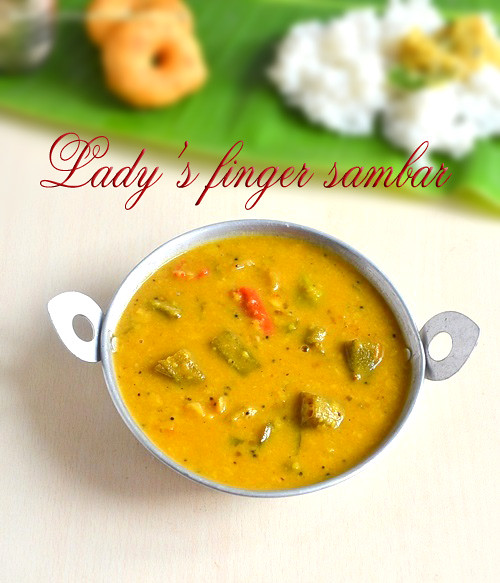
This is my mom in law’s basic sambar recipe for rice in which we use lady’s finger @ okra. Last week a reader mailed me to blog basic sambar & vathakuzhambu recipes. So I thought of sharing this recipe which might be useful for Tamil new year lunch menu too. I usually make vendakkai sambar & avarakkai sambar for no moon day and for festivals where we don’t use onions because this sambar tastes good even without onions. My mom also makes vendakka sambar but the procedure is completely different. Do click here to know my mom’s Nellai sambar recipe.
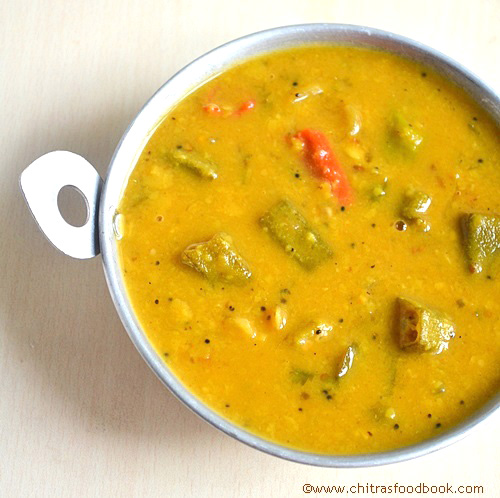
This sambar is very easy to make and flavourful too.There is no grinding part. Hence bachelor’s also can give a try. We usually eat sambar sadam adding a few drops of ghee. It enhances the flavour of sambar and even kids would love to have it.
For this sambar, you can replace lady’s finger with brinjal, Raw mango, drumstick or even Keerai thandu. But the quantity of tamarind varies for each veggie. In this post, lets see how to prepare Tamil nadu style basic sambar recipe with Lady’s finger.
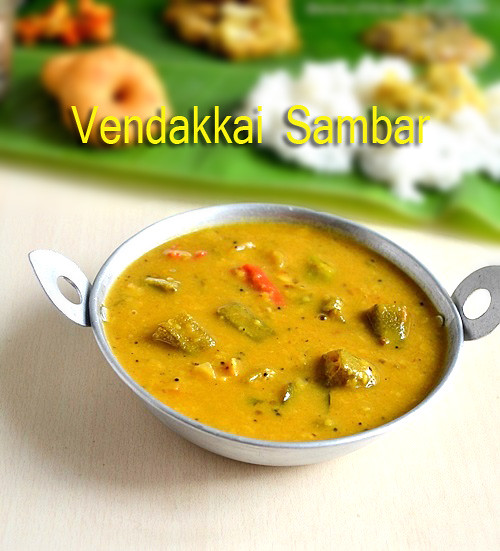
Vendakkai sambar recipe/Okra sambar recipe
Lady's finger/Okra/Vendakkai sambar recipe - Basic south indian style sambar for rice !
In a pressure cooker, take the toor dal, turmeric, red chilli, curry leaves with required water. Pressure Cook in low flame for one or two whistles till dal turns mushy.
In the mean time, wash and pat dry the okra in a towel and cut into small pieces of 3-4. Peel onions, cut chillies and set aside.
Soak tamarind in enough water and take the extract using 2 cups of water. Addsambar powder, turmeric powder, salt, hing and curry leaves. Set aside .
In a kadai,heat ghee + oil and temper mustard, methi seeds, red chilli & curry leaves. Add the chopped lady’s finger pieces. Saute for a minute and then add onions and green chillies. Saute till onions turn transparent & lady’s finger shrink and skin turns slightly brown here and there. Then saute tomato pieces till mushy. Add 1 cup of water and allow the lady’s finger to cook well. When it is 3/4 th cooked, add the tamarind extract mixture.
Add some hing and pinched raw curry leaves (please note we are adding hing & curry leaves two times). Allow the sambar to boil well for 5-10 minutes till raw smell emanates.
Now add the mushy cooked dal and boil for 2-3 minutes. Lastly before switching off the flame.
Add chopped coriander leaves, boil for few seconds and switch off !
Cover the sambar with a lid and serve after 30 minutes to 1 hour for all the taste to blend well.
Note
Please reduce the amount of green chillies based on its size & spiciness. Use minimum 2.
Sauting okra is very important else it will become slimy while cooking.
Please add less tamarind as vendakkkai has the tendency to absorb all the tanginess.
Adding coriander leaves for garnishing gives a nice flavor.
Use ghee for tempering as it gives a nice aroma.
Enjoy this sambar with plain rice adding few drops of ghee with papad & poriyal as side dish. Tastes great !
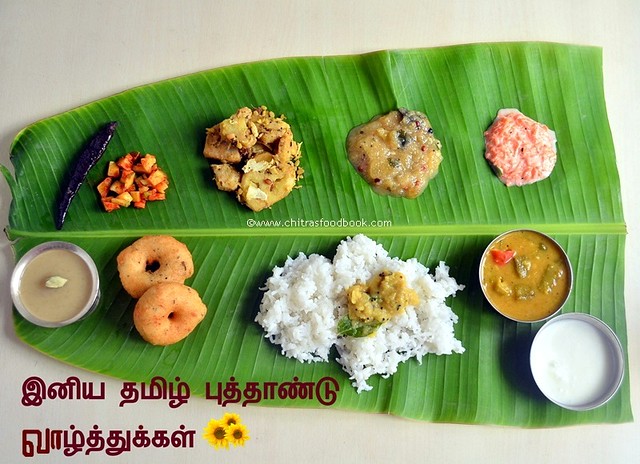
Tamil Varusha pirappu /Tamil puthandu / Varuda pirappu is celebrated on the first day of Tamil month chithirai. Every year it falls on April 14th. Its a most important festival for Tamil people. We make a simple yet inviting lunch menu with sambar, poriyal or kootu, 2 pachadi varieties, vada, payasam and curd. Neer mor and Panakam should be prepared only when we keep panchangam in neivedyam otherwise it is not necessary.
Among these recipes, Mango pacahdi, Payasam and Vada are mandatory. We don’t keep appalam as it is not homemade. But Mor milagai I have kept is homemade. I have shared that recipe in a separate post. I have shared how to prepare this Tamil new year special lunch menu under one hour at the the end of this post. Instead of making full meals, you can make Tamil new year thaligai with 5 rice varieties like lemon rice, tamarind rice, coconut rice, curd rice and sweet pongal.
Actually I planned to post this lunch menu during last tamil new year but couldn’t as I was in Salem. Yesterday I asked my MIL and prepared this menu with the vegetables I had in hand. Sendhil loved the entire platter & especially he gave credits for Vendakkai sambar. He had the same for dinner too. I have posted sambar recipe separately as I want to have it as a dedicated post in my food book. Please check the link for sambar recipe below.
Here, I have shared raw banana curry and carrot raita recipe. I have also shared other options for making this lunch menu. Do visit the links for other recipes. Try this No onion No Garlic lunch menu for Tamil New year / Tamil puthandu. Let this year be filled with happiness & fortune!!
அனைவருக்கும் எனது இனிய தமிழ் புத்தாண்டு நல்வாழ்த்துக்கள் !!
Tamil New year lunch menu recipes
Tamil New year lunch menu recipes - Paruppu, Vendakkai sambar, Raw banana curry, Carrot pachadi, Raw mango pachadi, Rice payasam, Pepper vada, Instant Mango pickle
Cuisine:Indian
Category:Lunch menu
Serves: 2
Prep time:30 Minutes
Cook time:60 Minutes
Total time:90 Minutes
RECIPE LINKS Check out THIS POST for Tamil new year celebration procedure.
Instead of making full meals, you can also make 5 rice varieties like lemon rice, sesame seeds rice or tamarind rice, curd rice, sweet pongal, coconut rice. Please watch the video below on how to cook these rice varieties easily.
RAW BANANA PORIYAL/CURRY RECIPE
Prep time-5 min | Cook time-10min | Total time-15mins
Ingredients
Raw banana - 1 no
Sambar powder – 1 tsp
Salt & water – as needed
Moong dal – 1 tbsp
Grated coconut – 3 tbsp
Tamarind – A very small piece(optional)
Asafetida/hing – 2 pinches
To temper
Mustard seeds- 1/2 tsp
Urad dal – 1/2 tsp
Finely chopped ginger – 1/2 tsp
Curry leaves – few
Coconut oil – 1 tbsp
Method
Wash and peel the skin of raw banana. Remove and cut the raw banana into slices. Keep immersed in water or rice washed water ( Kazhani thanni) till use to avoid discoloration.
In a cooking bowl, take the moong dal, raw banana, sambar powder, salt and a small piece of tamarind with required water and salt.
Cook until raw banana becomes tender. Make sure it is not over cooked. It should stay firm in shape. If you prick the cooked raw banana with a fork, it will go easily at the same time it will not break.
Remove and drain all the excess water..
In a kadai, temper all the ingredients given above and add the cooked raw banana, moong dal mixture. Saute well in low flame for 5 minutes. Make sure you don’t break the veggie. Do it gently. Lastly add grated coconut, mix well and saute for 2 minutes. Switch off the stove.
Serve with sambar sadam ! NOTE
Adding tamarind is optional but it helps to reduce the slight bitterness from raw banana. Add very little tamarind otherwise poriyal will become too tangy.
Adjust sambar powder as per your need. Sometimes I add red chilli powder + sambar powder half and half.
CARROT RAITA/THAYIR PACHADI
Prep time – 5 mins | Cook time-2 mins | Total time – 7 mins
Ingredients
Carrot – 1 no
Curd – 1/2 cup
Salt – as required
Green chilli – 1 no (finely chopped)
To temper
Cooking oil – 1 tsp
Mustard seeds – 1/2 tsp
Urad dal – 1/2 tsp
Curry leaves – few
Method
Wash and grate carrot. Take in a bowl with finely chopped green chillies , required salt.
Just before serving, mix the curd and temper the above said ingredients.
Serve with dal rice/paruppu sadam!
HOW TO MAKE TAMIL NEW YEAR LUNCH MENU
Wash and soak urad dal for vada and keep in refrigerator till you grind. It takes nearly 30 minutes to 1 hour for soaking. Wash and soak big gooseberry sized tamarind for sambar, small gooseberry size tamarind for rasam. Dry roast moong dal till golden and raw rice till puffy. This is for payasam. Set aside. Grate or slice one full coconut. You can use it for making pachadi, kootu and poriyal.
Take 2 pressure cookers ( 3 litre cooker is better). In first cooker bottom, add washed toor dal for sambar, turmeric powder, a drop of oil and required water. (If you are using broad beans, cluster beans for sambar, add to dal. I used lady's finger. So I made sambar in a different way).
Take a small box with lid. Add moong dal, turmeric powder, hing, a drop of oil and water for paruppu. Keep it inside the pressure cooker.
Take another small box with lid. Wash and peel raw mango. Chop into big pieces and add to the box. Add chopped green chillies, little salt and water. Do not add more water. Keep in inside the first cooker.
Take a round plate suitable for first cooker. Spread chopped raw banana, moong dal, sambar powder, salt, turmeric powder and a pinch of tamarind. Sprinkle little water and place the plate covering the first cooker. Close the cooker lid.
In the second cooker bottom, add washed rice, required water. Take a small round box, add dry roasted moong dal and rice for arisi paruppu payasam. Add required water and keep in inside the rice. If you want to make kootu, add the chopped vegetable, moong dal, salt and water in another small box and keep that inside the cooker. Close the cooker with the lid.
Pressure cook both the cookers in low flame for one whistle. (i.e Keep the flame high till steam comes out. Put the weight valve and then lower the flame completely. Cook for one whistle in low flame. It takes nearly 10 to 12 minutes based on the cooker make.) Switch off the flame. Let the steam release naturally.
In the mean time, heat oil in a kadai. Temper mustard seeds, methi seeds, red chilli, curry leaves. Add chopped lady's finger till golden brown. Add chopped tomato and saute till mushy. Add tamarind extract from big gooseberry size. Add sambar powder, salt and hing. Boil till raw smell goes off and lady's finger cooks soft.
Grind chopped gooseberry, grated coconut, green chilli, salt and hing adding required water. Add to curd and set aside. Do the tempering at the end. Pachadi is ready. ( I made carrot pachadi. For this grate carrot, finely chop one green chilli. Add to curd and temper with mustard seeds, urad dal and curry leaves.)
Grind coconut + rice flour for kootu and mango pachadi. Set aside.
Now both the cookers will be ready to open. Open the dal cooker first. Remove the plate and boxes kept inside. Mash the dal and add to sambar kadai. Boil and garnish with coriander leaves. Sambar is ready.
Open the paruppu/ moong dal box and mash well. Add tempering in ghee. Mix well and set aside. Paruppu is ready.
Open the mango pachadi box. Heat oil in a kadai. Temper mustard seeds, urad dal, curry leaves. Add cooked mango pieces. Add jaggery and ground coconut paste. Mix well and boil till thick. Mango pachadi is ready.
Take the poriyal plate and drain excess water if any. Heat oil in a kadai, temper and add cooked raw banana mixture. Mix gently and add grated coconut. Mix and switch off the flame. Transfer to a bowl. Poriyal is also ready.
Now open the second cooker with cooked rice. Remove the payasam box and kootu box.
Add ground coconut paste to the kootu box. Temper mustard seeds, urad dal, curry leaves in coconut oil. Add the kootu mixture. Boil for few minutes. Transfer to a bowl. Kootu is done.
Lastly open the payasam box. Mash the rice+dal. Take in a wide bowl. Add required water, powdered jaggery or jaggery syrup after removing impurities. Add crushed cardamom. Boil till raw smell of jaggery goes off . Roast cashews, cloves and a pinch of mace powder in ghee. Add to payasam. Lastly add boiled milk or coconut milk in room temperature. Boil in very low flame just for 30 seconds and switch off the flame else it may curdle. Payasam is ready now.
Now take the soaked urad dal and grind to smooth paste adding green chilli, hing, pepper and cumin seeds. Add water carefully. Make thick paste and transfer to a bowl. Beat the batter with your hanads for few minutes till fulffy. Add finely chopped curry leaves and salt.
Mix well and deep fry vada in hot oil. Remove and fry the papad / appalam, more milagai.
If you want to make raw mango pickle, chop finely. Add salt, red chilli powder, a pinch of roasted methi seeds powder, hing and mix well. Temper with mustard seeds with sesame oil. Mix well and serve.
Lastly make neer more and panakam. For this, take curd. Add water and salt to make buttermilk. Add crushed ginger + green chilli to the butter milk and finely chopped coriander leaves. Temper mustard seeds, curry leaves and hing. Add to buttermilk. Neer more is ready.
To make panakam, take one cup of water, add grated jaggery, lemon juice, a pinch of salt, crushed cardamom, cloves and mix well. Panakam is ready.
Rice, paruppu, 2 pachadi, poriyal, kootu (optional), payasam, vada , pickle, neer more and panakam are ready to serve for neivedyam.
This is how I make Tamil new year lunch menu every year under one hour. You too try this way and finish your work quickly.
Make this yummy platter on Tamil New year day, Offer to God, Get his blessings and enjoy !
Wish you all a very happy Tamil new year / Tamil puthandu Vaazhthukkal !!
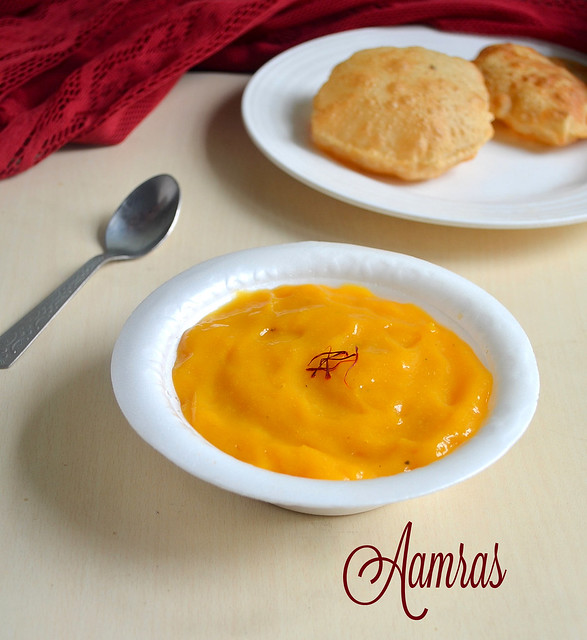
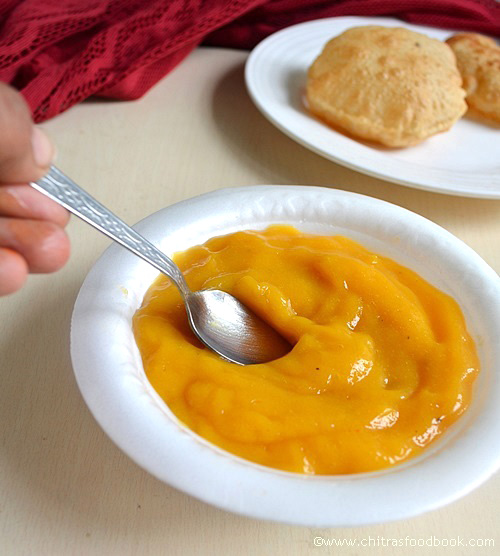
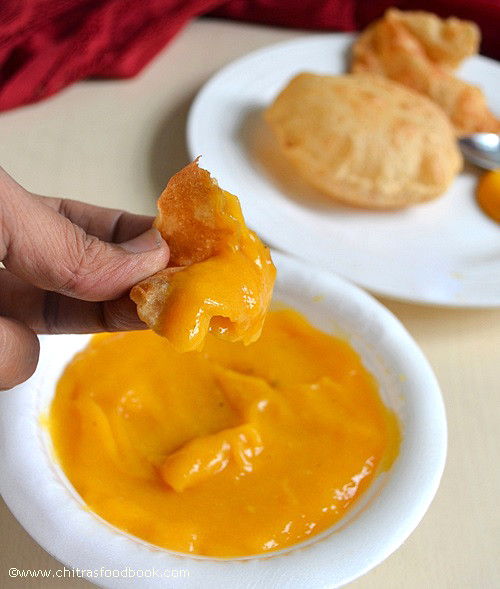
To start with mango recipes, i chose this simple and easiest North indian dessert recipe,Aamras.Aam – Mango,Ras – juice/Pulp.As its name indicates,its just the pulp of ripe mangoes sweetened with sugar or jaggery flavoured with cardamom or saffron/Kesar or dry ginger powder.After i went through some websites,i came to know that this recipe is very popular in Gujarat,Maharashtra and Rajasthan & made during festivals.Each recipe has its own mild variations.But in general,i read they all have this aamras with poori/puri.First i felt it to be an unusual combo but after i tried, i realised its taste and loved it.It was tasting like jam with poori or roti.Kids would love this combo.Basically i love the combination of sweet & spice.So i had poori with aamras & pickle .I just dipped a piece of poori in aamras and mango thokku and enjoyed it.The combination of sweet and spicy taste made me eat 3-4 pooris.Do try this way.U may love it like me .Over to the recipe..
Aamras recipe
Aamras recipe with poori - Yummy,easy north indian dessert recipe
Cuisine:Indian
Category:Sweet
Serves:Serves 2
Prep time:5 Minutes
Cook time:3 Minutes
Total time:8 Minutes
INGREDIENTS
Ripe mangoes - 2 nos ( use alphonso mango for best taste)
Sugar or jaggery - as needed ( i used 2.5 tbsp of sugar)
Cardamom - 2 nos OR Dry ginger powder - 2 pinches OR Saffron - few threads
Water or milk – little (to grind)
METHOD
Wash and peel the mangoes,Cut into pieces.Take them in a mixie jar.Add sugar or jaggery based on the sweetness of mango. Add cardamom powder or dry ginger powder or saffron threads while grinding.( Cardamom is used in Maharashtra,Saffron threads are used in Rajasthan and dry ginger powder in Gujarat – thanks for these info Spice up the curry) .
Add little milk or water while grinding. I used 3-4 tbsp of milk.
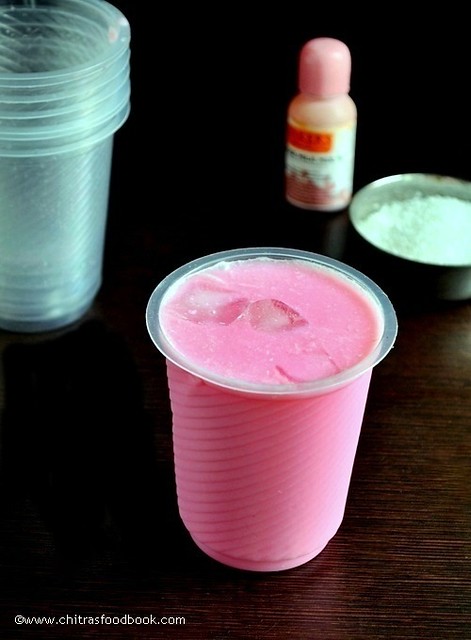
Rose milk is the easiest summer drink recipe which can be made in few minutes if u have cold milk in hand.When i was a kid, i loved rose milk kuchi ice(popsicle) more than this drink.I used to buy in Tirunelveli whenever i go for summer vacation.Soon i’ll post that version here.U can find Rose Milk in almost all the juice shops in Tamil nadu.Last week i went to Nellai and i happened to see rose milk served in a road side juice shop in a plastic cup.Immediately,i was tempted to try at home beacuse this is my family favourite.My MIL loves it a lot.She usually have this drink during summer in the evening instead of coffee/tea.Nowadays i make this for all my guests too.Sendhil usually says Rose milk tastes great only when sugar is on higher side.So i add little more.When served chilled,it tastes great.I wanted to make home made rose syrup but i din’t have proper ingredients in hand.So i went with bakers rose milk mix.Recently my friend Shalini shared rose milk shake recipe with rooh afza.I’ll try & share here soon.
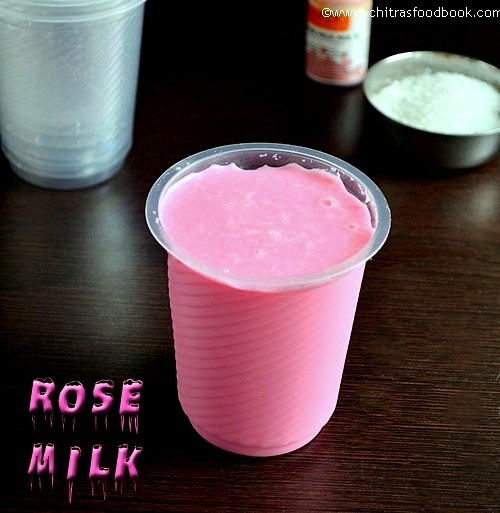
Rose milk recipe
Rose milk recipe for summer – Easiest drink with a great flavour of rose!
Cuisine:Indian
Category:Drinks
Serves:Serves 4
Prep time:180 Minutes
Cook time:10 Minutes
Total time:190 Minutes
INGREDIENTS
Milk – 2.5 cups
Rose milk essence - few drops
Sugar – 4-6 tsp ( add 4 tsp for mild sweet)
Ice cubes - optional
METHOD
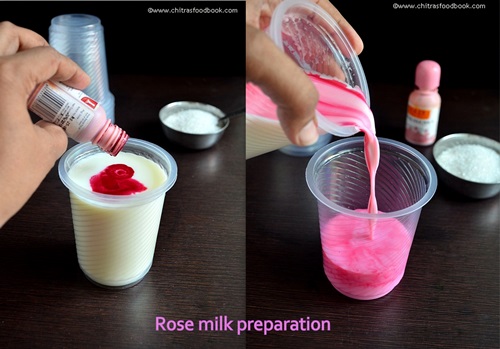
Boil milk,add sugar ,mix well and set aside to cool.Refrigerate or freeze it for an hour for quicker cooling.
After it comes to room temperature,add few drops of rose essence mix as per the flavour & color u require.Mix well.
Filter it to remove the skin of the milk (paal aadai) and refrigerate again for 1- 2 hours to serve chilled or add ice cubes and serve immediately.
Note
Adjust the quantity of rose essence & sugar as per ur taste.I usually add more sugar & more essence as i love dark color.
Tastes best only when serve chilled.
Always filter the rose milk otherwise u may get paalaadai while drinking which many people won’t like..
Serve chilled with or without ice cubes as u wish ! Enjoy !