Search Chitra's Food Book

August 25, 2014

EASY PAAL KOZHUKATTAI RECIPE WITH COCONUT MILK, SUGAR

Paal kozhukattai recipe
As u all know,Paal kozhukattai is an yummy Chettinad dessert recipe.It is loved by all irrespective of ages.I should have made this post for Gokulashtami but I din’t.Now I am posting this easy paal kozhukattai recipe for my Bachelor friend , Jayagopal.He wanted to make it for potluck party in his office this week.So he told me share this recipe as soon as possible.This is not the authentic chettinad version though.I must learn that and post here soon. Actually I had planned to post some Ganesh chathurthi recipes as the festival is around. But then I thought, this is also a variety of kozhukattai which we can make easily and offer Lord Ganesh.  So I prepared this easy paal kolukattai version using milk, coconut milk powder and sugar as Vinayagr chathurthi special recipe. It was tasting great. I had already shared my MIL’s Paal kohukattai recipe with jaggery which is Sendhil’s most favourite recipe. But I love this version more than that Love Struck.So I usually make it more often for myself and Raksha as evening snack or dessert for your guests.Special thanks to my friend Jayagopal, otherwise i would not have done this post even now Happy.Ok,Lets see how to make this yummy and easy paal kozhukattai recipe.

Easy paal kozhukattai recipe

Easy paal kozhukattai recipe


Paal kozhukattai recipe Easy paal kozhukattai recipe using coconut milk powder,milk and sugar
Cuisine: Indian
Category: Sweets
Serves: 2 persons
Prep time: 10 Minutes
Cook time: 15 Minutes
Total time: 25 Minutes


INGREDIENTS
  • Store bought rice flour - 1/2 cup
  • Water - 1/2 cup + 2-3 tbsp (for dough)
  • Gingely oil – a drop
  • Salt – a pinch
  • Sugar – 2 tbsp
  • Boiled milk – 1/2 cup
  • Coconut milk powder - 1.5 tbsp or thick coconut milk - 1/2 cup
  • Cardamom seeds - 1 no (crushed)
  • Saffron threads - few
METHOD

  • In a wide bowl , take the rice flour.Add a pinch of salt ,mix well & set aside.
  • Boil water adding a drop of gingely oil.when the water starts to boil,initially u can see some small bubbles on the bottom and sides of vessel.After few minutes,water will start to roll boil with big bubbles.Switch off the flame as soon as water starts to roll boil with big bubbles.
Paal kozhukattai 1
  • Add the boiled water to the rice flour little by little and mix well.Rice flour may not take all the water.Stop adding water as soon as u get a non-sticky dough.If u feel the dough is dry,add little more hot water.Make sure the dough is not sticky.Knead the dough when it is warm.Make small balls of seedai size by greasing your fingers.Cover it till use.
Paal kozhukattai 2
  • Now boil water in idli pot or in a kadai.Grease the idli plate with oil and spread the balls.If u are using kadai,keep the balls in a small plate.Place a small wide bowl and keep the plate over the bowl.Cover the kadai and cook for 5 – 10 minutes.
Paal kozhukattai 3
  • In the mean time,mix 1.5 tbsp of coconut milk powder in 1/2 cup of boiled n cooled milk without any lumps.To this add sugar, saffron thread and cardamom powder.Stir well.
Paal kozhukattai 4
  • Allow it to boil for 2 minutes in medium flame.Milk will thicken slightly.To this, add the cooked rice balls and boil for few seconds.
  • Remove and serve warm or cold.

Note
  • U can cook the rice balls directly in milk instead of cooking in idli pot.In that case,use 1/2 cup of milk + 1/2 cup of water.Cook till rice balls float on top.Now mix 1 tbsp of coconut milk powder in 1/4 cup of milk and add to the cooked rice balls.Boil for a minute and switch off the flame.Add cardamom powder & few saffron threads. Mix well and serve !
  • I cooked the rice balls in idli plate to ensure proper & easy cooking.Also balls won’t break or dissolve.
  • The consistency of dough is important for getting soft rice balls. No problem even if u make the dough little sticky.U can grease ur hands with oil and make balls.But if u make the dough hard and dry,u will never get soft balls.so please add water carefully.
  • If u don't have coconut milk powder in hand,use 1/2 cup of grated coconut.Grind & take thick coconut milk adding 1/2 cup of water.Add to the milk at the end.Give a boil in low flame & switch off.


Make this easy paal kozhukattai and offer to GOD Smile
Paal kozukattai

Continue Reading...


August 22, 2014

BENNE BISCUIT RECIPE - KARNATAKA IYENGAR BAKERY STYLE BISCUITS

Benne biscuit recipe
Nankhatai( Indian butter cookies) is called by different names in different languages. In Tamil nadu, we call it as”shrewsbury biscuit”. In Karnataka, it is called as “Benne biscuit”. But whatever be the name its a very popular biscuit all over India which you can find in all the bakeries. Here in Bangalore, Iyengar bakery is very famous for Benne biscuit, Khara biscuit, open sandwich, khara bun and many more.

 Though Iam in Bangalore for more than 10 years, I had tasted these bakery stuffs only a few times. But every time when I come across Iyengar bakery style recipes in my fellow bloggers blog, I feel like trying them immediately but somehow I didn’t. Yesterday I was tempted very badly by seeing this recipe. The comments & feed backs from the readers made me try the recipe immediately. Actually it was titled as Benne biscuit(butter cookies) but ghee was used in the recipe. I doubted & browsed through so many benne biscuit recipes and most of them had ghee or oil. And finally I got the explanation for its name from here.  

As this biscuit has a smooth & melt in mouth texture like butter, it is called Benne biscuit & not that its made of butter (Benne means butter in Kannada). Of course in bakeries they do use dalda or vegetable shortening. So without researching further, I just tried it. In the next 20 minutes, biscuits were ready in my hand & Yes, it was a big hit in my home & among my Kannadiga friends too. But my friends told cardamom is optional to use otherwise it is perfect ! My in-laws and myself loved it very much. I had already posted Multi grain Nankhatai recipe with oats,ragi & wheat flour using oil. But this recipe uses ghee. How come it tastes bad when you add so much of ghee??. Even Beginners in baking can dare to try this recipe. U will get the perfect result , Iam sure..

Ok, lets see how to make this iyengar bakery style eggless benne biscuit/Nankhatai at home easily.

Benne biscuit recipe


Benne biscuit/Nankhatai recipe


Benne biscuit/Nankhatai recipe Easy,bakery style nankhatai recipe for tea time!
Cuisine: Indian
Category: Baking
Serves: 10 
Prep time: 10 Minutes
Cook time: 12 Minutes
Total time: 22 Minutes


INGREDIENTS

  • Homemade ghee - 3.5 tbsp ( use 4 tbsp max) 
  • Maida/All purpose flour - 1/2cup
  • Powdered sugar – 1/4 cup
  • Crushed cardamom + clove – 2 + 1 no (optional)
  • Baking powder - 1/4 tsp
HOW TO MAKE BENNE BISCUIT - METHOD

  • Powder sugar adding cloves & cardamom very finely. Melt ghee & bring it to room temperature. In a wide bowl, take the flour,powdered sugar, baking powder. Mix well. Add melted ghee at room temperature little by little and make a dough.
Benne biscuit 1
  • Dough should be non-sticky and soft without cracks . But it won’t be too soft & pliable like chapathi dough. So no need to add more ghee. Initially dough would look crumbly but as you roll it tightly, you will be able to make a soft dough.
Benne biscuit 2

  • Now take a cookie tray & grease it with little ghee. Take big gooseberry sized ball and press it lightly. Do not press it flat. These biscuits are meant to be small & round. Hope you know it. But by mistake, I flattened it bit more. Cracks may form. Pat it and seal the cracks. Arrange all the biscuits in the tray.
Benne biscuit 3
  • Preheat oven in convection mode for 10 minutes in 180c. Then keep the cookie plate and bake the cookies in 180 c for 12 minutes. Switch off, remove and set aside for 5 minutes. Now try to move the cookies. If they move, it is done. Else cookies will be sticking to the plate and it will break.
  • Let it cool completely. When the cookies are hot, it would be very soft. Cracks are unavoidable. It shows the cookies are done. May be if  you add 4 tbsp ghee, cracks might be less. Do not brown it. It will be cooking even after you remove from oven. So be patient & allow it cool completely. Remove, Serve & Enjoy with tea !
Benne biscuit 4

Note
  • I used ghee with sediments.So mine turned out slightly yellow in color. Otherwise it should be white.
  • No problem if the cookie dough is slightly crumbly. Just roll it tight and make balls. If you feel the dough is cracking too much, add little more ghee say 1/2tbsp.
  • In the actual recipe, it was told to rest the dough for 2 hours before baking but I din’t do it.
  • U can always replace ghee with oil or butter.But quantity may vary.
  • Never add frozen ghee. It won’t work. U should use melted ghee but it should not be hot. It should be in room temperature.

Enjoy this bakery style melt in mouth benne biscuit with hot milk or tea !
Benne-biscuit-recipe
Continue Reading...


August 21, 2014

PANEER SANDWICH RECIPE-KIDS LUNCH BOX RECIPES


paneer-sandwich-recipe-for-kids

I tried paneer sandwich recipe for the first time using homemade paneer for our breakfast .I referred few websites and came up with my own combination.We all liked it very much.More than us,Raksha enjoyed it a lot.The combination of paneer masala,green chutney and tomato sauce with bread was yummy.Its a simple yet filling breakfast recipe for kids as well as adults.It can be packed for lunch box too.I made few colourful open sandwich to serve my daughter.It was more appealing Happy.

Paneer-sandwich

Paneer sandwich recipe


Paneer sandwich recipe Easy & colorful paneer sandwich recipe for kids breakfast and lunch box
Cuisine: Indian
Category: Breakfast
Serves: Serves 2
Prep time: 10 Minutes
Cook time: 10 Minutes
Total time: 20 Minutes


INGREDIENTS
For paneer masala
  • Homemade paneer cubes - 20 nos
  • Big onion - 1/2tsp
  • Ginger garlic paste – 1/2 tsp
  • Red chilli powder – 1/2 - 1 tsp
  • Garam masala powder – 1/2 tsp
  • Salt & water - as needed
  • Turmeric powder - 1/8 tsp
  • Kasoori methi - a big pinch
  • Coriander leaves - to garnish
For green chutney
  • Mint leaves or coriander levaes - A handful
  • Green chillies - 2 nsos
  • Garlic - 2 cloves
  • Lemon juice - few drops
  • Cashew nuts - 5 nos
  • Salt & water - as needed
For Sandwich
  • Bread slices - 10 nos
  • Tomato sauce - as needed
  • Butter/ghee or oil - to toast
METHOD

  • Crumble paneer cubes into small pieces.Set aside.Grind green chutney with the ingredients given above and keep aside.
Paneer sandwich recipe 1
  • In a pan,heat oil and splutter cumin seeds.Saute onions.G&G paste.Mix well till raw smell leaves off.Now add the crumbled paneer,red chilli powder,turmeric powder & Garam masala powder.Add the required salt and mix well.Saute till u get a nice smell.Lastly add kasoori methi,give a toss and switch off the flame.Garnish with coriander leaves.
Paneer sandwich recipe 2
  • Now take one bread slice and apply green chutney on one side.Toast the other side for few seconds adding butter or ghee.Remove in a plate.Take another slice of bread and apply tomato sauce on it.Toast the other side with ghee or butter or oil.Now spread the paneer masala on top of tomato sauce bread.cover it with green chutney bread and toast both the sides for few seconds till u get browned top. Remove & cut it diagonally.
Paneer sandwich recipe 3
  • Serve & Enjoy !

Note
  • U can replace tomato sauce with red garlic chutney & make it more spicy.
  • U can also remove the corners of bread slices if needed.But  i dint remove as my bread slices were very small.
  • U can also do the grill & make a grill sandwich.

Paneer sandwich with tomato sauce tastes yummy.Do try it for ur kids !
paneer sandwich recipe
Continue Reading...


August 19, 2014

BRINJAL RASAVANGI/KATHIRIKAI RASAVANGI RECIPE


kathirikai rasavangi

Brinjal is my most favourite vegetable.But i am not able to make brinjal recipes often in my kitchen because Sendhil & Raksha are not fond of it.So i used to cook some interesting kathirikai recipes whenever my in-laws visit my place. This time, i tried Rasavangi recipe learning from my MIL.Usually we make Rasavangi using Ash gourd/Poosanikkai.But i tried with the freshly bought eggplant from Salem.It was too good & i loved it a lot.I am sure brinjal lovers would love this gravy for rice.Do try it !


Brinjal rasavangi recipe


Brinjal rasavangi recipe Brinjal Rasavangi Recipe / Kathirikai Rasavangi Recipe for rice - Yummy brinjal recipe !
Cuisine: Indian
Category: Gravies
Serves: Serves 4-6
Prep time: 15 Minutes
Cook time: 20 Minutes
Total time: 35 Minutes


INGREDIENTS

  • Brinjal - 5 nos ( chop into bite sized cubes)
  • Chana dal/Kadalai paruppu OR Toor dal - 2 tbsp
  • Tamarind – Big gooseberry size
  • Salt & water - as needed
  • Turmeric powder - 1/8 tsp
  • Jaggery – a pinch.
To roast and grind
  • Coriander seeds - 1 tbsp
  • Urad dal - 1.5 tbsp
  • Grated coconut -1/4 cup
  • Red chillies - 4 nos ( use 3 for less spice)
  • Hing/Asafetida - 2 big pinches
To temper
  • Cooking oil - 1 tbsp
  • Mustard seeds - 1/2 tsp
  • Urad dal - 1/2 tsp
  • Curry leaves - few
  • Coriander leaves – few to garnish
METHOD
This quantity serves 4-5 persons. Please reduce to half for 2 persons.
  • Wash and soak chana dal in required water for 15 minutes.In the mean time,wash and chop the brinjal into small cubes & keep it immersed in water.
Brinjal Rasavangi 1
  • In a pan,heat a tsp of oil and roast the coriander seeds,urad dal & red chillies adding hing.Add grated coconut,roast it lightly and grind them to a smooth paste adding little water.Set aside.
Brinjal Rasavangi 2
  • In a wide bowl,take the soaked chana dal.Add enough water & cover cook for sometime around 10 minutes.Add tamarind extract, chopped brinjal pieces and cook till it turns soft but it should retain its shape. While cooking,add turmeric powder & salt.( U can add 1/2  tsp of sambar powder if u want more flavour) .
Brinjal Rasavangi 3
  • Now add the ground paste,a pinch of jaggery and little water.Boil for sometime and switch off the flame.Temper at the end. Garnish with coriander leaves.
Brinjal Rasavangi 4
  • Mix with plain rice adding few drops of ghee!
    Enjoy !


Note

  • U can replace brinjal with ash gourd.
  • Replace chana dal with toor dal.
  • Sambar powder is optional as it is not aaded in authentic rasvangi.Instead u can add some powdered roasted pepper corns.
Enjoy brinjal rasavangi with plain rice adding few drops of ghee ! It tastes yum !!


Do check out my other brinjal recipes

Continue Reading...


August 17, 2014

EASY AVAL PANCHAMIRTHAM RECIPE / POHA PANCHAMRIT - EASY GOKULASHTAMI RECIPES

Happy-krishna-jayanthi
We celebrated Krishna Jayanthi pooja early today as Sendhil is leaving to Norway for an official trip.My in-laws are here with us and we had a great celebration.My MIL made this Panchamirtham using poha/Aval and mixed fruits.It was so nice.Last year we performed Ganapathi Homam in our house. At that time,priest made this aval panchamirtham to offer in Homam and he gave us as Prasad too.My MIL reminded that and she made it today for Naivedyam as Lord Krishna is fond of both Aval & fruits. It was delicious & it took just few minutes to prepare.She also told me to blog this recipe for people who cannot make deep fried stuffs.It can be prepared even in the last minute before pooja. Friends,if you are looking for some easy,no cook aval recipe for krishna janmashtami,just try this.Offer this to God along with fruits,curd,milk & butter. I am sure Krishna would be pleased and bless us !
easy krishna jayanthi recipes

Easy panchamirtham recipe with poha & mixed fruits


Easy panchamirtham recipe with poha & mixed fruits Easy aval/poha & mixed fruits panchamirtham recipe for Krishna jayanthi
Cuisine: Indian
Category: Sweet
Serves: Serves 4
Prep time: 5 Minutes
Cook time: 5 Minutes
Total time: 10 Minutes


INGREDIENTS
1 cup - 250ml

  • Poha/aval ( thin or thick) - 1/4 cup
  • Honey - 1 tbsp
  • Grated jaggery - 1-2 tbsp
  • Small Banana - 1 no
  • Small apple - 1/2 no
  • Pomegranate - a handful
  • Mosambi - 2 pieces (optional)
  • Mango – 4 small cubes
  • Guava - 1/4 no(optional)
  • Ghee - 2 tsp
  • Cardamom crushed - 1 no
  • Edible camphor – a pinch (optional)
METHOD

  • Wash the poha twice,drain and set aside.In a wide bowl,take the washed poha,chopped mixed fruits,honey,Ghee,grated jaggery,crushed cardamom and edible camphor.Mix well.
  • Give a standing time of 30 minutes before u consume.Poha will become soft.
Offer to GOD!
Enjoy !


Note

  • Adding guava is optional.
  • U can use either thin or thick aval.
  • Adjust the quantity of jaggery & honey as per the taste.


Make this easy panchamirtham recipe for krishna jayanthi & offer GOD !!

aval Panchamirtham

Continue Reading...


August 14, 2014

KAI MURUKKU RECIPE | HOW TO MAKE SUTHU MURUKKU | KRISHNA JAYANTHI RECIPES

Kai murukku recipe

My MIL has the practice of making Kai murukku for Gokulashtami festival. People in Tamil nadu make this murukku generally for festivals and occasions like Seemandham & marriage as seer murukku. My MIL usually says my husband’s grandmom ( ie My mil’s MIL) is an expert in making perfect swirls. My MIL also makes it very fastly & iam still learning from her. Of course swirls come only by practice.

Last year I tried kai murukku using idli rice following my friend Shalini’s recipe. It came out very well & I found it easy for twisting too. I will try to post that recipe very soon. But for festivals, we are supposed to use only raw rice/Pacharisi. So this time I wanted to try this raw rice kai murukku for krishna jayanthi. I got this recipe from my MIL and tried it for the first time. I also referred “Ammavin samayal” kai murukku video for making twists. My twists/swirls din’t come out perfect but the taste was great. Sendhil liked it very much. As every beginner’s hope, I too believe I can make perfect suthu murukku at least by next year.


There are some points to be noted to make a perfect kai murukku. First & foremost thing is “You should use only homemade processed rice flour and roasted urad dal flour”. Store bought rice flour never works.The flour should be very smooth in texture. Also, you should start making this murukku as soon as u grind the rice flour.ie, processed rice flour should be wet. If you allow the homemade flour to dry for long time,u won’t be able to make swirls properly. It will get cut. We should not add too much of butter because murkku will drink oil.

The ratio of Rice flour & urad dal flour should be 8:1.  I have shared some of the remaining tips & tricks in “Notes” section. Do have a look before you start making. Ok, Lets see how to make Kai murukku at home with step by step pictures.

kai-murukku


Kai murukku recipe


Kai murukku recipe How to make kai murukku for Gokulashtami/Krishna jayanthi
Cuisine: Indian
Category: Snacks
Serves: 10
Prep time: 2 Hours
Cook time: 10 Minutes
Total time: 2H10 Minutes


INGREDIENTS

METHOD

  • Take the homemade processed wet rice flour, urad dal flour, sesame seeds, salt and hing. Mix well. Now add soft butter and mix well with the flour. Butter should be well mixed with the flour. Lastly add water little by little and make a non-sticky dough.
Kai murukku 1
Kai murukku 2
  • Take a small lemon sized ball and try to make swirls using your fingers. If you are able to make it, proceed further. If u find the thread getting cut, dough must be dry. So sprinkle little more water in the dough and knead it well. Apply little oil on your hands if the dough is sticky.
Kai murukku 3
  • Spread a cotton cloth or butter paper and place a small bottle lid. Keep a small bowl of water & a bowl of oil nearby. Take a small lemon sized ball from the dough.
  • Make the swirls/murukku around the lid. While making the swirls,keep your hand a little higher from the lid.The dough will stretch easily if u made it perfect. When u hold ur hand higher in length, u can make the twist easily.
  • U can dip ur hands in water whenever needed. It helps u to make twists neatly.
  • Use ur first three fingers ( ie thumb, fore finger & big finger) and press the dough with ur thumb, make a twist and keep doing it to form a circle shape. It sounds bit difficult but it will come by practice for sure. Keep the remaining dough closed with a wet cloth to prevent drying.
  • Make some 10 murukkus & heat oil in a pan for deep frying. Drop a small piece of dough. If it rises immediately, oil temperature is correct. Now remove the murukku using ur hand or dosa flipper and drop in oil carefully. U can slide it in the sides. It will move to the center. Add 3-4 murukku per batch and deep fry.
Kai murukku 4
  • Cook till the bubbles and sshhh sound ceases completely. Flip it once in the middle. Remove the murukku, drain in a tissue paper. Allow it to cool & Enjoy !
Kai murukku 5
  • For storage,keep a tissue paper in a box and arrange the murukku after it cools down completely. The original flavour of murukku can be felt only by next day.U can store it for months too.It tastes crunchy and yummy.


Note

  • You should use only homemade processed rice flour and roasted urad dal flour”. Never roast the rice flour. It should be wet. Store bought rice flour never works. The flour should be very smooth in texture. Also you should start making this murukku as soon as you grind the rice flour. i e, processed rice flour should be wet. 
  • If u allow the homemade flour to dry for long time, you won’t be able to make swirls properly. It will get cut. We should not add too much of butter because murkku will drink oil. The ratio of Rice flour & urad dal flour should be 8:1
  • Grease your fingers with oil whenever needed while making twists.
  • For trouble shooting : If u find the thread getting cut while making twists, dip ur hand with murukku dough in water slightly and press the dough. Dough will become slightly wet. Now u can make twists easily.
  • Never use store bought rice flour for making dough.
  • Homemade rice flour should be slightly wet while making dough. U can use oil for greasing ur hands if u feel the dough is sticky.
  • Less butter should be added. Adding more butter makes the murukku absorb more oil.
  • Here Urad dal flour gives the stretchable tendency to the flour. So never skip or replace it.
  • Some people also use gram dal flour but it works well with idli rice kai murukku & not with raw rice murukku.

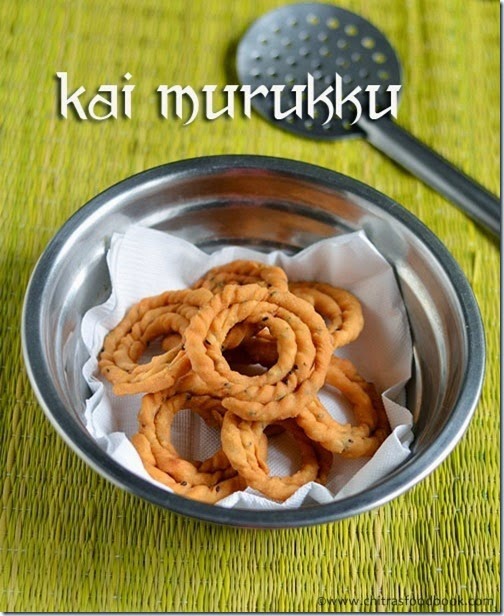
Is my kai murukku looks somewhat OK ?? 
I will try to make it perfect in future by practice and update the pictures for sure. 

kai-murukku-recipe

Continue Reading...


August 13, 2014

PAV SANDWICH RECIPE(MUMBAI STREET FOOD) - RECIPES WITH PAV BUN

Pav-sandwich-recipe
I had some pav buns which was about to expire. Actually I bought them to try vada pav but I couldn’t make it as I was busy in trying some Gokulashtami recipes. This evening, Raksha was asking some snacks to munch and then I realised about these pav buns. I was not in a mood to make pav bhaji or vada pav. So I quickly browsed some easy pav bun recipes and found this in Sanjeev Kapoor’s video. 

It was very simple and found it yummy with spices & masalas. I tried immediately & it was a big hit with my daughter. I too loved it a lot. Its a very easy, simple and quick snacks recipe which can be made in minutes. Even bachelors can try this as it has no grinding job.

In the actual recipe cucumber, tomatoes were used & it was titled as jain masala pav sandwich without onions. But I used onion & boiled potato slices as I din’t have cucumber in hand. So the choice is yours. It tastes yummy however its made. Do try this easy sandwich recipe for your kids evening snacks. I am sure, they will love it. Not just kids, we parents can also have one & enjoy!

Pav sandwich recipe

Pav sandwich recipe


Pav sandwich recipe Easy masala pav sandwich recipe - Quick n yummy sandwich recipe !!
Cuisine: Indian
Category: Sandwich
Serves: 3
Prep time: 10 Minutes
Cook time: 5 Minutes
Total time: 15 Minutes


INGREDIENTS
For masala
  • Pav bhaji masala - 1 tsp
  • Garam masala - 1 tsp
  • Red chilli powder - 1 tsp
  • Coriander powder - 1 tsp
  • Salt - as needed
  • Water - little to make a paste

  • Pav buns - 9 nos
  • Coriander leaves + Mint leaves - 3 tbsp (finely chopped)
  • Butter or ghee - 3 tbsp
HOW TO MAKE PAV SANDWICH RECIPE - METHOD


  • Make the masala by mixing all the spices. Add water & make it little thin. Add little lemon juice if needed.
  • Now slice onions, tomatoes & boiled potatoes. Slit open the pav buns vertically like an open book till half way.
Pav sandwich 1
  • Heat dosa pan. Add 2 tsp of butter or ghee. Keep the flame low and spread the butter all over the pan. Now add 2 tsp of mixed masala and saute for few seconds in low flame. Do not increase the flame. It will make the masala burn. Now add some finely chopped coriander+mint leaves. Mix well.
Pav sandwich 2
  • Open the pav and place it over the tawa. Quickly move the pav all over the tawa for the masala to coat well on both sides.
Pav sandwich 3
  • Remove the pav and arrange the onion slices in one side & tomato slices in the other side. Keep the boiled potato slice in the middle and close the pav. Serve hot immediately.
Pav sandwich 4
Enjoy !
Note
  • For no onion no garlic version (Jain) use cucumber slices instead of onions.
  • U can also keep a slice of cheese for kids.


Masala pav sandwich with Hot chai is ready to serve ! A bite of sandwich and a sip of hot tea tastes divine. Enjoy it !

Pav sandwich recipe


Continue Reading...