Search Chitra's Food Book

November 9, 2014

15 CHUTNEY RECIPES FOR RICE - THOGAYAL RECIPES - THUVAIYAL VARIETIES

Thogayal-recipes

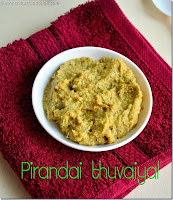
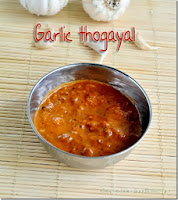
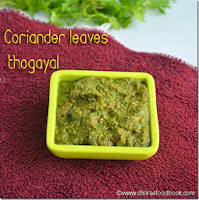
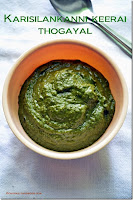
In this collection you can find thogayal recipes /chutney recipes for rice like Paruppu thogayal, Coriander leaves thogayal/Kothamalli thuvaiyal,pudina thogayal/Mint thogayal, Poondu thuvaiyal/Garlic thogayal, curry leaves thogayal/Karuvepilai thuvaiyal, Thengai thogayal/Coconut thuvaiyal, Pirandai thogayal, Karisilankanni thogayal, chow chow thogayal, radish thogayal & banana stem thogayal recipes for rice pepared by Tamil people.
 
Thogayals/ Thuvaiyals are very popular among South Indians especially for Tamil people. Some people like to mix with plain rice and eat and some loves to have it as a side dish for curd rice & sambar rice. In my family, everybody loves thogayal a lot. Everyday our lunch menu starts with a thogayal recipe. I came to know about varieties of thogayal recipes only after my marriage. Before marriage, my mom used to make thengai thogayal to mix with plain rice & pottukadalai thogayal as side dish for lemon rice and that too she makes it very rarely in weekends.

But after marriage, when I tasted few thogayal recipes prepared by my MIL,it was very new and tasted delicious for me. My MIL makes all the thogayals perfectly with well balanced taste. The ratio of tamarind,salt and chillies are very important to make a perfect thogayal otherwise it will taste spicy or tangy. So whenever my MIL visits me, I tell her to make varieties of thogayal recipes like paruppu thogayal, peerkangai/ridge gourd thogayal,coriander thogayal,pudina thogayal, Poondu thuvaiyal, curry leaves thogayal and many more. I refrigerate them in an air tight box and enjoy it for more than a week.

As Sendhil loves thogayal sadam a lot, I pack it for his lunch box too along with some stir fry/poriyal recipes. If I have few thogayals in hand, it is a big support for me as it makes the lunch box job much easier. In my blog, I have posted nearly 12 thogayal recipes for rice so far. It includes some healthy thogayal recipes like pirandai thogayal, Karisilankanni keerai thogayal as well. I wanted to have a collection of them in one post for my easy reference and for people who look for varieties of thogayal recipes for their daily lunch. I am yet to post few more like inji thogayal/ginger thogayal & peerkangai thogayal. I will share them in near future and add it here.

Most of the recipes are without coconut. So you can grind, saute in oil and store them in refrigerator for more than a week too. I hope these thogayals would be very handy and useful for bachelors & working women who wants quick lunch or dinner. Do try these thogayal varieties for your lunch & lunch box. It tastes yummy. Do leave your feedback if you try any of these. I would be more happy. Thanks for visiting this page.

Thogayal recipes


Thogayal recipes Collection of thogayal recipes / chutney for rice - Varieties of thogayal/ thuvaiyal / chutney recipes for rice !
Cuisine: Indian
Category: Thogayal
Serves: 3
Prep time: 10 Minutes
Cook time: 15 Minutes
Total time: 25 Minutes


INGREDIENTS

  • Coriander leaves/Kothamalli
  • Mint leaves/Pudina
  • Curry leaves
  • Pirandai
  • Karisilankanni leaves
  • Banana stem
  • Chow chow/Chayote
  • Coconut
  • Red chillies
  • Toor dal,Moong dal
  • Urad dal
  • Brinjal
  • Tamarind
  • Jaggery
  • Pepper corns
  • Garlic cloves
  • Cooking oil
  • Mustard seeds


Continue Reading...


November 7, 2014

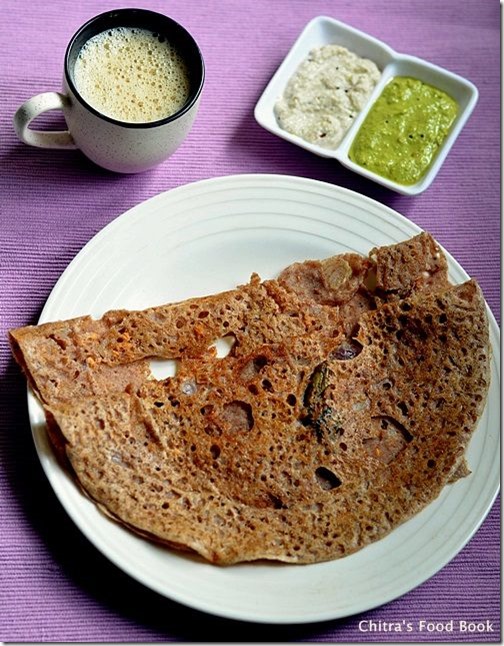
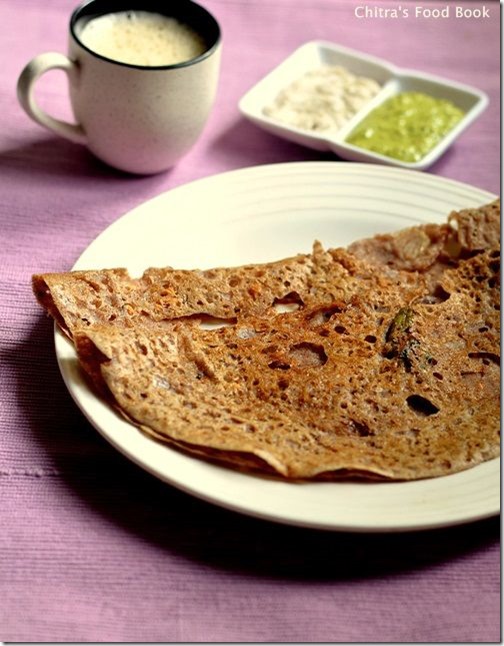
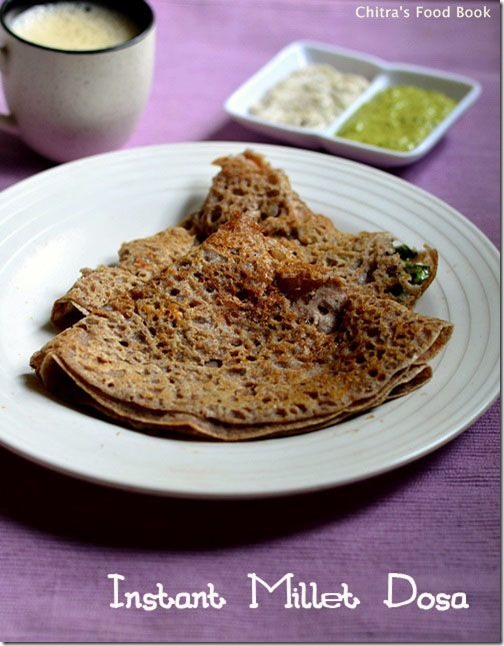
INSTANT MILLET DOSA USING ENERGY MIX POWDER/SATHU MAAVU DOSA RECIPE

Instant-millet-dosa

Few weeks back i shared  millet energy mix powder/siru thaniya sathu maavu podi.You can find that recipe here.This millet powder is very useful & handy for us.We use this powder for making instant dosa & porrdige for our breakfast and dinner. It comes out very well with awesome flavours of millets.Every month my FIL buys 1/2 kg in each variety of millet & grind in a mill.We store and use that powder for 2-3 months and make dosas regularly and porridge during fasting days.My MIL usually says, instead of searching for different recipes with each millet,she is very much comfortable and happy with this mixed millet powder as it includes health benefits of all the millets in one recipe.Nowadays i too started making this dosa very often in my kitchen.Friends,if you got bored of making idli,dosa,pongal,upma and rice recipes with millets,do try this sathu maavu /health mix powder for a change.You will love it for sure.OK,Lets see how to make this easy,instant mixed millet powder dosa.
Check out my other millet recipes :
About millets
Mixed millet powder ladoo
Little millet sweet pongal
Foxtail millet idli,dosa


Millet dosa recipe

Millet energy mix powder dosa/Millet sathu maavu dosai


Millet energy mix powder dosa/Millet sathu maavu dosai Instant millet dosa using millet energy mix powder
Cuisine: Indian
Category: Breakfast
Serves: 5nos
Prep time: 5 Minutes
Cook time: 2 Minutes
Total time: 7 Minutes

INGREDIENTS
For batter
To temper & saute
  • Cooking oil - 1 tsp
  • Mustard seeds - 1/2 tsp
  • Urad dal - 1/2 tsp
  • Cumin seeds/Jeera - 1/2 tsp
  • Big onion - 1 no
  • Green chilli - 1 no ( slit or chop finely)
  • Curry leaves - few
  • Ginger - 1/2 inch piece ( chopped finely)
METHOD

  • Mix all the ingredients given under “ To batter”.Heat oil in a kadai and temper all the ingredients in the same order given under “ To temper”.Saute the onions,chillies till transparent.( Usually i do tempering job in dosa pan itself)
Millet-dosa-step1
  • Add this to the batter and mix well.Check for salt. Batter should be slightly watery.Heat dosa pan and pour the batter in a circular manner starting from outwards towards center.Fill the holes with little batter.
Millet-dosa-step2
  • Drizzle a tsp of oil around the dosa and cook for one side in medium flame till the edges start to lift slightly. Flip the dosa & cook for a minute.Remove in a plate n enjoy with chutney or idli podi
Millet-dosa-step3

Enjoy !
Note

  • Adding rice flour & curd is optional here.Instead u can add a tbsp oof ragi flour for easy removal of dosa.
  • If u want to make thick dosas,add little water & make dosas thick.For thin,lacy dosas,add more water & make the batter watery.But adding too much of water makes the dosa look dry.So take care.
  • Also if u don’t have time to have saute onions,just add pepper corns and jeera to the batter and make dosa.It also tastes equally good.


Enjoy eating this healthy energy mix mixed millet powder dosa for your breakfast/dinner.It is easily digestible too Smile
Millet-recipes

Continue Reading...


November 6, 2014

Easy Beetroot Poriyal Recipe-Bachelor’s Recipes

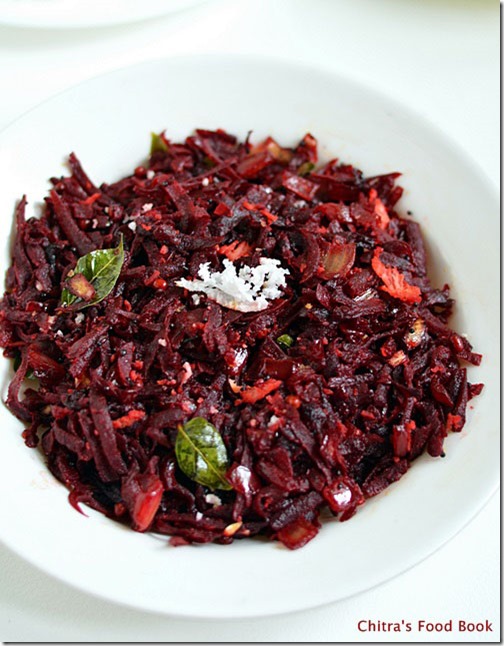
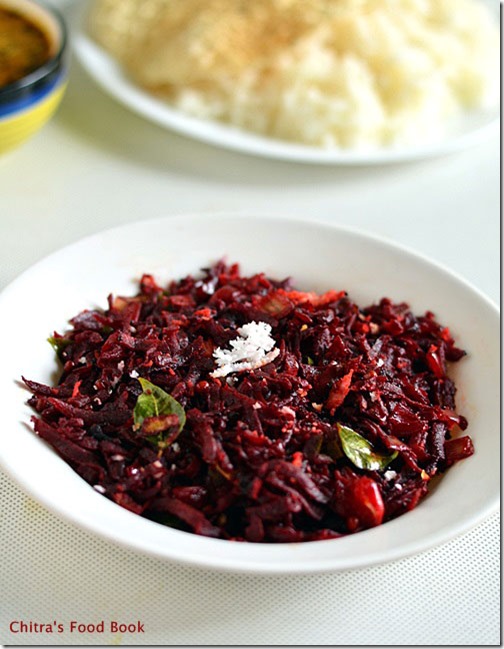
Easy beetroot poriyal
This is one of the easiest poriyal recipes that can be done under 15 minutes during busy morning hours.I learnt this recipe from my MIL but made few changes according to my tastes buds.Usually i make beetroot poriyal following my mom’s method and it tastes awesome with more kuzhambu and keerai kuzhambu.But this poriyal recipe is much much easier than that version because it doesn’t need pressure cooking & grinding and it tastes equally yummy too.U can make it with or without coconut .So this recipe would be apt for bachelors and working girls/women to pack for their lunch box.You can have this as a side dish for sambar rice,rasam and More kuzhambu.Generally beetroots are very good for health especially for liver problems.So i make sure to use it at least once in a week in the form of poriyal,kootu,salad or at least juice.Friends,do try this easy beetroot stir fry recipe and enjoy its health benefits.Soon i will share our beetroot kootu recipe here.Lets see how to make this easy,south indian style beetroot poriyal recipe for rice.

easy beetroot stir fry

Easy beetroot poriyal recipe


Easy beetroot poriyal recipe Easy beetroot poriyal recipe for bachelors and working women - It can be done under 15 minutes.
Cuisine: Indian
Category: Poriyal
Serves: Serves 1-2
Prep time: 5 Minutes
Cook time: 10 Minutes
Total time: 15 Minutes


INGREDIENTS
To grate
  • Beetroot - 2 nos ( Medium sized)
To temper & saute
  • Cooking oil/ Coconut oil - 1 tbsp
  • Mustard seeds - 1/2 tsp
  • Urad dal - 1/2 tsp
  • Chana dal - 1 tsp
  • Hing/asafetida – a pinch
  • Curry leaves - few
  • Big onion - 1 no ( finely chopped)
  • Sambar powder - 3/4 - 1 tsp
  • Turmeric powder - 1/4 tsp
  • Salt & water - as needed
  • Grated coconut - 2 tbsp ( optional)
  • Lemon juice - few drops (optional)
METHOD

  • Wash and peel the skin of beetroots.Grate it using a grater.I used bigger sized grater here.Set aside.Chop the onions finely and keep it aside.
beetroot-stir-fry-step1
  • In a pan,heat oil and temper mustard,urad dal,chana dal,curry leaves and hing.Then add the finely chopped onions and saute till it turns transparent.Stay nearby and do everything in high flame.Then add the grated beetroot and saute for few seconds.
beetroot-stir-fry-step2
  • Add salt,sambar powder & turmeric powder while sauting.After the beetroot starts to shrink & reduced in quantity to a bit,sprinkle some water ( say 3-4 tbsp) and cover cook in low flame for 2-3 minutes.Then remove the lid,mix well and check whether it is cooked else sprinkle little more water and cover cook again.
  • After the beetroot is cooked well n soft,add the grated coconut,mix well for a minute and switch off the flame.Add few drops of lemon juice if u need tangy flavor.
beetroot-stir-fry-step3

Enjoy !


Note

  • You can follow the same procedure & make carrot & cabbage poriyal too.
  • Here i used coconut oil while tempering which renders an additional flavour to this poriyal.Its optional though
  • U can also garnish with coriander leaves in the end if u are not using grated coconut.
  • Add few drops of lemon juice at the end if u need mild tangy taste, else skip it.

You can have this poriyal mixed with plain rice adding a tsp of gingely oil OR as a side dish for sambar,rasam etc.Tastes yum!
beetroot-stir-fry


Continue Reading...


November 4, 2014

GONGURA THOGAYAL RECIPE/GONGURA PACHADI-ANDHRA STYLE


Gongura thogayal recipe
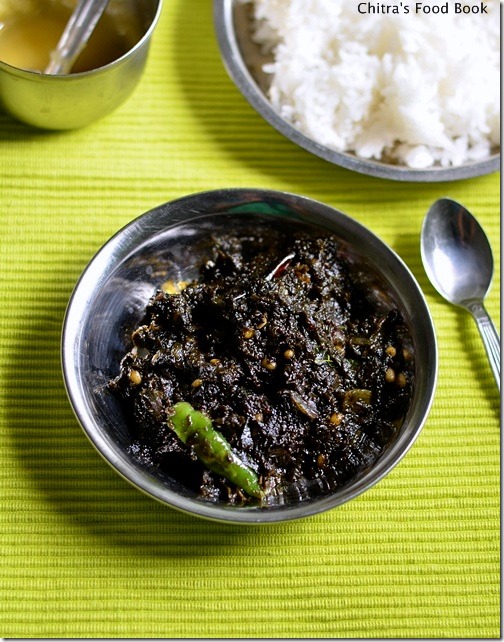
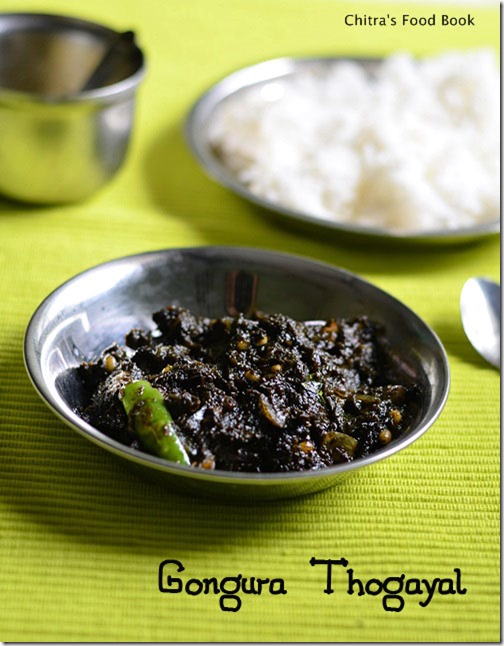
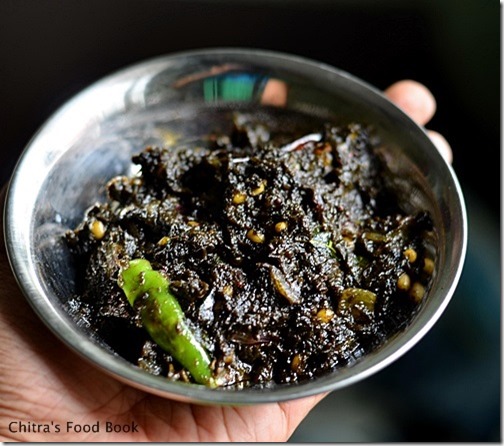
Gongura/Red Sorrel leaves in English,Ambadi in Gujrati,Marathi,Pitwa in Hindi,Pundi in Kannada & Pulichai Keerai in Tamil,Mestapat in bengali and Nalita in other languages is a very famous green variety in Andhra.Most of you would have heard about gongura pickle.But i tried thogayal with it years ago.Yes,this was the first & foremost recipe i tried after marriage from this website via google search.Recently a reader asked me to post gongura recipes and especially thogayal recipes.So after a long time,i referred that blog again and made this thogayal yesterday for rice.It was spicy,tangy n yummy when we had with hot rice and ghee.In the original recipe,it was titled as gongura pachadi/gongura chutney but i named it as thogayal because of its thick texture.Its very simple to make and you can store this thogayal for more than a week too.Even bachelor’s can try this and use it for 2-3 days without refrigeration.Soon i will share more gongura recipes like gongura sambar,gongura pappu in my blog and now lets see how to make this yummy Andhra style gongura thogayal for rice.
Gongura thogayal
Gongura thogayal recipe


Gongura thogayal recipe Andhra style gongura thogayal recipe- Tastes yum with hot rice n ghee !
Cuisine: Indian
Category: Thogayal
Serves: Serves 3
Prep time: 10 Minutes
Cook time: 10 Minutes
Total time: 20 Minutes


INGREDIENTS
To pressure cook
  • Gongura leaves - Half bunch ( say 3 handful)
  • Green chillies - 5 nos ( big finger size)
To temper & saute
  • Sesame oil/Gingely oil OR cooking oil - 2 tbsp
  • Mustard seeds - 1/2 tsp
  • Urad dal - 1 tsp
  • Red chillies - 1 no
  • Green chillies - 1 no ( slitted)
  • Curry leaves - few
  • Hing/Asafetida - A big pinch
  • Small onions – 5 nos ( whole)
  • Big onion – 1 no ( small,finely chopped)
METHOD

  • Wash the gongura leaves,drain the water and take in a pressure cooker base.Add green chillies,salt to it along with little water(Leaves will leave some water.So add little water) Pressure cook in high flame for 2 whistles.Open the lid and let it cool.
    gongura-thogayal
  • Take out 2 green chillies & reserve.Grind the cooked mixture to a smooth paste.Check for taste and add the reserved chillies,grind again. In a kadai,heat oil and splutter mustard seeds,uradl dal,hing,curry leaves,red chillies & green chillies.Add finely chopped big onions and whole,peeled small onions and saute till transparent.
gongura-thogayal-1
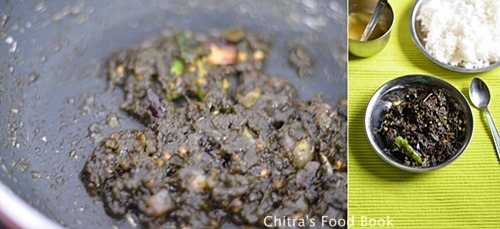
  • Then add the ground paste and mix will till the mixture thickens and oil leaves from it.If needed add a tbsp of oil in the middle.Remove and let it cool.Store in a box and refrigerate.
gongura-thogayal-2
  • Mix with hot rice adding few drops of ghee. Enjoy !

Enjoy !


Note

  • Adjust the quantity of green chillies as per your spice level.
  • Add a small piece of jaggery while grinding the leaves.
  • You should saute till oil leaves from the paste and becomes thick.Else this thogayal will spoil soon. 
  • This thogayal stays good for more than a week if stored properly in refrigerator.Use a clean spoon while you handle.


Enjoy mixing this yummy thogayal with plain hot rice adding few drops of ghee !
Gongura-thogayal-recipe


Continue Reading...


November 3, 2014

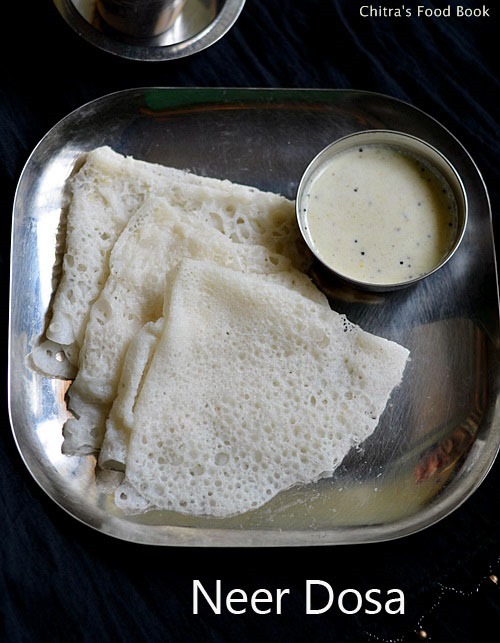
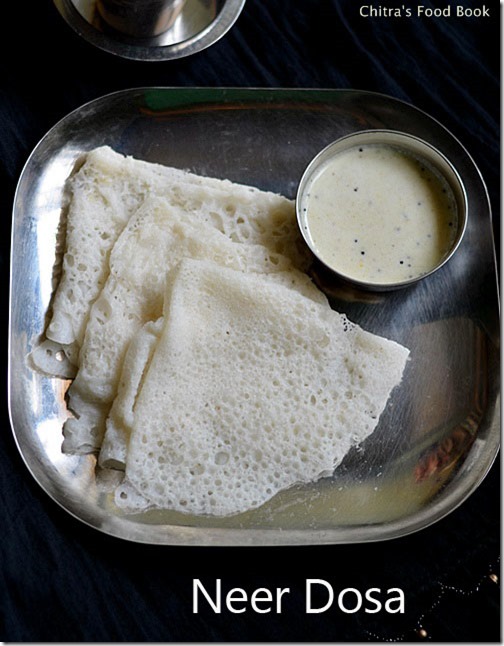
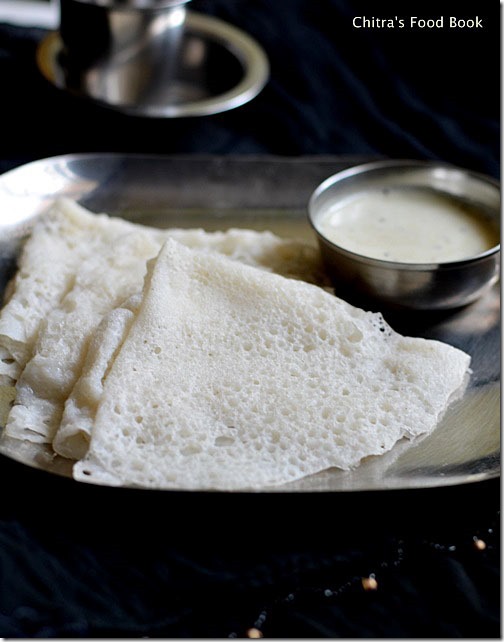
NEER DOSA RECIPE - NEER DOSA WITH COCONUT CHUTNEY- KARNATAKA BREAKFAST RECIPES

neer dosa

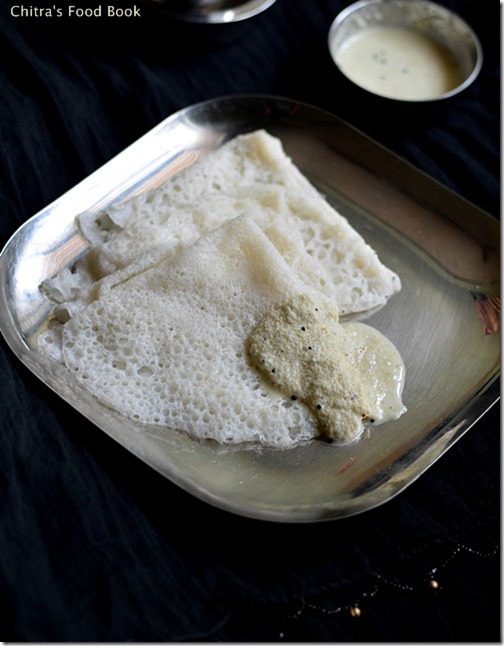
Neer dosa recipe / neer dose in Kannada must be familiar to many of you. Literally it means water dosa and is a crepe made out of rice flour & coconut. Its one of the most popular dosa varieties of Karnataka's Udupi & Mangalore regions. It tastes the best with coconut chutney or veg curry. In Tamil nadu, we prepare a similar dosa called rice flour dosa(arisi maavu dosa in Tamil) which needs over night fermentation. But this neer dosa can be done instantly after grinding the batter. It was in my try list for long time but I got tempted to try this out when I watched Vijay Tv’s Samayal Samayal with Chef Venkatesh bhat. When he showed this neer dosa paired with onion tomato chutney, I started drooling like anything. But I followed neer dosa recipe from Veggie belly

This neer dosa is Sendhil’s favourite too. He used to have this dosa with kaju curry in restaurants here when he was new to Bangalore.But I have not tasted this dosa in hotels so far. Recently we went to VV puram’s food street and tasted akki roti, thatte idli, brinjal gravy, kulfi etc from roadside hotels. There I asked in many stalls for neer dosa but it was not there and I came off disappointed. Then Sendhil enquired his colleagues and told me about a small hotel in Malleshwaram which is famous for Neer dosas. I must pay a visit soon.The ones I made yesterday in my kitchen was awesome. It was so lacy and very soft. I tried it for the first time and I was completely satisfied with the result. Sendhil told it tastes the same like hotel ones. What else, this recipe was a grand hit in my house. 

When I asked my kannadiga friends( school moms) here, they told me an Instant neer dosa recipe which they mentioned as “thideer dosa” using rice flour and coconut. They also suggested coconut chutney and vegetable sagu as the best side dish for neer dosa. Neer dosa & chutney is the simple & best combination they added. So I prepared spicy, watery coconut chutney and it was tasting great. But one thing I have to admit is, this dosa won’t be filling even after having 5-6 nos if you are a good eater. So make sagu or any vegetable kurma if you want to have a tummy filling breakfast or dinner. Else make it as brunch or snacks;)

There are certain techniques to be followed to make a perfect neer dosa. Based on my observation and the tips from veggie belly, I have shared some points in my “Note”section. Do read it before making this dosa. U will get it perfect even if you are a first timer . Lets see how to make this karnataka style neer dosa !

Neer-dosa-recipe

Neer dosa recipe


Neer dosa recipe Neer dosa recipe - Karnataka's popular breakfast recipe
Cuisine: Indian
Category: Breakfast
Serves: 15-20 nos
Prep time: 8 Hours
Cook time: 2 Minutes
Total time: 8H2 Minutes


INGREDIENTS


  • Good quality sona masoori Raw rice - 2 cups
  • Grated coconut - 1/4 cup
  • Water & salt - as needed ( i used nearly 4-5 cups of water)

Side Dish - Coconut chutney

  • Grated coconut - 1/2 cup
  • Fried gram dal/Hurikadale/Pottukadalai - 1/4 cup
  • Green chillies - 5-6 nos 
  • Curry leaves - few ( optional)
  • Garlic cloves - 2nos ( optional)
  • Tamarind -a small pinch
  • Salt & water - as needed
To temper
  • Cooking oil – 1 tsp
  • Mustard seeds – 1/2 tsp
  • Urad dal – 1/2 tsp
  • Curry leaves - few

METHOD


  • Wash and soak the raw rice in enough water for 4-6 hours or over night. Drain all the water and grind it along with grated coconut and little salt.This dosa batter takes less salt so add it carefully. If you feel salt is less after grinding, you can add it later. But do not add more salt while grinding. First grind the rice & coconut to a coarse paste without adding water and then add 1 cup of water to  make a smooth paste.Wipe the sides & the jar while grinding. I used my bigger sized mixie jar to grind the batter.
  • Check the batter and grind it again adding required water till u get a very smooth paste without any grits. I used nearly 2 cups of water while grinding. Do not run the mixie for longer time. Give some time gap between successive grinding so that your jar won’t get heated up soon.
Neer dosa step1
  • After grinding the batter smoothly,remove the batter in a bowl and wash the jar with 1/2 cup of clean water. Add this to the batter and check for its smoothness by taking the batter between your thumb finger & fore finger.It should be very smooth without any grits or rice particles. Then add more water( around 1.5-2 cups) to make a watery batter. Its consistency should be like low fat milk or buttermilk. So add water accordingly. Check for salt.
  • To check the right consistency of batter, dip the back of spoon into the batter. If the batter coats very lightly, it is correct. Else add little more water. U can also check its consistency by making a dosa. If dosa comes out very thick and if the batter doesn’t spread on its own, add more water. So you have to adjust the consistency only by some trial & error. After adding all the water, you may get around 6-7 cups of batter I guess.
Neer dosa step2

  • To make dosas, a good conditioned non-stick dosa pan or frying pan with handle is needed. Heat the dosa pan well. Sprinkle few drops of water and if water droplets go off within few seconds, heat is just right. Then dip a cloth or tissue paper in oil and grease the pan well. Proper heating of pan and good greasing is very important. Keep the flame high.
  • Season/grease the pan and mix the batter thoroughly well every time before making dosa. Don’t forget !
Neer dosa step3
  • Now take 1/2 ladle of batter and pour it from 1/2 feet above the dosa pan. As soon as you pour the dosa batter using your right hand, the batter will spread on its own to some extent. Immediately swirl the dosa pan with your left hand and try to make it round. Fill the holes with little batter if you need.
Neer dosa step4
  • Now simmer the flame completely and close the dosa with a lid. Let it cook for 30 seconds. Then remove the lid and again cook in open pan for another 30 seconds. Sides of the dosa may lift slightly. That’s it. No need to flip the dosa and do not brown the dosa. It should be super white in color. Carefully fold the dosa into half and fold again to make a triangle shape. Serve with chutney or sagu !
Neer dosa step5
Neer dosa step6
  • For the next dosa, before pouring the batter,keep the flame high, grease the pan with oil, mix the batter thoroughly and then make dosa. Repeat this procedure till the end.
  • Do not stack the dosa one above the other when it is hot because they will stick to each other easily. Serve in two plates.
  • Grind all the ingredients given under " For coconut chutney" to a smooth paste. Adding garlic & curry leaves gives hotel taste. Use it as per your choice. Do the tempering & enjoy with neer dosa.

Enjoy !

Points to Note

  • The batter should be ground smooth. So add water accordingly. Choose a bigger sized jar if you are using mixie to grind the batter. U can use little more coconut if you want more flavourful dosa. But I was happy with this quantity. Adding more coconut makes the dosa too soft n it may break.
  • The consistency of batter should be very important. If its thick, dosa will crack. It should be thin like low fat milk or buttermilk. Even if it is slightly thick, you won’t get lacy dosas and your dosas wont be soft too.The batter should spread on its own till half of the pan as soon as you pour the batter. So adjust the consistency.
  • The temperature of dosa pan is very important. Do the water sprinkling test as I mentioned above before pouring the batter.
  • Season/grease the pan and mix the batter thoroughly well every time before making dosa.
  • If the pan is not heated properly, dosas will crack and it won’t spread on its own. So keep the flame high when you pour the batter. Pour the batter from 1/2 feet distant from the pan. Rotate/swirl the pan as soon as you pour the batter and make a round dosa. There will be holes on it. U can fill the bigger holes with batter if needed..
  • Cook the dosa in low flame with a lid for 30 seconds and without lid for 30 seconds. Do not brown the dosa. It should be white. No need to flip the dosa.
  • Do not stack the dosa one above the other when it is hot because they will stick to each other easily.
TO SUM UP
  1. Rice should be soaked well for minimum of 4-6 hours to make a smooth batter. It should be ground well with coconut to a very smooth batter without any grits.
  2. The consistency of batter is very important. It should be watery like milk.
  3. Heat of the dosa pan is also very important here. It should be high but not smoky. Use a non-stick pan. Iron griddle wont be helpful.
  4. Season/grease the pan and mix the batter thoroughly well every time before making dosa.
  5. Do not cook the dosa in high flame, it should be cooked in very low flame for 1 minute to maintain its white color. This dosa cooks super fast. So remove after a minute without browning them.
  6. This dosa tastes great even after it cools down. So you can make it advance before serving. But you should not stack them one above the other when it is hot. They will stick to each other. Hence stack them after they are cooled down completely.

Enjoy this super soft n lacy neer dosas with coconut chutney,onion tomato chutney OR vegetable sagu. Tastes great with anything and everything ! 
Neer dosa recipe


Continue Reading...


November 2, 2014

BRINJAL THOGAYAL/KATHRIKAI THUVAIYAL RECIPE-BRINJAL RECIPES


Brinjal-thogayal

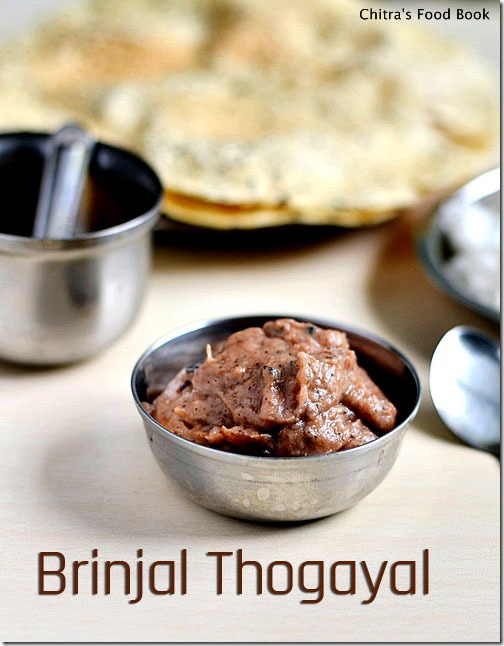
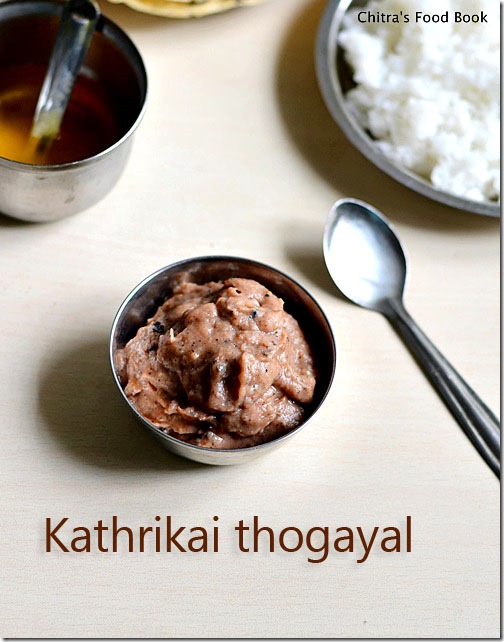
Brinjal Thogayal / Eggplant thogayal is one of the favourite thogayal recipes of our family.In my family, My in-laws and myself are big big fans of brinjal recipes. Sendhil & Raksha are just opposite to us.But they love to have very few dishes with brinjal.This is one among them.He loves Ennai kathrikai kuzhambu & this thogayal very much just because of pepper flavour.Yes,the flavour of pepper & garlic is the highlight of this thogayal and it makes the dish stands out.Generally people make thogayal by smoking the brinjal in flame and they call it as sutta kathrikai thogayal.But our entire family hates the smell of smoky brinjal,sounds strange right?? So i always burn the brinjal in microwave.By this way,brinjal gets cooked easily & there won’t be smoky smell at all.Follow whichever method u like.This thogayal tastes good in either ways! Lets see how to make brinjal thogayal for rice.
Please check out my brinjal chutney for idli,dosa if interested !

Kathirikai-thogayal


Brinjal thogayal recipe


Brinjal thogayal recipe Yummy brinjal thogayal for rice - Tastes best when mixed with hot rice drizzled with ghee!
Cuisine: Indian
Category: Thogayal
Serves: Serves 4
Prep time: 5 Minutes
Cook time: 10 Minutes
Total time: 15 Minutes


INGREDIENTS

  • Brinjal - 3 nos ( Medium sized)
  • Red chillies - 1-2 no ( use 2 if u need spicy)
  • Tamarind - small gooseberry size
  • Salt & water - as needed
  • Cooking oil – 1tsp + few drops to brush brinjals
To grind coarsely
  • Garlic cloves - 5 nos
  • Pepper corns - 3/4 tsp
METHOD

  • Soak tamarind in very little water.Wash the brinjals.Apply little oil all over the brinjal.Prick it with a fork in all the sides.Microwave it for 3-4 minutes turning it once in the middle.Check it for every 1 minute else it may burn.
    brinjal-thogayal-step1
  • Peel the skin of garlic and coarsely grind it with pepper corns using a mortar & pestle.Set aside.Heat 1 tsp of oil in a kadai and fry the red chillies.Set aside.Peel the skin of cooked brinjal. In a mixie jar,take the cooked brinjals,tamarind,salt and red chillies. Grind it to a paste adding little water.To this lastly add the coarsely ground pepper+garlic mixture.Pulse it once and remove the thogayal in a serving bowl.Serve with hot rice & ghee !
brinjal-thogayal-step2

Enjoy !


Note

  • You can use one big brinjal instead of 3 small brinjals.
  • Increase the quantity of red chillies or pepper if u want more spicy thogayal.
  • Adding ghee is a must while serving.It helps to balance the heat of pepper & brinjals.
  • Do not over grind after adding the pepper+garlic mixture.Just give a pulse.


Enjoy mixing this thogayal with hot rice drizzled with few drops of ghee ! Tastes yum !

thogayal for rice

Continue Reading...