Search Chitra's Food Book

January 10, 2015

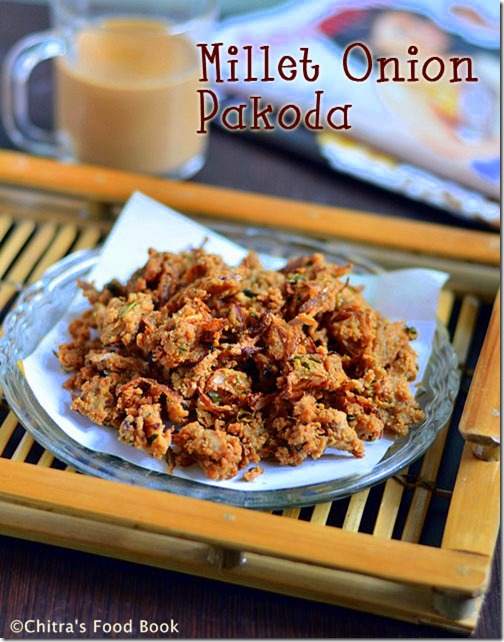
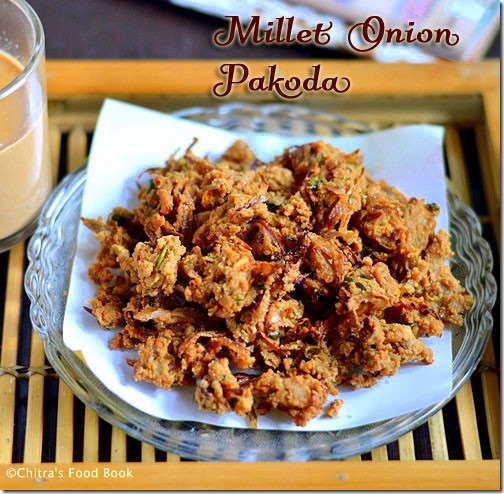
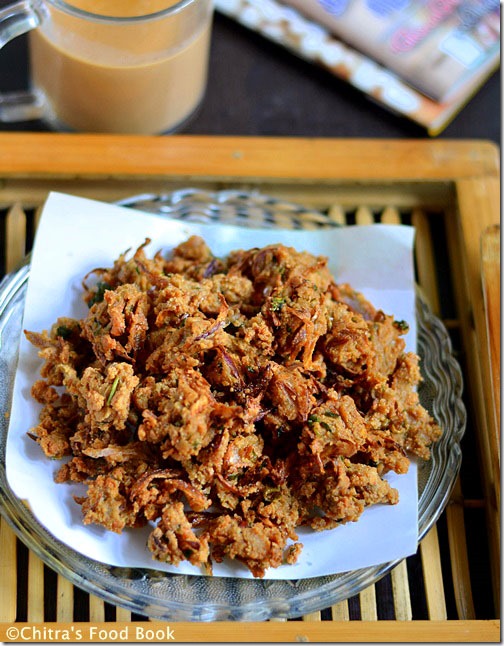
Millet Flour Onion Pakoda Recipe-Millet Snacks Recipes


onion pakoda

Onion pakoda must be one of the favourite evening snacks for most of us.We generally make it using gram flour & rice flour.For a change,i tried it adding our homemade mixed millet flour/Millet sathu maavu powder.It came out really crispy and flavourful.Raksha & Sendhil liked it very much.I was also happy that i could give them a healthy deep fried snack using millets.And now i am typing this post munching these crispy pakoras,its yummWinking.Friends,Try this snack recipe for your family & enjoy with evening coffee or Tea.
Check out my other millet recipes here !

Onion-pakoda

Millet flour onion pakoda recipe


Millet flour onion pakoda recipe Onion pakoda recipe using millet flour
Cuisine: Indian
Category: Snacks
Serves: 15 nos
Prep time: 10 Minutes
Cook time: 5 Minutes
Total time: 15 Minutes


INGREDIENTS
To make the batter
  • Mixed millet flour - 1/3 cup
  • Gram flour - 1/4 cup
  • Rice flour – 1 tbsp
  • Big onion - 2 nos ( medium )
  • Red chilli powder - 1/2 tsp
  • Hing/Asafetida - 2 pinches
  • Finely chopped green chillies - 1 no
  • Curry leaves - few
  • Coriander leaves – few
  • Mint leaves – few 
  • Ginger - 1/2 inch piece
  • Hot oil - 1 tbsp
  • Ghee – 1/2 tsp ( I used frozen ghee)
  • Water – Very little ( say 1.5 tbsp)
  • Salt – as needed
Cooking oil - to deep fry
METHOD

  • Wash and slice big onions thinly.Wash and chop ginger,green chillies,mint,curry leaves,coriander leaves & set aside.

  • In a wide bowl,take all the ingredients except cooking oil and ghee.Mix all the ingredients well without adding water.Onions will leave water while u mix.So mix everything together.
Onion pakoda-1
  • Heat oil to deep fry.Take a tbsp of hot oil  and add to the flour.Add ghee.Mix well.Then sprinkle few drops of water and make a dough.
Onion pakoda-2
  • Put a drop of batter & check the heat of oil.If  the batter comes up immediately,oil is ready.Reduce the flame to medium high & pinch in a portion of batter and drop in the oil in a sprinkled manner. Cook till onions turn golden brown.Remove in a tissue and enjoy eating hot with tea !
Onion pakoda-3


Note

  • Gram flour is used for binding and rice flour for crispiness.
  • You can follow the above recipe and make pakodas with kambu maavu or thinai too.
  • Hot oil is added to give crispy pakoda.Don’t skip it.Ghee is for softness.


Enjoy this crispy millet onion pakoda with tea/coffee ! Tastes yum !!
onion-pakoda-recipe

Continue Reading...


January 8, 2015

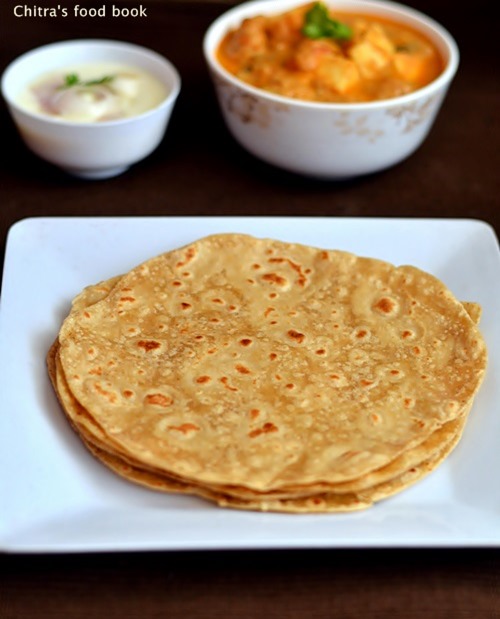
How To Make Soft Chapati / Super Soft Chapathi Recipe With Tips

Chapati

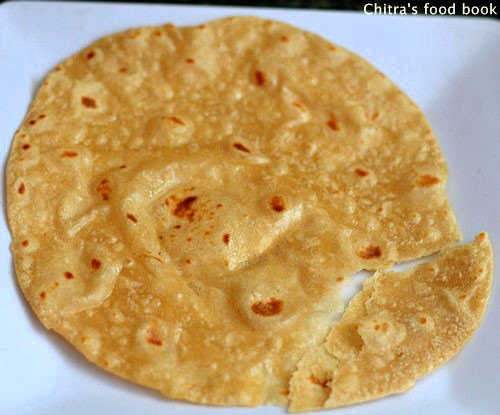
“How to make soft chapati??” was my biggest worry when I was a beginner in cooking. I was not aware of the secrets, tips and tricks for making hotel style soft chapati when I was new to cooking. Not just me, making a super soft chapathi that stays soft for long time would be the dream for many. When I was a beginner I used to make hard, chewy chapati and sometimes like roasted papad too.  As we were newly married, Sendhil couldn’t scold me instead he used to make fun of my chapathi. Once my MIL told this method, ingredients and suggested me to give a try. When I tried it for the first time, I couldn’t believe the results. It came out super soft. I felt very happy and excited to see my chapathi soft like a kerchief. More than me, Sendhil was feeling much more relieved 😃. Thanks a ton to my MIL for teaching me this wonderful recipe. 

After making this chapathi successfully, I attempted phulka/roti without oil and now I can confidently make phulka/roti and chapathi anytime. Soon I will share my phulka recipe too. Before going to this recipe let me tell you, this is not chapathi without oil. It is not North Indian phulka or roti. I hope you know the difference between roti and chapati.You would have come across different types of soft chapati recipes using milk, hot water, ghee etc. This is one such kind. 

Many of you must have tasted this kind of chapati in Tamil nadu hotels. Here I have used oil & curd to bring the softness. So fat is used in this recipe. Please do not attempt this recipe if you are calorie conscious or if you are in diet. This recipe is purely for beginners & bachelors who craves for making soft chapathi. You can dare to try this recipe for your lunch box and to your guests as well. It stays soft for long time. 

If you follow this recipe, you do not have to worry about the wheat flour brand. It works for all the brand like Aashirvaad, Pillsburry, Any multi grain atta, Swad etc. You can even try with homemade wheat flour ground using ration wheat grains/ ration godhumai. I have also given some general tips to make soft chapathi dough. Hope this will help. Lets see how to make soft chapati with step by step pictures.
Soft chapathi recipe

Chapathi recipe

Soft Chapati recipe 


Soft chapati How to make soft chapathi at home with tips and step by step pictures !
Cuisine: Indian
Category: Dinner
Serves: 5 nos for 1 cup
Prep time: 35 Minutes
Cook time: 1 Minutes
Total time: 36 Minutes


INGREDIENTS

1 cup = 250 ml
  • Wheat flour/atta - 1 cup
  • Refined oil  OR Gingely oil (Nalla ennai) - 1 tbsp 
  • Curd - 1 tbsp ( Not too sour & thick, I use semi solid curd)
  • Water – 1/3 cup (+/- 1/2 tbsp)
  • Salt - 1/4 tsp
Oil or ghee - for brushing(optional)

HOW TO MAKE SOFT CHAPATI 

  1. Mix wheat flour/ atta, curd, oil and salt.
  2. Add water, knead for 5 minutes.
  3. Cover and rest the dough for 30 minutes.
  4. Make small balls, dust in flour, roll chapathi.
  5. Cook both sides brushing oil or ghee !

SOFT CHAPATHI - METHOD 

  • In a wide bowl or plate, measure the flour/atta & take it. Add curd, oil & salt to it. Mix it well so that curd & oil spreads well with atta/ wheat flour. Now sprinkle water in small quantity & try to make a soft,non-sticky dough. No problem if the dough sticks lightly to your hand. Knead the dough well at least for 5 minutes. If possible beat in a hard surface. Keep it covered for minimum 30 minutes.
Soft-chapati-1
Soft-chapati-2
  • After 30 minutes, dough would become very soft. Now make golf sized balls out of the dough & keep in the bowl. Take one ball, roll it without any cracks, pat it slightly & dust in the flour. Keep the remaining balls closed till use. Roll the ball into a uniform, thin circle. Dust it once in the middle only if necessary.
Soft-chapati-3Soft-chapati-4
  • Put the chapathi in a news paper or sheet & cover it well. Do not keep it one over the other. Roll the other chapathis & spread it. Heat a good conditioned non-stick pan & put the chapathi. Reduce the flame to medium. Keep rotating it. U will see some bubbles appear on the top of chapathi. Immediately flip the chapathi.
Soft-chapati-5
  • Cook the other side in low flame by pressing it using a ladle so that corners will cook well. Remove and brush with ghee or oil if needed. Serve hot with vegetable kurma.
Soft-chapati-6
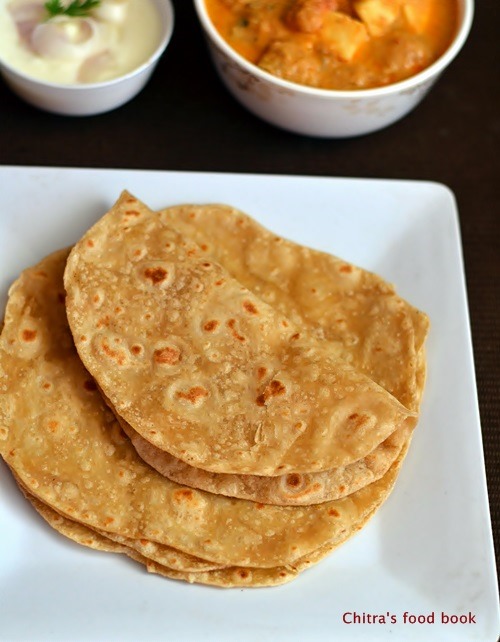
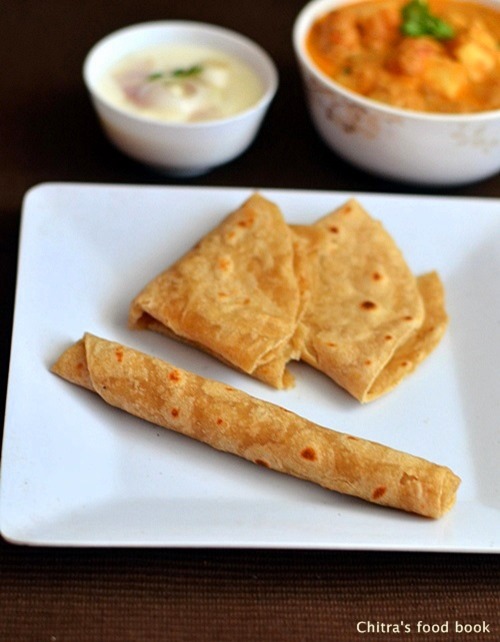
  • If you want to store the chapathi, spread a towel inside a hot pack. Brush the cooked chapati with oil or ghee. Then stack the chapathis one above the other. Wrap it with a cloth napkin & store it.  It will stay soft for hours. If you want to pack the chapathis for lunch box, brush it with oil /ghee. Just fold the chapathi like a triangle and stack it. It will remain soft for long hours.


TIPS TO MAKE SOFT CHAPATI

These are some of the general tips and secrets to be followed to make a soft chapathi or phulka.
  1. The quantity of water may vary based on the atta/wheat flour brand you use. Aashirvaad takes little more water than Pillsbury. The water quantity I have given here is an approximate measure. It may vary for multi grain atta.
  2. Do not add all the water while kneading the dough. Sprinkle water only in small quantities. If you feel you have added excess water, you can add little flour to it but you should add few more drops of oil & knead it really well else chapathi will come out hard.
  3. Rolling the chapathi of uniform thickness is necessary for uniform puffing else chapathi won’t puff up in some places. Also never roll the chapathi very thin like a transparent sheet. They will roast like a papad.
  4. Do not over dust the chapathi in flour. Do it once or twice. If you dust more, chapathi may come out soft but it will look dry.
  5. Do not leave the chapathi dough or rolled chapathi in air for long time. It will become dry & gives you hard chapati. So keep it closed till use.
  6. Heat of the flame is very important while cooking chapathi. It should be low to medium. Never cook in high flame. It will become a papad. Flame should be high only for making phulkas and that too while showing in direct flame.
  7. Always brush the chapathi with oil or ghee if you keep for long time. No need to brush  if you consume immediately.


Try this recipe at home & enjoy soft chapathi for dinner or lunch with your favourite side dish. I served it with paneer kurma ! It was yummly !!
Soft chapati

Continue Reading...


January 6, 2015

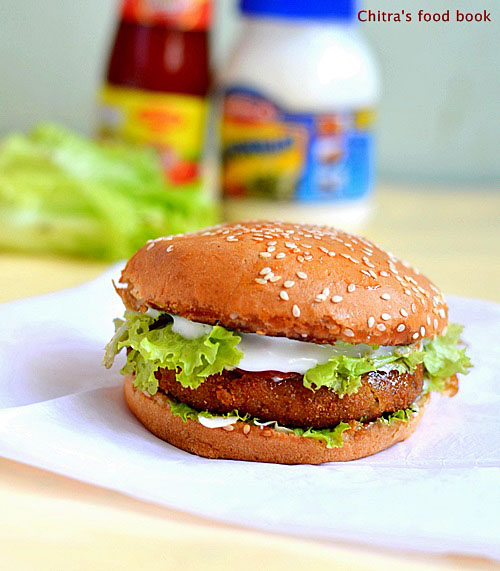
Veg Burger Recipe | Mc Donald’s Style Veggie Burger Patty Recipe

Veg burger recipe

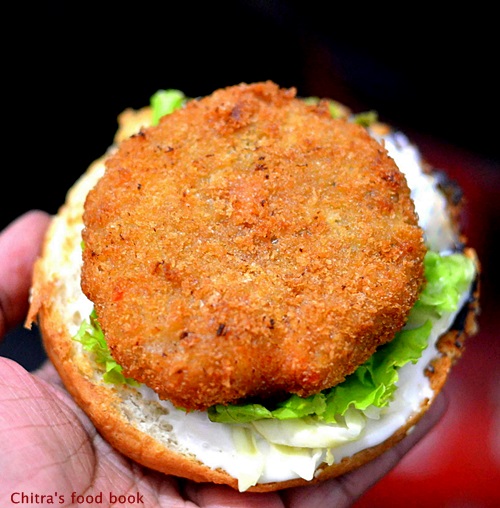
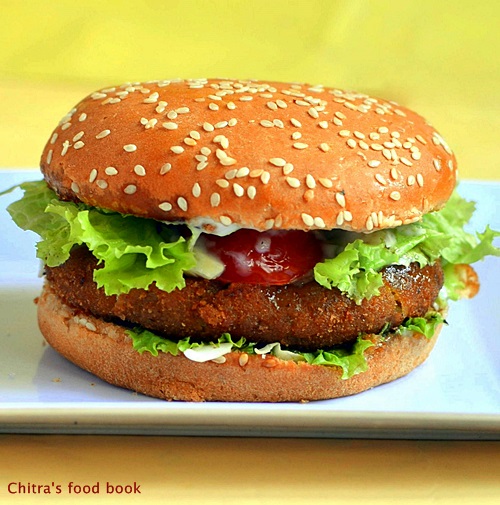
Don’t you get tempted to try if you come across a recipe titled “Mc Donald’s style Veg Burger Recipe” ??. I know many of your answers would be YES!. Yeah, I too tried Veg burger for the first time in my kitchen after getting very much tempted by watching this video. In that video, he had shared the recipe of Mc Donald’s style McVeggie burger patty recipe with easily available ingredients in all our pantries and moreover it was Eggless! I just made few changes in the ingredients & method as per my convenience.

I replaced corn meal with powdered corn flakes just like my KFC style Veg Strips and I used crushed garlic instead of garlic powder. The result was awesome!! The Patty was super crispy outside and soft inside. I also tried grilling in my convection oven instead of deep frying and it came out pretty well. You can also opt for shallow frying if you are calorie conscious.What ever be the method of cooking, patties taste great.

This recipe is really a keeper and I am planning to make it for my daughter’s birthday party too. Sendhil loved it a lot and I guess he won’t take me to Mc Donald’s anymore as I started making it at home regularly. Soon I will try to share my daughter’s most favourite KFC Potato krisper/Aloo burger recipe which would be more of our Indian style. 

Friends, do try this easy burger recipe using store bought burger buns and mayonnaise & let me know how it turned out for you. Procedure may seem a bit lengthy as I made bread crumbs and corn meal on my own. If you have them readymade in hand, making this burger would be really easy !!

Veg burger recipe
Veg burger patty recipe

Mc Donald’s Veggie burger recipe


Mc veggie burger recipe Veg burger with homemade burger patty recipe – Mc Donald's style !
Cuisine: International
Category: Snacks
Serves:
Prep time: 60 Minutes
Cook time: 10 Minutes
Total time: 70 Minutes


INGREDIENTS
For arranging burger
  • Fresh Burger buns - 4 nos
  • Lettuce leaves - few
  • Shredded celery - as needed ( I used cabbage)
  • mayonnaise - as needed
  • Sliced tomato - 4 slices
  • Cheese slice – 4 nos ( optional, I din't use)
For burger patty
  • Boiled potatoes - 3nos ( medium)
  • Cooked peas - 1/4 cup
  • Carrot - 1 no ( finely chopped)
  • Onion - 1 no ( finely chopped)
  • Garlic crushed – 4 nos
  • Thick poha/Aval – 1/2 cup ( soak in water for 20 minutes)
  • Maida / All purpose flour - 1.5 tbsp
  • Salt & water – as needed
Spice powder recipe
  • Chilli flakes  or paprika – 1/2 tsp
  • Amchoor powder –1/2 tsp
  • Turmeric powder – 1/8 tsp
  • Pepper powder – 1 tsp
  • Salt – as needed
  • Parsley – 1/4 tsp
For batter
  • Maida - 1/2 cup
  • Corn flour – 1/4 cup
  • Corn meal OR powdered corn flakes - 1/4 cup
  • Oil – 1 tbsp 
  • Water - as needed
Bread crumbs - 1 cup  ( to coat)
HOW TO MAKE VEG BURGER - METHOD

  • Finely powder the cornflakes in a mixer and keep in a bowl. Mix all the powders given under “ Spice powder” and set aside. ( If you are using raw corn flakes, microwave it in high power for 1.5 minutes & then powder it)
Veg burger recipe-1
  • Wash and soak poha in hot water for 20 minutes. Then crush & squeeze it with your hands very well. It will become a dough like thing. Keep it covered & set aside.
Veg burger recipe-2
  • Pressure cook potatoes, peel the skin, mash it well. Cook the peas and keep it ready. Chop the carrots and keep it in hot water till use. Chop onions.
Veg burger recipe-3
  • In a kadai, heat oil and saute onions, crushed garlic cloves till onion turns transparent. Now add the carrot and saute till its soft. Add some salt to quicken the cooking process. Lastly add the mashed potato and cooked peas. Add little water & let the carrot cook for some time. After carrots are cooked & water is absorbed, add the spice powder mix. Adjust salt. Mix well & Mash it with the back of ladle. 
  • Finally add the soaked & squeezed poha and maida. Mix well. Poha & maida acts as a binding agent here. So mash it really well and make the entire mixture to a thick dough. Switch off the flame & let it cool.
Veg burger recipe-4
Veg burger recipe-5
  • After the mixture is cooled down, wrap it in a polythene sheet like a cylinder as shown in the picture. Cover the edges using a rubber band. Refrigerate it for 30 minutes to 1 hour.
    • After 30 minutes, remove the patty dough and roll it tightly. Cut it into roundels. Refer picture below. The size of the patty should be the size of burger. Roll the patty on the kitchen counter or a plate to bring uniform thickness and to make a perfect round.
Veg burger recipe-6
  • In the mean time, prepare the batter & bread crumbs. To prepare bread crumbs, remove the corners i.e brown part of the bread and powder it in a mixie. Set aside in  a plate. Homemade instant bread crumbs is ready. For the batter, mix all the ingredients given under “ for batter” and add little water to make a thick dosa batter consistency. Keep it ready.
Veg burger recipe-7
  • Now dip the patty and in maida batter. Again dip in bread crumbs. Repeat the same once again. Yes, you have to coat it twice to get a super crispy exterior.
Veg burger recipe-8
  • Now heat oil to deep fry and check the temperature by dropping a pinch of batter. If it comes up, simmer the flame completely and drop the patty. If the heat of the oil is high, patty will burn. So take care. Cook only in low flame till they turn golden brown in both the sides. Flip it whenever needed. Deep fry, remove & drain in a tissue. Repeat the same procedure and keep all the patties ready.
Veg burger recipe-9
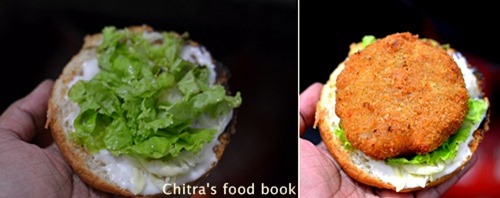
  • For arranging the burger : Take the burger bun and slit into two roundels. Toast in dosa pan by drizzling oil or butter. Take one portion of the bun and apply mayonnaise using a spoon.
Veg burger recipe-10
  • Wash and chop lettuce & celery. Place some of them on the bun.Now keep the patty. Above the patty keep some lettuce leaves, tomato slice & cheese slice. Cover it with another portion of toasted bun.( I applied mayonnaise on both the portions of bun as we love it that way)
      • Adjust the quantity of mayonnaise as per your taste.You can also keep some onion rings, tomato slices & cheese slices if you like.
Veg burger recipe-11
Veg burger recipe-12
Serve immediately with ketchup !! Enjoy it to the core !!


Note


  • Use fresh burger buns for best taste.
  • As per the actual recipe,u have to refrigerate the boiled potatoes for 6 hours. But I skipped that step.
  • I have used corn flakes powder instead of corn meal here. U can add corn meal if u have in hand.
  • I coated the patty twice in the batter & bread crumbs to make a crispy exterior. But make sure oil is in right temperature else patty will get burnt.
  • You can make the patties instantly instead of refrigerating it for 30 minutes. In that case,take a ball of dough and pat it to bring the shape and proceed as given above.
  • If you are planning to make this for parties, you can make the dough very well in advance and refrigerate it by tightly wrapping in sheet & keep it covered. This dough stays good for 2 days in refrigerator if  properly stored.
    • Adjust the quantity of mayonnaise as per your taste.You can also add keep some onion rings,tomato slices & cheese slices if you like.

Try this veg burger recipe for your family. I am sure you won’t step into Mc D anymore !
Veg burger recipe

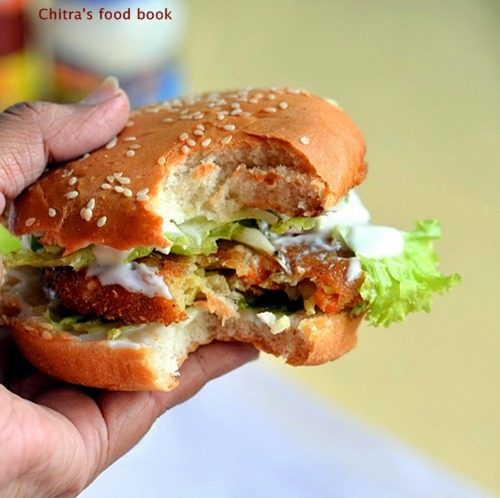
Veg Burger – After a bite by me :P 

Burger-after a bite

Continue Reading...


January 4, 2015

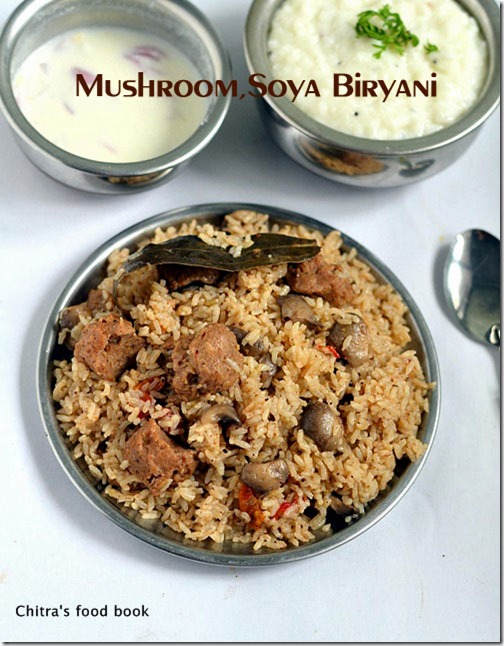
Dindigul Thalappakatti Veg Biryani-Mushroom,Soya Chunks Biryani Recipe--Sunday Lunch Recipes -1

Dindigul-thalapakatti-biryani

In this New year, with all your support and blessings, I have planned to start biryani series from this week. I guess most of you make ( Both vegetarian & Non-vegetarian) make biryani in weekend especially on Sunday. Even I too make biryani mostly on Sundays, make myself free and enjoy my time with my family. To me, Biryani is an easy to make yet very rich & delicious one pot meal that make everyone drool over its smell & color. I love to try varieties of biryani recipes by watching TV shows, by referring blogs or cookbooks. I thought of blogging the same here as it might be useful to vegetarians who look for varieties of biriyani recipes. So every Sunday, you can expect some yummy biryani & pulao recipes in my blog. Actually I wanted to start this series with “How to cook Basmati rice” post. But I still have some work pending to bring that post here. As I am in Salem, I couldn’t do it. So I thought of starting this series with this most popular Dindigul thalappakatti biryani recipe in which I used jeera rice. Generally vegetarians have less options for biryani varieties. So I used to refer non-veg biryani recipe too & try it  by replacing chicken or mutton with vegetables like mushroom, Gobi/cauliflower and soya chunks. You can find one such example here.  Even today I have shared Dindigul thalapakatti biryani which is the most popular mutton biryani of Dindigul district. For this recipe, I referred so many sites and read readers comments to get some idea about its color, the rice used in it etc. Finally I landed upon here & tried this biryani by making small changes in the actual recipe to achieve its brown color. I used mushroom & soya chunks/meal maker in place of mutton ;). The taste was awesome. It came out super flavourful with minimum masala. Raksha & Sendhil loved it a lot. Raksha told me to make the same biryani next day too for her lunch box . So I made a minimum quantity for her using rice cooker. Now I can confidently try this biryani for my guests too. I served this biryani with simple onion raita as a side dish. I made fruit custard for dessert & curd rice as well. So last week we had this biryani, raita, fruit custard and curd rice for our lunch. It was simple yet divine ! I have updated this recipe with a full video. Do watch it !

I will try my level best to collect the best biryani recipes, try them in my kitchen and share it here.Wish me Good Luck. Leave your feedback or share the picture if you try any biryani recipes from this series. It will motivate me to try n post more. Check out my other biryani & pulao recipes that are popular in my blog.

I have updated this recipe with a video. Please check it !


Continue Reading...


January 2, 2015

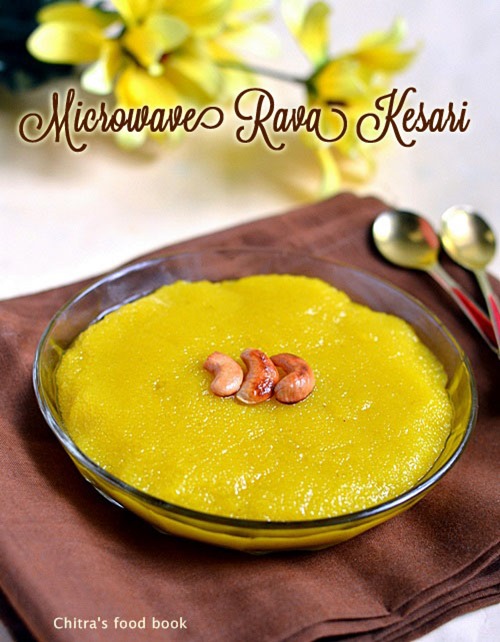
Microwave Rava Kesari Recipe/Sooji Halwa

Microwave rava kesari

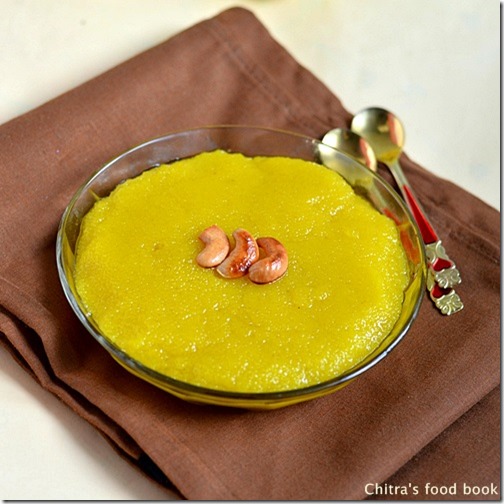
Hi friends, I hope you all had a great new year celebration. I had a wonderful day with morning darshan at a nearby perumal temple for vaikundha ekadesi, breakfast with this rava kesari, lunch at Rajdhani Restaurant and above all I bought my favourite red color Handbag in JP nagar central mall as New year gift. The day went on really well more than I expected but we missed our daughter Raksha as she is in Salem for vacation. Tomorrow we are going there & spend this weekend with my in-laws.

Coming to this recipe, I must thank my friend Sudha for insisting me to try rava kesari recipe using microwave. She gave me a recipe too. I made some modifications & tried it yesterday for New year celebration.We loved it a lot. 

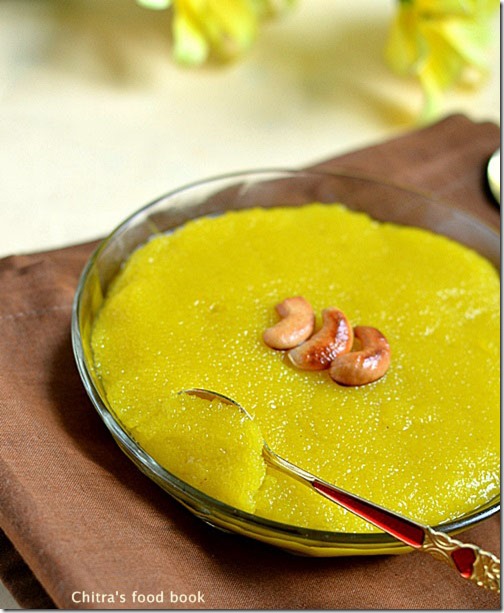
 I have used oil & ghee after watching Revathy shanmugam mam’s recipe in youtube video and I also referred Mrs.Mallika Badrinath’s Microwave recipes book for the timing and method. I added yellow food color and pineapple essence. So its flavor was very similar to pineapple kesari. But I tell you its not the authentic pineapple kesari version. So you can follow this recipe in my way using pineapple essence or just add cardamom powder with kesari color.It tastes great in either ways! 

Try this easy, hassle free microwave rava kesari for poojas,special occasions and for your guests. I am sure it will come out great !!


Microwave-rava-kesari

Rava kesari - Microwave version


Rava kesari - Microwave version Rava kesari recipe using microwave !
Cuisine: Indian
Category: Sweet
Serves: Serves 2
Prep time: 4 Minutes
Cook time: 4 Minutes
Total time:Minutes


INGREDIENTS

  • Rava/sooji/Bombay rava - 1/4 cup
  • Sugar – 1/2 cup
  • Water – 1.5 cups
  • Ghee - 1 tbsp + 2 tsp
  • Oil - 1 tbsp
  • Yellow food color - 2 pinches
  • Pineapple essence or cardamom powder - little ( as needed)
  • Cashew nuts – few ( to garnish)
METHOD

  • Take a big microwave safe bowl & add oil + ghee.Choose a big bowl because rava will rise well while cooking & it may spill.
  • Add cashews & roast it for 2 minutes in high power(mine is 800w power). Keep an eye after 1 minute.If cashews turn golden brown quickly,remove it.No need to keep it for 2 minutes.Remove cashews alone & add rava to the oil+ghee mixture,mix well so that rava is well coated without any lumps.
Microwave rava kesari -1
  • Roast the rava in high power for ONE minute.Open the microwave,mix well & again roast it for a minute.So roasting takes TWO minutes here.Take care that rava doesn’t get burnt.So stand nearby and watch carefully.Remove the rava bowl and keep aside.
Microwave rava kesari-2
  • In a vessel,heat water in gas stove till it starts to roll boil and add it to the roasted rava.Take care,it splashes.After adding water,add food color.Mix well without lumps.
Microwave rava kesari-3
  • Cook the rava for TWO minutes in high power covering with a lid. Choose a big bowl because rava will rise well while cooking & it may spill.After 2 minutes,remove the bowl,mix well, cover it with the lid & cook again for ONE minute.Rava will thicken and gets cooked very well.Now remove the bowl.
    • Add sugar,essence & mix well without lumps.
Microwave rava kesari-4
Microwave rava kesari-5
  • The mixture will turn watery & small lumps may form.Mix quickly and break the lumps.As u mix,mixture will thicken slightly due to the heat of glass bowl & lumps will break.Make sure u break all the lumps.If u touch the mixture,it will be slightly sticking to the fingers.
Microwave rava kesari-6
  • Keep it in high power for 30 seconds,remove & mix well. U will see the rava leaving the sides of bowl.Immediately add 2 tsp of ghee.Mix well & transfer to a plate or bowl.Do this process quickly else kesari may turn hard because of the heat of glass.If u touch,mixture will be non-sticky.
  • Mixture will be semi solid initially. But it becomes thick & well set as it cools down.So don’t panic.
Microwave rava kesari-7
Microwave rava kesari-8

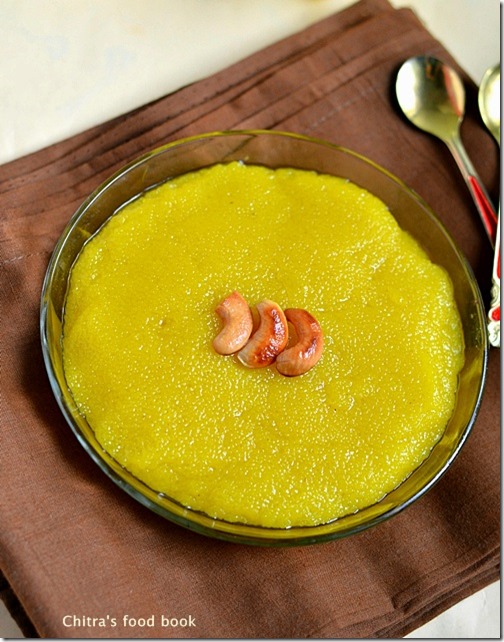
  • Serve in a bowl by garnishing with roasted cashews.U can also reheat the kesari for one minute in high power before serving ! But this step is optional.
NOTE : Timings may differ based on the power of your microwave.If its more than 800w,the entire process needs lesser time than mentioned and if the power is less than 700w,time taken may be more.So keep an eye and do it carefully if making for first time.


Note

  • Rava has to be cooked well else kesari turns chewy n hard.
  • Adding right amount of sugar also helps to give u soft kesari.
  • Adding oil helps to retain the moisture & prevents the kesari turning hard even after it cools down.Skip it & add ghee alone if u wish.
  • Adding pineapple essence is completely optional.U can add cardamom powder or saffron as u wish.
  • Here i used more water than mentioned in the original recipe.It helps to make lump free and perfectly cooked kesari.

Microwave-rava-kesari-recipe

Try this easy microwave rava kesari and enjoy your day !
rava kesari recipe


Continue Reading...