Mangalore buns recipe @ Banana poori served with coconut chutney as side dish is one of the most popular breakfast combo in Karnataka. I have tasted this few times in hotels like Anna Kuteera, SLV etc. Mangalore buns is a kind of Poori/ puri made with all purpose flour, banana, sugar and curd. As this poori tastes soft, spongy with a mild sweet taste, its called as buns. Mangalore buns cannot be prepared instantly. Its dough should be fermented for at least 4 to 6 hours or overnight to get the best results. Recently I prepared it for our breakfast along with coconut chutney by watching few YouTube video. It came out very well. We liked it very much. Its a unique, Karnataka style breakfast recipe. Friends, do try this banana poori / Mangalore buns at home. You will love it for sure. Ok, lets see how to prepare Mangalore buns recipe with step by step pictures and video.
Do check out my collection of 10 Poori varieties & 20 Side dish for Poori.
Have a look at my Instant Mangalore Bonda recipe as well.
Do check out my collection of 10 Poori varieties & 20 Side dish for Poori.
Have a look at my Instant Mangalore Bonda recipe as well.

Mangalore buns recipe - Banana Poori
 Mangalore buns recipe with coconut chutney as side dish. - Karnataka special breakfast recipe
Cuisine: Indian
Category: Breakfast
Serves: 6 to 8 no.
Prep time: 6 Hours
Cook time: 5 Minutes
Total time: 6 Hours 5 Mins
INGREDIENTS
| For Mangalore buns 1 cup - 250ml
|
METHOD
- In a wide bowl, mash the banana with a fork.
- Add curd, sugar, salt, all purpose flour and mix well
- Make a dough without adding water.
- Cover and keep it aside for minimum 6 hours.
- Knead it well and make thick, round poori.
- Deep fry it both the sides till golden brown.
- Remove in a tissue paper. Serve hot with coconut chutney.
METHOD - STEP BY STEP PICTURES

|


Note
|
Try this yummy, Karnataka special Mangalore buns with coconut chutney for your breakfast.
Tastes Yummy !

Technorati Tags: Mangalore buns recipe,mangalore buns,mangalore buns with coconut chutney,buns recipe,how to prepare mangalore buns,how to make mangalore buns,mangalore buns video


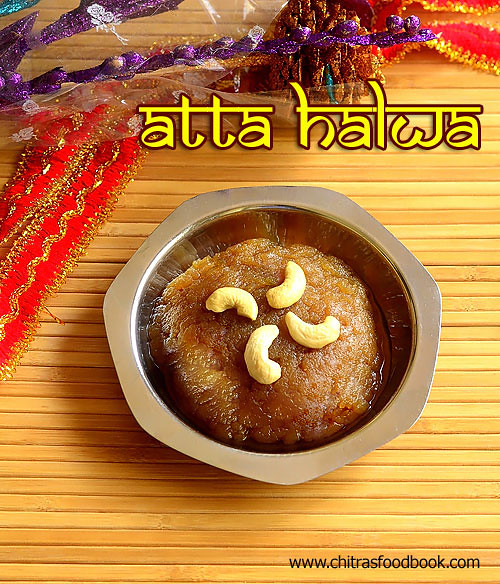
 12 Kesari Varieties