Search Chitra's Food Book

December 3, 2020

Snake Gourd Dal Recipe – Pudalangai Paruppu Kulambu

Snake gourd dal recipe

Recent days I have been trying varieties of dal recipes for lunch. Snake gourd dal / Pudalangai paruppu kulambu is a simple and easy dal recipe for rice and roti. When I was looking for easy Snake gourd recipes, I came across this snake gourd moong dal recipe in this blog. I loved the simplicity and ease of the recipe and tried it immediately.

Its a quick one pot recipe that can be prepared easily in a pressure cooker. I used both moong dal and toor dal in this recipe. Just add chopped Snake gourd, onion, tomato , ginger, garlic and green chilli to the dals. Pressure cook and mash it. Temper mustard seeds and red chilli in ghee and add to dal. Voila, dish is ready in few minutes !

You can mix this Snake gourd dal in plain rice drizzled with few drops of ghee and have it with any spicy curry as side dish. I prepared Brinjal podi curry and vatha kuzhambu along with it and served with some karasev prepared for Diwali. We had a soul satisfying lunch.

Lets see how to make this simple and quick, one pot Snake gourd dal recipe with step by step pictures.

Snake gourd moong dal

Snake Gourd Dal Recipe - Pudalangai Paruppu Kuzhambu


Snake Gourd Dal Recipe - Pudalangai Paruppu Kuzhambu

Snake Gourd Dal Recipe - Pudalangai Paruppu Kuzhambu for rice


Cuisine: Indian
Category: Side dish
Serves: 3
Prep time: 10 Minutes
Cook time: 20 Minutes
Total time: 30 Minutes


INGREDIENTS
1 cup = 250ml
  • Toor dal - 1/4 cup
  • Moong dal - 1/4 cup
  • Snake gourd - 1 (chop into small slices)
  • Green chilli - 1 or 2 (Use 1 for less spice)
  • Big onion - 1 (roughly chopped)
  • Ginger - 1 inch piece (finely chopped)
  • Garlic cloves - 5
  • Tomato - 1 (finely chopped)
  • Turmeric powder - 1/4 tsp
  • Hing / Asafetida - 1/4 tsp
  • Salt & water - as needed
  • Cooking oil – few drops
To Temper
  • Ghee - 2 tsp
  • Mustard seeds - 1/2 tsp
  • Cumin seeds - 1/2 tsp
  • Curry leaves - few
  • Red chilli - 1
To Garnish
  • Coriander leaves - 2 tbsp (finely chopped)
HOW TO MAKE SNAKE GOURD DAL
  1. Wash the dal and soak in water for 15 minutes.
  2. Wash and chop onion, tomato, ginger finely and Snake gourd into small slices. Set aside.
  3. In a pressure cooker base, take the soaked toor dal, moong dal, chopped snake gourd, onion, slit green chilli, tomato, ginger, garlic cloves, turmeric powder, hing, required salt, few drops of cooking oil and water.
  4. Mix well and pressure cook in very low flame for two whistles.
  5. Open the cooker after the steam is released. Mash it well. 
  6. Temper mustard seeds, curry leaves and red chilli in ghee and add to dal.
  7. Mix well and boil for few minutes till thick. Garnish with coriander leaves.
  8. Serve with plain rice along with a curry / poriyal !
METHOD - STEP BY STEP PICTURES
  • Wash the moong dal and toor dal. Soak in enough water for 15 minutes. In the mean time, wash and chop onion, tomato, ginger finely. Wash and chop Snake gourd into small slices or cubes as you like.

  • In a pressure cooker base, take the soaked toor dal, moong dal, chopped snake gourd, chopped onion, tomato, garlic, ginger, turmeric powder, hing, salt, a drop of oil and drinking water.
  • Snake gourd dal recipe
  • Mix well and pressure cook in low flame for 2 whistles. Open the cooker after the steam is released. Mash it well. 
  • If the dal is too thick, add little water and mix well.

  • Heat ghee in a kadai. Splutter mustard seeds, curry leaves, cumin seeds, red chilli and switch off the flame. Add this to the mashed dal.
  • Snake gourd dal recipe
  • Boil the dal till it thickens slightly. Garnish with coriander leaves and switch off the flame.
  • Snake gourd dal recipe
  • Serve hot with plain rice adding few drops of ghee.

  • Enjoy !


Note

  • Soaking the dal helps to cook it mushy.
  • Use drinking water to cook the dal.
  • Adjust the quantity of green chilli based on your taste.
  • You can use moong dal or toor dal alone in this recipe.
  • If you want to make it for chapathi / roti, make the dal thicker and add a tsp of garam masala powder while the dal boils.


Try this easy, Snake gourd dal recipe and enjoy with plain rice!

Snake gourd dal


Continue Reading...


November 26, 2020

Karthigai appam recipe with rice flour – Instant Sweet appam with rice flour

Karthigai appam

Every year during Karthigai deepam, I try some varieties of sweet appam recipe and nei appam recipes. This year I tried a simple and instant sweet appam recipe using rice flour, jaggery and banana. I followed this recipe from Kamala’s corner blog. Traditional Karthigai appam is prepared by soaking and grinding raw rice with little urad dal. But this is an instant version with just idiyappam flour. Even though this appam is without wheat flour or maida, it came out so well and soft as expected. It was not hard or chewy.

I tried both deep fried version and paniyaram pan version. Deep fried version had a crispy exterior and soft interior whereas paniyaram pan version tasted spongy and soft. I loved both of them equally. We all enjoyed it.

This sweet appam recipe can be prepared instantly without any soaking or grinding job. You can use ghee if you wish to make nei appam. Friends, I am sure you will like this recipe for its ease. I have added jaggery syrup to remove the impurities. If you have pure jaggery, you can just powder and add it directly which makes the job even more easy.

If you want to make sweet appam without banana, please refer this recipe link. I have made a separate post for that. If you wish to skip baking soda, then you can try adding 2 banana instead of one. Still there would be some compromise in softness and texture of appam.

Ok friends, Lets see how to make Karthigai appam recipe with rice flour, jaggery and banana.

Check out my other Karthigai deepam recipes if interested.

Also check out my post on how to celebrate Karthigai deepam at home

Karthigai appam recipe

Karthigai appam recipe


Karthigai appam recipe

Karthigai appam recipe with rice flour, jaggery and banana


Cuisine: Tamil nadu
Category: Sweet
Serves: 12
Prep time: 10 Minutes
Cook time: 20 Minutes
Total time: 30 Minutes


INGREDIENTS
1 cup = 250ml
  • Idiyappam flour / rice flour - 1 cup ( I used idiyappam flour)
  • Powdered jaggery – 1/2 cup + 2 tbsp ( Use 1/2 cup for less sweetness)
  • Ripe banana - 1 (Use 2 if small)
  • Grated coconut - 2 tbsp
  • Cardamom powder - 1/2 tsp
  • Baking soda - 1/4 tsp
  • Water - 1/2 cup for syrup + extra for batter
  • Salt - a pinch
HOW TO MAKE SWEET APPAM WITH RICE FLOUR
  1. In a bowl, peel the banana and mash it well.
  2. Add rice flour, grated coconut, cardamom powder, baking soda and a pinch of salt. Mix well.
  3. Take jaggery in a bowl and add some water to cover it. Boil and melt it completely. Let it cool down.
  4. Strain the syrup and add to rice flour mixture. Add required water.
  5. Make a thick but pourable batter. Heat oil to deep fry.
  6. Pour one appam and cook both sides till golden. Remove and serve.
  7. To make in paniyaram pan with less oil, add oil or ghee in paniyaram pan.
  8. Pour batter, cover cook and flip the other side. Cook both sides till golden. 
  9. Remove and drain in a tissue paper. Serve hot !

Karthigai appam

METHOD - STEP BY STEP PICTURES
  • In a wide bowl, take the banana. Peel the skin and mash it well. Use 2 banana if very small. I used one big sized yelakki banana. You can use rasthali or poovazhai variety.
  •  Karthigai appam with rice flour

  • To this mashed banana, add rice flour, cardamom powder, grated coconut, baking soda and a pinch of salt. Mix well and set aside.

  • Take powdered jaggery in a bowl or kadai. Add water to cover it. Boil and melt it by stirring with a ladle. Once its completely melted, switch off the flame. Make sure syrup is not thick. If necessary add some cold water and mix well. Set aside to cool down.
  • Karthigai appam with rice flour
  • Take a metal strainer and add the jaggery syrup. Strain and add to the rice  flour mixture. Mix well and add some water to make appam batter. Use a whisk and mix well to avoid lumps.
  • Karthigai appam with rice flour
  • Add required water to make thick batter but it should be pourable. Do not make the batter thin or watery. So add the water carefully. Mix well and rest the batter for minimum 10 minutes.

  • Heat oil in a kadai to deep fry appam. Drop a pinch of batter to check if it rises to the top. Once the oil is hot, pour a small ladleful of batter in the oil. Make one appam at a time. Lower the flame and splash some oil over the appam. Once it turns golden in color, flip and cook the other side till golden and bubbles subsides. Remove from the oil and drain in a tissue paper. Initially appam tastes hard with crispy exterior. But it becomes soft as it cools down.Sweet appam with rice flour
  • To make appam in paniyaram pan, heat a paniyaram pan adding oil or ghee in each hole. Pour batter till 3/4th of the hole. Cover with a lid and cook in low to medium flame till bottom turns golden. Flip and cook the other side. Remove and serve hot.Karthigai appam with rice flour
    Enjoy !

Note

  • Add 3/4 cup jaggery for more sweetness.
  • You can add more coconut if you like.
  • Do not skip baking soda as this is an instant version.
  • You can add 2 ripen banana instead of one.
  • For variations, you can add 2 tbsp of wheat flour along with 1 cup rice flour.
  • Do not make the batter watery. Appam will absorb more oil.
  • Do not add more baking soda.
  • My daughter liked the deep fried version whereas we loved the pan ones. I just made 4 deep fried appams and made the remaining in paniyaram pan for us. So you can make based on your liking.


Try this easy and instant sweet appam recipe with rice flour and jaggery. Enjoy !

Karthigai appam with rice flour


Continue Reading...


November 19, 2020

Chinna Vengaya Chutney For Idli dosa, Small Onion Chutney Recipe

Small onion chutney

I love onion chutney recipes more than coconut chutney or tomato chutney varieties. And that too this small onion chutney (Chinna vengaya chutney) is my most favorite side dish for idli dosa next to my my mom’s raw onion chutney.

Small onions also known as sambar onion or shallots is one of the costliest vegetables in Bangalore. Its always priced double when compared to Salem, Tamil nadu. So I buy and use it very rarely in my kitchen. But this is my go to chutney recipe whenever I have small onions in stock.

This onion chutney is without tomato or coconut. So it stays good for travel. You can use it for one day at room temperature and up to one week under refrigeration. Tastes the best with hot idli and dosa. Don’t forget to add some gingely oil while serving because it tastes mildly spicy.

Now lets see how to make small onion chutney / chinna vengaya chutney for idli, dosa with step by step pictures and video !


Small onion chutney

Chinna vengaya chutney recipe / small onion chutney


Chinna vengaya chutney recipe / small onion chutney

Chinna vengaya chutney recipe / small onion chutney for idli dosa


Cuisine: South Indian
Category: Side dish
Serves: 2
Prep time: 10 Minutes
Cook time: 10 Minutes
Total time: 20 Minutes


INGREDIENTS

  • Small onion - 25
  • Garlic cloves - 5
  • Red chilli - 4 or 6
  • Cooking oil – 2 tbsp
  • Tamarind - Berry size (sundakkai alavu)
  • Salt & water - as needed
To Temper
  • Gingely oil - 1 tbsp
  • Mustard seeds - 1/2 tsp
  • Urad dal - 1 tsp
  • Curry leaves - Few
HOW TO MAKE SMALL ONION CHUTNEY
  1. Wash and peel small onion, garlic.
  2. Heat oil in a kadai. Saute onion, garlic and red chilli.
  3. Saute for a minute. 
  4. Lastly add tamarind, salt and saute till onion turns transparent.
  5. Switch off the flame.
  6. Cool and grind everything to a smooth paste.
  7. Temper mustard seeds, urad dal and curry leaves in gingely oil.
  8. Add to chutney. Mix well and serve with idli dosa !
METHOD - STEP BY STEP PICTURES
  • Wash and peel the small onion and garlic cloves. Set aside.

  • Heat cooking oil in a kadai. Saute small onion, garlic cloves and red chilli till onion turns transparent. Keep the flame medium and saute the onions. Do not burn the chillies.
  • Small onion chutney
  • Once onion starts to cook, add tamarind and salt. Mix well and saute till onion turns pinkish and transparent. Switch off the flame. Let it cool down.

  • Grind to a smooth paste adding required water. Transfer to a bowl. Heat gingely oil. Temper mustard seeds, urad dal and curry leaves. Add to chutney and mix well.
    • Small onion chutneySmall onion chutney
         
    • Serve with hot idli and dosa. Enjoy !

    Note

    • Adjust the quantity of red chillies as per your taste. I used 4.
    • If you add more red chillies, add more tamarind to balance the taste.
    • Make sure you saute the onion properly else chutney smells raw. 
    • For variations, you can add 2 tbsp of grated coconut or saute one big tomato along with onions.

    Try this easy, yummy small onion chutney for idli dosa and enjoy !

    Chinna vengaya chutney

    Continue Reading...


    November 9, 2020

    How to celebrate Diwali at home in Tamil nadu - Diwali celebration ideas

    How to celebrate Diwali at home

    Diwali or Deepavali (in Tamil) is one of the biggest Hindu festivals celebrated across India. It is one of the most important festivals of the year. I have been sharing the celebration procedures of various Hindu festivals in my blog. But somehow I missed posting on how to celebrate Diwali at home. This is purely Tamil nadu / Tamilians style celebration and that too my family’s way of Diwali celebration at my home. This year 2023, Diwali festival is on 12th November, Sunday in Tamil nadu. 

    Diwali festival gets its name from the row (avali) of clay lamps (deepa) that Indians light outside their homes to symbolize the inner light that protects from spiritual darkness. So Diwali is called the Festival of Lights. 

    Diwali falls in the month of 'Kartik' in Hindu calendar. It is the celebration of returning of Lord Rama to Ayodhya after 14 years of exile. Diwali is also the day on which Lord Krishna had defeated demon Narakasura.

    Diwali diya decorations

    Unlike other Hindu festivals, there is no hard and fast rules for Diwali celebration. It would be a fun-filled festival. Even though this festival is important to Hindus, it is also enjoyed and celebrated by non-hindus as well. Diwali celebration includes lighting Diya and LED lights across the house, decoration with flowers, rangoli, shopping dresses, fireworks/ crackers, puja (prayers), exchanging gifts, enjoying grand food and relish Diwali special sweets & snacks.

    On this day, we light candles and decorate our homes with Rangoli. We burn firecrackers, eat lots of sweets, snacks and share them with our friends and neighbors. Diwali is the most loved festival, and we enjoy it very much. I have shared some of our last year's Diwali celebration images below. Hope you will get some ideas with it !

    Diwali sweets and snacks


    Ingredients for Diwali celebration :

    • New dresses for the family members
    • Crackers (optional, avoid using to celebrate Eco friendly Diwali)
    • Sesame oil, Shikakai powder, turmeric powder, mehandi powder or paste.
    • Banana leaf
    • Coconut
    • Betel leaf and nut
    • Banana
    • Turmeric and kumkum
    • Lamps, oil and wicks
    • Varieties of sweets and snacks
    • Idli rice, urad dal to make idli batter

    Diwali Pre – Preparation :

    For us, Diwali preparation begins with purchase of new dresses for the family. We purchase Diwali dresses one month before the festival. Diwali shopping would be a big excitement for all of us. We buy dresses for my in-laws & ourselves and in turn they buy dresses or silver articles for us as Diwali gift.

    Diwali decorations

    We don’t have the practice of doing grand decorations for Diwali instead my daughter loves to paint some clay lamps/ diya and we light it in our house entrance around the rangoli. She also puts mehandi for me and herself. 

    Diwali snacks recipes

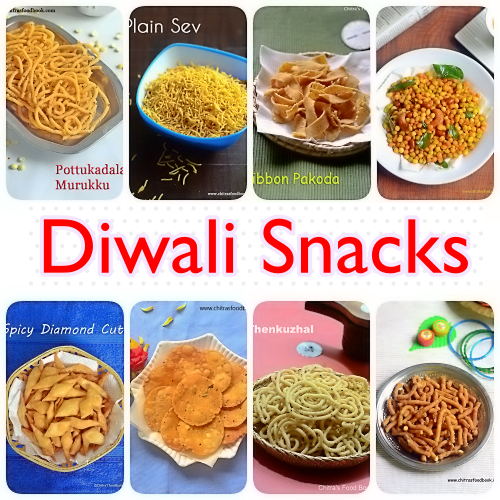
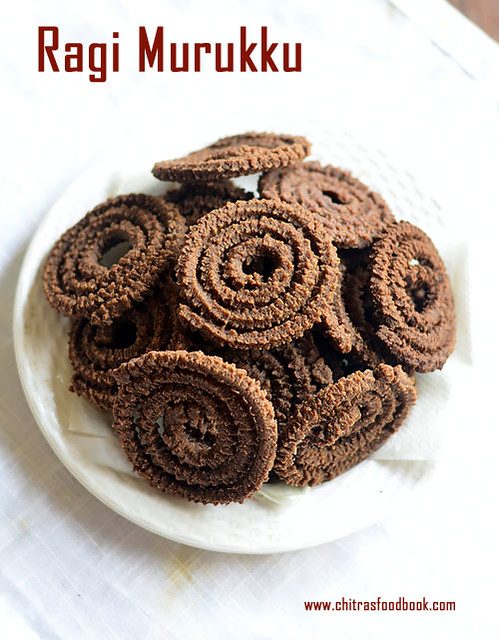
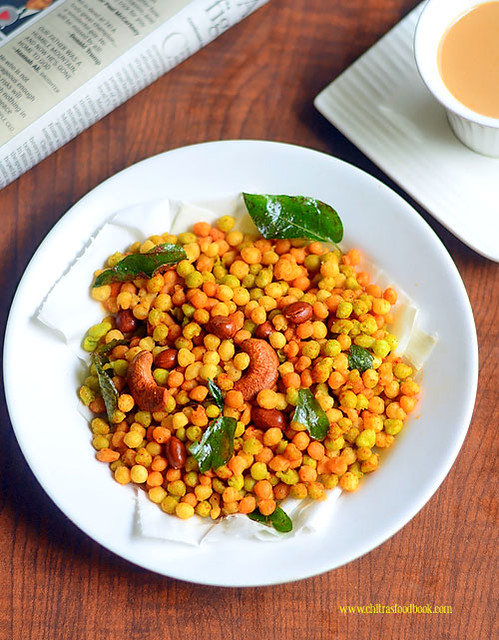
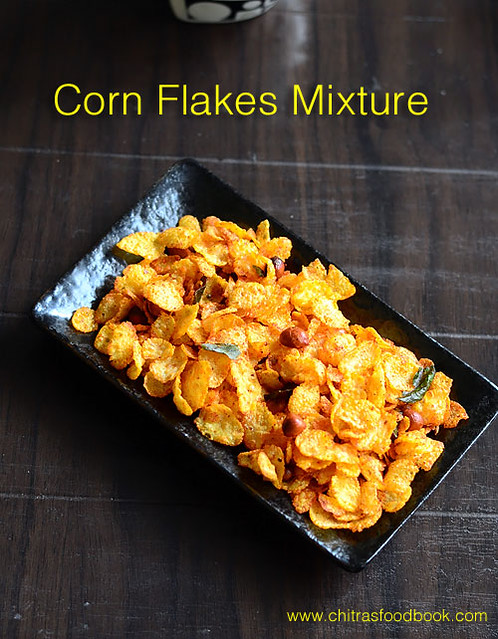
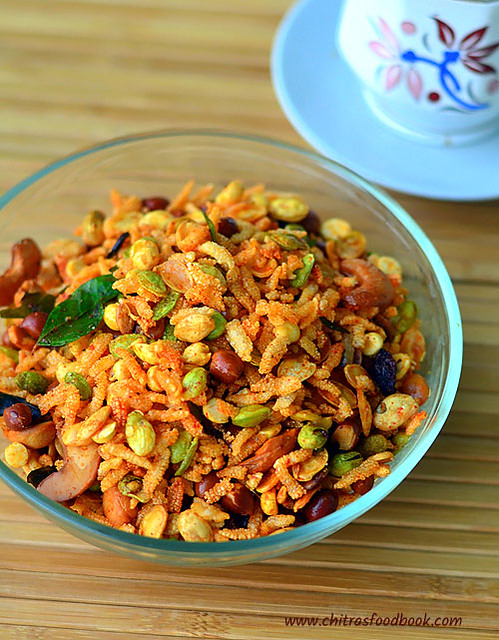
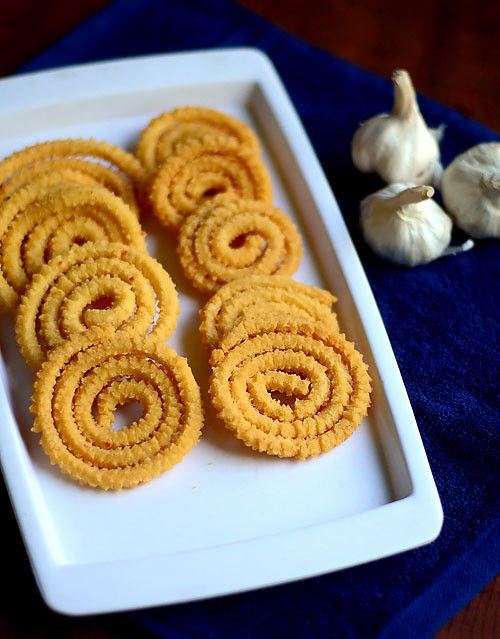
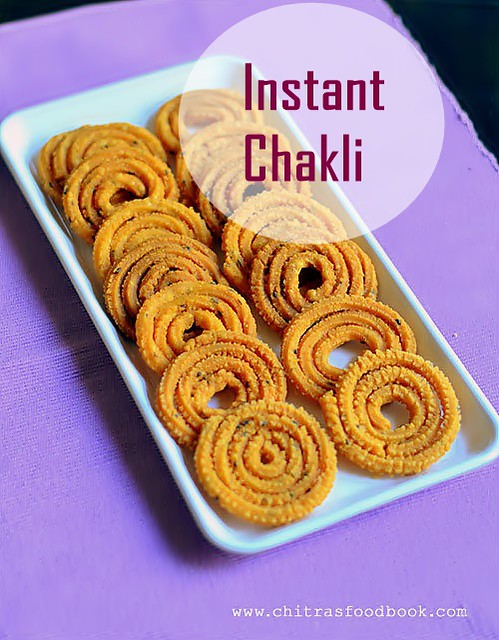
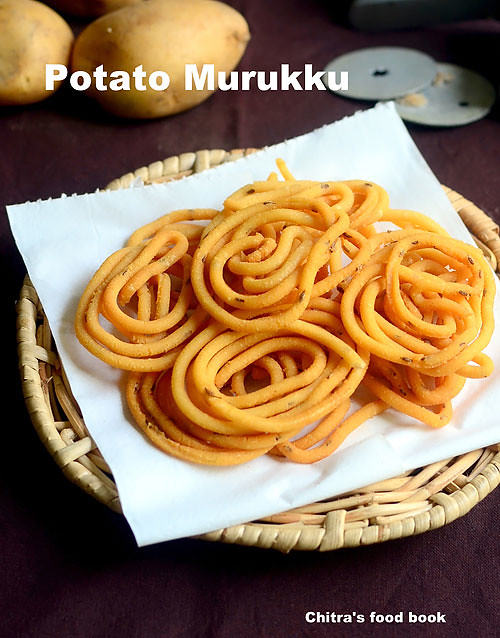
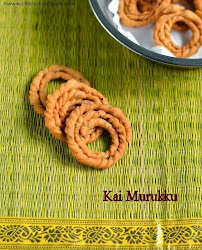
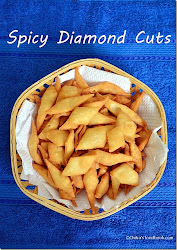
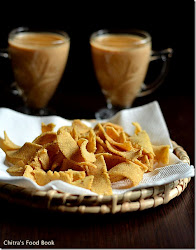
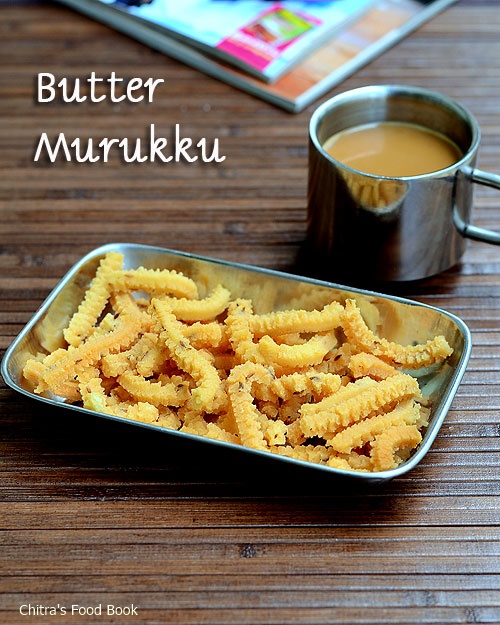
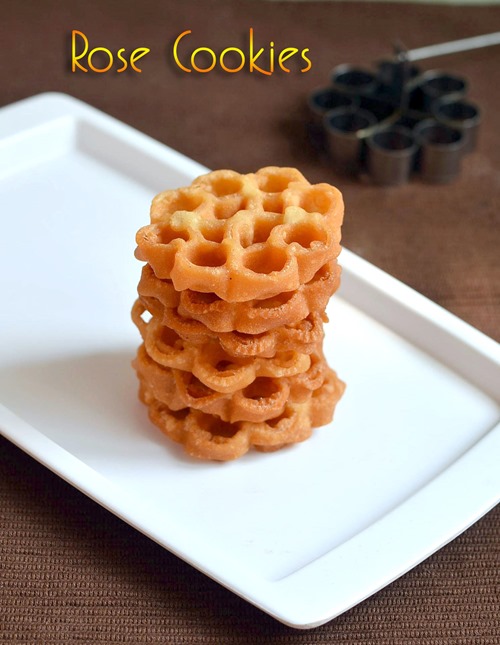
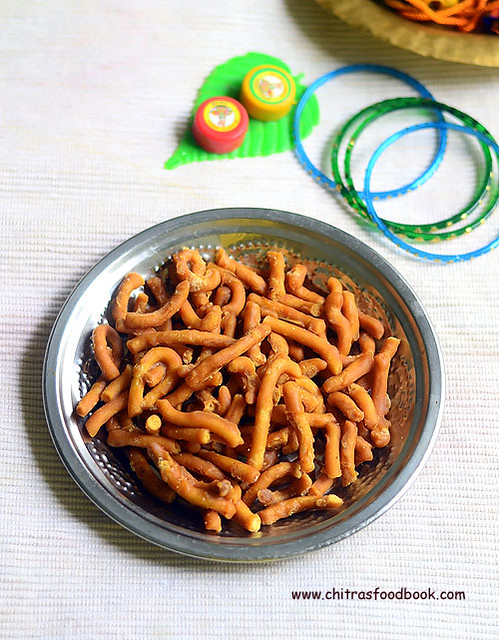
    Next to Diwali shopping comes the Diwali recipes preparation. As a food blogger, I start to make Diwali recipes 15 days before the festival to blog the sweets and snacks recipes. But my MIL starts the preparation one week before Diwali. She makes a big batch of thenkuzhal, ribbon pakoda, kara sev and maida chips/ namakpara for snacks. These snacks are must in our house.

    For sweets, usually my MIL makes Badushah, maida burfi, badam burfi, wheat halwa and boondhi ladoo. Once I go to Salem, I make some kaju katli and gulab jamun as the last minute sweets. Overall minimum one variety of halwa, burfi, ladoo, gulab jamun and some milk sweets or cashew sweets will be in the diwali menu.

    We reserve few pieces of sweet and snacks in separate boxes to keep them for naivedyam on Diwali day and we consume the rest.

    Finally, we purchase crackers a week before Diwali. But recent years, we stopped buying them. We just buy sparklers and one packet of crackers for keeping in neivedyam.


    Coming to our house Diwali celebration procedures :

    Diwali celebration

    In some places, Diwali is a five days festival. But for us, its a 2 days festival. Every year, we go to Salem 2 days before Diwali and love to celebrate it with my in-laws. On Diwali day, I also visit my parents as both my parents and in-laws are at Salem. So its a double treat for me.

    Diwali sweets

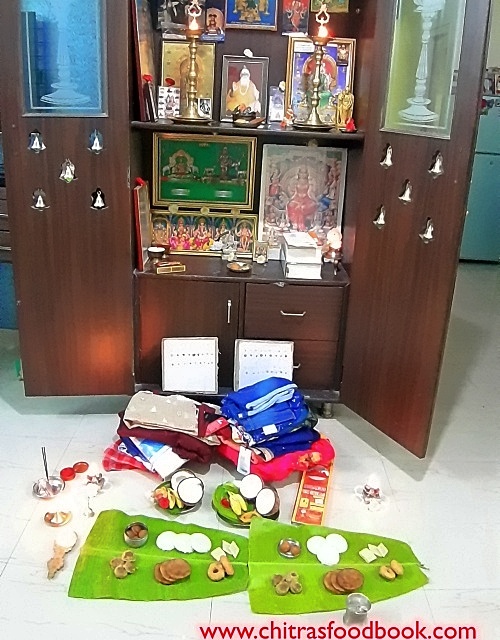
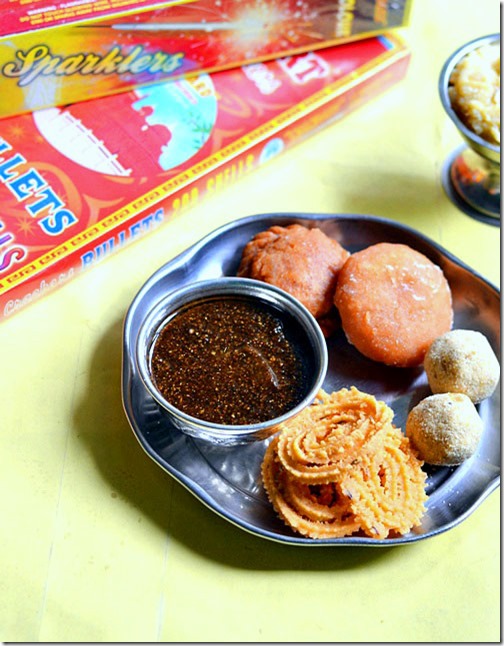
    On the eve of Diwali, we burn crackers till 8.30 night and then we start to prepare suzhiyan, adhirasam which is a must do for Diwali in my home. We stack it in a box. We wash & decorate the diyas/ lamps and other pooja items, decorate them with turmeric, kumkum dots. Sweep the house and draw rangoli / color kolam in house entrance and in pooja room.

    In a big plate, we arrange all the new dress by keeping turmeric & kumkum in a corner of the dress and keep everything ready in pooja room. We also keep a small packet of crackers safely in one corner to keep it for neivedyam. By the time, we finish all these works, it will be around 10.30-11 PM. You can do all these activities in the day time as well.

    On Diwali day morning, we ladies wake up early around 4 AM, brush the teeth and wash the face. My MIL ( eldest lady) lights the lamp and keep a small bowl of sesame oil/ nalla ennai & shikakai powder, turmeric powder and mehandi / marudhani in pooja room. In 2 plates, we keep a set of betel leaves, nuts, 2 banana and one unbroken coconut. The elder( my FIL) in our home apply little oil in the forehead for all of us and keep a pinch of shikai powder on our head for sastram. Then we take bath and wear some old clothes first.

    How to celebrate diwali at home

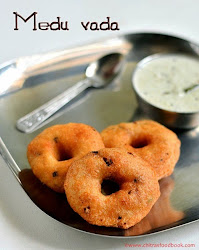
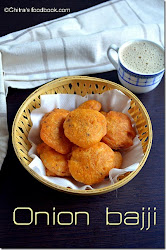
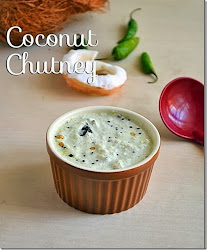
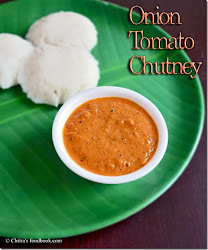
    We ladies enter the kitchen and start to make vada, bajji, idli & sambar for breakfast. In the mean time, my FIL keep flowers for all the idols and keep the pooja room ready. After making all neivedyam recipes, we keep the dresses in 2 different plates, keep some crackers in front of the God as shown in the picture above. We place 2 banana leaves (one for veetu theivam and another one for magamaayi) in front of the God and serve the reserved sweets and snacks along with idli smeared with ghee, vada, suzhiyan and adhirasam.  No need to keep sambar if you add onion. Break the coconut that is kept in the thamboolam plate and get ready for main pooja.

    This is my MIL’s practice but my mom offers all sweets & snacks along with bajji, idli and vada in front of our pooja room in common to all the God. I heard most of the people worship Lord Ganesha and Goddess Lakshmi on this day. Finally, it depends on our tradition. We don't chant any slokhas or sthothrams or keep kalasam on this day. You can recite some Lakshmi slokhas if you like. 

    Usually, we do the pooja before 6 am. The eldest person (my FIL) in the family do the pooja by showing dhoop, dheep and give dresses to everyone.  Dresses are given to the younger ones in the family and then goes according to the age. We wear the new dress and start to burn crackers. 

    diwali food


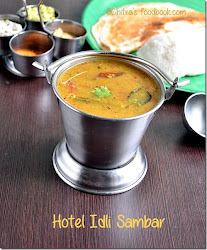
    After burning crackers for an hour, we have breakfast (Idli sambar) along with diwali sweets & savouries in banana leaf. In the above pictures, I have shared our last year’s Diwali sweets, snacks and breakfast.

    After breakfast, myself and my MIL pack the sweets and snacks for our neighbors and friends, distribute them. That’s all. All our works will be over with this . Then we have a relaxing day by watching all the special programs in TV & enjoy the whole day without cooking.

    Every body will have the sweets, snacks, vadai, suzhiyan & adhirasam as food for the whole day. We don’t prepare lunch on Diwali day instead we give the sweets, snacks, vada or bajji if they feel hungry or make tea / coffee / juice if needed. 

    On Diwali day evening, we wear new dresses and we burst all the remaining crackers with family and friends and finish the celebration. We make idli sambar for dinner or some curd rice to keep it light and simple. This is how we celebrate our Diwali. 

    On diwali night or the next day morning, we consume a small gooseberry sized diwali legiyam for better digestion.

    Please find all our diwali recipes collection if you are interested.

    Disclaimer : All these details shared above are based on my family’s celebration procedure. Please consult with your elders and alter it as per your tradition and practice.

    Continue Reading...


    November 6, 2020

    90’s Kids Sweet–Halkova Recipe / Palkova / Maida burfi Recipe

    halkova recipe

    To celebrate this Diwali 2020, today I have shared an easy, yummy, nostalgic sweet recipe that kindles our school days memories. Yes, its a 80’s – 90’s kids favorite sweet fondly known as Palkova / halkova. We used to call this as Maida burfi. When we were young, we used to buy this 25p/ 50 paise sweet from the petty shop (Petti kadai) near our school and house. Nowadays its very rare to find petti kadai and 2k kids are not even aware of this sweet. So I thought of making this sweet in my home and enjoy.  Even though this is titled as palkova, this is no way related to a milk sweet. Milk or milk powder is not used in this recipe. As it looks white in color, it is called as palkova I guess.

    During this lock down, I came across this halkova recipe in my Instagram feed, tried and posted by @starving.tummy Vinesh. When I saw the picture, I was tempted to know the recipe and DM’ ed him. He was so sweet and he shared this perfect recipe immediately. With just 3 major ingredients, this petty shop palkova can be prepared under 15 minutes. Its completely a beginners sweet. There is no sugar syrup consistency or mixing process unlike our usual Maida burfi. It is so simple to make. Original recipe called for using Dalda / Vanaspathi but I used ghee in my first attempt and dalda in my second try. We loved the ghee ones more. 

    Anyone can make this halkova easily without any fuss. Friends, do try this easy, yummy, halkova / palkova / Maida burfi recipe for this Diwali 2020 and enjoy !


    Palkova recipe

    90's kids petty shop sweet - Halkova / Palkova / Maida burfi


    90's kids petty shop sweet - Halkova / Palkova / Maida burfi

    80's - 90's kids favorite petty shop sweet - Palkova / halkova/ easy maida burfi recipe


    Cuisine: Indian
    Category: Sweet
    Serves: 35
    Prep time: 5 Minutes
    Cook time: 10 Minutes
    Total time: 15 Minutes


    INGREDIENTS
    1 cup = 250ml
    • All purpose flour / maida - 1 cup
    • Powdered sugar - 1 cup
    • Melted ghee or dalda - 1/2 cup 
    • Cardamom powder - 1/4 tsp
    HOW TO MAKE HALKOVA RECIPE
    1. Heat ghee in a kadai for few seconds. Add maida and roast in low flame for 8 to 10 minutes without changing the color.
    2. Maida gets roasted and resembles a semi thick paste. Switch off the flame. Transfer to a bowl.
    3. Let it come to room temperature. Add cardamom powder.
    4. Add powdered sugar gradually and mix well to make a thick dough.
    5. Take a ghee greased bowl lined with butter paper and press the dough to make square shape.
    6. Let it set for an hour in room temperature or in refrigerator.
    7. Then loosen the sides and invert the bowl in a plate.
    8. Cut into small squares and store in an air tight box. It tastes the best from the next day.
    9. Store in an air tight box and enjoy up to one week.
    METHOD - STEP BY STEP PICTURES
    • Powder 1/2 cup + 2 tbsp sugar and measure 1 cup from it. Set aside. 
    • 90's kids sweet palkova
    • Take melted ghee in a kadai and heat it for few seconds. Add Maida. Roast it well for 8 to 10 minutes in low to medium flame without changing the color of maida. Maida turns like a semi thick paste after roasting. Switch off the flame and remove the kadai. Transfer the roasted maida to a mixing bowl and cool down. I kept in the kadai itself. 
    • 90's kids sweet palkova
    • Let the maida paste cool down to room temperature. It should be warm enough to handle with your hands. It should not be hot. Add cardamom powder and half of powdered sugar. Mix well and add the remaining powdered sugar gradually.
    • 90's kids sweet palkova90's kids sweet palkova
    • Mix well to make a smooth, thick dough. Take a bowl. Line with butter paper. Grease with ghee and transfer the dough to it. Press to make shape. Let it set for an hour on counter top or refrigerate it. It takes 30 minutes to set in refrigerator. Remove the bowl and keep it outside. If it's too hard to cut, wait for sometime to bring down to room temperature otherwise burfi may crumble while you cut it. 90's kids sweet palkova

    • Loosen the sides with a knife gently. Invert the bowl to a plate and pat it. It will fall easily. Now cut into small squares and arrange in an air tight box. It tastes the best from the next day. You can store and use up to one week. Enjoy !
    • 90's kids sweet palkova

    Note

    • To make white colored burfi, maida should be roasted patiently in low flame without changing its color. 
    • Do not forget to line the bowl with butter paper for easy removal. 
    • If you use dalda, texture and taste of burfi varies slightly. Also burfi sets quickly than the ones made with ghee.
    • Make sure, you don’t change the color of maida while roasting. Burfi won’t come white in color.
    • For variations, you can add a tbsp of milk powder along with powdered sugar.
    • If you cut the burfi before its set completely, it may crumble into small pieces.

     Try this easy, yummy palkova / maida burfi recipe and enjoy !

    90's kids sweet palkova

    Continue Reading...


    November 2, 2020

    35 Diwali Snacks Recipes | South Indian Dry Snacks For Diwali

    Diwali snacks

    In this post, I have shared the collection of simple, easy and top South Indian Diwali snacks / deepavali dry snacks like murukku recipes, mixture recipes, ribbon pakoda, kara sev, kara boondi, thattai, Tirunelveli special snack thukkada, mixture biscuit, maida biscuit etc which is commonly prepared in Tamilnadu and in most of our houses for Diwali. I have shared this snacks list under one page for quick reference. Hope you find it useful. 

    This year I am planning to make Madras mixture/ South Indian mixture recipe. I will include that as soon as I post in my blog. Ok friends, do try these easy snacks for this Diwali and have a fun-filled celebration. I am sure these snacks would be loved by everyone including children/kids.

    Ok, Lets see the list of easy Indian Diwali snacks below. I have also shared some Diwali day neivedyam recipes like Idli, vada, bajji, sambar and chutney for your reference. Last but not the least, 2 diwali special legiyam recipes to enhance the digestion.

    HERE is my full collection of Diwali Recipes with celebration procedures !

       
    Also check out my murukku varieties post .

    Diwali snacks


    Diwali snacks recipes collection 25 easy diwali snacks recipes

    cuisine: South Indian
    category: Snacks
    serves:  3
    prep time: 10 min
    cook time: 20 min
    total time: 30 min


    DIWALI SNACKS RECIPES


    Manapparai Murukku recipe Magizhampoo murukku

    Kara sev recipe Pulippu murukku


      urad dal murukku

    Garlic ribbon pakoda corn flakes mixture


    DIWALI DAY NEIVEDYAM RECIPES 


      Potato bajji


    masala vada Instant bonda 


    SIDE DISHES FOR DIWALI BREAKFAST 


    bajji bonda mix


    Last but not the least, Inji legiyam & Diwali marundhu recipes for easy digestion of diwali snacks & sweets :)

      Diwali legiyam

    Wish you all a very happy & safe Diwali celebration. Hope you try these recipes & mail me your feedback !

    Click HERE to view my full collection of Diwali Recipes with celebration procedures!

    Continue Reading...