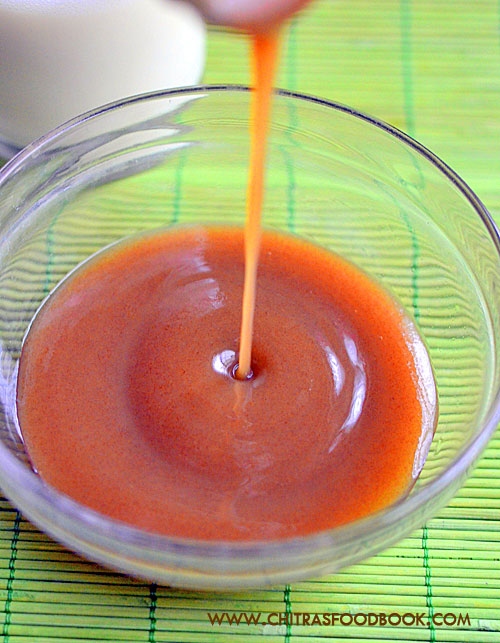
I have never thought of making dates syrup at home on my own. Usually I buy Lion dates syrup from shops and mix it with my morning milk. It keeps me active throughout the day. But recent days I felt the sweetness is more in Lion dates syrup and I started suspecting it for more sugar content than dates. So I stopped buying it and I was taking plain milk in the morning.
Recently I came across this homemade dates syrup recipe when I was browsing for Christmas fruit cake recipe. I prepared it to mix and consume with my milk. It came out so well with mild and natural sweetness which I loved it. I made in a small batch as its my first trail. I am sure I will make in bulk and store it.
Friends, do try this easy and simple dates syrup at home. You can mix this in plain milk, spread for bread/ dosa/ pancake, can be used as a natural sweetener in desserts and sweets. You can replace sugar with this healthy Dates syrup.
Dates syrup / Homemade Dates syrup recipe
Dates syrup recipe - How to make dates syrup at home easily.
Wash the dates and soak in hot water for one hour till its soft.
Drain the water and squeeze the soft dates to a pulp using a masher.
Strain through a cheese cloth or a sieve.
Take the water in a bowl and boil in low flame till it thickens like honey.
Switch off the flame, Cool down and store in a glass bottle.
METHOD - STEP BY STEP PICTURES
Wash the dates and soak in hot water for one to two hours till it becomes soft.
Drain the water and mash the dates to a pulp using a steel masher or potato masher. Sieve it through a cheese cloth or muslin cloth. I used a plastic sieve with fine mesh.
Mix the extracted pulp to the drained water and boil everything until thick and saucy like honey. Boil in low flame for 10 to 12 minutes to reach this consistency.
Switch off the flame. Cool down and store in a glass jar in refrigerator. You can mix in plain milk, spread in bread/ dosa/ pancake or use as a natural sweetener in sweets and desserts.
Enjoy !
Note
Mejdool dates works the best as its soft. But I used Lion brand dates.
Color of the syrup varies as per the quality of dates.
If you are using dried dates, soak it overnight in hot water and then proceed.
Do try this easy and healthy Homemade Lion dates syrup and enjoy !
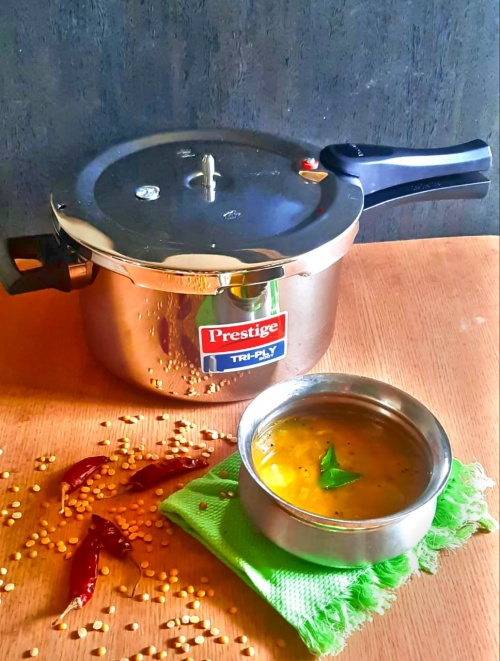
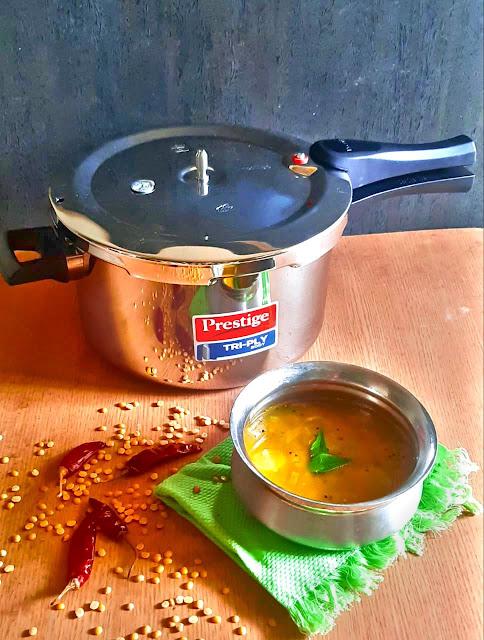
Sambar is a staple side dish for idli, dosa, pongal and other tiffin varieties in South India. It’s difficult to resist its aromatic flavours. I like to add vegetables into it to enhance its nutritional value. In this blog, I will be showing you how to prepare one-pot sambar usingPrestige Svachh Triply Outer Lid Pressure Cooker. This pressure cooker makes the cooking process hassle-free as it has an innovative Deep Lid that controls the spillage of starchy water.
This one-pot recipe is suitable for bachelors and working women as they can prepare it easily during the busy morning hours. You can prepare it within 10 minutes by adding simple ingredients like onions, tomato, carrots, and beans. I have been using this Prestige Svachh stainless steel pressure cooker for the past two years. It has a Unique Deep Stainless Steel Lid designed to prevent froth from flowing down the pressure cooker.
This cooker also has a Revolutionary Pressure Indicator that acts as a locking device. It cannot be opened if the pressure inside the cooker is too high. On most days, I do pot-in-pot cooking by placing a small vessel with chopped vegetables over the dal to prepare both the dishes simultaneously. Its both time and fuel saving for me.
Friends, do try this easy and simple one pot, pressure cooker sambar and enjoy with Idli, dosa, pongal and other tiffin varieties.
One pot idli sambar - Pressure cooker idli sambar recipe
One pot idli sambar - Pressure cooker idli sambar recipe
Heat oil in Prestige pressure cooker. Splutter mustard seeds, methi seeds, curry leaves, red chilli and hing.
Lower the flame completely. Add turmeric, red chilli powder, coriander powder and sambar powder. Mix quickly.
Add chopped onion, chopped carrot, beans and mix quickly. Add washed toor dal. Add required water, jaggery and salt. Lastly add one whole tomato.
Cover the lid and pressure cook in low flame for 2 whistles. Open the cooker after the steam is released.
Mash the dal well. Boil for a minute if sambar is watery. Garnish with coriander leaves and add a tsp of ghee.
Serve with Idli, dosa and pongal.
METHOD - STEP BY STEP PICTURES
Heat oil in a pressure cooker. Splutter mustard seeds, methi seeds, curry leaves, red chilli and hing.
Lower the flame completely and add turmeric powder, red chilli powder, coriander powder and sambar powder. Mix quickly.
Add chopped onion, vegetables and saute quickly. Add washed toor dal, salt, jaggery and required water. Lastly add one whole tomato. Do not cut the tomato because it will prevent the dal turning mushy.
Pressure cook in low flame for one to two whistles. Open the lid after the steam is released. Mash the dal first and then the tomato. Mix everything together.
Boil for few minutes if the sambar is watery. If its too thick, add little water to adjust the consistency. Lastly garnish with finely chopped coriander leaves and a tsp of ghee. Serve with hot idli, dosa and pongal. Enjoy !
Note
Adjust the quantity of spices as per your taste.
You can use moong dal instead of toor dal.
You can dilute 1 tsp of besan flour in 1/4 cup water and add to pressure cooker along with dal.
Make sure you don’t burn the masala powders. It will spoil the taste of sambar. So keep the flame low or switch off the flame after tempering and then add the spice powders.
Try this easy, healthy one pot idli sambar. You will love it.
Ash gourd also known as white pumpkin in English (Vella poosanikai in Tamil, Boodhu kumbalakai in Kannada, Kumbalanga in Malayalam, Petha in Hindi ) is a super healthy vegetable that is a rich source of Calcium, Magnesium, Manganese, Pottasium, Zinc and Vitamin C. It is used to treat obesity and helps to maintain the PH ratio in our body.
Ash gourd rasavangi is our family favourite recipe. Apart from this, I add ash gourd in more kuzhambu which gives a hotel taste and flavor. Recently I tried this white pumpkin stir fry / Vellai poosanaikai poriyal as side dish for sambar rice. Its preparation is so simple and takes very less cooking time as ash gourd is a watery vegetable.
Friends, do try this ash gourd stir fry / Vellai poosanikai poriyal for rice and roti. Enjoy.
HOW TO MAKE WHITE PUMPKIN STIR FRY / VELLAI POOSANIKAI PORIYAL
Wash and peel the skin of Ash gourd. Remove the seeds and flush part in the middle. Chop into cubes. Set aside.
Heat oil in a kadai. Splutter mustard seeds, urad dal, cumin seeds, curry leaves and hing.
Lower the flame and add the turmeric powder, sambar powder and salt.
Add the chopped ash gourd pieces and mix well in low flame.
Cover cook in low flame till ash gourd is cooked soft. Switch off the flame.
Add grated coconut and chopped coriander leaves. Mix gently and serve with rice or roti.
METHOD - STEP BY STEP PICTURES
Wash and peel the skin of Ash gourd. Remove the seeds and flush part in the middle. Chop into cubes and set aside.
Heat oil in a kadai. Splutter mustard seeds, urad dal, cumin seeds, curry leaves and hing.
Lower the flame completely. Add turmeric powder, sambar powder and salt. Mix quickly without burning.
Add the chopped ash gourd pieces. Mix quickly to coat the masala in low flame. Cover cook with lid till ash gourd is cooked soft but make sure it retains its shape.
Switch off the flame. Add grated coconut and chopped coriander leaves. Mix well and serve with sambar rice, curd rice, mix with plain rice and roti.
Note
You can use the same method and make poriyal with chow chow, knol khol, yellow pumpkin.
For variations, you can use plain red chilli powder instead of sambar powder.
Use coconut oil for nice flavour.
Healthy and easy Ash gourd poriyal is ready to serve with rice.
I learnt this ridge gourd skin chutney recipe for rice from my friend Shalini. We call it as Peerkangai thol thogayal in Tamil. Its a very simple and healthy recipe. Usually we discard the skin of ridge gourd. But it has so many health benefits. So we can make this yummy and healthy thogayal recipe with its skin and enjoy mixing with plain rice adding few drops of sesame oil or ghee.
I love to pair it with appalam/ papad. Hot rice mixed with this thogayal and appalam in its side tastes divine. Though this chutney is mainly served with rice, it tastes good with idli, dosa as well.
Friends, do try this recipe and enjoy ! You will love it for sure. Lets see how to make Ridge gourd peel chutney / Peerkangai thol thogayal for rice with step by step pictures.
Wash and peel the ridges of ridge gourd. Peel the skin, chop and set aside.
You can use the flesh to make poriyal/ curry with it.
Heat oil in a kadai. Roast urad dal, red chilli and add saute onion, garlic till golden in color. Add the ridge gourd peels/ skin and saute till it shrinks in size.
Grind everything to a thick, smooth paste adding coconut, salt, tamarind, jaggery and little water.
Lastly temper the chutney with mustard seeds, curry leaves and hing. Mix well
Mix with plain rice adding sesame oil or ghee and enjoy.
METHOD - STEP BY STEP PICTURES
Wash and peel the ridges and remove it. Peel the skin and chop it. Set aside. You can use the flesh to make poriyal / kootu with it.
Heat oil in a kadai. Roast urad dal, red chilli, hing for a minute. Add onions, garlic and saute till its transparent. Add the chopped ridge gourd peel and saute till it shrinks in quantity. Switch off the flame. Add salt, tamarind, jaggery, coconut and mix well. Cool down.
Grind everything to a smooth and thick chutney. Heat oil and temper mustard seeds, curry leaves, hing and add to chutney. Mix well.
Serve with plain rice adding ghee or sesame oil. Enjoy with papad / Appalam.
Note
You can skip onion but it adds a great taste and flavor to the chutney.
Adding coconut is optional.
For bright green color, add a pinch of turmeric powder.
Try this easy, healthy Ridge gourd peel chutney for rice, idli, dosa. You will love it.
I have bookmarked so many Kalyana veetu recipes to try. As the list is going long, I wanted to start with this easy and flavourful Kalyana veetu vazhakkai varuval recipe / Kalyana veetu vazhakkai poriyal. I love this Tamil nadu marriage style vazhaikai varuval a lot since my childhood. Some people call it as vazhakkai chops too.
Every time I taste this in a marriage banquet, I have tried to guess the ingredients that goes into it. I was able to spot the fennel seeds alone. I have also made a Yam chops recipe in my blog years ago. Now I am happy to try this perfect Kalyana veetu style vazhakkai curry with a strong masala flavor which is my kind.
The ingredients used for grinding the masala is the highlight in this recipe. So please do not skip any. Actually I referred this recipe in many YouTube channels and tweaked it slightly to make an easy version. It came out so well. We all loved it.
Friends, do try this Tamil nadu Kalyana veetu style Vazhakkai varuval recipe. You will love it for sure. It tastes great with sambar, rasam and curd rice. Check out the video below
Kalyana veetu vazhakkai varuval recipe
Kalyana veetu vazhakkai varuval recipe | Marriage style raw banana fry recipe for rice
Wash and peel the skin of raw banana. Chop into big cubes and set aside.
Steam in an idli pot or in a cooker. Raw banana should be soft but firm in shape.
Remove and cool down. Heat oil and shallow fry the raw banana till golden in color. Collect in a plate.
Grind all the ingredients given under “ To grind masala” to a coarse paste without adding water. Set aside.
In the remaining oil, splutter mustard seeds, fennel seeds and curry leaves.
Saute onions and add the ground masala, salt and turmeric powder. Mix well. Add little water and Saute till raw smell goes off.
Lastly add the roasted raw banana pieces. Mix to coat well in low flame.
Switch off the flame and garnish with coriander leaves.
Serve with plain rice, sambar, rasam and curd rice. Enjoy !
METHOD - STEP BY STEP PICTURES
Wash and peel the skin of Raw banana. Chop into big cubes. Keep in water till use.
Take the chopped raw banana cubes and steam if for 5 minutes in an idli pot or keep it in a vessel inside a pressure cooker. Steam cook for one whistle in high flame. Make sure raw banana pieces turns soft but firm in shape. This step is completely optional. But I did it as I wanted my raw banana pieces to be cooked well to avoid Gas trouble and stomach irritation.
Take the steamed raw banana pieces. Heat 3 tbsp oil and drop few banana pieces. Shallow fry both the sides till golden and slightly crispy.
Remove in a plate. Repeat the same in batches. Fry all the raw banana pieces and set aside.
Grind the ingredients given under “For masala” to a coarse paste without adding water. Set aside.
Heat the remaining oil the kadai after shallow frying. Splutter mustard seeds, fennel seeds and curry leaves. Add finely chopped onion and saute till transparent.
Add the ground masala and mix well. Add little water and boil in low flame till thick. Masala boils and leaves the raw smell too. It becomes thick and starts to leave oil in the sides.
Lastly add the fried raw banana pieces and mix gently to coat well. Roast in low flame for few minutes. Switch off the flame once the poriyal starts to leave nice smell. Garnish with coriander leaves.
Serve hot with rice, sambar, rasam and curd rice.
Enjoy !
Note
To make it more spicy, add one finely chopped green chilli along with onion and saute it.
Adjust the quantity of oil. You can also fry the raw banana pieces in little oil in dosa tawa.
Do not skip fennel seeds.
Try this yummy Kalyana veetu style Vazhakkai varuval recipe and enjoy !
Palak keerai kadayal or masiyal is a simple, healthy and yummy side dish for rice, idli and dosa. I am happy to add this to my Palak keerai recipes list in my regular cooking. Its procedure is simple but it tastes so good. Usually palak keerai kadayal is prepared with toor dal or moong dal. But this pasalai keerai kadaiyal is without dal. It tastes more like chutney or thogayal.
Friends, do try this palak keerai masiyal / kadayal without dal in this way. You will love it with plain rice, idli and dosa. For variations, you can make the same using arai keerai or mulai keerai.
Palak keerai kadayal / Keerai Masiyal recipe
Pasalai keerai kadayal / Masiyal without dal for rice, idli, dosa.
Wash the keerai several times. Chop roughly and set aside.
Heat oil in a kadai. Saute cumin, onion, green chilli, garlic and tomato till mushy.
Add the washed palak, turmeric powder, sugar and saute till it shrinks in quantity.
Switch off the flame and let it cool down. Add salt and grind to a smooth paste.
Temper mustard seeds, vadagam, curry leaves, red chilli and add to ground palak leaves.
Mix well and serve with plain rice adding ghee.
METHOD - STEP BY STEP PICTURES
Wash the palak leaves and chop roughly. Set aside.
Heat oil in a kadai. Saute cumin seeds, onion, green chilli, garlic and tomato. Saute till tomato turns mushy.
Now add the washed palak leaves, turmeric powder, a pinch of sugar and saute till it shrinks in quantity. Switch off the flame and let it cool down.
Grind to a smooth paste adding required water and salt. Temper mustard seeds, vadagam (optional), curry leaves, red chilli and hing.
Add to the masiyal and mix well. Serve with hot rice adding ghee. Enjoy.
Note
You can use arai keerai mulai keerai / Amaranthus instead of palak leaves.
For variations, use red chilli instead of green chilli.
Addition of turmeric powder and sugar helps to get bright green color.
Tempering vadagam is optional but it gives a nice flavor and taste to this kadayal. If you don't have vadagam, you can saute finely chopped small onion till golden and add to it.
Try this healthy Palak Keerai masiyal recipe and enjoy !
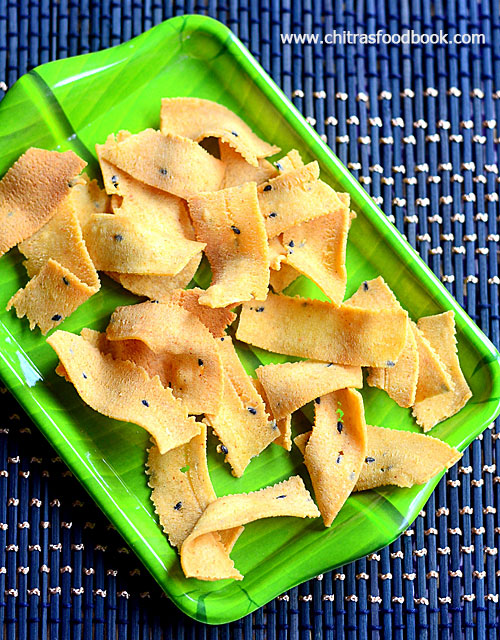
Every year during Diwali I make Ribbon pakoda / Ola pakoda without fail. Usually I make it adding hing. This year, I made ribbon pakoda adding garlic. It turned out so flavourful and crunchy than my usual ones. So I am planning to try this version every year during Diwali.
Generally Garlic ribbon pakoda is prepared by grinding soaked red chilli and garlic cloves to a paste and added to the rice flour. In this method, garlic pieces and red chilli won’t grind properly. So I followed a different method as suggested by Happy homemaker – Tamil YouTube channel video. Thank you so much Jaya. Your tip worked out so well.
Its so easy to make and stays good for a month if handled properly. Friends, lets see how to make this yummy Garlic ribbon murukku recipe with step by step pictures and a short video.
Store bought rice flour or Idiyappam flour - 1 cup
Besan flour or Roasted gram flour / pottukadalai maavu - 1/2 cup
Melted butter - 1 tbsp
Sesame seeds - 1 tsp
Salt - as needed
Red chilli powder - 1 tsp
Water - as needed
Cooking oil - to deep fry
To grind
Garlic cloves - 10
HOW TO MAKE GARLIC RIBBON PAKODA
In a wide bowl,sieve rice flour and besan flour.
Add salt, sesame seeds and Kashmiri chilli powder to it. Mix well.
In a mixie jar, take the garlic cloves and add a handful of rice flour mix to it.
This helps to grind garlic to a powder without any grits. Add the garlic mix to the rice flour mix.
Lastly add melted butter and mix well and spread evenly.
Add water and make a thick dough. Take the ribbon pakoda mould and grease with oil.
Fill the dough. Heat oil and drop a pinch of dough. If it rises to the top immediately, oil temperature is right.
Squeeze the murukku press over the hot oil and deep fry ribbon pakoda in both the sides till bubbles cease. Remove from oil and drain in a tissue paper.
Store in an air tight box once it cools down. Stays good for a month.
METHOD - STEP BY STEP PICTURES
In a wide bowl, sieve the rice flour and besan flour. You can use roasted gram dal flour instead of besan flour. Add Kashmiri red chilli powder, salt and sesame seeds to it. Mix well and set aside.
In a mixie jar, take the garlic cloves without skin and add a handful of above said mixed rice flour to the garlic cloves. Grind well to a smooth powder. ( Tip : Adding rice flour to the garlic cloves helps in even grinding of garlic pieces without any grits. I got this tip from “Happy homemaker – Tamil YouTube channel video”. Thanks Jaya for this nice tip.
Add this ground garlic powder to the rice flour and mix well. Lastly add the melted butter and spread it well with your hands. Try to hold little quantity of flour after mixing. You should be able to hold the shape but it should crumble when you drop it. This shows fat content is enough for the dough.
Take the ribbon pakoda mould along with the murukku press. Grease with oil and fill the dough. Heat oil to deep fry and check the oil temperature by dropping a pinch of dough. If it rises to the top immediately, oil temperature is just right.
Now lower the flame to medium. Hold the murukku press over the hot oil and squeeze it in a circular manner to make ribbon pakoda. Cook till bubbles cease in one side. Flip over and cook the other side till bubbles cease and turns golden in color.
Remove and drain in a tissue paper. Break the ribbon pakoda into pieces and store in an air tight box. It stays good for a month.
Enjoy !
Note
For variations, you can use roasted gram dal instead of besan flour.
You can use 2 tbsp of hot oil instead of butter.
Deep fry ribbon pakoda till the bubbles and Sshh sound ceases.
Store in the box after it comes to room temperature. Do not store when hot because it will sweat and becomes soggy.
Try this easy, yummy Garlic ribbon pakoda and enjoy for this Diwali !