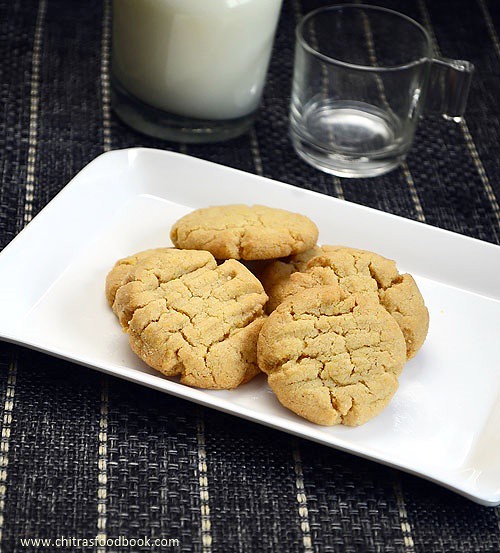
I tried this eggless whole wheat flour custard cookies & an eggless chocolate cake during Christmas for Raksha’s snacks party in school. It was a super hit among her friends & teachers.This is the first time I tried these custard powder cookies without eggs,butter & maida.I used whole wheat flour (atta) & oil by referring this recipe. It came out really well & crunchy with no trace of oil smell.You can use this recipe to make basic eggless biscuit with custard powder.Its so easy to make.This is different from yo yo cookies. Try this cookies/biscuits during this holiday season for your kids.They will enjoy for sure!! Lets see how to make eggless whole wheat flour custard cookies with oil.
Vegetable oil/Cooking oil - 1/4 cup ( use odourless oil)
Sugar - 1/2 cup ( powder it)
Baking powder - 1/2 tsp
Baking soda - 1/4 tsp
Vanilla essence - 1/2 tsp
Milk - 1 tbsp ( add 1 tsp more if required)
METHOD
Powder 1/2 cup of sugar and set aside.In a wide bowl,sieve wheat flour,powdered sugar,baking powder,baking soda and custard powder.Mix well and make a dent in the center.
Add oil,vanilla essence and mix well to make a crumbly mixture.Add 1 tbsp of milk and try to make a dough.If you are not able to make the dough,add 1 tsp more milk.Do not add more milk or oil.Cookies won’t cook well.So adding the mentioned quantity of milk is important here.(You should add powdered sugar else you can't make the dough adding less oil)
Take a small ball sized dough and flatten it slightly. Press it with a fork to make an impression.No problem if there are cracks in the dough.Cracks are unavoidable in this cookies.
Grease a baking tray with oil or line it with a butter paper.Arrange the cookies giving enough gap.These cookies will flatten while baking.So leave enough space between each cookie.Preheat the oven in convection mode at 180c and bake the cookies for 15-17 minutes.Keep an eye after 12 minutes.
The bottom of cookies turn light brown and it will come off easily from the tray.Remove the tray and allow the cookies to cool down completely.Remember these cookies would be very soft while you remove from the tray.It will turn crunchy once it cools down completely.So let the cookies cool down before you taste them.Store in a container.It stays good for a week.Enjoy with tea/coffee !
Note
You should use powdered sugar for this recipe.You can replace with icing sugar if you wish.
You can use maida/All purpose flour instead of wheat flour or use both in equal quantity.
Do not add more milk or oil while making the dough.Cookies will take more time to bake and it will remain soft n chewy in the middle.So take care.
Don’t worry if there are mild cracks in the dough.These cookies will have more cracks after baking.
Enjoy these crunchy cookies with tea,coffee or milk!!
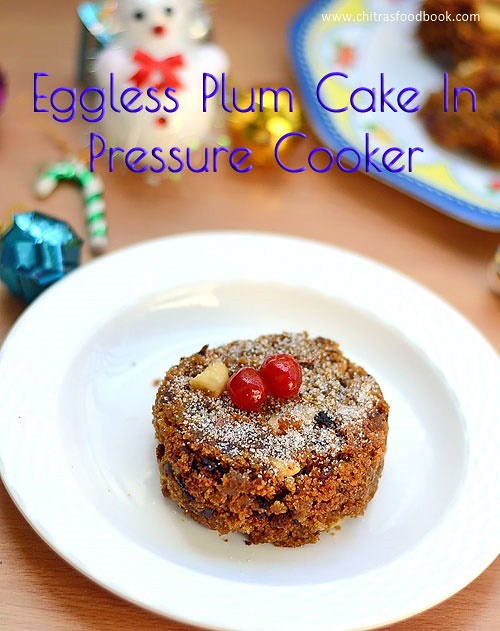
Its my long time wish to try Christmas special Fruit cake / Plum cake recipe using pressure cooker. Last year I got few request to share some eggless cake recipe in cooker. So keeping that in mind, I tried this eggless fruit cake in pressure cooker using my plum cake convection oven recipe (dry fruits cake). I tried it twice by making some changes. It came out really well, soft n spongy equal to my convection oven & microwave methods.
Friends, if you wish to make this Christmas special plum cake at home without oven, try this pressure cooker method. You can make a lovely cake and treat your family members. I wanted to post this recipe with video for beginners. So I have shared my eggless plum cake in pressure cooker video link below. Hope you will find it useful. Soon I will share a post on how to make cookies using cooker which was also requested by many. Now lets check how to make eggless plum cake recipe in pressure cooker with stepwise pictures.
P.S.The color of cake in the pictures are different as I used demerara sugar & refined sugar in equal quantity. In the first picture, both sugars are used whereas in the second picture, only demerara sugar is used.
Pressure cooker do a great job in baking a cake. So anyone can bake a cake without worrying about convection oven. I am sure you can bake crispy cookies as well.
The softness & the flavor of cake would be almost equal to the oven cake. No compensation.
Baking is done fastly in a cooker than oven based on the flame.
You can either use the powdered salt/sand or in empty cooker for baking the cake. As I don’t want to heat my cooker empty,i used salt here.You can use the same salt for repeated baking. No need to change it everytime.
Actually water is not suggested to use inside pressure cooker by baking experts. But I have baked a cake adding water & got good resultsHERE. If you buy a readymade pressure cooker cake mix,water is sugessted for baking. So i am not sure about this point.
You should be very careful with the baking time when you use pressure cooker because it varies as per the cooker metal,size & the flame. If you use indolium cooker,heat may vary.I used steel cooker here.So you should stay nearby and keep checking every 10 minutes else cake will burn very quickly.Baking is done fastly in cooker than oven.You can easily identify the correct baking with the smell of cake.It wafts through your house nicely.
DO NOT use your cooker for baking the cake very often because cooker will lose its shine and life. DO NOT use gasket. It may burn due to over heat.
The most important thing which I felt bad is the stain marks of cooker. The color of cooker changes to dark brown after heating for 30-40 minutes continuously. So you have to wash it atleast for 10 minutes to remove its stains.
Eggless Plum cake in pressure cooker
How to make Eggless Plum cake in pressure cooker with stepwise pictures & a video!!
Cuisine:Indian
Category:Cakes
Serves:10 pieces
Prep time:20 Minutes
Cook time:30 Minutes
Total time:50 Minutes
INGREDIENTS
1 cup = 240ml , 1 tsp = 5 ml , 1 tbsp = 15ml
Maida/all purpose flour - 1 cup
Baking powder - 3/4 tsp
Cooking soda - 1/8 tsp
For fruit mixture
Dry fruits & nuts - 1/2 cup ( I used tutti frutti,cherries,dried cranberries.dry grapes,cashews,badam and pista)
Unsalted butter - 1/2 cup ( approx 100gms) at room temperature
Water - 1/2 cup
Dates syrup or maple syrup or golden syrup - 1/2 tbsp
Sugar or demerara sugar - 1/2 cup ( I used bluebird brand)
Cooking soda - 1/2 tsp
Curd/yogurt - 3 tbsp
Vanilla essence - 1/2 tsp
All spice powder - 1 tsp (Crush 1 clove,1 small piece cinnamon & a small piece of nutmeg)
Mashed potato - 1/2 cup ( cook 2 medium sized potatoes)
Grated orange zest or orange peel – 1 tbsp (optional)
For pressure cooking
Powdered salt - 1/2 kg
Pressure cooker plate - 1 no
Aluminium Baking pan – Small size to suit cooker
Butter paper - to line the pan
Butter or oil - to grease the pan
HOW TO MAKE PLUM CAKE IN COOKER - METHOD
Choose a right baking pan for your cooker and set aside.
In a wide bowl, sieve maida, cooking soda & baking powder. Set aside. Grease a baking pan with butter and line it with butter paper. Keep aside.
Chop the dry fruits and nuts.Mash the boiled potato ( pressure cook 2 medium potato & peel the skin, mash it) and set aside. Keep the orange zest/peel & all spice powder ready.
In a kadai,take the chopped dry fruits (Do not add nuts now). Add water, butter at room temperature, sugar or demarara sugar ( I used both in equal quantity). Mix well and boil the mixture in low flame for 15 minutes. Dry fruits will be cooked well & soft and the mixture thickens. Switch off the flame and immediately add 1/2 tsp of cooking soda. Mix well. Mixture will become foamy.
After the fruit sauce is completely cool, add vanilla essence, orange peel, all spice powder, mashed potato & yogurt. Mix well.
Now add the sieved maida mixture, chopped nuts and make the batter. The consistency of batter should be thick and spoonable. Transfer the batter to the lined baking pan. Decorate it with cashews or badam.
Take your pressure cooker & a slotted plate. Any plate would do. I used my 5 liter steel cooker. Now spread 1/2 kg of powdered salt ( or sand ) in the bottom of cooker. Put the plate inside and preheat the cooker in high flame for 10 minutes. No need to put gasket & weight valve (whistle).
Open the cooker after 10 minutes and place the baking pan inside the cooker. Close it with the lid and keep the flame medium. Let the cake cook for 25-30 minutes. Open it once in the middle after 15 minutes and check whether it is cooked. The cooking time may vary as per the size & cooker type. You will get a nice cake smell. Keep an eye after 25 minutes because the bottom & sides of cake will burn quickly. I experienced this problem when i tried for the first time. So please be careful.
Open the cooker after 25 minutes and insert the back of a long spoon or skewer in the middle of cake. If it comes out clean, cake is baked properly. Take out the pan and allow the cake to cool down completely. Invert the cake over a plate and remove the butter paper carefully. Slice and serve !! It tastes the best next day will full of flavors. This cake stays good for a week if stored properly in an air tight box. No refrigeration is needed.
Note
1. Cake batter should be thick and spoonable as shown in the video.
2. Baking time varies as per the flame. So its better to keep it low to medium if you are a beginner. Please keep an eye after 20 minutes else cake may burn at the bottom and sides.
3.The color of cake depends on the sugar you use. If you use brown sugar or demerara sugar, the color of cake will be dark brown whereas if you use normal crystal sugar,color of the cake will be light brown.In the above recipe, I used demerara & refined sugar in equal quantity.
4. Mashed potato, butter and yogurt gives the softness to the cake. So do not skip any ingredient.
5. Adding orange peel/zest is optional but it gives a nice flavor. So add it along with yogurt.
6. Most important point : You should remove the cake only after it cools down completely else it may break into pieces. This cake needs a standing time of 1-2 hours for all the taste to blend well.
I hope you can follow the same in a idli pot instead of cooker but I have not tried it though.
Try this eggless plum cake recipe using pressure cooker and enjoy this Christmas festival!!
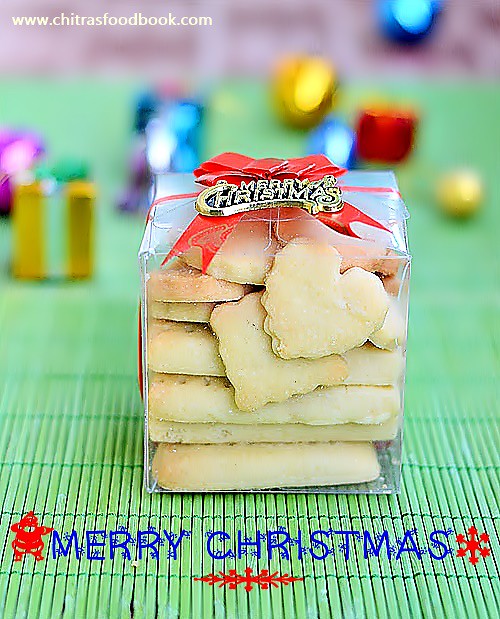
Hope I am not late in sharing Christmas Recipes 2015.For the past one week,I had been trying various cookies and cake recipes.From today,I will share them one by one till Christmas.To begin with,here is the most popular cookies that everyone must try during this season.Yes,Its melt in mouth,crispy Shortbread cookies(Eggless version).We call this as Butter biscuit/ butter cookies.I browsed through few recipes and came up with this version.This is my first attempt in making these cookies and I must say”It came out PERFECT”. I am completely happy with the results.The ingredients and measurements are very easy to remember.It’s a fool proof,beginners cookie and anyone can bake it easily.Its perfect for Christmas & New year Gifting.With buttery soft and melt in mouth texture,it tastes awesome.You won’t and you can’t stop with one even if you are calorie conscious.I saw few recipes with cornstarch/corn flour and few with a combination of wheat flour & maida.I am sure it works in all the ways as the butter makes the magic here.I have shared all the possible tips and tricks in my Notes section.Do peep into it before you start.Friends,How come a cookie with so much of butter goes wrong.Do try it confidently and surprise your family members by showing your expertise in bakingYou will be showered with praises!!
Lets see how to make these delicious Christmas special Shortbread Cookies with stepwise pictures and a VIDEO !!
I love Bangalore Iyengar Bakery’s Khara buns & Khara biscuits more than Benne biscuits.But I usually bake benne biscuits/Nankhatai as its my family’s favorite.This morning I tried savory biscuits/Masala biscuits for the first time by referring this recipe.Actual recipe called for using butter or Vegetable shortening.In bakeries,they use vanaspati/Dalda.But I halved the recipe & used cooking oil(refined oil) to cut down the calories.I was really skeptical about the result.But good biscuits came out very well with melt in mouth texture & crispiness.I was so happy about this bake and enjoyed it with my tea.Friends,do try this bakery style Masala biscuits/Khara biscuits and enjoy your tea time ! Color of this biscuit may vary slightly based on the time of baking and quantity of spices used.But the taste would be gr888 !
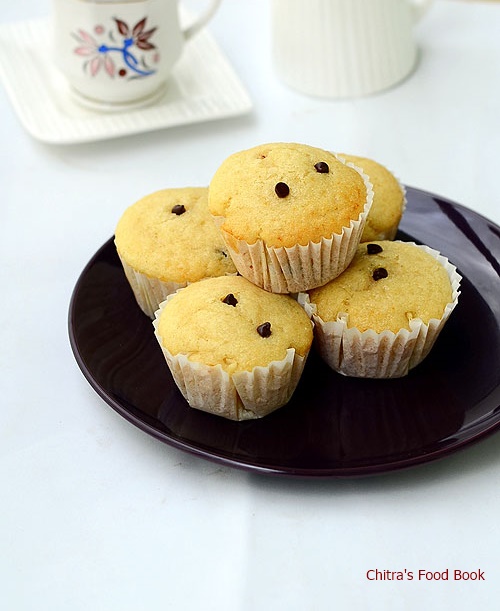
Here is an Eggless vanilla cupcake recipe without butter (with oil) and without condensed milk. It comes out super soft, spongy and moist in texture. Yesterday my daughter Raksha told me to bake a cake using Vanilla essence as its her favorite flavor. She told ” Mummy, when I come back from the school, I should see a cake in your hand”. Its been months since I baked a cake in my kitchen.
For the past few months, I have been making only microwave mug cake recipes(refer side bar) for her after school snacks very easily within minutes. I think she got bored of them. So she badly wanted me to bake a regular cake this time. As I had already bookmarked some good cake recipes, I quickly browsed through them and tried this eggless vanilla cupcake. This recipe uses simple ingredients.
The cake raised beautifully and tasted great with moist, soft and spongy texture. I couldn’t feel its a no egg, no butter, no condensed milk cupcake. You can dare to try this recipe even if you are a beginner in baking. I have used choco chips in this cake to attract my daughter. You can add chopped nuts or even decorate the cake with simple chocolate frosting or buttercream frosting if you are interested.
Lets see how to make this super moist cupcake from scratch.
If you are eager to know the differences between a cupcake & muffin, here you go
Cupcakes tend to be sweeter than muffins; there are savory muffins such as cornbread.
Cupcakes are often iced or frosted, whereas muffins tend to have no topping, or a simple crumb topping.
Cupcakes usually have a head or top no larger than the body of the cupcake; muffins are often encouraged to overflow their baking cup, so that their top is larger in diameter, giving them somewhat of a mushroom shape.
Cupcakes are almost always, well, cupcake shaped; muffins can be made as just muffin tops.
Cupcakes are almost never crispy or crunchy; muffins are often encouraged to brown and develop texture, especially on the top.
Eggless vanilla cupcake recipe
Eggless,moist cupcake recipe - Easy to make n bake !
In a wide bowl sieve maida, baking powder & baking soda and a pinch of salt. Add choco chips to it. Mix well and set aside.
In another bowl,mix the vinegar & milk. It will curdle slightly (U can replace vinegar with lemon juice. But I used vinegar).To this add oil,sugar and vanilla essence. Mix well till sugar dissolves.
Add the sieved flour to it and mix in one direction. It will become a thick batter. It should flow like a ribbon. If you feel, the batter is too thick, add 1-2 tsp of milk. Do not add more milk because cake will become sticky.
Line a muffin tray with muffin papers. Pour the batter till 3/4th of the cup. Preheat the oven in convection mode at 180c. Bake the cupcakes for 15 minutes at 180c. Remove and check it with a tooth pick. If the tooth pick comes out clean, cake is done else keep it for 1-2 minutes more. Do not over bake.
Remove the cake from the tray and enjoy with tea !
Note
Add 1-2 tbsp more sugar & extra vanilla essence for more sweetness & flavor.
You can bake this as a regular cake instead of cupcakes. I guess it will work.
Do not over bake the cake because the outer layer will turn chewy.
You can use lemon juice if you don't have vinegar in hand.
Enjoy this easy, spongy cupcake recipe with tea ! Tastes yum !!
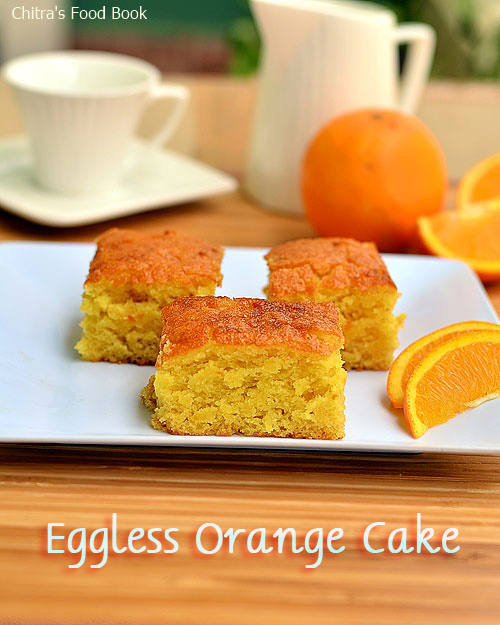
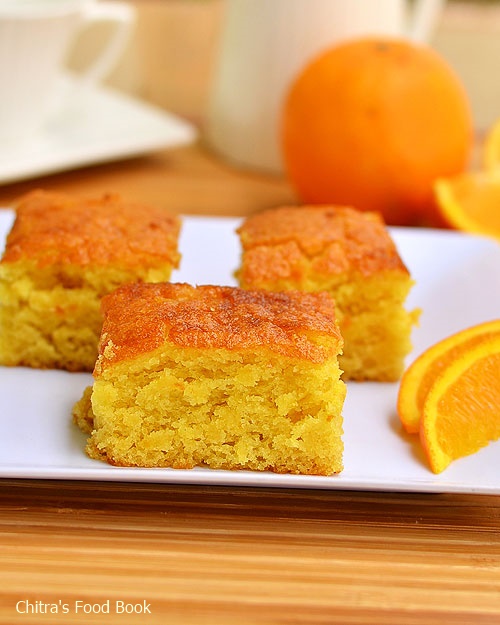
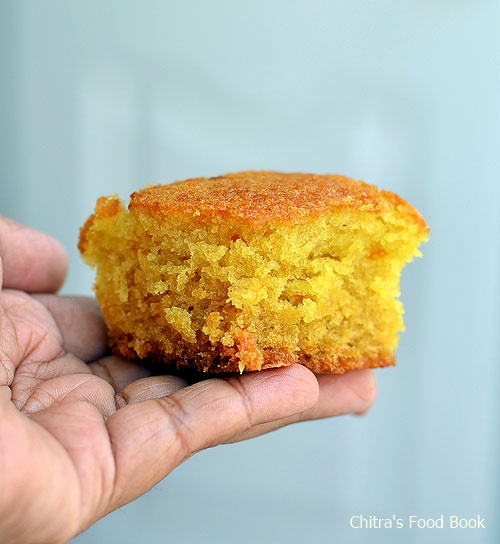
I usually makeeggless orange biscuit cakeand its our family favorite too. But this time I tried an eggless, butter less orange sponge cake recipe using fresh orange juice.This recipe is without condensed milk, curd and it’s a vegan version too. I referred this recipe and used cooking oil to achieve the softness. Cake came out very well with bursting orange flavor. I loved its color, texture, flavor and above all it was like pillow soft to touch and eat. I was completely satisfied with the result and patted myself for this successful baking.
I am happy and double confident that this cake is going to be a super hit among my family members. I am waiting for Raksha to come back from school and taste it. I guess this cake can be made with wheat flour too. I must give a try. Lets see how to make this easy, low fat vegan orange cake recipe with stepwise pictures.
Eggless orange cake recipe
Eggless orange cake recipe without egg, butter, cream, condensed milk and curd.
Cuisine:Indian
Category: Baking
Serves: 10
Prep time:10 Minutes
Cook time:30 Minutes
Total time:40 Minutes
INGREDIENTS
1 cup = 240 ml
All purpose flour/Maida - 1.5 cups ( Heaped)
Baking powder - 1/2 tsp
Baking soda – 1 tsp
Sugar - 3/4 cup
Orange juice - 1 cup (Use fresh juice for best results)
Cooking oil - 1/3 cup ( use odourless oil, I used sunflower oil)
Salt - a pinch
Orange zest - 1/2 tsp (Use grated skin)
METHOD
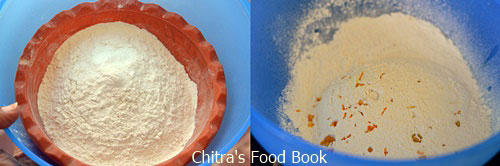
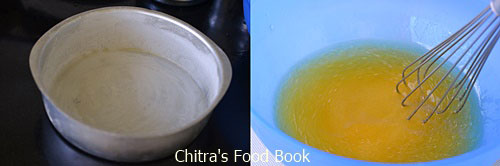
In a wide bowl, sieve the maida, baking powder, soda and salt. Mix well. Add the orange zest to it. ( I grated the skin of orange and mixed with the flour) Set aside. Grease a baking pan with oil or butter and sprinkle the maida all over the pan. Keep aside.
In another bowl, mix the sugar,oil and orange juice. Use a whisk and stir the mixture until the sugar dissolves well.
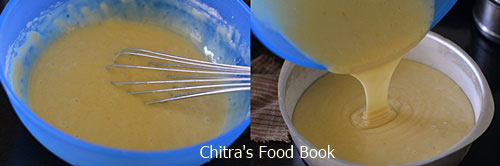
Add the flour to the oil mixture and mix it with a spatula or whisk in one direction. Do not over beat the mixture. Cake will not rise.The batter should fall like a ribbon. This is the right consistency.
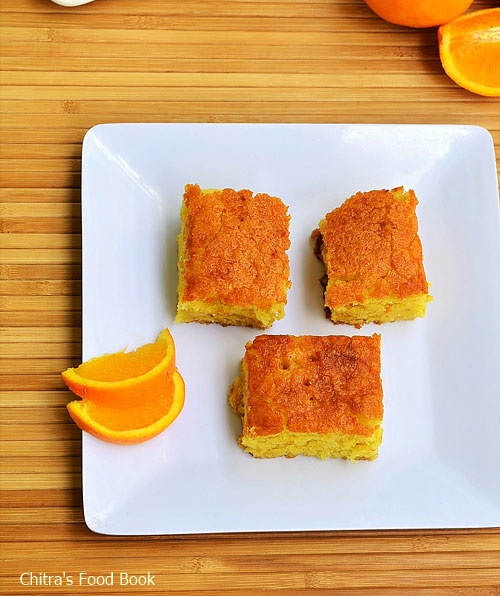
Preheat the oven in convection mode at 180c for 10 minutes. Pour the batter in the baking pan and pat its bottom once for even distribution of batter. Now bake the cake in convection mode at 180c for 30-35 minutes. Check the cake by inserting a tooth pick in the center of the cake after 30 minutes. If it comes out clean or with little crumbs, cake is done. If you find the wet batter in the tooth pick, bake the cake for 2-3 minutes more. Invert the pan in a plate after the cake is cooled down. Cut into slices and enjoy with Tea.
Note
Please adjust the timing based on the convection oven..
You can replace oil with softened butter.
You can also use store bought orange juice but cake flavor will be less.
No need to use water,curd or milk.Orange juice would do.
Do not invert the cake as soon as you bake. Cake will break. If the cake doesn’t fall off easily, bake it for 2 more minutes.
Enjoy this cake for your tea time. Tastes awesome !
Recently I won a Bajaj air fryer in Mother’s recipe contest and shared the pictures on my Facebook& Google plus pages. Some of my readers told me to post some airfryer recipes. I tried french fries, Bitter gourd chips, Lady’s finger fries and bread rolls in my air fryer. Everything came out very well but I couldn’t post them here as everything vanished even before I click.
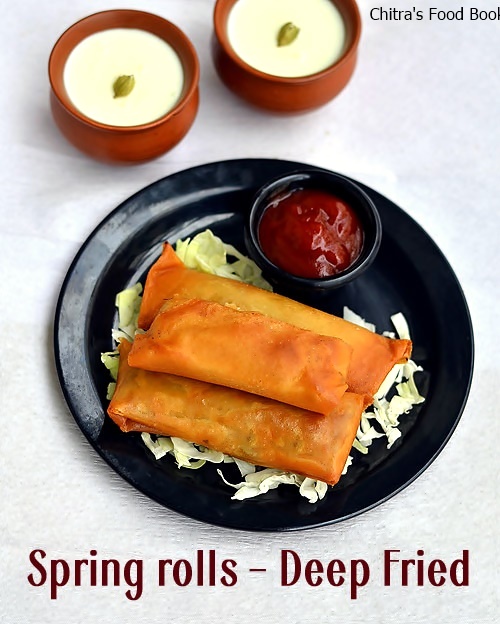
Yesterday evening I tried vegetable Spring rolls using store bought spring roll pastry sheets for the first time. I baked a few in air fryer and deep fried the remaining to compare the results. I prepared a simple and easy vegetable stuffing using cabbage, carrot and capsicum. I made everything quickly and finished clicking before Raksha and Sendhil came home. Believe me, I loved the air fryer version more than the deep fried ones. Air fried ones were very very crispy compared to the other. Moreover its crispness was maintained for long time. Sendhil came 2 hours after I made the spring rolls. Even then they were crispy. I think you can make the same using convection oven too.
I was very happy that I served him a low calorie,oil less evening snack recipe. Friends, if you have any plans to buy an air fryer, just go for it without any hesitation. I am sure you won’t regret for the buy. These spring rolls can be served as a starter for small birthday parties and family functions. Everything can be prepared ( including rolling) well in advance and refrigerated. So here you go, my first recipe using air fryer – Crispy Veg Spring rolls !
Vegetable Spring Rolls Recipe
Vegetable Spring rolls recipe - Yummy starter recipe!!
Cuisine:Indian
Category:Starter
Serves:8 nos
Prep time:15 Minutes
Cook time:25 Minutes
Total time:40 Minutes
INGREDIENTS
For Stuffing
Shredded cabbage - 2 cups
Carrot - 1 big
Big onions - 2 nos ( optional)
Capsicum - 1/2 no
Ginger - 2 inch piece
Garlic - 8 nos
Sugar – a big pinch
Pepper powder - 1 tbsp
Soya sauce - 1 tsp
Salt - as needed
Cooking oil - 2 tbsp
Spring onion – to garnish
For the sheet
Spring roll sheet – 10 nos
Corn flour or maida – 2 tbsp
Water – as needed
METHOD
Take out the spring roll sheet from the freezer and keep it outside for 1 hour. In the mean time, prepare the stuffing part.
Grate the cabbage thinly. Chop the carrot and onion into thin strips.Slice the capsicum thinly. Chop the ginger and garlic very finely. Make sure everything should be of same size and thickness. Try to chop them as thin as possible to ensure quick cooking.
Heat oil in a kadai and saute all the chopped vegetables adding some salt and sugar. Sugar helps to maintain the color of veggies. Saute in high flame continuously for 2-3 minutes.Veggies would get cooked and reduce in quantity. Lastly add the soya sauce and pepper powder. Mix well and switch off the flame. Garnish with finely chopped spring onions if you have it. Stuffing for the spring roll is ready.
In a wide bowl, take the maida or corn flour and add some water to make a cream like paste.
Now the spring roll sheet must be ready to use. Take a sheet and cut into 4 if you want to make small sized spring rolls. Cover the remaining sheets with a wet cloth to avoid drying. If you want big spring rolls as in the picture, no need to cut the sheet.
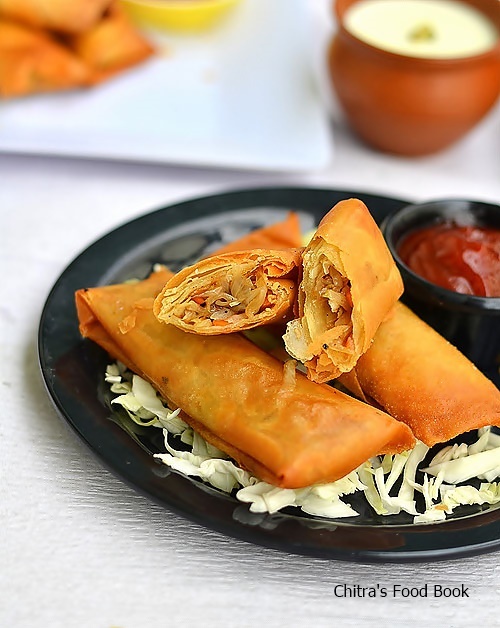
Place a tbsp of stuffing in one corner of the sheet. Roll it tight and fold the sides as shown in the picture. If you don’t roll it tight, spring roll becomes flat.
Apply the corn flour paste in the other corner and stick it. Repeat the same process with all the sheets and arrange them in a plate.
Heat oil to deep fry. Put the spring rolls and cook them in medium flame till they turn golden brown.Turn it whenever needed. Remove in a tissue paper and serve with tomato sauce. Enjoy !
AIR FRYER VERSION
Preheat the air fryer in 180c for 5 minutes. Roll the sheets as mentioned above and arrange them. Brush the spring rolls with some oil. Place the sheets in the Air fryer basket.
Set the timing to 20 minutes and temperature to 180c.Bake it for 10 minutes. Remove the basket and flip the spring rolls to bake the other side. Bake for the remaining 10 minutes and check the color of spring rolls. If it remains white, bake it for another 2-3 minutes or more. Remove and serve hot ! It stays crispy for long time. So you can store the baked spring rolls in the air fryer basket till you serve.
Note
Do not keep less stuffing and roll it tight. Keep the stuffing according to the size of sheet.
To make the stuffing more spicy, add some chilli sauce.
Jain readers can skip the onions, garlic and use more cabbage. There won’t be much difference in taste.
Pictures of deep fried vegetable spring rolls.
Try this kids friendly starter recipe this weekend and enjoy your tea time !


 Eggless whole wheat custard cookies recipe


 .For the past one week,I had been trying various cookies and cake recipes.From today,I will share them one by one till Christmas.To begin with,here is the most popular cookies that everyone must try during this season.Yes,Its melt in mouth,crispy Shortbread cookies(Eggless version).We call this as Butter biscuit/ butter cookies.I browsed through few recipes and came up with this version.This is my first attempt in making these cookies and I must say”It came out PERFECT”. I am completely happy with the results.The ingredients and measurements are very easy to remember.It’s a fool proof,beginners cookie and anyone can bake it easily.Its perfect for Christmas & New year Gifting.With buttery soft and melt in mouth texture,it tastes awesome.You won’t and you can’t stop with one even if you are calorie conscious
 .I saw few recipes with cornstarch/corn flour and few with a combination of wheat flour & maida.I am sure it works in all the ways as the butter makes the magic here.I have shared all the possible tips and tricks in my Notes section.Do peep into it before you start.Friends,How come a cookie with so much of butter goes wrong.Do try it confidently and surprise your family members by showing your expertise in baking
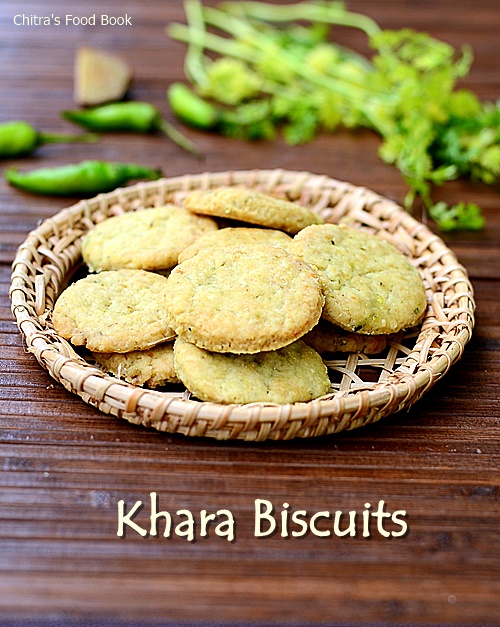
 .Friends,do try this bakery style Masala biscuits/Khara biscuits and enjoy your tea time ! Color of this biscuit may vary slightly based on the time of baking and quantity of spices used.But the taste would be gr888 !