Search Chitra's Food Book

Showing posts with label NO ONION NO GARLIC RECIPES. Show all posts

May 3, 2022

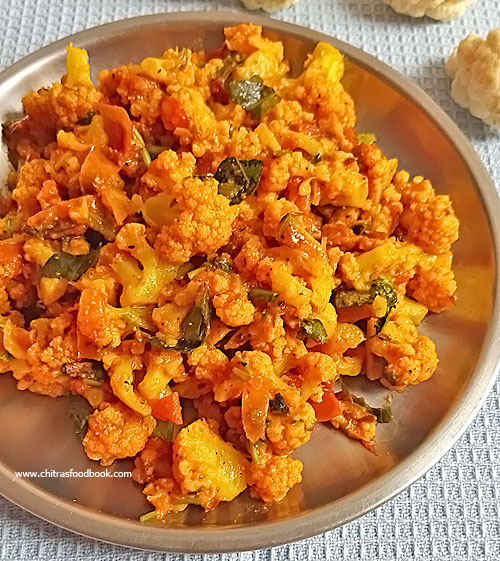
Cauliflower Curry Without Onion, Garlic - Cauliflower Poriyal Recipe

cauliflower poriyal without onion garlic

Its my long time wish to try different types of cauliflower curry without using onion and garlic. I have already posted a cauliflower curry without onion, garlic and tomato in Jain style.  Usually I make Cauliflower poriyal following my mom’s recipe. It has onion, ginger, garlic, tomato and spice powders. We love this version.

Recently when I was looking for a change from my version, I found this Dhaba style Cauliflower curry in Cooking Shooking YouTube channel. Chef had used both cauliflower and potato in this recipe but I used cauliflower alone. Also I tweaked the recipe slightly to make it a low calorie version. Still it came out great. Tasted awesome. Myself and Raksha loved it with Dal rice and rasam rice.

Friends, do try this easy and yummy Cauliflower curry without onion and garlic. You will love it like us. I made it dry like a poriyal. You can also add little water to make it like Sabji / gravy.  Ok, Lets see how to make North Indian style Cauliflower curry without onion and garlic with step by step pictures.

Cauliflower curry without onion garlic

Cauliflower curry without onion, garlic


Cauliflower curry without onion, garlic

Cauliflower curry without onion, garlic for rice, roti.


Cuisine: Indian
Category: Side dish
Serves: Serves 4
Prep time: 10 Minutes
Cook time: 20 Minutes
Total time: 30 Minutes


INGREDIENTS
1 cup = 250ml
  • Cauliflower - 1
  • Cooking oil - 2 tbsp
  • Cumin seeds - 1/2 tsp
  • Ginger - 1 inch piece (finely chopped)
  • Curry leaves - 1
  • Tomato - 1
  • Turmeric powder - 1/2 tsp
  • Red chilli powder - 3/4 to 1 tsp
  • Coriander powder - 1.5 tsp
  • Garam masala powder - 1/2 tsp
  • Curd – 1 tbsp
  • Coriander leaves - to garnish
HOW TO MAKE CAULIFLOWER CURRY WITHOUT ONION GARLIC
  1. Wash and separate the cauliflower into medium sized florets. Keep in water.
  2. Roll Boil 3 cups of water in a bowl and add turmeric powder, salt.
  3. Switch off the flame and add the cauliflower florets. Cover and keep it for 10 minutes till its half cooked. Drain the water and set aside.
  4. Heat oil in a kadai. Splutter cumin seeds, ginger, curry leaves.
  5. Add tomato and saute till mushy. Add turmeric, chilli powder, coriander powder, salt, garam masala powder and curd. Mix well. 
  6. Lastly add the cauliflower florets and toss it well. Add little water, cover cook till its soft but retains its shape. Switch off the flame.
  7. Garnish with coriander leaves and serve with rice, roti !
METHOD - STEP BY STEP PICTURES
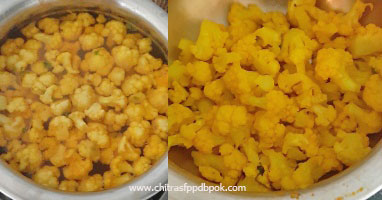
  • Wash and separate the cauliflower into medium sized florets. Keep in water till use. Roll boil 3 cups of water in a bowl. Add turmeric powder and salt. Switch off the flame and add the cauliflower pieces. Cover and keep it aside in hot water for 10 to 15 minutes. Drain the water completely and set aside. 
  • Cauliflower curry without onion garlic
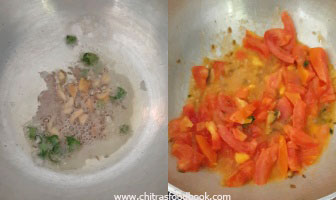
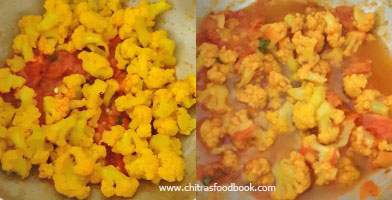
  • Heat oil in a kadai. Splutter cumin seeds, ginger and curry leaves. Add tomato and saute till mushy. Add salt, turmeric powder, chilli powder, coriander powder, garam masala powder and curd. Mix well.
  • Cauliflower curry without onion garlicCauliflower curry without onion garlic
  • Lastly add the cauliflower florets and toss it well. Add little water, cover cook till its soft but retains its shape. Switch off the flame. Garnish with coriander leaves. Serve with rice and roti. Enjoy !Cauliflower curry without onion garlic

Note

  • Parboil cauliflower to remove the worms. Do not skip this step.
  • Make sure you do not over cook the cauliflower florets.
  • Adjust the quantity of spices as per your taste.

Try this easy, yummy Cauliflower curry without onion, garlic. You will love it !

cauliflower curry without onion garlic


Continue Reading...


March 17, 2020

Cauliflower curry without onion, garlic – Jain Style Gobi Sabzi

Cauliflower is in season now. So I buy it once in a week and trying some yummy recipes with it. Last week I prepared this cauliflower curry without onion and garlic, tomato for the first time. Its a dry sabzi that goes well with rice, roti or naan. This Jain style gobi curry came out so well even though its without onion, garlic. Its called as Sukha gobi and this recipe is ideal for fasting / Vrat ka khana during Navratri. Friends, do try this easy, yummy cauliflower curry without onion and garlic for rice or roti. Share your feedback with me.

Cauliflower / Gobi Curry without onion, garlic


Cauliflower / Gobi Curry without onion, garlic

Cauliflower curry without onion and garlic, tomato


Cuisine: North Indian
Category: Side dish
Serves: Serves 3
Prep time: 10 Minutes
Cook time: 20 Minutes
Total time: 30 Minutes


INGREDIENTS
1 cup = 240ml
  • Cauliflower - 1/2 (I used big one)
  • Cooking oil - 2 tbsp
  • Cumin seeds - 1/2 tsp
  • Bay leaf - 1
  • Turmeric powder - 1/2 tsp
  • Red chilli powder - 1 tsp
  • Coriander seeds powder - 1.5 tsp
  • Garam masala powder – 1/2 tsp
  • Aamchur powder or lemon juice – 1/4 tsp (optional, I din't use)
  • Salt - as needed
  • Water - to sprinkle + 3 cups ( to boil cauliflower florets)
  • Coriander leaves – to garnish
HOW TO MAKE JAIN CAULIFLOWER CURRY
  1. Wash the cauliflower florets and parboil in water for few minutes adding turmeric powder.
  2. Drain the water and keep the parboiled cauliflower aside.
  3. Heat oil in a kadai. Temper cumin seeds, bay leaf.
  4. Lower the flame. Add chilli powder, coriander seeds powder, garam masala powder.
  5. Mix quickly and add the cauliflower florets, required salt. Mix well.
  6. Cover cook for few minutes. Sprinkle little water if its too dry.
  7. Switch off the flame after the cauliflower is completely cooked.
  8. Garnish with coriander leaves, sprinkle lemon juice and serve hot with rice, roti !
METHOD - STEP BY STEP PICTURES
  • Wash the cauliflower florets and parboil in 3 cups of water adding turmeric powder.

  • Drain the water completely and set aside. Heat oil in a kadai and splutter cumin seeds, bay leaf.

  • Lower the flame completely. Add red chilli powder, coriander seeds powder, turmeric powder, garam masala powder and required salt.

  • Mix quickly and add the parboiled cauliflower florets. Mix well. Sprinkle little water if the curry looks too dry. Cover cook till cauliflower is completely cooked. Add some aamchur powder (optional) and mix well.

  • Boil and evaporate if there is excess water. Switch off the flame and garnish with coriander leaves. Sprinkle lemon juice if you like. 

  • Serve hot with rice, roti and naan. Enjoy ! For variations, you can add some frozen green peas, boiled and cubed potato along with cauliflower. This is called as aloo gobi matar curry in North India.

  • Enjoy !

Note

  • I didn’t use tomato or aamchur powder in this recipe. Instead I sprinkled some lemon juice at the end.
  • For variations, you can saute frozen green peas along with cauliflower and make this curry.
  • You can also make this in gravy kind by sauting tomato along with cauliflower and adding more water for cooking.
  • Adjust the quantity of chilli powder and other spice powders as per your taste.

Try this easy, yummy cauliflower curry without onion, garlic, tomato and enjoy with rice, roti !


Continue Reading...


January 20, 2020

Iyengar Paruppu Urundai Kuzhambu Recipe – No Onion No Garlic Recipe

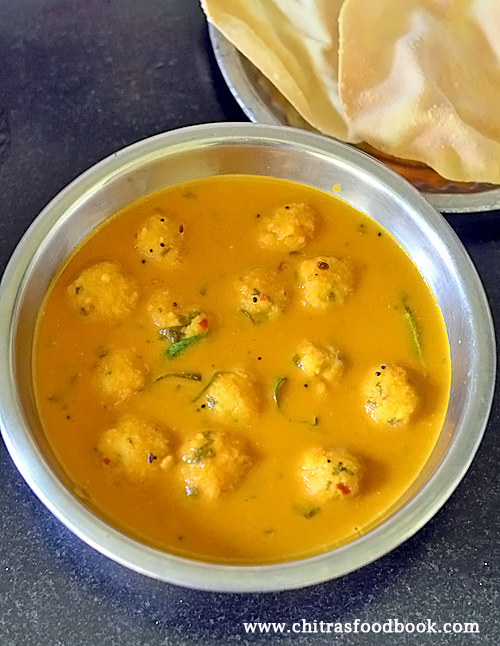
Paruppu urundai kuzhambu is our family favorite. Usually I make in this method. But this time I tried Iyengar style no onion, no garlic paruppu urundai kuzhambu recipe following the recipe from Iyengar thaligai. It came out very well and super flavorful as I cooked in tin coated bronze pot which I recently got from Zishta. Its an organic cookware shop in Jayanagar, Bangalore. You can get handcrafted, quality checked, traditional cook wares in this shop.

 Actually I have a bronze pot given by my mom for my marriage. Every year I use that pot for making sweet pongal on Pongal festival day. In bronze pot, we cannot cook tamarind based or lemon based tangy dishes. But tin coated bronze pot can be used to prepare all the tamarind, lemon based dishes and rice dish like pongal, upma, payasam, So I got this pot from Zishta. Its really good. I can feel its handcrafted and not a machine mould. I am not sure about wear off of the tin coating. But I hope it will take at least an year if used on a daily basis. But proper washing care is needed. Click this link on how to maintain this pot. 

When I made this kuzhambu in tin coated bronze pot, it was so flavorful which I never experienced in my kitchen. It was amazing and I had a different cooking experience. Though the pot takes slightly more time to heat up and cook, it holds the heat for hours together. So we can enjoy this kuzhambu hot or warm for more time. Overall, I am happy with this purchase. Friends, do check out this recipe and try in a traditional cookware. You will love its taste and flavor ! Lets see how to make Iyengar style paruppu urundai kuzhambu with step by step pictures.

Check out my Iyengar style milagu kuzhambu recipe, manathakkali vathal kuzhambu , Iyengar sweet pongal too.


Iyengar Paruppu Urundai Kuzhambu Recipe


Iyengar Paruppu Urundai Kuzhambu Recipe

Learn how to make this delicious Iyengar paruppu urundai kuzhambu recipe


Cuisine: Indian
Category: Sweet
Serves: Serves 4
Prep time: 120 Minutes
Cook time: 20 Minutes
Total time: 140 Minutes


INGREDIENTS
1 cup = 240ml (For paruppu urundai)
  • Bengal gram / chana dal - 1/4 cup
  • Toor dal - 1/4 cup
  • Red chilli - 2
  • Coriander leaves - 2 tbsp
  • Rice flour - 1 tsp
  • Cooking oil or gingely oil - 2 tsp
  • Salt - as needed
  • Cooking soda - a small pinch ( optional)
  • Asafetida / hing - 1/4 tsp
For kuzhambu
  • Tamarind - Big gooseberry size
  • Kuzhambu milagai thool or sambar powder - 1 tbsp
  • Turmeric powder - 1/4 tsp
  • Salt - as needed for kuzhambu 
To temper
  • Gingely oil/ Sesame oil - 2 tbsp
  • Mustard seeds - 1/2 tsp
  • Urad dal - 1 tsp
  • Chana dal - 2 tsp
  • Red chilli - 1 (pinch into 2)
  • Hing / Asafetida - a pinch
HOW TO MAKE IYENGAR PARUPPU URUNDAI KUZHAMBU
  1. Soak tamarind. Wash and soak dals, red chilli in required water for 2 to 4 hours.
  2. Drain the water and grind coarsely adding salt and hing.
  3. Take in a bowl. Add rice flour, coriander leaves, oil and cooking soda.
  4. Make balls and keep aside. In a pot or kadai, take 2 cups of tamarind extract.
  5. Add sambar powder, salt and hing. When it boils, add the dal balls one by one.
  6. Cook till balls float on top and gets cooked. Switch off the stove once the kuzhambu becomes thick.
  7. Lastly temper the ingredients in gingely oil and add to kuzhambu. Garnish with curry leaves.
  8. Serve hot with plain rice adding ghee or gingely oil. Tastes great for 2 to 3 days when refrigerated.
IYENGAR PARUPPU URUNDAI KUZHAMBU - STEP BY STEP PICTURES
  • Wash and soak dals and chilli in required water for 2 to 4 hours. Drain the water completely. Grind coarsely adding required salt and hing. Soak tamarind in 2 cups of water.

  • Take in a bowl. Add rice flour, coriander leaves, gingely oil and cooking soda (If using). Mix well and make balls. Set aside.

  • Take 2 cups of tamarind extract. Add sambar powder, hing and required salt. Boil in high flame. When the tamarind extract starts to roll boil, add dal balls one by one keeping the flame high.

  • After adding all the balls, lower the flame to medium. Cook in medium flame till urundai gets cooked. Balls float on top after its cooked. Adjust water quantity based on need. Check the kuzhambu taste and add more sambar powder, salt if needed. Boil for few minutes. 

  • Switch off the flame when the kuzhambu turns thick as you like. Lastly do the tempering part. Heat gingely oil. Splutter mustard seeds, urad dal, chana dal, hing and red chilli. Add to kuzhambu.

  • Garnish with curry leaves and serve with plain rice adding ghee or gingely oil. It stays good for 2 days when refrigerated.

    Enjoy !

Note

  • Addition of baking soda and oil in the urundai mixture helps to make the urundai soft and well cooked.
  • Adjust the quantity of sambar powder as per your taste.
  • Thickness comes to this kuzhambu from the dal balls/ urundai. If necessary you can mash one or two urundai in the kuzhambu. 

Try this Iyengar style paruppu urundai kuzhambu and enjoy with plain rice and roasted papad !
Continue Reading...


January 15, 2018

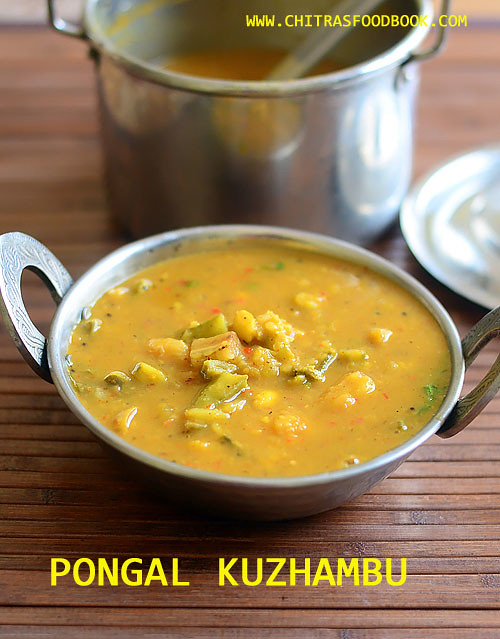
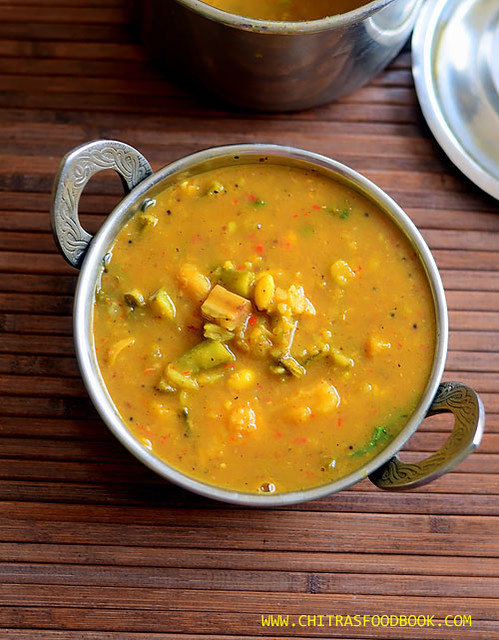
Pongal Kuzhambu – Pongal Festival Sambar With Mixed Vegetables

Pongal kuzhambu
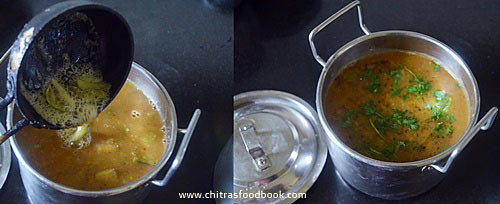
People in Tamil nadu prepare Pongal kuzhambu on Pongal festival day adding 5 or 7 vegetables. We call it as 7 kai kuzhambu or kootu in Tamil. There are many versions for Pongal kuzhambu. It differs based on their custom. In Chettinad region, people make it without adding any dal or coconut. But this version is a no onion, no garlic Arachu vitta sambar kind of Pongal kuzhambu I learnt from my friend Shalini. But the quantity of dal and coconut used is very less for this kuzhambu. It is prepared with freshly roasted & ground spices. So its too flavorful just like Brahmin’s style arachuvitta sambar.

 Shalini told me to use 5 vegetables. So I blindly followed her recipe and came up with this version. If you are making on a normal day, you can skip all these vegetables and use yellow pumpkin alone. This pongal festival sambar tastes good with white pongal / Paal pongal, rice, ven pongal and idli,dosa.

 Friends If you are planning to make Pongal kuzhambu with mixed vegetables in sambar taste, you can follow this recipe. You will like it for sure. Next year before Pongal festival, I will try to share Chettinad Pongal Kuzhambu Recipe. Now lets see how to make no onion, no garlic pongal festival kuzhambu with step by step pictures.

Check out my Brahmin style Thalagam kuzhambu recipe too !

Pongal festival kuzhambu

Pongal Kuzhambu - Mixed vegetable sambar for Pongal Festival


Pongal Kuzhambu - Mixed vegetable sambar for Pongal Festival

No onion, no garlic mixed vegetable kuzhambu for Pongal festival day !


Cuisine: South Indian
Category: Side dish
Serves: 3
Prep time: 10 Minutes
Cook time: 20 Minutes
Total time: 30 Minutes


INGREDIENTS

1 cup - 250ml
  • Mixed vegetables - 1.5 cups ( 5 cluster beans, 1/2 raw banana, 1/2 sweet potato, 4 pumpkin pieces, 1/2 cup of mochai)
  • Toor dal - 2 tbsp
  • Tamarind - Medium gooseberry size
  • Green chilli - 2 nos
  • Asafetida / Hing - A pinch
  • Turmeric powder - 1/4 tsp
  • Salt & water - as needed
To roast & grind
  • Cooking oil - 1 tsp
  • Coriander seeds - 1.5 tsp
  • Chana dal - 1 tsp
  • Urad dal - 1 tsp
  • Pepper corns - 2 nos
  • Cumin seeds / Jeera - 1/2 tsp
  • Methi seeds - 1/4 tsp
  • Raw rice - 1/4 tsp
  • Red chillies - 3 to 5 nos
  • Grated coconut - 1 tbsp
To Temper
  • Ghee - 2 tsp
  • Mustard seeds - 1/2 tsp
  • Curry leaves - Few
  • Coriander leaves - to garnish

HOW TO MAKE PONGAL KUZHAMBU

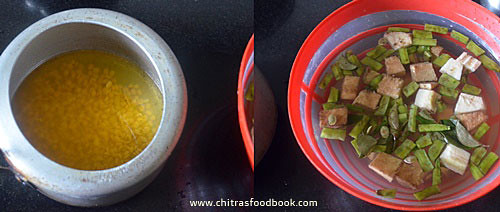
  1. Wash and soak toor dal. Chop all the vegetables and keep aside.
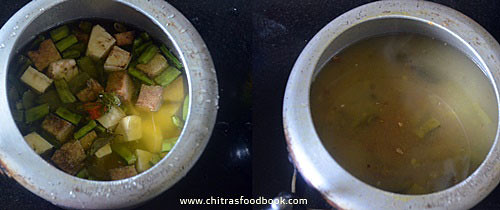
  2. In a pressure cooker base, take toor dal and add vegetables, green chillies.
  3. Cook for 2 whistles in low flame. Open and mash the dal.
  4. To the cooked dal, add tamarind extract, roasted & ground masala.
  5. Boil for few minutes. Temper mustard seeds, curry leaves and add to sambar.
  6. Garnish with coriander leaves. Serve hot with white pongal / Paal pongal.

METHOD - STEP BY STEP PICTURES

  • Wash and soak toor dal in a cooker base. Wash and chop all the vegetables into cubes and set aside. Soak tamarind in 1/2 cup of water. Take the extract and keep aside.
    pongal kuzhambu
  • Add chopped vegetables to toor dal. Add slit green chilli. Add required water, turmeric powder and cook for 2 whistles in low flame. Remove the lid after steam is released. Mash the dal well. Set aside.
    pongal kuzhambu
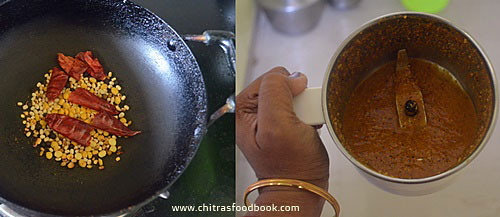
  • Heat 1 tsp oil in a kadai. Roast all the ingredients given under “to roast and grind” and grind to a smooth paste.
    pongal kuzhambu
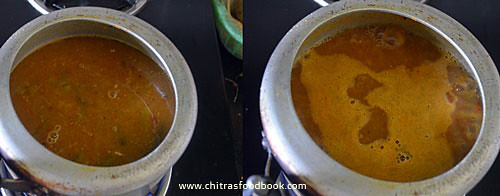
  • Add this paste and tamarind extract to the cooked dal. Mix well and boil for few minutes till its raw smell goes off. 
    pongal kuzhambu
  • Temper mustard seeds, curry leaves in ghee and add to sambar. Garnish with coriander leaves and serve with white pongal / Paal pongal. This sambar tastes good with idli , dosa too.
    pongal kuzhambu
  • Enjoy !

Note

  • Adjust the quantity of red chilli as per your taste.
  • Do not add more tamarind.
  • You can skip toor dal if you want to make this kuzhambu without dal. But adjust the quantity of coconut and roasting spices to give thickness to kuzhambu.
Try this yummy Pongal kuzhambu with 5 vegetables and enjoy !
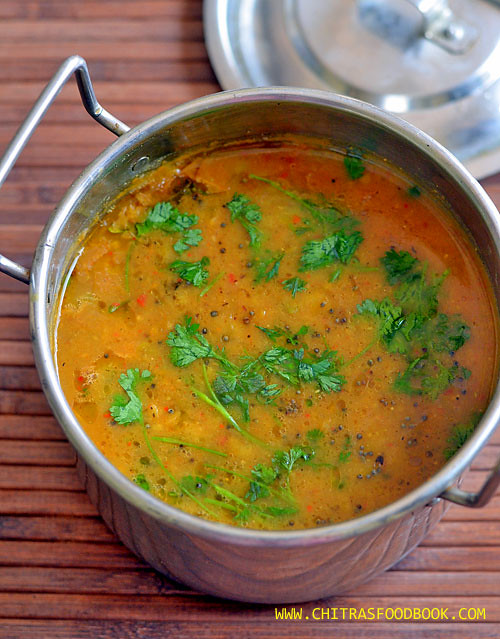
Pongal sambar
Continue Reading...


January 13, 2018

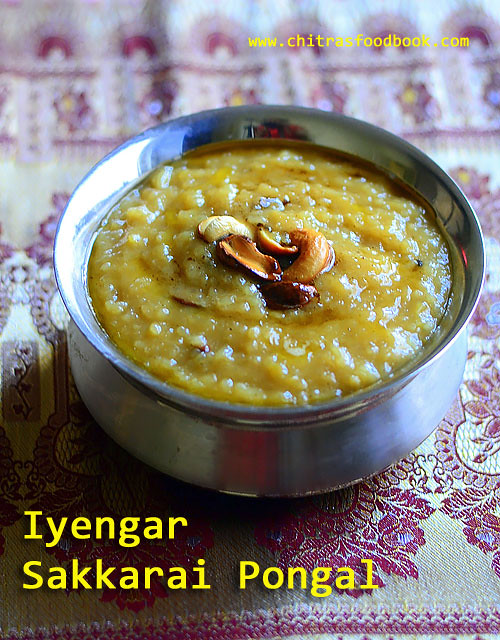
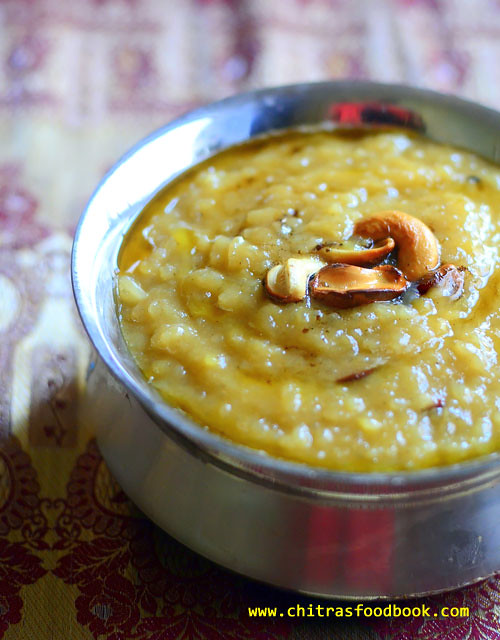
Iyengar Sakkarai Pongal – Iyengar Style Sweet Pongal Recipe In Pressure Cooker

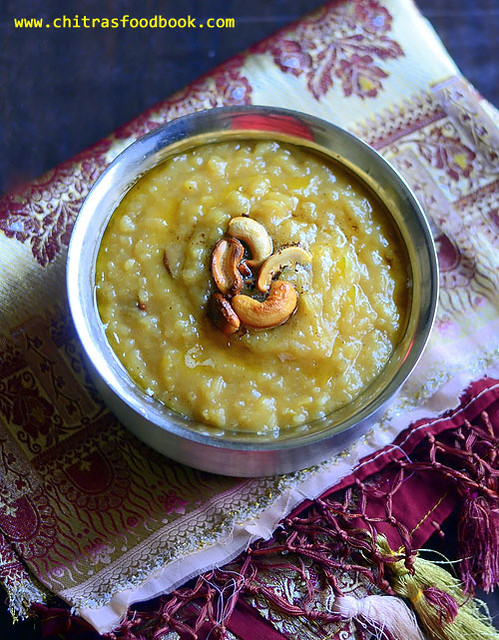
Iyengar sakkarai pongal
Iyengar style sweet pongal / Sakkarai pongal recipe was in my try list for long time. Recently I bought a cookbook named “Iyengar Pandigai Samayal “ from Kumbakonam. All the Iyengar specialty recipes are discussed in that book according to the festival. I found a traditional Sakkarai Pongal recipe prepared using a pot ( bronze pot/ Venkala paanai). 

When I saw that recipe, I immediately called my school friend Sumi who is the only source for my Tamil Iyengar Recipes in my website to confirm the recipe and ingredients. She shared all the most important tips to get perfect Perumal temple style Sakkarai Pongal. Thank you so much Sumi.  I became very happy and tried it for my Thursday Guru Pooja Neivedyam yesterday. It came out finger licking good. But for your help, this post would not have come up today :). 

My friend told me to prepare this pongal in a bronze pot to get the authentic flavor and taste. But my pot is too big to make small quantity. So I used a pressure cooker to ease my job. My job was done in less than 30 minutes.

Friends, I have shared all the tips shared by my friend Sumi if you like to try the authentic version like temples. If you wish, you can prepare in a bronze pot like temples or use your cooker to make it quickly. Choice is yours ! But taste wise pot pongal is the best. 

Next year during pongal festival,  I will try to buy a small pot and make a separate & detailed post. Now lets see how to make Iyengar style sakkarai pongal recipe / Sweet pongal recipe with step by step pictures and video.

Sweet pongal recipe Iyengar

POINTS TO NOTE

  1. To make temple style pongal, you should cook the rice & dal in an open pot, preferably in a bronze pot as it helps to retain the heat longer & maintain the consistency of pongal.
  2. Addition of Pachai karpooram/ edible camphor is a must in Iyengar Pongal.
  3. They also use freshly made ghee from butter to roast the cashews and add to pongal for neivedyam. They do not use the ghee used for regular cooking. So the taste & flavor of fresh ghee matters a lot.
  4. Never use boiled rice. Always use good quality Sona masoori rice for best taste.
  5. Do not use basmati rice as well.
  6. Roasting moong dal is an optional step. Some people add it as such.
  7. My friend told me to soak rice & moong dal in milk & water for 15 to 30 minutes to cook quickly.  But I din’t soak it as I used pressure cooker.
  8. Milk should be used in Iyengar pongal. Some people cook the rice only with milk. But I have used a combination of water & milk as suggested by my friend.
  9. The quantity of milk may vary based on the consistency of pongal. So reserve some boiled milk and add it while serving if needed.
  10. I have used rice & jaggery in the ratio of 1: 2. Some people use 1:1.5 for mild sweet taste. It all depends on your taste buds.

Iyengar Sakkarai Pongal - Sweet Pongal recipe


Iyengar Sakkarai Pongal - Sweet Pongal recipe How to make Iyengar style sweet pongal recipe / sakkarai pongal with milk & jaggery.
Cuisine: South Indian
Category: Iyengar recipes
Serves: 3
Prep time: 5 Minutes
Cook time: 20 Minutes
Total time: 25 Minutes


INGREDIENTS

1 cup - 250ml
  • Raw rice - 1/2 cup ( Good quality Sona Masoori rice)
  • Yellow moong dal - 2 tbsp 
  • Boiled milk - 1 cup
  • Water - 1.5 cups
  • Powdered Jaggery - 1 cup ( Use 3/4 cup if using paagu vellam)
  • Water- 1/2 cup ( to melt jaggery)
  • Ghee - 2 to 3 tbsp ( I used 2 tbsp butter to roast nuts)
  • Cashew nuts - Few
  • Cardamom powder - 1/2 tsp
  • Edible camphor / Pachai karpooram - A pinch

HOW TO MAKE IYENGAR SAKKARAI PONGAL

  1. In a pressure cooker base, heat 1 tsp ghee. Roast moong dal for a minute.
  2. Add raw rice to it and roast for another minute. Wash them.
  3. Add water + milk to the cooker along with a pinch of salt.
  4. Pressure cook in very low flame for 2 whistles.
  5. Mash the cooked rice & dal. Boil and melt jaggery adding water and strain the syrup.
  6. Add jaggery syrup, 1 tbsp ghee to the mashed rice. Mix well and boil till semi solid in consistency. Switch off flame.
  7. Add cardamom powder, a pinch of edible camphor and cashews roasted in ghee.
  8. Mix well and remove from flame. Garnish with more cashews if you like and serve hot !

METHOD - STEP BY STEP PICTURES

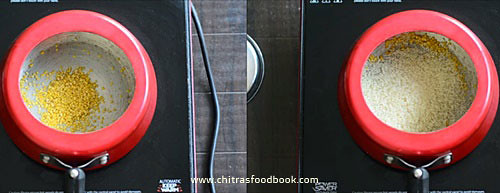
  • In a pressure cooker base, heat 1 tsp of ghee. Roast yellow moong dal for a minute. To this, add rice and roast for one more minute. Remove the cooker and wash the rice + dal. Drain the water and keep it back in flame.
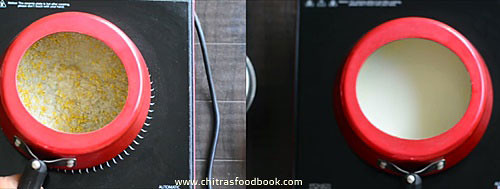
  • Add milk + water to the washed rice, dal mixture. Add a pinch of salt as well. Mix well.
    Iyengar sweet pongal
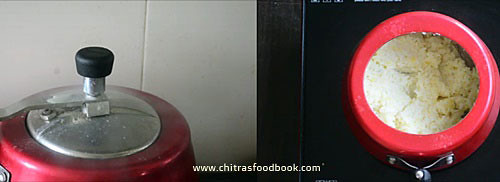
  • Pressure cook in very low flame for 2 whistles.Open the cooker after steam is released. Mash the rice and dal very well with a ladle or masher. Make sure rice + dal is mashed properly. Add more boiled milk or water if needed. Mix well. Keep the cooker aside.
    Iyengar sweet pongal
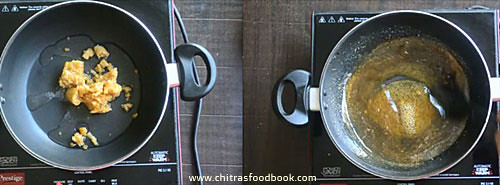
  • In a kadai, boil and melt jaggery adding water. Strain the syrup in a wire mesh. (If the jaggery tastes too sweet, you can reduce to 3/4 cup)
    Iyengar sweet pongal
  • Add the syrup to the mashed rice and mix well. Add little more hot water or milk if the pongal is too thick at this stage. Add 1 tbsp ghee to avoid sticking of rice to the bottom of cooker.
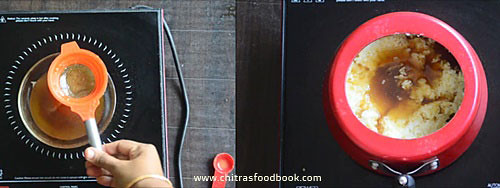
    Iyengar sweet pongal
  • Mix well and boil till pongal comes to semi solid in consistency. Do not cook till too thick. It will harden as it cools down. So make it semi thick.  Remove from the flame.
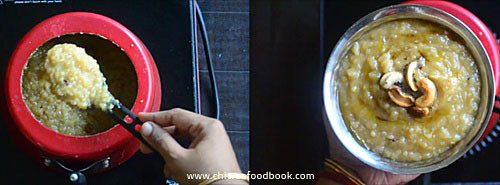
  • Roast cashews in the remaining 1 tbsp ghee and add to pongal. (  I used fresh butter, melted to make ghee and roasted the cashews as suggested by my friend.) Add cardamom powder, a pinch of edible camphor and mix well. Add 1 tbsp more ghee and few more roasted cashews for garnishing. Serve hot !
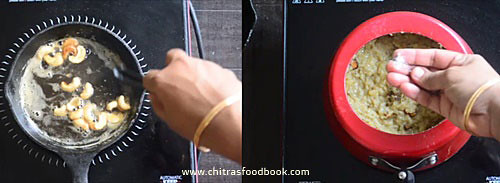
    Iyengar sweet pongal
    Iyengar sweet pongal


    Enjoy !

Note

  • The ratio of rice & water depends on the quality of rice. Old rice takes more water. For pongal festival, we buy new rice ( pudhu arisi).So it takes less water. I used 1:5 ratio of rice and water. You can also use 1:4 or 1:6 based on the rice.
  • Similarly the quantity of jaggery depends on the type of jaggery. If you use paagu vellam, you can add 1:1.5 ratio of rice & jaggery else use 1:2 as I did to get nice color and taste.
  • If you feel the sweetness is more, you can add more boiled milk or hot water to reduce the sweetness.
  • Edible camphor is the most important to get temple flavor.
  • You can also add powdered nutmeg and roasted cloves if you like.
  • Do not reduce ghee than the mentioned quantity. You must add more ghee to get ghee dripping pongal else pongal looks dry.
Try this easy, yummy Iyengar style Sakkarai pongal for this Pongal festival at home and enjoy !
Iyengar sakkarai pongal
Continue Reading...


October 3, 2017

Pattani Sundal Recipe – Green Peas Sundal – Sundal Varieties

I had to post this Green Peas Sundal Recipe (Pattani sundal in Tamil) last week during Navaratri. But I couldn’t do it due to some personal work. I am yet to start Diwali recipes. So today I am posting this recipe from my draft. From tomorrow, you can expect some yummy Diwali sweets and snacks from here : )). Pattani sundal is one of the easy and yummy sundal varieties we make during Navaratri for neivedyam. Last week I prepared this sundal recipe for Golu. I used dried green peas, soaked it overnight and prepared this sundal. If you have frozen or fresh green peas (pachai pattani) in hand, your job becomes easier. Cooking green peas perfectly is a bit tricky. Most of us face the problem of peas becoming mushy after pressure cooking. 

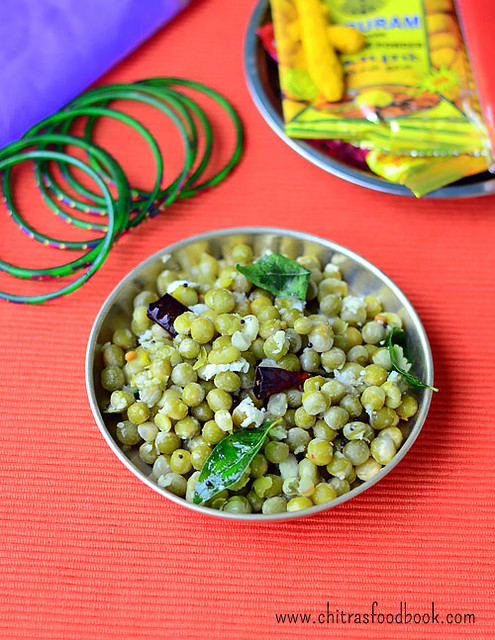
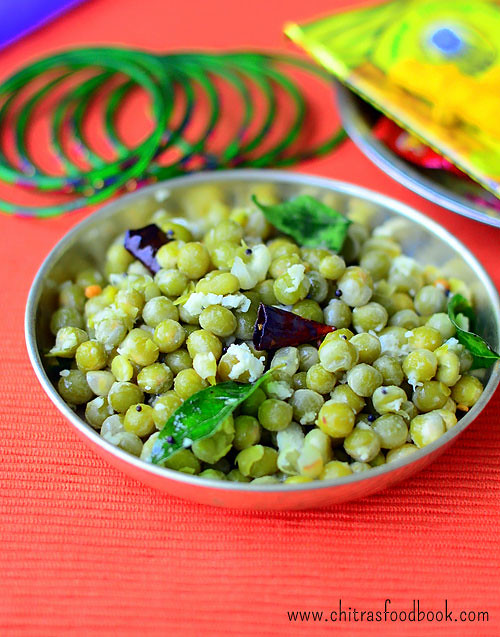
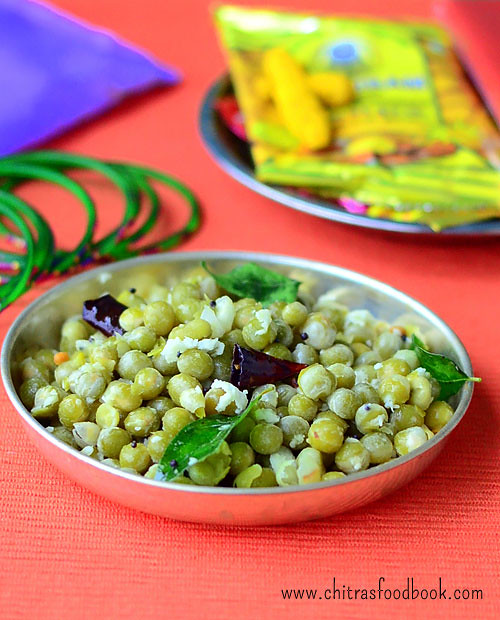
Green peas sundal

Proper soaking and addition of salt while pressure cooking helps to retain its shape and cooks soft as well. Recently my neighbor shared this sundal by adding masala. It was tasting great and truly flavorful. But I made it in the usual way as we need to avoid onion & garlic for neivedyam. Soon I will share my neighbor’s masala sundal recipe. For variations, you can make this sundal with white peas or yellow peas as well. Today lets see how to make green peas sundal recipe with step by step pictures.

Pattani sundal

Green Peas Sundal Recipe / Pattani Sundal

Green peas sundal

How to make Green Peas Sundal Recipe

South Indian
Sundal Recipes
4


Ingredients (1 cup - 250ml)

  • Dried Green Peas - 1 cup
  • Water - as needed (to soak & cook the peas)
  • Salt - as needed

    To Grind

  • Grated coconut - 1/4 cup
  • Green chilli - 1 to 2 nos
  • Cumin seeds - 1/2 tsp

    To temper

  • Coconut oil - 1 tbsp
  • Mustard seeds - 1/2 tsp
  • Curry leaves - Few
  • Red chilli - 1 no (pinched)
  • Hing - 1/8 tsp

How to make the recipe

  1. Wash and soak the dried green peas for 8 hours.
  2. Pressure cook the green peas adding soaked water and salt in low flame for 2 whistles.
  3. Drain the excess water if any and keep the cooked peas aside.
  4. Grind coconut, chilli and cumin seeds to a coarse paste without water.
  5. Temper mustard seeds, curry leaves, hing and add cooked peas, ground paste.
  6. Mix till raw smell goes off. Sprinkle some lemon juice if you like.

Green Peas Sundal Recipe - Step by step photos

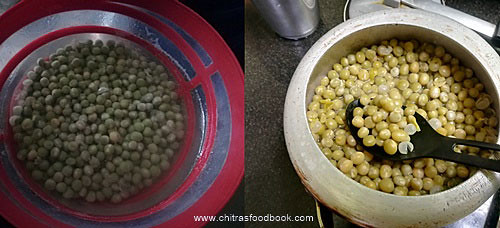
  • Wash and soak dried green peas for 8 hours or overnight.Pressure cook it adding enough water and salt in low flame ofr 2 whistles.
    Pattani Sundal Recipe
  • Adding salt helps to prevent peas becoming mushy.So don't forget to add salt.Remove after the steam is released.
  • Drain in a colander. Grind coconut, chilli and cumin seeds to a coarse paste without adding water.
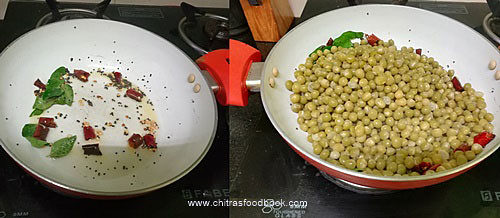
  • Heat coconut oil in a kadai. Splutter mustard seeds, curry leaves, hing and pinched red chilli.
    Pattani Sundal Recipe
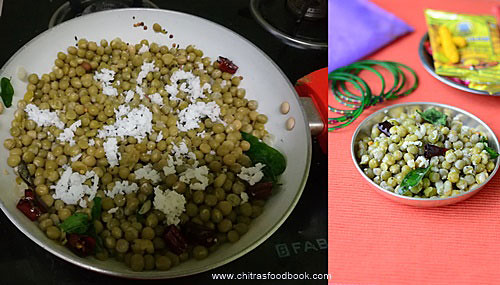
  • Add cooked peas, ground coconut paste and saute till raw smell goes off.You can sprinkle some lemon juice if you like. Serve warm !
    Pattani Sundal Recipe

Notes

  • Dried green peas should be soaked at least for 6 to 8 hours.If using fresh peas, no need to soak it.
  • Addition of salt while cooking peas helps to prevent it becoming mushy.
  • For variations, you can add grated coconut instead of grinding it.

Try this easy, kids friendly Green peas sundal recipe at home and share your feedback with me Happy.

pattani sundal recipe

Continue Reading...