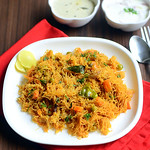
Search Chitra's Food Book

Showing posts with label TIFFIN BOX RECIPES. Show all posts

June 12, 2020

Instant Tomato Dosa Recipe With Rice Flour – Instant Thakkali Dosai

Instant tomato dosa
I got this instant tomato dosa recipe from my School moms group friend Archana. She shared few pictures of this instant thakkali dosa and a recorded voice message with recipe in WhatsApp. She suggested me to try and blog this instant dosa variety. Usually I make varieties of instant dosa recipes like wheat flour dosa, jowar dosa, ragi or millet dosa for my dinner. I am happy that I tried this recipe too. Its a very easy and quick instant dosa recipe. This batter can be prepared under 10 minutes.

 With the mild tangy taste of tomato and bright red color, this tomato dosa was so good in taste. It was a super hit in my family. We all loved it. Make the batter watery like neer dosa and rava dosa because consistency of dosa batter is the key to make super crispy and lacy dosa as shown in the picture. You will get it after making one or two dosa and adjust the water quantity accordingly.

This instant tomato dosa tastes the best when served hot with coconut chutney as side dish. It also tasted good even after cooling down. So you can pack for tiffin box if you like. This batter can be refrigerated and use it the next day too. Friends, do try this easy and quick tomato dosa recipe. You will love it for sure.

Note : Below picture was taken at night using the fresh batter. The remaining pictures were taken the next day morning by making dosa with leftover batter.

Instant tomato dosa

Instant tomato dosa

Instant Tomato Dosa Recipe


Instant tomato dosa

Instant tomato dosa recipe with rice flour, sooji and wheat flour.

Cuisine: South Indian
Category: Side dish
Yield: 10
Prep time: 10 Minutes
Cook time: 20 Minutes
Total time: 30 Minutes


INGREDIENTS
To Grind (1 cup = 240ml)
  • Tomato – 3 ( Use 4 for more tangy taste)
  • Byadgi or Kashmiri Red chilli – 4 (helps to get bright color, add 6 to 8 for spicy taste)
  • Pepper corns – 1/2 tsp
  • Cumin seeds – 1 tsp
  • Ginger – 1 inch piece
  • Water – to grind smoothly
For dosa batter
  • Rice flour – 1 cup
  • Sooji / Rava / Semolina – 1/2 cup ( I used Chiroti rava/ fine rava)
  • Wheat flour – 1/2 cup
  • Big onion - 1 (finely chopped )
  • Curry leaves – Few (finely chopped)
  • Coriander leaves – finely chopped
  • Salt & Water – as needed
  • Cooking oil – to drizzle over dosa
HOW TO MAKE INSTANT TOMATO DOSA
  1. Grind tomato, pepper corns, cumin seeds, ginger to a smooth paste.
  2. In a wide bowl, take rice flour, wheat flour and sooji.
  3. Add the ground tomato paste, salt, finely chopped onion, curry leaves and coriander leaves.
  4. Add required water and make thin batter.
  5. Heat dosa tawa. Pour the watery batter in a circular motion. 
  6. Flip and cook both the sides in medium flame till golden and crispy.
  7. Remove the dosa and serve hot with coconut chutney. 
INSTANT TOMATO DOSA RECIPE - STEP BY STEP PICTURES

  • To make tomato paste, grind tomato, pepper corns, cumin seeds, ginger to a smooth paste. Set aside.Instant tomato dosa
  • In a mixing bowl, take rice flour, wheat flour and sooji. Add tomato paste, finely chopped onion, curry leaves, coriander leaves and salt. Instant tomato dosa recipe
  • Add required water and make thin batter. Batter should be watery in consistency just like neer dosa or rava dosa batter.

  • Instant tomato dosa recipe
  • Heat a dosa tawa. Pour the batter in a circular motion. Cook in medium flame till golden. Flip and cook the other side too.
  • Instant tomato dosa recipe
  • Fold and remove the dosa in a plate. Serve hot with coconut chutney. Enjoy !!
Note

  • Make the batter thin and watery to make the dosa crispy else dosa looks thick and hard.
  • Add more tomatoes and red chillies if you like more tangy and spicy dosa. 
  • You can also use green chillies instead of red chillies but color of dosa won’t be bright red.

Try this easy, instant tomato dosa recipe and enjoy !
Instant tomato dosa with rice flour
Continue Reading...


December 6, 2019

Bansi Rava Upma – Karnataka Bansi Rava Uppittu Recipe

Bansi rava upma
Bansi rava was very new to me till I come to Bangalore. In Tamil nadu, we used to buy Bombay rava for all the dishes like upma, dosa, idli, kesari, pongal and kichadi. Bansi rava is quite popular in Karnataka and in many other South Indian homes. People make uppittu and Kharabath here. When I Googled about the difference between bansi rava and normal white rava / suji , I found both kinds of semolina (rava) are obtained from wheat, albeit different varieties. 

Bansi rava is darker in color than plain semolina / rava. Some people also say Bansi rava is made from corn kernels as its yellow in color. Its healthier than normal rava in terms of nutrition (Source : Quora). We should use 3 cups of water for 1 cup of rava (1:3 ratio of bansi rava and water). It takes more time to cook than Bombay rava. 

This upma tastes similar to Godhumai rava upma / wheat rava upma. It stays soft for hours. So you can prepare it for lunch box as well. Its a tummy filling one. It can be opted for diet recipes too. Ok, lets see how to make Karnataka style bansi rava uppittu with step by step pictures and video.

Check out my Chiroti rava upma and Kharabath recipe !!


Bansi rava upma

Bansi rava upma / Karnataka uppittu Recipe


Bansi rava upma / Karnataka uppittu Recipe

Karnataka style bansi rava uppittu / upma recipe


Cuisine: South Indian
Category: Breakfast
Serves: 3
Prep time: 10 Minutes
Cook time: 20 Minutes
Total time: 30 Minutes


INGREDIENTS
1 cup = 250 ml
  • Bansi rava - 1 cup
  • Big onion - 1 (Finely chopped)
  • Tomato - 1 (Finely chopped)
  • Green chilli - 2 (slit into two)
  • Curry leaves - few
  • Water - 3 cups
  • Salt - as needed
To Temper
  • Cooking oil - 2 tbsp + 2 tbsp for roasting
  • Mustard seeds - 1/2 tsp
  • Urad dal - 2 tsp
  • Chana dal - 1 tbsp
  • Cumin seeds - 1/2 tsp
Coriander leaves & grated coconut - a fistful (to garnish)
HOW TO MAKE BANSI RAVA UPMA
  1. Wash and chop onion, tomato, slit green chilli. Set aside.
  2. In a kadai, heat oil and roast bansi rava in medium flame till golden.
  3. Transfer to a plate. In the same kadai, heat oil.
  4. Splutter mustard seeds, urad dal , chana dal and curry leaves.
  5. Saute onion, green chilli for a minute. Add tomato and saute till mushy.
  6. Add boiling water or cold water and required salt. When it comes to roll boil, add rava.
  7. Mix till water is absorbed. Cover cook for few minutes till done.
  8. Lastly garnish with coriander leaves and grated coconut. Serve hot with coconut chutney !


BANSI RAVA UPMA - STEP BY STEP PICTURES
  • Wash and chop onion, tomato and slit green chilli. Chop the vegetables finely if using. Set aside.


  • Heat 2 tbsp oil in a kadai. Roast bansi rava in low to medium flame for 5 minutes. Remove in a plate. 
  • Bansi rava upma

  • In the same kadai, heat another 2 tbsp oil. Splutter mustard seeds, urad dal, chana dal. Saute for few seconds. Add onion, curry leaves and slit green chilli. Saute till onion becomes transparent.
  • Bansi rava upma
  • Now add chopped tomato and saute till mushy. Add 3 cups of water and required salt. Let it come to a roll boil.
  • Bansi rava upma
  • Keep the flame low and add roasted bansi rava.  Mix well. Take care it splashes. Keep mixing till most of the water is absorbed by the rava. Keep the flame low and cover the kadai with a lid. Cook for 5 to 10 minutes. Open the kadai and stir the upma once or twice.
  • Bansi rava upma
  • Cook till rava is completely soft. Switch off the flame and garnish with coriander leaves and grated coconut. Upma looks mushy when hot but becomes fluffy as it cools down. Enjoy this healthy, yummy bansi rava upma with coconut chutney, chutney podi or sugar. 
  • Bansi rava upma 
    Bansi rava upma

Note

  • For healthy variations, you can use finely chopped vegetables like carrot, potato, beans and green peas. In that case, add the vegetables along with onion, saute for few minutes. You may also need to add 1/2 cup more water for the veggies to cook.
  • Instead of slit green chilli you can use MTR vangi bath powder and make kharabath.
  • Water quantity can be adjusted based on your taste.
  • Coriander leaves and grated coconut adds a nice flavor & taste to this dish. So don't skip it. 

Try this healthy Bansi rava upma and share your feedback with me !
Bansi rava uppittu


Continue Reading...


November 30, 2018

Soft Dosa Recipe - How To Make Soft Dosa For Lunch Box And Travel

Soft dosa for lunch box and travel

I always pack dosa varieties for Raksha’s lunch box and travel as it is her most favorite food. Usually I add poha / pressed rice or leftover cooked rice to make soft dosa that stays good for long time. Recently I came across this soft dosa batter recipe using raw rice (pacharisi in Tamil) and urad dal in Mallika Badrinath’s cook book. This recipe is without poha/aval, sabudana/javvarisi/sago or curd. 

Though it looks similar to set dosa, ingredients of this soft dosa recipe is different from sponge dosa and set dosa. Its a very simple dosa recipe without using idli rice. You can also call it as raw rice dosa or pacharisi dosai. It can be prepared during Navratri and other fasting days to offer God.  You can grind the batter in mixie or grinder as you wish. 

When I was young, my mom used to pack dosa and podi for school and college lunch box. She doesn’t even smear idli podi over the dosa to keep it soft. My mom just adds a tsp of sesame oil over the dosa. Still dosa stays soft and good till lunch time. When I tried this recipe, I reminded my mom’s dosa. Friends, if you want to pack this dosa for travel or lunch box, just follow the tips I have shared in this post. I am sure it will stay soft for hours. 

For variations, you can make it small in size, top this dosa with finely chopped onion, mixed vegetables or even add cheese if making for kids. If you like you can stuff it with potato masala as well. Ok, lets see how to make soft dosa batter at home with step by step pictures.

Don't forget to check out my

Poha dosa / aval dosa

Puffed rice dosa

Sponge dosa without urad dal

soft dosa recipe

Soft dosa recipe for lunch box and travel - Soft dosa batter recipe


Soft dosa recipe for lunch box and travel - Soft dosa batter recipe

How to make soft dosa batter recipe at home. This dosa is prepared with raw rice and urad dal. It stays soft for hours. You can pack it for lunch box and travel.


Cuisine: Indian
Category: Breakfast Recipes
Serves: 15 
Prep time: 14 Hours
Cook time: 5 Minutes
Total time: 14Hours 5 Minutes


INGREDIENTS
! cup - 240ml
  • Dosa rice / Raw rice - 3 cups ( I used dosa rice)
  • White, round urad dal - 1 cup
  • Methi seeds / fenugreek seeds - 1/2 tsp
  • Salt & Water - as needed
  • Sesame oil / Gingely oil - to drizzle
HOW TO MAKE SOFT DOSA BATTER
  1. Wash and soak raw rice, urad dal and fenugreek seeds in a bowl for 3 to 4 hours.
  2. Grind to a smooth batter in a mixie or grinder. Transfer to a bowl.
  3. Let it ferment overnight. Batter will rise. The next morning, add salt and mix well.
  4. Adjust batter consistency adding water. Make small, thick dosa. 
  5. Drizzle oil over the dosa and cook one side.
  6. Flip it and cook the other side. Sprinkle few drops of water over the dosa to make it soft. Remove and keep it in a plate.
  7. Make the second dosa in the same way and stack it. Cover with a plate.
  8. Pack in a lunch box or for travel after dosa becomes warm.
  9. Serve with idli podi or any chutney.
METHOD - STEP BY STEP PICTURES
  • Wash and soak raw rice/ Pacharisi, Urad dal, Fenugreek seeds together for 4 hours. Grind to a smooth batter using grinder or mixie in batches. (Use ice cold water for grinding if using mixie). No need to add salt. Collect the batter in a bowl.
  • soft dosa batter recipe
  • Let it ferment over night or for 12 hours (timings vary during winter season). Batter will rise. The next morning, add the required salt, mix well. If the batter is too thick, add little water to bring dosa batter consistency.
  • soft dosa batter recipe
  • Heat a dosa pan and sprinkle some water. It should sound ssshh. Then lower the flame completely and wipe the dosa pan with a cloth. Now pour a ladleful of batter. Spread it slightly and make thick or medium thick dosa as you like.

  • Now increase the flame to medium. Bubbles will appear all over the dosa. Then drizzle a tsp of oil around the dosa and cook for a minute.

  • Flip the dosa and cook the other side. Before removing the dosa from the pan, sprinkle few drops of water all over the dosa. It helps to keep the dosa for long time.
  • soft dosa batter recipe
  • Remove the dosa from the pan and keep it on a plate or banana leaf. Make the other dosa in the same way. Stack all the dosa one over the other if you are packing for travel or lunch box. Cover with a plate to prevent drying.
  • Enjoy eating hot immediately OR You can pack the dosa and idli podi/chutney in separate boxes. You can also smear idli podi mixed with oil all over the dosa and pack in a box. I tried making crispy, thin dosa too. It came out well.
  • soft dosa batter recipe
    Enjoy !

Note

  • Methi seeds is optional. But I used it for nice flavor.
  • You can soak rice and dal separately. Grind them separately and mix both the batter.
  • Cooking soda is not needed.
  • If you are consuming the dosa immediately, you don’t have to sprinkle water over the dosa while cooking.

Try this super soft dosa recipe and enjoy with your favorite chutney or idli podi !
I served it with pottukadalai chutney.

how to make soft dosa for lunch box and travel


Continue Reading...


July 24, 2018

Besan Tomato Omelette – Eggless Omelette Recipe - Vegetable Omelette Recipe Without Egg

Eggless Omelette Recipe

Recently we tasted this eggless vegetable omelette in Hotel Saravana bhavan, Salem. We loved it. It was so soft with a nice flavor. When I asked the ingredients of this vegetarian omelette without egg, waiter told its made of besan flour/Kadalai maavu, tomato, onion and pepper powder. I reminded about our North Indian besan cheela recipe and told the same to Sendhil. Simply we can call it as besan dosa / Kadalai maavu dosai ;).  As Sendhil liked this dosa very much, I tried to recreate the restaurant style vegetable omelette at home. Its a super easy and quick recipe that can be prepared under 10 minutes for breakfast or dinner. Ideal for working women and bachelors. Usually Green chutney is served as side dish for cheela but I served it with tomato thokku/ bhaji. It also tasted good. Friends, do try this easy, yummy, instant besan cheela recipe for your breakfast and share your feedback with me. Lets see how to make besan chilla recipe with step by step pictures.
Vegetable omelette recipe without egg

Eggless Omelette recipe - Besan tomato omelette recipe


Besan cheela recipe - Besan tomato omelette recipe

Eggless omelette recipe - Besan tomato omelette recipe - Instant vegetable omelette recipe without egg for breakfast/dinner


Cuisine: North Indian
Category: Breakfast recipes
Serves: 5 nos
Prep time: 5 Minutes
Cook time: 10 Minutes
Total time: 15 Minutes


INGREDIENTS
1 cup - 250ml
  • Besan flour / Kadalai maavu - 1 cup
  • Big onion - 1 (finely chopped)
  • Ripe tomato - 1 (finely chopped)
  • Green chilli - 1 (finely chopped)
  • Cumin seeds or Ajwain - 1/2 tsp
  • Curry leaves - Few
  • Ginger - 1/2 tsp (finely chopped)
  • Coriander leaves - 2 tbsp (finely chopped)
  • Asafetida / Hing - a pinch
  • Pepper powder - 1 tsp
  • Red chilli powder - 1/4 tsp
  • Turmeric powder - 1/8 tsp
  • Sugar - 1/2 tsp
  • Curd - 1 tbsp
  • Salt & water - as needed
  • Cooking oil / ghee – to drizzle the cheela
HOW TO MAKE BESAN TOMATO OMELETTE / EGGLESS OMELETTE
  1. In a wide bowl, take the besan flour / kadalai maavu.
  2. Add finely chopped onion, tomato, green chilli, curry leaves, ginger, coriander leaves.
  3. Add chilli powder, turmeric powder, pepper powder, hing, sugar and salt.
  4. Mix well adding curd and enough water. Make a lump free batter.
  5. Heat dosa pan and make besan cheela. Cook both sides till golden. Serve hot !
BESAN TOMATO OMELETTE - STEP BY STEP PICTURES
  • In a wide bowl, take all the ingredients except cooking oil. Add the required water.
    Besan tomato omelette recipe
  • Mix without lumps. Consistency of batter should be slightly watery than regular dosa batter. It depends on the thickness of cheela. If you like thin cheela, make the batter watery else thick.
  • Heat an iron dosa pan(for best results) or non-stick dosa pan. Pour a ladleful of batter. Spread it well.
    Besan tomato omelette recipe
  • Drizzle a tsp of oil around the dosa. Cook both sides in medium flame till golden. Remove in a plate and enjoy serving hot ! You don’t need any side dish for this dosa. If needed, you can have with green chutney or pickle.
Besan tomato omelette recipe

Note

  • Addition of curd is optional but it helps to make the dosa soft. If you skip curd, rest the batter for 30 minutes before making dosa.
  • If you want to make thin cheela, make the batter slightly watery.
  • Rice flour is not necessary.
  • You can also refrigerate this batter and use it for 2 days.
Try this easy, instant besan tomato cheela recipe for your breakfast or dinner and enjoy !
Eggless omelette recipe

Continue Reading...


September 28, 2017

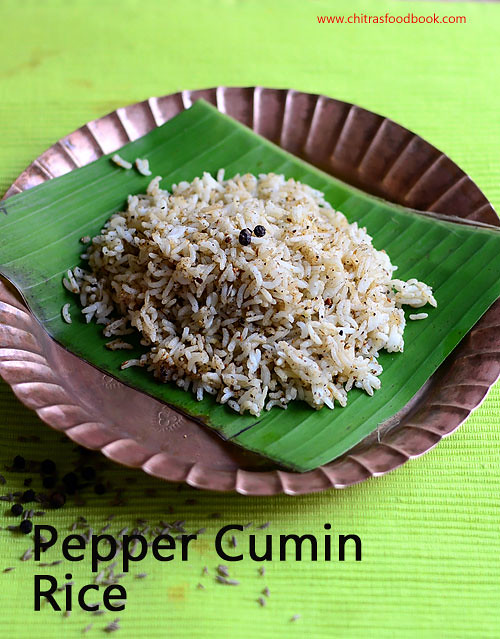
Milagu Jeeraga Sadam – Pepper Cumin Rice Recipe

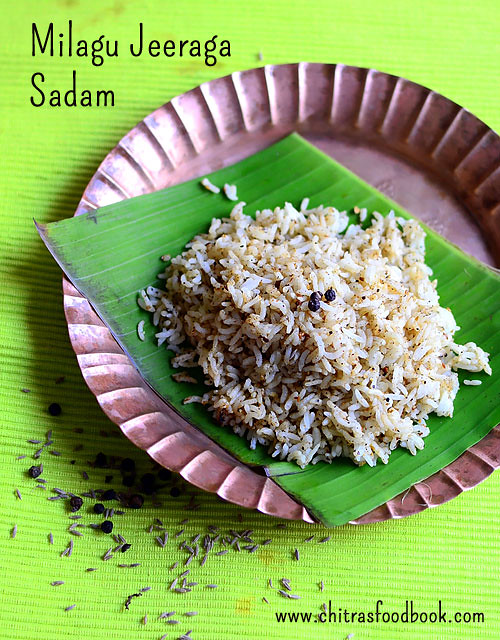
Pepper cumin rice
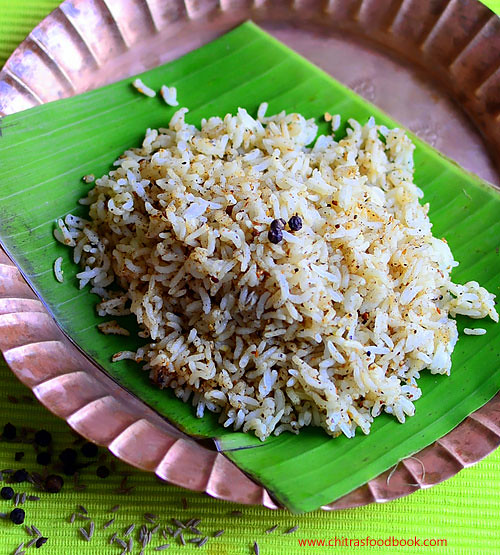
Pepper cumin rice / Milagu jeeraga sadam in Tamil is one of the yummy, South Indian rice recipes we make as prasadam for Navratri, Saraswathi pooja, Purattasi sani thaligai, aadi 18 etc. Yesterday I made this rice for navaratri afternoon neivedyam learning from my MIL. My MIL make this rice at least once in a week as pepper is a healthy Indian spice that helps to purify blood, improves appetite and digestion. Sendhil loves this rice variety a lot. So we make this pepper rice for his lunch box and  one day travel as well.

Sometimes we used to combine Saraswathi pooja, Purattasi sani thaligai festivals and make 5 rice varieties, chana sundal and thullu maavu(rice flour mixed with jaggery) for Saraswathi pooja neivedyam. We make this milagu jeeraga sadam as one of the 5 rice varieties. As its so easy to make, I thought it would be useful for you all. I have already shared a video on how to make 5 rice varieties. You can replace sesame seeds rice/ ellu sadam with milagu jeeraga sadam and offer to God for tomorrow Saraswathi pooja festival. Lets see how to make this easy milagu sadam /pepper rice with step by step pictures !
Milagu jeeraga sadam

Milagu Jeeraga Sadam - Pepper Cumin Rice

Pepper cumin rice recipe

How to Pepper cumin rice

South Indian
Main course
2

Ingredients (1 cup - 250ml)

  • Cooked rice - 1 cup
  • Ghee - 1 tsp (to roast)
  • Pepper corns - 1 tbsp
  • Cumin seeds/Jeera - 1/2 tbsp
  • Salt - as needed
  • Ghee - to mix with rice

How to make the recipe

  1. Heat ghee in a kadai.Roast pepper & cumin seeds till it starts to crackle.
  2. Remove and grind to powder adding salt.
  3. Mix this powder with cooked rice.
  4. Enjoy !

Pepper cumin rice - Step by step photos

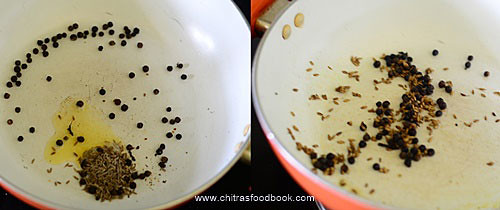
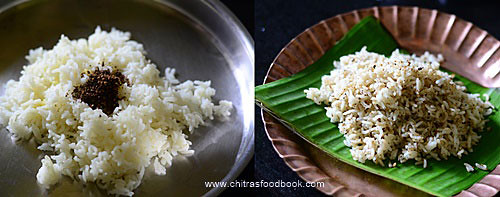
  • Heat ghee in a kadai and roast pepper & cumin seeds in medium flame till cumin seeds starts to splutter.
    Pepper cumin rice/ Milagu jeeraga sadam
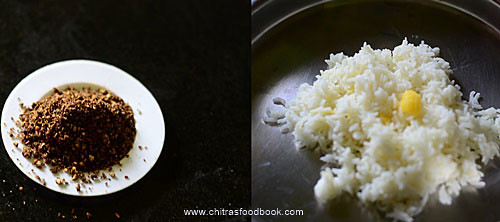
  • Remove in a plate and let it cool down. Grind to a slightly coarse powder adding salt.
  • Take the required cooked rice. Add 2 tsp of ghee, ground powder, mix well and check for taste.
    Pepper cumin rice/ Milagu jeeraga sadam
  • Add more salt & powder if required. Serve !
    Pepper cumin rice/ Milagu jeeraga sadam
  • If you wish, you can temper mustard seeds, curry leaves in ghee and add to rice.

Notes

  • Pepper alone gives spiciness to the rice. So you can add more pepper if you want spicy taste.
  • Do not add more cumin seeds. Its flavor will dominate.
  • Adding ghee helps to enhance the flavor and taste. If you don't want to add ghee, you can add sesame oil.

Try this easy and flavorful pepper cumin rice and enjoy !
Milagu sadam
Continue Reading...


August 3, 2016

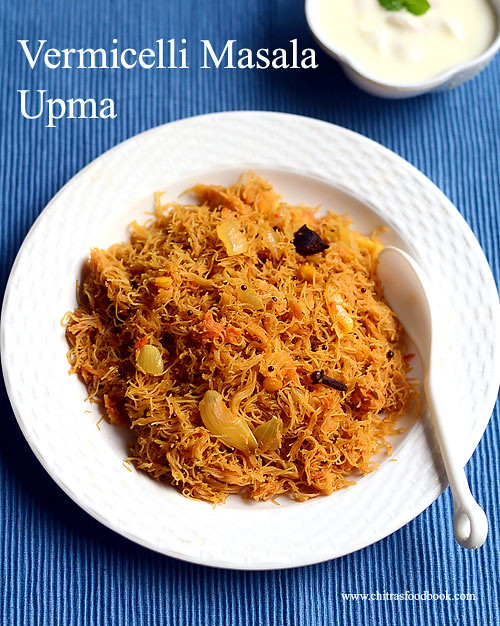
Fine Vermicelli Masala Upma Recipe– Fine Vermicelli Recipes

Vermicelli masala upma
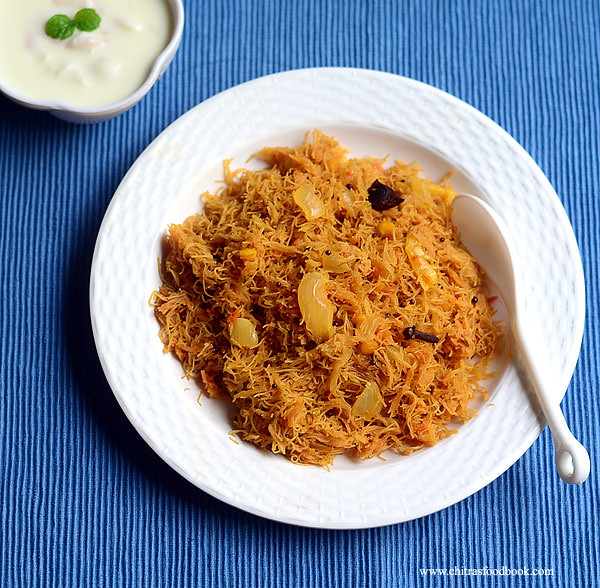
Most of us make kheer/Payasam using fine vermicelli. Me too no exception. Recently I bought a big pack of fine vermicelli to make sheer korma during Ramadan festival. I had nearly 1/2 kg of fine vermicelli leftover in hand and I wanted to try some interesting and a different recipe with it. I asked our blogger friend Lubna Karim to suggest some fine vermicelli recipes. She shared Khara vermicelli masala upma recipe from her blog. I tried it for our breakfast and shared the picture in my Instagram and facebook pages too. After that, I have made this upma twice but I couldn’t make a post here. This morning I made it just for blogging sake. The list of ingredients may seem more. But its very easy to make and cooks faster than our regular vermicelli. So you can prepare this upma for breakfast or dinner in just 10 minutes. This dish is ideal for bachelors and working women. It tastes like semiya pulao and resembles Idiyappam(Rice noodles) with mild masala flavor. You can add mixed vegetables and make it more colorful and healthy. You can try this upma with thick vermicelli too. But water quantity varies.This upma stays soft for hours.So it can be packed for lunch box too. Kids would love it for sure. I liked it with coconut chutney as side dish whereas Sendhil & Raksha loved it with onion raita. Do try this masala upma with fine vermicelli and share your feedback. Soon I must try fine vermicelli kesari too. Also check out my Fine vermicelli Payasam Recipe.

NOTE : In Bangalore, you can find Fine vermicelli in Nilgiris, Jayanagar 4th block BDA complex Pooja materials shops, MK Ahmed stores.

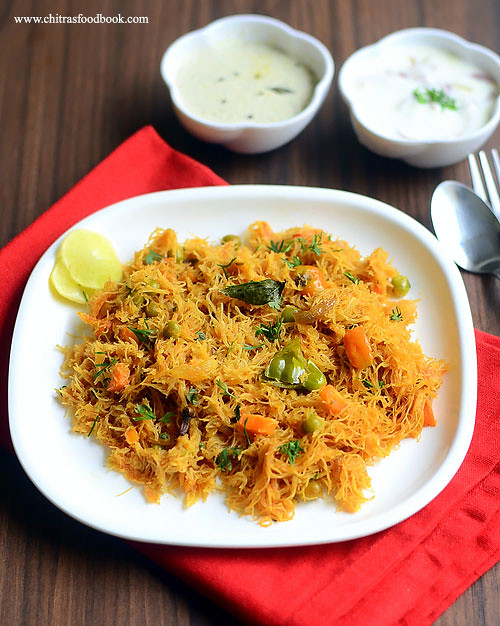
Vermicelli upma with vegetables

Fine vermicelli Masala Upma Recipe


Fine vermicelli Masala Upma Recipe Vermicelli masala upma recipe - Easy and quick breakfast recipes
Cuisine: Indian
Category: Breakfast recipes
Serves: Serves 2
Prep time: 10 Minutes
Cook time: 10 Minutes
Total time: 20 Minutes


INGREDIENTS
1 cup - 250ml
  • Fine vermicelli - 2 cups
  • Water - 1.25 cups ( add more based on the need)
To Temper & saute
  • Cooking oil - 3 tbsp
  • Mustard seeds - 1/2 tsp
  • Urad dal - 1 tsp
  • Chana dal - 2 tsp
  • Cinnamon - 1 small piece
  • Cloves - 2 nos
  • Fennel seeds - 1/2 tsp
  • Big onion - 2 nos ( medium sized)
  • Ginger-garlic paste - 1 tsp
  • Ripe tomato - 1 no (big)
  • Green chilli -  1no
  • Mixed vegetables - 1/4 cup ( Carrot, peas, potato)
  • Turmeric powder - 1/4 tsp
  • Red chilli powder - 1 tsp
  • Garam masala powder - 1/4 tsp
  • Salt - as needed
Ghee – 2 tsp
Coriander leaves – to garnish
Lemon juice - few drops (optional)
METHOD

  • I have tried this upma with & without vegetables.So the step by step pictures  slightly differs from the main picture.
  • Wash and slice the onion, chop the tomato, slit the chilli and finely chopped vegetables ( If adding).
Fine vermicelli upma
  • Heat a kadai with oil. Splutter mustard seeds, urad dal, Chana dal, Cinnamon, cloves and fennel seeds. Saute and add sliced onion, green chilli and ginger-garlic paste. Saute well till the raw smell of g&g paste goes off.
  • Now add the chopped tomato pieces,mixed vegetables ( If using). Saute until tomato turns mushy and veggies are half cooked.
Fine vermicelli upma
  • Add turmeric powder, red chilli powder,  garam masala powder, required salt and mix well. Add  1.25 cups of water and cover the kadai. Let the vegetables cook for 2 minutes.
Fine vermicelli upma
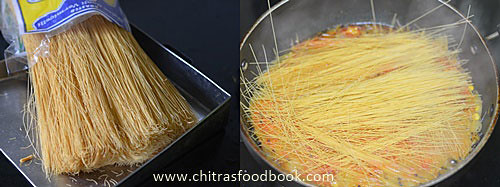
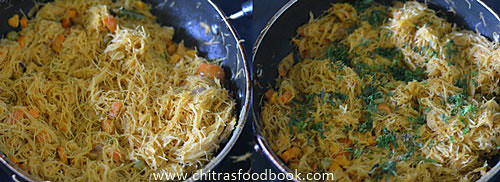
  • Break the fine vermicelli strands into two.Add them to the boiling water and mix well. You may feel water quantity is less for vermicelli. Don’t worry. As soon as you mix the vermicelli with the water, it will absorb all the water and becomes soft. So keep tossing and flipping it gently. If possible,  use a fork like ladle to avoid vermicelli turning mushy. Keep the flame minimum and cover the kadai. Let it cook for 2 minutes. If you feel the vermicelli looks too dry and not cooked properly, you can add 1/4 cup of water at this stage and mix well. ( Water quantity is the key to get perfectly cooked,fluffy upma. If you add more water, it will turn to vermicelli khichdi. So please use less water and add more only if needed). This vermicelli turns fluffy and separate when it cools down.  Lastly add 2 tsp of ghee and garnish with coriander leaves.  Sprinkle some lemon juice if you like. Mix well and serve hot.
Fine vermicelli upma
  • Enjoy with coconut chutney & onion raita !


Try this easy to cook, yummy fine vermicelli masala upma for breakfast/dinner. You will love it like me.
Vermicelli masala upma
Continue Reading...