Search Chitra's Food Book

Showing posts with label TRAVEL RECIPE. Show all posts

August 3, 2020

Kovil Puliyodharai Recipe –Temple Style Tamarind Rice

Kovil puliyodharai recipe
Making a perfect Kovil puliyodharai / Temple style tamarind rice must be the dream for many. Me too not an exception. Whenever we visit temples, I never forget to buy a pack of tamarind rice from temple’s prasadam stall. Sometimes my FIL buys an extra packet of puli sadam just for me. I love the flavor of puli sadham packed in banana leaf or served in donnai (hand pressed plantain leaf bowls). I have always wanted to recreate that taste in my kitchen and tried so many recipes titled temple style puliodharai but never satisfied with the result.

 
Recently I tried this kovil puliyodharai recipe from Royal Dakshin YouTube channel and was so happy with the outcome. I altered the quantity of ingredients as per my requirement and tried it. It tasted so close to the puli sadam served in Tamil nadu temples. I have tasted this kind of puliodharai in perumal koil madapalli and some other temples near Trichy, Kumbakonam. But one thing I observed is, this recipe needs some standing time for all the taste and flavor to blend well. Also if you store this tamarind rice in a bowl lined with banana leaf, it tastes exactly like kovil puliyodharai. 

Friends, do try this Tamilnadu temple style tamarind rice during this festival month and share your feedback with me. Lets see the making with step by step pictures and video !

Temple style puliyodharai

Temple style puliodharai / Kovil puliyodharai recipe


Temple style puliodharai / Kovil puliyodharai recipe
Tamil nadu temple style puliyodharai recipe with stepwise pictures.


Cuisine: South Indian
Category: Main course
Serves: 4
Prep time: 10 Minutes
Cook time: 20 Minutes
Total time: 30 Minutes


INGREDIENTS

For Pulikachal Paste
  • Gingely oil - 3 tbsp
  • Mustard seeds - 1 tsp
  • Urad dal - 1 tsp
  • Chana dal - 1 tbsp
  • Roasted peanuts - 2 tbsp
  • Curry leaves - few
  • Red chilli - 2 ( pinched into 2)
  • Hing/ asafetida - 1/4 tsp
  • Red chilli powder - 1/2 tsp
  • Jaggery - 1 tsp
  • Tamarind - Lemon size
  • Salt & water - as needed
For spice powder (Dry roast)
  • Coriander seeds - 1.5 tsp
  • Chana dal - 1.5 tsp
  • Urad dal - 3/4 tsp
  • Fenugreek seeds - 1/2 tsp
  • Red chilli - 4
  • Pepper corns - 1/2 tsp
  • Cumin seeds - 1/4 tsp
  • Black or white sesame seeds - 2 tsp ( I used black ones)
  • Asafetida / Hing - 1/4 tsp
  • Curry leaves - 5
For tamarind rice
  • Raw rice or steamed rice - 1 cup
  • Water - 2 cups for raw rice / 3 cups for steamed rice
  • Gingely oil - 1 tbsp + few drops for cooking rice
  • Curry leaves - Few ( to decorate)
  • Banana leaf - to store and serve the rice

HOW TO MAKE KOVIL PULIYODHARAI

  1. Heat a kadai and dry roast all the ingredients given under “For spice powder”.
  2. Cool down and grind to a fine powder. Set aside.
  3. Heat oil the kadai and splutter mustard seeds, urad dal, chana dal, red chilli, roasted peanuts, curry leaves and hing.
  4. Add 1.5 cups of tamarind extract, required salt, turmeric powder, chilli powder, jaggery.
  5. Let it roll boil till oil floats on top and becomes semi thick paste.
  6. Lastly add 2 tsp of ground puliyodharai spice powder and boil for a minute.
  7. It thickens more and leaves oil on sides. Switch off the flame. Cool down and store in a box. 
  8. Pulikachal paste is ready. You can refrigerate and use up to 2 weeks. Store the remaining spice powder in an air tight box.
  9. To make Kovil puliyodharai, wash and pressure cook one cup of raw rice adding 2 cups of water and few drops of gingely oil.
  10. Spread the rice in a plate, cool down. Add the required tamarind rice paste and the spice powder. Mix well.Check for taste, add more if needed.
  11. Add little gingely oil, mix gently. Garnish with chopped curry leaves and cover the bowl with a banana leaf.
  12. Give a standing time of one or two hours. Serve and enjoy !

METHOD - STEP BY STEP PICTURES

  • Heat a kadai and dry roast all the ingredients given under “For spice powder”. Cool down and grind to a fine powder. Set aside. Soak lemon size tamarind in 1 cup warm water for 20 minutes. Take 1.5 cups extract. Keep it aside.
    Kovil puliyodharai recipeKovil puliyodharai recipe
  • Heat oil in the same kadai. Splutter mustard seeds, urad dal, chana dal, red chilli, curry leaves, hing. Add 1.5 cups of tamarind extract, turmeric powder, red chilli powder, required salt and jaggery.
    Kovil puliyodharai recipe
  • Boil till the raw smell leaves and starts to leave the oil. When the paste becomes semi thick, add the ground spice powder. Mix till thick and leaves oil. Pulikachal / tamarind rice paste is ready.
    Kovil puliyodharai recipe
  • Switch off the flame. Cool down the paste completely and store in a clean box. Use a clean spoon to handle. Stays good for 2 weeks under refrigeration. Also store the remaining spice powder in a box.

  • To make temple style tamarind rice : Wash and pressure cook 1 cup of raw rice. Add 2 cups of water, few drops of oil and pressure cook in low flame for one whistle. Open the cooker after the steam is released. Spread the rice in a plate. Add 2 tsp of gingely oil. Cool down.

  • Add the required paste, 1 to 2 tsp of spice powder and mix gently to coat evenly. Add more gingely oil if required. Garnish with fresh curry leaves. Keep the rice in a bowl lined with banana leaf. Cover it with another banana leaf and give a standing time for an hour or two to enjoy the original temple style puliyodharai.
    Kovil puliyodharai recipe
    Enjoy !

Note

  • Adjust the quantity of red chillies used for grinding for more spicy taste.
  • Boil the tamarind paste till it leaves oil for best taste.
  • Mixing spice powder along with tamarind paste in the rice is the highlight of this puli sadam.
  • Do not hesitate to use more gingely oil. It gives nice flavor and also helps to pacify the body heat generated due to tamarind.
Kovil puliyodharai recipe

Try this easy, yummy, Kovil puliyodharai recipe and share your feedback with me.
Temple style tamarind rice recipe


Continue Reading...


January 25, 2019

Bitter Gourd Thokku / Pavakkai Thokku Recipe

Pavakkai thokku
Bitter gourd is one of my favorite vegetables. So I love to try varieties of bitter gourd recipes in my kitchen. Recently I tried this yummy bitter gourd thokku recipe for rice (pavakkai in Tamil, Karela in Hindi) from Sangeetha’s blog. Its basically an onion, tomato, bitter gourd curry very similar to our Tamil nadu style tomato thokku. As usual I tried this bitter gourd thokku in an easy way by using my pressure cooker. It came out so well with a combination of tangy, sweet and mild bitter taste. It was so easy and quick to make in a pressure cooker. It tastes great when mixed with plain rice drizzled with few drops of sesame oil. It goes well with curd rice and chapathi as well. The bitterness is not much visible in this recipe as we are adding tomato, tamarind and jaggery. Also slicing the bitter gourd thinly helps to reduce the bitterness. If you are a bitter gourd lover, you must try this recipe. You will love it for sure. This pavakkai thokku stays good for 10 days or more when refrigerated. If kept outside, it stays good for 2 days. So you can pack it for travel too. But use a clean spoon to handle it. Ok, lets see how to make this easy, yummy bitter gourd thokku recipe with step by step pictures.

Check out my bitter gourd poriyalpavakkai pitlaipavakkai puli kulambu, Andhra style Kakarakaya pulusu, Bitter gourd biryani, Bitter gourd chips and bitter gourd masala curry.

bitter gourd thokku

Bitter gourd thokku recipe / Pavakkai thokku


Bitter gourd thokku recipe / Pavakkai thokku

How to make bitter gourd thokku / pavakkai thokku easily in a pressure cooker.


Cuisine: South Indian
Category: Side dish for rice
Serves: Serves 4
Prep time: 10 Minutes
Cook time: 20 Minutes
Total time: 30 Minutes


INGREDIENTS
1 cup - 250ml
  • Bitter gourd - 1 no (big sized, thinly sliced)
  • Big onion - 2 nos. (finely chopped)
  • Ripe tomato - 2 nos.(finely chopped)
  • Garlic cloves - 5 (finely chopped)
  • Tamarind extract - Big gooseberry size
  • Powdered Jaggery - 1 tbsp (adjust)
  • Red chilli powder - 1.5 tsp to 2 tsp
  • Coriander powder - 1 tsp
  • Turmeric powder - 1/2 tsp
  • Salt & water - as needed
To Temper
  • Cooking oil or Gingely oil - 4 tbsp
  • Mustard seeds - 1/2 tsp
  • Urad dal - 1 tsp
  • Cumin seeds / Jeera - 1/4 tsp
  • Curry leaves - Few
  • Hing / Asafetida - 1/4 tsp
HOW TO MAKE BITTER GOURD THOKKU
  1. Wash and chop bitter gourd into small thin slices. It helps to reduce bitterness.
  2. Chop onion, garlic, tomato finely. Heat oil in a pressure cooker base.
  3. Splutter mustard , urad dal, cumin seeds, curry leaves and hing.
  4. Add finely chopped onion and garlic. Once transparent, add sliced bitter gourd.
  5. Add turmeric powder and salt. Mix well and saute for 5 minutes till its quantity reduces slightly.
  6. Now add tomato and saute till it becomes mushy. Add chilli powder and coriander powder.
  7. Mix till raw smell goes off. Lastly add 1/4 cup of tamarind extract, powdered jaggery. Mix well.
  8. Pressure cook in low flame for one whistle. Remove the lid after the steam is released.
  9. Mix and boil if thokku is watery. Once its thick, you can remove and cool down.
  10. Yummy Pavakkai thokku is ready ! Store in a clean box and refrigerate it. Enjoy with plain rice, curd rice and chapathi
BITTER GOURD THOKKU - STEP BY STEP PICTURES


  • Wash and chop bitter gourd into small, thin slices. Slicing thinly helps to remove bitterness. You can mix the chopped bitter gourd pieces  and salt. Keep it aside for 15 to 30 minutes. Squeeze and drain the water. It also helps to reduce the bitterness. But its nutritional value is lost. So I don’t do this way. I just chop the BG thinly. Similarly chop onion, garlic and tomato into very small pieces.


  • Heat oil in a pressure cooker base. Splutter mustard seeds, urad dal, cumin seeds, hing and curry leaves.Pavakkai thokku


  • Add onion, garlic and saute till transparent. Now add thinly sliced bitter gourd, turmeric powder and salt. Saute for 5 minutes in medium flame till bitter gourd shrinks in quantity slightly.Pavakkai thokku


  • Add tomato pieces. Saute till it turns mushy. Then add chilli powder and dhania powder. Mix well till its raw smell goes off.

  • Lastly add 1/4 cup of tamarind extract, jaggery and mix well. You can add very little water if the thokku is too thick. Close the pressure cooker lid. Keep the flame high till steam comes out. Put the weight valve and simmer the flame completely. Cook in low flame for one whistle.Pavakkai thokku


  • Open the cooker lid after the steam is released. If you find there is excess water in the thokku, boil for sometime till its thick. Switch off the flame and remove in a clean bowl. Let it cool down. Store in a refrigerator. It stays good for 10 days. You can enjoy with plain rice, curd rice, chapathi, idli dosa too. Enjoy ! Pavakkai thokku
  • Note

    • Adjust the quantity of chili powder as per your taste.
    • Do not skip jaggery. It gives a mild sweet taste to this thokku.
    • Make sure there is no excess water in the thokku. It will reduce its shelf life.

    Try this easy, yummy bitter gourd thokku and enjoy !
    bitter gourd thokku recipe


    Continue Reading...


    September 28, 2017

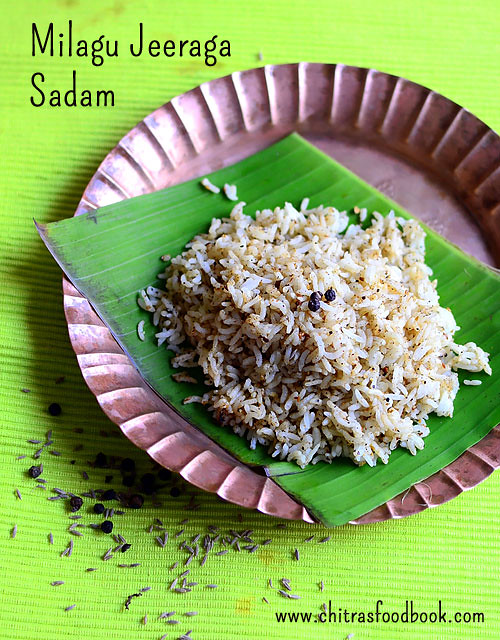
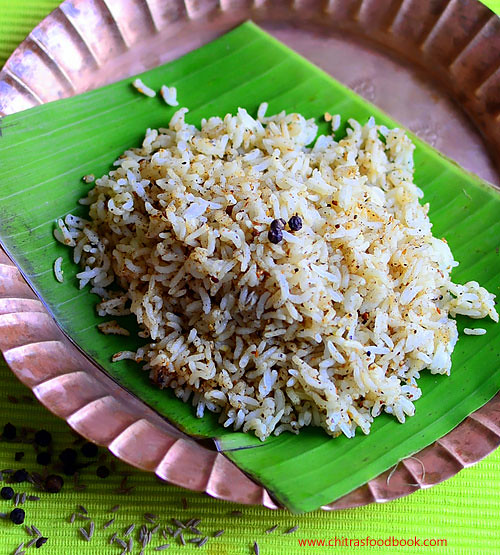
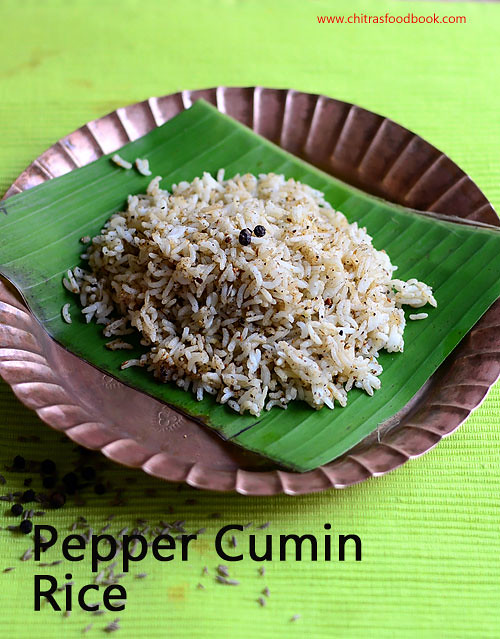
    Milagu Jeeraga Sadam – Pepper Cumin Rice Recipe

    Pepper cumin rice
    Pepper cumin rice / Milagu jeeraga sadam in Tamil is one of the yummy, South Indian rice recipes we make as prasadam for Navratri, Saraswathi pooja, Purattasi sani thaligai, aadi 18 etc. Yesterday I made this rice for navaratri afternoon neivedyam learning from my MIL. My MIL make this rice at least once in a week as pepper is a healthy Indian spice that helps to purify blood, improves appetite and digestion. Sendhil loves this rice variety a lot. So we make this pepper rice for his lunch box and  one day travel as well.

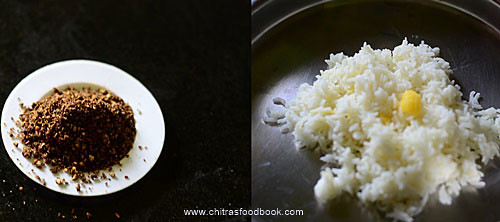
    Sometimes we used to combine Saraswathi pooja, Purattasi sani thaligai festivals and make 5 rice varieties, chana sundal and thullu maavu(rice flour mixed with jaggery) for Saraswathi pooja neivedyam. We make this milagu jeeraga sadam as one of the 5 rice varieties. As its so easy to make, I thought it would be useful for you all. I have already shared a video on how to make 5 rice varieties. You can replace sesame seeds rice/ ellu sadam with milagu jeeraga sadam and offer to God for tomorrow Saraswathi pooja festival. Lets see how to make this easy milagu sadam /pepper rice with step by step pictures !
    Milagu jeeraga sadam

    Milagu Jeeraga Sadam - Pepper Cumin Rice

    Pepper cumin rice recipe

    How to Pepper cumin rice

    South Indian
    Main course
    2

    Ingredients (1 cup - 250ml)

    • Cooked rice - 1 cup
    • Ghee - 1 tsp (to roast)
    • Pepper corns - 1 tbsp
    • Cumin seeds/Jeera - 1/2 tbsp
    • Salt - as needed
    • Ghee - to mix with rice

    How to make the recipe

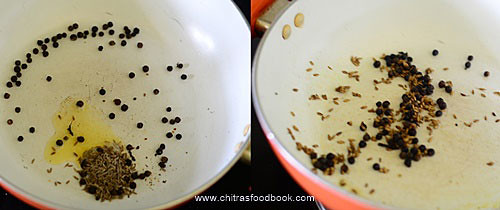
    1. Heat ghee in a kadai.Roast pepper & cumin seeds till it starts to crackle.
    2. Remove and grind to powder adding salt.
    3. Mix this powder with cooked rice.
    4. Enjoy !

    Pepper cumin rice - Step by step photos

    • Heat ghee in a kadai and roast pepper & cumin seeds in medium flame till cumin seeds starts to splutter.
      Pepper cumin rice/ Milagu jeeraga sadam
    • Remove in a plate and let it cool down. Grind to a slightly coarse powder adding salt.
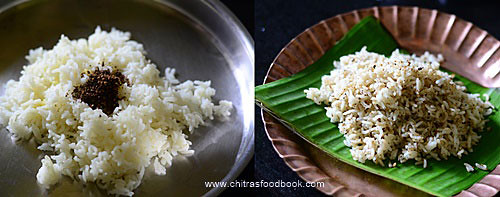
    • Take the required cooked rice. Add 2 tsp of ghee, ground powder, mix well and check for taste.
      Pepper cumin rice/ Milagu jeeraga sadam
    • Add more salt & powder if required. Serve !
      Pepper cumin rice/ Milagu jeeraga sadam
    • If you wish, you can temper mustard seeds, curry leaves in ghee and add to rice.

    Notes

    • Pepper alone gives spiciness to the rice. So you can add more pepper if you want spicy taste.
    • Do not add more cumin seeds. Its flavor will dominate.
    • Adding ghee helps to enhance the flavor and taste. If you don't want to add ghee, you can add sesame oil.

    Try this easy and flavorful pepper cumin rice and enjoy !
    Milagu sadam
    Continue Reading...


    November 27, 2014

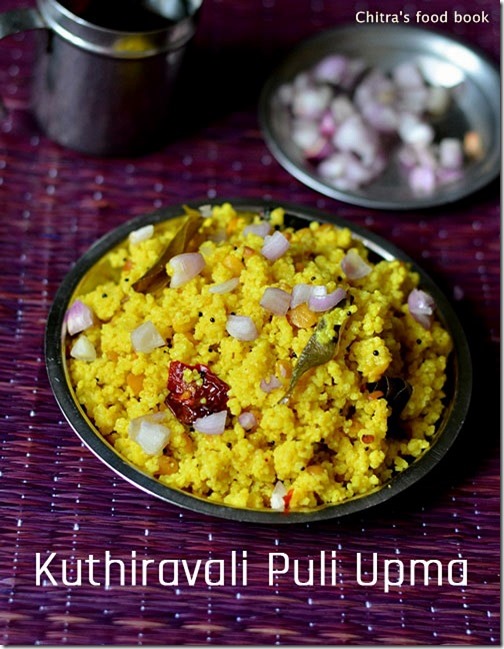
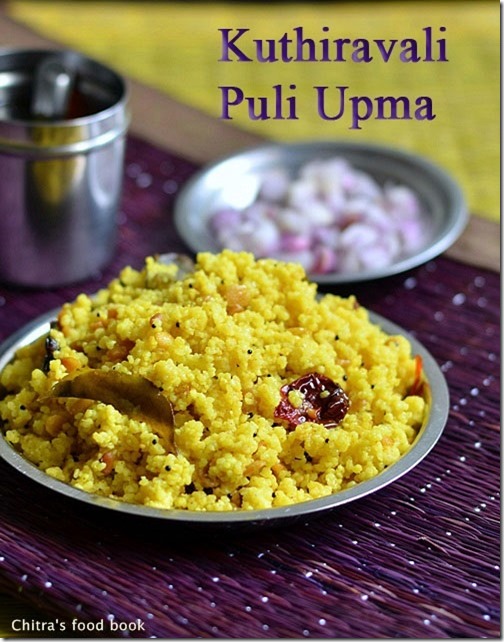
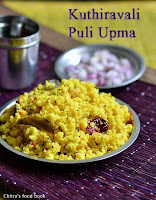
    Kuthiraivali Puli Upma Recipe|Barnyard Millet Recipes

    Kuthiravali-upma

    Barnyard millet/Kuthiraivali in Tamil, Oodalu in Kannada, Odalu in Telugu, Jhangora in Hindi and Kavadapullu in Malayalam is a healthy millet which has 6 times high fiber content when compared with wheat. Its a gluten free millet with high calcium,phosporous & fiber. It is high in carbohydates & fat too. It helps to maintain the body temperature.It acts as a good anti oxidant too. This puli upma with kuthiravali is an easy and yummy breakfast and dinner recipe which can be made under 20 minutes. Its a flavorful one pot meal. Its a great time saving recipe for people who look for quick breakfast/dinner options.We usually make this puli upma with rice or broken rice/Noi arisi.

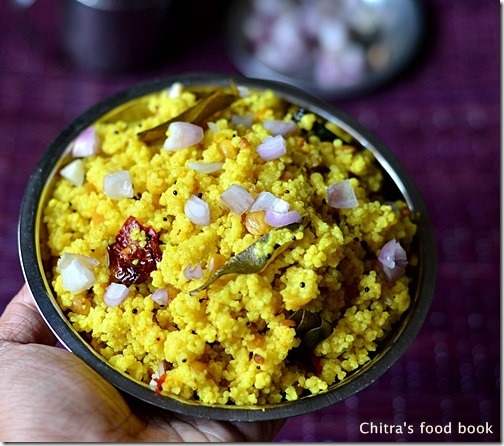
    Last week I just tried it with kuthiraivali for a change following my Puli sundal recipe & it tasted yummy when drizzled with few tsp of gingely oil. The best side dish for this puli upma is finely chopped sambar onions/pearl onions. This is not only a tasty combo but also it helps to balance the heat of tamarind & keeps the body cool. 

    Friends try this easy, tasty puli upma recipe with any millet. I am sure you are going to love it. You can also replace kuthiravali with varagu or samai. Cooking procedure & water quantity are the same. This upma can be done in electric rice cooker too. In that case, add 1/2 cup of water more than the mentioned quantity. Ok, Lets see how to make this tasty puli upma using healthy barnyard millet. It stays good for one day travel too. Check out my varieties of millet recipes here.

    barnyard millet recipes

    Kuthiraivali puli upma recipe


    Kuthiravali puli upma recipe Kuthiraivali/Barnyard puli upma recipe
    Cuisine: Indian
    Category: Breakfast/Dinner
    Serves: 3
    Prep time: 10 Minutes
    Cook time: 15 Minutes
    Total time: 25 Minutes


    INGREDIENTS

    • Kuthiravali/Barnyard millet - 1 cup
    • Toor dal - 2 tbsp
    • Water - 2.5 cups
    • Tamarind - Big gooseberry size
    • Turmeric powder - 1/4 tsp
    • Hing/Asfetida - 1/8 tsp
    • Curry leaves - few
    • Salt - as needed
    To temper
    • Cooking oil or gingely oil - 2 tbsp
    • Mustard seeds - 1 tsp
    • Urad dal - 2 tsp
    • Red chillies - 4-6 nos
    • Curry leaves - few
    • Hing/Asafetida - 1/8 tsp
    HOW TO MAKE KUTHIRAIVALI PULI UPMA - METHOD

    • Soak tamarind in warm water for 10 minutes and take the extract using 2.5 cups of water as mentioned above. Its not necessary to use all the 2.5 cups for taking tamarind extract. U can use 2 cups of water for extract and add the remaining 1/2 cup of water directly to the cooker.To this tamarind juice, add curry leaves, turmeric powder, salt and hing. Set aside.
    • In a kadai, heat a tsp of oil & roast the toor dal. Remove in a plate. In the same kadai, roast the millet/kuthiravali till it changes to white & puffy. Remove it in toor dal plate.
    kuthiravali-puli-upma-recipe-1
    • Heat a pressure cooker base with oil and temper all the ingredients given above in the same order. Now add the tamarind extract taken using 2.5 cups of water. When the water comes to boil, simmer the flame and add the roasted dal & millet. Mix well without lumps.
    barnyard millet recipes
    • Pressure cook in low flame for one whistle or 3-4 whistles if high flame. It takes 10-12 minutes. After the steam is released, open the lid and fluff it with a fork. It will look mushy when it is hot but it becomes grainy & separate as it cools down.
    kuthiravali-puli-upma-recipe-2
    • Don’t forget to add a tsp of gingely oil while serving. Enjoy this upma with small onions as side dish.

    Note

    • Roast the dal & millet carefully in medium flame. Make sure nothing gets burnt.
    • Adjust the quantity of chillies based on your spice level.
    • Add less water ( around 2.25 cups) if you want more fluffy upma.


    Enjoy this healthy kuthiravali upma with small onions as side dish. Tastes yumeee !!
    kuthiravali-puli-upma

    Continue Reading...


    April 22, 2014

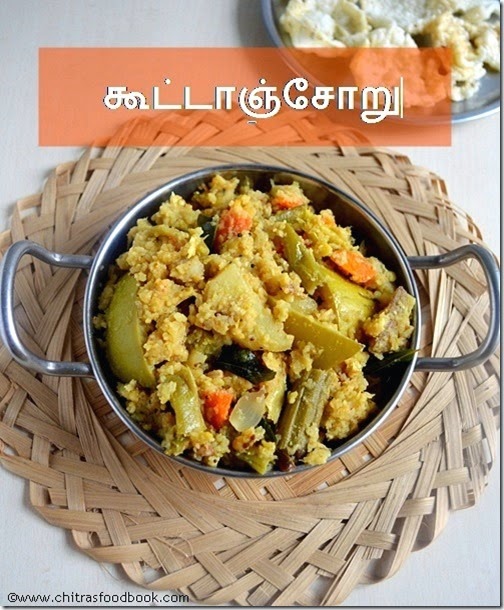
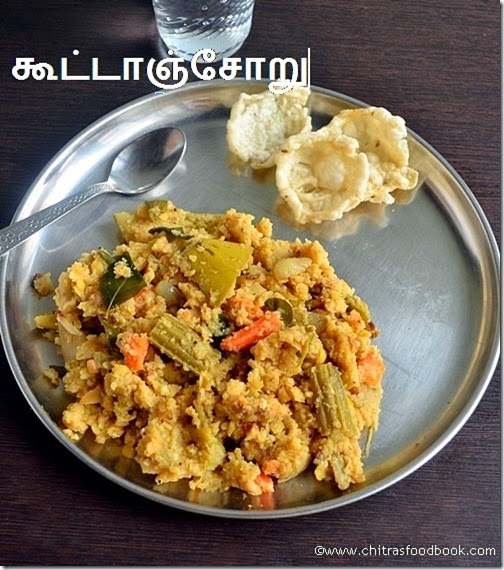
    TIRUNELVELI KOOTANCHORU RECIPE - TRAVEL LUNCH IDEAS


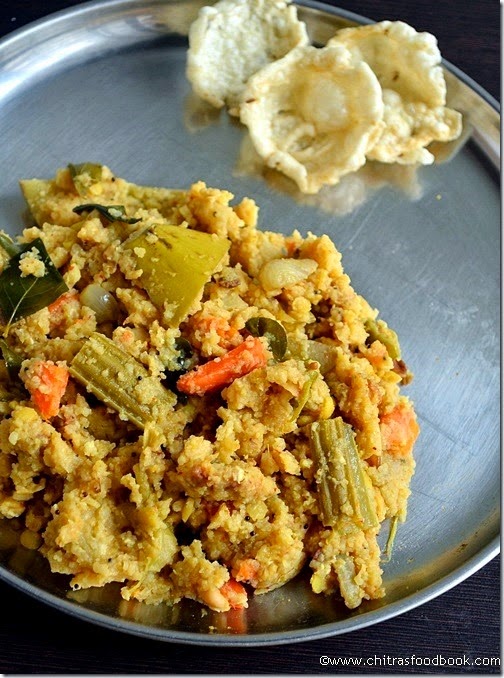
    Kootanchoru rice
    Tirunelveli famous Kootanchoru @ kadamba sadam is one of the signature recipes of my mom. Mostly Nellai people make this rice for picnic / trips and for guests. This is one of the best foods for travel. It stays good for one to two days without refrigeration. When (me & my sis) we were young, we used to go to thatha, aachi’s house in Nellai for every summer vacation.

    My periamma and chithi also comes with their family. We go for a one day trip to Tiruchendur & Kutralam every year. Amma, Periamma and Chithi together prepare this rice in early morning in a big eeya paanai traditionally for 10-12 people and pack in a big vaali (thooku chatti) for travel. We have this rice for lunch in a  piece of vazhai ilai(banana leaf) after a nice bath in five falls, Kutralam. With the awesome smell of banana leaf, it tastes great & we all have minimum of two servings. Vathal/vadagam or  appalam  is the best side dish for kootanchoru. This rice tastes the best after it cools down.
    Kootanchoru
    Last week my mom was with me for two days. I told her to prepare this rice for our lunch and of course for blogging because some of my Nellai readers asked me to share kootanchoru recipe after trying my uluntham paruppu sadam. I asked my mom to prepare using pressure cooker but mom said making this rice in eeya paanai or indalium vessel or kadai gives the right consistency to the rice, vegetables and tastes great. As she said, it was very flavourful and tasty. But she also told the method on how to make in pressure cooker if needed. I have shared it below. 

    Kootanchoru is very easy to prepare if you have chopped onions & vegetables ready in hand. It takes just 20 minutes to prepare this rice. I personally feel, it is better to do chopping & grinding work the previous night if you plan to make this rice for next day travel. Sendhil had it for the first time and loved it. We had this rice for lunch and the leftover for dinner too. My mom & dad packed this rice in a foil box & took it for their train journey. Friends if you plan for a picnic,do prepare this rice. I am sure you can have a delectable lunch.

    kadamba-sadam-recipe

    Kootanchoru recipe


    Kootanchoru recipe Tirunelveli style kootanchoru recipe – Ideal & tasty food for travel !
    Cuisine: Indian
    Category: Lunch
    Serves: 6
    Prep time: 20 Minutes
    Cook time: 30 Minutes
    Total time: 50 Minutes


    INGREDIENTS
    To chop
    • Carrot - 2 nos
    • Beans -  10 nos
    • Potato - 1 no (big)
    • Broad beans - 10 nos
    • Raw banana - 1/2 no
    • Raw mango - 1/2 no
    • Brinjal - 3 nos
    • Drumstick - 1 no
    • Drumstick leaves & arai keerai – a handful
    To cook
    • Rice - 1.5cups
    • Toor dal - 1/2 cup
    • Water - 12 cups
    • Tamarind – Small lemon size ( use big lemon size if you don’t add raw mangoes)
    To grind
    Paste -1
    • Red chillies – 12-14 (adjust)
    Paste-2
    • Small onions – 30 - 40 nos (3/4 cup)
    • Garlic cloves - 2 bulbs(small) or 1 bulb if big variety
    • Jeera- 1 tsp
    To saute
    • Cooking oil -  1 tbsp
    • Small onions - 15 
    • Green chillies – 2 TO 4( adjust)
    Grated coconut – 1/2 cup
    To temper
    • Gingely oil - 2 tbsp
    • Mustard seeds - 1 tsp
    • Urad dal – 1 tsp
    • Vadagam – 2-3 tbsp (OR)Small onions - 20 nos(finely chopped)
    • Curry leaves – half handful
    HOW TO MAKE KOOTANCHORU - METHOD

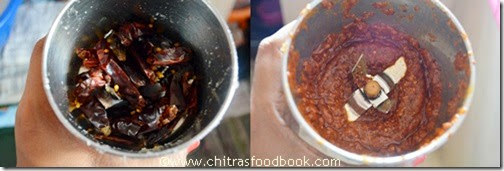
    • Grind red chillies adding required water to make a smooth paste. This is paste-1.Set aside.
    Kootanchoru step2
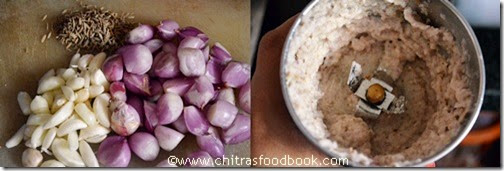
    • Wash and peel the small onions, garlic cloves and grind with jeera & water to make paste-2.
    Kootanchoru step1
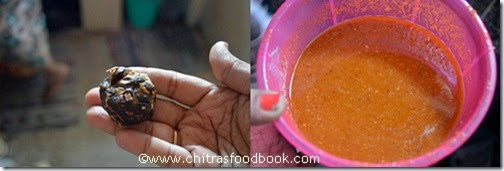
    • Soak tamarind in enough water. Take the extract using 1.5 cups of water and mix the paste-1 & paste-2, turmeric powder and salt.
    Kootanchoru step3
    • Wash and chop all the vegetables of uniform size and keep the raw banana & potato cubes immersed in water till use. Chop drumstick, chop raw mango into big cubes as shown in the picture.
    Kootanchoru step4
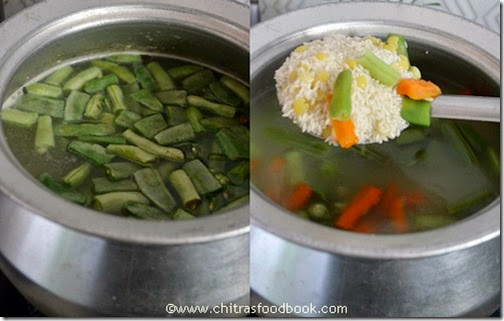
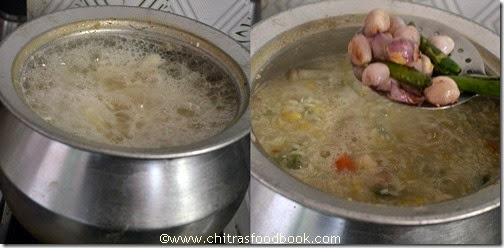
    • In a big vessel(preferably, eeya paanai or indalium vessel) take the mentioned quantity of water. When the water starts to boil, add toor dal, turmeric powder. Allow it to cook till the dal blossoms. It should be mashable.
    Kootanchoru step5
    • After the dal is 3/4th cooked, add all the vegetables & keerai (greens) except raw mango pieces. It takes 10 minutes for all the vegetables to cook. Keep stirring whenever necessary.
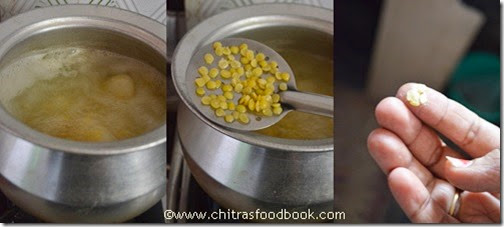
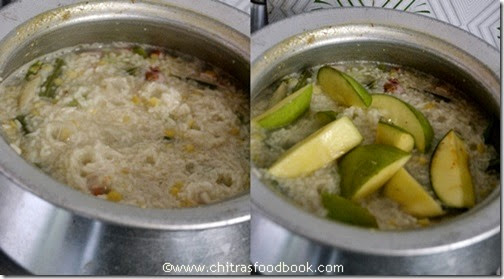
    • After 10 minutes, wash and add the rice. Again boil for 10-15 minutes and check whether rice is done. Rice absorbs all the water and gets cooked. Add the required salt.
    Kootanchoru step6
    • Check if the rice is cooked properly. Use back of the ladle to mix the rice to avoid it turning too mushy. In the mean time, heat 1tbsp oil in a kadai and saute onions, green chillies & add to rice.
    Kootanchoru step7
    • Now add mango pieces. It takes 5 minutes & mango pieces will be half cooked.
    Kootanchoru step8
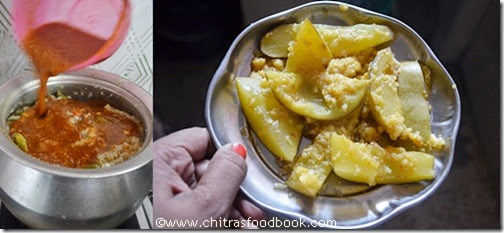
    • Now add the tamarind extract mixture and allow it to boil for 5 minutes in medium flame. Keep stirring every now & then to avoid burnt bottom.
    • Remove the mango pieces alone after it is cooked yet firm in shape else mango will become mushy & mixed with the rice completely leaving the skin. It makes the rice tangy.
    Kootanchoru step9
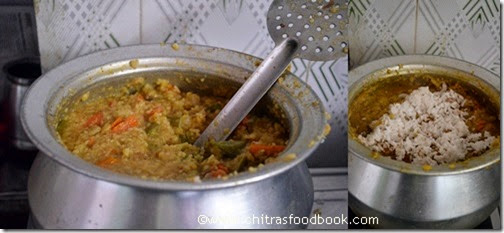
    • Use back of the ladle or fork like ladle to mix the rice. Lastly add grated coconut & mix well. 
    Kootanchoru step10
    • Finally, temper all the ingredients given under”to temper” and add to the rice. Rice looks mushy initially but its consistency will get adjusted after it cools down.
    Kootanchoru step11
    Just before serving,add the cooked raw mango pieces & mix well.
    • Give a standing time of minimum one-two hours because it takes this time for all the taste to blend well with the rice.
    Serve with koozh vathal/Vadam..!! Tastes great !!
    **Do not use your hands at any cost while serving. Rice will be spoiled very soon. So always use a ladle.


    PRESSURE COOKER METHOD
    • Take toor dal with 2 cups of water in pressure cooker and cook in high flame for 2-3 whistles.
    • Remove the lid and add the rice and chopped vegetables except raw mango.Cook it adding 6 cups of water & salt.
    • After rice is cooked,open the lid and add the sauteed onions, chillies, tamarind extract mixture & raw mango pieces & salt if needed.
    • Allow the raw mango to cook well. Rice absorbs all the tamarind extract mixture. Use fork like ladle to mix the rice. Simmer the flame & boil for few minutes.
    • Lastly add grated coconut & tempered ingredients. Mix well, check for taste. Give a standing time of 1-2 hours & serve with vathal/vadam.
    TIPS TIPS
    • If the rice is too spicy, add little tamarind extract & grated coconut. It balances the taste.
    • If the rice is too tangy, add some chilli powder mixed in water & boil for sometime with rice. Add little salt if needed.
    • Adding a handful of drumstick leaves & arai keerai is suggested for this rice. But I din’t add both as I din’t have the stock.
    • Raw mango is purely optional but it gives a nice flavour to this rice. If you don’t add raw mango pieces, use big lemon size tamarind.
    • Adjust the quantity of red chillies based on your taste buds. But use tamarind in correct quantity if u reduce chillies.

    Pack this rice in a foil box for your travel and enjoy with vadagam/Vathal & appalam. It tastes great !!!
    kootanchoru-recipe
    Very good recipes Tags: , , ,
    Continue Reading...


    April 17, 2014

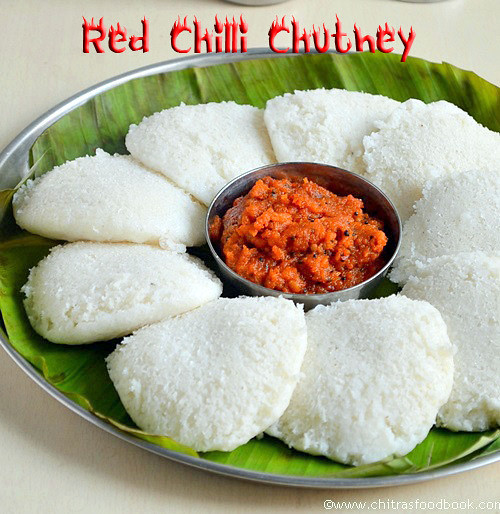
    Chettinad Vara Milagai Thuvayal(Red chilli Chutney Recipe)- Chutney For Paniyaram

    Vara milagai chutney is a popular side dish for idli, dosa and paniyaram in Karaikudi - Chettinad region. This is one of the easiest chutney recipes & ideal for travel as it is without coconut. I think chettinad kara chutney and vara milagai thuvayal are the same because both have the same ingredients.

    Friends from Chettinad, please tell me if there is any difference. I would love to try that too. Sendhil doesn’t like spicy side dishes. So I was waiting for a good chance to try this chutney for me. Yesterday my parents were in my house. As my dad is fond of kara chutney, I tried this spicy red chilli chutney for him. 

    He loved it a lot and told me to pack this chutney with idli for his travel to Hyderabad. Whenever we go to hotels, myself and my dad ask for more servings of kaara chutney than coconut chutney & sambar. We are a big big fan of this. People looking for spicy side dishes must try this chutney. I am sure you will have at least 2 idlies more than your regular intake.


    Chettinad Kara chutney recipe


    Kara chutney recipe Kara chutney recipe - Chettinad style - Tastes great with idli, dosa & paniyaram
    Cuisine: Indian
    Category: side dish
    Serves: 3
    Prep time: 10 Minutes
    Cook time: 10 Minutes
    Total time: 20 Minutes


    INGREDIENTS

    • Tomato - 1 no
    • Small onions - 20 nos or big onion - 2 no
    • Red chillies – 5 nos
    • Tamarind - a small piece(a big pinch)
    • Garlic cloves - 3 nos
    • Salt & water - as needed
    To temper
    • Gingely oil - 3 tbsp
    • Mustard seeds - 1/2 tsp
    • Urad dal - 1 tsp
    • Curry leaves - few
    HOW TO MAKE CHETTINAD KARA CHUTNEY - METHOD

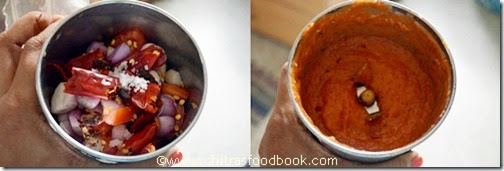
    • Grind tomato,red chillies,small onions, garlic cloves, tamarind with salt & water to a slightly coarse paste. (Tips Tips: Always pinch the tamarind into small pieces and use for grinding. It helps to grind smoothly)
    Vara milagai chutney step1
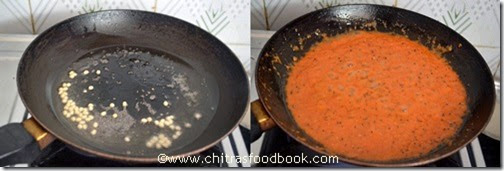
    • Heat gingely oil in a pan and temper with mustard seeds, urad dal & curry leaves. Pour this chutney in hot oil and allow it to boil till raw smell emanates completely.Chutney thickens as well.
    Vara milagai chutney step2
    • Remove & serve with idli, dosa or paniyaram.


    Note

    • Do not reduce the oil quantity for tempering as it helps to suppress the body heat developed by red chillies. It is good for your tummies too.
    • Use one big onion if you don’t have small onions in hand. 
    • If you like the raw smell of onions & want more spicy, just temper & pour it on the chutney. No need to boil the chutney.
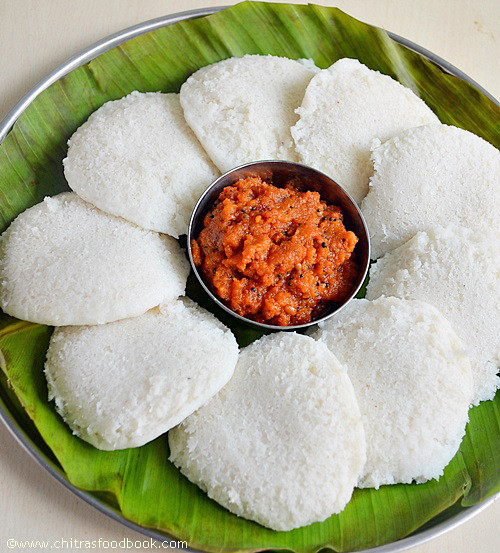
     Malligai poo idli with spicy hot vara milagai chutney for breakfast is a total bliss, Right?? 
    Continue Reading...