Search Chitra's Food Book

Showing posts with label COOKING ESSENTIALS. Show all posts

September 10, 2019

How To Cook Kerala Matta Rice In Pressure Cooker

how to cook kerala matta rice
Kerala matta rice also known as rosematta rice, vadi matta rice, palakadan matta rice, red rice, Kerala red rice, Kerala parboiled rice (Malayalam: കേരള മട്ട)is a healthy grain that is grown in Kerala and Karnataka regions. It is mainly consumed by people all over Kerala, Srilanka and coastal areas of Karnataka like Mangalore. As we all know, Kerala matta rice is a magnesium rich grain with immense health benefits. This rice can be cooked in a pressure cooker, microwave, electric rice cooker and in an open pot without cooker.

One cup of Matta rice contains 84 grams of magnesium, one gram of calcium, one gram of fiber with 160 calories. It also contains vitamins. Though this red rice is different from brown rice, it has equal health benefits. Just like the usual polished white rice, this red rice can be used to make idli, dosa, appam, murukku and snacks. It can be consumed mixing with kuzhambu, sambar, rasam and non-veg curries. More than all these recipes, matta rice porridge is a most popular and healthy baby food.

Apart from this, Kerala matta rice is good for people having Type 2 diabetes, heart diseases and osteoporosis. It makes you feel full for long time. Rice gruel is given to babies. Every year during Onam festival, I used to make Sadya at home for our lunch. I cook Kerala Matta rice easily in a pressure cooker. Washing the rice & soaking for minimum one hour is essential for cooking this rice perfectly. Ok friends, lets see how to cook Kerala red rice with step by step pictures.

Check out all my Kerala Recipes

how to cook kerala matta rice in cooker

How to cook Kerala Matta Rice in a pressure cooker


How to cook Kerala Matta Rice in a pressure cooker

How to cook Kerala Matta Rice in a pressure cooker / How to cook red rice in a cooker


Cuisine: Kerala
Category: How to
Serves: 3
Prep time: 120 Minutes
Cook time: 30 Minutes
Total time: 150 Minutes


INGREDIENTS
1 cup - 250ml
  • Kerala matta rice / Kerala red rice - 1/2 cup
  • Water - 2.5 to 3 cups
HOW TO COOK KERALA MATTA RICE
  1. Wash the matta rice thrice in water.
  2. Soak in enough water for 2 to 4 hours or overnight.
  3. Color of the rice turns pale white after soaking.
  4. Drain the water and take the rice in a pressure cooker.
  5. Add 2.5 to 3 cups of water. Keep the flame high till vapor comes off through nozzle.
  6. Put the weight valve and lower the flame completely.
  7. Cook for 5 whistles in low flame. Switch off the flame.
  8. Open the cooker after the steam is released.
  9. Strain the excess water through a colander.
  10. Fluff the rice and serve. You can drink the rice cooked water (gruel).
  11. Serve the hot rice with sambar, theeyal or any non-veg curry.
KERALA MATTA RICE - STEP BY STEP PICTURES
  • Wash the Kerala matta rice/ red rice twice or thrice till the water color changes from red to pale white. Soak in enough water for minimum one hour to maximum over night.
  • how to cook kerala matta rice in cooker
  • Color of the rice changes to pale white after soaking. Drain the excess soaked water and take the rice in a pressure cooker.

  • Add 2.5 cups of water (Rice : water = 1: 5). Mix well and close the cooker. Keep the flame high till vapor starts to come off through the nozzle.
  • how to cook kerala matta rice in cooker
  • Put the weight valve and lower the flame completely. Cook in low flame for 5 whistles. It takes 15 to 20 minutes.

  • Switch off the flame. Open the cooker after steam is released. Take a vessel and place a colander / sieve over it. Strain the cooked water. Its known as rice gruel.
  • how to cook kerala matta rice in cooker
  • You can drink it adding a pinch of salt. Its very healthy. Take the cooked rice and press it with your fingers. If it becomes mushy, rice is cooked well. Remove the rice from colander and transfer to a bowl. Serve hot with sambar, theeyal, rasam etc. Enjoy ! how to cook kerala matta rice in cooker
  • Note

    • Wash the rice thrice to remove the starch.
    • Color of rice changes to pale white after soaking for few hours.
    • Soaking is mandatory. Minimum one hour is necessary.
    Enjoy this flavorful, healthy Kerala matta rice for your lunch and stay fit !
    how to cook kerala rice


    Continue Reading...


    September 26, 2016

    Cooking Tips For Working Women – Indian Cooking Ideas

    Cooking tips for working women
    Friends, this post is all about useful cooking tips for Indian working women, beginners in cooking, bachelors, stay at home moms with babies in hand and for house wives who wish to finish the morning chores quickly and easily without any tension .These pre-preparation ideas would help you feel relaxed and manage to do quick and easy cooking during the busy, hectic weekdays. 

    Recent days I have been getting mails to share some simple lunch menu ideas for busy weekdays by spending less time in kitchen. Very soon I will start a lunch menu series suggesting some easy and healthy Indian lunch recipes for daily cooking. Before that, I wanted to make a post about useful cooking tips & pre preparations to make the job easier.

    As I had worked for an year after marriage, I have seen and heard from my colleagues about the difficulties in managing home and career.Time management plays a major role here. For me, there was no problem at all as I was in a joint family. My in-laws did all the household chores and supported us very well.In this present day nuclear family setup, many people does not get the luxury of moral & physical support of elders to share cooking and other household responsibilities. So it would be really tiresome and stressful if we don’t plan things ahead. 

    I hope these simple, handy tips and tricks would  be helpful to make the kitchen chores easier and stress free. Don’t worry, these pre-preparations won’t eat your weekend’s relaxing hours. You may need to spend just 2-3 hours to finish all these works or you can get the help of your servant maid to finish this job quickly. This will save lot of time during busy weekdays.

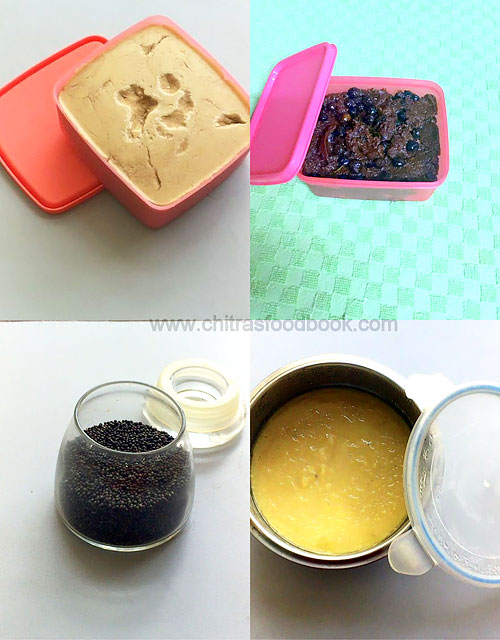
    Before going to this post, I must thank my friend Shalini for helping me to frame these points as she is regularly following these things. Love you lots dear !!.  She also shared some pictures from her kitchen. I have made them as a collage and given below. 

    Friends, I hope this post would be useful to plan & manage things easier. Working women and bachelors, please share your valuable tips you follow in your daily cooking in the comments section. It would be of great help for the people who read this post. Thanks in advance. Ok, now lets see some smart cooking tips and secrets to be a super wife and mom.This post is with more & more of stories and essays. Please bear with me.

    DISCLAIMER : All the points I have shared below is based on the ideas I got from my working friends. I have also gone through some websites and magazines for more tips. Please modify or skip the suggestions as per your wish & need. You need to have a refrigerator, pressure cooker and some good air tight containers to make & store the dishes.

    Cooking tips for working women Indian

    SOME USEFUL GADGETS

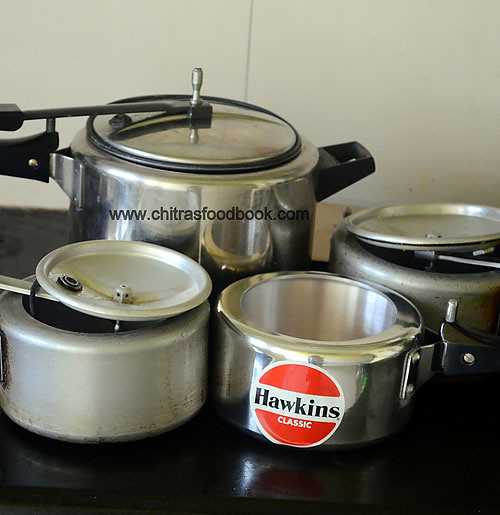
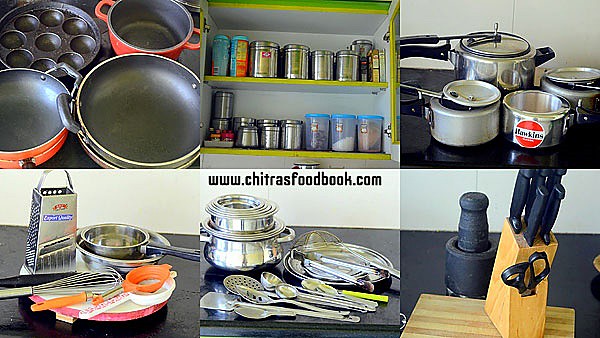
    According to me a 2 burner gas stove, 3 small pressure cookers, few ladles, mixing bowl and a mixer grinder is enough to cook even for 10 people. Pressure cooker is my biggest strength. It helps to cook any food quickly and easily. I have shared the pictures of  my cookers above for your reference. 

    I use 3 Hawkins small sized pressure cookers ( 1.5 liters and 2 liters) and one 5 liter cooker. I use 2 of them for lunch preparation and 1 for cooking breakfast. I use the big sized cooker only for my guest. I will share how I use these cookers for quick cooking in my upcoming lunch menu series.

    Cooking tips for working women - Indian
    Pic courtesy – My friend Shalini
    PLAN AHEAD

    Make a weekly timetable for the menu according to your family's preferences. Keep a list of all the dishes you want to cook in the following week and write down all the required ingredients so that you can purchase all the groceries and vegetables as per the list.If you don’t like to spend time in grocery shopping, go for a monthly purchase. 

    Refer my “Monthly Grocery list” post for the idea. You can buy vegetables once in 10 days and store them in refrigerator.  I follow this every month to save my time spent in shopping. 

    Please check the links below for the grocery, fruits and vegetables pruchase from Amazon. I am completely dependent on Amazon during this pandemic lockdown. All the below are affiliate links. If you use this link to purchase the products,  I would be getting a small percentage for sales. Thanks for your support. 

    Dal : https://amzn.to/2UymjQe

    rice : https://amzn.to/38LTZSB

    flours : https://amzn.to/38L3elU

    spices : https://amzn.to/36yeSxK

    Oils : https://amzn.to/3pxxVAZ

    Nuts : https://amzn.to/2IGnhae

    Pasta : https://amzn.to/3pxyjzr

    Toiletries : https://amzn.to/38OcGVM

    cleaning products : https://amzn.to/3f2baQS

    pooja items : https://amzn.to/32MmQlU

    ready mix : https://amzn.to/2UvQSpx

    miscellanous : https://amzn.to/36GRJti

    fruits : https://amzn.to/3kzIwI0

    vegetables : https://amzn.to/2K7FyxP 

    Diary products : diary products

    Spice powders : spice powders


    GRIND THE BATTER

    This point is especially for people who rely on Idli dosa recipes. Grind Idli dosa batter, Appam batter, Adai batter during weekend and store it for a week. You can even make millet idli, dosa batter and store it for one day. Idli, dosa batter is a real savior in Indian cooking. You can make idli, dosa, uthappam, Paniyaram for breakfast and dinner as well.

     Similarly you can also grind and keep batter for dosa varieties like Set dosa, sponge dosa, poha dosa etc. It will help you for sure. My friend Shalini's maid helps her to grind varieties of idli and dosa batters during every Sunday for the whole week's use.

    Even though I am a house wife, I too grind all the batters during weekends and use it mainly for the week's breakfast because I don't want to hit my head thinking about breakfast recipes during busy morning hours. Generally I make Instant dosa varieties, Instant idli varieties like oats idli, rava idli, upma recipes like wheat rava upma, vegetable rava kichdi, millet recipes, Ragi roti, Phulka or stuffed paratha varieties for my dinner. I try to avoid consuming rice at night.

    Check out my Idli varieties post for varieties of idli,dosa batter. Check out my easy dosa batter recipe too ! For other options, you can make instant dosa varieties, upma varieties for breakfast or dinner.

    MAKE ROTI DOUGH

    Make roti dough well in advance and refrigerate it. The kneaded dough will remain fresh for at least 2-3 days. You can make use of this dough for making roti , poori and stuffed paratha. Remember to store in an air tight box. Take only the required quantity of dough from the box and immediately refrigerate the leftover dough.  But try to use it within 3 days.

    PREPARE THE SIDE DISHES

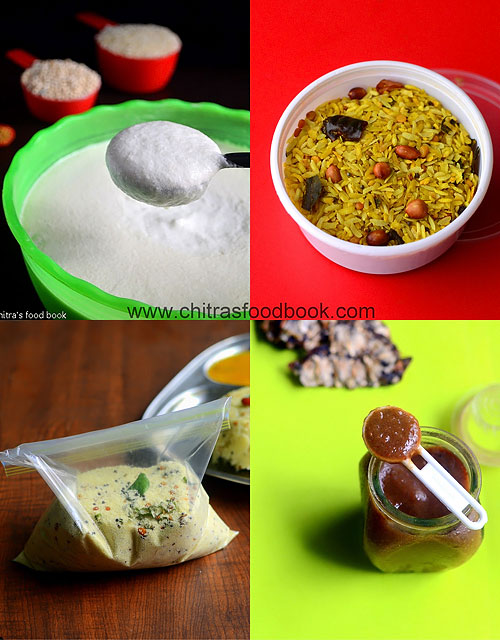
    When we have idli, dosa batter in our hand, we start to hit our head for making side dishes. That’s quite natural. So prepare some side dishes like tomato thokku without onion, tomato thokku with onion, onion tomato chutney, garlic chutney, Raw onion chutney, Idli Podi/Gun powdergreen chutney without coconut based on your preference and store in an air tight box. It will stay good for a week. You can use these chutneys as side dish for idli, dosa, appam and roti or use it as sandwich spread too.

    I usually make onion tomato chutney and stock it for my daughter’s breakfast and lunch box. For roti, you can prepare side dishes like capsicum-tomato curry, tomato thokku, pickles and even jam for your kids.  You can even cook Dal for making dal tadka or dal curry and refrigerate for 3 days. If you love to have pasta, you can make white sauce & pasta sauce ahead and store them.

    Check out my 50 chutney recipes for more ideas.

    For quick lunch, you can prepare and store Pulikachal paste/Puliyogare paste, Lemon rice paste, coriander thokku, thogayal varieties, Vathakuzhambu paste and podi/powder varieties like Dal powder/Paruppu podi, Dhania/coriander seeds powder, Angaya podi, Sundakkai podi, Poondu podi/Garlic powder, coconut podi etc.

    Kuzhambu varieties like vatha kuzhambu, poondu kuzhambu, milagu kuzhambu, kara kuzhambu, tomato gravy, brinjal gravy stays good for even 2 -3 days with or without refrigeration. So you can make them once or twice in a week apart from sambar and rasam.

    Check out my 30+ kuzhambu varieties post to get the links for the above recipes.

    READYMADE BREAKFAST MIX

    Roast rava and keep in bulk. It will help you to make upma quickly. You can also make Rava/sooji upma mix, Poha mix, pongal mix, rice upma mix in advance and store in the freezer. It helps you to make your breakfast or dinner quickly and easily. Always keep a packet of bread in stock for making quick sandwich or toast.

    CHOP THE VEGETABLES AND FREEZE

    Vegetables like carrot, beans, peas, cauliflower, sweet corn, cluster beans, spinach, broad beans can be diced or chopped & frozen for a week.If you want to use the vegetable for the next day morning, you can simply refrigerate the chopped veggies. Do not freeze them. 

    Usually I keep frozen peas and frozen corn always in stock. Grate 2 coconuts and store 3/4th of the quantity in a zip lock cover.Deep freeze it. Store the remaining coconut in refrigerator. Just thaw it for few minutes before use or use warm water to grind the coconut.

    Take the required quantity of coconut, refrigerate it and keep the remaining in freezer immediately. 
    De-stem coriander, curry leaves and mint leaves and store in an air tight box. Mostly I use palak leaves during weekdays as it is easy for cleaning, chopping and cooking. During weekends, I buy other greens/Keerai varieties, clean them and store in a ziplock cover.Do not chop onions and store. It attracts more bacteria when its cut.

    Apart from chopping veggies, you can make some lemon juice and store in a glass bottle, peel garlic cloves, Peel &finely chop ginger, peel small onions and keep them ready for usage. But remember to store the chopped vegetables in a clean zip lock cover and refrigerate.

    COOK PUREES, PASTE & LENTILS

    Cook toor dal or moong dal in large quantity, refrigerate/freeze and store in a box for 2-3 days use. Take the required amount and make sambar instantly. Soak beans like rajma, dried peas and chana for 8 hours and refrigerate them for later use.

     You can easily cook a quick meal like pulao,  biryani or gravies & even make a healthy salad with it. Sprout green gram and other legumes based on your liking and keep them in the freezer. So whenever you want to have some salad, you can semi cook and have them ready.

    Grind and keep tomato puree, homemade tamarind paste, ginger-garlic paste, onion paste, sauce varieties ready in hand. You can also keep some readymade seasoning, green chilli pasteSome people keep some sauteed, browned onions too. I have seen some of my friends making onion-tomato puree adding masala powders and keep the base ready for making North Indian gravies. If you have enough time in hand, you can even make two to three varieties of curries and refrigerate them.
     
    Vegetables like potato, cauliflower, sweet corn and peas can be boiled in advance and refrigerated for later use. You can even cook pasta and store them in the fridge.

    Keep curd, buttermilk, paneer, cheese and other essential milk products ready in hand so that you can use it for raita, buttermilk/ Chaas, lassi, gravies and sandwich.

    TO DO LIST

    I have summarized the above points and shared a TO-DO list for weekend. Do this according to your preference and time in hand.
    1. Grind idli, dosa batter and other batters if grinding.
    2. Make chapathi/ roti dough.
    3. Soak pulses & lentils like rajma, chana/ kabuli, peas.
    4. Chop all the required vegetables. Make frozen peas and sweet corn.
    5. De stem green leaves/Spinach, coriander leaves, mint leaves and curry leaves.
    6. Cook toor dal and moong dal in large quantity for making sambar & dal for roti.
    7. Make Tamarind paste, Tomato puree, Puliyogare paste, Tomato thokku, homemade powders like dal powder, curry leaves powder, coriander leaves thokku, thogayal varieties, Lemon rice mix, Chutney varieties according to your choice. ( I have shared the links in the above sections. please check it)
    8. Make white sauce and pasta sauce for cooking pasta recipes.
    9. Prepare rava/sooji upma mix, poha mix, dosa mix, pongal mix.
    10. Make onion tomato base for North Indian gravies.
    11. Purchase week’s grocery and vegetables.
    12. House cleaning if needed.
    Friends,I  hope this post will be helpful to you. Thanks for visiting this page !!

    Continue Reading...


    July 9, 2016

    How To Make Tamarind Paste – Tamarind Pulp / Puli Paste Recipe

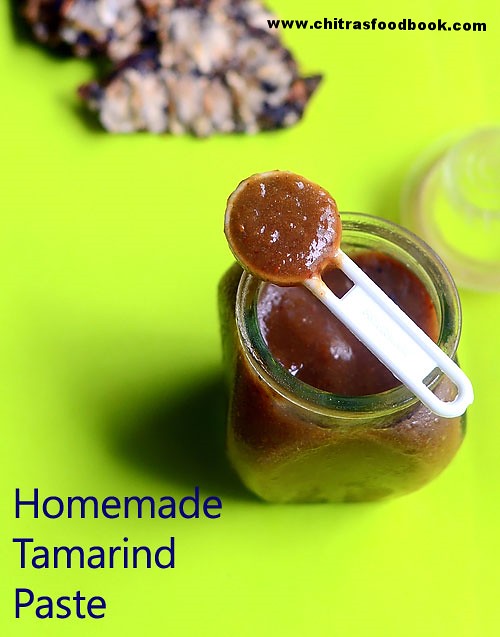
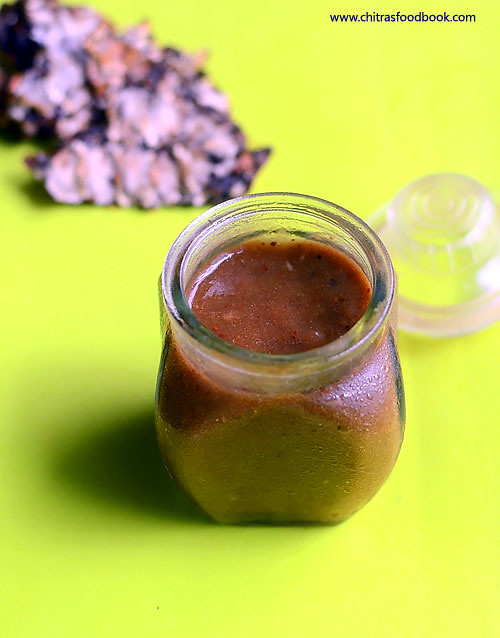
    Tamarind paste/Tamarind pulp  ( Puli Paste) is one of the most important ingredients for making sambar, rasam, vathakuzhambu in South Indian cooking. I have seen my friends buying tamarind paste from stores every month in their grocery purchase. But I don’t have the habit of using store bought tamarind paste as I am concerned about the use of preservatives. So I soak tamarind everyday before I start cooking and take tamarind pulp freshly. But most of the time I forget to soak and do it in last minute by heating the tamarind in water for quick soakingBatting Eyelashes. Recently when I was talking with my friend Shalini, she told about her homemade tamarind paste. She said its handy for quick cooking and the wastage of tamarind would be very much reduced. She told me to try it once to believeTongue.Last week I made tamarind paste just for 1 week usage and stored in refrigerator.As she told, its really useful and I am impressed with this. It saves more time especially while cooking during busy morning hours. I am sure it would be a big help for working women. You can make it in bulk quantity and preserve for months by keeping in refrigerator. It would be much better than store bought tamarind pulp. Lets see how to make tamarind paste at home and store it.

    Homemade Tamarind Paste


    Homemade Tamarind Paste How to make tamarind paste at home
    Cuisine: Indian
    Category: Coking basics
    Serves: -
    Prep time: 30 Minutes
    Cook time: 20 Minutes
    Total time: 50 Minutes


    INGREDIENTS
    1 cup - 250ml
    • Tamarind - 200gms
    • Water - 1 cup
    • Salt - as needed
    METHOD

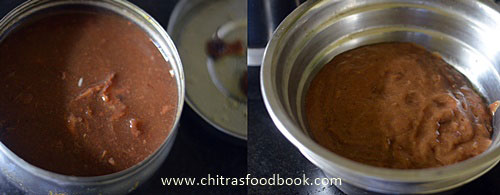
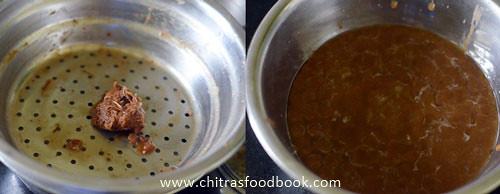
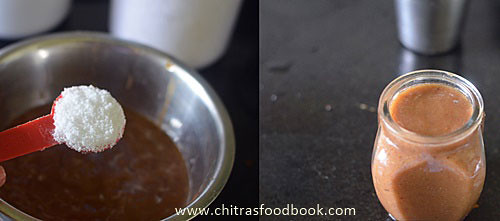
    • Soak tamarind in 1 cup of  hot water for 30 minutes to 1 hour. Tamarind will become soft and well soaked.Squeeze the tamarind and remove seeds, grits if any. ( If you feel, there are more hard shells/ grits, add 1/2 cup more water while soaking so that all the grits will settle down, remove the thick tamarind OR squeeze the tamarind hard so that the grits will settle in your hand)  Grind the soaked tamarind adding little water. Grind to a thick paste. Mix with the soaked water and transfer the paste through a colander and squeeze the paste well. Discard the waste if any.
    How to make tamarind paste
    How to make tamarind paste
    • Add the required salt and store in an air tight glass bottle ( preferably) and refrigerate it. You can follow this method if using the paste for one week to 10 days. If you want to preserve the paste for more than a week, proceed to the next step.
    Homemade tamarind paste
    • In a wide bowl, take the tamarind pulp and boil for 5 minutes in medium flame.  It may splash everywhere. So keep it closed and stir it once or twice in the middle carefully. Switch off the flame. Mix well and let the paste cool completely. Tamarind paste resemble like a cream.
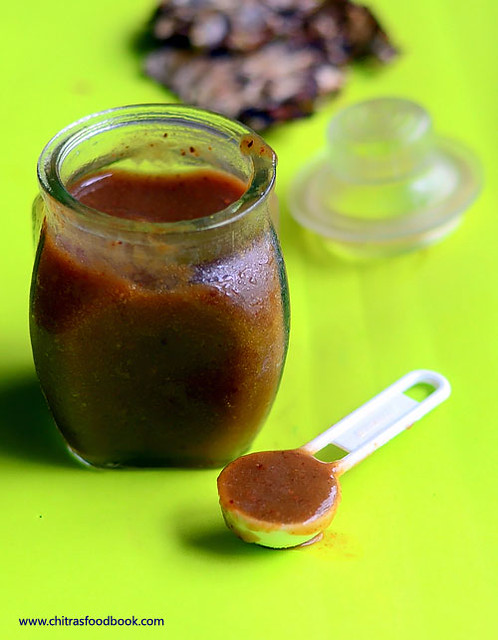
    • After the paste is cooled down completely, store in an air tight glass jar and preserve it for months. You can also keep it in a porcelain jar( Peengaan jaadi).
    • Add 1.5 tbsp of this paste for sambar, 2-3 tbsp for vathakuzhambu and 1 tbsp for rasam based on the number of serving.

    Note
    • You can preserve this tamarind paste for months only if its cooked.
    • If the pulp is raw, you can store it only for a week or max 10 days. 
    • You can add 1 tbsp of cooking oil to the paste while it boils which acts as a preservative. But I used only salt.

    Make your own homemade tamarind paste and use it for your quick cooking !
    Homemade tamarind paste
    Continue Reading...


    March 9, 2016

    Kitchen Utensils & Tools List For Home With PDF

    Kitchen utensils list

    In my previous post, I have shared the list of essential kitchen appliances needed for a home. In this post, you can find the list of Kitchen utensils required for setting up a new Indian kitchen. In this post, I have discussed the uses of utensils & kitchen tools and shared the list of all possible kitchen utensils & tools. I have segmented them under different categories namely Cookware, Storages, Serve ware, Bakeware and tools. But I have not recommended any brands. As I promised in my previous post, I have also shared a PDF of Kitchen appliances & utensils list. Please click on the link and download it, Its free. Do the changes as per your need. 

    All the utensils I have given here are not purchased in one day. You don’t need everything at the beginning of cooking too. It could be accumulated in months, years based on your requirement & usage. I referred this & this post for making the list. I hope this list would help beginners to arrange their new kitchen. Wishing you all the very best. Happy cooking !!

    Click HERE to view & download the PDF.

    I have given affiliate links for all the utensils from Amazon with links and pictures.
    Here is my routine dialogue : Friends, take this list as a guidance and buy the utensils which is of use to you. Even I don’t have many of the tools & utensils listed here. Its just the collection of all possible kitchen utensils & tools. If you feel anything important is missed here, please share it in comments section. I will update it. Thanks for visiting this page.Leave your feedback about this list. It would make me even more happy.

    Click HERE to view & download the PDF.

    Click HERE to view Kitchen appliances list with brand recommendations.


    USES OF UTENSILS
    • A kadai/Skillet is used for stir frying, sauting, cooking and boiling. You can use stainless steel or Non-stick or ceramic kadai. But an iron kadai is recommended for deep frying. So better buy a small sized or medium sized iron kadai too.Also try to buy the ones with sturdy handles and a transparent lid.
    • Tadka pan/ Mini kadai is used for seasoning Indian dishes.
    • Stock Pots, Saucepans and Stainless steel cooking pots can be used for boiling gravies, soups,stews,Cooking vegetables and greens. It would be better if its with transparent lid.
    • Thick bottomed milk pan  or Milk cooker – I prefer stainless steel ones.
    • Pressure cooker – For cooking rice,steaming vegetables. To me its the heart of utensils. I can cook any number of dishes if I have two cookers in hand.
    • Stackable stainless steel cooking pots in various sizes – Its mainly used for serving gravies,chutney & curries.
    • Cassorle/ Hot pack – To keep roti, idli, rice & gravies warm for hours.
    • Idli pot & Dosa pan for making idli & dosa
    • Appam pan/Paniyaram pan/ uthappam pan – For making appam, Paniyaram, Utappam
    • Glass bowls – If you have microwave, you can use it for reheating and cooking.
    • Big Stainless steel bowls or plastic bowls for making chapathi/bread dough, for rinsing vegetables.
    • Plates – For serving & covering the food
    • Ladles & spoon – For cooking & serving gravies,curries etc
    • Cups/Coffee cups/Water glass/Tumblers – For serving liquids
    • Tea pot / Flask – To keep coffee or tea
    • Measurement cups & spoons – Mainly needed for baking & sweets making.
    • Rice server and idli scooper – To serve rice & to remove idli.
    • Rolling pin & board - For making roti,Poori etc
    • Knives & scissors – To chop & cut ( Invest in good quality ones)
    • Peeler & grater – To peel the skin of vegetables , grater for grating cheese,vegetables
    • Scrapper – mainly used for coconut scrapping
    • Perforated frying spoon/skimmer/strainer for deep frying  [Hindi: jhaara/zara]
    • Tongs/Idukki in Tamil – Its mainly used for removing roti & papad from hot oil.
    • Locking tongs – For holding hot vessels
    • Whisk & churner – For mixing batter without lumps, whip curd and for mixing cake batter.
    • Big sized Storage containers for storing groceries & Dosa batter
    • Medium & Small sized containers for storing pickles, spice powders etc
    • Spice box/Anjarai petti – For storing whole spices
    • Masher – For mashing boiled potato, kichadi and other dishes.
    • Wire mesh – It is used to puff up roti, roast papad, brinjals etc


    Click HERE to view Kitchen appliances list with brand recommendations.

    COOKWARE
    q 


    SERVEWARE
    serveware
     
    STORAGES
    Storage containers

    BAKEWARE
     
    KITCHEN TOOLS
     
    MISCELLANEOUS
    FLOOR CARE & CLEANING ITEMS


    Click HERE to view & download the PDF.
    Continue Reading...


    January 4, 2016

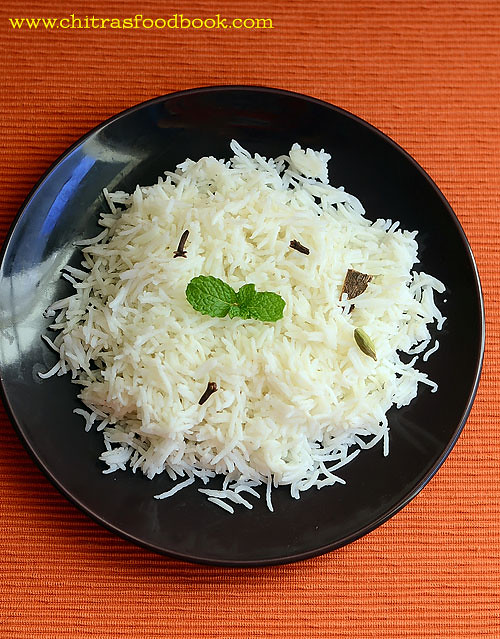
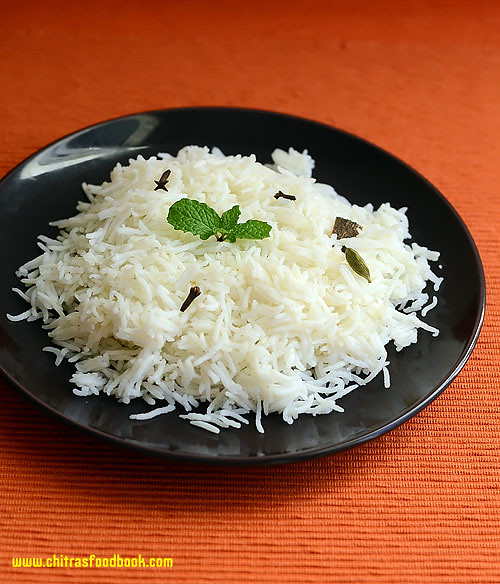
    How To Cook Basmati Rice For Biryani, Pulao In Pressure Cooker, Open pot, Microwave, Rice cooker

    How to cook basmati rice for biryani
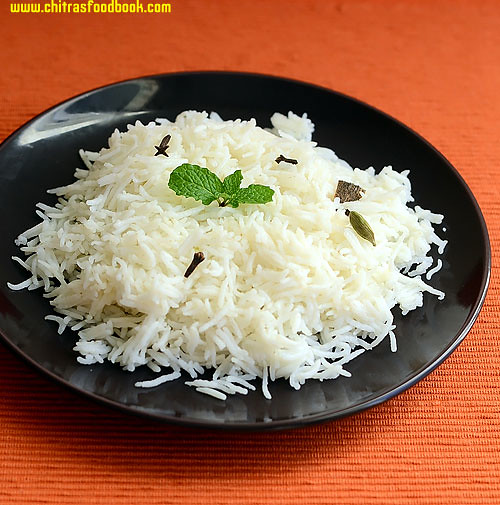
    In this post, I have shared how to cook basmati rice in a pressure cooker, open pot, rice cooker and Microwave oven.

    Basmati rice & Seeraga Samba Rice/Samba rice is one of the most important ingredient for making biryani and pulao recipes. This fragrant rice gives a nice flavor, aroma to the dish and makes it more special. Perfect cooking of basmati rice yields a fluffy, slender, long grain look that makes the dish more appealing to our eyes. So most of us always look for basmati rice cooking tips, correct water ratio, soaking time & proportions to cook it perfectly. Having tried more than 30+ Veg biryani recipes using basmati rice, I thought of sharing my observations and tips to cook a perfect basmati rice in various ways in this post. Cooking jeera rice/Seeraga samba rice is very simple. I have shared the details below.

    Basmati rice can be cooked in a pressure cooker, rice cooker or in a pot(Open or closed). Its cooking method completely depends on the dish we make. For making one pot biryani or pulao recipes, pressure cooker method or closed pot method is the best whereas for Dum biryani, open pot cooking is preferrable. I personally like to cook basmati rice using open pot method as we can have control over the cooking of rice and remove them without breaking. So in this post, I have shared how to cook basmati rice using pressure cooker, rice cooker, microwave and open pot method.

    There are many brands of Basmati rice available in the market. But I prefer & buy Kohinoor & India Gate basmati rice. Ok, enough of stories, lets see how to cook basmati rice perfectly with stepwise pictures and its health benefits at the end of this post.

    Points to note
    • You can use any brand of basmati rice but please read the back of packet for the instructions of cooking and water quantity to get a rough idea. This is the first thing you should do to cook a perfect rice.In this post,i have mentioned the water quantity for India Gate Dubar- Green color packet.
    • Basmati rice needs a minimum soaking time for 30 minutes to elongate while cooking. As a first step, try to soak the rice before you start making pulao/biryani. It is enough to soak it for a while you chop the veggies and do the grinding jobs if any.
    • You can whole garam masala like 1 cinnamom,2 cloves, 1 cardamom, 1 bayleaf, 1 star anise & 1 black stone flower in the water while cooking. 
    • Addition of lemon juice gives you the rice white in color. So wash the rice twice and add lemon juice while cooking to get the nice color.
    • If the recipe calls for more tomatoes or tomato puree, adjust the quantity of water accordingly.
    • In my observation, For 1 cup of basmati rice i.e.250ml
    Soaking time Water quantity
    No soaking 2 cups
    Less than 30 minutes  1.75 cups
    1 to 4 hours 1.5 cups
    More than 6 hours or overnight 1.25-1.5 cups

    How to cook basmati rice in cooker

    How to cook basmati rice


    How to cook basmati rice How to cook basmati rice for making biryani & Pulao
    Cuisine: Indian
    Category: Cooking basics
    Serves: 2 cups
    Prep time: 10 Minutes
    Cook time: 15 Minutes
    Total time: 25 Minutes
    INGREDIENTS
    1 cup = 250ml

    • Basmati rice - 1 cup ( India Gate Dubar-Green color packet)
    • Water -1.5 to 2 cups depending on soaking time
    • Salt - as needed
    • Whole garam masala( 1 cinnamon,2 cloves,1 cardamom,1 bayleaf,1 black stone flower) – optional
    • Lemon juice – 1/2 of small lemon
    FOR SAMBA RICE
    • Seeraga Samba Rice –1  cup
    • Water – 1.75 cups
    • Cooking oil – 1 tsp
    METHOD

    HOW TO COOK SEERAGA SAMBA RICE/SAMBA RICE

    Wash and add the rice to the cooker along with sauteed spices. No need to soak the rice. Add 1.75 cups of water for 1 cup of water. Pressure cook the rice in low flame for one whistle. Remove the rice after steam is released. Fluff it with a fork. Please check my Ambur biryani recipeDonne biryani recipe, Kovai Angannan biryani using samba rice.

    HOW TO COOK BASMATI RICE IN DIFFERENT WAYS
    • Pressure cooker method: Wash the basmati rice twice and soak it for minimum 30 minutes to maximum overnight. Soking helps the rice to elongate while cooking. So soaking atleast 30 minutes in necessary. Drain the soaked water(carbs would be removed) and put the rice inside the cooker. If you wish, roast the rice for 2-3 minutes in a kadai without breaking the rice. 
    • Take a pressure cooker and add 1.75 cups of water if you have soaked for 30 minutes to 1 hour. The quantity of water may differ based on the rice brands & soaking time. Check out the table above. Add a tsp of oil/ghee and squeeze the lemon juice in water. Put the weight valve when the steam is fully up. Lower the flame completely and cook the rice for one whistle. Remove the rice after the steam is released completely. Transfer it to wide plate. Drizzle a tsp of oil and let the rice cool down. Cover it with a lid to prevent drying.
    How to cook basmati rice
    How to cook basmati rice
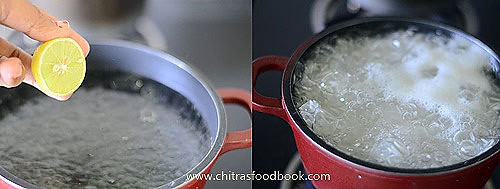
    • Open Pot method: Take the rice and wash it twice. Boil 5 cups of water for 1 cup of rice. When the water comes to a roll boil, add the whole garam masala, few drops of lemon jucie, washed & drained rice. No need to close the bowl. Let the rice cook in open pot in medium high flame for 4-5 minutes. Stir it once or twice in between. 
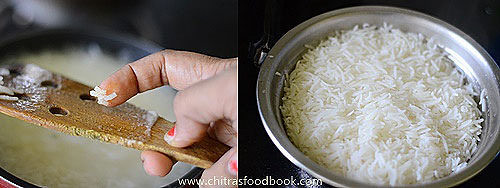
    • When the rice is cooked to 90% ( You should be able to break the rice), remove it and drain the excess water in a colander. Collect the hot water in a bowl. You can keep this bowl of water over the lid when you put the rice in dum. Spread the drained rice in a plate and add 2 tsp of oil. Cover it with a lid to avoid drying.
    How to cook basmati rice
    How to cook basmati rice
    • Microwave method: Wash and soak the rice for minimum 30 minutes. Keep it in a microwave safe bowl double the size of water quantity ( to avoid water spilling) and add 2 cups of water, a tsp of oil and few drops of lemon juice. Cover the bowl with a microwave safe lid. Cook in high power (800w) for 2-3 minutes. Take the bowl and stir the rice once. Again keep in high power for 2 minutes. Check whether the rice is done. Transfer the rice to a plate and cover it with a lid to prevent drying.
    • Rice Cooker Method:Wash and soak the rice for 30 minutes. Saute the spices as per the recipe and pour 2.5 cups of water for 1 cup of rice. After the water starts to roll boil , add the rice. Check for salt and cover cook for sometime.Cooker will automatically switch to “Keep warm” mode. Open the lid and check whether rice is cooked well.If not add 1/2 cup of water, mix well and again switch it to “cooking” mode. Please check my tomato rice recipe using rice cooker recipe for more details.


    Health Benefits of basmati rice
    Basmati is considered to be a Healthy”super grain”.It is gluten-free and low in fat. It contains all eight essential amino acids, folic acid, and is very low in sodium and has no cholesterol. Basmati has a low to medium glycaemic index, meaning that energy is released at a slower, steadier rate leading to a more balanced level of energy. Basmati rice builds body tissue and is very rich in prana or vital bio-energy. Basmati rice can be beneficial to certain groups of people. Those on low-calorie diets can benefit from incorporating this grain into their diets since it is so low in fat. However, at slightly over 200 calories per cup, the calories can pile up if not eaten in moderation.

    How to cook basmati rice for biryani
    Continue Reading...