Search Chitra's Food Book

Showing posts with label MICROWAVE. Show all posts

March 16, 2023

Butterscotch Mug Cake in a Microwave | Butterscotch Mug Cake No Egg

Butterscotch mug cake in microwave

Here is an easy and yummy eggless Butterscotch mug cake in microwave under 2 minutes. Usually I make one minute mug cakes frequently for Raksha’s cake cravings. But I gave a break for baking during Corona. So after 2 to 3 years, here I am with an easy mug cake recipe. This can be prepared so easily and quickly. Just collect all the ingredients, mix in a microwave safe mug and microwave it for 1 to 2 minutes based on the power. Tada, Its ready ! It comes out so soft, fluffy and spongy. 

In my family, both Sendhil and Raksha loves Butterscotch flavor when it comes to cakes or ice cream. But I love Vanilla flavor the most. As I had already shared One minute eggless chocolate mug cake, Vanilla mug cake, Red velvet mug cake and a brownie recipe in a mug, I tried butterscotch flavor this time.

I referred few Youtube videos and came up with this recipe. If you don’t have a microwave oven, you can make this cake in a pressure cooker or a kadai and cook for 10 minutes. You can follow the same recipe and use Vanilla essence instead of butterscotch. 

Lets see how to make this no egg Butterscotch mug cake in a microwave under 2 minutes. 

Butterscotch mug cake

Butterscotch mug cake recipe no egg


Butterscotch mug cake recipe no egg

Eggless butterscotch mug cake recipe in microwave under 2 minutes


Cuisine: Indian
Category: Cake
Serves: 1
Prep time: 5 Minutes
Cook time: 2 Minutes
Total time: 7 Minutes


INGREDIENTS

  • All purpose flour / Maida - 4 tbsp
  • Powdered sugar - 2 to 3 tbsp (adjust)
  • Cooking oil - 1 tbsp (Use flavourless oil)
  • Boiled milk at room temperature - 4 tbsp
  • Butterscotch essence - 1/4 tsp
  • Baking powder - 1/8 tsp
  • Baking soda - a pinch
  • Yellow food color - 2 drops
  • Sprinklers - to garnish
HOW TO MAKE BUTTERSCOTCH MUG CAKE
  1. Take a bigger sized, microwave safe ceramic mug.
  2. Add all the ingredients given above and mix well.
  3. Make sure the batter is flowing like a ribbon.
  4. Adjust the quantity of sugar by checking the taste of the batter.
  5. Keep the mug inside microwave and set the power to 800W and one minute time.
  6. After one minute, check the cake is raised well. Insert a toothpick and check if it comes out clean.
  7. If its sticky, cook it for another 30 seconds to 1 minute till the inserted tooth pick comes out clean.
  8. Remove the mug from the microwave and garnish with sprinklers. Enjoy when warm !
METHOD - STEP BY STEP PICTURES
  • Take a bigger sized microwave safe ceramic mug. This cake doubles in size. So use a big mug.

  • Add in the dry ingredients like maida, powdered sugar, baking soda, baking powder and mix well. Now add the wet ingredients like cooking oil, milk, butterscotch essence and yellow food color.

  • Mix well to make a thick batter that flows like a ribbon as shown in the picture. Take the mug and keep it inside the microwave oven.

  • Set the power to 800W and time to 1 minute. Batter doubles in size while cooking. Insert a toothpick and check if it comes out clean else cook for 30 seconds to 1 minute more.

  • Remove the mug and keep it for few minutes. Decorate with sprinklers and enjoy.

Note

  • Adjust the time as per the power of your microwave.
  • For me, it took 2 minutes to bake.
  • Do not skip any of the above said ingredients.


Try this easy mug cake and enjoy with a scoop of ice cream if you like.

Butterscotch mug cake recipe no egg

Continue Reading...


February 5, 2019

Microwave Vendakkai Poriyal – Lady’s Finger Curry In Microwave

Microwave vendakkai poriyal
Recently I started making vendakkai poriyal (Okra fry / Lady’s finger curry) in microwave. Its so easy to make and hassle free. I tried it in my own way by microwaving chopped onion and lady’s finger in high power for 8 to 10 minutes by tossing them twice in the middle. Then did the seasoning. It came out very well. The best part is you don’t have to stand nearby and keep sautéing to remove the slimy texture of vendakkai. Lady’s finger cooks so quickly in less oil. I am happy with my first attempt of making lady’s finger poriyal in microwave. You too give a try and share your feedback with me. Ok, lets see how to make vendakkai poriyal in microwave with step by step pictures.

Check out my vendakkai poriyal - stove top version, Lady's finger poriyal with tomato too !

Lady's finger fry in microwave

Microwave vendakkai poriyal recipe / Lady's finger curry in microwave


Microwave vendakkai poriyal recipe / Lady's finger curry in microwave

South Indian lady's finger poriyal in microwave


Cuisine: South Indian
Category: Main course
Serves: Serves 3
Prep time: 10 Minutes
Cook time: 20 Minutes
Total time: 30 Minutes


INGREDIENTS
1 cup = 250ml
  • Lady's finger / Vendakkai - 20 nos.
  • Big onion - 1
  • Sambar powder - 1 tsp
  • Turmeric powder - 1/4 tsp
  • Salt - as needed
  • Cooking oil - 1 tbsp
To Temper
  • Cooking oil - 2 tsp
  • Mustard seeds - 1/2 tsp
  • Urad dal - 1 tsp
  • Cumin seeds - 1/2 tsp
  • Curry leaves - few
HOW TO MAKE VENDAKKAI PORIYAL IN MICROWAVE
  1. Wash and pat dry lady’s finger with a towel. Chop into small roundels.
  2. In a microwave safe bowl, take the chopped vendakkai, chopped big onion, turmeric, sambar powder and salt.
  3. Add a tbsp of cooking oil and mix well to coat the vegetable.
  4. Microwave in high power (800w) for 6 to 8 minutes. Open the microwave once in 2 minutes and stir it well.
  5. Remove the lady’s finger after its cooked soft. In a small kadai, temper mustard, urad dal, cumin and curry leaves, add to the poriyal. You can add grated coconut if you like.
METHOD - STEP BY STEP PICTURES
  • Wash the lady’s finger. Pat it dry using a cloth towel. Chop into small roundels. Wash and peel the onion skin. Chop into small squares.

  • In a microwave safe bowl, take the chopped lady’s finger, onion, turmeric powder, sambar powder and salt. Pour a tbsp of cooking oil and mix well to coat the pieces.
  • microwave vendakkai poriyal
  • Microwave in high power (800w) for 2 minutes. Open the microwave and remove the bowl. Mix well. Again cook for 2 minutes.
  • Lady’s finger starts to cook and becomes slimy leaving out threads. Mix well and cook for 2 more minutes.
  • microwave vendakkai poriyal
  • Open and mix again. Cook till sliminess goes off and lady’s finger becomes soft. It shrinks in quantity too. It took total 8 minutes for me. Time may vary based on the power of your microwave oven.
  • microwave vendakkai poriyal
  • Once its cooked soft, remove. Temper mustard, urad dal, cumin seeds and curry leaves in a small kadai. Add to lady’s finger poriyal. Mix well and serve ! Optionally you can garnish the poriyal with grated coconut. 
  • microwave vendakkai poriyal

Note

  • You can red chilli powder instead of sambar powder.
  • For variations you can add one finely chopped tomato along with lady’s finger. It also helps to remove the sliminess quickly.


Try this easy vendakkai poriyal in microwave quickly and enjoy !


Continue Reading...


December 19, 2018

Eggless Apple Cake Recipe | How To Make Apple Cake (Microwave and convection oven version)

Eggless apple cake recipe

I tried this eggless apple cake recipe using wheat flour/ atta by watching Sanjeev Kapoor’s YouTube video. As this is my first attempt of trying an apple cake at home without eggs, I followed original recipe to the dot. Chef used wheat flour and maida in equal quantities. Cake came out so soft, moist and spongy. I should call it as apple cinnamon cake because cinnamon acts as the major flavoring ingredient. When the cake is baked, I could feel a nice fruit smell with cinnamon all over the house. We all loved it. 

During Christmas season, most of us like to bake a fruit cake at home. If you are bored with the regular dry fruits cake, you can try this eggless apple cake instead. The best part is you can make this cake in microwave mode, convection oven and in a pressure cooker as well. 

Actually I baked 3/4 th of the batter in convection mode and the remaining in microwave mode by keeping in a glass bowl. Both turned out great. Convection oven cake took nearly 40 minutes of baking time whereas in microwave it was done under 4 minutes. So you can bake this eggless apple cake in microwave mode or convection mode in your oven. 

If you want to bake the same in pressure cooker, it is also possible. Just spread 1 inch of powdered salt in a thick cooker bottom.  Put a small plate or slotted plate over the sand, preheat the cooker for 15 minutes in medium flame till salt is heated. Remove the gasket and weight valve from the lid and cover the cooker. After preheating, place the baking pan and cook for 20 to 30 minutes in low flame. Check with a tooth pick & remove after cooling down. This recipe is so versatile and it works great for all the baking methods.

Friends, do try this eggless apple cake recipe and share your feedback with me. Hope the step by step pictures can help you better. I will try to share the video recipe soon.

Check out my eggless orange cake, eggless dates cake with wheat flour, eggless christmas fruit cake recipe, eggless plum cake in pressure cooker, microwave fruit cake too.

How to make eggless apple cake


Eggless apple cake recipe


Eggless apple cake recipe

Eggless apple cake recipe with wheat flour , all purpose flour, butter and milk.


Cuisine: Indian
Category: Eggless cake recipes
Serves: 1/2 kg
Prep time: 10 Minutes
Cook time: 40 Minutes
Total time: 50 Minutes


INGREDIENTS

  • Apple - 2
  • Wheat flour / atta - 1 cup
  • All purpose flour / Maida - 1 cup
  • Powdered sugar - 1 cup
  • Baking powder - 2 tsp
  • Baking soda - 1/2 tsp
  • Cinnamon powder - 1/2 tsp
  • Vanilla essence - 1/2 tsp
  • Milk - 1 cup
  • Melted butter - 1/2 cup + 1 tbsp (150 gms)
  • Cooking oil - 1 tbsp
  • Water - 1/2 cup (to grind apple)
HOW TO MAKE EGGLESS APPLE CAKE
  1. Wash and chop apple into small cubes. Grind to a puree adding water.
  2. In a wide bowl sieve wheat flour, maida, baking powder, baking soda and cinnamon powder.
  3. In another bowl mix melted butter, milk, vanilla essence and apple puree.
  4. Add the sieved dry flours and mix without lumps. Lastly add 1 tbsp cooking oil and mix well.
  5. Transfer the apple cake batter to a greased baking pan. Bake in a preheated convection oven for 40 minutes. Check with a tooth pick and remove the cake after warm.
  6. For microwave apple cake, take 1/2 cup of cake batter in a microwave safe glass bowl.
  7. Cook for 4 minutes. Remove it by checking with a tooth pick. Enjoy when warm.
  8. Apple cake stays good only for 2 days. So try to consume it quickly.
METHOD - STEP BY STEP PICTURES
  • Wash and cut apple into small cubes. Grind to a smooth puree adding 1/2 cup of water. Set aside.

  • In a wide bowl, sieve wheat flour/ atta, maida, baking powder, baking soda and cinnamon powder. Keep it aside.

  • In another bowl, mix melted butter, milk, vanilla essence and apple puree.

  • Add sieved dry flour to the wet milk mixture. Add little by little and mix without lumps.

  • Batter should be thick and pourable. It will fall like a ribbon. Lastly add 1 tbsp cooking oil. Mix well.

  • Take an aluminum baking pan. Grease it with butter. Sprinkle maida all over the pan and dust off the excess flour. Pour the cake batter to the pan. Fill 3/4th of the pan. Pat the pan to level the batter and break the air bubbles.

  • Preheat the oven in convection mode at 180c. Place the baking pan and bake at 180c for 35 to 40 minutes. Cake rises and cracks on top. No issues. After 30 minutes, open the oven and insert a tooth pick or knife in the middle of the cake. If its sticky or with batter, bake for another 5 to 10 minutes. If the knife comes out clean, cake is done. Remove the baking pan and set aside to cool down.

  • After the cake becomes warm, run a knife around the cake and loosen the sides. Invert the cake in a plate and remove it. Make pieces and enjoy ! This cake stays good only for 2 days if kept outside. Refrigeration is not advisable because cake may become dry. So its better to consume soon.

  • FOR MICROWAVE APPLE CAKE : Take 1 cup of apple cake batter in a big glass bowl. Microwave in high power (800w) for 3 to 4 minutes. Check with a tooth pick and remove it. Invert in a bowl after cooling down.

Note

  • You can use wheat flour completely instead of atta and maida half and half. But cake looks dense and thick. Not fluffy as shown in the picture. You may need to add more baking soda too.
  • You can use brown sugar instead of white sugar for healthy options.

Try this eggless apple sponge cake at home and enjoy !
How to make apple cake without eggs

Continue Reading...


March 2, 2018

Instant Rabri Recipe In Microwave - Quick Rabdi Recipe With Milkmaid/Condensed milk

Instant rabri recipe
After trying mawa malpua successfully, I prepared this instant, easy rabri recipe to serve with malpua. Its a quick version with just 3 major ingredients using microwave. It can be done in 6 minutes. Basically Instant rabri can be prepared using milk powder, ricotta cheese, khoya or even with condensed milk and corn flour.

But today I have used Paneer / Chena, Milk and condensed milk / milkmaid to make this instant rabdi recipe. I followed Tarla dalal’s recipe. It came out really well. I won’t say its taste is equal to the authentic rabri, but it tasted good when served chilled. I used store bought paneer. This rabri tastes even better when you make it with fresh chena. If you are craving for rabri, you can make it this way and enjoy instantly. Lets see how to make easy rabri recipe in microwave under 6 minutes with step by step pictures.
instant rabri recipe in microwave

Instant Rabri Recipe Using Microwave


Instant Rabri Recipe Using Microwave

Instant rabri / rabdi recipe using microwave in 6 minutes.


Cuisine: Indian
Category: Dessert recipes
Serves: 4
Prep time: 5 Minutes
Cook time: 6 Minutes
Total time: 11 Minutes


INGREDIENTS

1 cup = 250ml
  • Boiled Milk - 2 cups ( Use Full cream milk)
  • Grated paneer or fresh chena - 1 cup
  • Condensed milk - 1/2 cup + 2 tbsp ( Use 3/4 cup more for sweetness)
  • Cardamom powder - 1/2 tsp
  • Kewra water or rose water - 2 drops
  • Saffron strands - Few (optional)
  • Chopped nuts  (Cashew, badam and pista) – 2 tbsp

HOW TO MAKE MICROWAVE, INSTANT RABRI WITH CONDENSED MILK

  1. In a microwave safe bowl, take milk, condensed milk/milkmaid, grated paneer, cardamom powder and rose water.
  2. Mix well and microwave in high power ( 800W) for 6 minutes.
  3. Mix it once in the middle after 3 minutes.
  4. After 6th minute, remove the bowl. Mix well.
  5. Transfer to serving bowl. Garnish with chopped nuts. Refrigerate for an hour. Serve chilled.

METHOD - STEP BY STEP PICTURES


  • Grate paneer and set aside.In a microwave safe bowl, take milk. Add grated paneer, condensed milk, cardamom powder and kewra water or rose water.
    insant rabri recipe in microwave
  • Mix well with a whisk or ladle. Microwave in high power at 800W for 6 minutes in total. Open it once in the middle at 3 minutes.
    insant rabri recipe in microwave
  • Mix well and again cook for 3 minutes. Remove, mix well and transfer to serving bowls. Garnish with chopped nuts. Refrigerate for 1 hour and Serve chilled.
    insant rabri recipe in microwave
  • Enjoy !

Note


  • Add more condensed milk if you need more sweetness.
  • Kewra water is optional. You can use rose water or saffron instead.
  • Rabri thickens after refrigeration. So you can add some milk to adjust its consistency while serving.
Try this easy, yummy instant rabri recipe for festivals and special occasions.Enjoy it serving with malpua, gulab jamun !
instant rabri recipe with condensed milk 


Continue Reading...


June 15, 2017

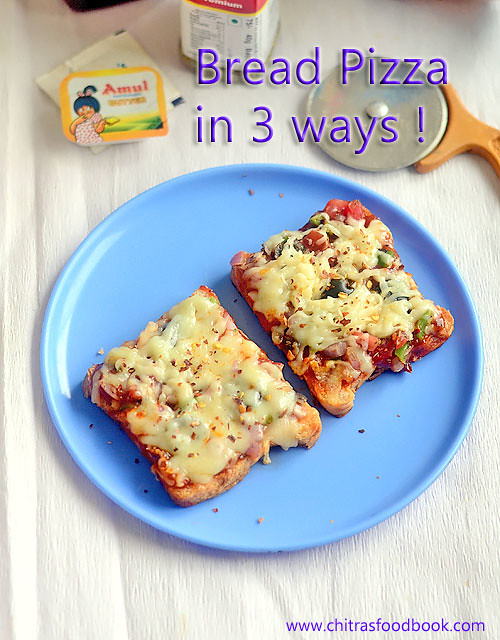
Bread Pizza Recipe On Tawa,Oven, Microwave With Video

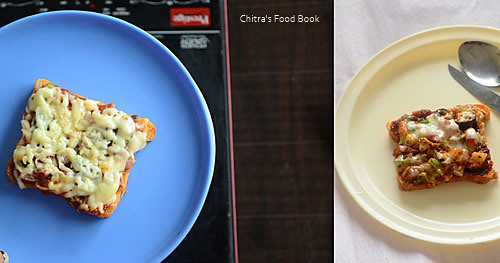
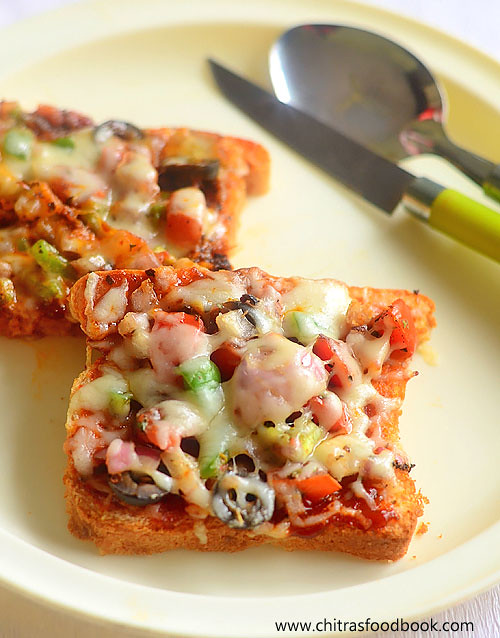
Bread pizza recipe on tawa, oven, microwave(with video)
Vegetable Bread Pizza is an easy and quick breakfast and snack recipes for kids.It tastes good with or without cheese.Actually Bread pizza can be made in 3 ways.It can be made without oven ie. in dosa tawa ( Stove top) or it can be baked in convection oven or microwave if you have at home. All are easy to make and tastes good in its own way.Its a great idea to use the leftover bread slices. I feel tawa and microwave options are easier as it takes less time to cook than baking in convection oven. But we should do it carefully as the chances of burning is more.This morning I prepared bread pizza recipe on stove top, oven and microwave just to make this post. I have shared all of the 3 methods below with a short video. Choose & try whichever is convenient to youHappy. I have used store bought pizza sauce and pizza seasoning/ spice mix. You can make it  just by using tomato ketchup & pepper powder. To make a pucca Indian version, sprinkle some garam masala powder or tandoori masala powder, marinated paneer cubes if you have in hand. You can top with lots of cheese for kids & without cheese if making for you & your husband ( If you are calorie conscious)Winking.Adding grated mozzarella cheese is just for attracting kids because taste of this pizza comes from the sauce, mixed vegetables and spice mix.Just play around with your favorite veg and non-veg toppings and enjoy it. Now lets see how to make this easy and simple recipe for vegetable bread pizza without oven( on tawa), microwave and convection methods with step by step photos and video.

Bread pizza on tawa

How to make bread pizza on tawa, oven and microwave


How to make bread pizza on tawa, oven and microwave Easy, yummy, kids friendly bread pizza recipe on tawa/stove top, convection oven and microwave methods
Cuisine: Indian
Category: Kids Recipes Indian
Serves: 5
Prep time: 10 Minutes
Cook time: 10 Minutes
Total time: 20 Minutes


Ingredients

1 cup - 250ml
  • Bread slices - 5 nos
  • Grated Cheese - 1/2 cup to 1 cup ( I used Amul Mozzarella cheese)
  • Capsicum - 1 no ( finely chopped)
  • Big onion - 1 no ( finely chopped)
  • Ripe tomato - 1 no ( finely chopped)
  • Black Olives - 5 nos ( sliced)
  • Boiled Sweet corn - 1/4 cup ( optional)
  • Pizza sauce or paste sauce or schezwan chutney - as needed ( I used pizza sauce around 3-4 tbsp)
  • Pepper powder - 1/2 tsp
  • Salt - a pinch
  • Chilli flakes - 1 tsp ( optional)
  • Oregano mix or pizza seasoning mix - 1 tsp

  • Butter - to grease the tawa & bread

Method

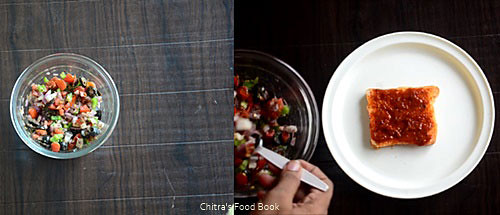
  1. To make bread pizza, wash and chop all the vegetables finely. Grate the cheese and keep aside.Take a bread slice and apply butter on both the sides.Keep in a plate.
    Bread pizza recipe without oven
  2. In a wide bowl, mix all the finely chopped vegetables, pepper powder, salt and pizza seasoning mix.Keep it ready.
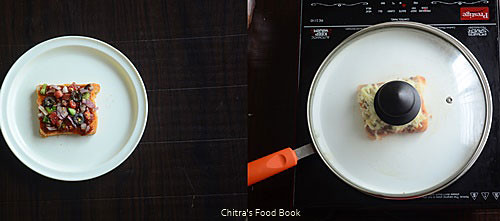
    Take the bread slice and apply the pizza sauce on one side.Spread the mixed vegetables. Top with grated cheese. You can either cook them on tawa/pan, microwave or bake in convection oven.
    Bread pizza recipe without oven
  3. Bread pizza in tawa : Heat a dosa tawa and apply some butter. Keep the loaded bread slice.Cover cook in very low flame for 3-4 minutes or until the cheese melts.Remove in a plate and serve hot. Cover cook is very important. If you don’t cover cook, cheese won’t melt and bottom of bread slice may burn.
    Bread pizza on tawa / Bread pizza without oven
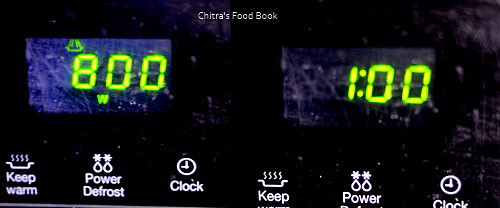
  4. Bread pizza in microwave : Place the bread slice in microwave and cook in high power( mine is 800w) for 1 minute or until cheese melts.If the power is less, it may take 1.5 to 2 minutes. If power is more, it can be done under 1 minute.So keep an eye.
    Bread pizza in microwave
    Bread pizza without oven
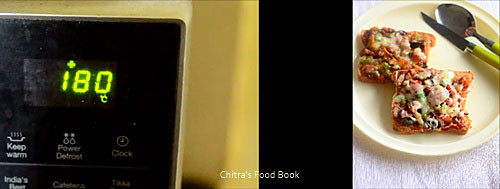
  5. Bread pizza in convection oven : Preheat convection oven in 180c. Keep the bread pizza in a baking tray. Bake it for 5 minutes at 180c. Cheese melts and the sides of bread slice turns slightly crispy. Remove and enjoy !
    Bread pizza baked in oven


Note

  • The quantity of chilli flakes, pizza mix and pepper powder depends on our taste.
  • You can add any number of toppings like paneer, mushroom, jalapeno, sweet corn etc..
  • Do not cook the pizza on open tawa, it takes long time for the cheese to melt.
  • Microwave bread pizza takes very less time to cook.If you keep for more time, pizza would burn.
Enjoy this easy, yummy bread pizza at home ! Kids would love it for sure !!
Bread pizza in oven


Continue Reading...


February 9, 2017

Microwave Oreo Cookies Brownie Recipe – Eggless Brownie In 2 Minutes

Oreo cookies brownie recipe
This is a super easy and quick eggless brownie recipe using Oreo biscuit in microwave under 2 minutes. I have already shared an eggless microwave Oreo cake which is a super hit recipe in my blog. After that, I couldn’t try and share any Oreo based recipes in my space.
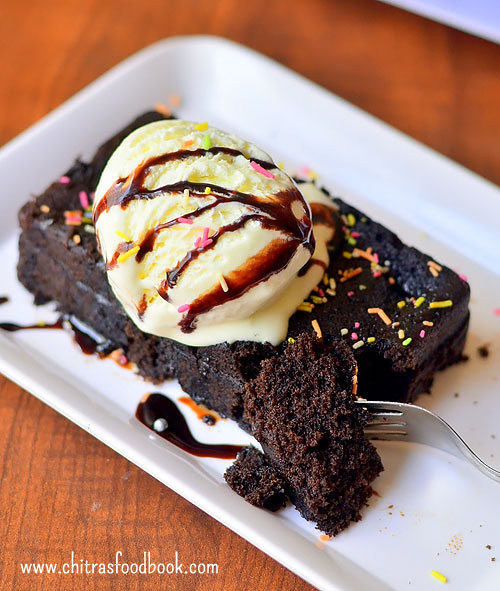
 For this Valentine’s day celebration, I wanted to post some simple, quick and easy recipes. When I saw this easy Oreo cookies brownie recipe in THIS video, I was so tempted to try it. This is my first attempt of making a brownie with biscuit base. It came out really well and tasted mildly sweet, chewy, soft and fudgy. Myself and Sendhil enjoyed it a lot. I served the warm brownie with a scoop of Ice cream and topped with some Hershey's chocolate syrup. Its a prefect dessert ! Our Valentine’s day celebration started with this brownie today. 

Friends, If you are looking for some quick and easy Valentine’s day recipes, this is for you. All you need is a pack of Oreo biscuit, milk, very little butter and baking soda. This is one of the best Oreo recipes ideas. Don’t hesitate to try it, just go on. Everybody would love its taste for sure. Ok, enough of hype, lets check how to make this eggless, microwave Oreo cookies brownie recipe with step by step photos and a video.

Do check out my 1 minute microwave brownie recipe too !


Oreo brownie recipe - eggless microwave

Microwave Oreo Brownie Recipe


Microwave Oreo Brownie Recipe Microwave Oreo Brownie Recipe - Eggless brownie recipe using Oreo Cookies under 2 minutes
Cuisine: Indian
Category: Brownie Recipes
Serves: Serves 2
Prep time: 5 Minutes
Cook time: 2 Minutes
Total time: 7 Minutes


INGREDIENTS
1 tbsp - 15ml ( 3 tsp)
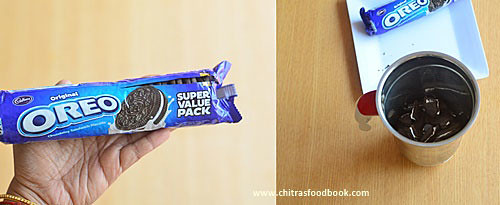
  • Oreo biscuits - 8 nos ( Original flavor)
  • Boiled milk - 3 tbsp + 1tsp ( optional) ( Milk at room temperature)
  • Softened butter - 1/8 tsp
  • Baking soda - A big pinch ( Half of 1/8th tsp)
METHOD

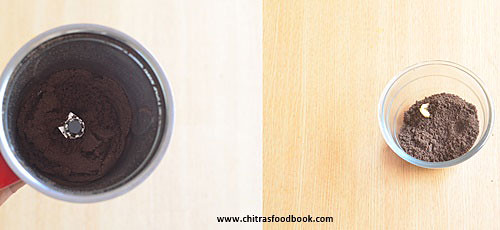
  • Grind 8 Oreo cookies with cream to a fine powder ( There was approx. 6-7 tbsp of powdered cookies). Transfer to a bowl.
    Oreo brownie recipe
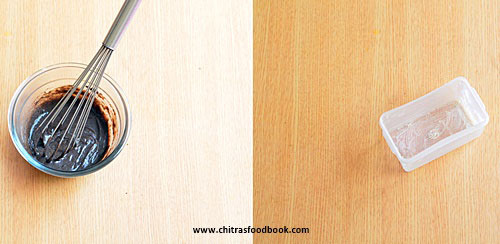
  • To this, add 1/8 tsp of soft butter( at room temperature). 
    Oreo brownie recipe
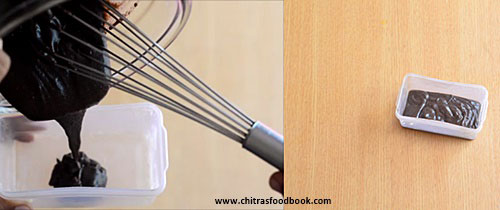
  • Add 3 tbsp boiled milk at room temperature and mix well with a whisk. If the batter is too thick, add 1-2 tsp milk. Quantity of milk should be half the quantity of powdered Oreo. Mix well and continue to add a big pinch of cooking soda. Brownie batter should be thick but pourable. Watch the video for reference.
    Oreo brownie recipe
  • Grease a microwave safe bowl with butter generously. Pour the batter and Pat it to level the batter.
    Oreo brownie recipe
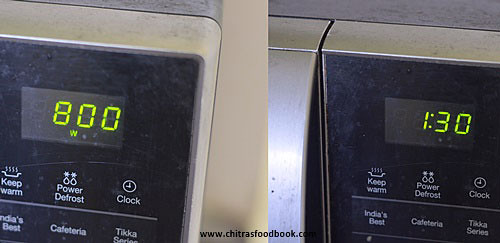
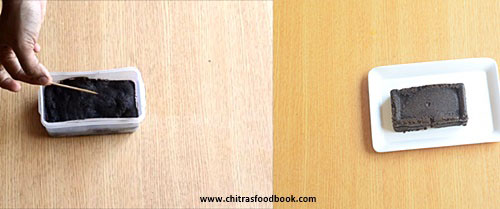
  • Microwave in high power (800w) for 1 minute 30 seconds. Insert a tooth pick and check it comes out clean or with crumbs. If not, keep it for another 30 seconds. It takes maximum 1 to 2 minutes to cook based on the power of microwave. Remove the bowl and let the brownie cool down for 2-3 minutes. Now run a knife along the sides of brownie and invert in a plate. It falls down easily.
    Oreo brownie recipe
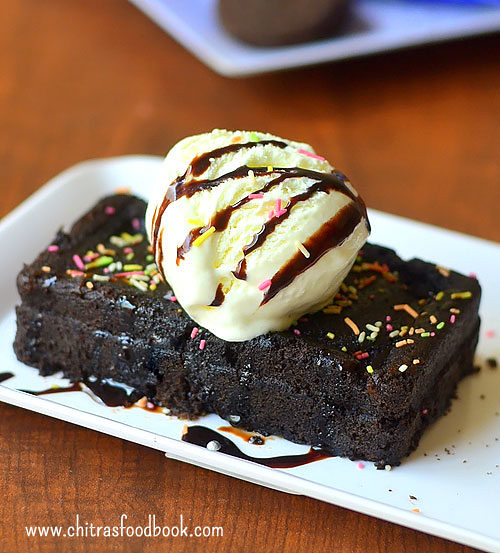
  • Top it with Chocolate syrup and garnish with sprinklers, Choco chips or nuts of your choice. Serve warm with a scoop of ice cream. Tastes yum with a mild chewy texture!
    Oreo brownie recipe
Enjoy !

Note
  • The consistency of brownie batter is more important to get perfect texture. If the batter is too thick, brownie comes out hard. If its too thin, brownie takes long time to cook.So make sure batter is thick but pourable.
  • I added 3 tbsp milk as per the original recipe and then added 1 tsp more milk as the batter was slightly thick.
  • Baking time varies as per the power of microwave. If its 900w, check the cake after 1 minute and continue cooking if needed.
  • For variations, u can add chopped nuts or Choco chips to the batter.

Enjoy this quick and easy, microwave, eggless brownie with Oreo cookies with a scoop of ice cream !Tastes delish !! Have a great Valentine’s day celebration with your loved ones. 
 oreo brownie recipe
Continue Reading...