Search Chitra's Food Book

Showing posts with label TIFFIN ACCOMPANIMENTS. Show all posts

October 5, 2021

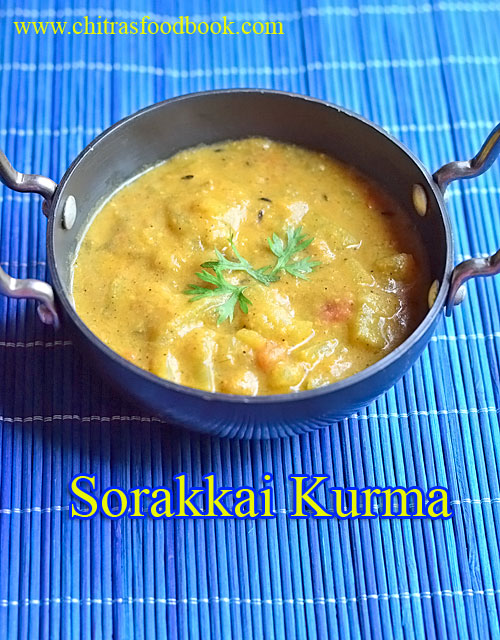
Sorakkai Kurma | Bottle Gourd Kurma Recipe

Bottle gourd kurma

I never imagined a kurma recipe with Bottle gourd (Sorakkai in Tamil, Lauki in Hindi) until I came across a YouTube video. In Bangalore hotels, I have tasted vegetable sagu for poori and set dosa with chow chow or turnip but I have never tasted kurma with bottle gourd.

Basically Bottle gourd is a bland vegetable with rich water content. So it can easily absorb the taste of the dish we add in. This kurma recipe I shared here is an easy, yummy South Indian style recipe that can be prepared directly in a pressure cooker just like my other Kurma varieties. It came out so well and tasty. We all loved it with soft chapathi. I am sure it will taste great with poori and dosa.

Friends, do try this Bottle gourd kurma / Tamil nadu style Sorakkai kurma for a healthy variation from usual kurma recipes. You will love it. 

Check out my

Sorakkai dosa

Sorakkai kootu

Sorakkai poriyal

Sorakkai sambar

Sorakkai paal kootu


Sorakkai kurma


Sorakkai kurma / Bottle gourd kurma recipe


Sorakkai kurma / Bottle gourd kurma recipe

Sorakkai kurma / Bottle gourd kurma recipe for chapathi, poori and dosa


Cuisine: South Indian
Category: Side dish
Serves: 4
Prep time: 10 Minutes
Cook time: 20 Minutes
Total time: 30 Minutes


INGREDIENTS
1 cup = 250ml
  • Bottle gourd – 1
  • Big onion – 1
  • Tomato – 1
  • Cinnamon – 1 inch
  • Cloves – 2
  • Cardamom – 1
  • Black stone flower – 1
  • Bay leaf – 1
  • Cumin seeds - 1/2 tsp
  • Red chilli powder – 1/2 tsp
  • Garam masala powder – 1/2 tsp
  • Salt and water - as needed
  • Coriander leaves - to garnish
To grind
  • Grated coconut – 1/4 cup
  • Fennel seeds – 1/2 tsp
  • Pottukadalai / roasted chana dal – 1 tbsp
HOW TO MAKE SORAKKAI KURMA
  1. Wash and peel the skin of bottle gourd. Cut and remove the center soft portion. Chop into small cubes.
  2. Grind coconut, fennel and gram dal into smooth paste.
  3. Heat oil in a pressure cooker base. Saute the whole spices.
  4. Now add the onion and saute till transparent.
  5. Add ginger garlic paste and saute for a minute.
  6. Add tomato and bottle gourd. Mix well.
  7. Add the ground coconut paste, red chilli powder and garam masala powder.
  8. Mix well and add little water. Pressure cook in low flame for one whistle.
  9. Open the cooker after the steam is released. Serve hot with chapathi, poori and dosa.
METHOD - STEP BY STEP PICTURES
  • Wash and peel the skin of Bottle gourd. Chop into small cubes.

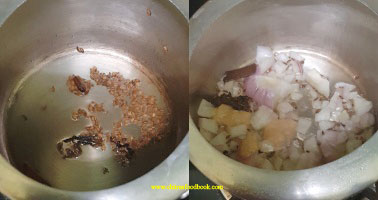
  • Heat oil in a pressure cooker. Saute cinnamon, cloves, bayleaf, black stone flower and cardamom. Add cumin seeds.

  • Add onion and saute till transparent. Add ginger garlic paste and saute until raw smell goes off.
    • Sorakkai kurma
  • Add tomato and saute till mushy. Now add turmeric powder, red chilli powder, salt and garam masala powder. Mix for a minute.
  • Sorakkai kurma
  • Lastly add the chopped bottle gourd pieces. Saute for a minute. Grind coconut, fennel seeds and gram dal to a smooth paste.
  • Sorakkai kurma
  • Add the paste to the cooker. Mix well and add little water. Do not add more water as bottle gourd itself leaves water while cooking. So adding more water makes the kurma watery. Pressure cook in low flame for one whistle. Open the cooker after the steam is released. Garnish with coriander leaves. Serve hot with chapathi. Enjoy !Sorakkai kurma

Note

  • For variations, you can grind green chilli instead of red chilli powder.
  • You can add ginger garlic while grinding instead of sauting ginger garlic paste.
  • Do not add more water while pressure cooking. Around 1/2 cup is enough.

Try this easy, yummy Bottle gourd kurma and enjoy with chapathi.

Sorakkai kurma recipe


Continue Reading...


April 3, 2018

Simple Idli Podi Recipe - How To Make Idli Milagai Podi At Home

Simple idli podi recipe
Idli milagai podi / Idli podi (Gun powder in English) is a must & should side dish for idli, dosa in every South Indian’s house. No matter about the varieties of chutney and sambar, we love to have at least one idli or dosa mixed with idli podi to finish our breakfast/dinner. 

Most of the time we manage to eat instant dosa varieties and idli varieties only with this idli podi as side dish. Even though we prefer homemade idli podi, sometimes I love to buy Sakthi or Aachi idli milagai podi just to enjoy its smooth texture because we grind it slightly coarse. 

Today I have come up with my MIL’s style simple idli podi recipe ( We call it as Ulutham paruppu molaapdi in Tamil) with 4 basic ingredients. Urad dal, chana dal, red chilli, hing and salt forms the base for this recipe. However you can make N number of variations in this podi recipe by adding garlic, sesame seeds, dhania (Coriander seeds), Jaggery, black urad dal, rice, tamarind, coconut and even horse gram and flax seeds.

 Remember the color of idli podi varies as per the red chillies and the way you roast it. Long back, I have already shared my mom’s most popular idli milagai podi with garlic. Soon I will try to share the remaining podi recipes with yummy variations. 

 Now lets see how to make this simple idli milagai podi recipe at home with easily available ingredients with step by step pictures.

Idli podi recipe

Simple Idli Podi Recipe - Idli Milagai Podi


Simple Idli Podi Recipe - Idli Milagai Podi How to make Idli milagai podi recipe for idli, dosa


Cuisine: Indian
Category: Podi recipes
Serves: 1 cup
Prep time: 5 Minutes
Cook time: 10 Minutes
Total time: 15 Minutes


INGREDIENTS

1 cup = 250ml
  • White, round urad dal - 1/2 cup
  • Chana dal - 1/2 cup
  • Red chillies - 25 nos ( I used long ones)
  • Hing / Asafetida - 1/4 tsp
  • Cooking oil - 2 tsp
  • Salt - as needed

HOW TO MAKE IDLI PODI - METHOD

  1. Heat 1 tsp of oil in a pan. Roast chana dal and urad dal in medium flame till golden.
  2. Remove in a plate. Add hing to it.
  3. Heat 1tsp oil in the same pan and roast the chillies till crispy and golden brown.
  4. Add the roasted chillies to the dal. Cool down. Add salt and grind everything to a fine or slightly coarse powder as you like.
  5. Store in an airtight box and enjoy with idli, dosa drizzled with gingely oil.
METHOD - STEP BY STEP PICTURES
  • Heat 1 tsp of oil in a kadai. Roast chana dal & urad dal patiently in medium flame till golden brown. Remove in a plate. Add hing to it.
  • Simple idli podi recipe

  • Heat 1 tsp oil in the same kadai and roast the chillies in medium flame. Do not burn the chillies. Remove when it becomes golden. Add to the roasted dal.

  • Simple idli podi recipe

  • Let the mixture cool down.  Add salt and grind to a slightly coarse powder or fine powder as you like.

  • Remove in an airtight box. Use clean spoon and serve with hot idli or dosa. It stays good for 15 days to 1 month. This idli podi tastes very spicy on the first day. But all the taste gets balanced from the second day and becomes good.

  • Simple idli podi recipe


  • Enjoy !

  • Note

    • Adjust the quantity of red chillies as per your taste.
    • For variations, you can  add 2 tbsp of dry roasted sesame seeds and grind it.
    • You can also add few raw garlic cloves while grinding.

    Try this simple idli podi recipe at home and enjoy with hot idli and dosa drizzled with sesame oil or ghee !
    Continue Reading...


    February 6, 2017

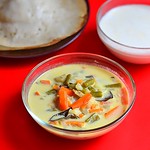
    Kerala Vegetable Stew | Ishtu Recipe – Side Dish For Appam, Idiyappam

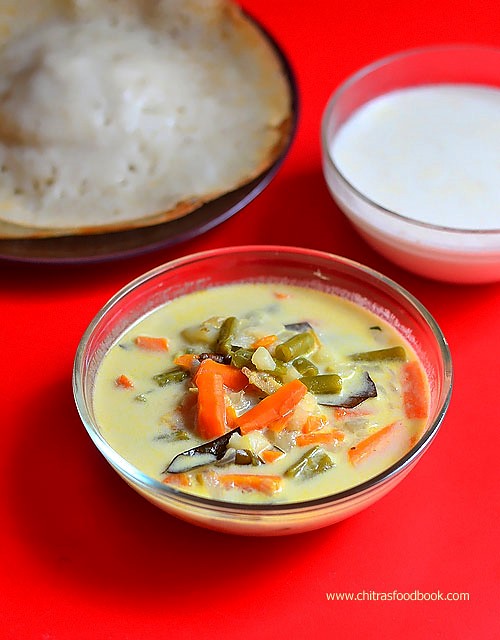
     Kerala Vegetable stew recipe
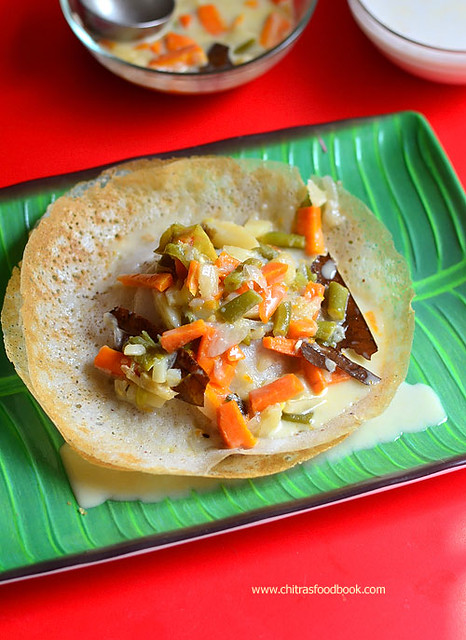
    Vegetable stew also known as Ishtu is one of the most popular side dish recipes served for Appam and Idiyappam/Noolappam in Kerala. I make appam at least twice in a month for breakfast as it is our family favorite. Usually I make mixed vegetable stew, potato kurma/ paya or onion chutney as side dish for appam. I learnt this stew recipe after watching a cookery show by a Chef in Raj TV. He addressed this recipe as “Restaurant style Vegetable Stew”. I got attracted by the title and wrote down the recipe in my cook book. Its a very simple & healthy vegetable stew recipe that looks colorful with awesome flavor and rich taste of mixed vegetables, coconut oil & coconut milk. I made this stew in pressure cooker to make my job easier.So its color was pale white but it tasted great. We loved it a lot with appam.This veg stew post was lying in my drafts for long time.So I thought of bringing out today. Friends, do try this easy, Kerala style vegetable stew recipe at home & relish it with appam or idiyappam for your breakfast. For variations, you can use potato instead of mixed veggies and make it as potato stew. Ok lets see how to make vegetable stew with step by step photos !
    Check out my other “Kerala Recipes” too!
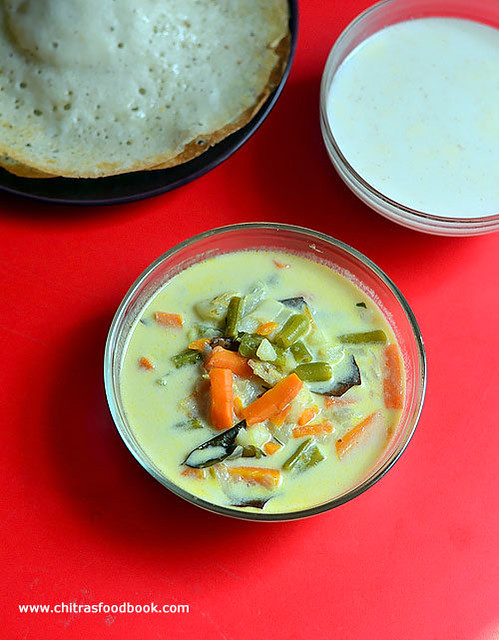
    Vegetable stew recipe

    Kerala Vegetable Stew Recipe


    Kerala Vegetable Stew Recipe How to make Kerala style vegetable stew recipe
    Cuisine: Indian
    Category: Side dish For Appam
    Serves: Serves 3
    Prep time: 10 Minutes
    Cook time: 20 Minutes
    Total time: 30 Minutes


    INGREDIENTS
    1 cup - 240ml
    • *Mixed vegetables ( Carrot, Beans, Potato) - 3/4 cup
    • Big onion - 1 no ( Slice thinly)
    • Ginger - 2 inch piece ( Slice it thinly or finely chopped)
    • Green chilli – 2-3 nos ( slit)
    • Thin coconut milk – 1 cup
    • Thick coconut milk – 1 cup
    • Salt – As needed
    • Sugar – A big pinch
    To temper
    • Coconut oil – 1 tbsp
    • Bay leaf - 1 no
    • Cinnamon - 1 inch piece
    • Cloves - 2 nos
    • Curry leaves – Few
    ** Carrot – 1 medium, Potato – 1 medium, Beans – 4 nos
    METHOD

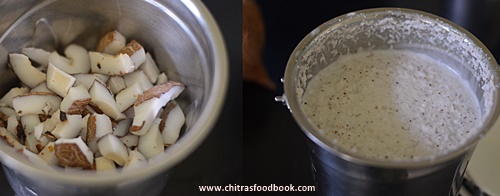
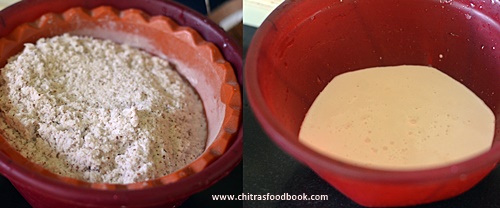
    • Grate or chop 1 coconut into pieces. Grind to a smooth paste adding 1 cup of water. Strain the thick coconut milk and keep it in a bowl. Again grind the coconut adding 1 cup of water.Take the second milk by extracting it. Keep in another bowl.
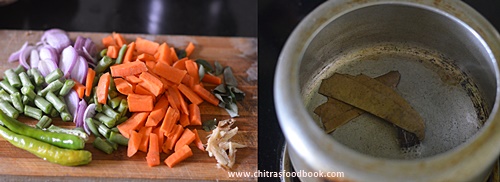
    • Wash and chop the vegetables of 1 inch length. Slit the green chilli, slice the onion.Chop the ginger into small pieces or slice it thinly.
      Vegetable stew recipe
      Vegetable stew recipe
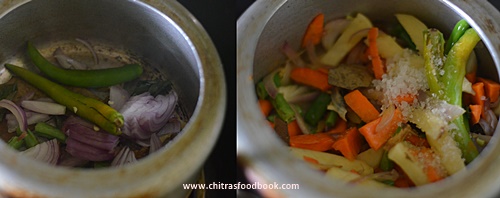
    • Heat coconut oil in a pressure cooker base. Saute bay leaf, cinnamon, cloves. Add thinly sliced onion, ginger pieces and slit green chilli. Saute till onion turns transparent. Make sure color of onion stays white and not brown.
      Vegetable stew recipe
      Vegetable stew recipe

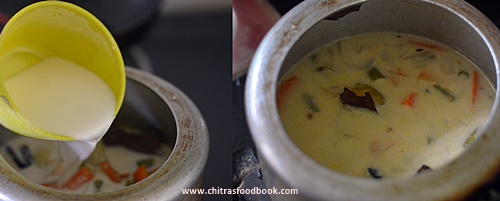
    • Then add the chopped mixed vegetables, a big pinch of sugar and saute for a minute. Sugar helps to retain the color of vegetables.Add the required salt and the second coconut milk.Mix well and close the cooker. Cook for one whistle in very low flame. It takes 7-8 minutes.Open the cooker after the steam is released.Veggies would be cooked soft.
    • Now add the thick coconut milk now and give one boil.Check for taste, add more salt if needed. Switch off the flame. Garnish with curry leaves and set aside. Give a standing time of 15 minutes and serve with appam/idiyappam.
      Vegetable stew recipe
    • Enjoy !


    Note
    • Add more green chilli for spicy taste.
    • Add cashew paste for thickness and richness to the stew. Grind 6 cashews and add the paste.
    • This stew has a mild masala flavor.
    • Coconut oil is very important for tempering. Do not skip it.
    Try this Kerala style vegetable stew with appam and enjoy !!
    How to make vegetable stew
    Continue Reading...


    December 7, 2015

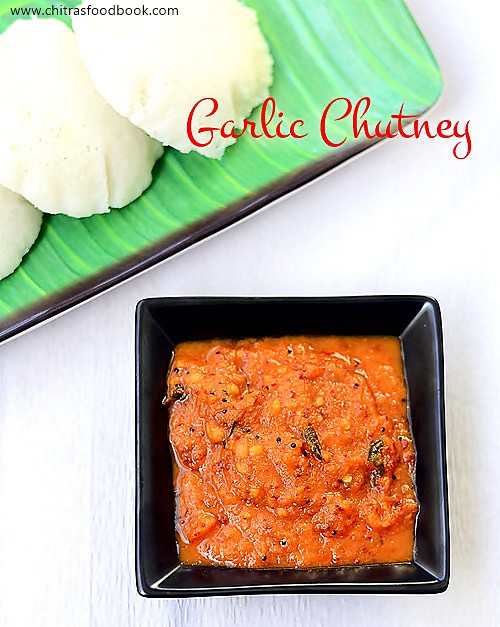
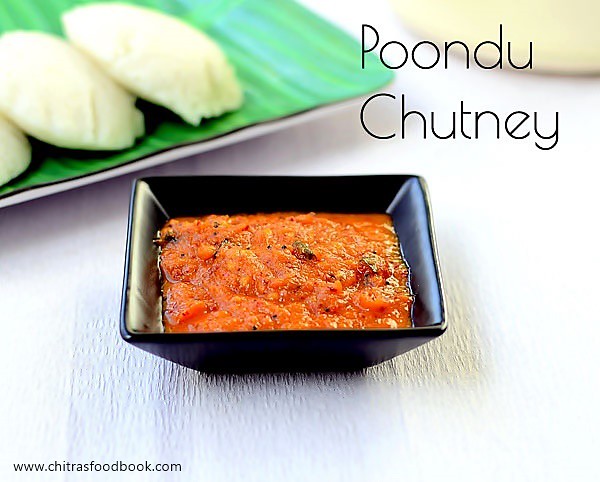
    Garlic Chutney Recipe | Poondu Chutney | Side Dish For Idli Dosa

    Garlic chutney recipe
    This is one of the chutneys I make for travel because it stays good for a day without refrigeration. My Dad loves this chutney a lot as it tastes spicy. Usually I add more onion and less garlic but this morning I tried the same chutney adding more garlic cloves and less onion. It was tasting great with idli & dosa.
    Garlic chutney (Poondu chutney in Tamil, Lahsun ki chutney in Hindi,Vellulli chutney in Telugu and Bellulli chutney in Kannada) for idli & dosa can be made in many ways. You could find varieties of poondu chutney in blogosphere. Some people add tomato & some use coconut. It can also be made as dry chutney just like my Poondu molapdi for Vendhaya dosa.
    The chutney recipe I have shared today is without coconut & tomato. Soon I will share the other variants of garlic chutney.In the mean time,check out my Poondu thogayal/Garlic thuvayal for riceeasy tomato garlic chutney for roti  if interested ! Lets see how to prepare this South Indian style onion poondu chutney for idli,dosa. 
    Poondu chutney recipe

    Poondu chutney/Garlic chutney recipe


    Poondu chutney/Garlic chutney recipe Poondu chutney for idli,dosa - How to prepare garlic chutney
    Cuisine: Indian
    Category: Chutney
    Serves: 2
    Prep time: 10 Minutes
    Cook time: 5 Minutes
    Total time: 15 Minutes


    INGREDIENTS

    • Small Garlic cloves - 10 - 12 nos ( peeled)
    • Big onion - 1 no
    • **Red chilli - 3 nos ( Use 4-5 for more spicy chutney)
    • Tamarind - 3 pinches
    • Salt & water - as needed
    To temper
    • Cooking oil OR Gingely oil - 1 tbsp
    • Mustard seeds - 1/2 tsp
    • Urad dal - 1/2 tsp
    • Curry leaves - few
    HOW TO MAKE POONDU CHUTNEY - METHOD
    • Peel garlic cloves and set aside.Peel onion and chop it.( **I used 2 spicy chillies & 1 byadgi chilli/Kashmiri chilli to get a nice color. You can skip byadge chilli and use normal chillies. But color of the chutney may vary slightly)
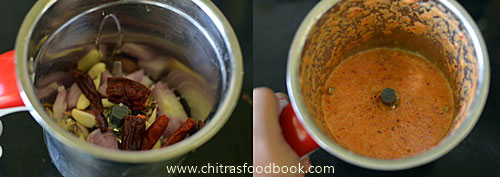
    • Take the chopped onion, peeled garlic cloves, pinched tamarind, pinched red chillies and salt. Grind it to a coarse paste without adding water. Then add little water and grind it to make a smooth paste.
    Poondu chutney for idli

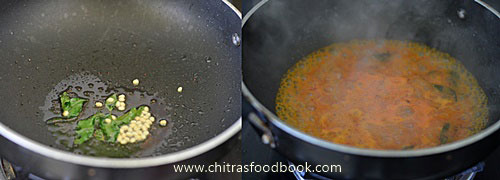
    • Heat oil in a kadai and temper mustard seeds, urad dal and curry leaves. Now add the ground chutney and boil for sometime till it becomes thick. Remove and serve hot with idli & dosa drizzling few tsp of gingely oil.
    Poondu chutney for idli

      This chutney stays good for a day or two without refrigeration if you make the chutney really thick without any moisture.So you can pack this for travel and njoy ! I hope it tastes good with roti too !
    Note
    • For variations,u can use 2 big onions & 7-8 garlic cloves and make this chutney
    • You can saute the ingredients in oil before grinding and temper at the end.
    • You can make the same chutney without using onions. In that case you must add more garlic cloves & tamarind to get more quantity.
    • Instead of tamarind you can use one ripe tomato while grinding.

    Enjoy this hot n spicy onion garlic chutney with idli & dosa drizzled with few tsp of gingely oil. 
    Tastes GR8!!
    Poondu chutney for idli


    Continue Reading...


    August 27, 2015

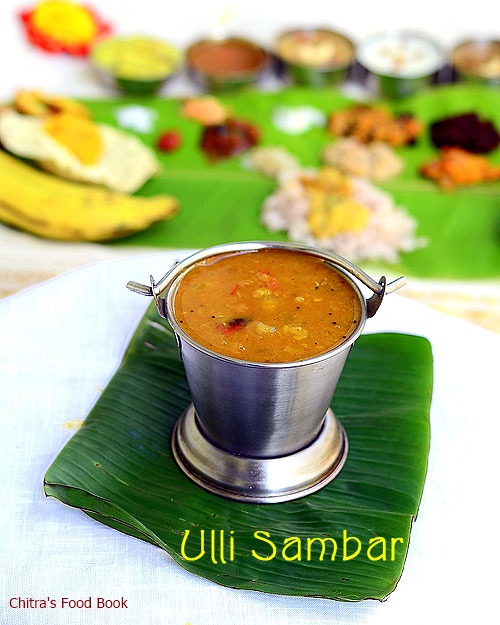
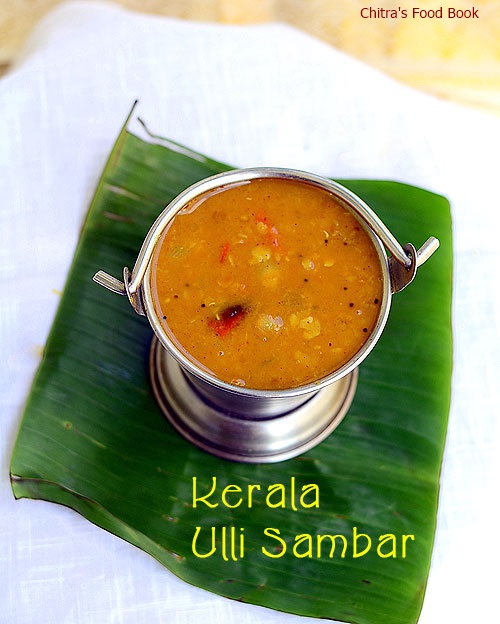
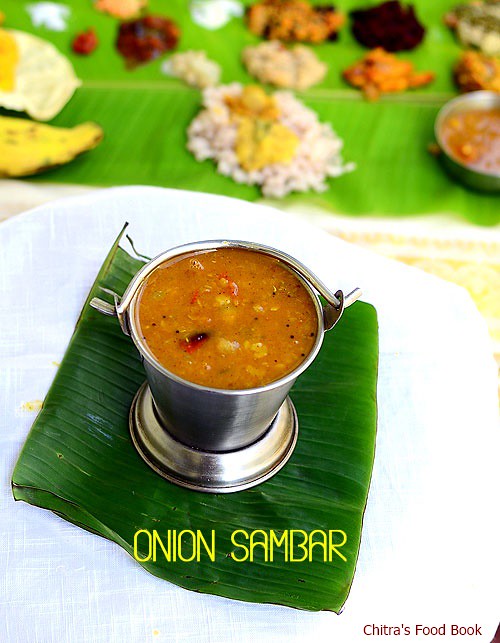
    Kerala Ulli Sambar Recipe - Kerala Sambar For Idli, Dosa & Rice

    For every Onam sadya menu,I love to try varieties of Kerala style sambar.I have tried Mixed vegetable sambar and Arachuvitta sambar. This year, I prepared Kerala Ulli sambar/Onion(Shallot) sambar without coconut for the first time from Kothiyavunu. It was easy to make without coconut, grinding job and tasted yummy just like restaurant style sambar. It was a good side dish for idli,dosa & tiffin varieties like pongal,upma and it was also a good accompaniment for plain rice.We loved this sambar very much.The highlight of this recipe is that the spice powders are roasted and mixed with the sambar at the end.It gives a superb flavor to the sambar and tastes more like hotel ones.You can try this sambar for mini idli.It tastes awesome with ghee.Do try this easy sambar recipe for this Onam sadya and enjoy.Lets see the preparation of Kerala style ulli sambar .

    Check out our Tamil nadu style Vengaya sambar recipe for rice.


    Kerala Ulli Sambar Recipe


    Kerala Ulli Sambar Recipe Kerala Ulli Sambar Recipe - How to make Shallot/Small Onion sambar for idli,dosa & rice
    Cuisine: Kerala
    Category: Side dish
    Serves: Serves 4
    Prep time: 10 Minutes
    Cook time: 20 Minutes
    Total time: 30 Minutes


    INGREDIENTS
    1 cup - 200ml
    • Toor dal - 1/2 cup
    • Tamarind - Medium lemon size
    • Coconut oil – 1 tbsp ( for sauting)
    • Small onion/Shallots - 20 nos
    • Green chillies – 1-2 nos
    • Curry leaves - few
    • Tomato - 1 no
    • Red chilli powder - 1 tsp
    • Coriander powder - 2 tsp
    • Sambar powder – 1 tbsp
    • Salt & water - as needed
    • Jaggery – 1/2 tsp
    To temper
    • Coconut oil - 1 tbsp
    • Mustard seeds - 1/2 tsp
    • Cumin seeds - 1/2 tsp
    • Hing/Asafetida - a pinch
    • Red chilli - 1 no
    To garnish
    • Coriander leaves - as needed
    METHOD
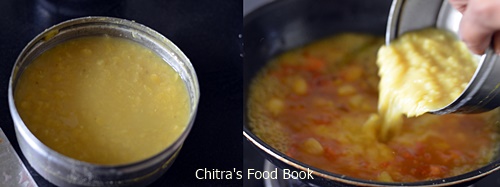
    • Soak tamarind in war water and take the extract using 1 cup of water.Pressure cook toor dal adding enough water,turmeric powder & a pinch of hing.Mash well and set aside.
    • Heat oil in a kadai and saute the small onions,green chillies,curry leaves till onion turns transparent. Add the tomato pieces,salt & saute till mushy.

    • Add the tamarind extract,turmeric powder and boil well. Add jaggery.After the onions are cooked well,add the mashed dal.

    • Heat oil in a kadai and when its heated , splutter mustard seeds,cumin seeds,hing,sambar powder,red chilli powder & dhania powder.Mix well in medium flame and add everything to the sambar.Boil well for a minute.Add raw curry leaves.Switch off the flame and garnish with coriander leaves. Enjoy !

    Visit my Onam Sadya recipes here

    Note
    • Make sure you don’t burn the masala powders while roasting.
    • Adding them at the end is the highlight of this ulli sambar.So do follow the same.
    • Add more chilli powder & sambar powder as per your taste.
    • You can also add big onions if you don’t have small onions in hand.But small onions gives the nice flavor.
    Enjoy Kerala style Ulli sambar with by mixing with plain rice & ghee.It can also be had with Idli,dosa & pongal !


    Continue Reading...


    August 17, 2015

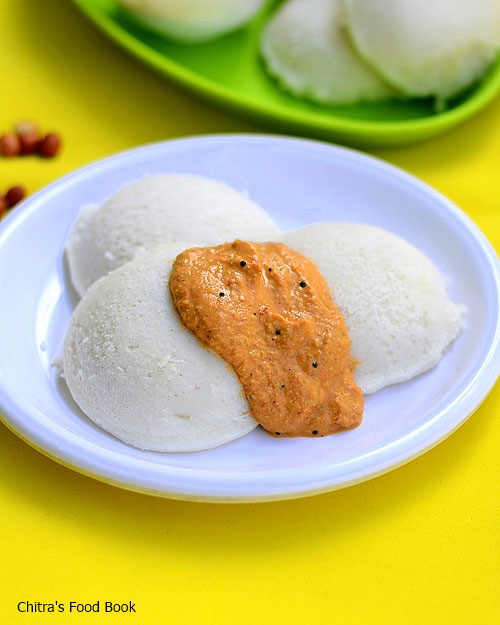
    Tomato Peanut Chutney Recipe | Andhra Style Palli Chutney Recipe

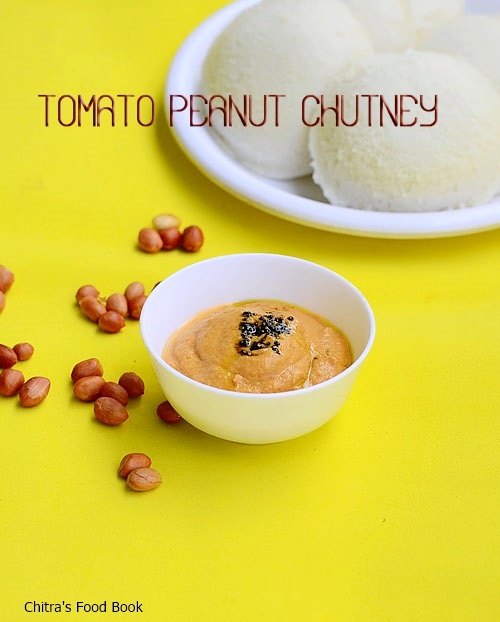
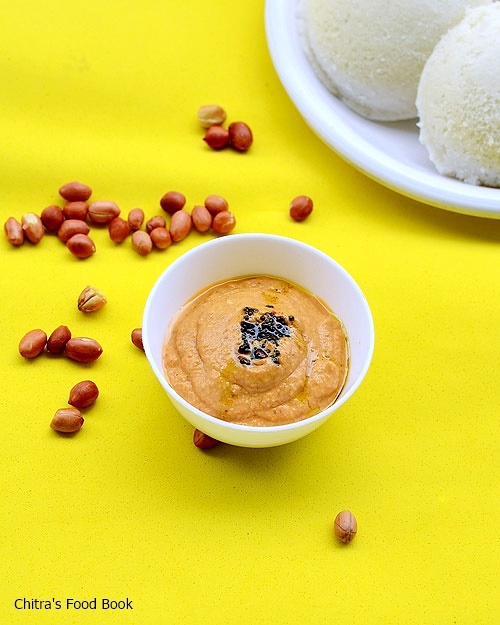
    Sendhil loves chutneys made using groundnut. I usually make Peanut/Groundnut chutney in this way. I was looking for a Peanut/Kadlekai chutney with the combination of tomato & red chillies but without onion. I came across this recipe in Sailu’s kitchen. This tomato peanut chutney without onion tastes great for idli, dosa. 

    In Andhra, this chutney is known as Palli Pachadi. I tried it by adjusting the quantity of chillies as per my family’s taste. It came out very well. Sendhil loved it a lot with hot idli. It tasted great for dosa as well. Friends, do try this chutney recipe if you are a peanut lover. You will make it very often. 

    Color of this chutney may vary if you use more chillies & tomato. Lets see how to make this yummy Andhra style side dish for idli dosa - tomato palli chutney. I forgot to tell you – It’s a no onion no garlic recipe . I am happy to add this chutney to my 35 chutney recipes collection . 

    Andhra Tomato Peanut chutney Recipe


    Andhra Tomato Peanut chutney Recipe Peanut chutney adding tomato--Palli Pachadi in Andhra style !
    Cuisine: Andhra
    Category: Side dish
    Serves: 2
    Prep time: 10 Minutes
    Cook time: 10 Minutes
    Total time: 20 Minutes


    INGREDIENTS

    • Groundnut/Peanuts - 1/4 cup
    • Tomato - 2 nos ( small) OR 1 big
    • Red chillies - 2 nos 
    • Green chilli - 1 no
    • Tamarind - a pinch (optional)
    • Salt &water – as needed
    To temper
    • Cooking oil - 1 tbsp
    • Mustard seeds - 1/2 tsp
    • Curry leaves - few
    • Hing/Asafetida -a pinch
    HOW TO MAKE TOMATO PEANUT CHUTNEY - METHOD
    • Roast the peanuts in medium flame for 5 minutes till it turns crispy. I roasted in microwave high power for 3 minutes.Rub the skin and take the groundnuts in a plate.
    • In a kadai,heat oil and saute the red chillies,green chillies, tomatoes until tomato turns mushy. Lastly add the roasted peanuts,tamarind and salt. Switch off the flame and let it cool.Grind it to a smooth paste adding water.
    • Temper mustard seeds, hing & curry leaves. Add to the chutney !Serve with idli,dosa.

    Enjoy !
    Note
    • Add more chillies if you like spicy chutney.
    • I sauteed the green chillies too. But the original recipe called for using raw chilli.

     Enjoy this yummy chutney with idli,dosa !


    Continue Reading...


    May 26, 2015

    Udupi Sambar Recipe-Hotel Style-No Onion No Garlic Sambar

    Udupi hotel sambar
    Last week I tried this Udupi hotel sambar recipe for idli and that too without onion,garlic brahmin version after years.I came across this recipe in “The Hindu” Food safari section.The recipes I have tried from that section is always a super hit in my home.The best example is my soft kulcha recipe.The taste & cooking method of this udipi sambar is very close to my Hotel idli sambar using freshly ground sambar powder.So Sendhil & myself liked it a lot and relished with idli,dosaHappy.Try this recipe if you are looking for a no onion no garlic side dish for idli,dosa & pongal.You will love it !Lets see how to make this Karnataka Udupi's most popular sambar recipe with step by step pictures.
    Continue Reading...


    February 11, 2015

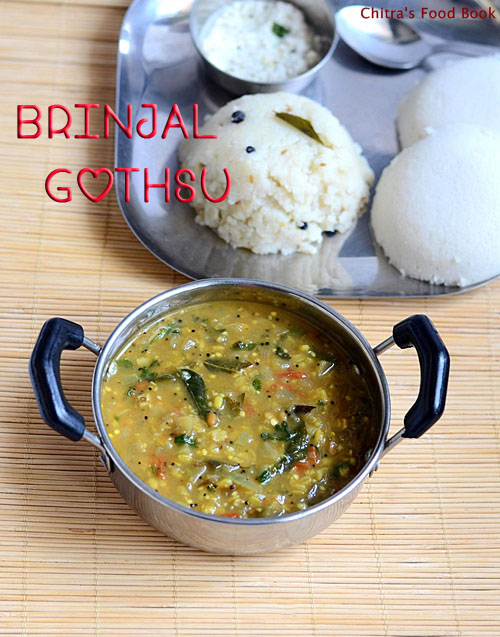
    Easy Brinjal Gothsu/Kathirikai Gothsu Recipe For Idli, Pongal

    Brinjal gothsu recipe
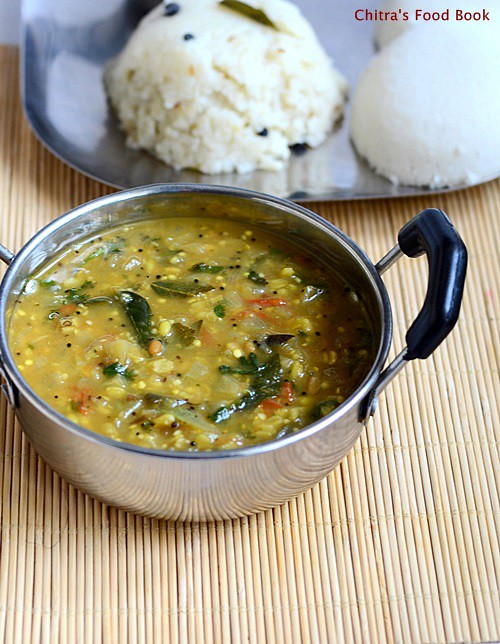
    I am a big big fan of brinjal recipes (Kathirikkai in Tamil). But Sendhil & Raksha are just opposite to me. So I make brinjal dishes only when my in-laws visit my place. This morning, I made this easy brinjal gothsu recipe in a pressure cooker learning from my MIL. Its a very easy, one pot brinjal gosthu recipe. In this method, you don’t need to roast & powder the spices as we do for Chidamabaram kathirikai gosthu. The procedure of this brinjal gravy is very similar to my MIL’s Thanjavur style tomato gosthu

    We usually make this as a side dish for Idli. But recently I had tasted this with pongal too. It was yummy. Its a great recipe for bachelors & working women who look for easy side dish recipes. All you have to do is just chopping, sauting & pressure cooking, Tada! This gravy would be ready under 15 minutes. Just try once, you will come to know. My MIL makes it watery as we like it that way. Here I have made it slightly thick to suit pongal. Finally, the consistency is your choice. Lets see how to make this yummy kathirikai/Brinjal gosthu recipe for idli and pongal.

    Brinjal gothsu

    Easy brinjal gosthu/Kathirikai gotsu recipe


    Easy brinjal gosthu/Kathirikai gotsu recipe Easy brinjal gosthu recipe-Side dish for idli and pongal
    Cuisine: South Indian
    Category: Side dish
    Serves: 2
    Prep time: 5 Minutes
    Cook time: 10 Minutes
    Total time: 15 Minutes


    INGREDIENTS

    • Brinjal / Kathirikai - 3 nos ( medium)
    • Small onions or big onion - 20 nos/1 no
    • Green chillies - 4 nos
    • Tomato - 1 no
    • Tamarind - small berry size (Sundakkai alavu)
    • Sambar powder - 1/2 tsp 
    • Moong dal - 1.5 tbsp
    • Turmeric powder – 1/8 tsp
    • Salt and water - as needed
    To temper
    • Cooking oil - 2 tbsp
    • Mustard seeds - 1 tsp
    • Urad dal - 1 tsp
    • Chana dal - 1 tsp
    • Curry leaves - few
    • Hing/asafetida - a big pinch
    • Idli/Dosa batter OR Rice flour - 1/2 tbsp/1.5 tsp
    Coriander leaves – to garnish
    HOW TO MAKE BRINJAL GOSTHU - METHOD

    • Wash and chop the brinjal into small squares. Soak in water till use to prevent discoloration. Similarly chop the onions,green chillies finely.

    • Heat oil in a cooker base. Splutter mustard seeds, urad dal & chana dal. Then add the finely chopped onions, green chillies, curry leaves & hing. Saute till onion turns transparent.
    Brinjal gothsu recipe
    • Now add the finely chopped tomato pieces & brinjal. Add some salt and saute till tomato turns mushy. Lastly add the tamarind extract and moong dal. Mix well. Add little turmeric powder, sambar powder(optional) , required salt and water.
    Brinjal Gothsu
    Kathirikai gothsu
    • Pressure cook in low flame for one whistle. After the steam is released, mash everything well. No problem if some dals are visible. Its enough if its just cooked & blossomed. Then add the idli/dosa batter or rice flour diluted in 1/4 cup of water. Mix well & allow the gravy to boil till it thickens lightly. Make it slightly thin if using for idli & thick for pongal. Garnish with lots of coriander leaves. Serve hot with idli or pongal.
    Brinjal gothsu recipe

    Enjoy !

    NOTE
    • If  you are serving for idli,add sesame oil/gingely oil while eating.It tastes great.
    • Add more chillies based on your taste.
    • Tamarind should be very less. Its used just to remove the mild bitterness of brinjals ( we call it as “Kaaral” taste in Tamil)
    • This recipe is completely different from chidambaram gosthu.So it tastes mildy spicy and tangy.
    • Adding idli/dosa batter helps to thicken the gravy. U can also replace it with rice flour.
    • Garnishing with coriander leaves gives a nice smell.


    Enjoy this yummy, easy brinjal gosthu with idli or pongal !
    Kathirikai gothsu recipe

    Continue Reading...