Search Chitra's Food Book

July 12, 2013

Eggless Chocolate Cupcake Recipe Without Butter, Condensed Milk - Best Vegan Chocolate Cupcake

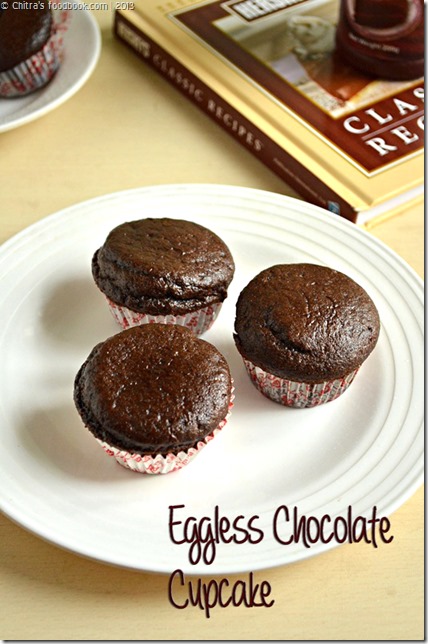
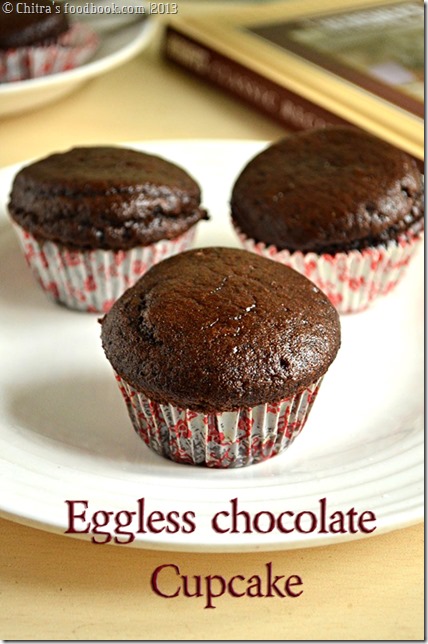
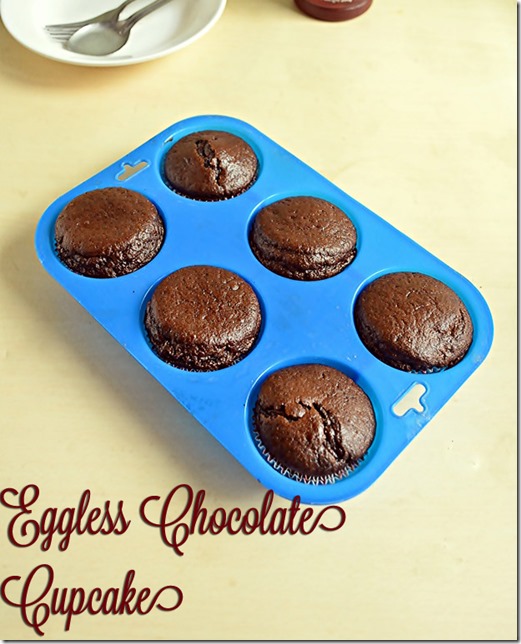
Chocolate cupcake eggless
 
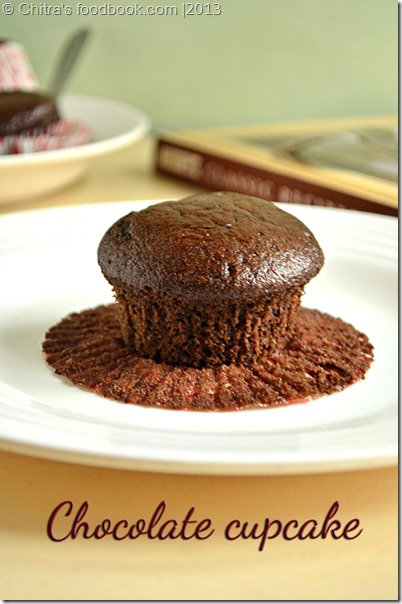
Recently my friend Gayathri gave me “Hershey’s classic recipes” cookbook. I tried this eggless chocolate cupcake without butter, condensed milk from the book. It turned out awesome. I couldn’t believe it is eggless, butter less cake without any milk products. Its a vegan cupcake recipe. It was so soft and moist.
 
I would say this is the best eggless chocolate cupcake I have ever tasted. We all loved it and it was a big hit in my home. Thank you so much Gayu for the book. The best thing is there is no butter, milk & curd. Instead I have used little vinegar & cooking oil. Try this cake, you’ll love it for sure.  It’s a best recipe for beginners to try. You can make this cake without oven in a pressure cooker or in a kadai too. 
 
Chocolate cupcake

Eggless chocolate cupcake recipe without condensed milk


Eggless chocolate cupcake recipe without condensed milk
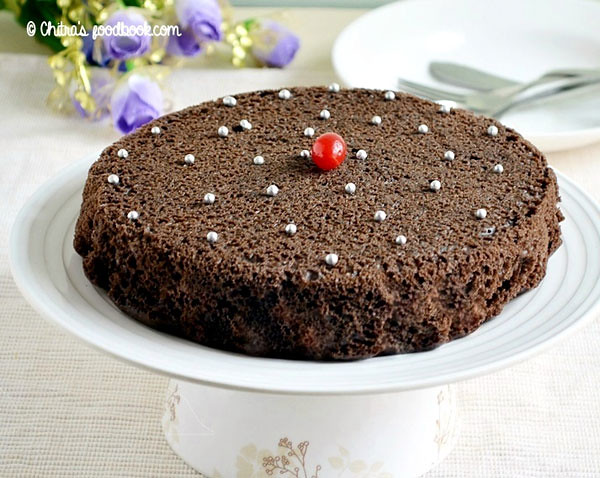
Eggless chocolate cupcakes without butter, condensed milk. Its a vegan cupcake


Cuisine: Indian
Category: Baking
Serves: 6
Prep time: 10 Minutes
Cook time: 20 Minutes
Total time: 30 Minutes


INGREDIENTS
1 cup = 200ml
  • All purpose flour / Maida – 3/4 cup
  • Sugar – 1/2 cup +2 tbsp (for more sweetness, else 1/2 cup will do)
  • Cocoa powder – 2 tbsp
  • Baking powder – 1/2 tsp
  • Cooking soda – A small pinch ( do not add more than a pinch)
  • Salt – 1/4 tsp
  • Water – 1/2 cup + (2 tbsp - optional)
  • Cooking oil – 3 tbsp
  • White vinegar/Colorless vinegar – 1.5 tsp
  • Vanilla essence – 1/2 tsp
HOW TO MAKE EGGLESS CHOCOLATE CUPCAKES
  1. Powder 1/2 cup of sugar and set aside.
  2. In a wide bowl sieve the flour , sugar , cocoa powder , baking powder , cooking soda & salt. \
  3. In another bowl mix all the wet ingredients ( oil , vinegar , vanilla essence & water).
  4. Add the dry ingredients little by little to the wet ingredients. Mix in the same direction. Batter should fall like a ribbon. Add little more water if necessary.
  5. Line the muffin tray with muffin cups and fill 3/4th with batter.
  6. Preheat the oven in 200c ( convection mode) & then bake the muffin in 200c for 12- 14 minutes.
  7. Check with a tooth pick, if it comes out clean , cake is done. Let it cool completely , serve !!
  
HOW TO MAKE EGGLESS CHOCOLATE CUPCAKE - METHOD
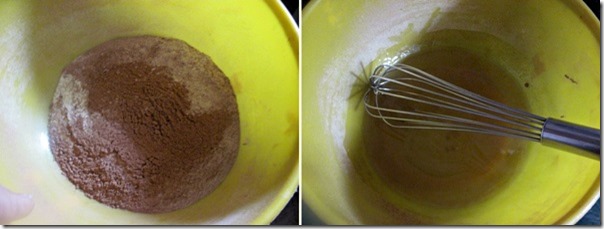
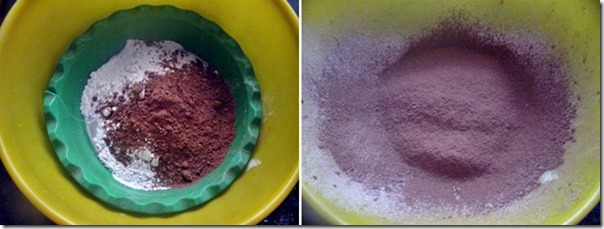
  • Powder 1/2 cup of sugar and set aside. In a wide bowl sieve the flour , sugar , cocoa powder , baking powder , cooking soda & salt.
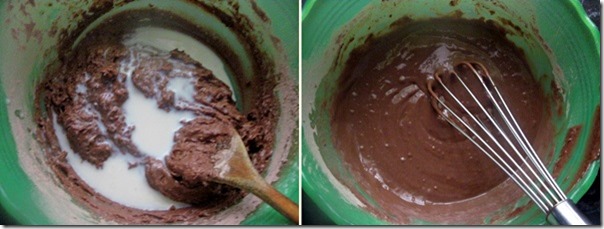
  • In another bowl mix all the wet ingredients ( oil , vinegar , vanilla essence & water). Add the dry ingredients little by little to the wet ingredients.
Chocolate cupcake tile 1
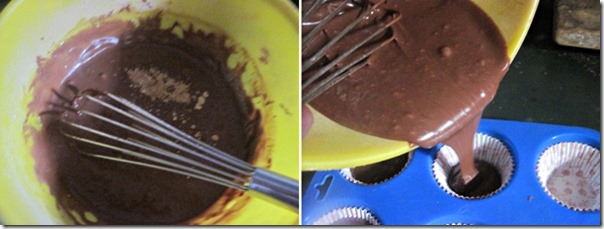
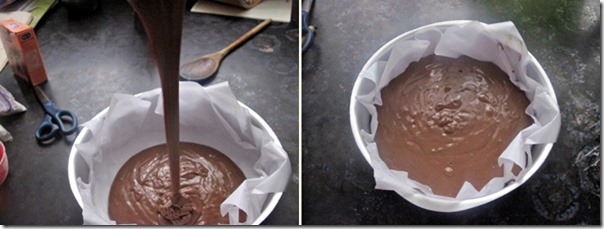
  • Blend well in the same direction. Batter should fall like a ribbon. Add little more water if necessary. Line the muffin tray with muffin cups and fill 3/4th with batter.
Chocolate cupcake tile 2
  • Preheat the oven in 200c ( convection mode) & then bake the muffin in 200c for 12- 14 minutes. Check with a tooth pick, if it comes out clean , cake is done. Let it cool completely , serve !!
  • To make in a pressure cooker : Spread 1 inch salt in the bottom of a wide pressure cooker. Place a small plate. Heat the salt in high flame for 5 minutes. 
  • Place the cupcakes over the plate inside the cooker. Cover with a lid without gasket or any plate that should be air tight. Let it bake in low flame for 10 to 12 minutes. Open and check with toothpick. If not cooked, cook for 2 more minutes. Timings may vary based on the flame and cooker. Keep an eye !
 
eggless chocolate cupcake

NOTE
  • Time varies from 12- 14 minutes. Please adjust as per your oven.
  • Use convection mode , 200c..
  • The batter should be of thick ribbon consistency. Add water to adjust it.
  • No need to add milk or curd. The cake itself comes out really soft.
  • U can try adding lemon juice instead of vinegar.

eggless chocolate cupcake


Continue Reading...


July 10, 2013

DRUMSTICK SAMBAR | MURUNGAKKAI SAMBAR FOR RICE – TAMILNADU STYLE LUNCH RECIPES

9251320761_cae23e5efc_z

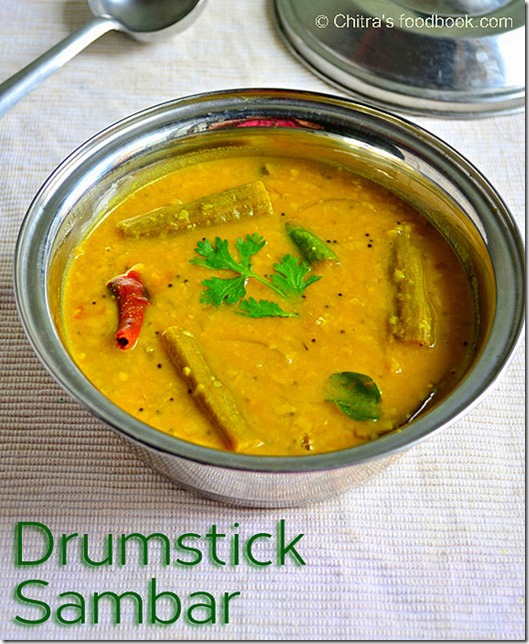
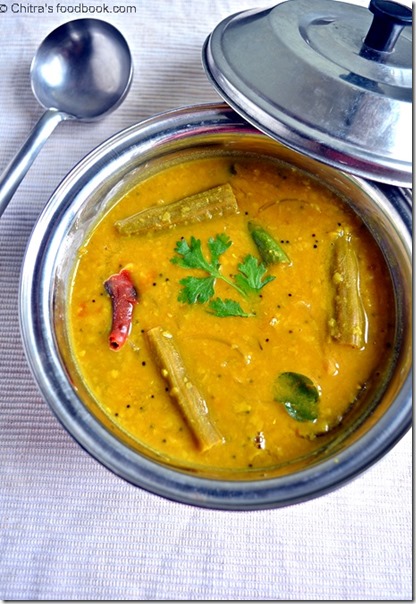
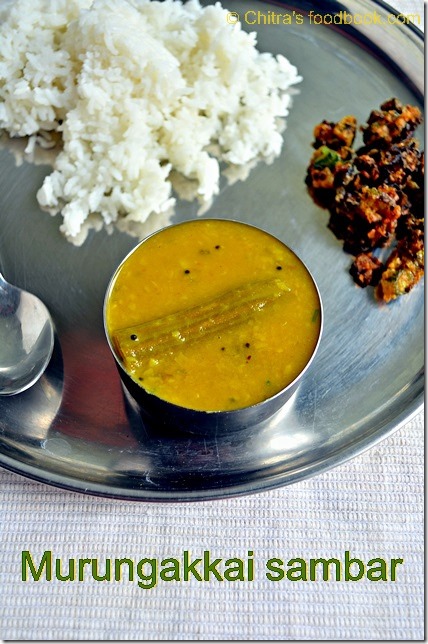
This is my MIL’s method of making Tamilnadu style drumstick sambar/ murungakkai sambar for rice. My MIl’s sambar is very easy when compared with my mom’s version. There is no grinding job. A tsp of sambar powder is enough to make this yummy sambar. After many attempts , I got hooked to this measurement. I usually add my MIL’s home made sambar powder for this sambar but you can use store bought sambar powder too. My in-laws are here in my place. I made this sambar last week and it was tasting great. My in-laws loved it. Here I have given the measurements for 4 people.
 
U can either half the quantity for two people or make the same quantity and use it for lunch & dinner. This sambar can be converted to idli sambar by adding a powder which I have given in “notes” section. We usually do this with leftover sambar.
 
It tastes similar to hotel sambar. Do try this sambar & let me know your feedback friends.

Drumstick-sambar

Drumstick sambar / Murungakkai sambar recipe for rice


Drumstick sambar / Murungakkai sambar recipe for rice

Drumstick sambar / Murungakkai sambar recipe for rice


Cuisine: Tamilnadu
Category: Side dish
Serves: 4
Prep time: 20 Minutes
Cook time: 20 Minutes
Total time: 40 Minutes


INGREDIENTS
To pressure cook
  • Toor dal – 1/3 cup
  • Turmeric powder – 1/4 tsp
  • Asafetida/hing – A pinch
  • Cooking Oil – a drop
  • Water – as needed
  • To soak in water:
  • Tamarind – Big gooseberry size
To add in drumstick water
  • Drumstick – 2 nos (medium sized)
  • Sambar powder – 1 tsp
  • Turmeric powder – 1/4 tsp
  • Hing / asafetida – 2 pinches
  • Salt – as needed
  • Curry leaves - few
To temper & saute
  • Cooking oil - 1 tbsp
  • Methi seeds – 1/4 tsp
  • Mustard seeds – 1/2 tsp
  • Red chilli– 2 (pinched)
  • Green chilli – 2 
  • Big onion – 1 no
  • Curry leaves – few
  • Coriander leaves – to garnish
How to make drumstick sambar
  1. Wash and pressure cook toor dal adding hing, turmeric powder and a drop of oil in required water for 2 whistles in low flame. Mash and set aside.
  2. Soak tamarind in warm water, take extract using 3 cups of water.
  3. Add sambar powder, salt, turmeric powder, hing and curry leaves.
  4. Cut drumstick into finger size pieces. Heat oil in a kadai. Add methi seeds, mustard seeds, chilli, onion and curry leaves.
  5. Add drumstick pieces, some water, salt and cook well. Add tamarind extract.
  6. Boil till raw smell goes off. Lastly add the cooked toor dal. Mix well.
  7. Boil for few minutes, switch off the flame.
  8. Garnish with coriander leaves. Enjoy with rice.
    
HOW TO MAKE DRUMSTICK SAMBAR FOR RICE - METHOD
  • Pressure cook toor dal adding turmeric powder, required water, hing and a drop of oil. Cook for 1 to 2 whistles in low flame. After the steam is released, open the lid, mash well and set aside.
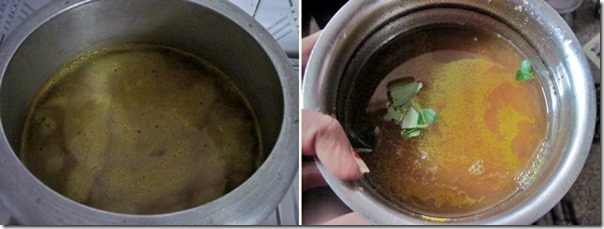
  • Soak tamarind in warm water and take the extract using 3 cups of water. To this extract add sambar  powder, salt,  turmeric powder, hing & raw curry leaves.. Cut the drumstick into finger size pieces. Slit them half the way.
drumstick sambar tile0
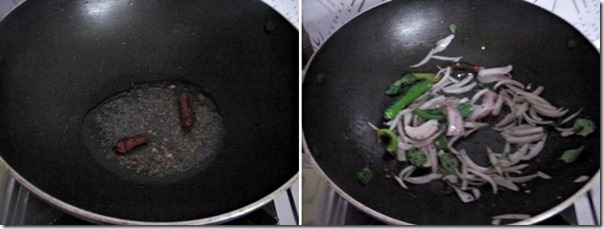
  • In a wide kadai  heat oil and add the methi seeds. When it starts to splutter add the mustard seeds and let it splutter completely. Then add the pinched red chilli, green chilli, sliced big onion and curry leaves. Saute well.
drumstick sambar tile1
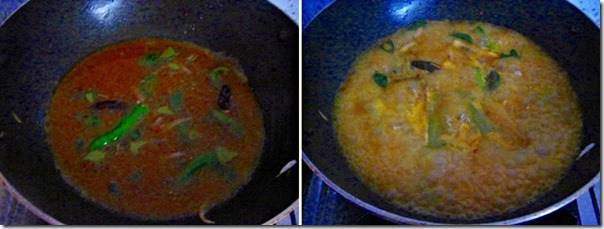
  • Now add the tamarind extract & drumstick pieces. Cover and cook in medium flame. Allow it to boil till the drumstick is cooked well. To check if it is cooked, take a piece of drumstick, open & remove the seeds. If it comes out easily, it is done.
drumstick sambar tile2
  • Finally add the cooked and mashed dal, some water if needed and allow it to roll boil twice. Switch off the flame and garnish with coriander leaves.
drumstick sambar tile3
Add a tsp of ghee while serving. Mix with plain rice and enjoy !!

NOTE
How to convert this sambar to idli sambar
For converting this sambar into idli sambar, add the below powder & allow it to boil. Add lots of coriander leaves & serve hot with idli, dosa. U can also saute & add small / big onions & one tomato to get additional flavour.

For sambar powder:
  • Methi seeds – 1/2 tsp
  • Dhania – 1.5 tsp
  • Chana dal –  2 tsp
  • Red chilli – 2 nos
  • Hing – A big pinch
Method:
Roast all the above ingredients in a drop of oil till you get a nice smell. Powder them nicely and add this to sambar. In a kadai, add a tsp of oil and saute the onions & tomatoes. Add 1/2 cup of water and cook them. Then add the sambar. Allow it boil. Garnish with coriander leaves & serve hot adding a tsp of ghee !!

Try this easy, yummy Murungakkai sambar for rice  and enjoy !
9254135722_74c892c1ea_z
 
Continue Reading...


July 6, 2013

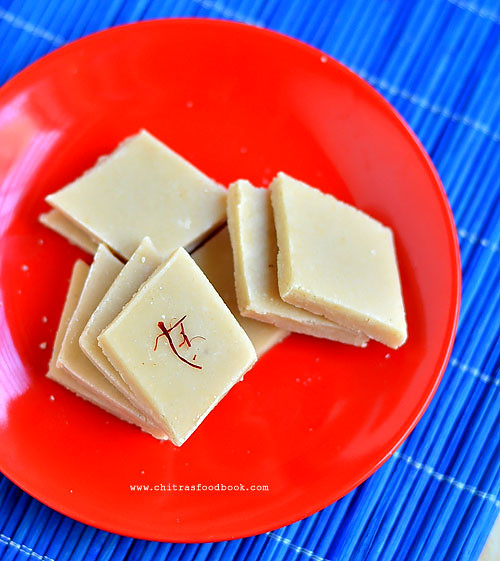
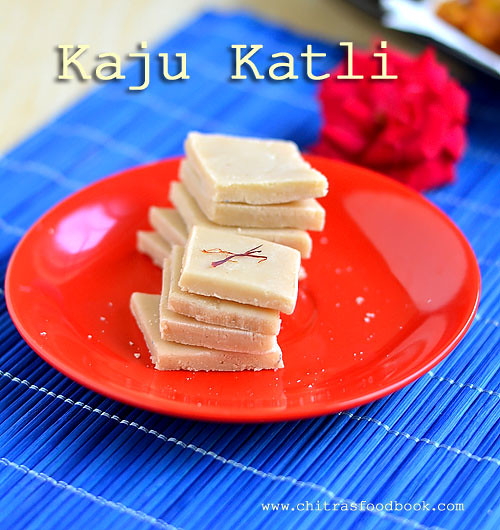
Kaju Katli Recipe - Cashew burfi - Munthiri Cake With Video

How to make Kaju katli recipe at home with step by step photos, video and tips - Easy method of making cashew burfi. It is known as Munthiri cake in Tamil, Kaju barfi in Hindi. 

Kaju katli is my family’s favourite sweet recipe.Every time we used to buy it from AAB sweet shop Bangalore & Tamil nadu even though it is costly in price. So I wanted to make it perfect just like sweet shops and tried it many times during Diwali and other family occasions ;) Kaju katli recipe is a very simple Indian sweet with very less ingredients. I heard milk powder, saccharine or mawa/khoya is used in sweet shops to yield more in quantity.But I don't think it is necessary.Homemade kaju katli tastes way better and healthy as well.This was the first sweet I tried on my own ( without my MIL’s help) after my marriage for Sendhil & Raksha.
Kaju katli
Long back I had posted this recipe without much details along with some other sweets & savouries during diwali. But I want to have a separate post for kaju katli in my blog with step by step pictures, video and some tips for easier understanding especially for beginners. I have tried this recipe several times and it comes out perfect. After I got the confidence of preparing kaju katli , I started making kaju lotus sweet which tastes very similar to kaju katli but it looks colourful. Both the sweets are very easy to prepare once you know the knack and tips for troubleshooting. So when you try this recipe , don’t forget to try kaju lotus. U’ll love it. For 1 cup of cashews, you can get 10 pieces using this recipe.

Check out my Easy Badam Cashew Burfi if interested !

I have updated this recipe with a full video for beginners reference. Hope you find it useful :) Please watch the video below !


Kaju katli


Kaju Katli recipe


Kaju Katli recipe How to make Kaju katli - Diwali sweets recipes
Cuisine: Indian
Category: Sweet
Serves: 8-10 nos
Prep time: 5 Minutes
Cook time: 10 Minutes
Total time: 15 Minutes


INGREDIENTS
1 cup = 250ml
  • Cashew nuts – 1 cup
  • Sugar – 1/2 cup
  • Water – 1/4 cup
  • Ghee – 1 tsp ( to grease the tray)
  • Milk – 1-2 tsp (optional, only if needed)
METHOD
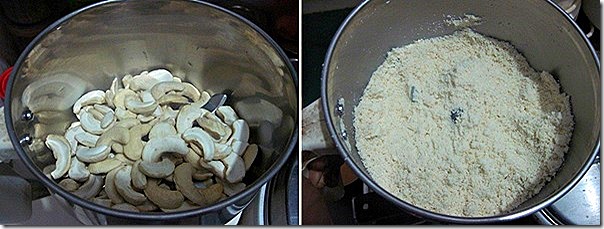
HOW TO POWDER CASHEWS
  • Cashews should be dry. If u have kept in the refrigerator, bring it to room temperature by spreading them in a towel or paper to absorb all the water. OR Dry roast the cashews in a broad hot kadai in low flame without changing the color.Switch off the stove and put the cashews in the hot kadai for 10-15 mins till it becomes crisp & dry. I have followed both the methods & it works.
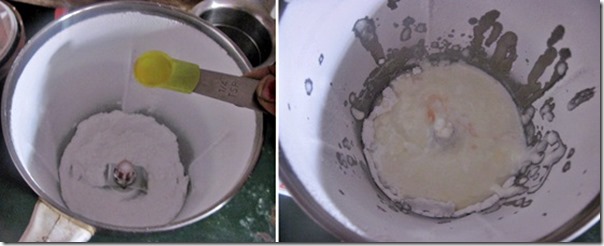
  • Grind cashews to a fine powder. U can do this by two methods.One is :Run the mixie at low speed for short intervals , stir in between to get a fine powder. Repeat the same for 2-3 times till u get a nice powder. Make sure u do not over grind them . If over ground , cashews will leave oil & becomes a sticky paste..
  • Second method is : Run the mixie continuously for one minute till u get a fine powder. U should be careful . Do not grind for more time. Cashew will release oil and becomes a sticky paste.
I have tried both the methods .. They work very well. U can try any.
When u grind 1 cup of cashews u’ll get  2-3 tbsp more than 1 cup of powder. U can use the same quantity and proceed further. No need to measure 1 cup of powder. 1/2 cup of sugar would be enough. After grinding, sieve the cashew powder through a wire mesh. You will get very fine cashew powder. Grind the leftover coarse ones and mix with cashew powder. This is the basic method of making cashewnuts powder. Once you have this powder in hand, making kaju sweets is a breeze :)
How to make kaju katli

HOW TO PROCEED
  • After grinding the cashews,set aside.Grease a plate with ghee & keep it ready.
  • In a kadai , take 1/2 cup of sugar & add 1/4 cup of water just to cover the sugar. Allow it to boil till frothy. Switch off the flame. Check if it reaches one string consistency.ie.take a drop of syrup from the back of ladle and test it between your thumb & fore finger. When u release it , u’ll get a thin,uncut single string.( oru kambi padham)
How to make kaju katli
  • Now switch on the flame to low. Add the ground cashew powder & mix well till u get a whole mass.ie, Keep stirring until the mixture starts to leave the sides of the pan and becomes thick.  It takes maximum of 4-5 minutes in low to medium flame.Do not wait for the dough to become too thick like chapathi dough. It should be soft and sticky. Test the consistency by making a small ball from the dough using ghee greased fingers. U should be able to roll a soft, non sticky ball out of it.
How to make kaju katli

  • Transfer the mixture to the greased plate, spread the dough with a spoon, add a tsp of  ghee ( optional)  and leave it for 5  - 10 minutes. It will be hot but good enough to handle it. Grease your hands with little ghee & Knead well like chapathi dough. 
  • Initially u’ll feel dry & hard but as u knead well, cashews release oil and becomes soft, smooth. ( If u have missed the right consistency, the mixture will become very hard & crumbly. In that case add 1 -2 tsp milk and start kneading. U’ll get a soft ball like this at the end. But adding milk reduces the shelf life of the sweet.Add milk only if u feel the dough is too hard to handle. Else add a tsp of ghee for kneading. )
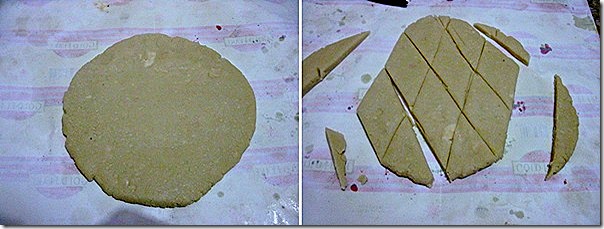
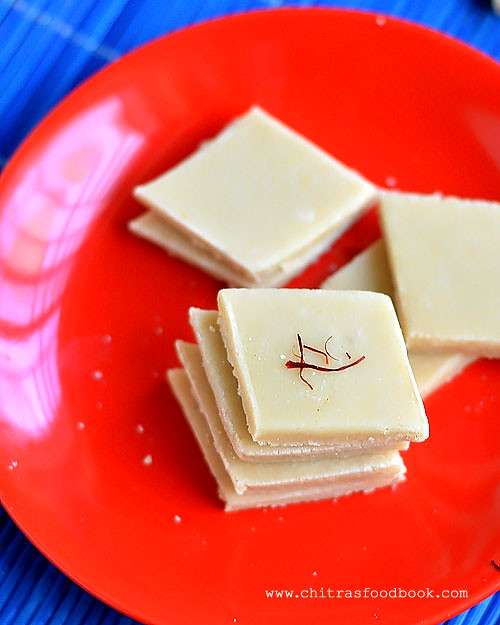
  • In a plastic sheet or butter paper,grease it with ghee, roll the kneaded dough using a rolling pin. Trim the corners and cut them into the desired shapes. Please note color of cashew burfi may vary based on the purity of sugar. If the sugar is with more impurities, katli comes out in pale white like u see in the picture below. But its color improves the next day !  So try to use pure, white colored refined sugar :)
How to make kaju katli
It just melts in ur mouth. Enjoy !! Stays good for 2-3 days  if store in an air tight box without refrigeration..Smile Enjoy !

Trouble shooting tips 

In case, you missed the right consistency and if the dough becomes crumbly and hard, just break them into pieces. Grind in a big mixie jar adding little water or milk and make a smooth paste. Transfer the mixture to the kadai and again cook it till you attain the correct stage.You can easily identify the right stage as you had experienced where you went wrong. So do it patiently and remove it at the right stage. Its always better to cook in low flame for safer side.
Note
  • Cashews should be completely dry before grinding.While powdering the cashews please be careful in running the mixie. Over doing it makes the cashews sticky & wet.U wont get the perfect smooth powder.
  • One string consistency is very important. If sugar reaches more than one string consistency , katli will become hard. So as soon as the sugar syrup becomes slightly thick and frothy, switch off the flame.Check for one string and then continue.
  • If the dough become hard, you have to add more milk to make it soft. Adding more than the required milk makes it wet & sticky.It reduces the shelf life of the sweet. So remove the dough at the right time. 
  • U can check the consistency of dough by making a small ball out of it.The ball should be non-sticky.Suppose if u over mix the dough and if it becomes hard,no worries.Just keep the dough in a plate and let it warm.Add little milk to it and knead it well.It will become soft.Then u can roll it and make pieces as mentioned above.
  

Enjoy this kids favorite Kaju Katli for Diwali  & have a great celebration !!
Kaju katli recipe


Continue Reading...


July 2, 2013

EGGLESS CHOCOLATE CAKE IN PRESSURE COOKER

Eggless pressure cooker cake
I tried this cake from an old cookbook. I wanted to post an eggless chocolate cake in my blog but i couldn’t do it. Now i am so happy i did a cake in pressure cooker which is very easy for beginners and for people who don’t own a oven. I just followed the recipe i noted in my cookbook and the result was soft , moist & delicious tasting chocolate cake. 

I have not used oil/butter/ ghee in this recipe. But i used fresh cream & curd to bring the softness. Do try this cake. You’ll get it perfect for sure.You can also try this recipe in microwave oven ( use convection mode @ 180c) . This cake is apt for beginners.Kids would love this cake !!

Eggless pressure cooker cake

Eggless chocolate cake in pressure cooker


Eggless chocolate cake in pressure cooker How to make Eggless chocolate cake in pressure cooker
Cuisine: Indian
Category: Cake
Serves: 10 pieces
Prep time: 10 Minutes
Cook time: 20 Minutes
Total time: 30 Minutes


INGREDIENTS
1 cup - 250ml
PART - I
  • All purpose flour/ Maida – 1 cup
  • Baking powder – 3/4 tsp
  • Cooking soda – 1/2 tsp
  • Cocoa powder – 1.5 tbsp
  • Salt –A pinch
PART-II
  • Sugar – 1/2 cup
  • Fresh cream – 1/2 cup
  • Thick Curd – 1/3 cup
  • Milk – 1/4 cup
  • Vanilla essence – 1/2 tsp
METHOD
  • Mix all the ingredients mentioned under Part - 1.Set aside.
PRESSURE COOKER CAKE

  • Powder the sugar nicely and add the other wet ingredients like curd , fresh cream & vanilla essence in the mixer and pulse in once or twice in low speed.All the ingredients will be mixed well.
PRESSURE COOKER CAKE

  • In a separate bowl take the wet ingredients and add the dry ingredients (PART-I) . mix well in the same direction. The consistency of batter should fall like a thick ribbon.If not add little more milk and mix well. Make sure consistency should be right.
PRESSURE COOKER CAKE
  • Now cover the bottom & sides of the vessel ( i used my aluminum baking pan) with a butter paper and pour the cake mixture into it. Pat it in the bottom of vessel for even spreading.U should fill the batter till half of the vessel because the cake will rise while it cooks..Again cover the top of the vessel with another butter paper tightly o avoid the vapour that goes inside the cake.
PRESSURE COOKER CAKE
  • Then take a big pressure cooker and add water in the base.Keep a plate inside( just as a stand for the vessel in which u bake ,i used mini idli plate here ). Now keep the vessel over the plate. If you are adding water ( if using salt,refer notes section),please add water till half of the size of vessel. If u add more water , the extra water may go into the vessel & the cake mixture will become watery.
PRESSURE COOKER CAKE
  • Do not put the weight valve , keep the flame high and allow the water boil till the full steam comes. Once the full pressure is reached , simmer the flame completely and allow it to cook for 20 minutes exactly without putting weight valve.During this time , steam will be coming out in low pressure. After 20 minutes switch off the flame & give a standing time till all the steam is released completely by itself. Please do not open till that time. It takes maximum of 20 minutes for all the steam to go by itself.
PRESSURE COOKER CAKE
  • Remove the vessel from the cooker and insert a knife or spoon. If it comes out clean ,your cake is done. Cut into pieces & enjoy !!
PRESSURE COOKER CAKE

Enjoy !
Note : You can bake the cake in a cooker by adding salt.For that,you should spread powdered salt in the base of cooker for 2 inches.Use 1/2 kg of salt.Then place the cooker plate and close the cooker by removing the gasket and weight valve.First preheat the cooker in high flame for 5 minutes.Then place the baking pan with cake mixture and cook in  low flame for 20-30 minutes.Check with the back of spoon and remove after the steam is released.
Eggless chocolate cake
Continue Reading...


June 28, 2013

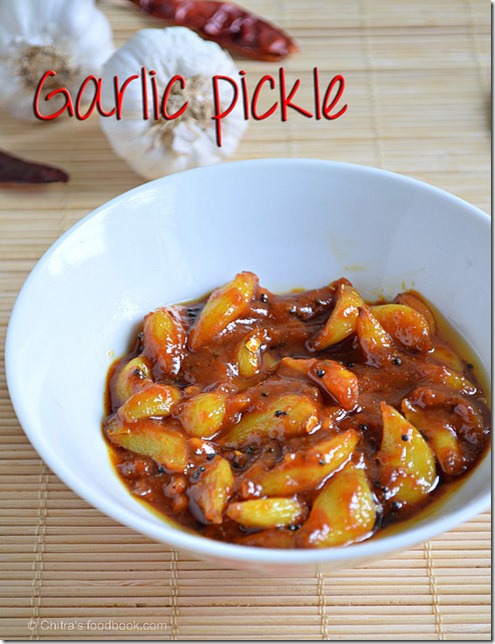
GARLIC PICKLE | PICKLE RECIPES

garlic pickle image copy

I love garlic pickle & onion pickle a lot. Yesterday I told my MIL to prepare this garlic pickle ( Poondu oorugai in Tamil) for me. She made it instantly. Its very easy to do. I stood nearby and noted down all the ingredients with measurements. Hope i’ll try this on my own very soon. We made in very less quantity (1/2 cup) and i finished all the pickle in one go...Now u know how much i loved this pickle & how tasty it was Winking smile. It was tasting great for curd rice & roti..Thank u Aunty ( this is how i call my MIL) Smile..  As my MIL says , next to red chilli powder ,3 ingredients are most important for any pickle .They are fenugreek seeds , turmeric powder & hing (ie . vendhayam , manjal , perungayam in tamil).. These 3 ingredients are responsible for taste & flavour of the pickle.Other than these , some pickles may need tamarind paste too..So beginners , making pickle is really an easy job. Storage has also become easier because of refrigerator..So don’t panic and go ahead trying this easy pickle recipe.U’ll succeed Smile
garlicpickle image
INGREDIENTS
1 cup - 250ml
  • Garlic cloves – 1/2 cup ( 2-3 bulbs)
  • Red chilli powder – 1.5 tsp
  • Turmeric powder – 1/4 tsp
  • Hing – 1/4 tsp
  • Grated jaggery – 3/4 tbsp
  • Tamarind – Big gooseberry size
  • Roasted & ground methi seeds – 1/4 tsp
  • Cooking oil – 1 tbsp
  • Salt & water – as needed
To temper
  • Sesame oil / gingely oil – 2 tsp
  • Mustard seeds – 1/2 tsp
  • Urad dal – 1/2 tsp

METHOD
  • Peel the skin of garlic , dry roast & grind the methi seeds & powder them. set aside.
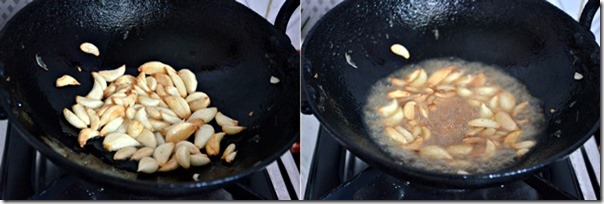
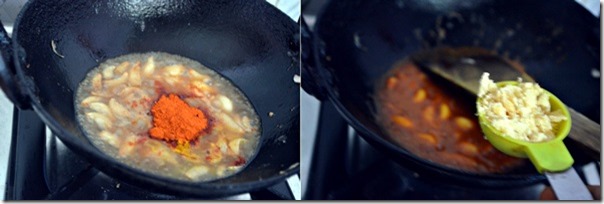
  • In a kadai , heat 1 tbsp of cooking oil and saute garlic cloves till golden brown. Then add 1 cup of tamarind extract and allow it to boil till the garlic is cooked well.Now add salt , red chilli powder, turmeric powder , hing and mix well.
garlic pickle tile1
  • Finally add the grated jaggery and methi seeds powder. Mix well till jaggery melts.Allow it to boil for few minutes.
garlic pickle tile2
    • U’ll get a thick paste. Switch off the flame and temper the above said ingredients..Mix well and serve with curd rice !!
garlic pickle tile3

garlic-pickle image


Continue Reading...


June 26, 2013

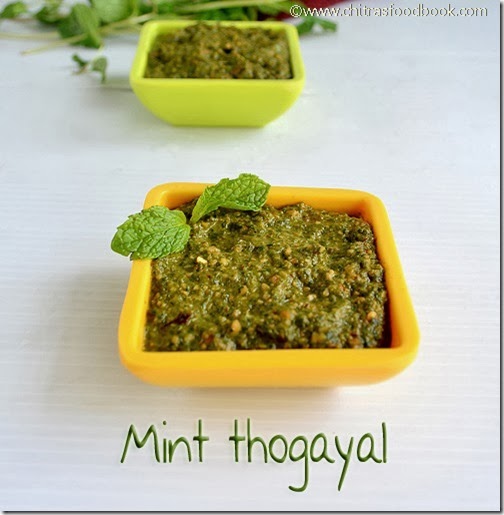
PUDINA THOGAYAL FOR RICE |MINT THOGAYAL- THOGAYAL VARIETIES

 Mint - thogayal

Mint thogayal /Pudina thogayal recipe is one of the yummiest thogayal varieties / chutney recipe for rice. I usually pack this thogayal sadam for my husband’s lunch box. Mint thogayal can be prepared in advance and stored for weeks in refrigerator. My MIL makes this thogayal adding roasted urad dal just like coriander leaves thogayal. But addition of urad dal is completely optional. Add only if u want to increase the quantity / yield of thogayal. This thuvayal tastes great when mixed with plain rice adding sesame oil ( nalla ennai). Try it and enjoy !
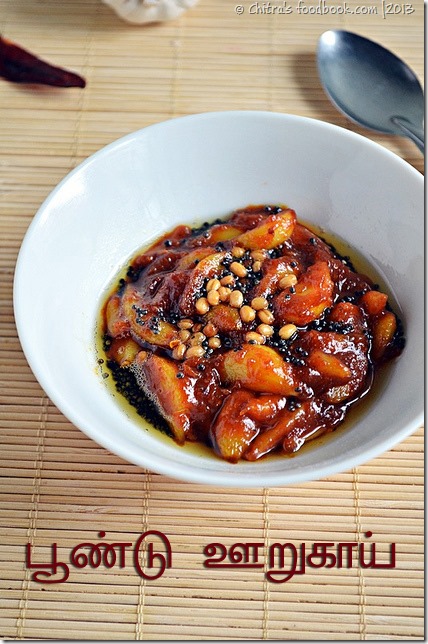
Mint thogayal/Pudina thogayal


Pudina thogayal for rice - Mint thogayaL/ Pudina thuvaiyal  Delicious mint thogayal recipe for rice,idli,dosa,upma
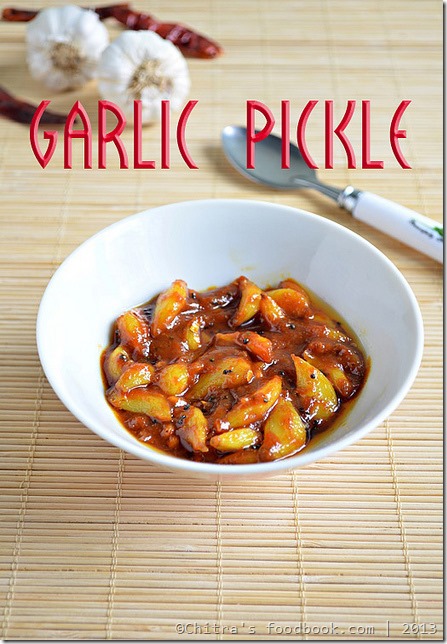
Cuisine: Indian
Category: Thogayal
Serves: Serves 2
Prep time: 10 Minutes
Cook time: 10 Minutes
Total time: 20 Minutes


INGREDIENTS
1cup = 240ml
To roast n grind
  • Mint leaves/pudina leaves – 1 cup (tightly packed)
  • Red chillies - 3 nos ( use 5 for spicy taste)
  • Urad dal - 1 tbsp
  • Jaggery – 1/4 tsp
  • Tamarind - Small gooseberry size
  • Salt - as needed
METHOD


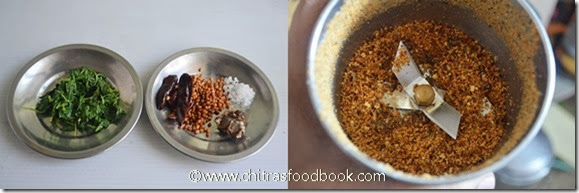
  • Wash mint leaves. Heat a  kadai with a tbsp of oil and fry the red chillies & urad dal.Remove  in a plate. In the same oil, fry the mint leaves for a minute so that it will be shrinked and get reduced in quantity. This gives a special flavour to the thogayal . Soak tamarind in little water.
mint leaves thogayal tile1
  • Now grind the red chillies, urad dal, soaked tamarind with salt to a coarse mixture.Then add the mint leaves and grind to a smooth, thick paste adding the required water. Remove and serve with plain rice topped with gingely oil . If u want to grind in large quantities and store , u have to follow the next step. Else stop with this step & enjoy.
    mint thogayal tile1
  • Heat a kadai with little gingely oil / nalla ennai ( 1 tbsp )and put the thogayal into it. The water content in it will be absorbed and becomes thick , heat it for a while. Cool down. It can be stored in a box, refrigerated and kept for 10 days. But this step is purely optional if you are consuming immediately. U can enjoy this thogayal without sauting in oil. But shelf life will be reduced.
For variations u can skip urad dal and add a tbsp of  grated coconut  while grinding.


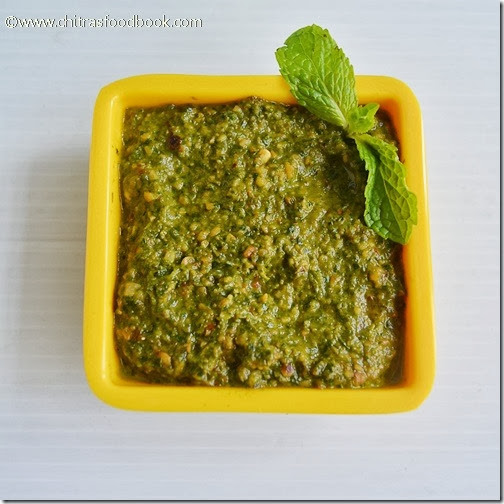
YUMMY MINT THOGAYAL is ready to be served with hot rice & tiffin. Enjoy adding sesame oil..
mint--thogayal 

Continue Reading...