Search Chitra's Food Book

September 24, 2014

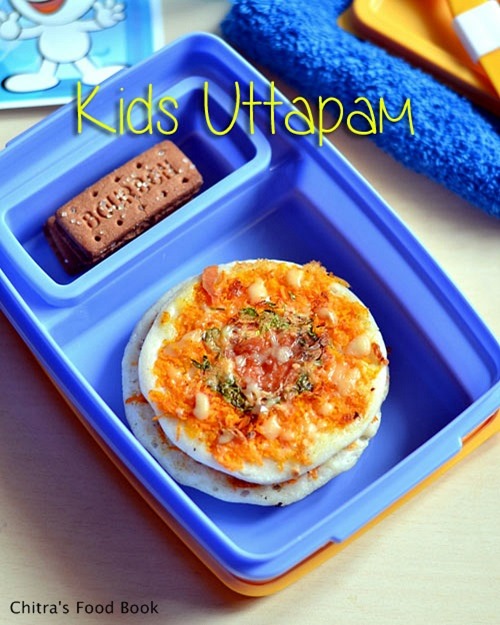
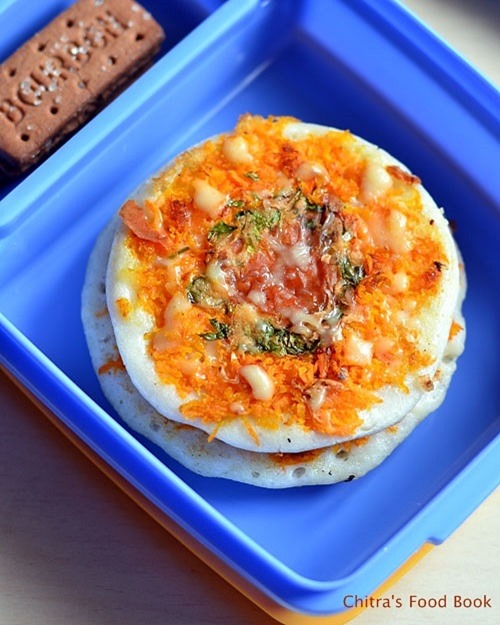
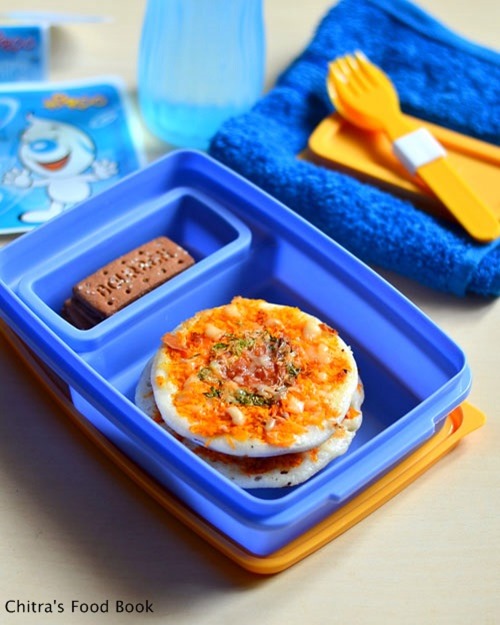
CHEESY MINI UTTAPAM-KIDS LUNCH BOX RECIPES


Vegetable Uttapam

Generally kids love colorful food.My daughter Raksha is no exception.She basically loves drawing & playing with colors.So she always demands me to pack some colorful food for her lunch box.But she doesn’t like to take chapathi rolls or bread sandwich.She is an ardent fan of idli,dosa just like meTongue.So i made this cheesy tri color uttappam for her lunch box.After coming from school,she happily said all her friends asked by seeing the colors “Is that national flag dosa??Big Grin “.She had proudly told No, its my mom’s dosaLaughing.This dosa recipe was a huge success with my daughter and i am making it very often for her lunch box with some variations(Refer notes).I usually add more carrots & less cheese as she likes to eat carrot in dosas and i don’t want her to consume more cheese.So this dosa tastes little sweetish.She likes to have this dosa with idli podi.Adjust the quantity of cheese n carrot and replace coriander with capsicum & even tomatoes based on your kids wish.U can also make this dosa for your kids after they come back from school as an evening snack.They will love to have it hot hot.So here you go,easy and colorful kids lunch box recipe – Cheesy veg mini uttapam.I am happy in sending this recipe to Indus ladies “ Kids lunch box recipes-100”.Special thanks to Chitvish mam for suggesting me to participate in this eventHappy.Friends,do send in your entries and get a chance for your recipe being published in a E-book.Both Bloggers and non-bloggers can participate.Please click the logo for more details.
Recipe-Contest-Logo-300x300

Cheese-dosa

Cheesy veg uttapam recipe


Cheesy veg uttapam recipe Easy n colorful cheesy veg uttapam recipe for kids lunch box.
Cuisine: Indian
Category: Breakfast
Serves: 2
Prep time: 5 Minutes
Cook time: 5 Minutes
Total time: 10 Minutes


INGREDIENTS

  • Idli/dosa batter - 1/2 cup
  • Grated carrot - 3 tbsp ( as needed)
  • Grated cheese - as needed
  • Finely chopped coriander leaves - 1 tbsp
  • Finely chopped onions - 1/2 no ( optional)
  • Oil.ghee - 1 tsp for each dosa
METHOD

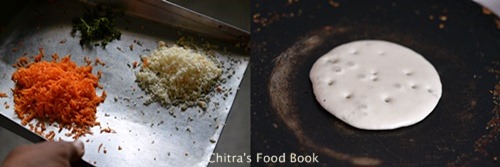
  • Wash and Grate carrot.Chop onions(if using) and coriander leaves finely.Grate cheese n set aside OR u can grate it directly over the dosa.Heat dosa pan and pour a ladleful of batter.Do not spread it.Batter should not be too thick or too thin.After pouring the dosa batter,simmer the flame completely.Leave it for few seconds.Bubble will start to appear.
cheese uttapam 1
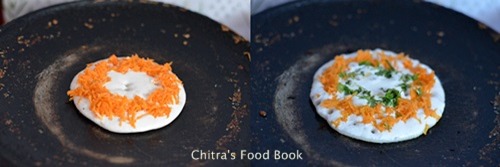
  • Now spread the grated carrot as outer layer and put some coriander leaves towards the middle.Lastly put the finely chopped onions in the center.Drizzle a tsp of oil/ghee around the dosa.Keep the flame low always else dosa will get burnt.
cheese uttapam 2
  • Flip the dosa and leave it for few seconds.Again flip the dosa and add the grated cheese or grate cheese all over the dosa.Leave till cheese melts.
cheese uttapam

Remove and serve hot or allow it to become warm and pack in lunch box.
U can make the same dosa for adults by sprinkling idli podi or pepper powder over the dosa.Reduce the quantity of carrot and add more onions.


Note

  • Adjust the quantity of carrots as per your wish. Adding more carrot make the dosa sweetish.
  • For variations,u can add finely chopped tomatoes & capsicum too.
  • Sprinkle half a tsp of idli powder or pepper powder if ur kids like spicy dosas.
  • Add double cheese for more cheesy dosas.


Pack this colorful,cheesy dosa for your kids lunch box and make them happy !
Veg uttapam

Continue Reading...


September 23, 2014

Navratri Golu Ideas - How To Keep Golu / Kolu At Home

golu

Hi friends,
Wish you all a very happy Navratri. I would like to start Navratri with this basic post on “How to celebrate Navarathri, i.e. how to keep golu at home”. This post is mainly for beginners and of course for my future reference. It would be more of essays with pictures, just read on.

Navratri is a nine days festival for Goddess durga that is celebrated all over India in various ways.In hindi/sanskrit, the word Navratri refers to “Nine nights”. During these nine nights, nine forms of Goddess Shakti are worshipped and the tenth day is celebrated as “Dussehra or Vijayadasami”. Usually the first set of three days is for Durga, the second three days is for Lakshmi and the last three days is for Saraswathi. Saraswathi pooja / Ayudha pooja is celebrated on the ninth day of this festival.

GOLU TIMINGS / NAVARATRI TIMINGS 

This year 2024, Navratri begins on Thursday 3rd October and ends on 12th October, Saturday. 
Kalasa sthapanam time : On 3rd October , 6:15 AM to 7:22 AM OR 11:46 AM to 12:33 PM (Abhijit muhurtham) . If you want to keep the kalasam on 2nd October (Amavasai) , 9.00 AM to 12:00 PM is the auspicious time. 

If you are unable to keep in the above timings, make sure you avoid Rahu kalam and Yama gandam and keep golu in auspicious time of the day. 

In Tamil nadu, Navarathri is celebrated by keeping Golu in houses. Golu means”Display”. It is the display of all idols and dolls representing major deities. Its a belief that Goddess is present in our house in all these nine days and we treat her offering Sundal and sweets as neivedyam. Some people go for fasting (Vrat) and they make no onion no garlic and strictly no non-veg recipes on all these days. Interested people can make Park, Zoo and some theme based golu set up too. I have shared some pics of park, artificial pond from my MIL's golu.

Suppose if you are not able to keep kolu on all the nine days, you can keep it just for 3 days. Usually last set of 3 days would be fine as you can celebrate Saraswathi pooja along with golu setup :)

Navratri

My MIL has the practice of keeping Golu/Kolu in salem home every year on all the nine days. She invites all our neighbours in the evening to visit our golu and give them thaamboolam ( a small pack of gifts including turmeric, kumkum, mirror, comb, blouse pieces along with betel leaf (vethalai) & pakku) and Sundal prasadam. Golu can be kept either in a grand manner with 9 or 11 steps OR just in a simple form with 3 steps. All you need is just interest, some creativity and passion. So in this post, I have given some golu ideas to help beginners and for my future reference too asking my MIL. I also referred sites like Wikpedia, Yahoo and howtodothings & ecards.com for more details. 

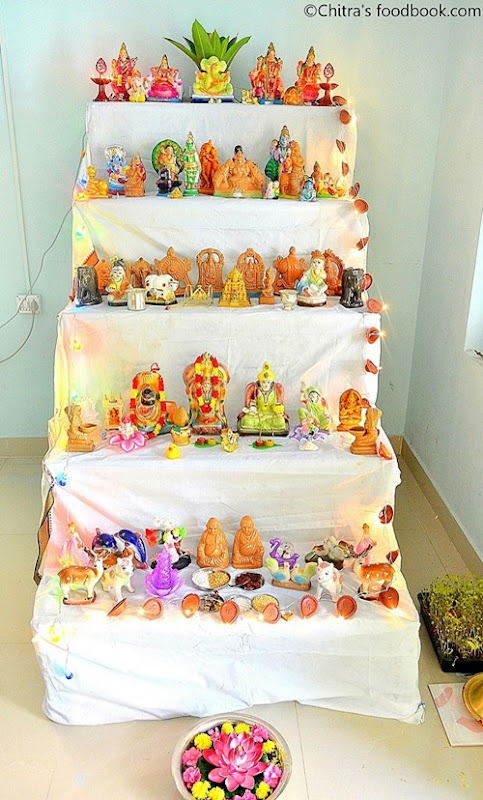
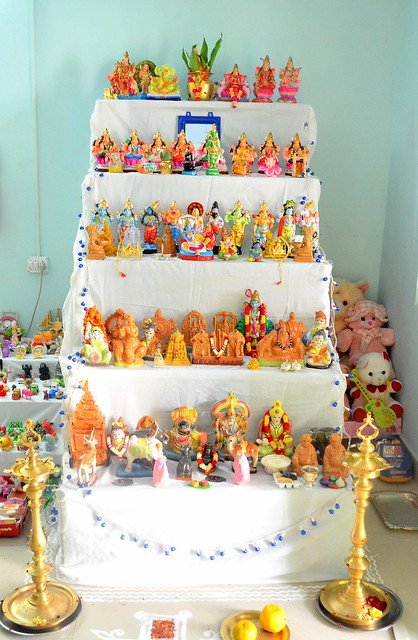
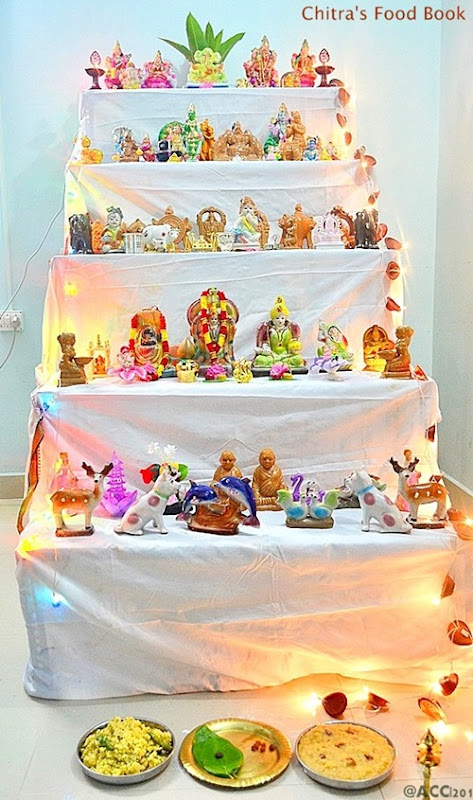
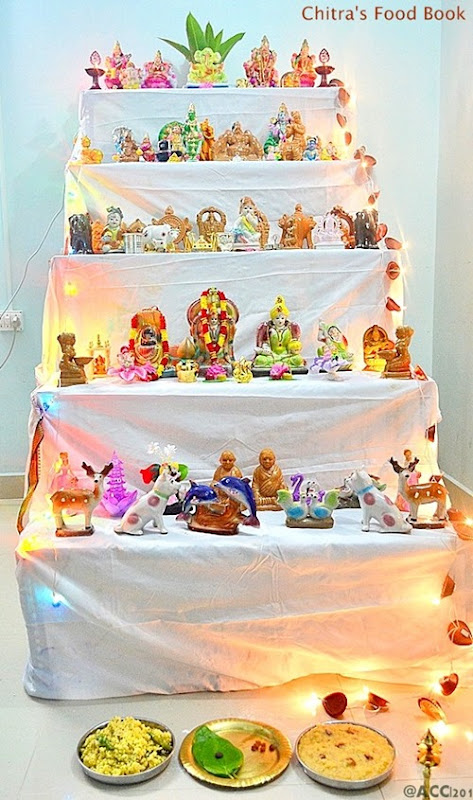
For keeping golu at home, there are certain procedures to be followed in arranging the dolls in steps/tier. All these details are shared below. These are the pictures of our last year golu. I have updated our last year’s golu picture below. I was super excited to see my Mil's golu as we have bought Dasavathar and Ashta lakshmi set with some new idols.

DISCLAIMER : The information & pictures I have shared below are completely based on our house golu. It may differ slightly with the authentic ones. Friends please excuse.  Please leave your thoughts in comment section if anything needs to be corrected!

Here is the picture of my MIL's Golu :)

How to keep golu at home

IMPORTANT THINGS NEEDED FOR KEEPING GOLU


Golu stand
Special thanks to my FIL for sharing this golu stand picture with me.
  • Readymade golu steps or steps made using tables and boxes ( number of steps should be 3,5,7 or9) (refer picture for Golu stand/golu padi)
  • A white cloth ( dhoti/Veshti) OR some colorful sarees.
  • Safety pins & bell pins for tucking the cloth with the stand.
  • Kalasam/Kalash/Poorana kumbham (an auspicious set up of brass pot/Sombu with rice, dal covered with mango leaves and coconut on top of it)
  • Mirror
  • Marapachi dolls ( Raja,Rani), New idols of gods or the ones you use traditionally.
  • Dasavatharam set, Ashta lakshmi set, Ganesha set & kalyana set (optional to keep)
  • Idols of saints, freedom fighters & some kids toys (whichever you have in your house)
  • A set of serial light and some decorative lamps.
  • Flower pond
  • Things for making park and other creative ideas.
  • Mulaipari with Vendhayam / methi seeds, green gram 

DO's and DONT's during Navaratri Golu


Do's
  1. Take bath daily( Preferrably Head bath) on all the 9 days.
  2. Wear clean clothes.
  3. Do not eat non-veg food if possible no onion, no garlic veg food.
  4. Draw small kolam everyday in front of golu
  5. Offer flowers to God in the display daily.
  6. Light lamp in the morning and evening.
  7. Offer some neivedyam both in the morning and evening. You can keep some rice varieties in the morning and have the same for your lunch. Keep some sundal varieties or sweets in the evening. If you are not able to prepare any special recipes for neivedyam, keep some fruits, kalkandu/ rock candy, jaggery or dry grapes/ raisins.
  8. Do Mangala harathi and recite some slokhas everyday.
  9. Invite & give thamboolam for married ladies and young girls in the evening.
  10. You should study in front of Saraswathi on Vijayadasami day.
Dont's
  1. Do not stitch the clothes at home during these nine days. 
  2. Do not cut your nails. Do not cut the hair. Avoid hair cut even in saloon
  3. Do not dust your house ( Otrai adikarathu) but you should sweep your house regularly.
  4. Do not eat non-veg food
  5. Do not study on Saraswathi pooja day. 
  6. Avoid travelling to places by locking your house if you keep golu. Try to be at home during pooja time if you are a working women. 
  7. Most importantly, do not fight with anyone at home. Try to be calm and happy !
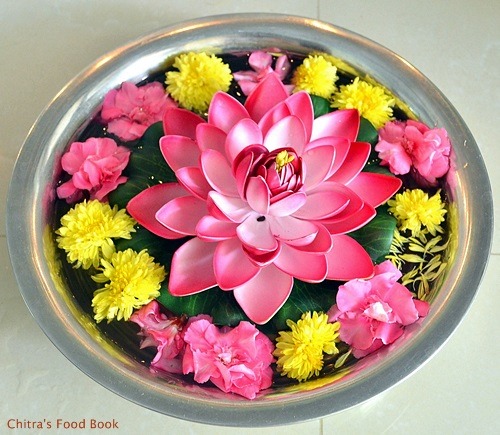
Flower pond


HOW TO ARRANGE THE DOLLS IN GOLU STEPS


Three days before golu, you have to put Mulaipari ( ie. you should grow/ germinate grains/ seeds in a plate filled with sand. U can use methi seeds, horsegram, green gram or ragi). For this, wash and soak the grains overnight. The next day drain the water & set aside. Take a small tray with rim and fill it half with sand. stud the grains and spread a layer of sand over it. Sprinkle some water and keep it in sun for few hours & in shade for two days. Sprinkle water whenever needed (never pour water). Small plants will come up. U should keep this in front of the golu. So keep it ready. Refer above for DO's & DONT's.
  • On mahalaya amavasya day, Golu steps are to be set by covering with white dhothi cloth or silk saree ( No problem even if its an old saree, just wash and use it) and it has to be ready. U can use the readymade golu padi/Golu steps or use some old boxes, tables, chairs etc to make steps. But keep in mind, the munber of steps should be 3, 5, 7 or 9. Keep the golu steps in the corner of the house(facing East or North) by resting on the wall. Usually Golu is kept facing east.
You can arrange the dolls on amavasya day night after 6pm. Keep the kalasam on the next day during paatimugam / Pradhamai time. Remember if you have arranged all the dolls and kept the kalasam, you should start doing the pooja with neivedyam. Keeping Kalasam is more important. No matter even if you arrange all the dolls, keep the kalasam at the right time and start the pooja. Do not keep the kalasam on Amavasya day. Please check drikpanchang.com for exact timings for kalasa avaahanam on prathamai day as per your place. 
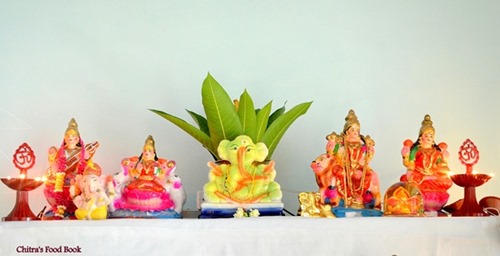
  •  Kalasam should be placed in the center of the top most step or in the last step. Please follow it as per your acharya's advice. My MIL usually keeps in the first step. 
  • For making kalasam, take a brass pot/sombu and fill it with rice and toor dal with some coins till its neck. Alternatively you can fill the kalasam with water adding cardamom, jathikai and other scented spices along with some coins. But I feel placing rice in kalasam is better than water as you cannot change the water during these 9 days. Then keep mango leaves in the sides and place a coconut over it. (Refer picture). The mango leaves should not be changed even if they go dry. Behind the kalasam, you should place a mirror. Here kalasam is considered as Goddess Durga. So keep a mirror such that kalasam should be seen on it.
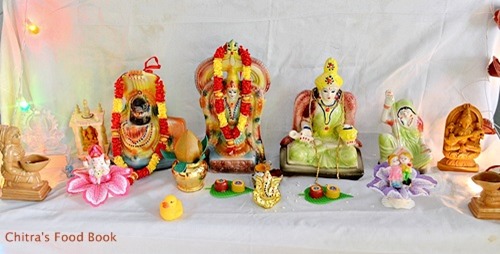
  • In the first step, keep the kalasam in the center. Next to kalasam on both the sides, you should keep Ganesha, Durga, Lakshmi & Saraswathi idols. Alternately, you can keep the kalasam in the bottom of golu by placing it on a plank.
Golu first step
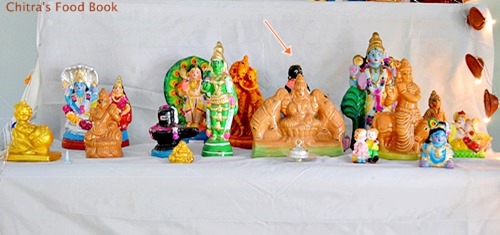
  • In the second step, you should keep two marapachi dolls (wooden dolls, see the arrow) a pair of male & female in the center by wearing saree, jewels and dhoti and you can decorate the couples as you wish. Arrange the other dieties like Vishnu, Shiva and Dasavathar set, Krishna set etc on the second and third steps. There is no hard and fast rule as to which deity goes where, but generally the top steps are reserved for deities, while the bottom steps are occupied by animal, human and inanimate statues.
second step golu

Kolu third step
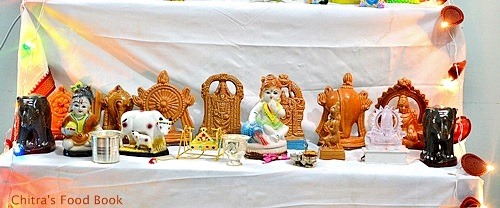
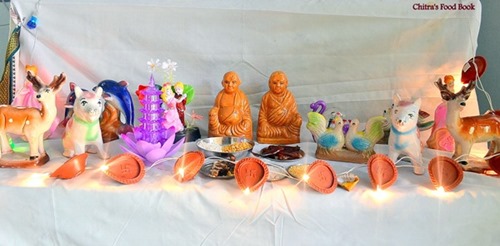
  • In the fourth step, you can keep some statues of saints/ guru like Ramanar, Meera, Ramakrishna paramahamsa & other mahans. Also you can keep the statues of freedom fighters & world famous personalities. (We din’t have those idols. So we have kept meera with other idols).
fourth step golu
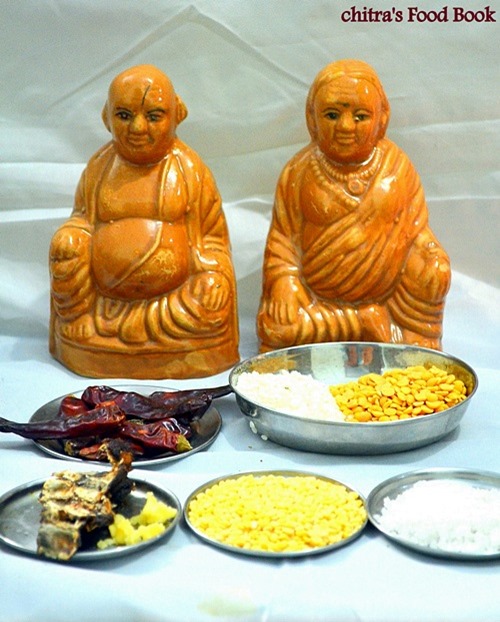
  • In the fifth(last) step chettiar bommai has to be kept in the center. In front of the chettiar bommai, arrange a shop like thing by keeping dals, rice, chillies in small plates ( Refer picture).
  • On the both sides of chettiar bommai, you can keep statues of other human beings, animals, birds and inanimate statues.
Golu fifth step

Chettiar bommai golu

After arranging all these dolls, draw a rangoli in front of the golu ( using rice flour & colour powders) and keep a big basin filled with water and decorated with flowers. On the sides of Golu, place two lamps( vilakku) and lit them. Keep the mulaipari in the side of golu or infront of it. The most important thing on all these nine days is once you keep the golu, you should not close the house without doing pooja for any reasons like travel etc. If you are a working women, do the pooja in the morning and evening after coming from the office. U should light the lamps in morning as well as evening and do pooja by offering some sweets and sundal.

One of the most important ritual in Golu is exchanging thamboolam. U should invite young girls, ladies to see the golu and honour them by giving thamboolam and prasadam. People usually say that we should not sleep in the afternoon as we have to do pooja in the evening. Suppose if you sleep, its better to take bath before doing the pooja.

On each day of Navratri, a sundal variety has to be done for prasadam. The scientific reason behind offering sundal is that during the months of September-october, people get easily tired and fell ill due to weather. So it is prescribed to have protein rich foods to rejuvenate ourselves. Another theory is that sundal is offered to appease Nava grahas i.e nine planets. What matters ultimately is that of all the dishes should be made from the nava-dhanyas during Navratri.

Please check my post on Navaratri Neivedyam Recipes for 9 days to decide the dish.

HOW TO REMOVE GOLU/KOLU


golu last day
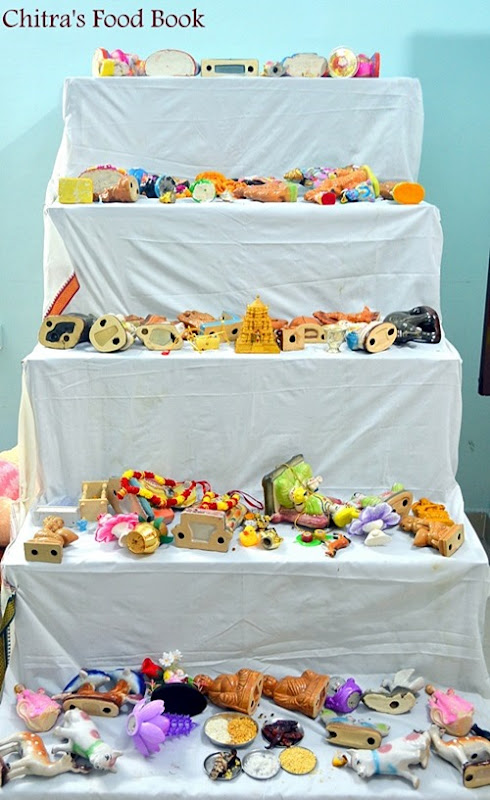
On Vijayadasami day, offer some neivedyam. Do the pooja and then take mangala harathi for Golu. Move the kalasam towards north and make either one doll or all the dolls to sleep after evening neivedyam to mark the end of that year’s golu( refer picture). The next morning, you can dismantle them and keep in a box covered with newspapers & thermocoal ( to avoid damages) safely for next years usage. Suppose if the 10th day is Friday or tuesday, make the dolls sleep after 10th day morning neivedyam and make them sleep till afternoon. U can pack them before evening. No need to make the dolls sleep over the night.

If you have used water in the kalasam, sprinkle some water on your family members and pour the  remaining water to thulasi plant or some trees. If you had put rice & dal in the kalasam, use it for cooking. Use the coconut in the kalasam for cooking or make some sweets with it. Take the coins and keep in the safe. Remove the keerai from mulaipari and use it for cooking Or transfer the mulaipari to a pot and grow it further.

NAVARATRI RECIPES - SUNDAL RECIPES & OTHER PRASADAMS


Always start with a sweet and sundal on first day. You can make Sweet pongal /Sakkarai pongal Or Kesari along with any sundal variety. Some people make sweet sundal and spicy sundal versions. So its our choice. But a sweet dish is a must on first day. Then you can make any varieties based on your wish for the remaining days.

Please refer my Navratri full collection for more recipes.

Also refer my Navratri recipes for 9 days - A table of South Indian ( Tamil nadu, Andhra) and North Indian recipes to offer God.

I hope this post would help the first timers .Wish you all a very happy Navarathri.
From tomorrow I will share some yummy sundal & sweet recipes along with some no onion no garlic vrat ka khana( fasting recipes). Stay tuned !

WISH U ALL A VERY HAPPY NAVRATARI !

Navratri

Continue Reading...

September 21, 2014

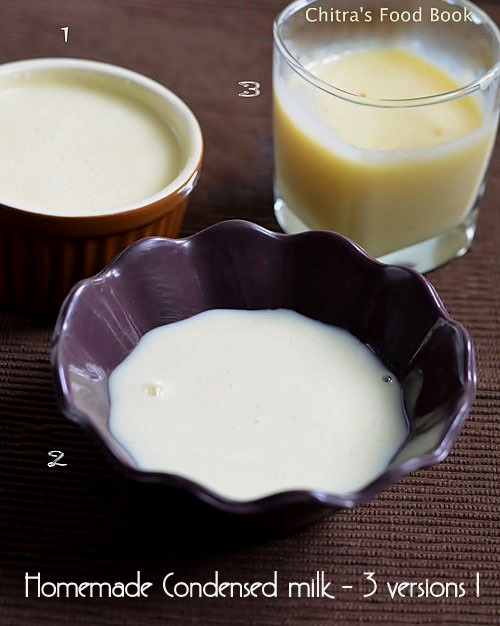
DIY-HOMEMADE CONDENSED MILK RECIPES IN 3 WAYS


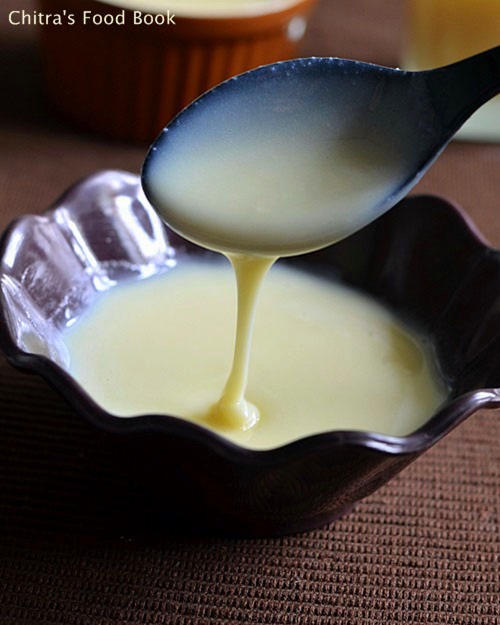
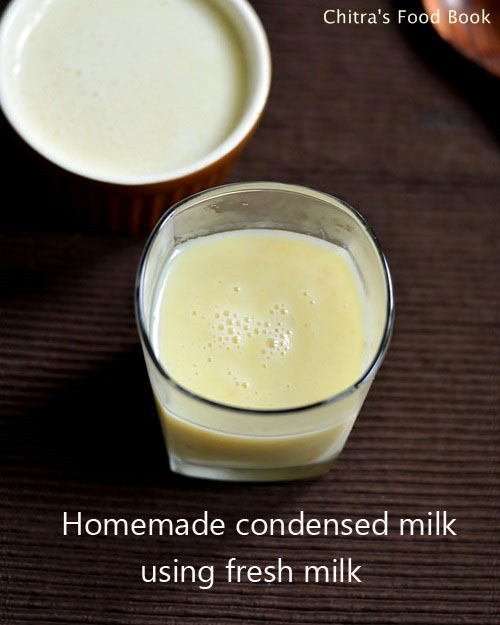
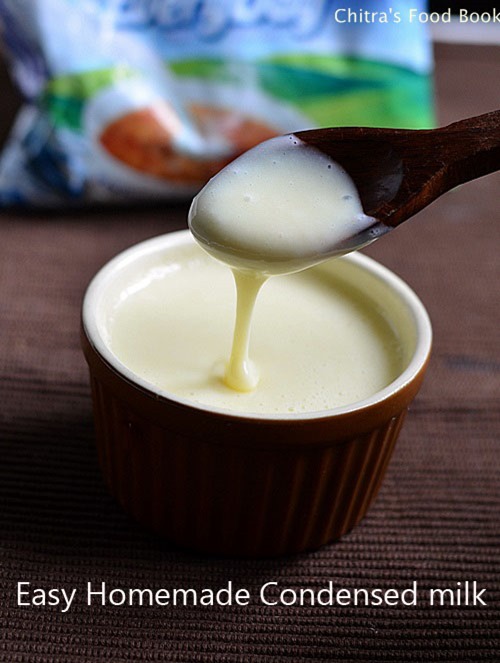
homemade-condensed-milk

Festivals are around & its time to experiment sweets and savouries at home.This year for Diwali & Navratri,i have planned to share some easy n yummy sweets recipes using condensed milk.Before that i wanted to make a post on “How to make sweetened condensed milk at home with & without milk powder using 3 ways”. So here it is !

Condensed milk aka sweetened condensed milk has become one of the most important ingredients for making sweets/Mithai,cakes and desserts.Actually, before blogging, i was not aware of the term condensed milk and i used to ask for milkmaid or amul mithai in shops.But then after blogging, i came to know they are just the popular brands and its not the name of ingredient. 

Even now my mom & MIL are very familiar with the name Milkmaid than Condensed milk.We love its taste very much.Generally we all love to use condensed milk in our sweets especially in kheer/Payasam as it adds a rich taste to the particular dish & it eases the cooking procedure too.But some people hesitate to use condensed milk either because of high calorie or by seeing the cost.One can( ie 14oz) of store bought condensed milk is way too costly.I too avoided using condensed milk in my recipes just because of the above reasons.But when i saw Sharmi’s easy homemade condensed milk within 5 minutes using milk powder, i was amazed and bookmarked immediately to try.I have tried it several times and it comes out very well.Once my Sister Radha suggested me another method of making homemade condensed milk using fresh milk & sugar by watching Nisha madhulika’s youtube video.So i tried in that way too.It came out awesome.I myself got tempted and searched for even more simple recipes that can be made with the ingredients easily available in all our pantries and at the same time within lesser time.I found  & tried the one from my handwritten cookbook.It came out equally well.So in this post,i have shared all the three methods with stepwise pictures.Each method has its own advantages & disadvantages but the result would be almost the same except color.Do follow any of these methods based on the ingredients and time.U will just love the result and u would never go back to buy readymade,store bought stuffs.It saves your time as well as money Money Eyes.I have used this condensed milk in payasam/Kheer and halwa but not in cakes or sweets.I am yet to try them.Ok,lets see how to make homemade sweetened condensed milk easily using 3 methods.

Homemade-sweetened-condensed-milk-recipes

Homemade sweetened condensed milk


Homemade sweetened condensed milk How to make homemade sweetened condensed milk at home with easily available ingredients !
Cuisine: Indian
Category: Sweet
Yields: 1/2 cup
Prep time: 2 Minutes
Cook time: 2 Minutes
Total time: 4 Minutes


INGREDIENTS
METHOD - 1
  • Milk powder - 1/2 cup
  • Icing sugar - 3 tbsp or 1/4 cup ( use 3 tbsp for moderate sweetness)
  • Unsalted Butter - 1tbsp ( at room temperature)
  • Water - 1/4 cup + 1 tbsp ( optional.It will thicken as it sits,so i added little more water)

METHOD -2
  • Milk powder - 1/2 cup
  • Granulated sugar - 1/4 cup
  • Water - 3 tbsp
  • Vanilla essence - a drop ( optional)
  • Unsalted Butter - 1 tbsp,at room temp (optional)

METHOD – 3 (Cook time – 20 minutes)
  • Fresh milk - 1/2 litre ( 2.5 cups)
  • Sugar - 1/2 cup ( 100 gms)
  • Baking soda - a pinch ( optional)
  • Unsalted butter - 1 tbsp at room temp (optional)

METHOD

METHOD – 1
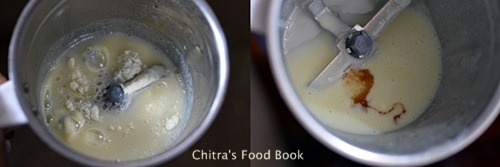
  • In a vessel,boil water till it starts to bubble.In a mixie jar,take all the ingredients given above.Add this boiled hot water to the jar and blend everything until smooth.Wipe the sides and bottom to remove all the milk powder sticking to the walls.Again pulse for a second and remove.Transfer to a bottle and let it cool.Store in refrigerator up to 5 days.Use as needed ! ( For this method,u need icing sugar.I guess u can use powdered sugar too but i have not tried it.) If it turns thick,add little hot water n mix well.It will thin down.
Homemade condensed milk

METHOD - 2
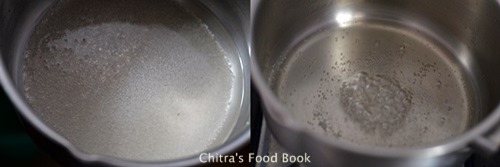
  • For this method,take sugar and mentioned water in a pan.Boil the water & melt the sugar completely.When it starts to bubble,switch off the stove.Take this sugar solution in a mixie jar and add the milk powder & butter to it.Blend it well to make a smooth paste.Wipe the sides & bottom.Add vanilla essence ( if using) and pulse it again.Remove and store after it cools down.This mixture will slightly thicken after it cools down.So add little hot water to adjust the consistency if necessary.
homemade sweetened condensed milk
homemade sweetened condensed milk-1

METHOD – 3
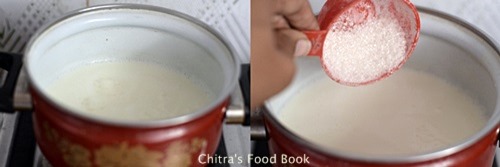
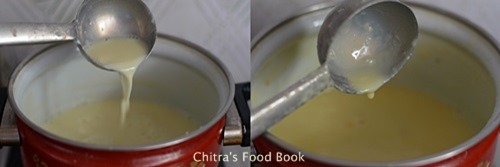
  • Take the fresh milk in a pan.When it comes to boil and rises to the top,simmer the flame and add the sugar.Stir well and allow it to boil till the milk reduces to 1/3 rd of its original quantity.
Homemade condensed milk -1
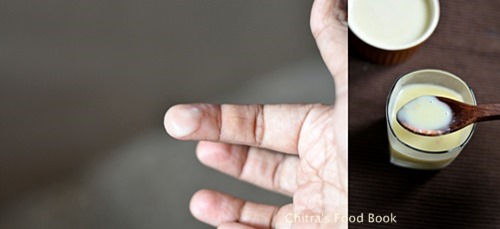
  • Keep the flame medium and stir every now n then to avoid charring.Once the milk becomes slightly thick,take a drop of milk and check it between your thumb and index finger.If the milk is sticky,thick and if it forms a half thread,it is done.Switch off ,add butter( if using) mix well and remove.Do not leave the milk to boil & reduce completely because it will become too thick like a cream once when it cools down.So switch off as soon as it reduces to 1/3 rd even if it is slightly watery.Lastly add a pinch of baking soda,mix well & set aside to cool.Refrigerate and use as desired !
Homemade condensed milk -2
Homemade condensed milk -3


Note

  • Condensed milk stays good for a minimum of 5 days in all the above method.But u should refrigerate it without using your hands.Use a clean spoon to handle.
  • This condensed milk with thicken once it cools down.So add little hot water and adjust the consistency.
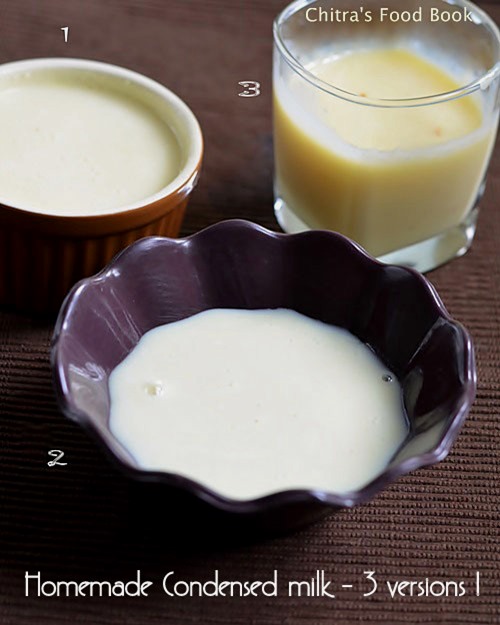
  • The color & consistency of condensed milk may vary in each method but tastes equally good.
  • Condensed milk tend to thicken when it cools down.In that case,add some hot water,mix well and store it.
  • The sweetness would be more in method – 3 than method – 1 & 2.So please adjust as per ur taste buds.


Homemade condensed milk

Make your own condensed milk in your kitchen using any of the above 3 methods.Save your money, time n Enjoy making your favourite sweets !

Homemade condensed milk using milk powder


Continue Reading...


September 19, 2014

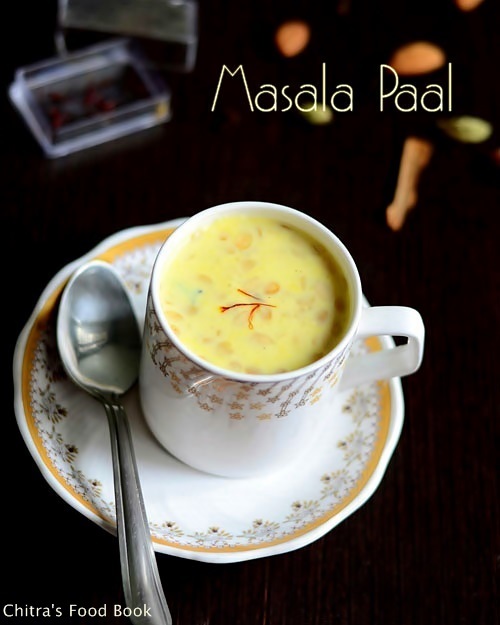
MASALA PAAL RECIPE | MADRAS MASALA MILK

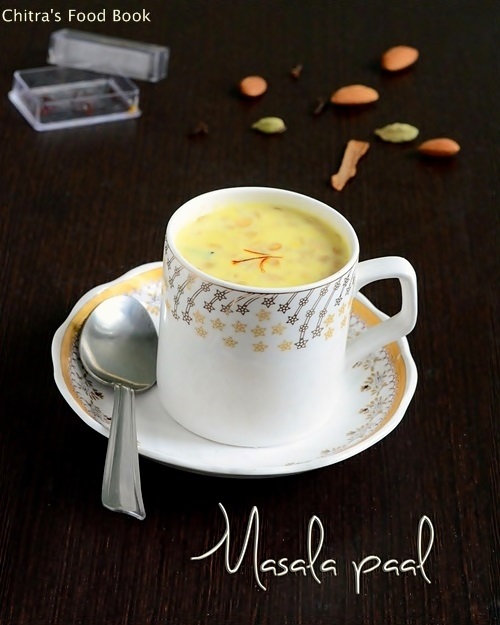
Masala paal recipe
Needless to say about Masala paal to Tamil people especially to Chennaites. For others, Masala milk is nothing but spiced milk with full of aromatic spices enriched by adding nuts. It is very famous in Chennai and it is fondly called as “Madras masala paal”.

Sendhil had told me so much about this drink. When he was doing his degree in Guindy college, he used to have this masala paal at midnight regularly in a small tea shop along with his friends and he is a big big fan of it. I had tasted this only once in Chennai Saravana bhavan but I completely forgot its taste.

Yesterday when I saw this video by Revathi sankaran in youtube on how to make madras masala paal, I got tempted to try. I tried it with few modifications and it came out very well. We loved it to the core. Even Raksha wanted to have it regularly instead of her usual health drink. 

In the actual recipe, Chironji/Piyal seeds ( saara paruppu) was used. But I added melon seeds. U can add pistachios instead OR make it without nuts too. Do try it tonight, drink it hot and have a peaceful sleep !
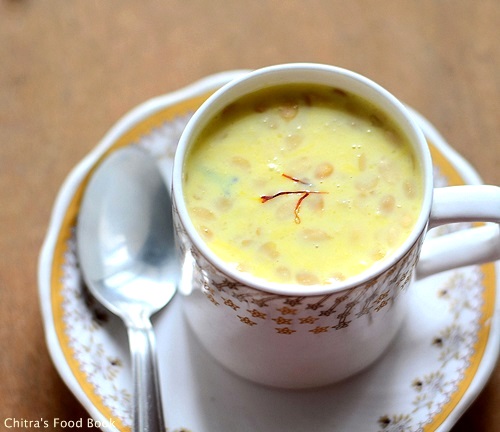
Masala paal

Masala milk/Masala paal recipe


Masala milk/Masala paal recipe Madras masala paal - Milk spiced with masalas and enriched with nuts !
Cuisine: Indian
Category: Drink
Serves: Serves 2
Prep time: 5 Minutes
Cook time: 20 Minutes
Total time: 25 Minutes


INGREDIENTS

  • Milk - 1/2 litre (full fat milk)
  • Sugar - 2.5 tbsp
  • Almond/Badam - 8-10 nos
  • Cloves - 2 no
  • Cinnamon - 1 inch piece
  • Cardamom - 2 nos (crushed)
  • Jathikai powder- a pinch ( optional)
  • Pepper powder - 1 pinch
  • Saffron threads - few(adjust as per the color you need)
  • Chopped Nuts or Chironji seeds/Piyal(saara paruppu) – 2 tbsp ( I used melon seeds)
HOW TO MAKE MASALA PAAL - METHOD

  • Boil water and add badam. Let it roll boil well for a minute. Discard the hot water carefully and immediately put the badam in cold water/tap water. Skin will come out easily. Grind it adding required water to a smooth paste.
How to peel badam easily
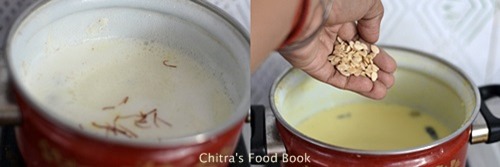
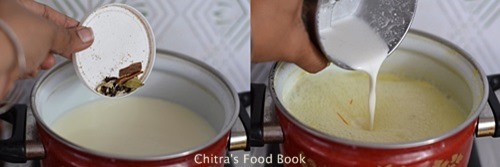
  • Boil milk adding all the spices like cinnamon,cloves, elachi, saffron threads & jathikai powder. When it comes to boil, add sugar and the ground badam paste. Let it boil well in medium flame for 15-20 minutes till the quantity of milk reduces to half. Keep stirring every now and then to avoid charring.
masala paal picture 1
  • Lastly before switching off the flame, add a pinch of pepper powder & chopped nuts. In the actual recipe, saara paruppu/Piyal seeds is used. But I used melon seeds.  Mix well. Remove the spices before serving and Serve hot !
masala paal picture 2
Enjoy !


Note

  • Use full fat milk to get rich taste.
  • U can replace sugar with palm sugar crystals/Panag karkandu to make it healthy.
  • Adjust the quantity of saffron threads as per the color you need.
  • I used melon seeds instead of chironji. U can replace it with cashews and pista.


Enjoy this hot masala milk at night before going to bed & have a peaceful sleep. 


Continue Reading...


September 16, 2014

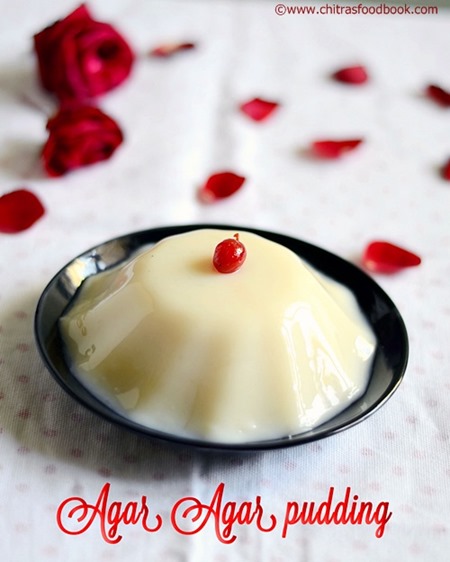
CHINA GRASS PUDDING/AGAR AGAR PUDDING RECIPE


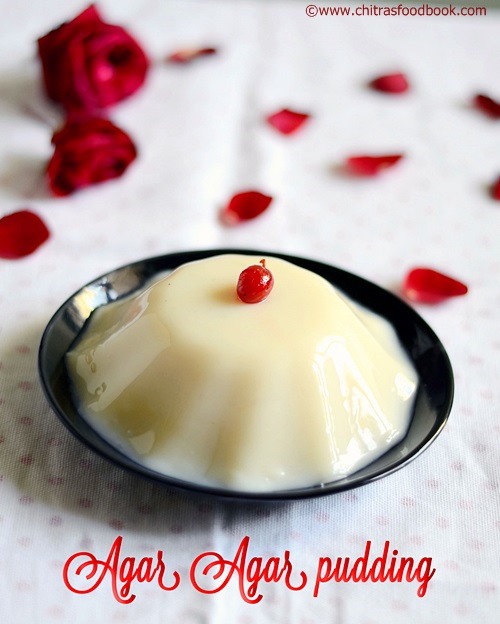
agar agar pudding recipe

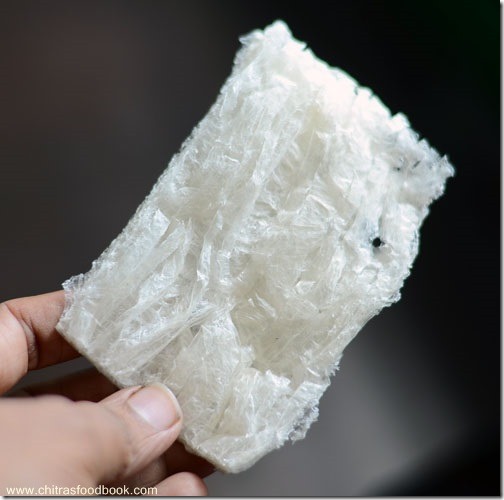
China grass well known as agar agar is a type of gelatin extracted from Sea weed. It is called as “Kadal paasi” in Tamil.It is available in the form of strands and powder.It is mainly used for making jellies,puddings and custard all over Asia.Once Sendhil told me about china grass halwa he tasted in his office.He told its very good for health and the best body coolant in summer.So I too wanted to try halwa with it and bought a packet of Bakers china grass. At that time I was not aware of other china grass recipes like china grass pudding and china grass payasam/kheer.When I was browsing for some simple agar agar recipes, I got it here. Its an easy dessert recipe with agar agar and milk. I made it in two flavours.One by adding rose milk essence and other one adding vanilla essence. Raksha loved the white one. Myself and sendhil liked the pink pudding.Soon I must try varieties of this pudding using tender coconut water, mango and pineapple. Its a quick fix and healthy, Indian dessert recipe. Do try it for your kids and yourself. You will love it !

china grass

China grass/Agar agar pudding recipe


China grass/Agar agar pudding recipe Easy,yummy,healthy pudding recipe using China grass/Agar agar.
Cuisine: Indian
Category: Dessert
Serves: Serves 3
Prep time: 15 Minutes
Cook time: 30 Minutes
Total time: 45 Minutes


INGREDIENTS
1 cup - 250ml
  • China grass/Agar Agar - 5 gm ( I used bakers,half of 10gm packet)
  • Milk - 2 cups
  • Water - 1 cup ( add 3/4 cup water if you want to cut pudding into pieces)
  • Sugar -  3/4 cup ( Use 1/2 cup for mild sweetness)
  • Vanilla essence - 1/2 tsp ( for white pudding)
  • Rose milk essence - few drops ( for pink pudding)
METHOD

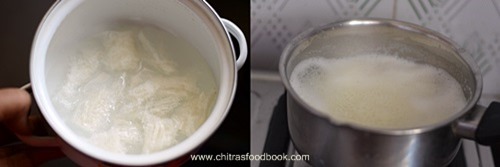
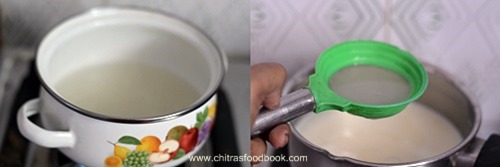
  • In a wide bowl, take 1 cup of water. If you want thick pudding, use 3/4 cup water. Cut the china grass into pieces and let it soak for 15 to 20 minutes. You can add it whole as shown in the video. China grass will become soft. In the mean time, boil milk for a minute. Do not add sugar now. Switch off the flame and keep the boiled milk aside.
agar agar pudding step by step picture
  • Take the soaked china grass along with water and boil in medium flame. Keep stirring. China grass will melt and mixes with water. When its 90% dissolved, reduce the flame to very low and keep stirring. It will dissolve completely.  If you mix in high flame, china grass will thicken. So do it in low flame and make sure agar agar mixture is in liquid form.
agar agar pudding step by step picture 1
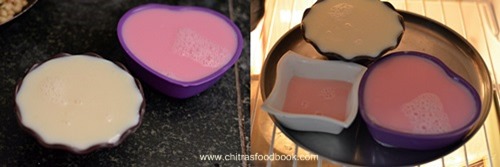
  • Now add this china grass water to the milk. No need to strain it. Mix well. Milk won't become thick now. It would be almost in same consistency. Now add sugar, mix well in very low flame till sugar dissolves in milk. You could find small crystals of china grass as you cook. Don't worry. Remove from the flame and let the milk become warm. Then divide the milk in two different shaped bowls. Add vanilla essence to one bowl and rose milk mix essence to the other. Mix well. Let the milk cool down. It will set once it starts to cool down. Refrigerate for 3 to 4 hours or till its set.
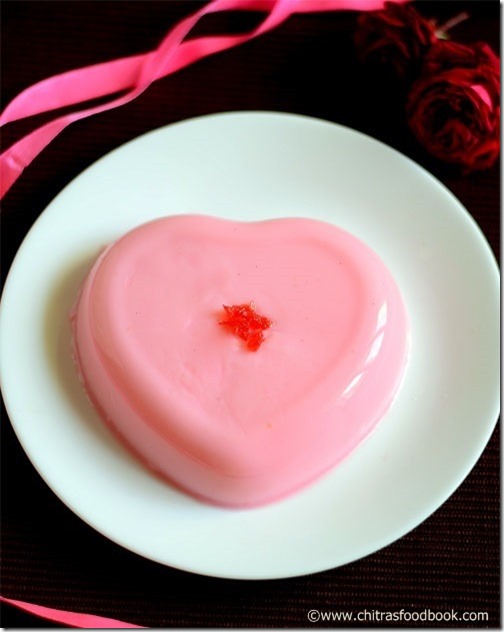
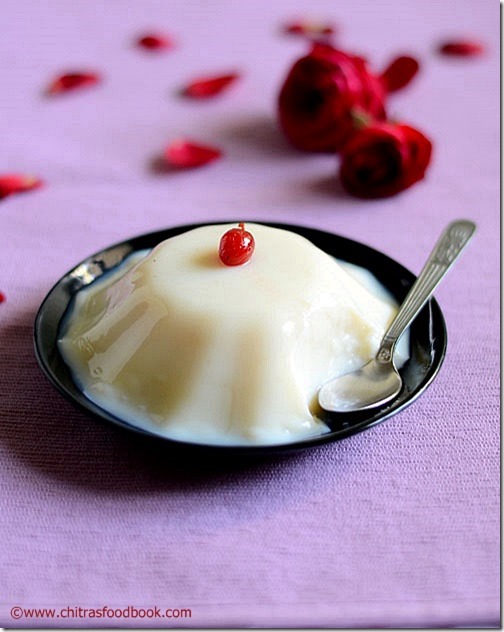
  • It would be well set. Remove and invert in a bowl or plate. Serve immediately.

agar agar pudding step by step picture 2
Enjoy !

Note

  • In the original recipe, it was mentioned to use cardamom powder.But I used vanilla essence.
  • U can also add few tbsp of condensed milk for more thick and rich taste.In that case, you should reduce sugar accordingly.
  • Do not cook the milk+ agar agar for long time after adding sugar. It may curdle.

Which one are you going to make,pink or white pudding Winking
china grass pudding recipe

Agar-agar-pudding-recipe

Continue Reading...