Search Chitra's Food Book

August 6, 2014

EASY INDIAN VEGETABLE SALAD RECIPE-SALAD RECIPES

 Mixed vegetable salad
We think about salad recipes only when we think about diet or weight loss, Right?. Whenever I pack vegetable salad for Sendhil’s lunch box, his colleagues ask him “What Sendhil, diet aa “ ?? We all have this mind set. I too had the habit of eating salads only in buffet and banquets and I was making varieties of vegetable and sprouts salad recipes for Sendhil’s lunch only to cut down the intake of rice when he was under diet to overcome some health issues.

But nowadays, I have introduced salads in our daily routine just to consume raw vegetables in a healthy and tasty way. I must thank my friend Shalini for urging me to make salad by suggesting some easy & quick recipes.When I browsed for mixed vegetable salad recipes, I found most of them with celery & lettuce leaves. But I couldn’t get these vegetables in small shops nearby my house. So I tried this simple salad recipe in Indian style with vegetables we can get easily even in petty shops especially in India. I used just 1/2 tsp of olive oil for salad dressing which is completely optional. Other than this, this is a low calorie, basic, simple Indian vegetable salad which you can make in minutes. Do try this healthy, easy salad recipe for your kids and family. Stay healthy and fit !
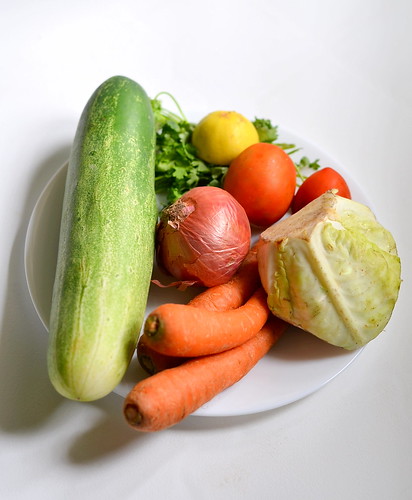
Vegetables for salad

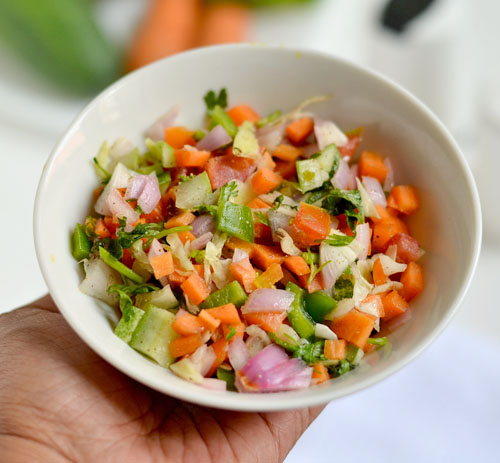
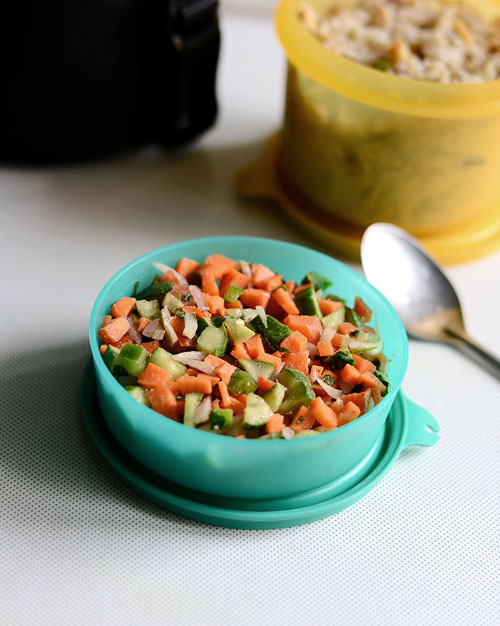
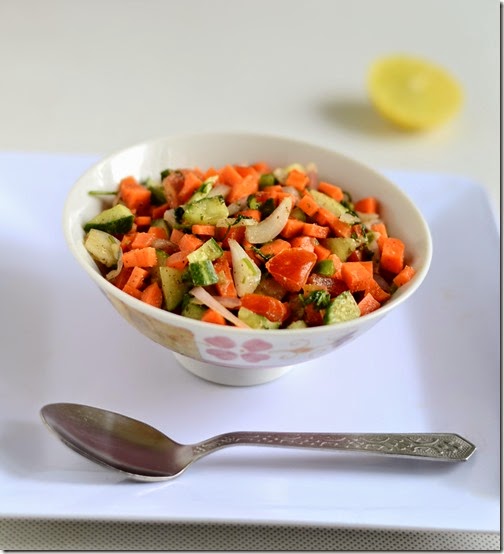
Indian vegetable salad recipe


Indian vegetable salad recipe Mixed vegetable salad recipe using Indian vegetables !
Cuisine: Indian
Category: Salad
Serves: Serves 2
Prep time: 10 Minutes
Cook time: 5 Minutes
Total time: 15 Minutes


INGREDIENTS

  • Carrot - 1 no (small)
  • Big onion - 1/2 no
  • Tomato - 1/2 no (use deseeded)
  • Cucumber - 1/4 no (small)
  • Capsicum- 2 tbsp (finely chopped)
  • Cabbage - 1 leaf (chopped or grated)
  • Coriander leaves - few
  • Salt - as needed
  • Pepper powder - 1/2 tsp (adjust)
  • Lemon juice - few drops
  • Olive oil or coking oil – 1/2 tsp
HOW TO MAKE VEGETABLE SALAD - METHOD

  • Wash and chop all the vegetables into small cubes. Deseed tomato n cucumber if you are packing this salad for lunch box because it will leave water. Else deseeding is optional. Add salt, lemon juice and pepper powder. Mix well. Lastly add 1/2 tsp of oil, mix and serve ! Adjust the quantity of pepper powder as per your taste buds ! Enjoy !


Note

  • For variations, you can add a handful of pomegranate seeds to make it a colourful fruit and vegetable salad.
  • U can also add a handful of boiled sweet corn kernels.
  • If you are making for kids, try adding few pieces of badam, cashews and dates. It will give a crunchy taste.
  • This salad won’t leave water unless you add more tomatoes and cucumber with seeds.
Do check out my vegetable & fruits salad for kids and parties !


Try this easy, yummy, colorful salad recipe. U will love its simplicity and taste !


Continue Reading...


August 4, 2014

Thinai Idli Recipe | Foxtail Millet Idli - Millet Recipes

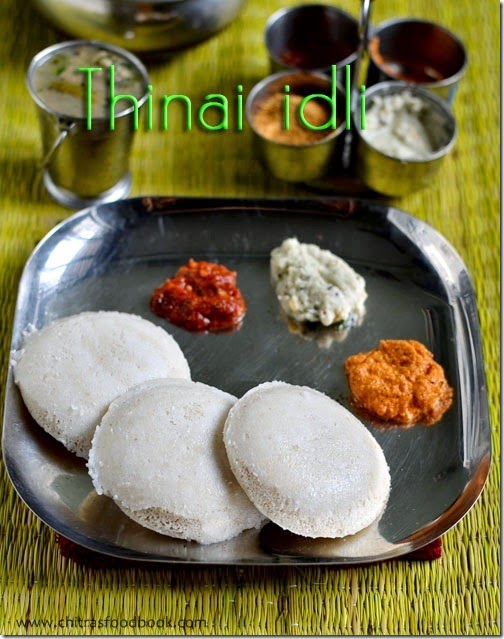
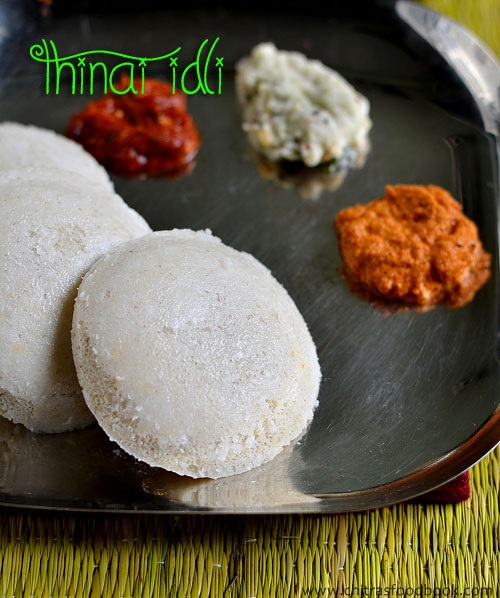
Foxtail millet idli recipe

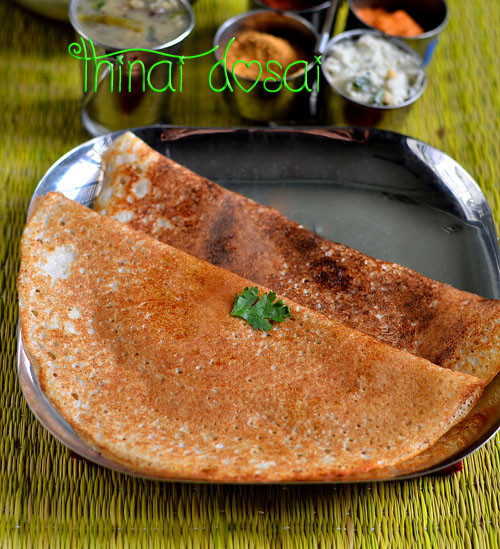
Last week I tried thinai idli recipe for the first time using fermentation method. Earlier I tried an Instant Foxtail millet idli which was a super flop. But this recipe worked out very well. Idli came out soft and spongy. I made idli as well as dosa with this batter. Its taste & texture was more like our usual idli, dosa. Only its color was not pure white.

We were very happy to have a healthy breakfast recipe & I was even more happy as i have got yet another interesting idli recipe to include in my idli varieties. In other languages, Thinai is called as ”Foxtail millet” in English,”Navane” in Kannada,”Kakum”in Hindi,”Korra” in Telugu,”Thina” in Malayalam,”Kaon” in Bengali,”Kang” in Marathi & Gujarati and ”Kanghu” in Oriya.

Last year few readers told me to post some quinoa recipes & I was thinking that quinoa in called as Thinai in Tamil.

But when I googled, I found quinoa & thinai (foxtail millet) are different. I will try to buy quinoa in Bangalore and try to post some healthy recipes with it. But before that, I wanted to share this easy and healthy millets recipe which is a great replacement for our rice idli. 

Please check this link to know more details about “Thinai & its health benefits” with pictures. Lets see how to make thinai arisi idli recipe . Soon I will share some more interesting recipes with other millets too. Don’t forget to check out my Mixed millet laddo recipe & other millet recipes .


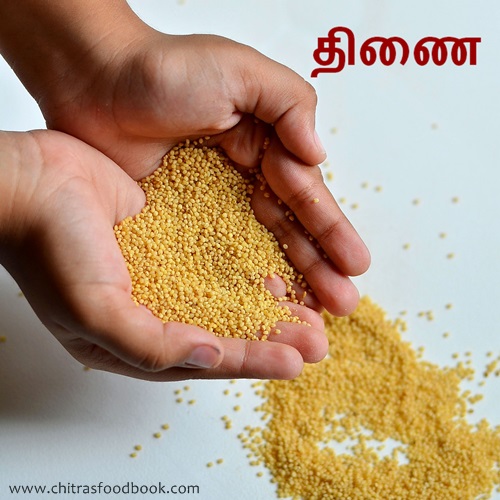
Thinai

Thinai idli/Foxtail millet idli recipe


Thinai idli/Foxtail millet idli recipe Idli recipe using Foxtail millet - Healthy breakfast recipe !
Cuisine: Indian
Category: Breakfast
Serves: 30
Prep time: 4 Hours
Cook time: 15 Minutes
Total time: 4H15M Minutes


INGREDIENTS
 1 cup = 250ml
  • Foxtail millet/Thinai - 2.5 cups
  • Idli rice/Salem rice - 1/2 cup
  • Urad dal - 1/2 cup
  • Aval/Poha - 1/4 cup
  • Fenugreek seeds - 1/2 tsp
  • Salt & water - as needed
HOW TO MAKE THINAI IDLI - METHOD

  • Measure & take all the ingredients together and wash it carefully . Its better if you wash it using a strainer. Soak for 3-4 hours.
  • Grind them to a smooth paste adding required water and salt. Remove mix well and allow it to ferment overnight or minimum 8 hours.
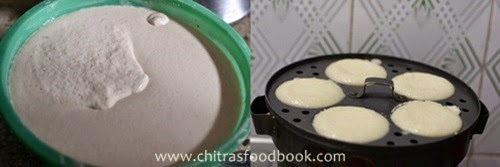
  • The  next day, batter would have raised well (Not doubled). Now mix the batter very well and pour in a idli plate.
Thinai idli recipe
  • Boil water in a idli pan and keep the plates. Steam it for 10-15 minutes. Check with the back of a spoon for doneness. If the spoon comes out clean, idli is ready.
  • Remove  the idli plate and rest it for 2-3 minutes before removing them else it will be sticky.
  • Refrigerate the batter & make dosas the next day.
Enjoy !
Note

  • This batter becomes sour very quickly so refrigerate it after 8 hours till you use it.
  • Do not use more urad dal than the mentioned quantity because idli will become sticky.
  • Do not remove the idlis if its very hot. It may be sticky. Give a standing time of 2-3 minutes before u remove.
  • If the quality of urad dal is too bad,use little more than 1/2 cup. Similarly if the quality of dal is too good, use 1/3 cup. It varies.
  • U can also make dosas using the above batter.

Do Check out my Mixed Millet laddu recipe & other millet recipes if interested !

Thinai Dosai 
Thinai dosai

Enjoy this healthy foxtail millet/thinai idli for breakfast with your favourite chutney and sambar !

Thinai idli recipe
Continue Reading...


August 1, 2014

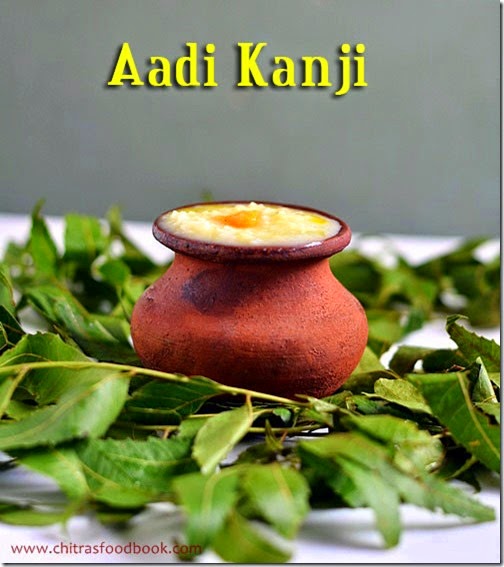
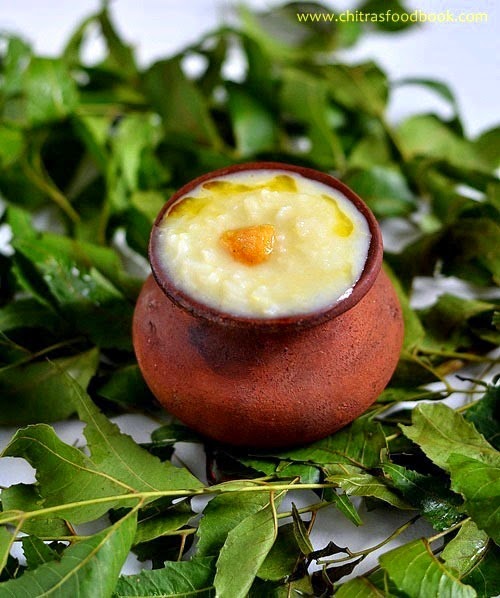
AADI KANJI RECIPE/ARISI PARUPPU KANJI-AADI VELLI RECIPES

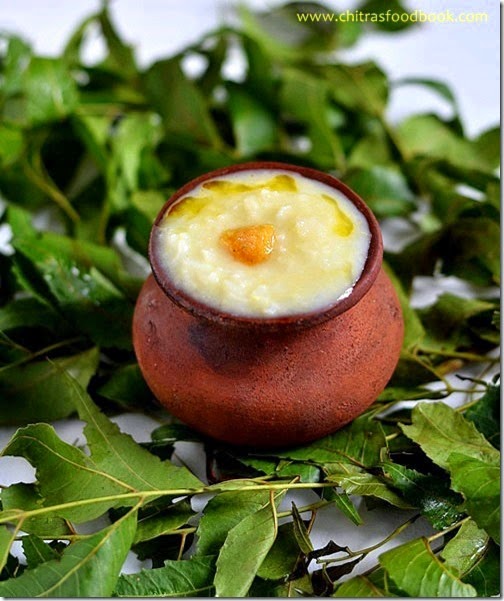
aadi kanji recipe

I made this arisi paruppu kanji/ rice dal porridge recipe for Aadi velli today. My MIL has the practice of offering this porridge for Mariamman on Aadi velli/friday. We call it as Mariamman kanji. My in-laws are with me for the past two weeks and we are having great days together. This time I learnt some yummy authentic recipes from her. This is one among them. In this porridge I have used rice & moong dal.It very easy to make & can be made in minutes. No need to roast the rice or dal. Its good for babies too.

Today I prepared this porridge for the first time and offered to Mariamman. It tasted yum. My in laws like this salty porridge more than the sweet ones and they usually have this for breakfast. Its a very filling & easily digestible porridge. Do try this easy porridge recipe for Aadi velli and get the blessings of Amman. Let see how to make this one step rice and dal porridge recipe.

Do check out my rice porridge recipe for babies.

aadi velli recipes

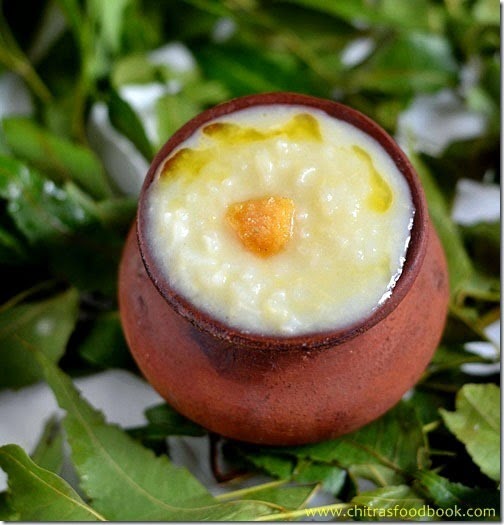
Aadi velli kanji recipe


Aadi velli kanji recipe Aadi kanji recipe for aadi velli using rice and moong dal
Cuisine: Indian
Category: Breakfast
Serves: 4
Prep time: 2 Minutes
Cook time: 15 Minutes
Total time: 17 Minutes


INGREDIENTS
1 cup - 250ml
To pressure cook
  • Raw rice - 1/4 cup
  • Moong dal - 3 tbsp
  • Salt - as needed
  • Water - 2 cups
  • Boiled Milk - 1/2 cup
While offering
  • Melted ghee - 1 tsp
  • Jaggery - a small piece
HOW TO MAKE AADI KANJI - METHOD

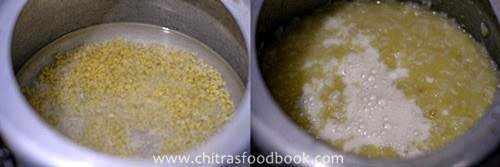
  • Wash the rice and dal and take in a small pressure cooker. Add 2 cups of water and the required salt. Pressure cook for 2-3 whistles in low flame. It takes 10-12 minutes.
  • After the steam is released, open the cooker and add 1/2 cup of boiled milk .Give a boil. Adjust the consistency as you wish by adding more milk or water. We make it in spoonable consistency. Transfer to a serving bowl.
Aadi kanji step
  • Just before offering, pour a tsp of melted ghee & a small piece of jaggery on top.
    Offer to GOD and enjoy !


Note

  • Do not forget to keep a small piece of jaggery & a tsp of melted ghee while offering to GOD. Its a must !
   Do check out my rice porridge recipe for babies.


Aadi porridge recipe

Make this simple and healthy porridge for Aadi velli & get the blessings of God !
aadi-porridge-recipe

Continue Reading...


July 31, 2014

ALOO KURKURE RECIPE-EASY KIDS SNACKS RECIPES

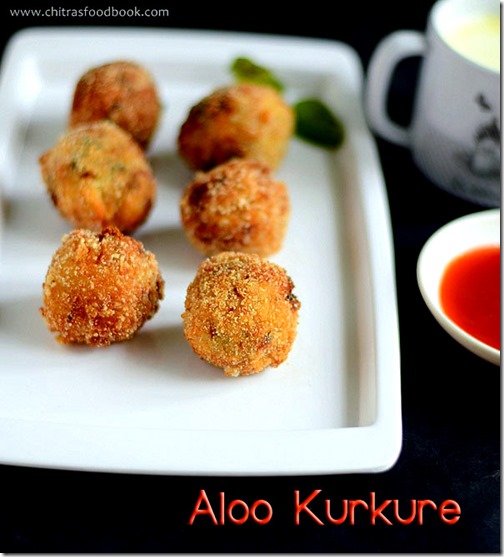
aloo kurkure recipe

Do u have Potato, poha and a handful of mint leaves in hand ? Then you can make this yummy kids snack recipe in the next 15 minutes . Its so easy to make and tastes super crispy. I am sure your kids won’t stop with one.I tried this recipe from Tarla Dalal’s site with slight modifications. Last week Raksha was asking for some evening snacks after coming back from school. 

I usually make some bajjibonda varieties as it can be made in minutes easily. But this time, I even felt bored of making the same and wanted to try something different. And I reminded about this recipe which I had bookmarked long back from her site as the title “Aloo kurkure” sounds different & attractive. I never expected such a crispy exterior for just the coating of poha/rice flakes. U can call this as potato-mint croquets too. It was tasting good with minty flavour. Its sure a crowd pleaser and you can make this snack for get together & birthday parties. It stays crispy for long time. Lets see how to make this yummy aloo kurkure recipe.

aloo-kurkure

Aloo kurkure recipe


Aloo kurkure recipe Aloo kurkure - A deep fried snack with minty flavoured potatoes coated with rice flakes!.
Cuisine: Indian
Category: Snacks
Serves: 10 nos
Prep time: 10 Minutes
Cook time: 10 Minutes
Total time: 20 Minutes


INGREDIENTS
For balls
  • Boiled Potato/Aloo - 2 nos ( 1/2 cup mashed)
  • Maida/ all purpose flour - 1 tbsp ( for binding)
  • Powdered poha - 2 to 3 tbsp ( to make thick dough)
  • Mint leaves - a handful
  • Green chillies – 2-3 nos small sized,(finely chopped)
  • Lemon juice - 1/2 tsp
  • Roasted cumin powder - 1/4 tsp
  • Garam masala powder Or Chat masala powder  -  1/2 tsp
  • Salt – as needed
For coating
  • Maida - 1/2 cup
  • Poha/Beaten rice flakes - 3/4 cup 
  • Water - as needed
  • Cooking oil - for deep frying
METHOD

  • Wash and pressure cook the potatoes in high flame for 3-4 whistles adding required water. Peel the skin and mash it well.
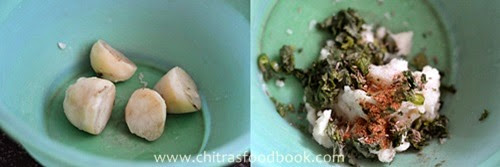
  • To this mashed potatoes, add maida, finely chopped mint leaves, all the spice powders, powdered poha, salt & lemon juice. (use crushed cumin seeds if you don’t have roasted cumin powder). Make a smooth, non sticky dough. 
aloo kurkure step1
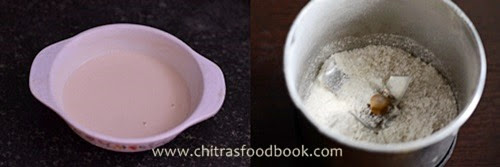
  • Mix well. Powder the rice flakes slightly coarse & take it in a plate. Set aside. Mix maida, little salt and water & prepare the batter for outer covering. The consistency of batter should be such that it should be able to coat the balls well. Do not make the batter very thick or thin. It should fall like a ribbon.
aloo kurkure step2
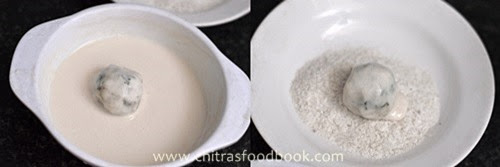
  • Make big lemon sized balls out of the potato mixture and coat it in the maida batter. Again roll it in the ground poha which you kept in the plate. Do it twice for better binding.
aloo kurkure step3
  • Heat oil to deep fry. Add a pinch of ball. If it rises immediately, oil temperature is just right. Now drop the balls in batches and deep fry them till golden brown.
aloo kurkure step4
It tastes crispy outside and soft inside!!
Enjoy with tomato sauce !


Note

  • Grind poha to a slightly coarse powder to make the balls coat well. Deep fry in medium to high flame.  As we are using boiled potatoes,these balls gets cooked quickly. So remove when the outer cover changes to golden brown.
  • U can use bread crumbs if you don’t have poha in hand.
  • U can add 1/4 tsp of ginger garlic paste to the above masala.
  • Make sure you have prepared enough maida batter & ground poha to cover the balls well. It takes more quantity.

Yummy,crispy Aloo kurkure is ready to gobble with tomato sauce !
Aloo kurkure


Check out my other easy kids snacks recipes

Continue Reading...


July 29, 2014

BENGALI MISHTI PULAO RECIPE/SWEET PULAO-BENGALI RECIPES


Bengali mishti pulao recipe
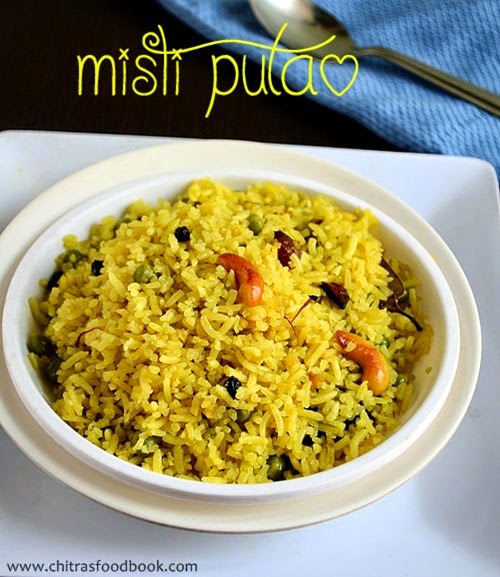
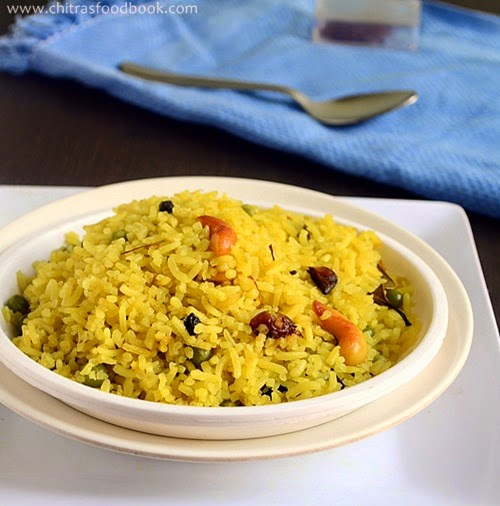
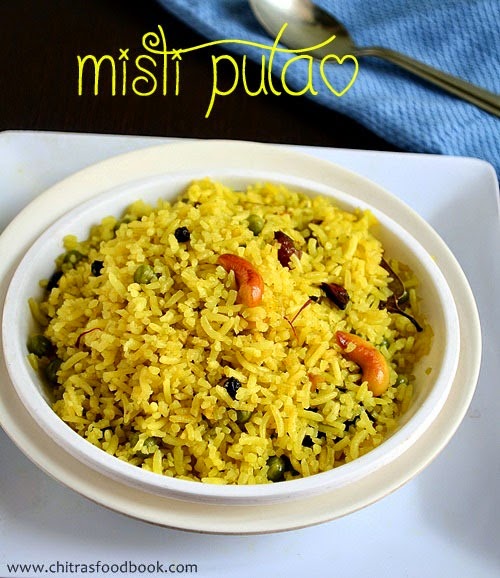
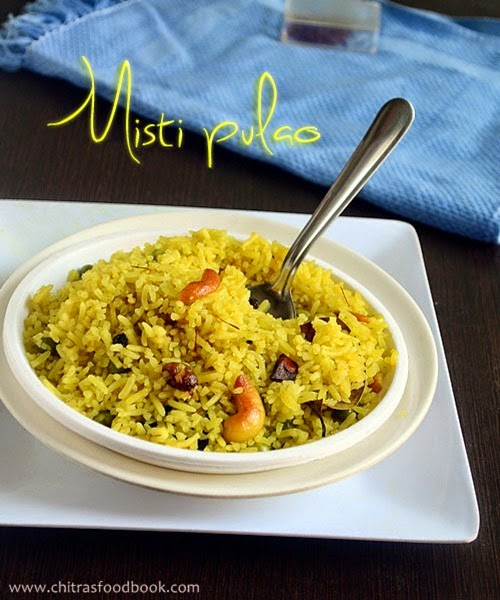
Eid Mubarak to all my friends and readers ! As Ramzan special post,i thought of sharing a sweet recipe with u all.So here comes a delicious Bengali special sweet rice recipe, Misti pulao/sweet pulao.This is a very easy and flavourful traditional Bengali rice recipe.It is also called as “Holud Pulao/Basanti Pulao or yellow pulao”.U can find this dish in most of the Bengali occasions & weddings.When i wanted to prepare Bengali thali,i found that sweet pulao recipe should be present in their authentic lunch menu.So i referred few blogs and finally tried it from Deepasri’s blog.It came out very well.Actually Bengalis use Gobindo bhog,a special fragrant rice variety to make this pulao.U can also substitute with jeera rice or Basmati rice.As i basically love the combination of sweet and spicy taste,i liked this rice very much when i had it with Chanar dalna(yet to post) & Begun bhaja.I read Bengalis have this rice with spicy mutton curry as accompaniment Smile.
bengali-mishti-pulao

Mishti pulao recipe


Mishti pulao Mishti pulao recipe – Bengali special sweet rice recipe!
Cuisine: Indian
Category: Sweet
Serves: Serves 4
Prep time: 10 Minutes
Cook time: 20 Minutes
Total time: 30 Minutes


INGREDIENTS

  • Gobindo Bhog Rice Or Basmati - 1 cup
  • Peas - a handful
  • Sugar - 2 -3 tbsp
  • Raisins/dry grapes - 2tbsp
  • Cashews - 2 tbsp
  • Chopped Ginger - 2 tsp
  • Turmeric powder - 3/4 tsp
  • Cinnamon- 1 no
  • Green cardamom - 2 nos
  • Javitri - 1/2 no
  • Saffron – few strands( soak in little milk)
  • Cloves - 2 nos
  • Black pepper corns - 1/2 tsp
  • Bay leaves - 1 no
  • Salt to taste
  • Ghee - 2 tbsp
  • Water - 1 cup
METHOD

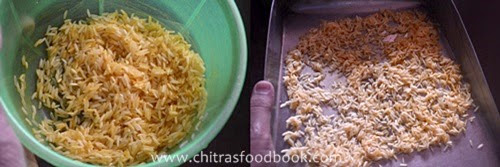
  • Wash and take the rice in  a bowl draining the water.Add turmeric powder,mix well and spread the rice in a plate till use.
mishti pulao step1
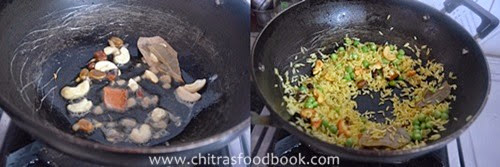
  • In a broad kadai,heat ghee and saute all the spices given above.Lastly add cashews and dry grapes and fry till the cashews turn golden brown and dry grapes bulge.Then add green peas and rice & saute for few minutes.Do in medium flame.Take care nothing gets burnt.Add sugar & required salt.
mishti pulao step2
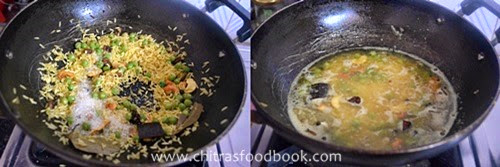
  • Now add 1 cup of water.When it comes to boil,mix well and simmer the flame.Cover the kadai with a lid and cook till the rice turns fluffy and soft.
mishti pulao step3

Enjoy !


Note

  • Adding green peas is completely optional.
  • U can use jeera rice in place of basmati rice.
  • Adjust the quantity of sugar as per ur tastebuds.
  • Do not fry rice for long time.It makes the rice firm and hard.

Enjoy this sweet pulao recipe.It tastes different and yummy !!
mishti-pulao

Do check out my other bengali recipes


Continue Reading...


July 28, 2014

HOMEMADE PANEER RECIPE–INDIAN COOKING BASICS


homemade paneer recipe

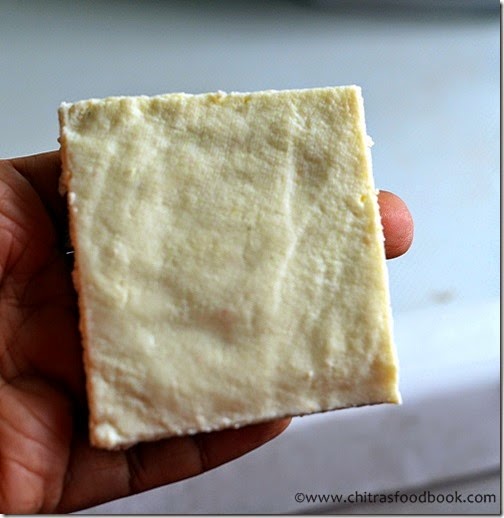
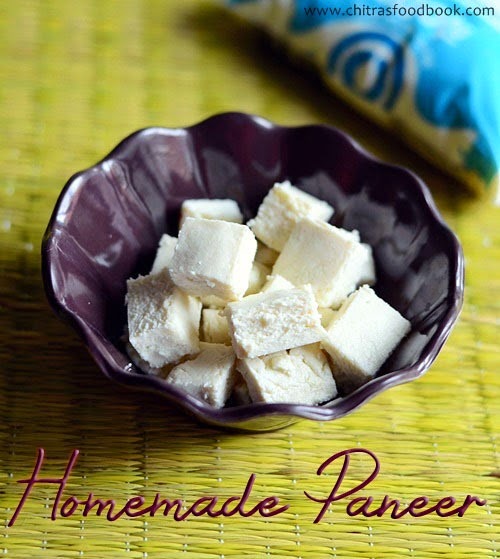
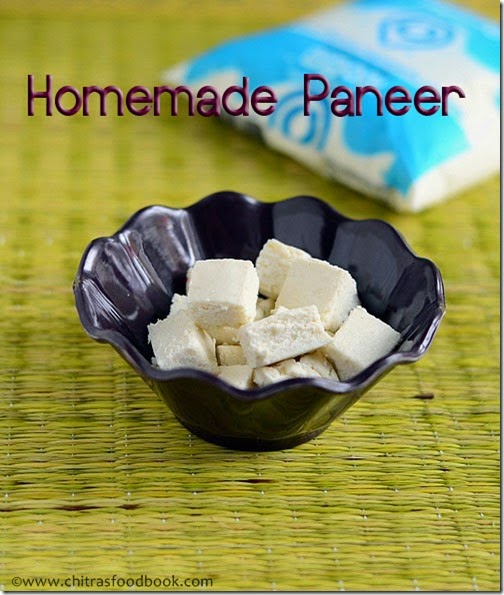
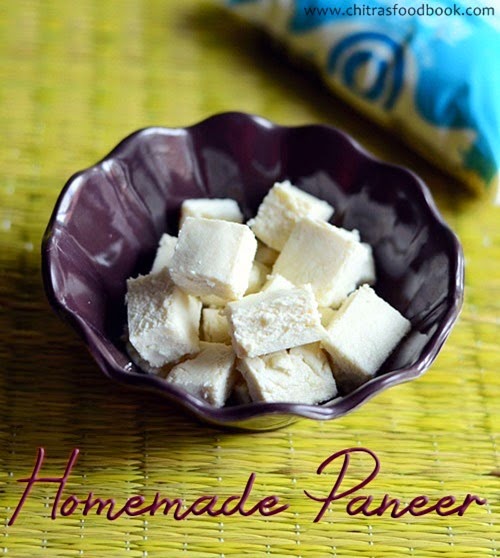
I would like to share some yummy paneer recipes in the upcoming weeks.Before that,i wanted to post this basic homemade paneer recipe.As u all know,making homemade paneer is very easy,healthy,hygenic,nutritious as well as low in cost when compared to store bought paneer.All u need is just a litre of milk,two lemons and a cheese cloth.Generally i use low fat milk to make paneer.It comes out super soft and stays good for a week when refrigerated in an air tight box.I have been following this method from Mrs.Mallika badrinath’s cook book for long time.I have tried with curd,vinegar and lemon juice too.Every time it comes out perfect.I am yet to try with citric acid.I have shared all the tips & tricks i learnt from my experience and observation. I hope it would be useful for beginners in cooking.I will try to upload a full video recipe soon.Lets see how to make paneer at home easilySmile.

Homemade-paneer


Homemade paneer recipe


Homemade paneer recipe Homemade paneer recipe using lemon juice
 
Cuisine: Indian
Category: Cooking basics
Serves: 15 cubes
Prep time: 15 Minutes
Cook time: 2Hours
Total time: 2H15Mins


INGREDIENTS

  • Low fat milk - 4 cups
  • Lemon juice - 2 to 3 tbsp + equal quantity of water
  • Salt - a pinch
  • Cheese cloth or muslin cloth or any cotton cloth - 1 no
  • Water - 1 cup or ice cubes – few
  • Maida – 1/2 tbsp (optional)
METHOD

  • Squeeze lemon juice from 2 lemons and add equal quantity of water & set aside.
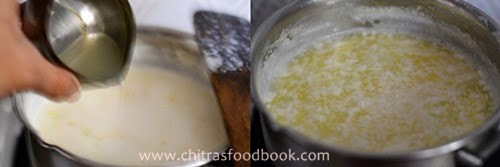
  • Boil milk till it froths & rises to the top.As soon as it starts to boil,switch off the flame and leave it untouched for 30 seconds.
homemade paneer step1

  • Now add 1 tbsp of lemon juice and stir the milk.Milk will start to curdle.Again add another 1 tbsp of lemon juice and keep stirring the milk.Milk will completely curdle and u could see the greenish whey separating from the milk.
  • To this,add 1 cup of plain water or few ice cubes and let it sit for few minutes.Whey will float on top and the chenna settles down.
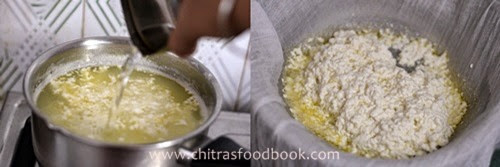
homemade paneer step2

  • Take a colander and cover it with the cheese cloth or cotton cloth.I used my cotton dupatta.Pour the curdled mixture & strain it by keeping a bowl underneath the colander.Collect the whey water & set aside.U can use this whey for curdling the milk,making rotis etc.
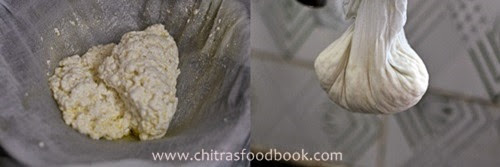
homemade paneer step3

  • Now tie the cloth & squeeze it lightly.Be careful,it would be hot.Hang the cloth under the cupboard or in a closed tap for about 30 minutes.Now all the excess water would be removed.
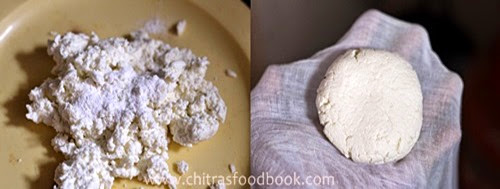
  • Remove the chenna & add 1/2 tbsp of maida.Knead it well for 2-3 minutes.Paneer will become very soft.Make a square share or round shape as u desire.
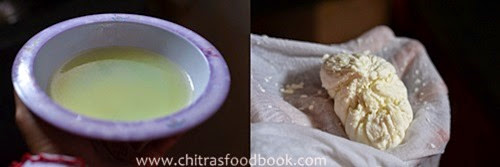
homemade paneer step4homemade paneer step5

  • Keep it in the cloth again & close it.Place the cloth on a plate and keep some weight( a bowl of water) over the cloth and set aside for one hour.When u remove after one hour,paneer would be well set.Remove the extras,cut into cubes and store in a box.Stays good for a week when refrigerated !
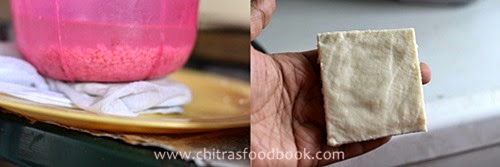
homemade paneer step6


Note

  • U can use curd in place of lemon juice.In that case,use 1/4 cup of slightly diluted curd.Remaining procedure is the same.
  • We should add equal quantity or even little more water to the lemon juice.By doing this way,the sourness of lemon would be reduced and the paneer wont taste sour.U don’t have to wash the paneer after straining.Its optional.
  • U can follow the same procedure for vinegar too.But i guess u may have to wash the paneer after straining as the vinger smell is powerful than lemon.
  • Do not boil the milk after u add lemon juice because paneer may become hard when u over boil the milk.
  • And u must add some plain water at room temp or ice cubes after the milk is curdled completely.This will help the whey and chenna to separate.This is optional though.
  • Do not use polyester cloth for straining paneer.Its better to use thin cotton cloth.
  • Adding maida is optional while kneading.U can skip it if u don’t like.
  • I usually make paneer using 2-3 days old boiled milk by refrigerating it.


homemade paneer


Continue Reading...