Search Chitra's Food Book

Showing posts with label ANDHRA RECIPES. Show all posts

December 26, 2022

Andhra style Ginger Chutney | Allam Chutney For Pesarattu, Idli, Dosa


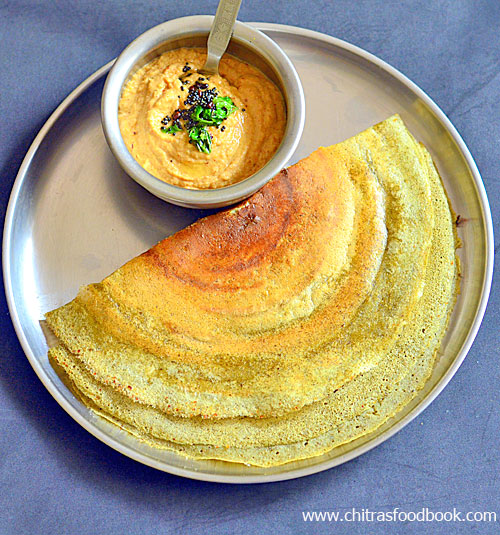
Usually I make this Andhra style allam chutney / ginger chutney for Pesarattu. Today I made Green gram idli for the first time and I prepared this ginger chutney as a side dish for this idli. It tasted great with this super soft green gram idli. I will post the idli recipe soon.

Today’s recipe is this simple and yummy Andhra style ginger chutney recipe with step by step pictures. Not only for pesarattu and green gram idli, dosa recipes, you can make this inji chutney for our regular idli, dosa too. It tastes spicy, tangy and mildly sweet.

Check out my Pesarattu recipe.

 Ginger chutney

Andhra style ginger chutney recipe / Allam pachadi recipe


Andhra style ginger chutney recipe / Allam pachadi recipe

Andhra style ginger chutney recipe / Allam pachadi recipe for Pesarattu, Idli, dosa


Cuisine: Indian
Category: Side dish
Serves: 2
Prep time: 10 Minutes
Cook time: 20 Minutes
Total time: 30 Minutes


INGREDIENTS

  • Cooking oil - 1 tbsp
  • Urad dal - 1 tbsp
  • Chana dal - 1 tbsp
  • Coriander seeds - 1/2 tsp
  • Ginger - Thumb finger size
  • Big onion - 2
  • Red chilli - 2 to 3
  • Tamarind - small gooseberry size
  • Jaggery - 1 tsp
  • Salt & water - as needed
To temper
  • Cooking oil - 1 tsp
  • Mustard seeds - 1/2 tsp
  • Curry leaves - few
HOW TO MAKE ANDHRA STYLE GINGER CHUTNEY / ALLAM PACHADI
  1. Wash and slice the ginger thinly. Wash and cut the onions into small cubes.
  2. Heat oil in a kadai. Saute chana dal, urad dal, coriander seeds, red chilli till dals turn golden.
  3. Add the cubed onion, sliced ginger pieces. Saute till onion turns transparent.
  4. Switch off and cool down. Add tamarind, jaggery, salt and grind everything to a smooth, thick paste.
  5. Temper mustard seeds, curry leaves and add to chutney. Mix well and serve with idli, dosa, pesarattu.
METHOD - STEP BY STEP PICTURES
  • Wash and slice the ginger thinly. Wash and cut onion into small cubes.
  • Andhra ginger chutney
  • Heat oil in a kadai. Saute urad dal, chana dal, red chilli, coriander seeds till dals turn golden brown in color.
  • Andhra ginger chutney
  • Add the onion, ginger slices and saute till onion turns transparent. Switch off the flame and cool down.
  • Andhra ginger chutney
  • Add tamarind, jaggery, salt and grind everything to a smooth, thick paste.
  • Andhra ginger chutney
  • Temper mustard seeds, curry leaves and add to chutney. Serve with idli, dosa.


Enjoy !

Note

  • Adjust the quantity of chilli as per your taste.
  • Do not add more ginger because chutney may taste bitter.


Easy and tasty ginger chutney is ready to serve with pesarattu, idli and dosa.

Allam chutney


Continue Reading...


July 9, 2022

Pesarattu Recipe – Andhra style Pesarattu | Green Gram Dosa

Pesarattu recipe

Andhra’s most popular and healthy breakfast recipe, Pesarattu along with Allam pachadi i.e Ginger chutney is one of my favourite recipes with Green gram/ Mung beans. I try to make it at least once in two weeks. In Tamil, we call it as Pacha payaru dosai. Though I make it regularly at home, I have never shared the recipe in my blog.

People fondly call this Pesarattu as MLA Pesarattu as it is popular in the MLA head quarters in Hyderabad. Usually this Pesarattu is stuffed with plain rava upma and served with spicy and tangy Ginger chutney. Some people also spread onion, carrot and green chilli mixture over the dosa instead of stuffing upma in it.

Today I have shared a very simple recipe without any stuffing or topping as we like it that way. We simply need a tangy Allam pachadi to go with it. Basically Green gram is high in fibre and low in calories. So this Pesarattu dosa recipe would be ideal for people looking for weight loss. It also makes less bloating and gas when compared with other legumes. So anyone can easily consume it without any worries.

Ok, lets see how to make this Andhra special Pesarattu recipe with step by step pictures.

Andhra pesarattu

Pesarattu recipe - Andhra style Pesarattu recipe with rice


Pesarattu recipe - Andhra style pesarattu recipe with rice

Pesarattu recipe - Andhra style pesarattu recipe with rice


Cuisine: Andhra
Category: Breakfast
Serves: 10
Prep time: 10 Minutes
Cook time: 20 Minutes
Total time: 30 Minutes


INGREDIENTS
1 cup = 250ml
  • Whole moong / Green gram - 1 cup
  • Raw rice - 2 tbsp
  • Green chilli - 2
  • Ginger - 1/2 inch
  • Cumin seeds - 1/2 tsp
  • Salt & water - as needed
  • Ghee or cooking oil - to drizzle over Pesarattu
  • Chopped onion, green chilli and carrot - for topping
HOW TO MAKE ANDHRA STYLE PESARATTU RECIPE
  1. Wash and soak green gram along with rice for 4 to 6 hours.
  2. Grind to a smooth or slightly coarse paste adding cumin seeds, green chilli and ginger.
  3. Transfer to a bowl. Add salt and mix well.
  4. Heat a dosa tawa. Spread the dosa thin or thick.
  5. Drizzle oil or ghee. Cook the dosa till its crispy and well cooked.
  6. No need to flip it. Flip the dosa and cook if you make it thick.
  7. Serve with Allam pachadi / Ginger chutney.
METHOD - STEP BY STEP PICTURES
  • Wash and soak green gram for 4 to 6 hours. Grind it adding green chilli, ginger and cumin seeds to a smooth paste.
  • Pesarattu
  • Transfer to a vessel. Add required salt and mix well. Check for batter consistency. Add water if needed.
  • Pesarattu
  • Heat dosa tawa. Spread a ladleful of batter. Make it thin or thick as you like. Cook the dosa in low to medium flame till its cooked well. Drizzle oil or ghee around the Pesarattu.
  • Pesarattu
  • Cook till the bottom turns light golden brown. No need to flip the other side if you want crispy dosa else you can flip and cook for few more minutes.

  • For variations, you can spread finely chopped onion and carrot all over the Pesarattu, flip and cook the other side.
  • Serve hot with Ginger chutney / Allam pachadi.

  • Enjoy !

Note

  • I grind the batter smooth. If you like, you can grind it slightly coarse.
  • Adjust the quantity of green chilli as per your taste.

  
  Make this healthy and tasty Green gram dosa / Pesarattu and enjoy with Allam pachadi / Ginger chutney !

Pesarattu recipe


Continue Reading...


September 13, 2021

Dosakaya Pappu–Andhra Style Cucumber Dal Recipe

Dosakaya pappu

Andhra style Cucumber dal / Dosakaya pappu is a super easy, quick dal recipe that can be prepared directly in a pressure cooker. Last week I had shared Karnataka style Cucumber palya / Salad Cucumber curry for rice. Its a super easy recipe. Similarly this Andhra style Dosakaya pappu is a super quick and healthy recipe with the combination of dal. I referred so many websites for this recipe and watched Vahchef’s YouTube video after a long time. 

Generally Andhra people use Yellow Cucumber for this recipe but I used Salad Cucumber as I had lots in my pantry. Even Vahchef used the Salad Cucumber in his video. So I was double happy and tried it confidently. Surprisingly it came out very well and most comforting with rice adding ghee. We all liked it. 

Friends, do try this Andhra special Dosakaya pappu recipe / Yellow Cucumber Dal for rice. You can enjoy with roti as well. Share your feedback with me!

Check out my Karnataka style Cucumber curry / Southekayi palya recipe too. 


Dosakaya pappu


Dosakaya Pappu | Andhra style Cucumber Dal Recipe


Dosakaya Pappu | Andhra style Cucumber Dal Recipe

Dosakaya Pappu | Andhra style Cucumber Dal Recipe for rice


Cuisine: Andhra
Category: Side dish
Serves: 4
Prep time: 10 Minutes
Cook time: 20 Minutes
Total time: 30 Minutes


INGREDIENTS
1 cup = 250ml
  • Moong dal - 2 tbsp
  • Toor dal – 2 tbsp
  • Cucumber – 1 or 2 ( I used Salad Cucumber)
  • Big onion - 1
  • Tomato – 1 (optional)
  • Green chilli - 1 or 2
  • Ginger – 1 inch piece
  • Turmeric powder - 1/4 tsp
  • Tamarind - small gooseberry size
  • Salt & water - as needed
To temper
  • Ghee - 1 tbsp
  • Mustard seeds - 1/2 tsp
  • Cumin seeds - 1/2 tsp
  • Red chilli - 1
  • Crushed garlic - 10
  • Red chilli powder - 1/2 tsp
  • Curry leaves - few
  • Hing / Asafetida – a pinch
  • Coriander leaves - to garnish
HOW TO MAKE DOSAKAYA PAPPU
  1. Wash and peel the skin of Cucumber. Chop into big cubes.
  2. In a pressure cooker base, take the dal, chopped cucumber, onion, tomato, green chilli, ginger, turmeric powder, salt and water.
  3. Pressure cook in low flame for 2 whistles. Open the mash the dal.
  4. Add little tamarind extract and boil well.
  5. Temper all the ingredients given under “ To temper”.
  6. Add to dal. Mix well and switch off the flame.
  7. Garnish with coriander leaves. Serve with plain rice adding ghee.
METHOD - STEP BY STEP PICTURES
  • Wash and peel the skin of Cucumber, Chop into big cubes. Wash and chop onion, tomato (optional), green chilli and ginger.
  • Dosakaya pappu recipe
  • In a pressure cooker base, take the washed toor dal, moong dal, chopped cucumber, onion, green chilli, ginger and tomato pieces (optional). Add required water, turmeric powder, few drops of cooking oil and salt.
  • Dosakaya pappu recipe
  • Pressure cook in low flame for 2 whistles. Open the cooker after the steam is released. Mash it well. Add 1/4 cup of tamarind extract and boil for few minutes.

  • Lastly temper mustard seeds, cumin seeds, red chilli, crushed garlic, red chilli powder and hing. Saute in low flame for a minute and add to dal. Boil the dal for few minutes till it reaches a desired consistency based on the thickness you need.
  • Dosakaya pappu recipeDosakaya pappu recipe
  • Switch off the flame and garnish with finely chopped coriander leaves. Mix well and serve hot with plain rice adding ghee. Enjoy !

Note

  • I used only one green chilli as I have added red chilli and red chilli powder.
  • Tomato is optional. Adding tamarind extract is enough. But I used tomato as well.


Easy, yummy Andhra style Dosakaya pappu is ready to relish with rice.
Dosakaya pappu recipe

Continue Reading...


June 25, 2021

Kovakkai Poriyal Recipe / Tindora Curry Without Coconut

 Kovakkai poriyal

I learnt this easy and simple Andhra style Kovakkai poriyal / Tindora curry without coconut from my School moms group friend Megha. I tried this poriyal at home after tasting it in her house. It was so good and easy to make too. But one thing you need to make this curry is patience. Yes, you need to chop the tindora into thin roundels and cover cook in low to medium flame for 15 to 20 minutes. For variations, you can add roasted peanut powder or grated coconut at the end. But I made it without coconut and peanut powder. Friends, do try this easy Kovakkai poriyal recipe for rice and enjoy ! You will love it like me.

 Kovakkai poriyal

Kovakkai poriyal recipe / Tindora curry recipe


Kovakkai poriyal recipe / Tindora curry recipe

Kovakkai poriyal recipe / Tindora curry recipe


Cuisine: Andhra
Category: Side dish
Serves: 3
Prep time: 10 Minutes
Cook time: 20 Minutes
Total time: 30 Minutes


INGREDIENTS
1 cup = 250ml
  • Kovakkai / Tindora / Dondakaya - 2 cups (chopped)
  • Cooking oil - 3 tbsp
  • Mustard seeds - 1/2 tsp
  • Urad dal - 1 tsp
  • Chana dal - 2 tsp
  • Cumin seeds – 1/2 tsp
  • Big onion - 1 (finely chopped)
  • Curry leaves - few
  • Turmeric powder - 1/4 tsp
  • Red chilli powder - 3/4 to 1 tsp
  • Salt & water - as needed
HOW TO MAKE KOVAKKAI PORIYAL
  1. Wash and chop kovakkai / tindora into round, thin pieces.
  2. Heat oil in a kadai. Splutter mustard seeds, urad dal, chana dal.
  3. Saute big onion, curry leaves. Add thinly sliced kovakkai, salt and turmeric powder.
  4. Saute in medium flame till it shrinks in quantity. Cover cook in low flame till it turns soft.
  5. Sprinkle a tbsp of water and cover cook if needed. Once its cooked, add red chilli powder.
  6. Saute for few minutes and switch off the flame. Serve with rice and enjoy !
METHOD - STEP BY STEP PICTURES
  • Wash and chop Kovakkai into thin round slices. Chop onion finely.

  • Heat oil in a kadai. Splutter mustard seeds, urad dal, chana dal and cumin seeds. Saute onion and curry leaves till transparent.
  • Kovakkai poriyal
  • Add sliced kovakkai pieces, salt and turmeric powder. Mix well in medium flame till it shrinks in quantity.
  • Kovakkai poriyal
  • Lower the flame completely and cover the kadai with the lid. Allow the kovakkai pieces to cook in the heat for 10 to 15 minutes or till it becomes soft.
  • Kovakkai poriyal
  • Add red chilli powder and mix well to coat it. Let it cook for few minutes. Then switch off the flame and garnish with coriander leaves if you wish. Serve the poriyal with rice. Enjoy !Kovakkai poriyal

Note

  • Adjust the quantity of chilli powder as per your taste.
  • You can also add little garam masala powder for more flavor.
  • You can add roasted and powdered peanuts at the end. It gives a nice flavor and taste.
  • You can also use grated coconut at the end.


Try this delicious Kovakkai poriyal for rice and enjoy !

Tindora curry


Continue Reading...


July 30, 2020

Senaga Guggillu Recipe – Brown Chana Sundal / Kala Chana Sundal

Senaga guggillu
Every year during Varalakshmi Vratham, I post some Andhra special recipes. So today’s post is an Andhra style sundal recipe which is called as guggillu in Telugu. Here I have used brown chana / black chana ( Sengalau in Telugu, Chickpeas in English) to make this sundal for varalakshmi pooja vrat and neivedyam. You can use white chickpeas / kabuli chana to prepare this dish. It is also prepared in most of the temples and served as prasadam. In Telugu, chana sundal recipe is called as Senaga Guggillu. Its not only a healthy and simple recipe but tastes delicious. In Tamilnadu, we call this as karuppu konda kadalai sundal. Both the recipes are almost similar in preparation with slight variations in ingredients. Friends, do check out the Senaga guggillu recipe with step by step pictures and prepare this for Varalakshmi Vratham festival tomorrow.

Check out my other Sundal varieties too !

Check out my Varalakshmi Vratham recipes collection.


Senaga guggillu recipe

Black chana sundal / Senaga Gugillu Recipe


Black chana sundal / Senaga Gugillu Recipe

Brown chana / Black chana / Kala Chana sundal / Senaga Guggillu in Telugu for Varalakshmi pooja prasadam. Its an Andhra style recipe.


Cuisine: Andhra
Category: Snack
Serves: 4
Prep time: 10 Hours
Cook time: 20 Minutes
Total time: 10H 20 Minutes


INGREDIENTS

1 cup = 240ml
  • Black chana / Brown chana / Senagalu / Konda kadalai - 1 cup
  • Water - to soak chana
  • Salt - as needed
To temper
  • Cooking oil - 1 tbsp
  • Mustard seeds - 1 tsp
  • Urad dal - 1 tsp
  • Chana dal - 2 tsp
  • Cumin seeds - 1/2 tsp
  • Curry leaves - Few
  • Ginger - 1 tsp (finely chopped)
  • Red chilli - 1 (Pinched into two)
  • Green chilli - 1 (Slit into two)
  • Asafetida/ Hing - 1/4 tsp
  • Turmeric powder – 1/4 tsp
To Garnish
  • Coriander leaves - 2 tbsp
  • Grated coconut - 1/3 cup

HOW TO MAKE SENAGA GUGGILLU / BROWN CHANA SUNDAL


  1. Wash and soak chana/ chickpeas overnight or for minimum 6 hours.
  2. In a pressure cooker, cook the chana adding required water.
  3. Cook in low flame for 2 whistles. Open the cooker, drain the excess water.
  4. Heat oil in a kadai. Temper mustard seeds, urad dal, chana dal, red chilli, green chilli, curry leaves and hing.
  5. Add cooked chana, turmeric powder, required salt and mix well. Boil for few minutes.
  6. Lastly add the grated coconut, chopped coriander leaves and mix well.
  7. Cook for a minute and remove in a plate. Offer to God and serve as prasadam.

METHOD - STEP BY STEP PICTURES

  • Wash and soak brown chana/chickpeas in water overnight or for minimum 6 hours. TIP : If you want to make soft sundal, add a pinch of baking soda while soaking the chana. Drain the water before cooking. Add fresh water, wash it once and then pressure cook it.
  • Take a pressure cooker, add the soaked chana. Add required water to cover it. Close the cooker and keep in high flame till steam / vapour starts to come out. Lower the flame immediately. Cook for 2 whistles in low flame. Switch off the flame.

  • Open the cooker and drain the excess water. Reserve the cooked chana in a plate.

  • Heat oil in a kadai and when it gets heated, splutter mustard seeds, urad dal, chana dal, hing, curry leaves, red chilli, green chilli, chopped ginger. Saute till dal turns golden in color. 
  • Add the cooked chana/ senagalu, turmeric powder and required salt along with little water. Mix well and boil till all the water is evaporated.
  • Lastly add the grated coconut, finely chopped coriander leaves. Mix well and offer as prasadam/ naivedaym to God. Later you can serve everyone. Enjoy !

Note

  • For variations, you can skip green chilli and use more red chillies.
  • Don’t skip hing / asafetida as it helps to prevent gas trouble from boiled chana.
  • You can also use white chana instead of brown ones.
  • If you like, you can sprinkle lemon juice at the end to get a mild tangy taste. 
Andhra style brown chana sundal recipe is ready to relish !
 

Continue Reading...


February 3, 2020

Instant Ulavacharu Using Readymade Paste


ulavacharu using readymade paste

Ulavacharu is a traditional Andhra special dish originated from Krishna and Guntur districts. Ulavacharu is a soupy (rasam/ saaru) kind of dish made from horsegram (Ulavalu in Telugu and Kollu in Tamil). Its a protein-rich, low fat food that contains a high amount of dietary fibers and is known to lower cholesterol, helps to reduce obesity. It looks thick, dark in color and it has a spicy, tangy taste with an earthy smell and flavor. Ulavacharu is usually served with plain rice adding a dollop of fresh cream, butter or ghee.

Recently people from Sitara foods, a homemade and handmade food brand based out of Hyderabad reached out to me. They are supported and recognized by the Government of India as a women empowerment startup. Friends , do check out their website sitarafoods.com to see their Andhra special pickles, pulihora paste, masala powders, traditional sweets and fryums. When they asked me to try their readymade ulavacharu paste and make a post in my blog, I had no clue about this recipe. After watching few YouTube videos, I came to know that making ulavacharu is a lengthy process which involves hours of cooking. But Sitara foods has made this authentically on wood fired mud stoves or poyyi by boiling Ulavalu for 14 to 15 hours and then made this readymade paste adding tamarind, spices and is prepared without any preservatives. You can make and enjoy this healthy ulavacharu using this paste effortlessly at home.


Here is the picture of readymade ulavacharu paste. 


All you have to do is just mix the paste in water, simmer and boil till thick. You can do the tempering with or without onion, garlic as you like. I did small modifications in this recipe by adding chilli powder as the spice level is less in this paste. So you can adjust it as per your taste buds. I made it for our weekend lunch. The smell was amazingly good. While boiling, its aroma was wafting through the entire house which tempted us to eat. I am sure everyone would love to try this delicious and delightful dish undoubtedly. As I am not aware of the authentic taste of ulavacharu, I passed a sample of this paste to my neighbor who is from Andhra. She too liked it and gave a good feedback. Apart from the spice level, everything is good in this paste. Friends, do check out and buy this ulavacharu paste from Sitara foods. It will be helpful for bachelors and people who travel abroad to make a quick lunch. Sitara foods is giving a shelf life of 9 months for this product under refrigeration. I hope you find the price reasonable as well. Ok, lets see how to make this yummy and tasty Andhra special ulavacharu easily, instantly and quickly using this readymade paste from Sitara foods.

Ulavacharu using readymade paste


Ulavacharu using readymade paste

Andhra special ulavacharu using readymade paste


Cuisine: Andhra
Category: Side dish for rice
Serves: Serves 4
Prep time: 10 Minutes
Cook time: 20 Minutes
Total time: 30 Minutes


INGREDIENTS
1 cup = 240ml
  • Readymade ulavacharu paste - 3 tbsp (adjust as per taste)
  • Water - 2 cups
  • Red chilli powder - 1/2 to 1 tsp (as per taste)
  • Salt - as needed
To Temper
  • Cooking oil - 1 tbsp
  • Mustard seeds - 1/2 tsp
  • Urad dal - 1/2 tsp
  • Cumin seeds - 1/4 tsp
  • Red chilli - 2 (pinched into two)
  • Green chilli - 1 (slit into two)
  • Curry leaves - few
  • Big onion – 1 (finely chopped)
HOW TO MAKE ULAVACHARU USING PASTE
  1. In a bowl, take 2 cups of water and mix 3 to 4 tbsp of ulavacharu paste.
  2. Heat a kadai and add this diluted ulavacharu. Boil for few minutes in low flame.
  3. Check for taste and add some chilli powder, salt if needed.
  4. In the mean time, heat a small kadai with oil. Temper mustard seeds, urad dal and cumin seeds.
  5. Add red chilli, green chilli and curry leaves. Saute onion till transparent.
  6. Add to the boiling ulavacharu. Boil for few minutes till it reaches desired consistency.
  7. Serve hot with plain rice adding butter, ghee or fresh cream. Enjoy !
METHOD - STEP BY STEP PICTURES
  • Take 3 to 4 tbsp of ulavacharu paste and mix with 2 cups of water. Check for taste and add some salt and chilli powder if needed. I added 1/2 tsp chilli powder.

  • Heat a kadai and add this mixture. Let it roll boil for few minutes in low to medium flame.

  • In the mean time, heat oil in a small kadai. Splutter mustard seeds, urad dal, cumin seeds, curry leaves. Add onion and saute till transparent. Add to the boiling ulavacharu.

  • Boil for few more minutes till it reaches the desired consistency. I made it slightly thick in consistency as it becomes thicker over the time.

  • Serve hot with plain rice adding ghee or butter or fresh cream. We relished it adding ghee. You can refrigerate the leftover paste and use for few months.

Note

  1. Adjust the quantity of paste as per your taste.
  2. I felt the paste was less spicy. So I used red chilli powder.
  3. Tempering and adding sautéed onions makes this ulavacharu tastes so good and flavorful. So don’t skip it.

Try this Andhra special Ulavacharu easily using the paste and enjoy with plain rice !
Continue Reading...


August 27, 2019

Kovakkai Masala Kuzhambu Recipe –Tindora Gravy For Rice, Roti

kovakkai masala kuzhambu
Today’s Kovakkai masala kuzhambu / Tindora gravy for rice and roti is my long time pending recipe bookmarked from Nees kitchen. At last I tried it yesterday for our lunch. I made slight changes in the ingredients and prepared this gravy directly in my pressure cooker as I had less time to cook. So the job was done under 15 minutes. It was so easy to make and tasted great with nice peanut flavor. We all loved it with plain rice and ghee. You can enjoy with roti if you make the gravy slightly thick. The taste of this gravy reminds you Andhra style dondakaya masala. Ok friends, lets see how to make this easy and yummy kovakkai masala with step by step pictures.

kovakkai kulambu


Kovakkai masala recipe


Kovakkai masala recipe

Kovakkai masala recipe / Tindora gravy for rice, roti


Cuisine: South Indian
Category: Side dish
Serves: Serves 4
Prep time: 10 Minutes
Cook time: 10 Minutes
Total time: 20 Minutes


INGREDIENTS
1 cup - 250ml
  • Tindora / Kovakkai - 25 nos
  • Ripe tomato - 2
  • Red chilli powder - 1/2 tsp
  • Turmeric powder - 1/4 tsp
  • Salt - as needed
To roast and grind
  • Coriander seeds - 1 tsp
  • Sesame seeds - 2 tsp
  • Cinnamon - 1 inch
  • Cloves - 2
  • Cardamom - 1
  • Roasted peanuts - 1/3 cup ( I used with skin)
  • Grated coconut - 1 tbsp (optional)
To temper
  • Gingely oil – 3 tbsp
  • Mustard seeds – 1/2 tsp
  • Urad dal – 1 tsp
  • Chana dal – 1 tsp
  • Cumin seeds – 1/2 tsp
  • Curry leaves – Few
  • Green chilli – 2
  • Big onion – 2
  • Ginger garlic paste – 1/2 tsp
HOW TO MAKE KOVAKKAI MASALA
  1. Wash and slit kovakkai into . Set aside.
  2. Heat oil in a kadai and roast all the ingredients given under “to roast and grind”.
  3. Lastly add roasted peanuts and coconut. Mix well and switch off the flame.
  4. Grind the masala to a smooth paste. In a pressure cooker heat oil.
  5. Splutter mustard seeds, urad, chana dal and cumin seeds. Add green chilli.
  6. Add the onion and saute well. Add the slit kovakkai and toss for a minute.
  7. Add gg paste and saute well. Add turmeric powder and chilli powder.
  8. Saute quickly without burning the masala. Add tomato , peanut masala and cook for a minute.
  9. Lastly add 1 cup of water and pressure cook in low flame for one whistle.
  10. Open the cooker after steam is released. Garnish with coriander leaves.
  11. Serve hot with rice or roti.
KOVAKKAI MASALA RECIPE - STEP BY STEP PICTURES
  • Wash and slit the kovakkai / Ivy gourd into 4 parts till half the way. 

  • Heat a kadai and dry roast the sesame seeds, dhania seeds, cloves, cinnamon and cardamom. Switch off the flame and add roasted peanuts, grated coconut. Grind to a smooth paste adding required water. Set aside.

  • Heat oil in a cooker base and splutter mustard seeds, urad dal , chana dal and cumin seeds. Add onion and green chilli. Saute till onion become transparent.

  • Add chopped kovakkai, saute for a minute. Add ginger garlic paste and saute for one minute. Add turmeric powder, chilli powder, salt & mix well. Do not burn any spices.

  • Now add chopped tomato. Cook till mushy. Then add the ground peanut masala. Mix and cook for a minute. Now add required water. I used 1 cup of water. Mix well and check for taste. Pressure cook in low flame for one whistle (It takes 8 to 10 minutes). Switch off the flame and let the pressure subside.

  • Open the cooker. You will see a layer of oil floating on top with a nice masala smell. Check the thickness of gravy. If its too watery, boil for a minute. If its too thick, add little water and mix well. Give one boil if needed. Garnish with coriander leaves.

  • Enjoy mixing with plain rice adding few drops of ghee ! You can also try with roti / chapathi if you like.

Note

  • Use small size kovakkai for better looks. I used bigger ones. So my gravy was not so appealing.
  • Cinnamon and coconut are optional. Its not mentioned in the original recipe. But I used it.
  • Adjust the quantity of green chilli and chilli powder as per your taste.

Try this easy, yummy kovakkai masala kuzhambu recipe and enjoy !
kovakkai kuzhambu

Continue Reading...