Search Chitra's Food Book

Showing posts with label HEALTH FOOD. Show all posts

September 10, 2020

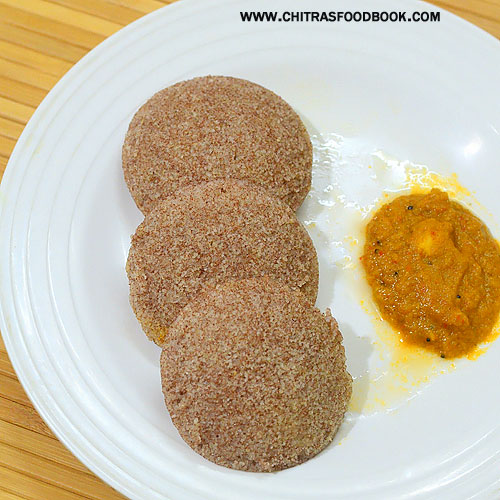
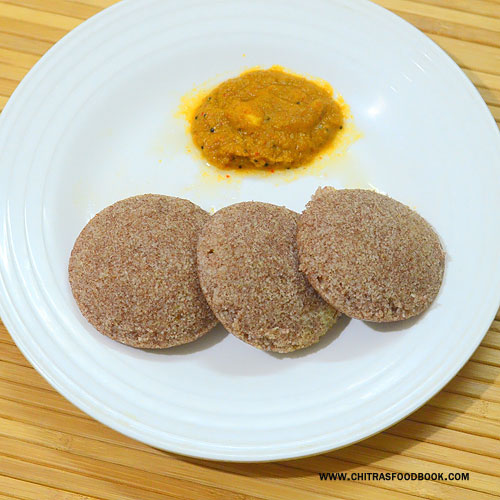
Instant Ragi Idli – Ragi Rava Idli | Ragi Sooji Idli Recipe

Instant ragi idli recipe

I have been making this instant ragi idli with ragi flour(finger millet flour in English) and rava/suji / sooji(Semolina in English) at least once in a week for the past few months. Usually I make instant ragi dosa or ragi adai. As I got bored of those dishes, I wanted to try some varieties of ragi recipes. As a result of this, I tried Instant ragi idli, ragi idiyappam and ragi mudde these days. All the dishes came out well in the first attempt itself. Still I wanted to blog them after few trials.

So today I am confidently sharing this instant ragi idli which can be prepared under 10 minutes. In this recipe, I have used equal amount of ragi flour (Nachni in Hindi, finger millet in English), unroasted suji/ Bombay rava/ Semolina along with curd, baking soda and salt. If you want to make this ragi idli without soda, you can use Eno fruit salt instead. Similarly if you want to make this idli without curd or with less curd, you should use more water and baking soda. But I would strongly recommend to use curd and use less baking soda which is good for health. Its a diabetic friendly and diet friendly recipe. People who look for weight loss can have this for dinner. It keeps your tummy full over the night.

I have tried this instant ragi idli with many side dish combination. But I felt tomato based side dishes suits well for this ragi idli as it tastes bland. So you can make tomato chutney, tomato mint chutney, tomato capsicum chutney or tomato thokku. I make one of these side dishes regularly. If you like, you can try with coconut chutney, tiffin sambar or idli podi / gun powder too.

Ok friends, lets see how to make instant ragi idli recipe with ragi flour and rava with step by step pictures and video.


Instant ragi idli

Instant Ragi Idli

Instant ragi idli recipe

Instant ragi idli recipe

Instant ragi idli recipe using ragi flour , rava / suji, curd and baking soda


Cuisine: Indian
Category: Main course
Serves: 15
Prep time: 10 Minutes
Cook time: 20 Minutes
Total time: 30 Minutes
1 cup = 250ml
  • Ragi flour / Finger millet flour - 3/4 cup
  • Unroasted rava / Suji / Semolina - 3/4 cup
  • Curd / Yogurt - 1.5 cups
  • Baking soda - 1/4 tsp
  • Salt and water - as needed
HOW TO MAKE INSTANT RAGI IDLI
  1. In a wide bowl, mix ragi flour, unroasted rava/suji, salt and curd.
  2. Mix well and add little water to bring into thick idli batter consistency.
  3. Add baking soda at the end. Mix well and rest for 5 minutes.
  4. In the mean time, roll boil water in idli pot and grease the idli plate.
  5. Pour idli batter in greased mould and steam it for 10 to 15 minutes till tooth pick comes out clean.
  6. Remove the idli plate and rest for few minutes. Now scoop out the idli using a ladle or spoon.
  7. Serve hot with tomato, onion chutney as side dish. Tastes great !
METHOD - STEP BY STEP PICTURES
  • In a wide bowl, mix ragi flour, unroasted rava/suji, salt and curd. Mix well.
    Instant ragi idli recipe
  • Add required water gradually and mix to make a thick batter. Do not use more water. I used 3/4 cup water but its quantity differs based on the consistency of curd. Add baking soda and mix well. 
  • Rest the batter for 5 to 10 minutes. Mix well and check the consistency of batter. It should be thick but pourable. 
  • Do not make the batter thin or watery. Idli becomes sticky and flat.
    Instant ragi idli recipe
  • In the mean time, boil water in idli pot. Grease idli plate with gingely oil. Pour idli batter in each mould. You can also make this idli by spreading cloth in idli plate.
    Instant ragi idli recipe
  • When the water starts to roll boil, keep the idli plate. Steam it for 10 to 12 minutes till toothpick comes out clean.

  • Remove the idli plate, rest for 2 minutes. Then remove the idli using a spoon or ladle.
    Instant ragi idli recipe
  • Serve hot with tomato chutney, tomato mint chutney, tomato capsicum chutney or tomato thokku. We love these side dishes. Enjoy !

Note

  • For variations, you can ENO fruit salt instead of baking soda. Use 1/2 tsp for this recipe.
  • Do not reduce the quantity of semolina. Equal amount of ragi flour and rava helps.
  • The most important point to note is : batter should be thick and pourable. Do not make thin batter. Idli becomes sticky and flat.
Enjoy this healthy, Instant ragi idli and share your feedback with me!
Instant ragi suji idli
Continue Reading...


July 30, 2020

Senaga Guggillu Recipe – Brown Chana Sundal / Kala Chana Sundal

Senaga guggillu
Every year during Varalakshmi Vratham, I post some Andhra special recipes. So today’s post is an Andhra style sundal recipe which is called as guggillu in Telugu. Here I have used brown chana / black chana ( Sengalau in Telugu, Chickpeas in English) to make this sundal for varalakshmi pooja vrat and neivedyam. You can use white chickpeas / kabuli chana to prepare this dish. It is also prepared in most of the temples and served as prasadam. In Telugu, chana sundal recipe is called as Senaga Guggillu. Its not only a healthy and simple recipe but tastes delicious. In Tamilnadu, we call this as karuppu konda kadalai sundal. Both the recipes are almost similar in preparation with slight variations in ingredients. Friends, do check out the Senaga guggillu recipe with step by step pictures and prepare this for Varalakshmi Vratham festival tomorrow.

Check out my other Sundal varieties too !

Check out my Varalakshmi Vratham recipes collection.


Senaga guggillu recipe

Black chana sundal / Senaga Gugillu Recipe


Black chana sundal / Senaga Gugillu Recipe

Brown chana / Black chana / Kala Chana sundal / Senaga Guggillu in Telugu for Varalakshmi pooja prasadam. Its an Andhra style recipe.


Cuisine: Andhra
Category: Snack
Serves: 4
Prep time: 10 Hours
Cook time: 20 Minutes
Total time: 10H 20 Minutes


INGREDIENTS

1 cup = 240ml
  • Black chana / Brown chana / Senagalu / Konda kadalai - 1 cup
  • Water - to soak chana
  • Salt - as needed
To temper
  • Cooking oil - 1 tbsp
  • Mustard seeds - 1 tsp
  • Urad dal - 1 tsp
  • Chana dal - 2 tsp
  • Cumin seeds - 1/2 tsp
  • Curry leaves - Few
  • Ginger - 1 tsp (finely chopped)
  • Red chilli - 1 (Pinched into two)
  • Green chilli - 1 (Slit into two)
  • Asafetida/ Hing - 1/4 tsp
  • Turmeric powder – 1/4 tsp
To Garnish
  • Coriander leaves - 2 tbsp
  • Grated coconut - 1/3 cup

HOW TO MAKE SENAGA GUGGILLU / BROWN CHANA SUNDAL


  1. Wash and soak chana/ chickpeas overnight or for minimum 6 hours.
  2. In a pressure cooker, cook the chana adding required water.
  3. Cook in low flame for 2 whistles. Open the cooker, drain the excess water.
  4. Heat oil in a kadai. Temper mustard seeds, urad dal, chana dal, red chilli, green chilli, curry leaves and hing.
  5. Add cooked chana, turmeric powder, required salt and mix well. Boil for few minutes.
  6. Lastly add the grated coconut, chopped coriander leaves and mix well.
  7. Cook for a minute and remove in a plate. Offer to God and serve as prasadam.

METHOD - STEP BY STEP PICTURES

  • Wash and soak brown chana/chickpeas in water overnight or for minimum 6 hours. TIP : If you want to make soft sundal, add a pinch of baking soda while soaking the chana. Drain the water before cooking. Add fresh water, wash it once and then pressure cook it.
  • Take a pressure cooker, add the soaked chana. Add required water to cover it. Close the cooker and keep in high flame till steam / vapour starts to come out. Lower the flame immediately. Cook for 2 whistles in low flame. Switch off the flame.

  • Open the cooker and drain the excess water. Reserve the cooked chana in a plate.

  • Heat oil in a kadai and when it gets heated, splutter mustard seeds, urad dal, chana dal, hing, curry leaves, red chilli, green chilli, chopped ginger. Saute till dal turns golden in color. 
  • Add the cooked chana/ senagalu, turmeric powder and required salt along with little water. Mix well and boil till all the water is evaporated.
  • Lastly add the grated coconut, finely chopped coriander leaves. Mix well and offer as prasadam/ naivedaym to God. Later you can serve everyone. Enjoy !

Note

  • For variations, you can skip green chilli and use more red chillies.
  • Don’t skip hing / asafetida as it helps to prevent gas trouble from boiled chana.
  • You can also use white chana instead of brown ones.
  • If you like, you can sprinkle lemon juice at the end to get a mild tangy taste. 
Andhra style brown chana sundal recipe is ready to relish !
 

Continue Reading...


April 6, 2020

Turmeric Milk Recipe – Manjal Paal For Cold, Cough

Turmeric milk
 In my house, we used to drink milk with turmeric powder and pepper powder at night during initial stages of cold and cough to get a good relief. Apart from this, we also inhale steam twice in a day, do salt gargle, drink hot water, consume everything hot throughout the day to curb cold and cough in the initial stages itself.

As per my ayurvedic doctor’s advice, every night before going to sleep, I give turmeric milk adding a pinch of pepper powder for Raksha as she is prone to get cold and cough very often. Addition of pepper powder helps to absorb curcumin from turmeric powder. My mom and MIL has also insisted me to give manjal milagu paal (also known as Golden latte) at night and some tulsi leaves in morning when she was a kid to build her immunity, get rid of cold, cough, allergies and to improve overall health.

Now when I heard about this Corona virus ( Covid-19 ), we all started to consume this manjal paal everyday at night. So I thought of making this post for beginners to know about our traditional turmeric milk and its health benefits. Drinking a cup of milk adding a pinch of turmeric powder + pepper powder everyday has so many amazing health benefits.
  • It is loaded With Antioxidants
  • Helps to boost immunity
  • Induces good sleep
  • Helps to Reduce Inflammation and Joint Pain
  • Improve Memory and Brain Function.
  • Curcumin in Turmeric helps to Improve Mood
  • Protect Against Heart Disease.
  • Lowers Blood Sugar Levels.
  • Reduce Risk of Cancer.
  • Has Antibacterial, Antiviral and Antifungal Properties.
  • Some articles have mentioned that turmeric milk helps in weight loss too. 
As far as I know turmeric milk doesn’t have any side effects in general. But over consumption or over dosage for some people may experience nausea, stomach upset problems. If you want to give turmeric milk for babies or kids below 3 years, please consult your doctor.

Every year my MIL used to give me a pack of homemade turmeric powder using the raw turmeric we buy during Pongal festival. I add a pinch of turmeric powder in milk, boil for few minutes and then consume it. You can also use good quality store bought turmeric powder. Ok, lets see how to make turmeric milk at home with step by step pictures and video.


manjal paal

Turmeric milk / Manjal paal recipe


Turmeric milk / Manjal paal recipe Turmeric milk / Manjal paal recipe for cold and cough

Cuisine: Indian
Category: Drinks
Serves: Serves 3
Prep time: 2 Minutes
Cook time: 10 Minutes
Total time: 12 Minutes


INGREDIENTS
1 cup = 240ml
  • Milk - 500ml (1/2 litre)
  • Turmeric powder - 1/2 tsp
  • Pepper powder - 1/4 tsp
  • Sugar or palm candy or organic jaggery - as needed
HOW TO MAKE TURMERIC MILK

  • In a pan, boil milk. Reduce the flame to low. Add turmeric powder, pepper powder and sugar or palm candy. Turmeric milk
  • Boil for few minutes and switch off the flame. Strain the milk through a cloth strainer or mesh. Transfer to the glass.. Drink hot ! Turmeric milkTurmeric milk
  • For variations, you can also add a pinch of dry ginger powder, a pinch of cinnamon powder too. If you are using jaggery, add powdered jaggery or jaggery syrup after switching off the flame. This helps to avoid curdling of milk.
  • Enjoy !


Note

  • Usually I add 4 tsp of sugar for 500ml milk. Add 2 tbsp of palm sugar candy if using.
  • Do not add more turmeric powder and pepper powder than the mentioned quantity. Over dosage may result in stomach upset problem for some people.
  • Drink the milk hot when you have cold and cough. It helps to give a good relief from cold and cough during initial stages.

Try this healthy turmeric milk at home and enjoy !

Turmeric milk for cold cough

Technorati Tags: ,,,,,,,,

Continue Reading...


February 7, 2020

Black Urad Dal Idli Dosa – Karuppu Ulundhu Idli, Dosai

black urad dal idli dosa
Recently I started making idli, dosa batter adding black urad dal (Karuppu ulundhu in Tamil) instead of white urad dal. When I was newly married I have seen my MIL making idli batter with black urad dal but she removes the skin before grinding the batter. Though its a time consuming process, I found it healthier than white urad dal idli. But here I have made the black urad dal idli with skin. I used whole, round black gram dal. You can use split black urad dal too. In my native place Tirunelveli, we make black urad dal dosa which we call as Kurunai dosai in Tamil. I have shared that recipe in my blog years ago. I have always wanted to try soft idli with black urad dal. So I tried it recently and succeeded in my attempt too. Only the color of idli, dosa looks grey otherwise there is no difference in taste and softness.

 Friends, do try this healthy idli with black urad dal and let me know your feedback.

black urad dal idli

black urad dal dosa

Black urad dal idli dosa recipe


Black urad dal idli dosa recipe

Idli , dosa batter with idli rice/ boiled rice and black urad dal


Cuisine: Tamil nadu
Category: Main course
Serves: 4
Prep time: 14 Hours
Cook time: 20 Minutes
Total time: 14Hours 20 Minutes


INGREDIENTS
1 cup = 240ml
  • Idli rice / Salem rice - 4 cups
  • Black urad dal - 1 cup
  • Fenugreek seeds / Methi seeds – 1/2 tsp
  • Salt and water - as needed
HOW TO MAKE BLACK URAD DAL IDLI DOSA
  1. Wash and soak idli rice, fenugreek seeds for twice or thrice. Soak for 4 hours.
  2. Wash and soak black urad dal for 2 to 3 hours.
  3. In a wet grinder, grind black urad dal with skin till fluffy, smooth adding required water.
  4. Collect the batter in a bowl. Grind the rice to a smooth paste adding required salt.
  5. Add to urad dal batter. Mix them well.  Ferment the batter over night.
  6. The next day, mix the batter well. Steam idli for 10 to 15 minutes.
  7. For making dosa, take the required batter in a bowl. Add little water to dilute the batter.
  8. Heat dosa tawa and spread a ladleful of dosa batter. Cook both sides and serve hot.
  9. Serve black urad dal idli and dosa with coconut chutney or sambar !
BLACK URAD DAL IDLI DOSA - STEP BY STEP PICTURES
  • Wash the idli rice and fenugreek seeds twice or thrice till the water runs clear. Soak it for 4 hours. Wash and soak black urad dal for 2 to 3 hours minimum.

  • In a wet grinder, take the soaked black urad dal with skin. Grind it adding sufficient water. Make a smooth, spongy batter and collect in a bowl. Do not make the batter too thick or too watery. 
  • black urad dal idli dosa

  • Grind soaked rice adding required water and salt to a smooth paste. Collect this batter with urad dal batter. Mix both the batter well using your hands.

  • Ferment the batter overnight or for 12 hours based on the weather. Batter increases in quantity and becomes fluffy and porous. The next day, mix the batter well.
  • black urad dal idli dosa
  • Boil water in idli pot. Grease idli plate with oil. Pour idli batter till 3/4th of the mould and steam for 10 to 15 minutes. Remove the idli plate. Rest for 5 minutes and scoop the idli.

  • To make dosa, take the required batter in a bowl. Add little water and loosen the batter. Heat a dosa pan. Make dosa and cook both the sides. Remove and serve with chutney, sambar. black urad dal idli dosa

Note

  • You can use split black urad dal or whole black urad dal.
  • Do not remove the skin after soaking the dal.
  • Grind the urad dal batter fluffy and smooth. Do not make it watery or too thick. 

Try this healthy black urad dal idli , dosa and enjoy !
Karuppu ulundhu idli dosai
Continue Reading...


February 3, 2020

Instant Ulavacharu Using Readymade Paste


ulavacharu using readymade paste

Ulavacharu is a traditional Andhra special dish originated from Krishna and Guntur districts. Ulavacharu is a soupy (rasam/ saaru) kind of dish made from horsegram (Ulavalu in Telugu and Kollu in Tamil). Its a protein-rich, low fat food that contains a high amount of dietary fibers and is known to lower cholesterol, helps to reduce obesity. It looks thick, dark in color and it has a spicy, tangy taste with an earthy smell and flavor. Ulavacharu is usually served with plain rice adding a dollop of fresh cream, butter or ghee.

Recently people from Sitara foods, a homemade and handmade food brand based out of Hyderabad reached out to me. They are supported and recognized by the Government of India as a women empowerment startup. Friends , do check out their website sitarafoods.com to see their Andhra special pickles, pulihora paste, masala powders, traditional sweets and fryums. When they asked me to try their readymade ulavacharu paste and make a post in my blog, I had no clue about this recipe. After watching few YouTube videos, I came to know that making ulavacharu is a lengthy process which involves hours of cooking. But Sitara foods has made this authentically on wood fired mud stoves or poyyi by boiling Ulavalu for 14 to 15 hours and then made this readymade paste adding tamarind, spices and is prepared without any preservatives. You can make and enjoy this healthy ulavacharu using this paste effortlessly at home.


Here is the picture of readymade ulavacharu paste. 


All you have to do is just mix the paste in water, simmer and boil till thick. You can do the tempering with or without onion, garlic as you like. I did small modifications in this recipe by adding chilli powder as the spice level is less in this paste. So you can adjust it as per your taste buds. I made it for our weekend lunch. The smell was amazingly good. While boiling, its aroma was wafting through the entire house which tempted us to eat. I am sure everyone would love to try this delicious and delightful dish undoubtedly. As I am not aware of the authentic taste of ulavacharu, I passed a sample of this paste to my neighbor who is from Andhra. She too liked it and gave a good feedback. Apart from the spice level, everything is good in this paste. Friends, do check out and buy this ulavacharu paste from Sitara foods. It will be helpful for bachelors and people who travel abroad to make a quick lunch. Sitara foods is giving a shelf life of 9 months for this product under refrigeration. I hope you find the price reasonable as well. Ok, lets see how to make this yummy and tasty Andhra special ulavacharu easily, instantly and quickly using this readymade paste from Sitara foods.

Ulavacharu using readymade paste


Ulavacharu using readymade paste

Andhra special ulavacharu using readymade paste


Cuisine: Andhra
Category: Side dish for rice
Serves: Serves 4
Prep time: 10 Minutes
Cook time: 20 Minutes
Total time: 30 Minutes


INGREDIENTS
1 cup = 240ml
  • Readymade ulavacharu paste - 3 tbsp (adjust as per taste)
  • Water - 2 cups
  • Red chilli powder - 1/2 to 1 tsp (as per taste)
  • Salt - as needed
To Temper
  • Cooking oil - 1 tbsp
  • Mustard seeds - 1/2 tsp
  • Urad dal - 1/2 tsp
  • Cumin seeds - 1/4 tsp
  • Red chilli - 2 (pinched into two)
  • Green chilli - 1 (slit into two)
  • Curry leaves - few
  • Big onion – 1 (finely chopped)
HOW TO MAKE ULAVACHARU USING PASTE
  1. In a bowl, take 2 cups of water and mix 3 to 4 tbsp of ulavacharu paste.
  2. Heat a kadai and add this diluted ulavacharu. Boil for few minutes in low flame.
  3. Check for taste and add some chilli powder, salt if needed.
  4. In the mean time, heat a small kadai with oil. Temper mustard seeds, urad dal and cumin seeds.
  5. Add red chilli, green chilli and curry leaves. Saute onion till transparent.
  6. Add to the boiling ulavacharu. Boil for few minutes till it reaches desired consistency.
  7. Serve hot with plain rice adding butter, ghee or fresh cream. Enjoy !
METHOD - STEP BY STEP PICTURES
  • Take 3 to 4 tbsp of ulavacharu paste and mix with 2 cups of water. Check for taste and add some salt and chilli powder if needed. I added 1/2 tsp chilli powder.

  • Heat a kadai and add this mixture. Let it roll boil for few minutes in low to medium flame.

  • In the mean time, heat oil in a small kadai. Splutter mustard seeds, urad dal, cumin seeds, curry leaves. Add onion and saute till transparent. Add to the boiling ulavacharu.

  • Boil for few more minutes till it reaches the desired consistency. I made it slightly thick in consistency as it becomes thicker over the time.

  • Serve hot with plain rice adding ghee or butter or fresh cream. We relished it adding ghee. You can refrigerate the leftover paste and use for few months.

Note

  1. Adjust the quantity of paste as per your taste.
  2. I felt the paste was less spicy. So I used red chilli powder.
  3. Tempering and adding sautéed onions makes this ulavacharu tastes so good and flavorful. So don’t skip it.

Try this Andhra special Ulavacharu easily using the paste and enjoy with plain rice !
Continue Reading...


August 17, 2019

Betel Leaves Rasam – Vetrilai Rasam Recipe - Vethalai Rasam


Betel leaves / vetrilai rasam also known as paan leaves was in my try list for long time. After Varalakshmi pooja, I had so many betel leaves in hand. Usually I make homemade paan /  sweet beeda or have it with gulkand as it helps for better digestion. As you all know, betel leaves has innumerable health benefits and uses. So this time, I wanted to make vethilai rasam. 

I followed my tomato rasam recipe, made slight changes and came up with this recipe. With the dominating flavor of betel leaves, it tasted yummy. Sendhil & myself loved it. Use vellai vethalai for best taste. Karuppu vetrilai may taste bitter and gives a pungent taste. 

Friends, do try this easy betel leaves rasam for a change. You will love it like us. Ok, lets see how to make vetrilai rasam with step by step pictures.

Do check out my other rasam varieties 

betel leaves rasam recipe

Betel leaves rasam / vetrilai rasam / vethalai rasam recipe


Betel leaves rasam / vetrilai rasam / vethalai rasam recipe

Betel leaves rasam / vetrilai rasam / vethalai rasam recipe for rice


Cuisine: South Indian
Category: Rasam recipe
Serves: 4
Prep time: 10 Minutes
Cook time: 20 Minutes
Total time: 30 Minutes


INGREDIENTS
1 cup = 250ml
  • Betel leaves - 2 or 3 ( I used 3 small leaves)
  • Ripe tomato - 1
  • Green chilli - 1
  • Pepper - 1/2 tsp
  • Cumin seeds - 1 tsp
  • Dhania / coriander seeds - 1 tsp
  • Toor dal - 1 tsp
  • Garlic cloves - 5
  • Tamarind – Berry size
  • Sugar - 1/4 tsp
  • Turmeric powder – 1/4 tsp
  • Salt & water - as needed
  • Coriander leaves - to garnish
To temper
  • Ghee - 2 tsp
  • Mustard seeds - 1/2 tsp
  • Cumin seeds - 1/4 tsp
  • Hing / asafetida - a pinch
  • Red chilli - 1
HOW TO MAKE BETEL LEAVES / VETRILAI RASAM
  1. Wash and remove the stalk of betel leaves.  Tear the leaves and take in a mixie jar.
  2. Add chopped tomato, green chilli, tamarind, pepper, cumin, dhania, toor dal, garlic cloves and grind to a smooth paste.
  3. Take the paste in a kadai. Add salt, turmeric powder, sugar and 1 cup of water.
  4. Boil for few minutes till frothy and nice smell arises.
  5. Temper mustard seeds, cumin and red chilli. Add to rasam. Garnish with coriander leaves.
  6. Serve hot with plain rice adding few drops of ghee.
BETEL LEAVES RASAM RECIPE / VETRILAI RASAM - STEP BY STEP PICTURES
  • Wash the betel leaves. Remove the stalk part (kaambu). Tear the leaves roughly. Take in a mixie jar.
  • Add chopped tomatoes, pepper, cumin seeds, dhania, green chilli, garlic to the mixie jar.betel leaves rasam recipe
  • Grind to a smooth paste adding required water.
  • Heat a kadai and add the rasam paste. Add 1 cup of water, turmeric powder, salt and sugar. betel leaves rasam recipe
  • Let it boil for few minutes till frothy with a nice smell. Switch off the flame. 
  • Heat ghee in a small kadai. Temper mustard seeds, cumin seeds, red chilli and hing.betel leaves rasam recipe
  • Add to the rasam. Garnish with coriander leaves. Serve with plain rice adding ghee. Enjoy !

Note

  • Adjust the quantity of betel leaves based on the size. I used 3 small ones, if big use 2. Do not use more. 
  • You can use red chilli in place of green chilli while grinding.
  • Do not skip dhania and garlic as it lends a special flavor to the rasam.
  • Toor dal adds slight thickness to the rasam. You can skip it if you want. 
  • Tamarind adds a milk tanginess to the rasam and helps to balance the bitter taste of betel leaves. But do not use more.
  • Tempering in ghee at the end makes the rasam more flavorful.

Yummy, interesting betel leaves rasam is ready to relish with plain rice adding few drops of ghee.
Vetrilai rasam

Continue Reading...


July 18, 2018

Mint Coriander leaves Dosa – Pudina Kothamalli Dosai Recipe–Green Dosa

Mint coriander leaves dosa

I learnt this mint, coriander leaves, curry leaves dosa recipe (Pudina, kothamalli, karuveppilai dosai in Tamil) from my friend Shalini. She calls it as “Green Dosa”. Shalini has been telling me for long time to try this healthy dosa recipe and post here. But somehow I couldn’t do it. Last week when I bought a fresh bunch of mint and coriander leaves, I remembered about this dosa recipe and tried it without further delay. It came out really well. Color, taste and flavor of this dosa was awesome. Raksha and Sendhil liked it very much. I had a great satisfaction of including mint, coriander leaves and curry leaves in our diet. 

Many people doesn’t like to eat curry leaves and coriander leaves added in their food. They remove and keep it in a corner of the plate. For those people,  this dosa is a good way to include these greens. It tastes like our regular crispy dosa but looks green and smells more flavorful. Friends, do try this yummy green dosa at home and share your feedback with me. I will try to share some interesting and healthy dosa varieties in upcoming weeks. Stay tuned !
Pudina kothamalli dosa

Mint, Coriander leaves Dosa

Mint, Coriander leaves Dosa

Mint, coriander leaves dosa / Green dosa Recipe - Healthy breakfast / dinner recipe !


Cuisine: Indian
Category: Dosa Recipes
Serves: 15 nos
Prep time: 12 Hours
Cook time: 5 Minutes
Total time: 12 Hours 5 Minutes


INGREDIENTS
1 cup = 250ml
  • Idli rice – 2 cups
  • Urad dal – 1/2 cup
  • Toor dal - 1.5 tbsp
  • Chana dal – 1.5 tbsp
  • Methi seeds – 1/4 tsp
  • Mint leaves – 3/4 cup ( 1/2 bunch)
  • Coriander leaves - 3/4 cup ( 1/2 bunch)
  • Curry leaves – 2 tbsp ( 2 sprigs)
  • Green chilli – 5 nos
  • Ginger - 1 inch piece (optional)
  • Turmeric powder - 1/4 tsp
  • Salt & Water - As needed
HOW TO MAKE MINT CORIANDER LEAVES DOSA
  1. Wash and soak idli rice, urad dal, methi seeds, chana dal and toor dal together for 4 hours.
  2. Wash and grind mint, coriander, curry leaves, green chilli, ginger, turmeric powder and salt in a mixie. 
  3. Add soaked rice + dal. Grind smooth to dosa batter consistency.
  4. Ferment overnight or 12 hours. The next morning, mix the batter well.
  5. Make thin or thick dosa as you wish. 
  6. Serve with coconut chutney or tomato chutney as side dish. Enjoy !
METHOD - STEP BY STEP PICTURES

  • Wash and soak idli rice, urad dal, methi seeds, chana dal, toor dal twice. Soak them together adding enough water for 4 to 6 hours.
    mint coriander leaves dosa
  • Wash mint leaves, coriander leaves and curry leaves. Take them in a mixie jar. Add green chilli, ginger, turmeric powder, salt. Grind to a smooth paste adding enough water. ( If you are using a grinder, you can grind rice and dal mixture. Grind the leaves and chilli separately in a mixie jar and add to the grinder along with rice. )
    mint coriander leaves dosa
  • To this paste, add the soaked rice, dal. Grind to smooth batter in 2 batches adding required water. Consistency of batter should be like regular dosa batter. Not too thin or thick.
    mint coriander leaves dosa
  • Transfer the batter to a bowl. Cover it with a lid. Ferment overnight or 12 hours for the batter to raise well. Suppose If you grind the batter in the morning around 10am, you can make the dosa for dinner around 7pm. It tastes good too. But overnight fermentation gives a nice flavor to the dosa. 
    mint coriander leaves dosa
  • After fermentation, mix the batter well. Heat dosa pan. Pour one ladleful of dosa batter and make thin or thick dosa as you like. Drizzle a tsp of oil over the dosa. Cook both sides till golden. Remove in a plate.
    mint coriander leaves dosa
  • Serve hot with coconut chutney or tomato chutney. I serve with thick coconut chutney and podi. Enjoy !

Note

  • Addition of ginger is optional. But it gives a nice flavor to the dosa and also helps in digestion.
  • Quantity of curry leaves used is less than mint and coriander leaves. If you like, you can add equal quantity too.
  • You can make this dosa for dinner if you grind the batter in the morning.
  • You can also add a pinch of turmeric powder to get nice green color dosa.
  • Addition of chana dal and toor dal gives a nice golden hint to the dosa.
  • You can use either mint leaves or coriander leaves alone.
  • If you have regular dosa batter ready in hand, you can grind greens and chilli to a paste. Add to dosa batter and make dosa immediately.
Easy, yummy, greeny dosa is ready to enjoy !
mint coriander leaves dosa recipe


Continue Reading...