Search Chitra's Food Book

Showing posts with label HEALTH FOOD. Show all posts

March 10, 2021

Flax Seeds Idli Podi | Flax Seeds Chutney Powder Recipe - Aali Vithai Podi

Flax seeds idli podi

Idli podi / Gun powder is an inevitable side dish in my house. Though I make varieties of chutney and sambar recipes for idli, dosa we have the habit of eating at least one last idli with idli podi. So I always keep idli powder also known as chutney powder in stock. And I love to try varieties of idli podi recipes. Its been a long time I used flax seeds in my cooking. 

Flax seeds (Linum usitatissimum) also known as common flax or linseeds (Aali vithai in Tamil, 

Alsi ke Beej in Hindi, 

Agase bījagaḷu in Kannada, caṇa vittukaḷ in Malayalam, Avise gin̄jalu in Telugu ) are small oil seeds that originated in the Middle East thousands of years ago. Lately, they have gained popularity as a health food. This is due to their high content of heart-healthy omega-3 fats, fiber, and other unique plant compounds. Flax seeds have health benefits such as improved digestion and a reduced risk of heart disease, type 2 diabetes, and cancer. They can be easily incorporated into your diet.  Roasting and grinding them is the best way to make the most of their health benefits. (source : https://www.healthline.com/nutrition/foods/flaxseeds).

 Earlier I used to add roasted flax seeds powder in my poriyal and kootu. This time, I wanted to include it in the form of idli podi.

This Flax seeds idli podi is a healthy chutney powder recipe prepared with urad dal, chana dal, flax seeds and curry leaves. Garlic flavored idli podi is our family’s favorite. So I have added some garlic cloves in this flax seeds podi. You can skip if you don’t like it.

Friends, do try this healthy flax seeds idli podi recipe / flax seeds chutney powder for idli, dosa. You will love it. Check out the video too !

Check out my

Basic idli podi recipe

Garlic idli podi

flax seeds horsegram idli podi 

Pepper idli podi

Sesame seeds podi


Flax seeds idli podi


Flax seeds idli podi recipe / Flax seeds chutney powder recipe


Flax seeds idli podi recipe / Flax seeds chutney powder recipe

Flax seeds idli podi recipe / Flax seeds chutney powder recipe - Side dish for idli dosa


Cuisine: Indian
Category: Side dish
Serves: 1.5 cups
Prep time: 10 Minutes
Cook time: 20 Minutes
Total time: 30 Minutes


INGREDIENTS
1 cup = 250ml
  • Flax seeds - 1/2 cup
  • White urad dal - 1/2 cup
  • Chana dal - 1/4 cup
  • Red chilli – 12 to 15 (6 spicy chilli, 6 byadge or Kashmiri chilli)
  • Curry leaves - 1 sprig
  • Asafetida / Hing – 1/4 tsp
  • Garlic cloves with skin - 10
  • Salt - as needed
  • Cooking oil – 2 tsp
HOW TO MAKE FLAX SEEDS IDLI PODI
  1. Heat a kadai and dry roast flax seeds till it starts to pop.
  2. Remove in a plate. Add 1 tsp cooking oil in the kadai.
  3. Roast chana dal and urad dal. Roast till golden in low to medium flame. 
  4. Remove in a plate. Heat 1 tsp oil. Add red chilli, curry leaves, hing and roast till crispy.
  5. Add salt and switch off the flame. Let everything cool down.
  6. Firstly grind the red chilli to a coarse powder.
  7. Now add the roasted dals, flax seeds and grind to powder.
  8. Lastly add the garlic cloves. Grind to a fine powder.
  9. Remove in a bowl. Cool down and store in a box.
  10. Enjoy with idli, dosa adding sesame oil. 

METHOD - STEP BY STEP PICTURES
  • Heat a kadai and dry roast the flax seeds till it starts to pop. Do in low to medium flame without burning them. Transfer to a plate.
  • flax seeds idli podi recipe
  • In the same kadai, add  1 tsp of cooking oil. Add chana dal, urad dal and keep roasting them till both the dals turn golden in color. Do it patiently in low to medium flame. It takes 5 to 7 minutes.
  • flax seeds idli podi recipe
  • Transfer to the flax seeds plate. Now add 1 tsp of oil and add the red chillies, hing and curry leaves. Roast it till crispy without browning the chillies. Roast in low to medium flame patiently. Lastly add salt.
  • Switch off the flame and let it be in the kadai for some time. It helps to make the chillies more crispy.

  • Firstly grind the red chillies (use Byadge or Kashmiri chilli for bright color), curry leaves coarsely. Then add the roasted dal, flax seeds together to a powder. Lastly add garlic cloves with skin. Grind to a smooth powder by mixing the powder from the bottom. Don’t worry, garlic will be ground well.
  • flax seeds idli podi recipe
  • Now transfer the idli podi to a bowl. Let it cool down. Then store in an air tight box. Use up to 2 weeks to 1 month. Enjoy with idli dosa drizzling with sesame oil.

  • flax seeds idli podi recipe

Note

  • For variations, you can skip garlic cloves and add asafetida alone.
  • You can also add 2 tbsp of dry roasted sesame seeds and add it while grinding. It adds a nice flavor.
  • Grinding red chillies firstly gives a nice, bright color to idli podi.
  • For healthy variations, you can add roasted horsegram too.
  • You can also add 2 tsp of roasted coriander seeds for variations. 

flax seeds podi
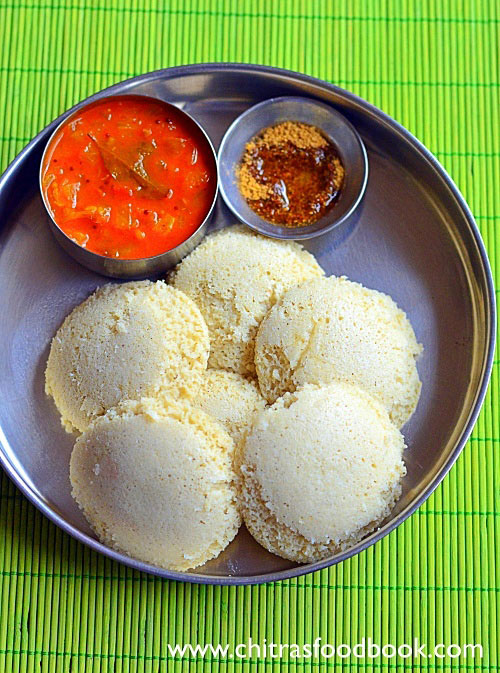
Healthy and tasty flax seeds idli podi is ready to enjoy with idli dosa !

flax seeds chutney powder


Continue Reading...


March 3, 2021

Khus Khus Milk / KasaKasa Paal Recipe - Poppy Seeds Milk

Khus khus milk

Recent days my sleep got disturbed because of my lower back pain. I was unable to sleep continuously due to anxiety and panic attacks. Apart from meditation and other natural sleeping techniques, I was looking for some home remedies and foods to include in my diet. I came across this khus khus milk / khas khas milk (poppy seeds in English) / Kasakasa paal/ Gasagasa paal recipe in Gowri samayalarai YouTube channel. I tried it on the same day as all the ingredients were readily available with me. It came out so well with a nice flavor of poppy seeds and cardamom.

Basically poppy seeds are used in baked goods and traditional dishes worldwide. Both the seeds and their oil are said to offer various health benefits including promoting digestion, boosting skin and hair health, treating headaches, coughs to curing asthma and insomnia. As poppy seeds are derived from the opium poppy, its banned in some countries. In India, people use khus khus in their cooking regularly for grinding masala. It helps to give a thick and creamy texture to kurma and other gravies. 

To powder the poppy seeds, I dry roasted them first which was not mentioned in the original recipe. I also added some cloves for flavor. It smells and tastes so good. Everyone in my home including Raksha loved it. I am taking this milk at night 30 minutes before going to bed. My sleep quality is improved. I am planning to take this milk for another week till I go back to my normal sleep. But do not consume more. For adults, you can give 1/2 cup of milk. 

Friends, do try this khuskhus milk / Poppy seeds milk / Gasagasa paal at home for a good night’s sleep. Remember this milk alone doesn’t make wonders. You have to do meditation, try to divert your mind by listening to good music, watch movies or do your favorite activity that relaxes your mind. 

Ok, lets see how to make this easy and yummy Khas khas milk with step by step pictures.

Kasakasa paal

Khus khus milk / Kasakasa paal recipe


Khus khus milk / Gasagasa paal recipe

Poppy seeds milk - Khus khus / khas khas milk recipe for good sleep and added health benefits.


Cuisine: Indian
Category: Beverage
Serves: 3
Prep time: 5 Minutes
Cook time: 10 Minutes
Total time: 15 Minutes


INGREDIENTS
1 cup = 250ml
  • Poppy seeds / Khus khus - 1/2 cup
  • Nutmeg / jathikai - 1 small piece ( I used 1/4 th of one nutmeg)
  • Cardamom - 5
  • Pepper corns - 10
  • Turmeric powder - 1/2 tsp
  • Cloves - 2
HOW TO MAKE KHUS KHUS MILK / KASAKASA PAAL
  1. Heat a kadai and dry roast the poppy seeds in low flame for few minutes.
  2. Add cardamom, cloves, nutmeg and roast it for a minute.
  3. Switch off the flame and allow to cool down completely.
  4. Now add pepper corns and turmeric powder.
  5. Grind everything to a smooth powder. Remove and store in a box.
  6. To make khus khus milk : Boil 1/2 liter milk. Add 1 tbsp of this powder.
  7. Mix well and boil for few minutes till it changes color. Strain the milk and serve hot or warm !
METHOD - STEP BY STEP PICTURES
  • Heat a kadai and dry roast the poppy seeds in low to medium flame for few minutes. Make sure you don’t burn it.

  • Add cloves, nutmeg and cardamom and roast it along with poppy seeds for a minute. This helps to powder easily. Switch off the flame.

  • Allow to cool down completely. Add them to mixie jar and add in pepper corns, turmeric powder.
    • Kasakasa paal recipe
  • Grind to a fine powder. Do not run the mixie continuously for long time. Poppy seeds releases oil and looks like paste. So grind it carefully. Mix in regular intervals and check if it becomes a powder.
  • Kasakasa paal recipe
  • Now transfer the powder to an air tight box. You can store up to a week at room temperature.

  • To make khus khus milk : Boil 500 ml milk in a bowl. Add 1 to 1.5 tbsp of this poppy seeds powder. Boil for few minutes till it changes color. Strain the milk using a metal filter. Serve the milk hot or warm. Enjoy !Kasakasa paal recipe

Note

  • Dry roasting poppy seeds is optional but it helps to powder it well.
  • If you want to wash the poppy seeds, wash it and spread them in a cotton cloth. Let it dry completely. Then you can roast it.


Try this healthy khus khus milk at home and enjoy its health benefits.

Khus khus milk

Continue Reading...


February 1, 2021

Dill leaves dal recipe / Sabsige soppu dal / Shepu dal/ Suva dal Recipe

Dill leaves dal recipe

Dill leaves dal is an easy and healthy recipe (Sabsige soppu in Kannada, Dill leaves in English, Shepu or Suva Bhaji in Hindi, Sathakuppai in Tamil and Sowa in Bengali). Sabbasige soppu / Sabsige soppu was very new to me until I come to Bangalore. My friends and neighbors here buy this soppu/ Keerai/ greens often. They add it along with coriander leaves in most of the dishes like instant idli, paddu/ paniyaram, akki roti, instant dosa varieties etc. Its very good for lactating mothers after pregnancy.

I tasted this dill leaves in Iyengar bakery masala bun for the first time and started loving its flavor. Then I tried a palya/ poriyal/ dry curry with dill leaves but my family didn't like its flavor. It became a flop in my house. So I stopped buying it.

Recently when I was looking for sago idli / sabbaki idli (recipe coming up next week) in a YouTube channel, dill leaves were added to the idli. It gave a nice and unique look to the idli. So after a long time, I bought a small bunch of dill leaves again and tried this dill leaves dal and sago idli with it. 

This dal recipe is of North Karnataka / Uttara Karnataka style sabsige soppu saaru with toor dal. Surprisingly both of them loved this sabbasige soppu dal recipe. They loved its flavor and had two servings. I am so happy that finally I found one good recipe to include this healthy greens in our diet. Before making the recipes, I explained its health benefits to my husband and daughter. Please find the health benefits below. 


Dill leaves dal

HEALTH BENEFITS OF DILL LEAVES / SABSIGE SOPPU :

Dill leaves are rich in anti oxidants. They are a good source of Vitamin C, Vitamin A, D, Iron, Magnesium etc. It helps to protect against heart diseases and cancer.

Dill leaves also promote healthy vision, augment skin, boost immune functions, treat digestive anomalies, remedy for sleep problems, fortify bone health, relieve respiratory infections, regulate hormonal balance, and enhance reproductive health. 

Friends, do try this easy, yummy and healthy sabsige soppu dal/ dill leaves dal and enjoy with plain rice adding ghee. You will love it. For variations, you can use moong dal instead of toor dal.

Sabsige soppu dal

Dill leaves dal / Sabsige soppu dal recipe


Dill leaves dal / Sabsige soppu dal recipe

Dill leaves dal / Sabsige soppu dal recipe for plain rice and roti.


Cuisine: Indian
Category: Side dish
Serves: 4
Prep time: 10 Minutes
Cook time: 20 Minutes
Total time: 30 Minutes


INGREDIENTS
1 cup = 250ml
  • Toor dal or moong dal - 1/2 cup
  • Dill leaves /Sabsige soppu - 1/2 cup
  • Cooking oil - 2 tbsp
  • Crushed Pepper + Cumin seeds - 1 tsp (pepper 1/2 tsp, cumin seeds 1 tsp)
  • Big onion - 1
  • Crushed garlic - 10 cloves
  • Curry leaves - few
  • Tomato - 1
  • Green chilli - 2
  • Tamarind - small berry size
  • Dhania powder - 1/2 tsp
  • Turmeric powder - 1/2 tsp
  • Sugar or jaggery - 1/2 tsp
HOW TO MAKE DILL LEAVES DAL / SABSIGE SOPPU DAL
  1. Wash and chop dill leaves, onion, tomato and green chilli.
  2. Wash and pressure cook toor dal in enough water for 2 whistles.
  3. Mash well and set aside. Heat oil in a kadai. Splutter mustard seeds, crushed cumin+pepper.
  4. Saute onion, crushed garlic, curry leaves, dill leaves and green chilli. Saute for 5 minutes. Add tomato and saute till mushy.
  5. Now add the cooked dal, tamarind extract, dhania powder, sugar and salt.
  6. Add required water and boil for few minutes. Serve hot with plain rice adding ghee. Enjoy !
METHOD - STEP BY STEP PICTURES
  • Wash and chop dill leaves, onion, tomato, green chilli and set aside. Wash and pressure cook toor dal adding required water, turmeric powder and few drops of oil.

  • Pressure cook in low flame for 2 whistles. Open the cooker after the steam is released. Mash well and set aside.
  • dill leaves dal
  • Now heat oil in a kadai. Splutter mustard seeds, crushed pepper + cumin seeds. Saute onion, curry leaves, crushed garlic cloves, green chilli and dill leaves. Saute for 5 minutes. The more you saute, the more flavor it lends. Saute in medium flame.
  • dill leaves daldill leaves dal
  • Add cooked dal, tamarind extract, dhania powder, sugar or jaggery and salt. Mix well and add required water. Boil for few minutes till nice aroma emits out.
  • dill leaves dal
  • Switch off the flame. Serve hot with plain rice adding few drops of ghee. If you make it thick, you can serve with roti as well. Enjoy !

Note

  • Add more green chillies based on your taste.
  • You can use moong dal instead of toor dal.
  • You can use red chilli powder instead of green chilli.

Try this easy, healthy, dill leaves dal for rice and roti. You will love it.

 Sabsige soppu saaru


Continue Reading...


January 23, 2021

Vazhaithandu dosai – How to make Banana stem dosa / Plantain stem dosa

Vazhaithandu dosai recipe

I started making vazhaithandu dosai/ banana stem dosa / plantain stem dosa after tasting in a restaurant.  I make it by stuffing vazhaithandu masala in the center of dosa like our regular masala dosa. But Raksha is not a big fan of it. She doesn’t like to eat banana stem as poriyal, pachadi too. So I was thinking on how to include this healthy vegetable in her regular diet.

Suddenly this vazhaithandu dosai recipe by grinding and adding banana stem paste to regular idli batter flashed in my mind. I googled and found an easy and yummy dosa recipe in Chettinad samayal YouTube channel. It was an instant hit at home. As I expected, Raksha loved it very much and had more dosa. I am so happy that I got a perfect dish to make my daughter eat Vazhaithandu.

Friends, do try this version of vazhaithandu dosai. I am sure its a great way to make the fussy eaters consume this healthy vegetable. Ok, lets see how to make banana stem dosa with step by step pictures and video.


Check out my other vazhaithandu recipes too


Vazhaithandu dosai recipe

Vazhaithandu dosai - Banana stem dosa recipe


Vazhaithandu dosai - Banana stem dosa recipe

Vazhaithandu dosai - Banana stem dosa recipe


Cuisine: Tamil nadu
Category: Main course
Serves: 15
Prep time: 10 Minutes
Cook time: 5 Minutes
Total time: 15 Minutes


INGREDIENTS
1 up = 250ml
  • Idli batter – 4 cups (5 cups idli rice, 1 cup urad dal)
  • Raw banana stem – 1
  • Big onion – 1 OR Small onion - 6
  • Green chilli – 2
  • Ginger – 1/2 inch piece
  • Cumin seeds – 1/2 tsp
  • Curry leaves – Few
  • Salt – 1/4 tsp (If required)
  • Cooking Oil - To drizzle over dosa
  • Water - to grind banana stem
HOW TO MAKE BANANA STEM DOSA / VAZHAITHANDU DOSAI
  1. Wash and slice the banana stem into rings. Immerse in buttermilk till use.
  2. Grind onion, green chilli, ginger, curry leaves and cumin seeds coarsely.
  3. Add chopped banana stem, add little water and grind to smooth paste.
  4. Do not add more water. Grind to a thick but smooth paste.
  5. Take thick idli batter and add this paste. Mix well and check for salt.
  6. Add water to adjust consistency. Heat dosa tawa. Pour a ladleful of batter.
  7. Spread it thin or thick. Drizzle oil around the dosa. Flip and cook the other side too.
  8. Serve hot with coconut chutney, tomato chutney or sambar !
METHOD - STEP BY STEP PICTURES
  • Peel the outer stem part/ bark part and wash the inner ring. Chop into thin slices and keep immersed in buttermilk till use.
  • Vazhaithandu dosai recipe
      Vazhaithandu dosai recipe

  • Take a big mixie jar. Add onion, green chilli, ginger, cumin seeds and curry leaves. Grind coarsely without water.

  • Now add in the batch of chopped banana stem slices by squeezing the buttermilk. Grind coarsely without adding water. Then add little water and grind to a smooth paste. Do not add more water. Firstly add 1/4 cup water. Try to grind to smooth paste by wiping the sides.

  • Open the mixie jar and add the remaining banana stem pieces too. Now grind again to a smooth paste. Add little water if required. As banana stem is a watery vegetable, it doesn’t need more water to grind. After grinding, paste looks dark grey or black in color. Its completely normal. Don’t panic. 

  • Take 4 cups of our regular idli batter in a wide bowl. Add this banana stem paste to the batter and mix well. Batter turns light grey in color after mixing. Check for taste and add salt if required. Add some water if required. Addition of water depends on the consistency of idli batter and the paste. So use water carefully.
  • Vazhaithandu dosai recipe

  • Heat a dosa tawa. Spread a ladleful of batter to make a thin or thick dosa. Let it cook in medium flame till 50%. Now drizzle oil all over the dosa. Flip and cook the other side OR remove once the bottom turns golden and top looks completely cooked. Fold and remove. Serve hot with chutney or sambar !
  • Vazhaithandu dosai recipe

    Enjoy !

Note

  • For variations, you can use red chilli instead of green chilli while grinding.
  • You can make this dosa thin or thick as you like.
  • No fermentation is required as we are using fermented idli dosa batter.
  • Make sure idli batter is not too thin or watery. After adding paste, the batter will become even more thin.
  • You can refrigerate this batter and use it for one day.


Try this healthy banana stem dosa/ vazhaithandu dosai for a change.

I am sure everyone will love it ! I made uthappam kind for me. 

Banana stem dosa


Continue Reading...


January 18, 2021

Pachai Sundakkai Puli Kuzhambu–Pachai Sundakkai Kara Kuzhambu

Pachai sundakkai kuzhambu

Last week I went to Salem after 10 months. Had a good time with my in-laws and parents. While coming back to Bangalore, my MIL gave me some vegetables that were grown in our house backyard. She gave me some pachai sundakkai / raw Turkey berry too.

After a long time, I am so happy to cook an interesting recipe with pachai sundakkai. Usually I make pacha sundakkai poricha kuzhambu learning from my MIL. But this time, I tried pachai sundakkai puli kuzhambu referring some YouTube channels. It came out so well in the first attempt itself as its more like our arachuvitta vatha kuzhambu.

If you don’t have fresh sundakkai in hand, you can use dried turkey berry/ sundakkai vathal too. It tastes and smells so good. You can make and store this pacha sundakkai kuzhambu in refrigerator and use it for 2 to 3 days. Its taste and flavor improves say by day. 

Friends, do check out this easy and yummy pachai sundakkai puli kuzhambu with step by step pictures. Enjoy mixing with plain rice and serve it with some papad and kootu / poriyal as side dish. You will love it !

Other common names for turkey berry include:

  • prickly nightshade
  • devil’s fig
  • shoo shoo bush
  • wild eggplant
  • pea eggplant
  • susumber

Pachai sundakkai kuzhambu

Pachai sundakkai kuzhambu recipe


Pachai sundakkai kuzhambu recipe

Pachai sundakkai kuzhambu / Fresh turkey berry gravy for rice.


Cuisine: Indian
Category: Kuzhambu recipes
Serves: 4
Prep time: 10 Minutes
Cook time: 20 Minutes
Total time: 30 Minutes


INGREDIENTS

  • Gingely oil - 4 tbsp
  • Mustard seeds - 1 tsp
  • Methi seeds / fenugreek seeds - 1/4 tsp
  • Cumin seeds - 1/2 tsp
  • Toor dal - 1 tsp
  • Small onion - 10 OR big onion - 1 (cubed)
  • Garlic cloves - 15
  • Curry leaves - few
  • Pachai sundakkai / Fresh, raw turkey berry - 1 cup
  • Tamarind - Small lemon size
  • Tomato - 1 (finely chopped)
  • Turmeric powder - 1/2 tsp
  • Sambar powder - 1 tsp
  • Jaggery - 1 tsp
  • Salt & water - as needed
To dry roast and grind
  • Coriander seeds / Dhania - 1 tbsp / 3 tsp
  • Grated coconut - 2 tbsp
  • Red chilli - 5 to 7
HOW TO MAKE PACHAI SUNDAKKAI KUZHAMBU
  1. Wash and chop pachai sundakkai into two or crush with mortar and pestle slightly. Set aside in water till use.
  2. Wash and peel onion, garlic cloves. Chop tomato.
  3. Heat a kadai. Dry roast dhania seeds, red chilli and coconut till nice aroma emits. Cool and grind to a smooth paste adding water.
  4. Heat the kadai adding oil. Splutter mustard seeds, methi seeds, cumin seeds and toor dal.
  5. Saute onion, garlic cloves and curry leaves. Add pacha sundakkai and saute for 5 minutes.
  6. Now add tomato and saute till mushy. Add 1 cup of water and cover cook sundakkai for few minutes.
  7. Add ground masala paste and 1 cup of tamarind extract. Add sambar powder, salt, turmeric powder and jaggery.
  8. Let the kuzhambu boils till oil floats on top. Switch off the flame and transfer to a vessel.
  9. Serve with plain rice along with kootu and appalam/ papad.
METHOD - STEP BY STEP PICTURES
  • Wash and crush the sundakkai lightly or chop into two halves. Keep them in water till use. Wash and chop onion, tomato and garlic cloves. Set aside.
  • Pachai sundakkai kuzhambu
  • Heat a kadai and dry roast coriander seeds, red chilli and grated coconut till nice aroma arises. Let it cool and grind to a smooth paste adding required water.
  • Pachai sundakkai kuzhambu
  • Heat oil in the kadai. Splutter mustard seeds, methi seeds, toor dal or chana dal and cumin seeds. Saute for a minute without burning them.
  • Pachai sundakkai kuzhambu
  • Add onion, garlic and chopped sundakkai. Saute till onion becomes transparent. Sundakkai shrinks and becomes dark green in color. Add tomato and saute till mushy.
  • Pachai sundakkai kuzhambu
  • Add 1 cup of water and cover the kadai. Boil and cook sundakkai is soft and well cooked. After sundakkai is cooked, add 1 cup of tamarind extract, ground masala paste, required salt, turmeric powder and sambar powder. Mix well.
  • Pachai sundakkai kuzhambu
  • Add jaggery. Mix well and check for taste. Boil till oil floats on the top. Kuzhambu will become thick by this time. Check for taste and thickness, add little water if required. Switch off the flame. Transfer the kuzhambu to a vessel and cover it. Serve after 30 minutes to one hour to enjoy its best flavor and taste. Enjoy !Pachai sundakkai kuzhambu

Note

  • You can add more red chillies and skip sambar powder.
  • Do not burn any spices while roasting. So roast in medium flame patiently.
  • You can skip tomato and add more tamarind if you like.


Do try this yummy and healthy pachai sundakkai kuzhambu. You will love it !

 Pachai sundakkai kara kuzhambu


Continue Reading...


January 6, 2021

Jowar Idli recipe without rice / Cholam Idli Recipe / Sorghum Idli Recipe

Cholam idli recipe

After a long time, I started making millet recipes in my kitchen. My recent try was this jowar idli recipe/ Sorghum idli dosa batter without rice. Jowar is a healthy gluten free millet which is high in fiber, protein and packed with essential minerals and vitamins. Its a great alternative for atta/ wheat flour and all purpose flour / maida. It is good to control diabetics, thyroid and aids weight loss. Sorghum is known as Cholam in Tamil, Jonnalu in Telugu, Jola in Kannada, Jowar in Hindi.

There are two varieties of Jowar in India. One is white in color and other one is red jowar which is called as Irumbu cholam/ Irungu cholam in Tamil and Malayalam. I have used white variety in this recipe.

For all millet idli recipes, I use a combination of millet, urad dal and poha / aval / pressed rice to replace rice. It comes out well and soft every time. Not only idli, you can also make crispy dosa with the same batter. But the only problem I face with all the millet idli batter is, you cannot refrigerate and store the batter for more days like our regular idli dosa batter. Millet idli dosa batter should be used within 2 days for best taste. 

This Jowar idli dosa batter is also the same like other millet idli batter recipes. You have to consume it within a day or two even under refrigeration. Other than this factor, you will not find much difference in taste, flavor from our regular idli dosa. I am sure you will love its spongy and soft texture. 

Jowar idli tastes the best with coconut chutney, tomato and onion based chutneys or tomato thokku. I served it with tomato thokku and idli podi. We loved it. I am happy that I can include this recipe in our regular diet too. Friends, do try this easy and yummy jowar idli / Sorghum idli and enjoy for your breakfast and dinner !

Check out my foxtail millet idli

Kodo millet idli

Ragi idli 

Pearl millet idli

Pearl millet dosa

Jowar idli without rice

Jowar idli / Sorghum idli/ Jonna idli without rice


Jowar idli / Sorghum idli/ Jonna idli without rice

Jowar idli / Sorghum idli/ Jonna idli dosa batter recipe without rice


Cuisine: Indian
Category: Main course
Serves: 15
Prep time:5Hours
Cook time:10Minutes
Total time:5 Hours 10 Minutes


INGREDIENTS
1 cup = 250ml
  • Jowar / Sorghum / Cholam - 2 cups
  • White, round urad dal - 1/2 cup
  • Poha / Pressed rice / Aval - 1/2 cup
  • Methi seeds / Fenugreek seeds - 1/2 tsp
  • Salt & Water - as needed
HOW TO MAKE JOWAR IDLI
  1. Wash the jowar and poha till you get clear water.
  2. Soak in enough water for 5 hours.
  3. Wash and soak urad dal and methi seeds for 2 hours.
  4. First grind urad dal to a smooth, thick batter. Transfer to a big bowl.
  5. Then grind soaked jowar to a smooth paste. Add to urad dal batter.
  6. Mix well with hands. Cover and ferment the batter over night or 12 hours.
  7. The next morning, add salt and mix the batter with a ladle.
  8. Pour in a greased idli plate and steam in a pot for 10 minutes.
  9. Remove and rest for a minute. Then scoop out and enjoy with chutney, sambar !
METHOD - STEP BY STEP PICTURES
  • Wash the jowar, poha together for 3 to 4 times to remove the dust. Wash till you see clear water. Add enough water and soak it for 5 hours.

  • Wash the urad dal + methi seeds together for 2 times and enough water to soak it for 2 hours.
  • Jowar idli without rice
  • First grind urad dal to a smooth, thick batter adding required water. If you are grinding the batter in wet grinder, add water gradually and grind to a smooth, thick paste like butter. If you are using mixie, use ice water to grind the batter. Collect the urad dal batter in a big, wide bowl with space for fermentation. 

  • Now grind the soaked jowar + poha to a smooth, thick paste adding required water. Add the jowar batter to urad dal batter and mix well with your hands to aid fermentation. Cover the batter and ferment it overnight or 12 hours based on the weather in your place. 
  • Jowar idli recipe without rice
  • The next morning, batter would have raised well. Add required salt and mix well. Take idli plate and grease with gingely oil.

  • Roll boil water in an idli pot. Place the idli plate and steam cook for 10 minutes. Check with a tooth pick or with a wet finger. If it comes out clean, idli is done. Remove the idli plate and wait for 2 minutes. Then scoop it with a flat spoon and serve in a plate. Enjoy with sambar or chutney !Jowar idli recipe without rice 

Note

  • You can use cooked rice instead of poha.
  • You can use thick or thin poha/aval for this idli
  • If you are using mixie, use ice cold water for grinding the batter to avoid heating of mixie jar.
  • Soak jowar and dal separately and grind them separately.
  • If you want to soak and grind everything together, use 3:1 ratio of jowar and urad dal. i.e use 1.5 cups jowar and 1/2 cup urad dal. 


Try this easy, yummy and healthy Jowar idli for your breakfast / dinner !

I served it with tomato thokku and idli podi. 

 Jowar idli recipe


Continue Reading...