Search Chitra's Food Book

Showing posts with label RICE ACCOMPANIMENTS. Show all posts

November 4, 2014

GONGURA THOGAYAL RECIPE/GONGURA PACHADI-ANDHRA STYLE


Gongura thogayal recipe

Gongura/Red Sorrel leaves in English,Ambadi in Gujrati,Marathi,Pitwa in Hindi,Pundi in Kannada & Pulichai Keerai in Tamil,Mestapat in bengali and Nalita in other languages is a very famous green variety in Andhra.Most of you would have heard about gongura pickle.But i tried thogayal with it years ago.Yes,this was the first & foremost recipe i tried after marriage from this website via google search.Recently a reader asked me to post gongura recipes and especially thogayal recipes.So after a long time,i referred that blog again and made this thogayal yesterday for rice.It was spicy,tangy n yummy when we had with hot rice and ghee.In the original recipe,it was titled as gongura pachadi/gongura chutney but i named it as thogayal because of its thick texture.Its very simple to make and you can store this thogayal for more than a week too.Even bachelor’s can try this and use it for 2-3 days without refrigeration.Soon i will share more gongura recipes like gongura sambar,gongura pappu in my blog and now lets see how to make this yummy Andhra style gongura thogayal for rice.

Gongura thogayal

Gongura thogayal recipe


Gongura thogayal recipe 
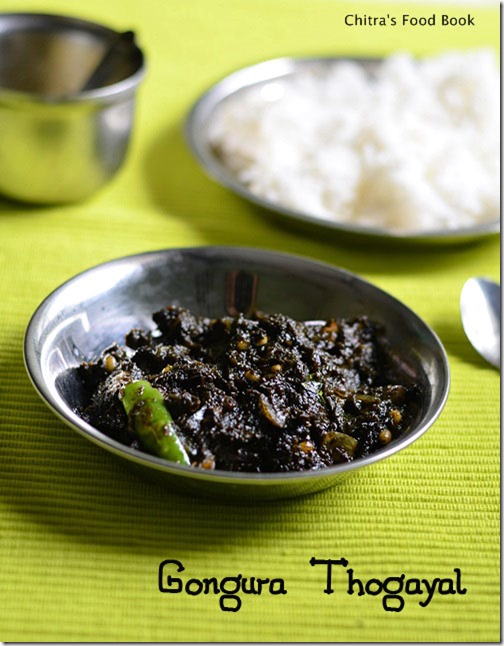
Andhra style gongura thogayal recipe- Tastes yum with hot rice n ghee !
Cuisine: Indian
Category: Thogayal
Serves: Serves 3
Prep time: 10 Minutes
Cook time: 10 Minutes
Total time: 20 Minutes


INGREDIENTS
To pressure cook
  • Gongura leaves - Half bunch ( say 3 handful)
  • Green chillies - 5 nos ( big finger size)
To temper & saute
  • Sesame oil/Gingely oil OR cooking oil - 2 tbsp
  • Mustard seeds - 1/2 tsp
  • Urad dal - 1 tsp
  • Red chillies - 1 no
  • Green chillies - 1 no ( slitted)
  • Curry leaves - few
  • Hing/Asafetida - A big pinch
  • Small onions – 5 nos ( whole)
  • Big onion – 1 no ( small,finely chopped)
METHOD

  • Wash the gongura leaves,drain the water and take in a pressure cooker base.Add green chillies,salt to it along with little water(Leaves will leave some water.So add little water) Pressure cook in high flame for 2 whistles.Open the lid and let it cool.
    gongura-thogayal
  • Take out 2 green chillies & reserve.Grind the cooked mixture to a smooth paste.Check for taste and add the reserved chillies,grind again. In a kadai,heat oil and splutter mustard seeds,uradl dal,hing,curry leaves,red chillies & green chillies.Add finely chopped big onions and whole,peeled small onions and saute till transparent.
gongura-thogayal-1
  • Then add the ground paste and mix will till the mixture thickens and oil leaves from it.If needed add a tbsp of oil in the middle.Remove and let it cool.Store in a box and refrigerate.
gongura-thogayal-2
  • Mix with hot rice adding few drops of ghee. Enjoy !

Enjoy !


Note

  • Adjust the quantity of green chillies as per your spice level.
  • Add a small piece of jaggery while grinding the leaves.
  • You should saute till oil leaves from the paste and becomes thick.Else this thogayal will spoil soon. 
  • This thogayal stays good for more than a week if stored properly in refrigerator.Use a clean spoon while you handle.


Enjoy mixing this yummy thogayal with plain hot rice adding few drops of ghee !
Gongura-thogayal-recipe


Continue Reading...


November 2, 2014

BRINJAL THOGAYAL/KATHRIKAI THUVAIYAL RECIPE-BRINJAL RECIPES


Brinjal-thogayal

Brinjal Thogayal / Eggplant thogayal is one of the favourite thogayal recipes of our family.In my family, My in-laws and myself are big big fans of brinjal recipes. Sendhil & Raksha are just opposite to us.But they love to have very few dishes with brinjal.This is one among them.He loves Ennai kathrikai kuzhambu & this thogayal very much just because of pepper flavour.Yes,the flavour of pepper & garlic is the highlight of this thogayal and it makes the dish stands out.Generally people make thogayal by smoking the brinjal in flame and they call it as sutta kathrikai thogayal.But our entire family hates the smell of smoky brinjal,sounds strange right?? So i always burn the brinjal in microwave.By this way,brinjal gets cooked easily & there won’t be smoky smell at all.Follow whichever method u like.This thogayal tastes good in either ways! Lets see how to make brinjal thogayal for rice.
Please check out my brinjal chutney for idli,dosa if interested !

Kathirikai-thogayal


Brinjal thogayal recipe


Brinjal thogayal recipe Yummy brinjal thogayal for rice - Tastes best when mixed with hot rice drizzled with ghee!
Cuisine: Indian
Category: Thogayal
Serves: Serves 4
Prep time: 5 Minutes
Cook time: 10 Minutes
Total time: 15 Minutes


INGREDIENTS

  • Brinjal - 3 nos ( Medium sized)
  • Red chillies - 1-2 no ( use 2 if u need spicy)
  • Tamarind - small gooseberry size
  • Salt & water - as needed
  • Cooking oil – 1tsp + few drops to brush brinjals
To grind coarsely
  • Garlic cloves - 5 nos
  • Pepper corns - 3/4 tsp
METHOD

  • Soak tamarind in very little water.Wash the brinjals.Apply little oil all over the brinjal.Prick it with a fork in all the sides.Microwave it for 3-4 minutes turning it once in the middle.Check it for every 1 minute else it may burn.
    brinjal-thogayal-step1
  • Peel the skin of garlic and coarsely grind it with pepper corns using a mortar & pestle.Set aside.Heat 1 tsp of oil in a kadai and fry the red chillies.Set aside.Peel the skin of cooked brinjal. In a mixie jar,take the cooked brinjals,tamarind,salt and red chillies. Grind it to a paste adding little water.To this lastly add the coarsely ground pepper+garlic mixture.Pulse it once and remove the thogayal in a serving bowl.Serve with hot rice & ghee !
brinjal-thogayal-step2

Enjoy !


Note

  • You can use one big brinjal instead of 3 small brinjals.
  • Increase the quantity of red chillies or pepper if u want more spicy thogayal.
  • Adding ghee is a must while serving.It helps to balance the heat of pepper & brinjals.
  • Do not over grind after adding the pepper+garlic mixture.Just give a pulse.


Enjoy mixing this thogayal with hot rice drizzled with few drops of ghee ! Tastes yum !

thogayal for rice

Continue Reading...


September 15, 2014

Broccoli Stir Fry Recipe | Broccoli Poriyal - Indian Style Broccoli Recipes

broccoli-stir-fry
Broccoli is a very healthy vegetable which helps to reduce cholesterol, maintains low blood sugar level, good for bone health and prevents cancer with its powerful antioxidants. Last month when I went to Total mall I picked Broccoli, Wheat grass, Baby tomatoes and some more vegetables which are rarely found in shops nearby my house. 

I tried broccoli stir fry for the first time following my mom’s South Indian style cauliflower fry recipe and loved it a lot. Its a very easy stir fry recipe to prepare in busy morning hours. In Tamil, you can call it as Broccoli poriyal. U can make it without onion & garlic too. I packed the same for Sendhil’s lunch box along with thogayal rice and curd rice. He too liked it. We were very happy to include this healthy vegetable in our regular lunch menu and I am planning to try and share more broccoli recipes in my food book. 

Ok, Lets see how to make this easy, Indian style, Vegetarian broccoli stir fry recipe at home.

Broccoli stir fry

Broccoli stir fry recipe


Broccoli stir fry recipe Broccoli stir fry - Easy, healthy stir fry recipe that can be made in minutes !
Cuisine: Indian
Category: Side dish
Serves: 2
Prep time: 10 Minutes
Cook time: 10 Minutes
Total time: 20 Minutes


INGREDIENTS

  • Broccoli -1 no (medium sized)
  • Big onion - 1 no
  • Ginger - 1/2 inch piece ( finely chopped or grated)
  • Garlic cloves - 4 nos (finely chopped)
  • Sambar powder - 1 tsp
  • Salt & water – as needed
  • Lemon juice - few drops
  • Coriander leaves – to garnish
To temper
  • Cooking oil - 1 tbsp
  • Mustard seeds - 1/2 tsp
  • Urad dal - 1/2 tsp
  • Cumin seeds - 1/2 tsp
  • Hing - a pinch
  • Curry leaves - few
HOW TO MAKE INDIAN STYLE BROCCOLI STIR FRY / BROCCOLI PORIYAL- METHOD

  • Remove the florets from broccoli, wash and soak in hot water till use. Drian the water and use it. 
broccoli stir fry recipe 1
  • In a wide kadai, temper the ingredients given above in the same order. Then add finely chopped onions, garlic cloves & ginger pieces. Saute till onion turns transparent. Add the required salt while sauting.
broccoli stir fry recipe 2
  • Now add the soaked broccoli florets and saute well for a minute in medium flame. Add the sambar powder and mix well. Sprinkle some water, mix well and cover cook in medium flame for 5 minutes.Toss it once or twice in the middle. Make sure nothing is burnt.
broccoli stir fry recipe 3
  • After the broccoli is cooked without losing its shape and crunchy taste , switch off the flame. Add lemon juice, mix well. Garnish with coriander leaves, remove and serve !
broccoli stir fry recipe 4

Enjoy with sambar rice or Rasam rice ! Tastes yummy !


Note

  • For no onion, no garlic version, simply skip onion and garlic and try the same. It tastes good in either ways.
  • U can cook broccoli in water for few minutes before sauting as we do for cauliflower. Its optional though.
  • U can replace sambar powder with 1/2 tsp of dhania & red chilli powder each.


Serve this healthy, yummy stir fry with sambar rice or rasam rice. Tastes great !
Broccoli stir fry recipe

Continue Reading...


July 5, 2014

ALOO POSTO,KALAI DAL RECIPE-BENGALI RECIPES


Aloo posto-kalai er dal recipe

This week’s Bengali recipe  Kalai er dal and aloo posto is one of the famous,hot combo that is served in an authentic Bengali lunch thali.I actually wanted to try aloo posto recipe and some bengali style dal recipe with toor dal or masoor dal.But when i was going through some blogs,they had mentioned aloo posto tastes great with kalai-er dal (dal made of split white urad dal).As i have not tried any dal recipes with urad dal,i tried this combo recipes from here.Both are no onion no garlic dishes.As Bengali’s say,aloo posto and kalai dal is really a classic combo and healthy too.The dal was aromatic with fennel n ginger flavour and alu posto was a bit spicy sidedish coated with poppy seeds paste.This combo went along each other very well Thumbs up. We loved its taste.I had some leftover dal and aloo posto for dinner and i found its taste was much much improved.I think this dish needs some standing time for all the flavours to blend well.Ok,lets see how to make this bengali  urad dal and the famous aloo posto recipes below Smile.

KALAI ER DAL
Kalai dal

Kalai dal recipe


Kalai dal recipe Bengali style kalai er dal recipe - Split white urad dal flavoured with ginger & fennel !
Cuisine: Indian
Category: Dal
Serves: Serves 3
Prep time: 10 Minutes
Cook time: 20 Minutes
Total time: 30 Minutes


INGREDIENTS
1 cup - 200ml

  • Split white urad dal - 1/2 cup
  • Green Chillies -2-3 nos
  • Hing/Asafetida - 1/4 tsp
  • Water - 2 cups for cooking the dal & 1/2 cup later
  • Salt- as needed
  • Turmeric powder - 2 pinches (optional)
To grind to a paste
  • Ada-Mouri bata ( a wet paste of Ginger and Fennel Seeds)
  • Mouri/Fennel Seeds - 1 tbsp
  • Ginger - 1 inch piece
METHOD

  • In a pressure cooker base,take the dal and dry roast it till it turns golden brown lightly with a nice smell.Roasting is to avoid the sliminess of the dal while eating.But this step is completely optional.Add enough water,turmeric powder,hing and pressure cook till dal turns mushy.
Bengali dal step1
  • In the mean time,grind the ginger and fennel seeds to a smooth paste adding water.
Bengali dal step2
  • After the pressure is released,remove the lid of the cooker and mash the dal well with a whisk or ladle.Keep aside.
  • In a kadai,heat oil and saute the green chillies and the ground paste.Saute till u get a nice smell.
Bengali dal step3
  • Add the cooked dal,salt and some water.Allow it to boil well for 5-7 minutes.check the consistency.Make it thick or slightly thin as per ur wish.
Bengali dal step4
Serve hot with rice topped with a drop of ghee !Enjoy !


ALOO POSTO RECIPE

Aloo posto recipe

Aloo posto recipe


Aloo posto recipe Bengali style aloo posto - Yummy side dish for kalai dal or any bengali dal recipe
Cuisine: Indian
Category: Side dish
Serves: Serves 4
Prep time: 10 Minutes
Cook time: 20 Minutes
Total time: 30 Minutes


INGREDIENTS

  • Potato - 3 nos
  • Poppy seeds - 3 tbsp
  • Salt & water - as needed
  • Cooking oil - 1tbsp
  • Jeera/Cumin seeds - 1/2 tsp
  • Green chillies - 3 nos
METHOD

  • Soak poppy seeds in enough water.Wash and chop the potatoes into cubes(refer picture)
Aloo posto step1
  • Grind the poppy seeds after 10-15 minutes to a smooth paste adding little water.Grind for long time to get a smooth paste.
  • Heat oil in a kadai and splutter jeera & saute slitted green chillies.Add the potato cubes and saute till golden brown.Add salt.
Aloo posto step2
Aloo posto step3
  • Add the ground poppy seeds paste.Mix well and add some water.Cover & cook till potatoes are well cooked.All the water will be absorbed and the mixture will be semi dry.
Aloo posto step4
Remove and serve with dal rice.
Enjoy !


Enjoy this hot and delicious Bengali combo for lunch !Smile


 Bengali urad dal,aloo posto recipe
Do check out my other Bengali recipes too Smile

Technorati Tags: ,,,,,,,,
Continue Reading...


June 26, 2014

BEGUN BHAJA RECIPE – BENGALI STYLE

Begun-bhaja-recipe
As I mentioned in my Chaler payesh post, here comes the second Bengali recipe for this week, begun bhaja which I made for lunch thali. Begun bhaja means (shallow) fried eggplants(aubergine). Bengalis serve this as an accompaniment for rice, rotis or just as a snack. They make varieties of bhaja with potato, bitter gourd etc & there should be at least one bhaja in their  authentic lunch menu for sure.

 Usually bengali bhaja is made in a very simple way by slicing and marinating bigger sized brinjal with turmeric powder, salt and a pinch of sugar & shallow fried in oil. But being a south Indian girl, I wanted it to be little spicier. So I just tweaked the actual recipe according to my taste bud.

When i googled, I saw many variations for this bhaja recipe like adding garam masala,dusting the begun in poppy seeds, rice flour, wheat flour or maida before frying to avoid oil consumption and to get a beautiful brown layer on top. But I did not want to deviate much from the original bengali style and so I followed this simple one. I referred many websites and Sanjeev kapoor’s video for this recipe.

As I am a big fan of brinjal, I loved this bhaja very much and I started making this bhaja for our South Indian sambar & Rasam rice too. Its so easy to make and you can prepare it within 10-15 minutes including marination time. I strongly recommend all the brinjal lovers to try this recipe at least once. U will love the simplicity of this recipe and of course the taste. But one thing, you should drain the brinjal in a tissue paper well before you eat else you may have to consume a week’s calorie in one meal. 

Ok , Lets proceed how to make this easy bengali style begun bhaja recipe. 

Bengali style begun bhaja recipe

Begun bhaja recipe


Begun bhaja recipe Bengali style begun bhaja recipe – Pan fried aubergine slices
Cuisine: Indian
Category: Sidedish
Serves: 3
Prep time: 10 Minutes
Cook time: 5 Minutes
Total time: 15 Minutes


INGREDIENTS

  • Medium sized Begun/Aubergine/brinjal - 1 no (the one we use for baingan bharta)
  • Turmeric powder - 1/2 tsp
  • Red chilli powder - 1 tsp (optional)
  • Salt - as needed
  • Water - as reqd
  • Sugar - a pinch
  • Cooking oil - 3-4 tbsp
HOW TO MAKE BEGUN BHAJA - METHOD

  • Wash and slice the big brinjal into one inch slice. Keep it immersed in salt water till use. ( It helps to remove the bitterness in brinjal if any)
  • Mix turmeric powder, salt, red chilli powder and sugar and set aside. Remove brinjal pieces from water and sprinkle this powder. Make sure the powder coats the brinjal well. Let it marinate for 5 minutes.
begun bhaja step1
  • Heat oil in a pan for shallow frying. Fry the brinjal pieces in batches for 5 minutes in medium flame. Flip it once in the middle. Fry till brinjal is cooked well and soft without losing its shape. It turns golden brown. Drain the brinjal in a tissue paper and remove the oil.
begun bhaja step2
Serve with dal ad rice OR with sambar , rasam.

Enjoy !

Note


  • U can make it more flavourful by adding garam masala pwd .
  • Skip red chilli powder if you want to try the authentic bengali version.
  • If you are conscious about oil absorption, dust brinjal slices in rice flour or wheat flour before frying.
  • The thinner u slice the brinjal,it gets cooked quickly but do not slice less than 1 inch else brinjal will become crispy.
  • Use big variety brinjal which has less seeds and more flesh for best results. I used small purple ones here. I think you can it find out from the picture.
  • Soaking brinjals in salt water is optional but it helps to remove the bitterness in brinjal if any.
  • Adjust salt while adding turmeric and red chilli powder. Do not add more.
  • Check the flame and keep turning the brinjals till it gets a nice brown color and it should be cooked till soft. Do not over cook it.
  • Add oil whenever necessary while frying between batches because brinjal absorbs more oil.


Begun bhaja recipe

Enjoy begun bhaja with roti, dal rice or sambar sadam or rasam! Tastes great with anything & everything. 
Bengali style begun bhaja

Do check out my other related posts for this recipe

Continue Reading...


June 9, 2014

VAZHAKKAI CHIPS | RAW BANANA CHIPS RECIPE - HOMEMADE

raw banana chips recipe
Raw banana chips / Vazhakkai chips is a very easy to make homemade chips unlike potato chips. My MIL makes it very often for puliodharai. But my mom makes it only for Sodhi kuzhambu. Last weekend I prepared Tirunelveli style sodhi, ginger pachadi, potato poriyal along with this vazhakkai chips for our lunch. 

We had a nice Tirunelveli saapadu after a long time. Usually I make deep fried version for Raksha and baked banana chips for myself and Sendhil. I will make a separate post for baked chips.Both mom & MIL follows this method for  deep frying banana chips. Its a very easy one. Even a beginner can try ! Ok, Lets see how to make this green banana chips at home easily.

Vazhakkai chips recipe


Vazhakkai chips recipe Vazhakkai chips/Raw banana chips recipe - Homemade,easy to make!
Cuisine: Indian
Category: Snacks
Serves: 2-3 cups
Prep time: 10 Minutes
Cook time: 20 Minutes
Total time: 30 Minutes


INGREDIENTS

  • Raw banana - 1 no (medium)
  • Red chilli powder – 3/4 tsp  or pepper powder – 1 tsp
  • Salt - as needed
  • Cooking oil - to deep fry
  • Water - to soak the banana
METHOD

  • Wash and cut the banana into two horizontally. Keep immersed in water till use to avoid discoloration. Take a thin mandoline slicer. I use Everest brand slicer. Heat oil in a kadai to deep fry.
vazhakkai-chips
  • Once the oil is heated,check it by dropping a small piece of vazhakkai. If it rises to the top immediately, oil is heated. Now simmer the flame completely and carefully hold the slicer in one hand few inches above the kadai. Slice the banana directly in the oil.  Make sure the slices are thin and even.
vazhakkai-chips 1
  • After u sliced a batch,increase the flame to medium high and leave the chips for few seconds. Then flip it.
  • Cook till the bubbles and ‘sshhh’ sound ceases completely. Adjust the flame as & when needed. Keeping the flame high continuously burns the chips. So take care.
  • In the mean time, mix red chilli powder and salt and set aside.
  • Remove the chips in a tissue paper and drain the excess oil.
  • Transfer it to a plate or bowl and sprinkle the chilli powder+salt mix.
vazhakkai-chips 2
Serve with rice or as an evening snack with coffee or tea !!
Store the remaining in an air tight box. Its shelf life is one week.


Note

  • U can use pepper powder in place of red chilli powder.
  • Some people slice the bananas, keep them immersed in water and then deep fry in oil. In that case, you should pat dry the banana slices in a towel else it chips won’t come out crispy and sometimes color may change into black.
  • Do not fry the chips in high flame. It changes the color of chips.
  • Fry all the chips uniformly. Even if you make one batch soggy, it will spoil all the batches.
  • Store in a box only after the chips is cooled down.
Continue Reading...