Basically I am a big fan of pickle recipes right from my Childhood. I need to have at least one pickle variety for my curd rice.I don’t mind about the oil, salt and preservatives in it. My appa is just the same like me. He can eat even
paruppu sadam, lemon rice, rasam rice and other rice recipes with pickle as side dish.
Even though we like all the pickles, Vadu manga urugai / Baby mango pickle is our family favourite. My mom doesn’t make pickles on her own getting afraid of fungus formation. So my dad used to tell a brahmin(yer)paati nearby our house to make this pickle for us. We used to store it for an year and relish it with curd rice.And now after marriage, I became very happy when I saw my MIL making pickles at home. She is an expert in making many pickle varieties like onion, garlic, Raw mango, Nellikai, Naarthangai etc etc.
This year, I bought baby mangoes in Bangalore and tried this pickle by myself following my MIL’s recipe. I was very happy and completely satisfied with the result. Thanks a ton Aunty for teaching me this easy and yummy maavadu pickle. I thank her everyday when I eat this pickle with a plateful of curd rice. Don’t hesitate to try this baby mango pickle even if you are a beginner. Just follow the recipe, you will get it right. Lets see how to make maavadu/Vadu mangai pickle at home with stepwise pictures.
Check out my other pickle recipes
here 
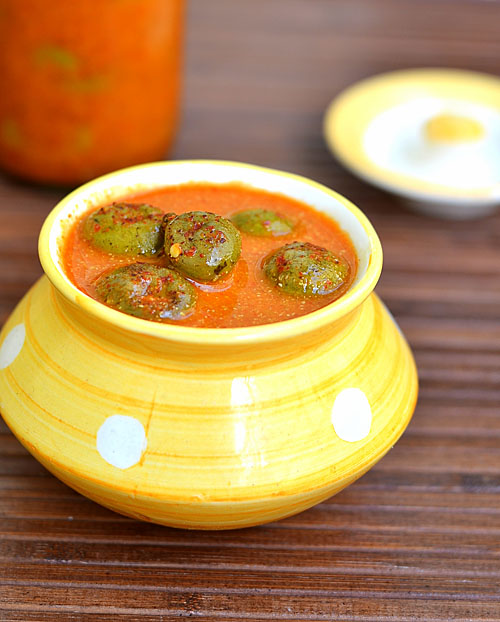
Maavadu Oorugai/Baby mango pickle
 How to make Maavadu Oorugai/Baby mango pickle at home
Cuisine: Indian
Category: Pickles
Serves: 5 cups
Prep time: 10 Minutes
Cook time: 7 days
Total time: 7 days 10 min
INGREDIENTS
- Baby mangoes/Vadu mangai- 5 cups ( heaped)
- Red chillies - 35 nos ( use 40 nos for more spice)
- Methi seeds - 2 tbsp
- Mustard seeds - 1.5 tbsp
- Turmeric powder - 1 tsp
- Hing/Asafetida - 1 tsp
- Rock salt/Crystal salt - as needed
- Castor oil – 2 tbsp
To temper
- Gingely oil - 2 tbsp
- Mustard seeds - 1 tsp
|
HOW TO MAKE MAAVADU OORUGAI RECIPE - METHOD
- Remove the stalk/Kaambu of baby mangoes if they are very big. Ignore this step if the stalk is small. Wash them well and spread it in a towel . Pat it dry.T ake the baby mangoes in a porcelain bowl (Peengaan jaadi) or glass bowl as other vessels may react.
- Now apply oil all over the baby mangoes. In a kadai, dry roast the methi seeds till golden brown in medium flame. In a mixie jar take the mustard seeds, roasted methi seeds, red chillies, turmeric powder, Hing and rock salt. Powder them nicely. Now add water and make a smooth paste.
- Add this paste to the baby mangoes and coat it well. Mix with a ladle and not with your hands. Now add water till the mangoes immerse well. Make sure water is not more. Mix well with a ladle. Check for salt and add more if needed.
- Cover the bowl with a cotton cloth and keep it under the sun for a day. Mix well once or twice in the middle. Remove and keep it closed over night. Repeat the same procedure for 5-7 days. Baby mangoes will start to shrink and soak well. Enjoy with curd rice.
You can eat the mangoes in the second day itself. But it needs at least a week to ten days to enjoy its best flavor and taste.
Enjoy ! |
Note
- Some version calls for roasting the chillies along with methi seeds and hing. But my MIL always add it raw. So I too follow her method.
- Adjust the quantity of red chillies as per your taste.
- U can also replace red chillies with chilli powder. Use Kashmiri chilli powder for best color.
- Mustard seeds gives a nice flavor to this pickle. So don’t skip it. But do not add more as it may give a bitter taste.
- This pickle tastes the best only after a week. So let it dry under sun. Do this patiently.
|
Check out my other pickle recipes
here .

Try this pickle in this mango season and relish it all through the year.
Continue Reading...


 Easy,no cook Nungu paal recipe - One of the best coolant for summer