Search Chitra's Food Book

Showing posts with label TIFFIN BOX RECIPES. Show all posts

February 26, 2016

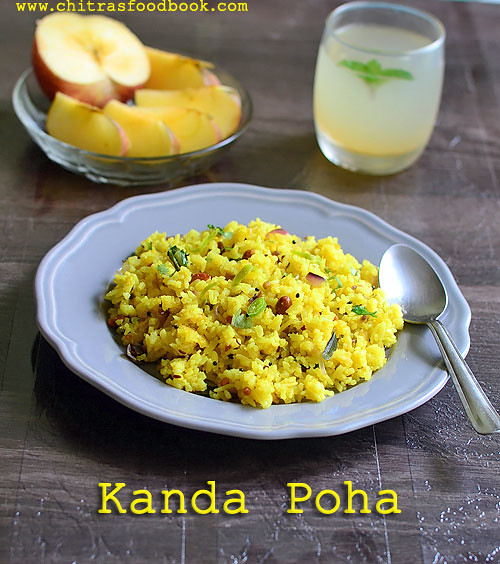
Kanda Poha Recipe – Maharashtrian Onion Poha Recipe

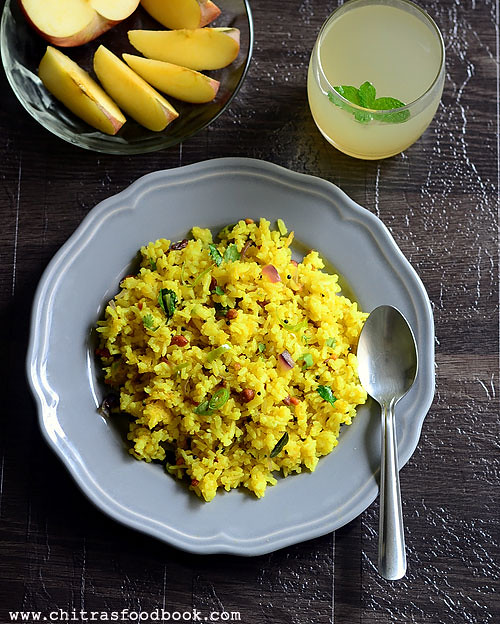
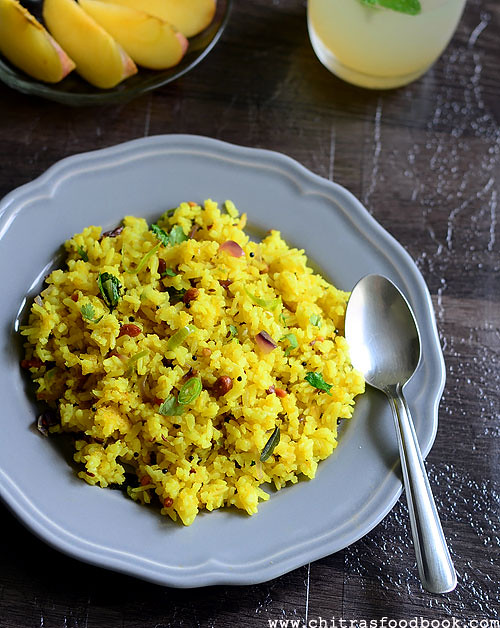
Kanda poha recipe
Kanda Poha is a very popular Maharashtrian breakfast & teatime snacks recipe which is most likely served for their guests.Kanda Pohe literally means Flattened rice prepared with onions in English.Other variants on the recipe include batata pohe (where diced potatoes are used instead of onion shreds). Other famous recipes made with Pohe (flattened rice) are dadpe pohe, a mixture of raw Pohe with shredded fresh coconut, green chillies, ginger and lemon juice and kachche pohe, raw pohe with minimal embellishments of oil, red chili powder, salt and unsautéed onion shreds ( source: wiki).In Tamil nadu,we call this as Aval Upma whereas in Karnataka it is most popularly known as Chitranna. Of course there are mild variations in the recipes of aval upma, chitranna and this North Indian style Kanda poha. But overall its a super quick,easy to make breakfast recipe for working women and Bachelors to prepare in the busy morning schedule.During festival/Vrat days,you can make the same without onion and by adding boiled potato cubes. For this recipe,I referred Sanjeev Kapoor’s video and made with my own variations.Lets see how to make the most popular Maharashtrian Kanda Poha with step by step pictures.
Check out my Karnataka style Chitranna & Tamilnadu Lemon Aval upma, Milagu Jeeraga Aval recipes too.
Kanda poha recipe Maharashtrian

Kanda Poha Recipe


Kanda Poha Recipe Kanda Poha Recipe - Maharashtrian Breakfast & Teatime snacks recipe
Cuisine: North Indian
Category: Breakfast
Serves: Serves 2
Prep time: 10 Minutes
Cook time: 10 Minutes
Total time: 20 Minutes
INGREDIENTS
1 cup = 250ml
  • Aval/Poha/Flattened Rice - 1 cup ( Thick variety)
  • Big onion - 1 no
  • Green chillies - 2 nos ( Finely chopped)
  • Roasted peanuts - 2 tbsp
  • Turmeric powder – 1/4 tsp
  • Sugar - 1/2 tsp
  • Salt - as needed
To temper
  • Cooking oil - 2 tbsp
  • Mustard seeds - 1/2 tsp
  • Urad dal - 1/2 tsp
  • Hing/Asafetida - few pinches
  • Curry leaves - few
  • Coriander leaves - to garnish
  • Lemon juice – few drops
METHOD

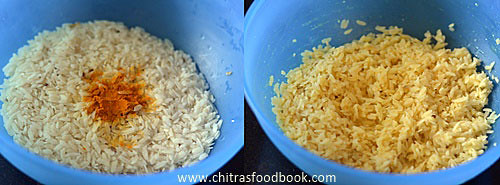
  • Wash the Poha twice.Add turmeric powder and required salt.Mix well and add water just to cover the poha.Let it soak for 5-10 minutes.Now all the water would be absorbed by the poha.
Kanda poha
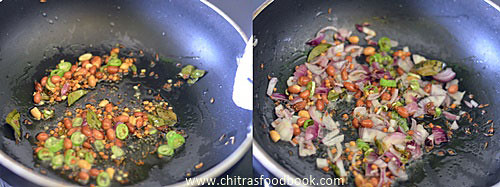
  • Heat oil in a wide kadai and season mustard seeds,urad dal,peanuts,curry leaves and hing.Add roughly chopped onions and finely chopped green chillies.Saute until onions turn transparent.
Kanda poha recipe
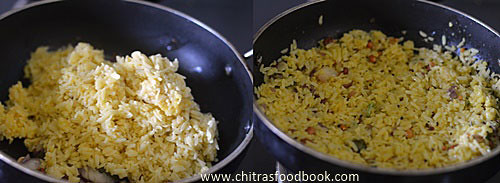
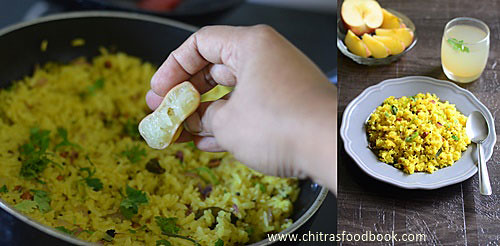
  • Now add the soaked poha & mix well.Keep the flame low & cook it for few minutes.After the poha turns soft and hot,check for taste.Add more salt if needed.Lastly add some lemon juice & garnish with coriander leaves and serve hot with tea.Enjoy !
Kanda poha recipe
Kanda poha recipe


Note
  • Use thick variety poha for best taste.
  • Adding sugar gives a mild sweet taste with a North Indian touch to the dish.So don’t skip it.
  • Add more chillies if you like spicy poha.
Enjoy this easy n quick Kanda Poha recipe for teatime snack or breakfast. I served it for breakfast along with sliced apples & Shikanji Happy
Kanda poha recipe

Continue Reading...


April 8, 2015

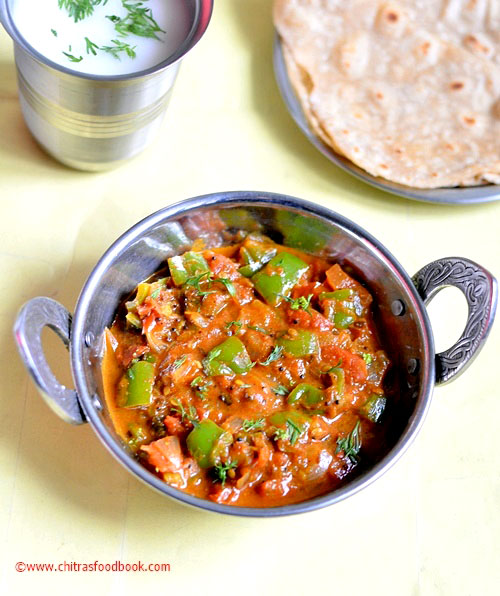
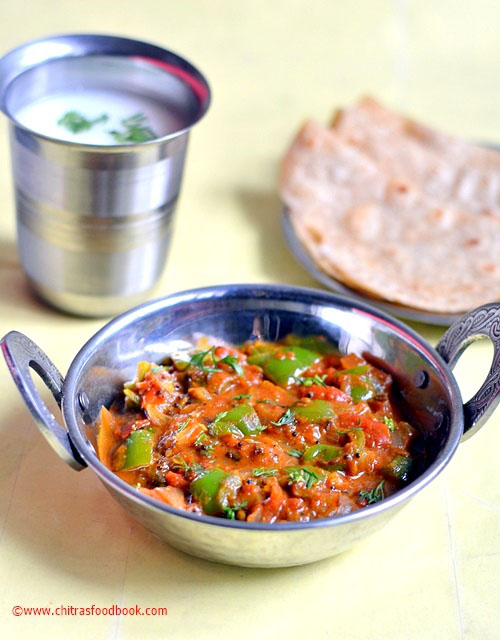
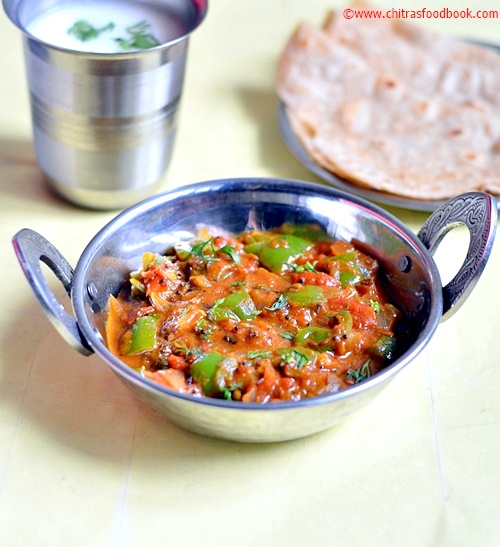
Capsicum Masala Curry Recipe - Capsicum tomato curry recipe For Chapathi

Capsicum masala curry recipe

Capsicum masala is a simple and tasty North Indian side dish for chapathi. It’s a very easy and quick recipe that can be made under 15 minutes with capsicum and tomato as major ingredients. Last week I packed roti/chapathi along with this capscium tomato curry and spicy buttermilk for Sendhil's lunch box. He loved it very much. For this recipe, I followed the basic North indian gravy recipe with tomatoes as base. So it resembled more like our South Indian Tomato thokku but tasted completely different.

The consistency of this masala can be varied from gravy to curry as per your wish. For variations, green capsicum (Bell pepper) can be paired with aloo/potato, paneer or sweet corn to make it even more healthy n tasty. So, lets see how to make this easy, no grinding, simple capsicum masala curry recipe. Try it for chapathi. U will love it. Stay tuned for some more easy side dish recipes for roti !

Check out my Capsicum kurma recipe if interested !
Capsicum tomato masala curry recipe

Capsicum masala curry recipe


Capsicum masala recipe Capsicum masala recipe - A simple side dish for chapathi
Cuisine: Indian
Category: Side dish
Serves: 2
Prep time: 10 Minutes
Cook time: 10 Minutes
Total time: 20 Minutes
INGREDIENTS

  • Green capsicum – 1 small
  • Ripe tomatoes– 2 nos(big)
  • Big onion – 1 no
  • Ginger&garlic paste- 1/2 tsp
  • Turmeric powder – 1/8 tsp
  • Coriander powder – 1/2 tsp
  • Red chilli powder – 1/2 tsp
  • Garam masala powder – 1/2 tsp
  • Kasoori methi – 2 pinches
  • Sugar – a pinch
  • Ghee – 1 tsp
  • Water & salt - as needed
To temper
  • Cooking oil – 1.5 tbsp
  • Mustard seeds – 1/2 tsp
  • Cumin seeds/Jeera – 1/2 tsp
  • Curry leaves – few 
Coriander leaves – to garnish
HOW TO MAKE TOMATO CAPSICUM CURRY - METHOD
  • Chop the capsicum into small chunks or as u wish.Chop the onions & tomatoes finely.
  • Heat oil + ghee in a kadai and splutter mustard,jeera and onions.Add g&g paste and saute till raw smell goes off.Then add capsicum pieces.Saute for a minute in medium flame.Now add the finely chopped tomatoes and saute till mushy adding required salt and turmeric powder.
Capsicum-masala-recipe-1
  • Add chilli powder, dhania powder and garam masala powder and saute till the masala well.
  • Add some water to cook the masala and capsicum and boil well till the mixture leaves oil. Adjust the consistency by adding more water to make a thick gravy or curry as you wish. Before switching off the flame, add kasoori methi and sugar. Switch off the flame and garnish with coriander leaves.
Capsicum-masala-recipe-2
Serve with roti/Chapathi !
Enjoy !

Try this easy, yummy, colorful capsicum masala for roti ! Tastes great !
Capsicum masala curry
Continue Reading...


January 4, 2015

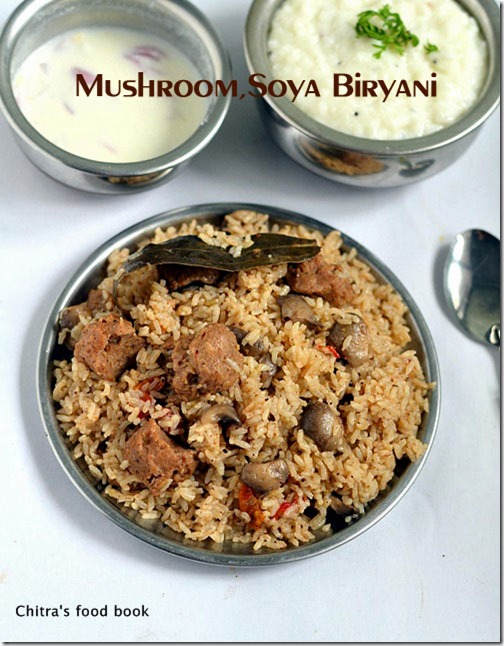
Dindigul Thalappakatti Style Veg Biryani | Mushroom Soya Chunks Biryani Recipe | Sunday Lunch Recipes -1

Dindigul-thalapakatti-biryani

In this New year, with all your support and blessings, I have planned to start veg biryani series from this week. I guess most of you make ( Both vegetarian & Non-vegetarian) make biryani in weekend especially on Sunday. Even I too make biryani mostly on Sundays, make myself free and enjoy my time with my family. To me, Biryani is an easy to make yet very rich & delicious one pot meal that make everyone drool over its smell & color. I love to try varieties of biryani recipes by watching TV shows, by referring blogs or cookbooks. I thought of blogging the same here as it might be useful to vegetarians who look for varieties of biriyani recipes. So every Sunday, you can expect some yummy biryani & pulao recipes in my blog. 

Actually I wanted to start this series with “How to cook Basmati rice” post. But I still have some work pending to bring that post here. As I am in Salem, I couldn’t do it. So I thought of starting this series with this most popular Dindigul thalappakatti biryani recipe in which I used jeera rice. Generally vegetarians have less options for biryani varieties. So I used to refer non-veg biryani recipe too & try it  by replacing chicken or mutton with vegetables like mushroom, Gobi/cauliflower and soya chunks. You can find one such example here.  Even today I have shared Dindigul thalapakatti style veg biryani which is the most popular mutton biryani of Dindigul district. 

For this recipe, I referred so many sites and read readers comments to get some idea about its color, the rice used in it etc. Finally I landed upon here & tried this biryani by making small changes in the actual recipe to achieve its brown color. I used mushroom & soya chunks/meal maker in place of mutton ;). The taste was awesome. It came out super flavourful with minimum masala. Raksha & Sendhil loved it a lot. 

Raksha told me to make the same biryani next day too for her lunch box . So I made a minimum quantity for her using rice cooker. Now I can confidently try this biryani for my guests too. I served this biryani with simple onion raita as a side dish. I made fruit custard for dessert & curd rice as well. So last week we had this biryani, raita, fruit custard and curd rice for our lunch. It was simple yet divine ! I have updated this recipe with a full video. Do watch it !

I will try my level best to collect the best biryani recipes, try them in my kitchen and share it here.Wish me Good Luck. Leave your feedback or share the picture if you try any biryani recipes from this series. It will motivate me to try n post more. Check out my other biryani & pulao recipes that are popular in my blog.

I have updated this recipe with a video. Please check it !


Dindigul thalappakatti biryani recipe

Dindigul thalappakatti biryani - Veg version


biryani recipe Dindigul Thalappakatti biriyani - vegetarian version
Cuisine: Indian
Category: Lunch
Serves: 2
Prep time: 10 Minutes
Cook time: 20 Minutes
Total time: 30 Minutes


INGREDIENTS
1 cup - 250ml
  • Jeera rice/Jeeraga sambar rice - 1 cup ( No basmati rice)
  • Water - 2 cups ( use 2.25 cups for softer rice)
  • Mushrooms – 8 nos
  • Soya chunks – 10 nos
  • Cooking oil – 2-3 tbsp
  • Big onion - 1 no
  • Tomato - 1 no 
  • Green chillies - 4 nos  
  • Chopped mint & coriander leaves - 2 tbsp
  • Biryani leaf - 1 no
  • Ginger-Garlic paste - 1 tbsp
  • Dhania powder/Coriander powder - 1/2 tsp
  • Curd - 1/2 tbsp OR Lemon juice - 1 tsp
  • Salt - as needed
For spice powder
METHOD

  • Take the ingredients given under “For Spice powder” and grind them nicely to a fine powder. You can also use a mortar & pestle to do this job. But powder it well else you will get spices in mouth while eating.( Suppose if ur mixie doesn’t grind smaller quantities,just double the above ingredients, grind it and use half the powder for this recipe. Use the remaining in kurma or gravies.)
Dindigul thalapakatti biryani -1

  • Finely chop onion and tomato. Slit green chillies. Boil 2 cups of water and soak the soya chunks. Wash and clean the mushrooms. Set aside.
Dindigul thalapakatti biryani -2

  • Wash the jeera rice and set aside. I used Nawab brand. NO NEED TO SOAK IT. In a pressure cooker base, heat oil + ghee and saute the biryani leaf. Then add onions, green chillies. Saute till onion turns transparent. Then add ginger-garlic paste. Toss well till raw smell emanates completely. Keep the flame medium.
  • Now add finely chopped tomato and saute till it becomes mushy. Add salt to quicken the process. Now add coriander powder & ground spice powder. Roast it well till u get a nice smell. Keep the flame low as it may burn. Now add soya chunks after squeezing it well & add mushrooms too. Mix well & add water, washed rice with required salt, add curd or lemon juice in water along with finely chopped mint,coriander leaves. Mix well.
Dindigul thalapakatti biryani -3
Dindigul thalapakatti biryani -4

  • Check for salt & spiciness. Close the cooker and pressure cook in very low flame for one whistle. It takes nearly 8-10 minutes. After the steam is released, open the lid and fluff the rice with fork. Serve hot with raita ! Enjoy !
Dindigul thalapakatti biryani -5


Note

  • I did not soak the rice. So I used 2 cups of water. If you soak the rice for 30 minutes,use 1.5 cups of water and add few tbsp of more water if necessary.
  • The spice powder is very important. Do not skip it.
  • You can make this biryani with either soya chunks or mushroom. U can also use other vegetables but the flavor and taste of this biryani may change as carrots give sweet taste to the rice.
  • You can also add finely chopped coriander & mint leaves at the end before closing the cooker. But I din’t use it.
  • Squeeze the soya before adding to the cooker else it will look bloated.


Do check out my other biryani & pulao recipes that are popular in my blog.

Enjoy this biryani with onion raita and have a happy meal with your family. Have a nice weekend !!

dindigul thalappakatti biriyani
Continue Reading...


November 9, 2014

15 CHUTNEY RECIPES FOR RICE - THOGAYAL RECIPES - THUVAIYAL VARIETIES

Thogayal-recipes

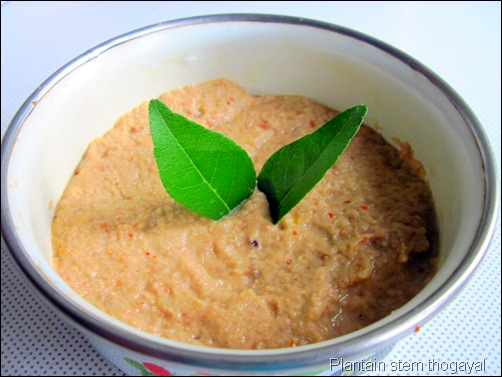
In this collection you can find thogayal recipes /chutney recipes for rice like Paruppu thogayal, Coriander leaves thogayal/Kothamalli thuvaiyal,pudina thogayal/Mint thogayal, Poondu thuvaiyal/Garlic thogayal, curry leaves thogayal/Karuvepilai thuvaiyal, Thengai thogayal/Coconut thuvaiyal, Pirandai thogayal, Karisilankanni thogayal, chow chow thogayal, radish thogayal & banana stem thogayal recipes for rice pepared by Tamil people.
 
Thogayals/ Thuvaiyals are very popular among South Indians especially for Tamil people. Some people like to mix with plain rice and eat and some loves to have it as a side dish for curd rice & sambar rice. In my family, everybody loves thogayal a lot. Everyday our lunch menu starts with a thogayal recipe. I came to know about varieties of thogayal recipes only after my marriage. Before marriage, my mom used to make thengai thogayal to mix with plain rice & pottukadalai thogayal as side dish for lemon rice and that too she makes it very rarely in weekends.

But after marriage, when I tasted few thogayal recipes prepared by my MIL,it was very new and tasted delicious for me. My MIL makes all the thogayals perfectly with well balanced taste. The ratio of tamarind,salt and chillies are very important to make a perfect thogayal otherwise it will taste spicy or tangy. So whenever my MIL visits me, I tell her to make varieties of thogayal recipes like paruppu thogayal, peerkangai/ridge gourd thogayal,coriander thogayal,pudina thogayal, Poondu thuvaiyal, curry leaves thogayal and many more. I refrigerate them in an air tight box and enjoy it for more than a week.

As Sendhil loves thogayal sadam a lot, I pack it for his lunch box too along with some stir fry/poriyal recipes. If I have few thogayals in hand, it is a big support for me as it makes the lunch box job much easier. In my blog, I have posted nearly 12 thogayal recipes for rice so far. It includes some healthy thogayal recipes like pirandai thogayal, Karisilankanni keerai thogayal as well. I wanted to have a collection of them in one post for my easy reference and for people who look for varieties of thogayal recipes for their daily lunch. I am yet to post few more like inji thogayal/ginger thogayal & peerkangai thogayal. I will share them in near future and add it here.

Most of the recipes are without coconut. So you can grind, saute in oil and store them in refrigerator for more than a week too. I hope these thogayals would be very handy and useful for bachelors & working women who wants quick lunch or dinner. Do try these thogayal varieties for your lunch & lunch box. It tastes yummy. Do leave your feedback if you try any of these. I would be more happy. Thanks for visiting this page.

Thogayal recipes


Thogayal recipes Collection of thogayal recipes / chutney for rice - Varieties of thogayal/ thuvaiyal / chutney recipes for rice !
Cuisine: Indian
Category: Thogayal
Serves: 3
Prep time: 10 Minutes
Cook time: 15 Minutes
Total time: 25 Minutes


INGREDIENTS

  • Coriander leaves/Kothamalli
  • Mint leaves/Pudina
  • Curry leaves
  • Pirandai
  • Karisilankanni leaves
  • Banana stem
  • Chow chow/Chayote
  • Coconut
  • Red chillies
  • Toor dal,Moong dal
  • Urad dal
  • Brinjal
  • Tamarind
  • Jaggery
  • Pepper corns
  • Garlic cloves
  • Cooking oil
  • Mustard seeds


Continue Reading...


October 29, 2014

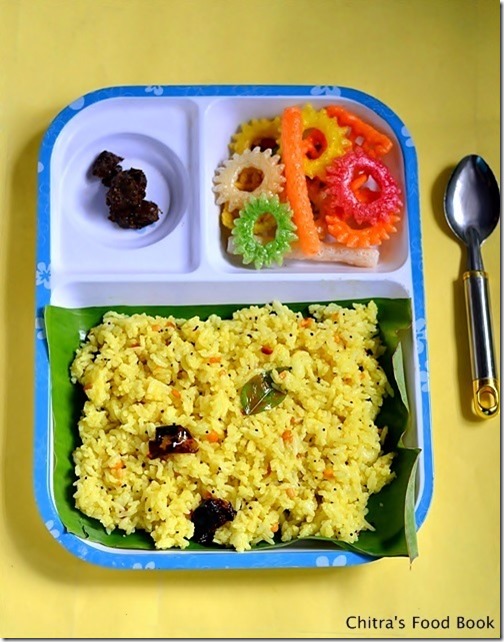
NARTHANGAI SADAM | CITRON RICE RECIPE

Narthangai-sadam-recipe

I am a big big fan of Narthangai(Citron fruits in English). Narthangai has amazing health benefits. My MIL used to say Narthangai helps to cure 108 diseases. I am not sure how far it is true. But I know its very helpful for pitha troubles & indigestion which I have experienced it.

Before marriage I used to get narthangai pickle from my Aachi in Tirunelveli. I can have a plateful of rice with it. I was thinking that pickle alone can be made with narthangai. But after marriage, when I tasted Narthangai pachadi from my MIL’s hands, I loved it more than pickle.

Recently we had a trip to Kumbakonam. Sendhil’s maami gave us a bag full of citron fruits/Narthangai from their backyard. We prepared pachadi with almost 3/4th of the quantity and made this rice with the remaining. It tastes very similar to lemon rice. Sendhil love this a lot. Its one of the yummiest Narthangai recipes. Today I made this rice for his lunch box. and now it has become my favourite too. You can serve this yummy rice variety with fryums, chips, vadam & pickle. I know all your eyes goes to those colorful fryums, right ??

I bought them in a small shop in Lee bazaar, Salem just by seeing its different shapes & color.
Ok, Lets see how to make this flavourful, yummy narthangai sadam. Here is a picture of narthangai/citron fruit for your reference.

Narthangai

Narthangai sadam recipe


Narthangai sadam recipe Delicious rice variety using citron fruits/Narthangai - Tastes similar to lemon rice
Cuisine: Indian
Category: Lunch
Serves: Serves 3
Prep time: 5 Minutes
Cook time: 20 Minutes
Total time: 25 Minutes


INGREDIENTS

  • Rice - 1/2 cup ( I use steamed rice. You can use raw rice too)
  • Water - 1.25 cups
  • Gingely oil - 1 tsp
  • Narthangai / citron fruit - 4 nos ( around 1/3 cup juice)
  • Salt - as needed
  • Asafetida/Hing - 1/8 tsp
To temper
  • Gingely oil - 1 tbsp
  • Mustard seeds - 1/2 tsp
  • Urad dal - 2 tsp
  • Chana dal - 1 tbsp
  • Red chillies  or Green chilli – 5-6 nos ( pinch into small pieces, use 6 if your chillies are less spicy)
  • Turmeric powder - 1/4 tsp
  • Asafetida/Hing - 1/8 tsp
  • Curry leaves- few
METHOD

  • Wash & Pressure cook rice adding required water & a tsp of oil. Rice should be fluffy & separate. In a plate spread the rice adding little salt & a tsp of gingely oil. It helps the rice to separate when it cools down.

  • Boil water in a pan & add the citron fruits/Narthangai( don’t cut it) to it. Let it boil for a minute. Then switch off the stove & remove the narthangai. It would become soft & now you can easily squeeze the juice using your hands. Take the juice from the fruit & strain the seeds. To this juice, add salt & hing. Set aside.
narthangai sadam - 1

  • In a kadai temper all the ingredients given under “ to temper” in the same order. Then add the extracted narthangai juice & switch off the flame immediately. Remove & keep in a bowl.
narthangai sadam - 2
  • Mix this juice with the cooked rice little by little. Add few tsp of gingely oil. Check for salt & adjust the taste.Yummy Narthangai sadam is ready to serve.
narthangai sadam - 3

  • I served with colorful fryums for my daughter & with narthangai pickle for us. It was yum!


Note

  • While squeezing the fruit, do not over do it because the juice will taste bitter if  you over squeeze it.
  • Boiling narthangai in water is optional. But it helps to remove the bitterness on the skin & it helps for easy squeezing too.
  • U can use combination of green chillies & red chillies while tempering. But my MIL used to say red chillies tastes the best for this rice. Here I used 2 byadgi chillies & 2 spicy chillies.
  • U may not need all the juice for the rice. So add little by little & check for taste whenever needed.


Serve this yummy rice with fryums, vadam & pickle. 
Narthangai sadam

Continue Reading...


September 24, 2014

CHEESY MINI UTTAPAM-KIDS LUNCH BOX RECIPES


Vegetable Uttapam

Generally kids love colorful food.My daughter Raksha is no exception.She basically loves drawing & playing with colors.So she always demands me to pack some colorful food for her lunch box.But she doesn’t like to take chapathi rolls or bread sandwich.She is an ardent fan of idli,dosa just like meTongue.So i made this cheesy tri color uttappam for her lunch box.After coming from school,she happily said all her friends asked by seeing the colors “Is that national flag dosa??Big Grin “.She had proudly told No, its my mom’s dosaLaughing.This dosa recipe was a huge success with my daughter and i am making it very often for her lunch box with some variations(Refer notes).I usually add more carrots & less cheese as she likes to eat carrot in dosas and i don’t want her to consume more cheese.So this dosa tastes little sweetish.She likes to have this dosa with idli podi.Adjust the quantity of cheese n carrot and replace coriander with capsicum & even tomatoes based on your kids wish.U can also make this dosa for your kids after they come back from school as an evening snack.They will love to have it hot hot.So here you go,easy and colorful kids lunch box recipe – Cheesy veg mini uttapam.I am happy in sending this recipe to Indus ladies “ Kids lunch box recipes-100”.Special thanks to Chitvish mam for suggesting me to participate in this eventHappy.Friends,do send in your entries and get a chance for your recipe being published in a E-book.Both Bloggers and non-bloggers can participate.Please click the logo for more details.
Recipe-Contest-Logo-300x300

Cheese-dosa

Cheesy veg uttapam recipe


Cheesy veg uttapam recipe Easy n colorful cheesy veg uttapam recipe for kids lunch box.
Cuisine: Indian
Category: Breakfast
Serves: 2
Prep time: 5 Minutes
Cook time: 5 Minutes
Total time: 10 Minutes


INGREDIENTS

  • Idli/dosa batter - 1/2 cup
  • Grated carrot - 3 tbsp ( as needed)
  • Grated cheese - as needed
  • Finely chopped coriander leaves - 1 tbsp
  • Finely chopped onions - 1/2 no ( optional)
  • Oil.ghee - 1 tsp for each dosa
METHOD

  • Wash and Grate carrot.Chop onions(if using) and coriander leaves finely.Grate cheese n set aside OR u can grate it directly over the dosa.Heat dosa pan and pour a ladleful of batter.Do not spread it.Batter should not be too thick or too thin.After pouring the dosa batter,simmer the flame completely.Leave it for few seconds.Bubble will start to appear.
cheese uttapam 1
  • Now spread the grated carrot as outer layer and put some coriander leaves towards the middle.Lastly put the finely chopped onions in the center.Drizzle a tsp of oil/ghee around the dosa.Keep the flame low always else dosa will get burnt.
cheese uttapam 2
  • Flip the dosa and leave it for few seconds.Again flip the dosa and add the grated cheese or grate cheese all over the dosa.Leave till cheese melts.
cheese uttapam

Remove and serve hot or allow it to become warm and pack in lunch box.
U can make the same dosa for adults by sprinkling idli podi or pepper powder over the dosa.Reduce the quantity of carrot and add more onions.


Note

  • Adjust the quantity of carrots as per your wish. Adding more carrot make the dosa sweetish.
  • For variations,u can add finely chopped tomatoes & capsicum too.
  • Sprinkle half a tsp of idli powder or pepper powder if ur kids like spicy dosas.
  • Add double cheese for more cheesy dosas.


Pack this colorful,cheesy dosa for your kids lunch box and make them happy !
Veg uttapam

Continue Reading...