Search Chitra's Food Book

August 10, 2014

EASY MYSORE PAK RECIPE- 3 MINUTES MICROWAVE SWEET RECIPES

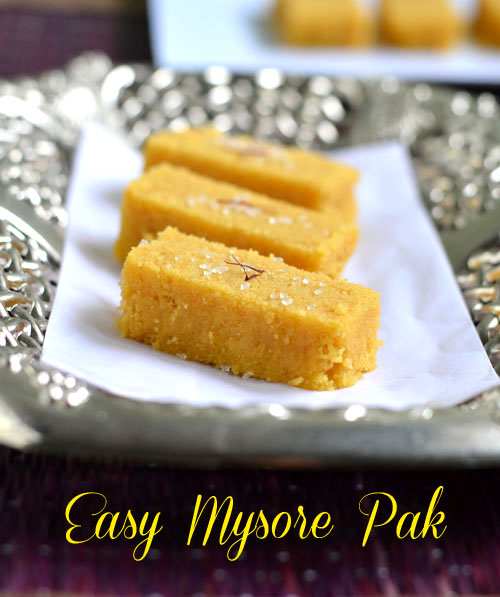
Mysore pak recipe

Wishing u all a very happy Raksha Bandhan. On this Rakhi festival day, I am here with an easy, peasy 
3 minutes microwave sweet recipe, Mysore pak.

Thanks a ton Aarthi ( yummytummy) for sharing this wonderful recipe with us. I tried Mysore pak for the first time in my life and it was a huge hit among my family and friends. My family members are not a big fan of mysorepak. So I never got an idea to try this sweet recipe by seeing the time consuming procedure and the gallons of ghee. But I know my Sister is a die hard fan of mysore pak especially from Sri Krishna sweets and Salem Lakshmi sweets. She loves the soft, melt in mouth texture and she never minds about emptying one full box of it in one day. So just for her sake, I wanted to try Mysore pak recipe for this year’s Diwali. 

When I saw this super easy, Instant microwave mysore pak recipe & that too in less than 5 minutes, I got tempted like anything and bookmarked it immediately. In this method, you don’t have to worry about sugar syrup consistency,no stirring job, less ghee comparitively & moreover it gets ready in 5 minutes. Its really a great sweet for beginners to try.

In Facebook’s Bombatt bhojana group, few people had tried the same and shared their pictures too. This gave me double assurance for this recipe to try. So what else, I tried this yummy mysore pak recipe for 3 times since yesterday & passed some of them to my friends too.They all loved it very much, took the recipe, tried it immediately & shared their pictures with me. I was so happy because this is the first recipe which became a super hit even before I blog it here. 

I have shared all the possible tips in “Note” section. This mysore pak won't come out so porous and not so soft like SKC's mysore pak. Its texture would be in the middle. But this recipe really makes wonders in less than 5 minutes I should say!. Try this, you will come to know. I was very much satisfied with my first attempt. I will try to share the stove top authentic mysore pak recipe for this Diwali.

Friends, do prepare this easy, yummy mysore pak recipe for Raksha bandhan celebration & treat your brothers. Lets see how to make this mysorepak at home using microwave instantly !!
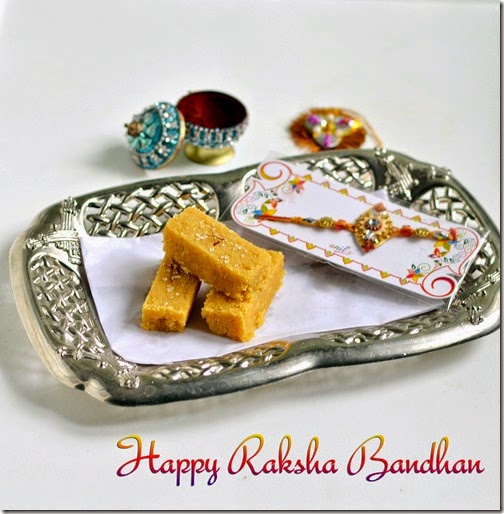
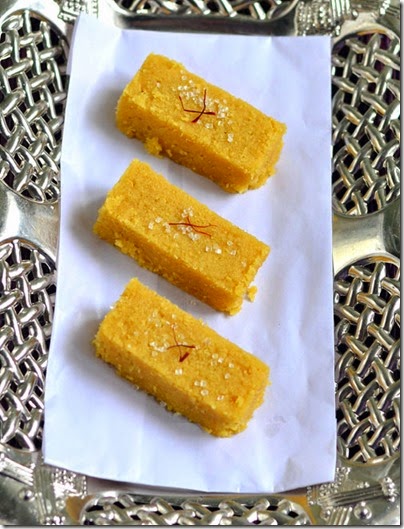
Easy mysorepak recipe


Easy microwave mysore pak recipe


Easy microwave mysore pak recipe Easy,instant mysore pak recipe using microwave in less than 5 minutes
Cuisine: Indian
Category: Sweet
Serves: 6-8nos
Prep time: 5 Minutes
Cook time: 3 Minutes
Total time: 8 Minutes


INGREDIENTS
1 cup - 250ml
  • Besan flour - 1/2 cup
  • Powdered sugar or icing sugar - 1 cup
  • Melted ghee - 1/2 cup + 1 tbsp
  • Boiled & cooled milk - 2 tsp ( at room temp,not hot)
METHOD

  • Powder 1/2 cup of crystal sugar to a fine powder. U will get around 1 cup.Set aside. Melt ghee & measure it. Set aside.Keep a plate ready greased with ghee.( I used my aluminium burfi plate which i bought from Salem) . In a wide bowl, sieve the gram flour. Keep aside.
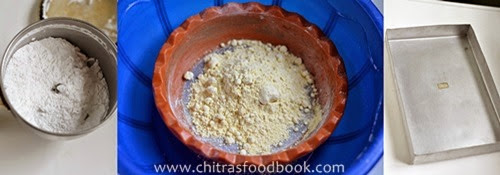
Mysore pak 1
  • In a microwave safe bowl (preferably glass bowl), take 1 tbsp of melted ghee & add the sieved gram flour. Mix well and keep it in microwave high power ( mine is 800w) for 1 minute. It will get roasted well.
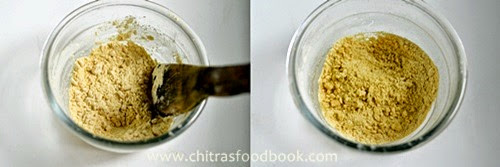
How to make mysore pak
  • Now remove the roasted gram flour in a bowl and set aside. In the same microwave bowl, take 1/2cup of melted ghee, add the powdered sugar or icing sugar & 2 tsp of milk. Mix well.
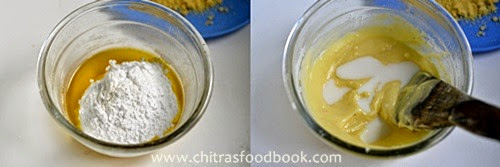
How to make mysore pak 1
  • To this, add the roasted gram flour without any lumps( this is more important to get a soft, non-crumbly mysore pak).
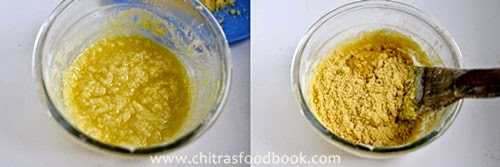
How to make mysore pak 2
  • Mix well and microwave in high power for 1 minute. U can see the ghee completely melted and floating on top. Remove and stir it well.
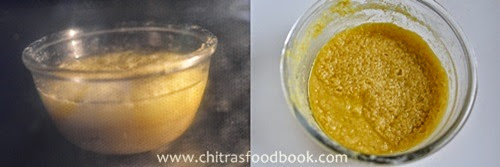
How to make mysore pak recipe
  • Again microwave for 1 minute in high power. Take it out, you can see foamy texture with bubbles in it. If its not foamy, mix well & keep it again for 20 seconds. ( You can increase the timing to 30 seconds based on the texture)
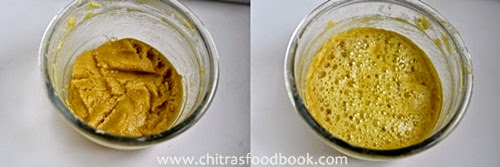
How to make mysore pak 4
  • After 20 seconds, remove & just pour it in the greased plate, press it very well with the back of spatula and smoothen it. The mixture will be slightly crumbly. Don’t worry.
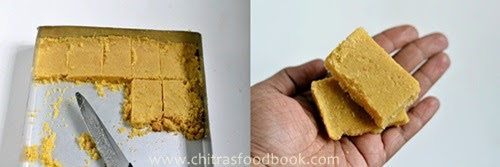
  • Leave it aside for 10-15 minutes. Once it becomes warm, draw shapes. Remove once its cooled down completely.
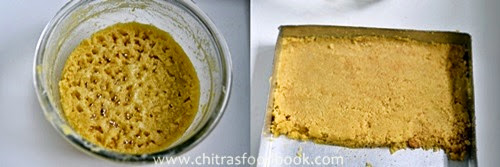
How to make mysore pak 5
How to make mysore pak 6
Serve n enjoy it ! Tastes yummy.Initially you may feel it little hard but as the time proceeds, it will become soft. It tastes best the next day. But everything will be vanished within NO time!!


Note

  • Cooking time depends on the heat & power of microwave. But don’t worry, even if you keep it for 30secs extra by mistake, it comes out well. But at any cost, do not keep it more than 2 mins 30 seconds excluding roasting time.
  • I used melted ghee in this recipe. If you use frozen ghee, take the required ghee & melt in microwave for 1 minute each time and then use. Do not use frozen ghee as it is. It won’t work.
  • Don’t worry if the mixture becomes crumbly because of over cooking. Just spread the mixture in greased plate and press it very well with a spatula or with your hands covering the mixture with sheet.Careful,it would be very hot. It will set when it turns warm. Tastes good too. Second time, I over cooked it slightly & color became dark but still the taste was great.
  • Make sure there are no lumps in besan flour before & after roasting because lumps results in uneven cooking and crumbly mysore pak. So better break it well with your hands or sieve it well.
  • As I said, it tastes the best as time proceeds. So reserve few pieces to check its actual taste the next day.
  • U can also use icing sugar instead of powdered sugar.
  • If using crystal sugar,powder 1/2 cup of it. U will get little less than 1 cup. But that’s enough for this sweet.


Don’t forget to check out my Easy coconut ladoo recipe too


Enjoy Rakhi festival with this easy, yummy sweet !! Once again I wish you all a very happy
Raksha Bandhan..

mysore pak recipe


Continue Reading...


August 8, 2014

SHAVIGE PAYASA RECIPE/VERMICELLI KHEER-KARNATAKA RECIPES

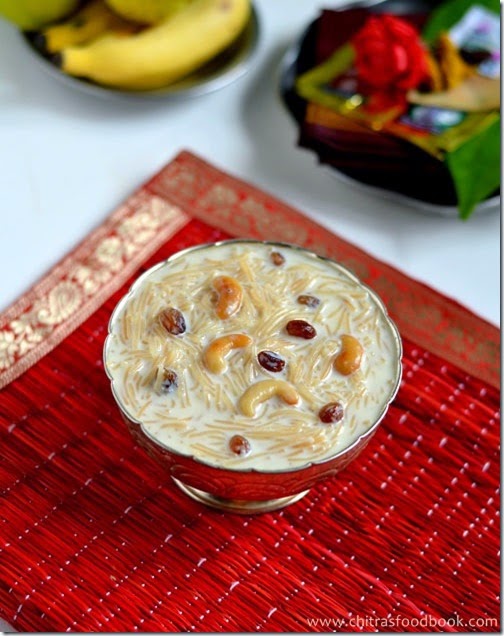
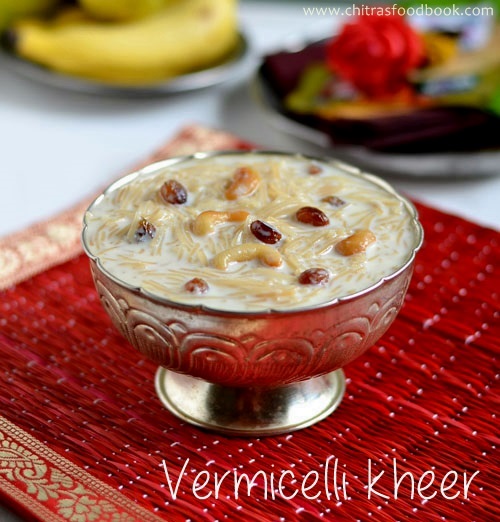
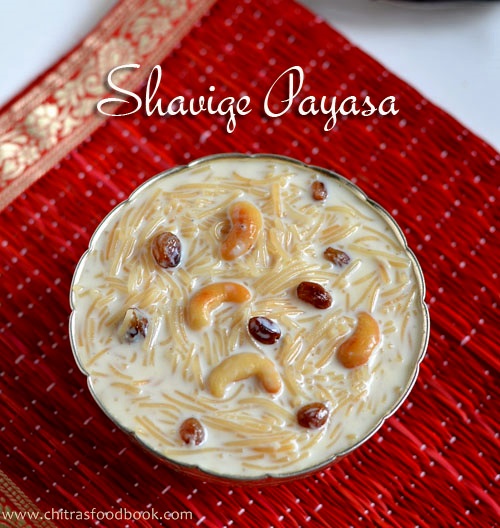
Shavige payasa recipe

Actually I wanted to share Karnataka style Holige as Varamahalakshmi festival recipe. But unfortunately I couldn’t make it as I expected. Next to holige, people in Karnataka make this shavige payasa for most of the festivals. So I thought of posting this simple and quick fix dessert recipe, vermicelli kheer on this auspicious day. In Tamil nadu, we make paal payasam aka semiya payasam in a similar way but we make it slightly watery in drinkable consistency. But here, people make it thick like vermicelli pudding in spoonable consistency. But tastes so good. U can make it rich by adding condensed milk(milk maid) or khoya/ kova. Some of my friends here add MTR badam milk mix to give a nice flavor, color and richness to this kheer. Ok, Lets see how to prepare this droolable shavige payasa.

Wish you all a very happy Varamahalakshmi festival. May we all get the blessings of Goddess Lakshmi on this wonderful day.

Shavige payasa recipe

Shavige payasa/Vermicelli kheer recipe


Shavige payasa/Vermicelli kheer recipe Shavige payasa/Vermicelli kheer recipe for Varamahalakshmi festival - Simple n yummy Karnataka delicacy
Cuisine: Indian
Category: Sweet
Serves: Serves 4
Prep time: 5 Minutes
Cook time: 20 Minutes
Total time: 25 Minutes


INGREDIENTS
1 cup = 240ml
  • Roasted Vermicelli/Shavige/Semiya - 1/2 cup (100 gms)
  • Boiled milk – 2.5 cups
  • Water – 1 cup
  • Sugar - 1/2 cup
  • Crushed cardamom - 2 nos
  • Cashewnuts and dry grapes - a fistful
  • Saffron threads - few (optional)
  • MTR Badam powder - 1 tsp (optional)
HOW TO MAKE SHAVIGE PAYASA - METHOD

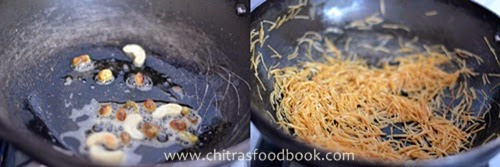
  • Heat 1 tbsp of ghee in a pan. Roast cashews & Dry grapes.When grapes turn bulgy, remove & keep in a plate.
  • In the same ghee, roast the vermicelli even if its roasted. It will enhance the taste.
shavige payasa 1
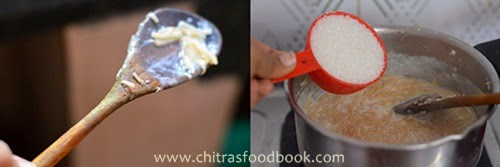
  • Boil 1 cup of water + 1 cup of milk in a wide bowl. When it comes to boil, add vermicelli. Let it cook in low to medium flame.After its well cooked, add sugar. 
shavige payasa 2
  • Mix well and boil for few minutes till all the sugar dissolves. Add the remaining milk  & MTR powder if using. Boil for few minutes.
shavige payasa 3
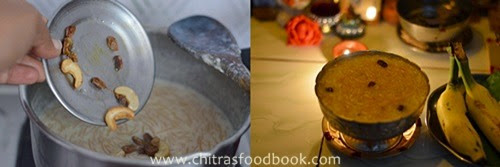
  • Lastly add cardamom powder, roasted cashews & dry grapes. Switch off the flame. This payasa will thicken once its cooled down. So adjust the quantity of milk. Refrigerate, cool n serve OR serve warm as you like.
shavige payasa 4

Enjoy !


Note


  • Adjust the quantity of milk as per the desired consistency.
  • U can also add 2 tbsp of condensed milk or khova to get a rich taste. In that case reduce the quantity of sugar.
  • Adding MTR badam powder is optional. But I have tasted in some of my friend’s houses. It tastes great with a nice flavor.


Do check out my Kerala style Paal Payasam, Bengali Chaler payesh & Tamilnadu style semiya payasam


Karnataka payasa recipes

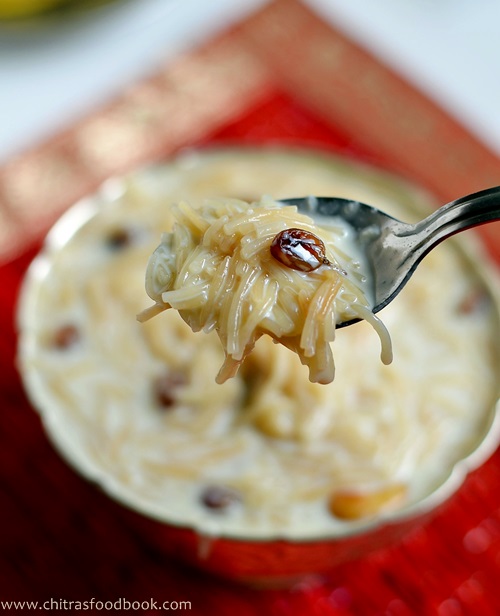
Karnataka style Shavige payasa is ready to relish!

Shavige payasa recipe


Continue Reading...


August 6, 2014

EASY INDIAN VEGETABLE SALAD RECIPE-SALAD RECIPES

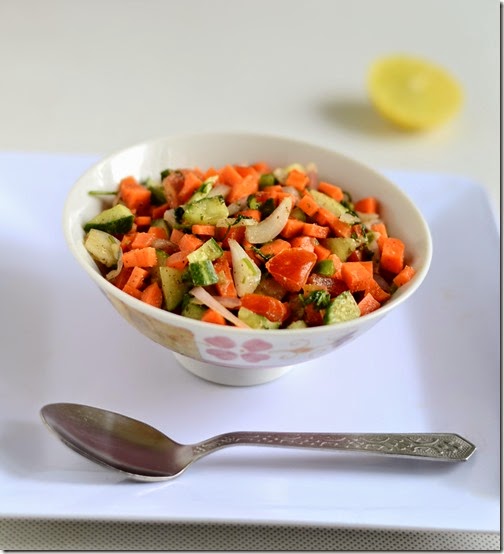
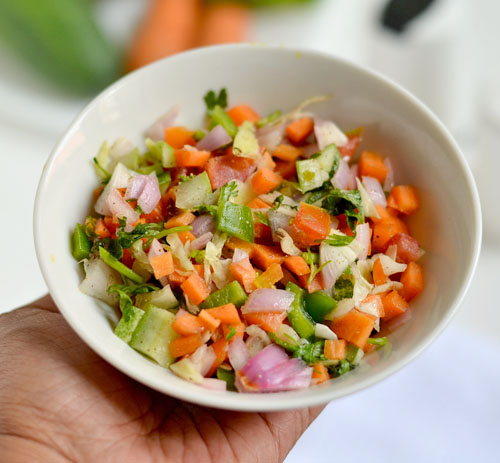
 Mixed vegetable salad
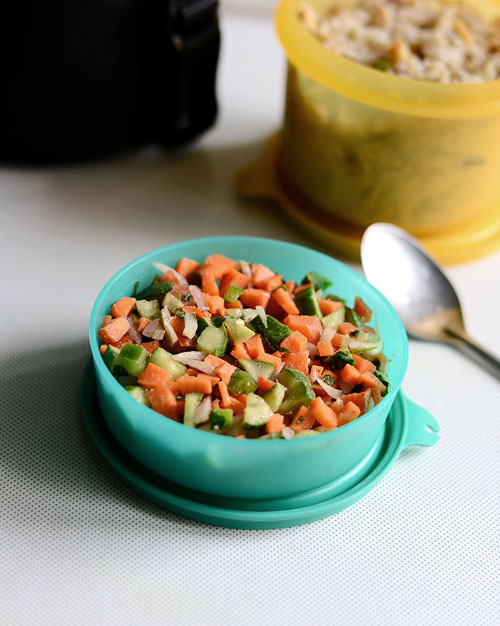
We think about salad recipes only when we think about diet or weight loss, Right?. Whenever I pack vegetable salad for Sendhil’s lunch box, his colleagues ask him “What Sendhil, diet aa “ ?? We all have this mind set. I too had the habit of eating salads only in buffet and banquets and I was making varieties of vegetable and sprouts salad recipes for Sendhil’s lunch only to cut down the intake of rice when he was under diet to overcome some health issues.

But nowadays, I have introduced salads in our daily routine just to consume raw vegetables in a healthy and tasty way. I must thank my friend Shalini for urging me to make salad by suggesting some easy & quick recipes.When I browsed for mixed vegetable salad recipes, I found most of them with celery & lettuce leaves. But I couldn’t get these vegetables in small shops nearby my house. So I tried this simple salad recipe in Indian style with vegetables we can get easily even in petty shops especially in India. I used just 1/2 tsp of olive oil for salad dressing which is completely optional. Other than this, this is a low calorie, basic, simple Indian vegetable salad which you can make in minutes. Do try this healthy, easy salad recipe for your kids and family. Stay healthy and fit !
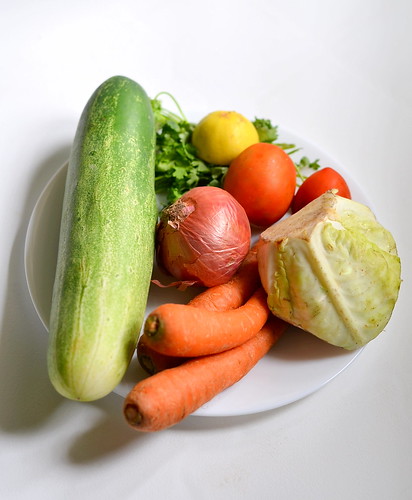
Vegetables for salad

Indian vegetable salad recipe


Indian vegetable salad recipe Mixed vegetable salad recipe using Indian vegetables !
Cuisine: Indian
Category: Salad
Serves: Serves 2
Prep time: 10 Minutes
Cook time: 5 Minutes
Total time: 15 Minutes


INGREDIENTS

  • Carrot - 1 no (small)
  • Big onion - 1/2 no
  • Tomato - 1/2 no (use deseeded)
  • Cucumber - 1/4 no (small)
  • Capsicum- 2 tbsp (finely chopped)
  • Cabbage - 1 leaf (chopped or grated)
  • Coriander leaves - few
  • Salt - as needed
  • Pepper powder - 1/2 tsp (adjust)
  • Lemon juice - few drops
  • Olive oil or coking oil – 1/2 tsp
HOW TO MAKE VEGETABLE SALAD - METHOD

  • Wash and chop all the vegetables into small cubes. Deseed tomato n cucumber if you are packing this salad for lunch box because it will leave water. Else deseeding is optional. Add salt, lemon juice and pepper powder. Mix well. Lastly add 1/2 tsp of oil, mix and serve ! Adjust the quantity of pepper powder as per your taste buds ! Enjoy !


Note

  • For variations, you can add a handful of pomegranate seeds to make it a colourful fruit and vegetable salad.
  • U can also add a handful of boiled sweet corn kernels.
  • If you are making for kids, try adding few pieces of badam, cashews and dates. It will give a crunchy taste.
  • This salad won’t leave water unless you add more tomatoes and cucumber with seeds.
Do check out my vegetable & fruits salad for kids and parties !


Try this easy, yummy, colorful salad recipe. U will love its simplicity and taste !


Continue Reading...


August 4, 2014

Thinai Idli Recipe | Foxtail Millet Idli - Millet Recipes

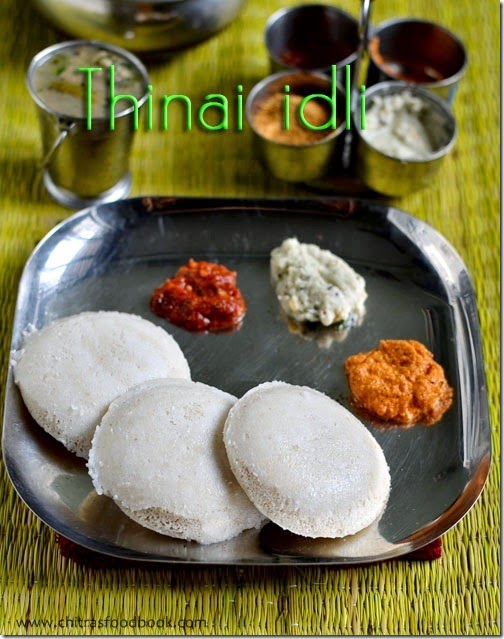
Foxtail millet idli recipe

Last week I tried thinai idli recipe for the first time using fermentation method. Earlier I tried an Instant Foxtail millet idli which was a super flop. But this recipe worked out very well. Idli came out soft and spongy. I made idli as well as dosa with this batter. Its taste & texture was more like our usual idli, dosa. Only its color was not pure white.

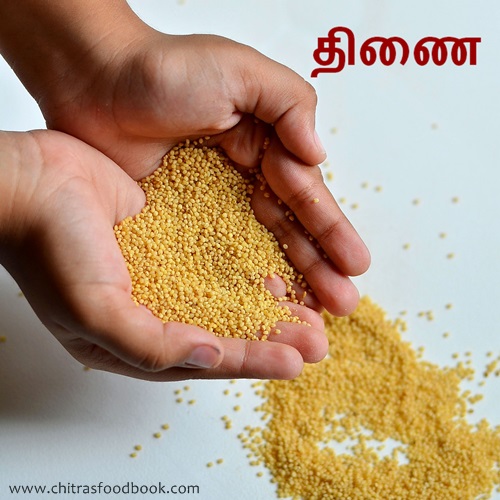
We were very happy to have a healthy breakfast recipe & I was even more happy as i have got yet another interesting idli recipe to include in my idli varieties. In other languages, Thinai is called as ”Foxtail millet” in English,”Navane” in Kannada,”Kakum”in Hindi,”Korra” in Telugu,”Thina” in Malayalam,”Kaon” in Bengali,”Kang” in Marathi & Gujarati and ”Kanghu” in Oriya.

Last year few readers told me to post some quinoa recipes & I was thinking that quinoa in called as Thinai in Tamil.

But when I googled, I found quinoa & thinai (foxtail millet) are different. I will try to buy quinoa in Bangalore and try to post some healthy recipes with it. But before that, I wanted to share this easy and healthy millets recipe which is a great replacement for our rice idli. 

Please check this link to know more details about “Thinai & its health benefits” with pictures. Lets see how to make thinai arisi idli recipe . Soon I will share some more interesting recipes with other millets too. Don’t forget to check out my Mixed millet laddo recipe & other millet recipes .


Thinai

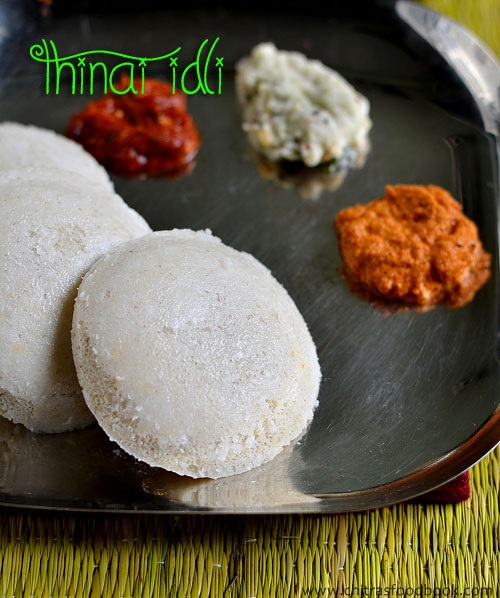
Thinai idli/Foxtail millet idli recipe


Thinai idli/Foxtail millet idli recipe Idli recipe using Foxtail millet - Healthy breakfast recipe !
Cuisine: Indian
Category: Breakfast
Serves: 30
Prep time: 4 Hours
Cook time: 15 Minutes
Total time: 4H15M Minutes


INGREDIENTS
 1 cup = 250ml
  • Foxtail millet/Thinai - 2.5 cups
  • Idli rice/Salem rice - 1/2 cup
  • Urad dal - 1/2 cup
  • Aval/Poha - 1/4 cup
  • Fenugreek seeds - 1/2 tsp
  • Salt & water - as needed
HOW TO MAKE THINAI IDLI - METHOD

  • Measure & take all the ingredients together and wash it carefully . Its better if you wash it using a strainer. Soak for 3-4 hours.
  • Grind them to a smooth paste adding required water and salt. Remove mix well and allow it to ferment overnight or minimum 8 hours.
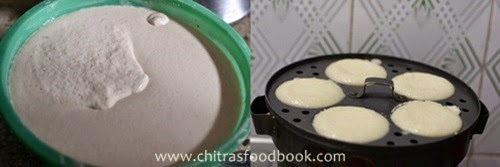
  • The  next day, batter would have raised well (Not doubled). Now mix the batter very well and pour in a idli plate.
Thinai idli recipe
  • Boil water in a idli pan and keep the plates. Steam it for 10-15 minutes. Check with the back of a spoon for doneness. If the spoon comes out clean, idli is ready.
  • Remove  the idli plate and rest it for 2-3 minutes before removing them else it will be sticky.
  • Refrigerate the batter & make dosas the next day.
Enjoy !
Note

  • This batter becomes sour very quickly so refrigerate it after 8 hours till you use it.
  • Do not use more urad dal than the mentioned quantity because idli will become sticky.
  • Do not remove the idlis if its very hot. It may be sticky. Give a standing time of 2-3 minutes before u remove.
  • If the quality of urad dal is too bad,use little more than 1/2 cup. Similarly if the quality of dal is too good, use 1/3 cup. It varies.
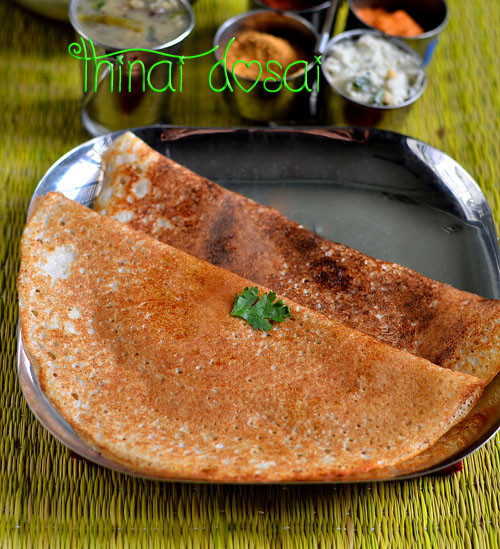
  • U can also make dosas using the above batter.

Do Check out my Mixed Millet laddu recipe & other millet recipes if interested !

Thinai Dosai 
Thinai dosai

Enjoy this healthy foxtail millet/thinai idli for breakfast with your favourite chutney and sambar !

Thinai idli recipe
Continue Reading...


August 1, 2014

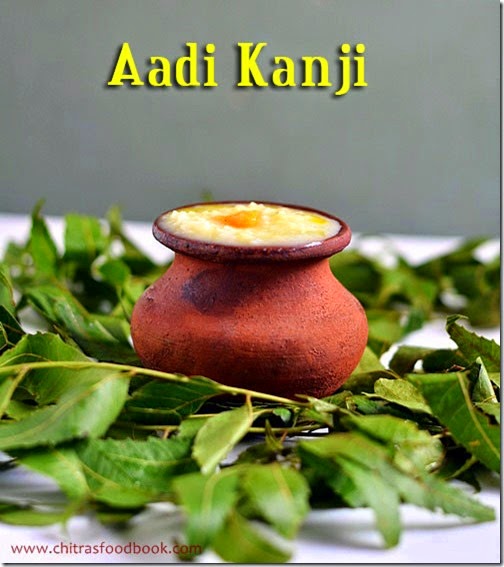
AADI KANJI RECIPE | ARISI PARUPPU KANJI | AADI VELLI RECIPES

aadi kanji recipe

I made this arisi paruppu kanji/ rice dal porridge recipe for Aadi velli today. My MIL has the practice of offering this porridge for Mariamman on Aadi velli/friday. We call it as Mariamman kanji. My in-laws are with me for the past two weeks and we are having great days together. This time I learnt some yummy authentic recipes from her. This is one among them. In this porridge I have used rice & moong dal.It very easy to make & can be made in minutes. No need to roast the rice or dal. Its good for babies too.

Today I prepared this porridge for the first time and offered to Mariamman. It tasted yum. My in laws like this salty porridge more than the sweet ones and they usually have this for breakfast. Its a very filling & easily digestible porridge. Do try this easy porridge recipe for Aadi velli and get the blessings of Amman. Let see how to make this one step rice and dal porridge recipe.

Do check out my rice porridge recipe for babies.

aadi velli recipes

Aadi velli kanji recipe


Aadi velli kanji recipe Aadi kanji recipe for aadi velli using rice and moong dal
Cuisine: Indian
Category: Breakfast
Serves: 4
Prep time: 2 Minutes
Cook time: 15 Minutes
Total time: 17 Minutes


INGREDIENTS
1 cup - 250ml
To pressure cook
  • Raw rice - 1/4 cup
  • Moong dal - 3 tbsp
  • Salt - as needed
  • Water - 2 cups
  • Boiled Milk - 1/2 cup
While offering
  • Melted ghee - 1 tsp
  • Jaggery - a small piece
HOW TO MAKE AADI KANJI - METHOD

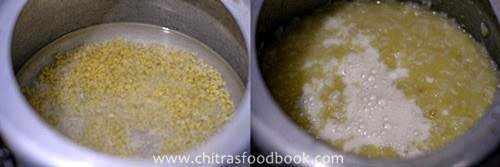
  • Wash the rice and dal and take in a small pressure cooker. Add 2 cups of water and the required salt. Pressure cook for 2-3 whistles in low flame. It takes 10-12 minutes.
  • After the steam is released, open the cooker and add 1/2 cup of boiled milk .Give a boil. Adjust the consistency as you wish by adding more milk or water. We make it in spoonable consistency. Transfer to a serving bowl.
Aadi kanji step
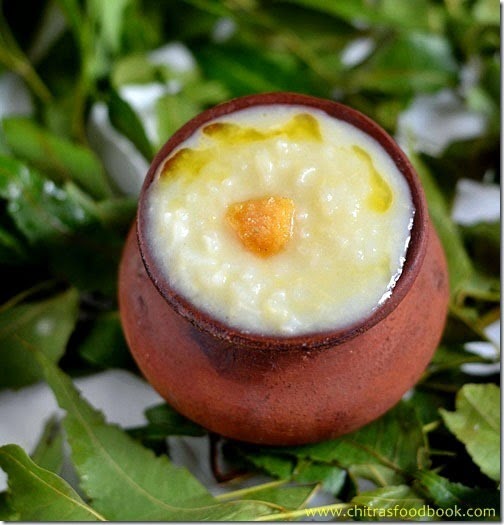
  • Just before offering, pour a tsp of melted ghee & a small piece of jaggery on top.
    Offer to GOD and enjoy !


Note

  • Do not forget to keep a small piece of jaggery & a tsp of melted ghee while offering to GOD. Its a must !
   Do check out my rice porridge recipe for babies.


Aadi porridge recipe

Make this simple and healthy porridge for Aadi velli & get the blessings of God !
aadi-porridge-recipe

Continue Reading...


July 31, 2014

ALOO KURKURE RECIPE-EASY KIDS SNACKS RECIPES

aloo kurkure recipe

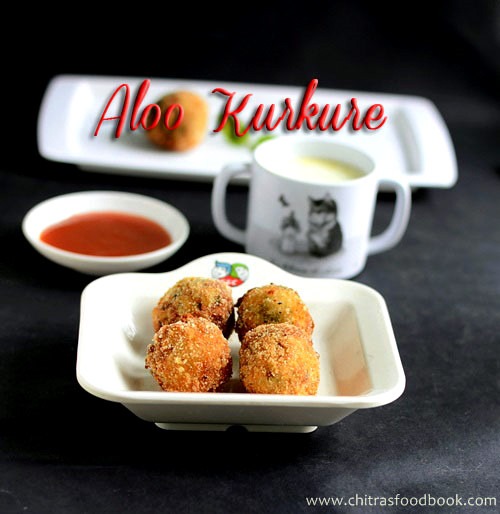
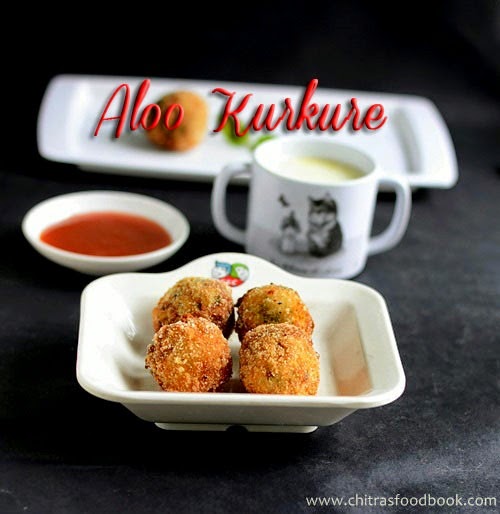
Do u have Potato, poha and a handful of mint leaves in hand ? Then you can make this yummy kids snack recipe in the next 15 minutes . Its so easy to make and tastes super crispy. I am sure your kids won’t stop with one.I tried this recipe from Tarla Dalal’s site with slight modifications. Last week Raksha was asking for some evening snacks after coming back from school. 
I usually make some bajjibonda varieties as it can be made in minutes easily. But this time, I even felt bored of making the same and wanted to try something different. And I reminded about this recipe which I had bookmarked long back from her site as the title “Aloo kurkure” sounds different & attractive. I never expected such a crispy exterior for just the coating of poha/rice flakes. U can call this as potato-mint croquets too. It was tasting good with minty flavour. Its sure a crowd pleaser and you can make this snack for get together & birthday parties. It stays crispy for long time. Lets see how to make this yummy aloo kurkure recipe.
aloo-kurkure

Aloo kurkure recipe


Aloo kurkure recipe Aloo kurkure - A deep fried snack with minty flavoured potatoes coated with rice flakes!.
Cuisine: Indian
Category: Snacks
Serves: 10 nos
Prep time: 10 Minutes
Cook time: 10 Minutes
Total time: 20 Minutes


INGREDIENTS
For balls
  • Boiled Potato/Aloo - 2 nos ( 1/2 cup mashed)
  • Maida/ all purpose flour - 1 tbsp ( for binding)
  • Powdered poha - 2 to 3 tbsp ( to make thick dough)
  • Mint leaves - a handful
  • Green chillies – 2-3 nos small sized,(finely chopped)
  • Lemon juice - 1/2 tsp
  • Roasted cumin powder - 1/4 tsp
  • Garam masala powder Or Chat masala powder  -  1/2 tsp
  • Salt – as needed
For coating
  • Maida - 1/2 cup
  • Poha/Beaten rice flakes - 3/4 cup 
  • Water - as needed
  • Cooking oil - for deep frying
METHOD

  • Wash and pressure cook the potatoes in high flame for 3-4 whistles adding required water. Peel the skin and mash it well.
  • To this mashed potatoes, add maida, finely chopped mint leaves, all the spice powders, powdered poha, salt & lemon juice. (use crushed cumin seeds if you don’t have roasted cumin powder). Make a smooth, non sticky dough. 
aloo kurkure step1
  • Mix well. Powder the rice flakes slightly coarse & take it in a plate. Set aside. Mix maida, little salt and water & prepare the batter for outer covering. The consistency of batter should be such that it should be able to coat the balls well. Do not make the batter very thick or thin. It should fall like a ribbon.
aloo kurkure step2
  • Make big lemon sized balls out of the potato mixture and coat it in the maida batter. Again roll it in the ground poha which you kept in the plate. Do it twice for better binding.
aloo kurkure step3
  • Heat oil to deep fry. Add a pinch of ball. If it rises immediately, oil temperature is just right. Now drop the balls in batches and deep fry them till golden brown.
aloo kurkure step4
It tastes crispy outside and soft inside!!
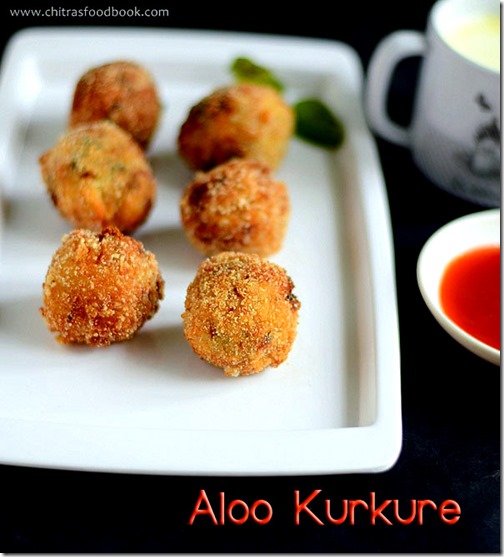
Enjoy with tomato sauce !


Note

  • Grind poha to a slightly coarse powder to make the balls coat well. Deep fry in medium to high flame.  As we are using boiled potatoes,these balls gets cooked quickly. So remove when the outer cover changes to golden brown.
  • U can use bread crumbs if you don’t have poha in hand.
  • U can add 1/4 tsp of ginger garlic paste to the above masala.
  • Make sure you have prepared enough maida batter & ground poha to cover the balls well. It takes more quantity.

Yummy,crispy Aloo kurkure is ready to gobble with tomato sauce !
Aloo kurkure


Check out my other easy kids snacks recipes

Continue Reading...


July 29, 2014

BENGALI MISHTI PULAO RECIPE/SWEET PULAO-BENGALI RECIPES


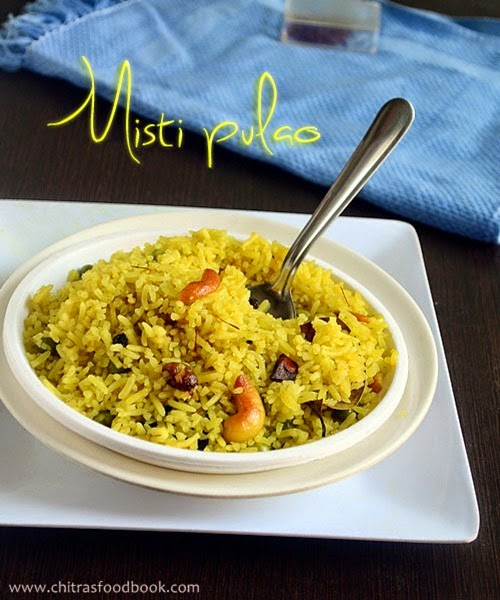
Bengali mishti pulao recipe
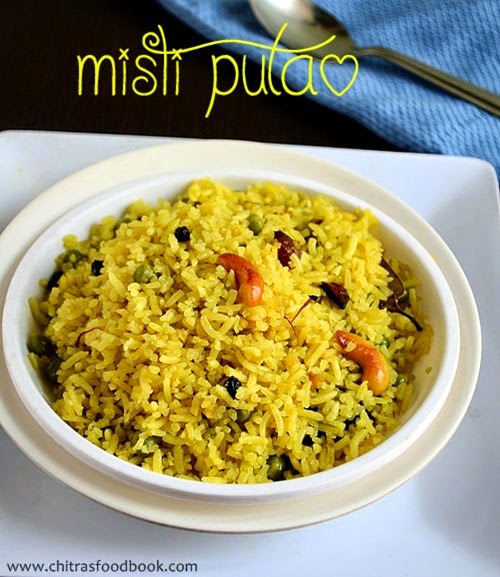
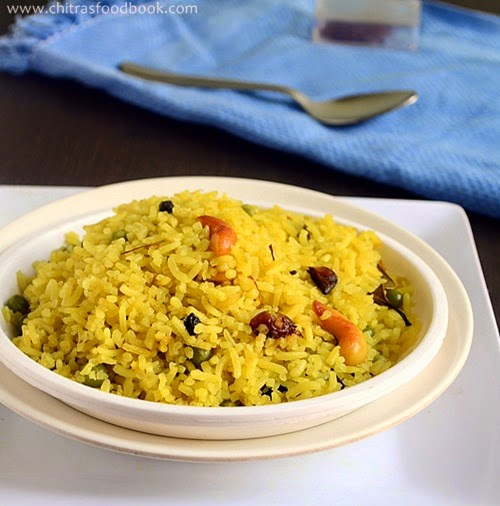
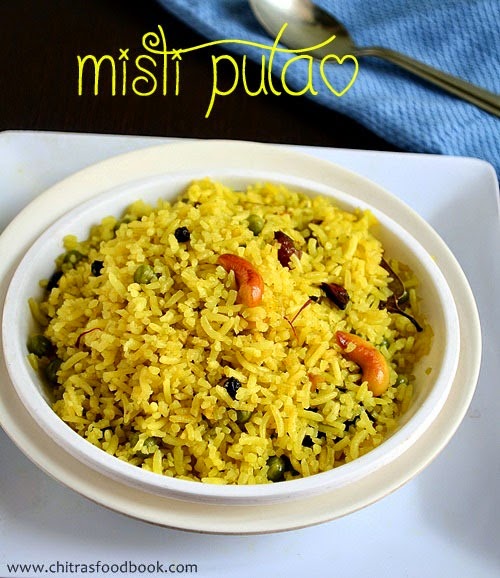
Eid Mubarak to all my friends and readers ! As Ramzan special post,i thought of sharing a sweet recipe with u all.So here comes a delicious Bengali special sweet rice recipe, Misti pulao/sweet pulao.This is a very easy and flavourful traditional Bengali rice recipe.It is also called as “Holud Pulao/Basanti Pulao or yellow pulao”.U can find this dish in most of the Bengali occasions & weddings.When i wanted to prepare Bengali thali,i found that sweet pulao recipe should be present in their authentic lunch menu.So i referred few blogs and finally tried it from Deepasri’s blog.It came out very well.Actually Bengalis use Gobindo bhog,a special fragrant rice variety to make this pulao.U can also substitute with jeera rice or Basmati rice.As i basically love the combination of sweet and spicy taste,i liked this rice very much when i had it with Chanar dalna(yet to post) & Begun bhaja.I read Bengalis have this rice with spicy mutton curry as accompaniment Smile.
bengali-mishti-pulao

Mishti pulao recipe


Mishti pulao Mishti pulao recipe – Bengali special sweet rice recipe!
Cuisine: Indian
Category: Sweet
Serves: Serves 4
Prep time: 10 Minutes
Cook time: 20 Minutes
Total time: 30 Minutes


INGREDIENTS

  • Gobindo Bhog Rice Or Basmati - 1 cup
  • Peas - a handful
  • Sugar - 2 -3 tbsp
  • Raisins/dry grapes - 2tbsp
  • Cashews - 2 tbsp
  • Chopped Ginger - 2 tsp
  • Turmeric powder - 3/4 tsp
  • Cinnamon- 1 no
  • Green cardamom - 2 nos
  • Javitri - 1/2 no
  • Saffron – few strands( soak in little milk)
  • Cloves - 2 nos
  • Black pepper corns - 1/2 tsp
  • Bay leaves - 1 no
  • Salt to taste
  • Ghee - 2 tbsp
  • Water - 1 cup
METHOD

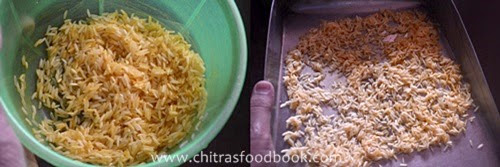
  • Wash and take the rice in  a bowl draining the water.Add turmeric powder,mix well and spread the rice in a plate till use.
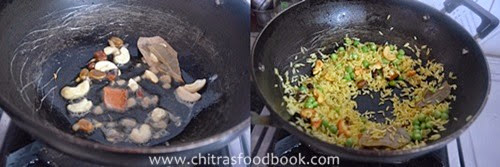
mishti pulao step1
  • In a broad kadai,heat ghee and saute all the spices given above.Lastly add cashews and dry grapes and fry till the cashews turn golden brown and dry grapes bulge.Then add green peas and rice & saute for few minutes.Do in medium flame.Take care nothing gets burnt.Add sugar & required salt.
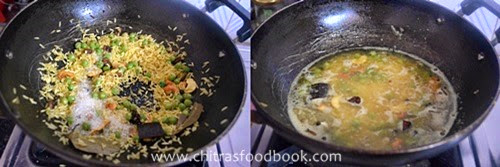
mishti pulao step2
  • Now add 1 cup of water.When it comes to boil,mix well and simmer the flame.Cover the kadai with a lid and cook till the rice turns fluffy and soft.
mishti pulao step3

Enjoy !


Note

  • Adding green peas is completely optional.
  • U can use jeera rice in place of basmati rice.
  • Adjust the quantity of sugar as per ur tastebuds.
  • Do not fry rice for long time.It makes the rice firm and hard.

Enjoy this sweet pulao recipe.It tastes different and yummy !!
mishti-pulao

Do check out my other bengali recipes


Continue Reading...