Search Chitra's Food Book

Showing posts with label GOKULASHTAMI RECIPES. Show all posts

August 18, 2022

Aval Kesari Recipe | Poha Sheera | Avalakki Kesaribath

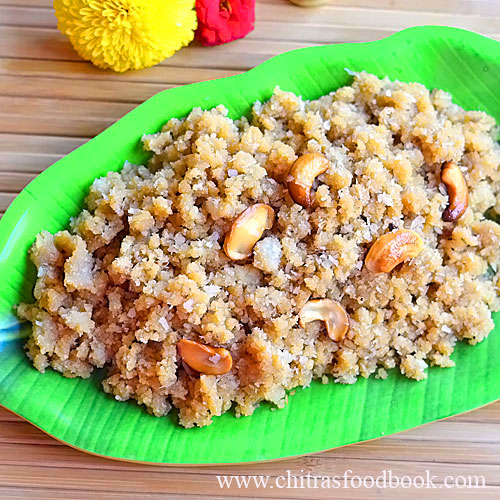
Aval Kesari

Aval Kesari / Poha Sheera in Hindi / Avalakki Kesaribath in Kannada, Atukula Kesari in Telugu is an easy sweet recipe that is served as prasadam for festivals like Gokulashtami, Ganesh Chaturthi, Varalakshmi Viratham, Friday Lakshmi Pooja and Thursday Guru pooja.

Aval Kesari is so easy to prepare under 15 minutes. Its a beginners sweet recipe. All you need is Poha/ Rice flakes, Sugar, Ghee and cardamom powder. Unlike our regular rava kesari, this poha kesari thickens quickly and chances of hardening is very less. So its easy to identify the end consistency. I have shared 2 videos in different languages and step by step pictures. I have added a video of Aval Kesari seimurai in Tami. Please watch it for better understanding. 

 Soon I will try to make an Aval kesari with jaggery. Friends, do try this easy Aval Kesari for this Gokulashtami / Krishna Jayanthi and enjoy.


Aval kesari in Tamil video ꜛ

aval kesari recipe

Aval Kesari / Poha sheera / Avalakki Kesaribath / Atukula Kesari


Aval Kesari / Poha sheera / Avalakki Kesaribath / Atukula Kesari

Aval Kesari / Poha sheera / Avalakki Kesaribath / Atukula Kesari for festival Prasadam/ Neivedaym.


Cuisine: South Indian
Category: Dessert
Serves: 3
Prep time: 10 Minutes
Cook time: 20 Minutes
Total time: 30 Minutes


INGREDIENTS
1 cup = 250ml
  • Poha / Thick Aval / Rice flakes - 1/2 cup
  • Sugar - 1/2 cup
  • Water - 1 to 1.5 cups
  • Ghee - 3 tbsp
  • Cardamom powder - 1/4 tsp
  • Cashew nuts – 5
  • Cloves – 1
  • Orange food color / Kesari color – a pinch
HOW TO MAKE AVAL KESARI
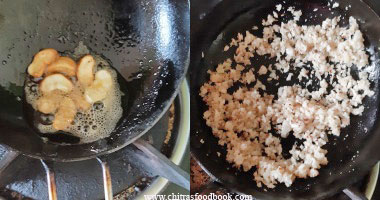
  1. Heat 2 tsp of ghee in a kadai. Add the Aval and roast till crispy.
  2. Take the roasted Aval and break it to check if crispy. Transfer to a mixer.
  3. Grind coarsely and set aside. Boil water in the same kadai adding a pinch of food color.
  4. When the water roll boils, lower the flame completely. Add the roasted poha powder.
  5. Mix without lumps till thick. Cover cook in low flame for 5 minutes.
  6. Then add sugar, cardamom powder and ghee. Mix without lumps in low flame.
  7. Mix till kesari leaves the sides of pan completely. Switch off the flame.
  8. Roast Cashews in 1 tbsp ghee and add to Kesari. Mix well and transfer to a plate. Serve warm and enjoy !
METHOD - STEP BY STEP PICTURES
  • Heat 2 tsp of ghee in a kadai. Add the aval and roast till crispy. Let it cool. Grind to a coarse powder. Set aside.
  • Aval kesari
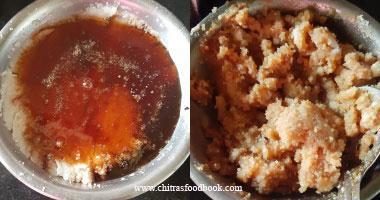
  • Add 1.5 cups of water in a kadai. Add a pinch of Kesari color. Let it roll boil. Lower the flame and add the roasted poha powder. Mix well without lumps.
  • Aval kesari
  • Mix in low flame till the mixture becomes thick. Cover cook in low flame for few minutes.Aval kesari
  • Add sugar, cardamom powder, clove and a tbsp of ghee. Mix in low flame till the sugar melts completely.
  • Aval kesari
  • Keep mixing till kesari becomes thick and leaves the sides of pan. Lastly roast cashews in a tbsp of ghee and add to the Kesari. Serve hot and enjoy.

Note

                
  • Adjust the quantity of sugar based on your taste.
  • Adding cloves is optional.
  • You can also use lesser ghee than mentioned but taste won’t be rich.


Try this easy, yummy Aval kesari for Gokulashtami and enjoy !

how to make aval kesari


Continue Reading...


August 30, 2021

Aval Puttu Recipe | Poha Puttu - Sweet Poha | Gokulashtami Recipes

aval puttu recipe


Aval puttu / Poha jaggery puttu is one of the easy and yummy neivedyam recipes you can prepare for Gokulashtami, Navarathri and other occasions at home. I learnt this recipe from my MIL. She used to make it often for our Friday Thiru vilakku poojai.

Last week I made this for my pooja asking the recipe and procedure from her. Actually my MIL told me to add powdered jaggery to the powdered and soaked poha directly. But I made jaggery syrup and strained it as it had some impurities. If your jaggery is clean, you can powder and add it as such.

Friends, do try this easy Aval puttu / Poha puttu for Gokulashtami festival and enjoy.

aval puttu recipe

Aval puttu / Poha puttu recipe


Aval puttu / Poha puttu recipe

Aval puttu / Poha puttu recipe for Gokulashtami and Navarathri festivals.


Cuisine: Indian
Category: Sweet
Serves: 4
Prep time: 10 Minutes
Cook time: 20 Minutes
Total time: 30 Minutes


INGREDIENTS
1 cup = 250ml
  • Thick or thin poha - 1 cup
  • Powdered jaggery - 1/2 cup
  • Grated coconut - 1/4 cup
  • Cardamom - 2 (Crushed)
  • Hot Water - as needed
  • Salt - a pinch
  • Cashew nuts - few
  • Ghee - 1 tbsp
HOW TO MAKE AVAL PUTTU
  1. Dry roast aval / poha for 5 minutes in medium flame till crispy.
  2. Remove and powder it coarsely. Wash and keep it aside.
  3. Add little hot water to make the poha soft. Cover it for 10 minutes
  4. Poha becomes soft and crumbly in few minutes.
  5. Boil jaggery and melt it. Strain the syrup and boil till frothy and thick.
  6. Add the syrup to the soaked poha. Mix well.
  7. Add cardamom powder, grated coconut and mix well.
  8. Lastly roast the cashews in ghee till golden in color.
  9. Add to the aval puttu and offer as prasadam to Lord Krishna for Gokulashtami !
METHOD - STEP BY STEP PICTURES
  • Heat a kadai and dry roast the aval / poha for few minutes in medium flame. Roast till it becomes crispy. You can use thin or thick poha.

  • Remove and cool down. Grind to a coarse powder and add little hot water to it. ( Say 1/2 to 3/4 cup). Cover and sit for 10 minutes. Poha absorbs all the water and it becomes soft, crumbly.aval puttu recipeaval puttu recipe
  • In the mean time, boil the jaggery adding 1/4 cup water and melt it. Strain the syrup and boil again till syrup becomes frothy and slightly thick.
  • aval puttu recipe
  • Add the syrup to the soaked aval and mix well. It will look mushy initially but it becomes crumbly and fluffy after some time.
  • aval puttu recipe
  • Lastly add the crushed cardamom,grated coconut and mix gently. Roast cashews in ghee and add to the poha mix.
  • aval puttu recipe
  • Mix well and offer as prasadam to Lord Krishna. You can also make this neivedyam for Navarathri along with some sundal varieties.
  • aval puttu recipe
    Enjoy !

Note

  • For variations, you can add powdered jaggery to the soaked poha if its clean.
  • For thin poha, just follow the same procedure but do not add all the syrup at once. Add gradually till poha absorbs it because thin poha doesn’t take all the syrup.


Delicious Aval Puttu recipe is ready to relish !

Aval puttu


Continue Reading...


August 7, 2020

Aval Murukku - Instant Poha Murukku Recipe - Gokulashtami Special Recipes

aval murukku
Last year during Gokulashtami , I bookmarked this aval murkku recipe / Poha murukku to try. But I couldn’t do it. So this year, I started making my Gokulashtami recipes with this easy, instant murukku recipe without butter. I just used store bought rice flour, ground poha, pottukadalai maavu/ roasted gram dal flour, hot oil and spices for flavor. I never thought it comes out so crispy and crunchy. It was a super hit at home. I referred so many YouTube videos, blogs, cookbooks for this recipe. 

When I was going through the comments section, I saw many people complained about more oil absorption. So I was also worried about it. But surprisingly, this aval murkku didn’t drink more oil as I thought. Due to the addition of roasted chana dal @ roasted gram dal flour (Pottukadalai maavu), it does absorb oil to some extent but not much. The crispness and flavor of this murukku is really good. For an instant chakli recipe, this is really good and quick to make. In this recipe, I have used thin poha / paper aval. You can use thick poha too.

For this Krishna Janmashtami, if you are planning to try some Instant murukku recipe, then you must try this. I am sure you will love it. Friends, lets see how to make instant aval murukku recipe with step by step pictures and video. Please check the NOTES section for all the details to make perfect murukku.

Check out my other Gokulashtami special recipes !


aval murukku recipe

Aval murukku recipe/ Instant poha chakli recipe


Aval murukku recipe/ Instant poha chakli recipe

Instant murukku recipe using pressed rice / aval / Poha, rice flour, gram dal flour and hot oil.


Cuisine: Indian
Category: Snacks
Serves: 14
Prep time: 10 Minutes
Cook time: 10 Minutes
Total time: 20 Minutes


INGREDIENTS

1 cup = 240ml
  • Rice flour - 1 cup
  • Poha / Pressed rice / rice flaked / Aval - 1/2 cup ( I used thin rice flakes)
  • Roasted gram dal / Pottukadalai - 1/4 cup
  • Hot cooking oil - 1 tbsp
  • Red chilli powder - 1 tsp
  • Hing / Asafetida - 1/4 tsp
  • Ajwain /Carom seeds - 1 tsp (crush in hands and add it)
  • Salt & water - as needed
  • Cooking oil – to deep fry ( I used refined oil)

HOW TO MAKE AVAL MURUKKU

  1. In a mixie jar, grind poha and roasted gram dal to a fine powder.
  2. Take a wide bowl. Sieve the ground poha mixture, rice flour.
  3. Add red chilli powder, salt, hing and ajwain seeds crushed in hands.
  4. Mix well. Add hot cooking oil and mix well. Then add water gradually.
  5. Make a smooth, non-sticky dough. Cover with a wet cloth till use.
  6. Take a chakli maker with round or star holes mould. Fill a portion of dough.
  7. Press it in the back of ladle and shape the murukku as you like.
  8. Heat oil and deep fry the murukku in batches. Cook both the sides till bubbles stop completely.
  9. Remove and drain the excess oil in a tissue paper. Store in a box after the murukku cools down.
  10. It stays good for a week. Enjoy !

METHOD - STEP BY STEP PICTURES

  • Take all the ingredients required to make aval murukku recipe. Grind aval /poha and roasted gram dal together to a fine powder.
    aval murukku recipe
  • In a wide bowl, place a sieve. Add the ground flour, rice flour and sieve well. To this, add red chilli powder, salt, hing and ajwain seeds by crushing in the hands slightly ( It helps to release more flavor). Mix well.
    aval murukku recipe
  • Add 1 tbsp of very hot oil to the flours. Mix using a ladle to handle the hot oil. Then mix it with your hands to spread the oil evenly all over the flour. After mixing, you should be able to hold and make a shape out of it. Refer picture below for better understanding.
    aval murukku recipe
  • Now add water gradually and make a smooth, non-sticky dough. This dough takes more water than usual. I used nearly 1.25 to 1.5 cups of water. Make sure the dough is not too hard with cracks or too soft and sticky. Cover the dough with wet cloth.
    aval murukku recipe
  • Take the murukku press/ chakli maker with round shaped holes or star holes as you wish. I used a 5 holed mould as shown in the picture below. Fill the dough and press to make shapes. Remember to cover the unused dough with a wet cloth always. It helps to prevent the drying.
    aval murukku recipe
  • Press the murukku in the back of ladle. If the murukku gets cut while pressing, you need to add more water to the dough. Heat oil to deep fry. Drop a pinch of dough. If it rises to top immediately, oil temperature is right. Lower the flame to medium and drop one or two murukku per batch based on the size of kadai.aval murukku recipe
  • Fry patiently in medium flame, flip and cook both the sides till bubbles stop completely. Do not cook in high flame. Murukku turns brown in color. Remove and drain in a tissue paper. Store in a box after the murukku cools down completely. Stays good and crispy for a week !aval murukku recipe

Note

  • You can use store bought plain rice flour for this recipe. No need to use idiyappam or kozhukattai flour.
  • I did not dry roast the flour.
  • I used thin poha here. You can use thick ones too. 
  • Do not add more hot oil or more roasted gram. Then murukku absorbs more oil while cooking.
  • Always cover the murukku dough with a wet cloth while unused. 
  • Murukku becomes hard if you reduce the quantity of hot oil. You can also use melted butter instead of hot oil.
  • Shaping will not be prefect if the dough is too hard with less moisture. String gets cut while pressing. To avoid this, sprinkle some water to the dough. Mix well and then shape it.
  • Heat of the oil should be correct for crispy murukku. If its too hot, murukku turns brown at the outside and inside remains soft.
  • If the oil starts smoking, you can switch off the flame. Bring it to right temperature and then start to fry again. Adjust the flame whenever needed.
  • Murukku turns soggy or soft if you don’t fry it until bubbles cease. So fry in medium flame patiently till bubbles stop completely.
  • Murukku turns hard if you add less fat or if the dough is too tight. 
  • Murukku absorbs more oil if the oil temperature is less or if the dough is sticky and wet. 

Try this easy, crispy Aval murukku / Poha chakli for this Gokulashtami and enjoy !


Continue Reading...


May 9, 2020

Spicy Besan murukku, Kadalai maavu Kara murukku Recipe

besan murukku
Instant besan murukku / Kadalai maavu murukku was in my try list since last Diwali. Some people make this murukku during Gokulashtami / Krishna jayanthi too. During this lockdown period, when I was craving for some spicy murukku, I made this instant besan chakli for the first time. It came out crunchy and tasty. We all loved it. So I have made it twice in the past 2 weeks.

Though I used thenkuzhal mould, I din’t have patience to make shapes. I made one big sized murukku and break into bite sized pieces like butter murukku. I have tried with both butter (vennai) and ghee (nei in tamil). It works well. I made a spicy murukku adding chilli powder. You can also use pepper powder for different taste. Color of this murukku may vary based on the chilli powder you use. This instant chakli can be stored up to a month.

We can enjoy it during lunch and tea time. Friends, do try this easy, yummy, instant besan kara murukku recipe and enjoy.

Check out my mini besan murukku and other murukku variteies !

besan murukku recipe

Instant Besan Murukku Recipe / Kadalai maavu murukku


Cauliflower Pakoda Recipe / Gobi Pakora

How to make instant besan flour and rice flour with spicy taste. 


Cuisine: Indian
Category: Snacks
Serves: -
Prep time: 10 Minutes
Cook time: 20 Minutes
Total time: 30 Minutes


INGREDIENTS
1 cup = 240ml
  • Besan flour – 1/2 cup
  • Rice flour – 1 cup
  • Red chilli powder – 1 tsp ( I used Kashmiri chilli powder)
  • Ajwain / Omam – 1/2 tsp
  • Asafetida / Hing – 1/4 tsp
  • Melted ghee – 1.5 tbsp / 4.5 tsp
  • Hot oil - 1/2 tbsp  ( 3/4 tsp)
  • Salt – as needed
  • Water - as needed
  • Cooking oil - to deep fry
HOW TO MAKE BESAN MURUKKU
  1. In a wide bowl, sieve besan flour and rice flour.
  2. Add red chilli powder, ajwain, hing, melted ghee, hot oil and salt.
  3. Mix well without adding water.
  4. Now sprinkle water and make a smooth dough.
  5. Take the murukku press with round or star shaped mould.
  6. Fill the dough and press in hot oil directly or in the back of a ladle.
  7. Put the murukku in hot oil and deep fry both the sides in medium flame till bubbles stop.
  8. Drain and remove in a tissue paper. Store in a box once its cooled down.
  9. Stays good for a month if handled properly without exposing to air. 
BESAN MURUKKU - STEP BY STEP PICTURES
  • In a wide bowl, place a sieve/ mesh. Sieve besan flour and rice flour. Add red chilli powder, hing, ajwain, salt, melted ghee and hot oil. Mix uniformly without adding water.   
     
    besan murukku recipe
                             
  • Now sprinkle water gradually and make a smooth, non sticky dough. Make sure dough is not too wet or too hard. Besan murukku recipe
  • Take the murukku/ chakli press and grease with oil for easy pressing. You can use thenkuzhal mould or star mould. Take a portion of dough and press it well. Cover the remaining dough with a plate. Do not let it dry in air.Besan murukku recipe  
  • Heat oil in a kadai and when it gets heated , drop a pinch of batter to check the oil temperature. If it rises to the top immediately, oil is heated. Now lower the flame and press the murukku over the hot oil in a circular shape. You can make it small or big in size. (If the oil temperature is less, murukku will dissolve in oil. So make sure oil temperature is right). Besan murukku recipe
  • Increase the flame to medium and cook for few seconds without touching it. Then flip it and deep fry the murukku till golden in color on both the sides. Toss and flip whenever needed. Remove once the bubble cease. Cook patiently in medium flame to get a nice golden color because this murukku blackens quickly if cooked in high flame. So take care in frying part. If the oil is over heated or smoky, switch off the flame for sometime and let the oil cool down a bit before frying the next batch. Besan murukku recipe   
  • Remove and drain in a tissue paper.Store in an air tight box once its cooled down completely. Enjoy with rice or as an evening snack. 

Note

  • Adjust the quantity of chilli powder as per your taste.
  • Do not reduce the quantity of ghee or oil. If fat is less, murukku will become hard to bite.  
  • Deep fry the murukku patiently else it will go dark/ black in color. 
  • If the murukku gets cut while pressing, dough should be hard or dry. So sprinkle some water and try to press the murukku.  
Try this easy, yummy, instant besan murukku and enjoy !
Kadalai maavu murukku

Continue Reading...


August 20, 2019

Kara Seedai Recipe – Spicy Seedai Recipe With Rice Flour


Kara seedai / Spicy seedai recipe is one of the easy and interesting seedai varieties. Recently we bought this seedai in a shop and loved its spicy taste. For every Gokulashtami /Krishna jayanthi, we get varieties of seedai in Salem Lakshmi sweets. I have seen masala seedai, mint seedai, kara seedai, vennai seedai in the menu. I wish to try all of them and share in my blog.  To begin with, I started with this kara seedai recipe. 

Traditionally seedai recipe is prepared using processed rice flour/ homemade rice flour by soaking and grinding raw rice/ maavu arisi. But its a time consuming process to make a small batch. So I started using store bought idiyappam flour or kozhukattai flour to make sweet seedai and spicy seedai. 

I have tried Double horse, Nirapara, Anil brands so far. All are good. Even if we use store bought dry flour, we must roast it to make crunchy seedai. If you make seedai without roasting the rice flour, seedai may stick to the tongue while eating. It won’t be light and crunchy as well. Also this seedai takes more time to cook. So you have to fry it patiently. Please keep this point and try this recipe. I am sure you won’t be disappointed with the results. I have also used pottukadalai maavu instead of roasted urad dal flour/ uluthamaavu. Color of the seedai may vary based on the quantity of chilli powder. Mine was not so dark in color but it tasted spicy and flavorful just like store bought ones. 

Friends. do try this kara seedai recipe for this Krishna jayanthi festival and share your feedback with me. 

Check out my other Gokulashtami recipes and video below


Kara seedai recipe / spicy seedai recipe


Kara seedai recipe / spicy seedai recipe

Kara seedai recipe / spicy seedai recipe with store bought rice flour


Cuisine: Tamil nadu
Category: Snacks
Serves: 30 to 50
Prep time: 10 Minutes
Cook time: 20 Minutes
Total time: 30 Minutes


INGREDIENTS
1 cup = 250ml
  • Store bought idiyappam flour / kozhukattai flour - 1/2 cup
  • Roasted gram flour / Pottukadalai maavu - 1 tbsp
  • Soft butter - 2 tsp (at room temperature)
  • Red chilli powder - 1/2 tsp
  • Hing/ asafetida - 1/4 tsp
  • Powdered coconut - 1/2 tsp (optional)
  • Cumin seeds or black sesame seeds - 1/2 tsp
  • Salt - as needed
  • Cooking oil - to deep fry
HOW TO MAKE KARA SEEDAI RECIPE
  1. Heat a kadai and dry roast the rice flour in medium flame for few minutes.
  2. Remove the flour as soon as it starts to fume slightly.
  3. Cool down the flour, Sieve and take rice flour, roasted gram flour. Add other ingredients except cooking oil and water.
  4. Mix well to spread the butter evenly. Add water gradually and make a soft, smooth, non-sticky dough.
  5. Roll seedai and spread in a cotton cloth, rest for 5 minutes and deep fry in oil.
  6. Fry in batches by tossing them till bubbles cease. Remove and drain in a tissue.
  7. Cool down and store in a box. Enjoy for a week !
KARA SEEDAI RECIPE - STEP BY STEP PICTURES
  • Heat a kadai and dry roast the idiyappam / kozhukattai flour for few minutes in medium flame without burning. Remove as soon as the flour starts to fume. Switch off the flame and draw a line to check it. Cool down. 

  • Sieve the rice flour and roasted gram flour to a avoid bursting( most important step).  Add chilli powder, salt, hing and powdered coconut. Add soft butter at room temperature. Mix it well to spread the butter evenly.

  • Add water gradually and make a smooth, non-sticky , soft dough. Roll seedai and spread in a cotton cloth. I got around 100 seedai. Make 2 rod shapes for baby Krishna. Let it dry for 5 minutes.
  •  
  • Heat oil to deep fry. Drop a pinch of dough. If it rises to the top immediately, oil temperature is right. Fry a batch of seedai in medium flame. Do not disturb or stir the seedai as soon as you drop them. Leave for a minute and then toss the seedai gently. (If you are a beginner and afraid of seedai bursting in oil, try this tip. Heat oil in a small tadka kadai. Drop one or two seedai and check it it burst or disperse in oil, If not, you can proceed for frying in big batches).

  • This seedai takes more time to cook. So cook it patiently in medium flame by tossing it in between. Remove the seedai after the bubbles cease. Do not burn them.

  • Remove in a tissue paper and drain the oil. Seedai becomes slightly darker in color as it cools down. It becomes more crunchy the next day. Store in an air tight box once the seedai cools down completely. It stays good for a week. Enjoy !

Note

  • Adjust the quantity of red chilli powder as per your taste.
  • Do not forget to sieve the flour to avoid bursting.
  • Dry roast the rice flour for best seedai. Do not skip it.
Try this easy, yummy, Kara seedai recipe and share your feedback with me.

Continue Reading...


August 31, 2018

Thattai Murukku Recipe – Thattai Recipe - Thattu Vadai Recipe

Thattai recipe

Thattai @ thattu vadai @ thattai murukku @ elladai @ nippattu  @ chekkalu ( ppaahh, so many names 😃) is one of my most favorite South Indian snacks recipe. Usually thattai is prepared with rice flour, urad dal flour, butter or oil. But nowadays in many snack shops, thattu vadai is prepared using maida/ all purpose flour, pottukadalai maavu (fried gram dal flour), vanaspathi and cooking soda to make it white, crispy and melt in mouth. But I followed a traditional Tamil style thattai recipe from one of my old cookbooks. It comes out golden brown in color and tastes crispy, slightly hard just like the way it should be. 

Traditionally thattu vadai is prepared using homemade processed rice flour but today I have shared the same recipe using store bought idiyappam flour to ease the job. In my family, we don’t have the practice of making thattai for Krishna jayanthi. But many people make elladai / thattai for this festival. So I thought of sharing this easy, crispy thattu vadai recipe with you all as my Gokulashtami special recipe. Lets see how to make Tamilnadu style thattai recipe with step by step pictures.  

Check out my other Gokulashtami recipes in THIS LINK.

thattai murukku

Thattai recipe / Thattu vadai Recipe


Thattai recipe / Thattu vadai Recipe

How to make thattai / thattu vadai with store bought rice flour, urad dal flour and butter


Cuisine: South Indian
Category: Snacks
Serves: 25 nos
Prep time: 10 Minutes
Cook time: 5 Minutes
Total time: 15 Minutes


INGREDIENTS

1 cup = 250ml
  • Idiyappam flour - 1 cup
  • Roasted urad dal flour - 3 tsp / 1 tbsp
  • Melted butter - 1 tbsp
  • Soaked chana dal or fried gram dal/ pottukadalai - 1 tbsp
  • Red chilli powder - 1 tsp
  • Asafetida / Hing - 1/4 tsp
  • Black sesame seeds - 1 tsp
  • Chopped curry leaves - 2 tsp
  • Salt & water - as needed
  • Cooking oil -  to deep fry

HOW TO MAKE THATTAI

  1. In a wide bowl, mix all the ingredients, butter.
  2. Mix well. Add water gradually and make a smooth dough.
  3. Take a big gooseberry sized ball. Pat in a greased zip lock cover.
  4. Prick with a toothpick. Arrange the thattai in a cloth and rest for 10 minutes.
  5. Deep fry both sides till bubbles cease. Remove and drain in a tissue paper.
  6. Store in a box after it cools down. Stays crispy for one to 2 weeks.

THATTAI MURUKKU RECIPE - STEP BY STEP PICTURES

  • Wash and soak 1 tbsp chana dal in required water for an hour. In a wide bowl, take the rice flour, roasted urad dal flour, salt, sesame seeds, hing, chopped curry leaves, soaked & drained chana dal or fried gram dal.

  • Add melted butter and mix well. Make sure butter is mixed well with the flour.

  • Add water gradually and make a smooth, non- sticky dough.  Make big gooseberry sized balls and keep it covered with a wet cloth till use.
  • thattai recipe thattai recipe

    • Take 2 zip lock covers or any thick sheets. Grease with oil and place a dough ball over one sheet. Cover with another sheet. Take a small bowl and press the dough to make a flat and thin circle. To make crispy thattai, pat it thin. You can cut the thattai into perfect round shapes with the bowl if you like.
    • thattai recipe
    • Shape all the balls into thin circles.  Carefully remove the thattai. If the thattai breaks while patting or removing it, dough is dry. So sprinkle little water to the dough and then make shapes. Remove the thattai from Zip lock cover and arrange them in a cotton cloth to absorb extra moisture. Let it rest for 10 minutes.
    • thattai recipe
    • Heat oil to deep fry. Drop a pinch of dough into hot oil. If it rises to the top immediately, oil temperature is right. Now keep the flame medium and drop the thattai. Cook both the sides till bubbles cease and becomes golden brown. Drain in a tissue and store in an air tight box after it cools down.Stays good for 2 weeks !thattai recipe

    Note

    • Prick the thattai with a fork without fail. It prevents the thattai from puffing up.
    • Oil temperature should be perfect. If the oil is too hot, thattai becomes golden brown without cooking properly.
    • Cook slowly in medium flame. Remove the thattai only after the bubbles cease completely else it will become chewy.
    • Pat it thin and even else it won’t cook perfect.
    • To make crispy thattu vadai, pat it thin.


    Try this crunchy thattai murukku and enjoy !
    thattu vadai
    Continue Reading...