
This is my MIL’s method of making Tamilnadu style drumstick sambar/ murungakkai sambar for rice. My MIl’s sambar is very easy when compared with my mom’s version. There is no grinding job. A tsp of sambar powder is enough to make this yummy sambar. After many attempts , I got hooked to this measurement. I usually add my MIL’s home made sambar powder for this sambar but you can use store bought sambar powder too. My in-laws are here in my place. I made this sambar last week and it was tasting great. My in-laws loved it. Here I have given the measurements for 4 people.
U can either half the quantity for two people or make the same quantity and use it for lunch & dinner. This sambar can be converted to idli sambar by adding a powder which I have given in “notes” section. We usually do this with leftover sambar.
It tastes similar to hotel sambar. Do try this sambar & let me know your feedback friends.


INGREDIENTS
NOTE


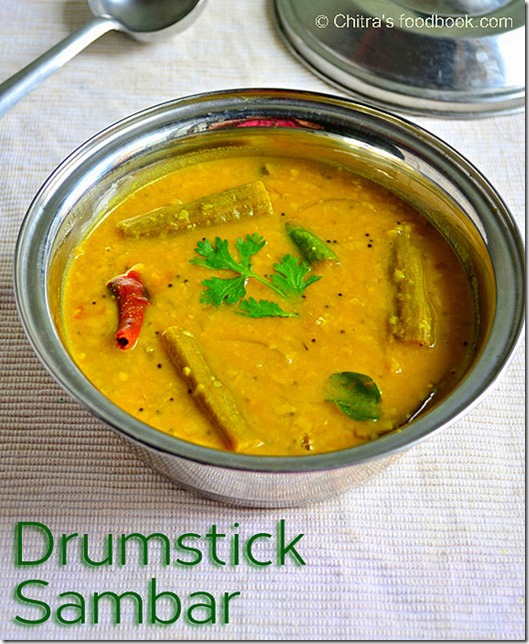
Drumstick sambar / Murungakkai sambar recipe for rice
Drumstick sambar / Murungakkai sambar recipe for rice
Cuisine: Tamilnadu
Category: Side dish
Serves: 4
Prep time: 20 Minutes
Cook time: 20 Minutes
Total time: 40 Minutes
INGREDIENTS
To pressure cook
|
How to make drumstick sambar
- Wash and pressure cook toor dal adding hing, turmeric powder and a drop of oil in required water for 2 whistles in low flame. Mash and set aside.
- Soak tamarind in warm water, take extract using 3 cups of water.
- Add sambar powder, salt, turmeric powder, hing and curry leaves.
- Cut drumstick into finger size pieces. Heat oil in a kadai. Add methi seeds, mustard seeds, chilli, onion and curry leaves.
- Add drumstick pieces, some water, salt and cook well. Add tamarind extract.
- Boil till raw smell goes off. Lastly add the cooked toor dal. Mix well.
- Boil for few minutes, switch off the flame.
- Garnish with coriander leaves. Enjoy with rice.
HOW TO MAKE DRUMSTICK SAMBAR FOR RICE - METHOD


Add a tsp of ghee while serving. Mix with plain rice and enjoy !! |
NOTE
| How to convert this sambar to idli sambar
For converting this sambar into idli sambar, add the below powder & allow it to boil. Add lots of coriander leaves & serve hot with idli, dosa. U can also saute & add small / big onions & one tomato to get additional flavour. For sambar powder:
Roast all the above ingredients in a drop of oil till you get a nice smell. Powder them nicely and add this to sambar. In a kadai, add a tsp of oil and saute the onions & tomatoes. Add 1/2 cup of water and cook them. Then add the sambar. Allow it boil. Garnish with coriander leaves & serve hot adding a tsp of ghee !! |
Try this easy, yummy Murungakkai sambar for rice and enjoy !