Search Chitra's Food Book

December 26, 2014

Eggless Vettu Cake Recipe | Tea Shop Sweet Bonda | Vedi Cake | Muttaikose recipe

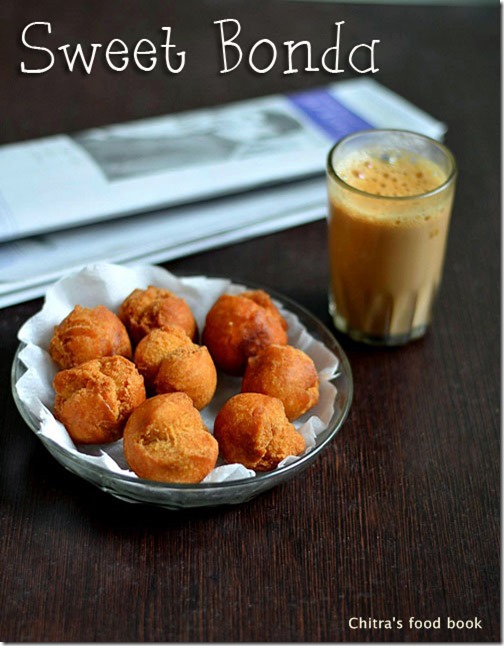
sweet bonda

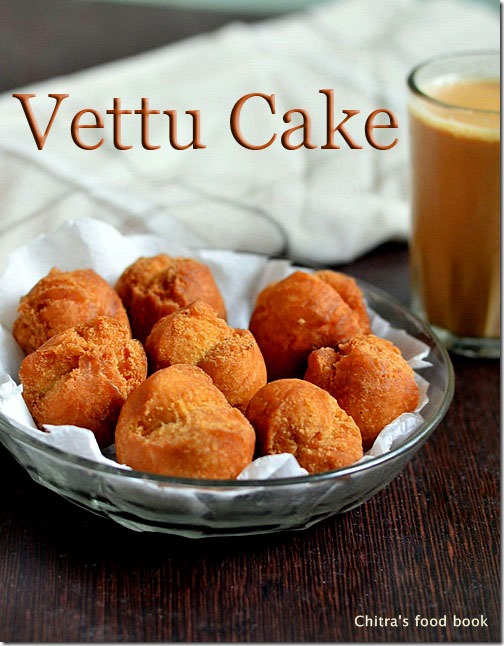
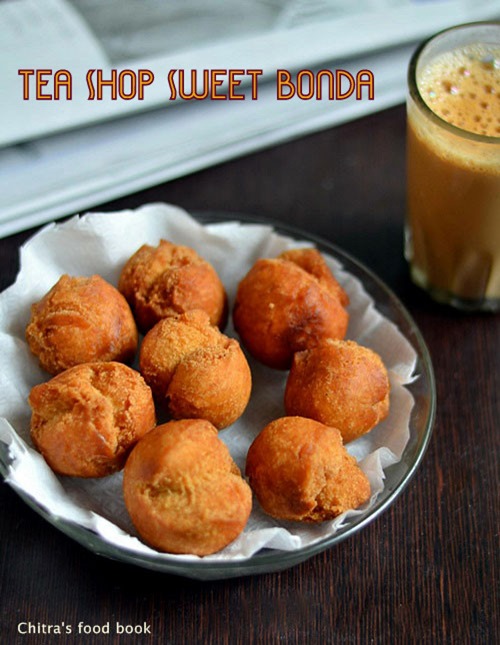
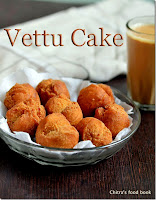
Eggless Vettu cake recipe / Tea kadai sweet bonda / Vedi cake / Muttaikose - People in and around Tamil nadu, Kerala knows very well about this tea time snack and call by different names. For people who are new to this recipe, let me tell you what it is.This vettu cake aka vedi cake is nothing but sweet bonda/deep fried dumplings made using maida, sugar and eggs. Its one of the famous tea shop snacks recipe in Tamil nadu as well as Kerala just like samosa and besan bonda. 

When I shared tea shop style besan bonda recipe, our fellow blogger friends were asking me about this vedi cake recipe in the comments section. At that time, I wasn’t aware of this recipe. I vaguely remembered seeing this sweet bonda in Tirunelveli/thoothukudi tea shops which is called as "Muttaikose"( Info by my sister Radha ;)). Then I started hunting for this recipe to try on my own. But most of them were with eggs. Of course the authentic version uses eggs but being a vegetarian, I was looking for eggless version and finally I found it from Kurinji's blog

When I saw the picture in her blog, I was so excited as it resembled the one we get in Tamil nadu tea shops. Not just the picture, her recipe is also perfect. I have tried it twice so far and it came out very well. She also shared some tips with me when I mailed her asking some queries :) So I made some slight changes and shared the recipe here. Do try it this weekend and enjoy your tea time with your family. 

Also don’t forget to try out my instant besan bonda-tea shop style for a spicy accompaniment. But remember you should serve everything hot to enjoy its best taste.
Vettu cake

Vettu cake/Sweet bonda recipe


Vettu cake/Sweet bonda recipe Vettu cake/Sweet bonda recipe - Tea shop style !
Cuisine: Indian
Category: Sweet
Serves:
Prep time: 45 Minutes
Cook time: 5 Minutes
Total time: 50 Minutes


INGREDIENTS
1 cup - 200ml
  • Maida / all purpose flour - 1 cup
  • Cooking soda - 1/4 tsp
  • Powdered sugar - 1/2 cup + 2 tbsp ( refer notes)
  • Water - as needed
  • Butter- 1/2 tbsp (softened,optional)
  • Cardamom - 2 nos
  • Salt - a pinch
  • Cooking oil - as needed
HOW TO MAKE VETTU CAKE - METHOD

  • Powder 1/2 cup of sugar and cardamom together to a fine powder. Remove and measure 1/2 cup + 2 tbsp from it. Take the powdered sugar in a bowl and add little water to cover it ( say 3-4 tbsp). Let the sugar dissolve well. Then strain the syrup and set aside.
vettu-cake-1

  • In another wide bowl, sieve maida, cooking soda and salt. To this add the softened butter and mix well. Add the sugar water and mix well. Check for sweetness. If you want more, add 1-2 tbsp of powdered sugar extra. Add few tbsp of water only if necessary and make a non-sticky dough. Knead the dough for 2-3 minutes.
  • Then cover the dough and set aside for 30-45 minutes. Do not make a sticky dough Or add more flour after kneading the dough. So making a non-sticky ans soft dough is very important.
vettu-cake-2
  • After the resting time, take the dough and pinch into golf balls size. Heat oil in a kadai to deep fry.
vettu-cake-3

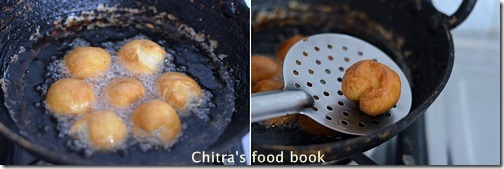
  • Put a pinch of batter in oil and as soon as it rises, simmer the flame completely and drop 3-4 balls in oil based on its size. Let it cook in slow flame. Toss it once or twice in the middle. Cracks will form automatically. Hence its called “Vedi cake/Vettu cake”. 
  • Cook till the balls turn golden color. Remove in a tissue. It may be soft while you remove but it becomes hard and crispy as it cools down. Store in an air tight box after it cools down and enjoy with your tea/coffee !
vettu-cake-4

vettu-cake-5

NOTE: Do not deep fry for long time because bonda may turn hard and chewy. Also adjust the quantity of sugar based on taste. This recipe will give you mild sweetness. So add 2-3 tbsp more if you want. Here I used butter. In shops they add dalda/vanaspati.

Deep fry only in low to medium flame for uniform cooking.


Enjoy this crispy tea shop sweet bonda with your tea/coffee ! It tastes yum!

sweet bonda recipe

Continue Reading...


December 25, 2014

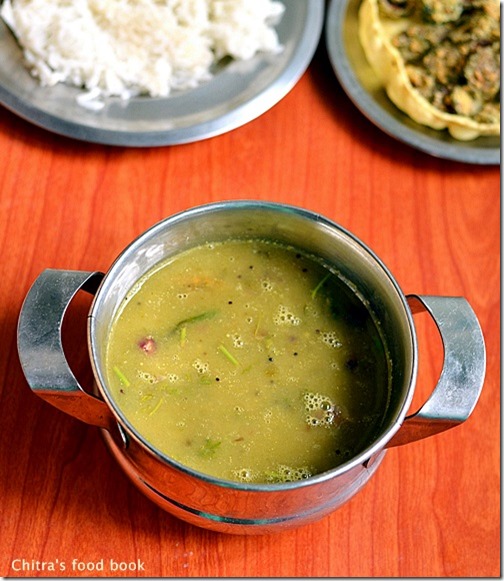
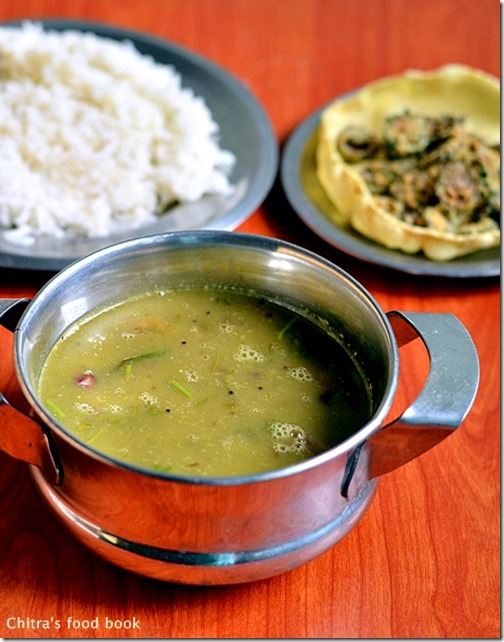
Ridge Gourd Gravy/Peerkangai Kuzhambu Recipe


Ridge-gourd-gravy

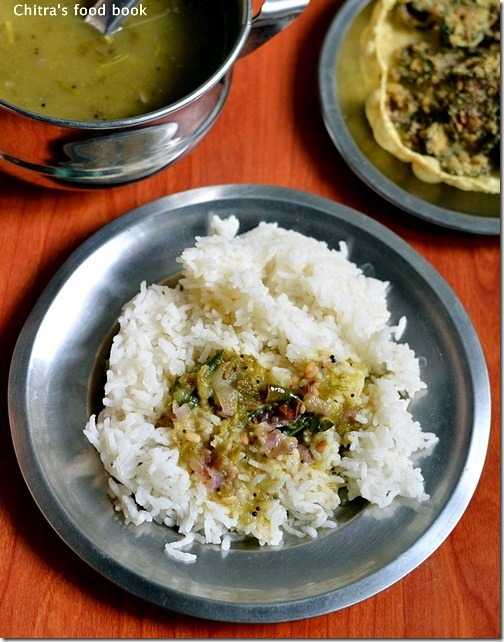
Ridge gourd gravy/Peerkangai kuzhambu is one of my favourite and easiest kuzhambu recipes.I love this gravy more than peerkangai thogayal/thuvayal.My MIL call this as peerkangai chutney though it is not thick like our usual chutneys.This gravy goes well with rice more than idli,dosa.I made this for our lunch last week when my in-laws were here.We had a simple yet yummy lunch with this gravy and bitter gourd fry.I will share bitter gourd fry recipe soon.Now lets see how to make this delicious peerkangai gravy recipe for rice.
Ridge gourd gravy

Ridge gourd gravy/Peerkangai kuzhambu recipe

Ridge gourd gravy/Peerkangai kuzhambu recipe Ridge groud gravy recipe for rice- Simple n delicious gravy !
Cuisine: Indian
Category: Gravies
Serves: Serves 2
Prep time: 10 Minutes
Cook time: 10 Minutes
Total time: 20 Minutes


INGREDIENTS

  • Ridge gourd - 1 no ( medium sized)
  • Tamarind - Medium gooseberry size(slightly more than small gooseberry)
  • Green chillies - 5 nos
  • Curry leaves - few
  • Hing/Asafetida - 1/2 tsp ( 1/4 + 1/4 tsp)
  • Small onions - 15 nos ( peel n chop into chunks)
  • Salt & water – as needed
To temper & saute
  • Cooking oil - 1 tbsp
  • Mustard seeds - 1/2 tsp
  • Urad dal - 1 tsp
  • Chana dal - 2 tsp
Coriander leaves - to garnish
METHOD

  • Wash and scrape the skin of ridge gourd.Do not peel the entire skin.Just remove the ridges.Chop them into small cubes.Peel and chop the small onions roughly into small chunks.Slit the green chillies & chop into small pieces.
  • In a pressure cooker base,take the chopped ridge gourd,salt,tamarind along with 1 cup of water.Pressure cook in low flame for one whistle or 3-4 whistles in high flame.Remove and let it cool. (I kept in a tiffin box and pressure cooked it along with dal)
Ridge-gourd-gravy-1
  • After it cools down,drain the excess water in a bowl and grind the cooked ridge gourd along with tamarind to a smooth paste. Add this paste to the reserved ridge gourd water.Add hing and few,torn curry leaves.Check for salt.
  • Heat oil in a kadai and temper mustard seeds,urad dal,chana dal,hing,chopped small onions and slitted green chillies.
Ridge-gourd-gravy-2
  • Now add the ridge gourd paste water.Add 1/2 cup of more water and let it boil for 2-3 minutes.Lastly add the finely chopped coriander leaves and garnish it.Mix with plain rice adding few drops of gingely oil and serve hot.It tastes yummy !
Ridge-gourd-gravy-3


Note

  • You can follow the same recipe and make gravy using pumpkin.Please check this link.
  • Adding small onions gives the best taste.But you can also add big onions if u don’t have small onions in hand.
  • Asafetida/Hing is the star ingredient for this recipe.We add it twice in this recipe.Once during tempering and the other when the gravy boils.So never skip this ingredient.


Enjoy this yummy gravy with plain rice.It tastes yum !
Ridge gourd gravy recipe

Continue Reading...


December 23, 2014

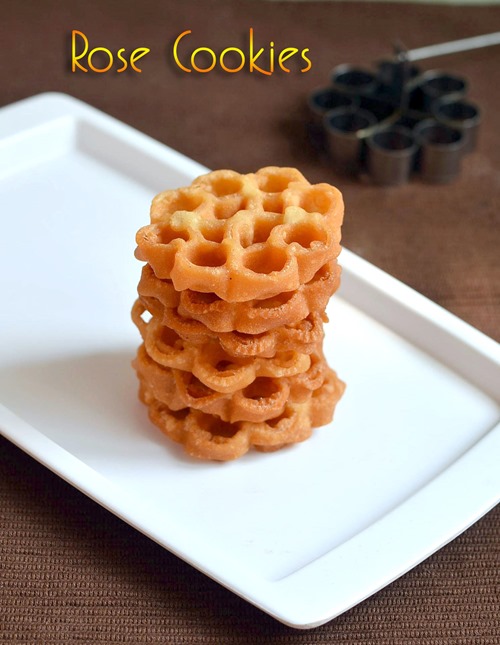
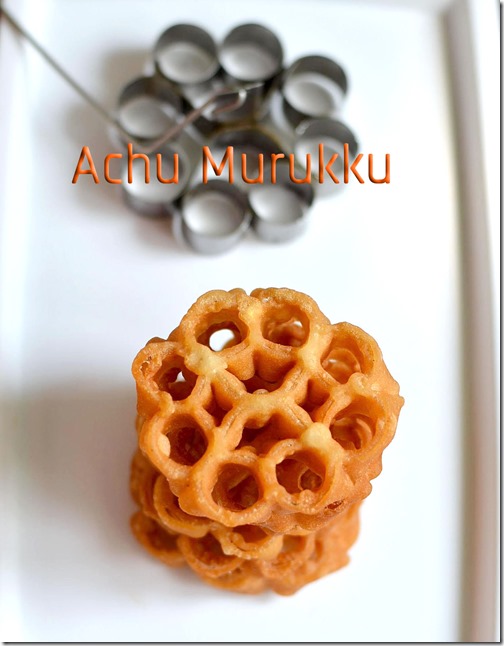
Eggless Rose Cookies/Achu Murukku Recipe - Kerala Achappam Without Egg

achu murukku recipe

As far as I know achu murukku/rosette cookies/rose cookies is very popular in Kerala and is called as achappam in Malayalam. Recently when I was browsing for some Christmas special recipes, I found achu murukku without egg is made for Christmas by people in and around Nagercoil. And this is my most favourite snack too. I just love its mild sweetness with flavour of coconut milk.

Whenever my neighbour Mrs. Prema visits her native place in Kerala, I tell her to buy a packet of achappam and coconut oil halwa especially for me. As a big fan of this achappam, I wanted to try them in my kitchen for long time and bought achu murukku mould from Salem, Tamil nadu long back. I tried once some months ago but I couldn’t make it properly. 

Yesterday I tried it again after referring this and this recipe. I made some slight changes in ingredients as per my convenience and taste. To my surprise, it came out really well and I was so happy and proud that I could make it well without eggs.

To make a perfect eggless rose cookies, the consistency of batter and heating point of oil is more important. I have explained them in Method section below. Also go through my notes before you start if you are a beginner. Ok, Lets see how to make this eggless rose cookies/Achu murukku/Kerala achappam without egg at home easily.

achu murukku


Eggless achu murukku recipe/Rose cookies recipe


Eggless achu murukku recipe/Rose cookies recipe Eggless achu murukku recipe/Rose cookies recipe for Christmas Celebration.
Cuisine: Indian
Category: Sweet
Serves: 15 nos
Prep time: 5 Minutes
Cook time: 5 Minutes
Total time: 10 Minutes


INGREDIENTS
1 cup - 250ml
  • Raw rice flour - 1/2 cup
  • Maida - 2 tbsp
  • Powdered sugar - 3 tbsp ( use 1/4 cup for more sweetness)
  • Salt - a pinch
  • Cardamom - 2 nos
  • Water + Coconut milk - 1/2 cup +1/4 cup ( 1-2 tbsp more of water)
HOW TO MAKE ACHAPPAM - METHOD

  • Powder 1/4 cup of sugar and 2 cardamom seeds together. Measure 1/4 cup from it and set aside. In a deep bowl, sieve the maida, rice flour, salt and sugar powder. Mix water + coconut milk and add it to the sieved ingredients.
achu murukku 1
  • The consistency of batter should be slightly thinner than dosa batter. Add little more water to adjust the consistency if needed. Heat oil in a kadai and dip the mould in oil till use. The mould should be hot.
achu murukku 2
  • Add a pinch of batter to check the heat of oil and as soon as it rises, keep the flame completely low and dip 3/4th of the mould in the batter. When you dip the mould in batter,u should get a ssshhh sound. Immediately keep the mould in oil. Do not touch the mould till bottom of kadai as it may stick.
achu murukku 4

  • As soon as you keep the mould inside the oil, it will become foamy and the batter starts to cook. Leave it for 30 seconds in very low flame. Do not wait for the murukku to half cook because you may not be able to release it. You can shake the mould and release the murukku OR hold the mould in one hand and release the corners of murukku from the mould using a knife in other hand. You need to do this way for 3 to 4 murukku. After that Murukku will release in oil and gets cooked. Cook for 30 seconds and flip the murukku.
  • Again cook for 30 seconds till bubbles cease n murukku turns golden brown lightly. Murukku will be soft while you remove but it turns crispy and hard as it cools down. Remove in a tissue paper and drain the oil. Store in an air tight box after it cools down. Again keep the mould in hot oil and increase the flame. Keep it for few seconds and dip in batter. Reduce the flame and cook it as mentioned above. Repeat the same process.
  • Remember to cook in low flame to get nice color. Also increase the flame as soon as you remove the murukku from the flame. By doing this way, you can adjust the heating level and murukku cooks uniformly. I would like to mention one more point here..i.e the top portion takes more time than the bottom. So cook the top portion for more time, 45 seconds and then flip, cook the other side. 
  • It stays good for weeks but I bet the box would be empty before that.
achu murukku 5


Note

  • Adding the correct quantity of water/coconut milk is more important to make perfect achu murukku. If you add less water,batter will be thick and rose cookies will be hard n chewy. If you add more water, batter will become thin and it won’t coat properly in the mould. So the consistency of batter is much more important.
  • The heating point of oil is also more important. If it is too hot, color of achu murukku turns dark brown. So you should cook in low flame at perfect heating point.
  • Some recipes have suggested to shake the mould after dropping in oil to release the murukku. But I felt the shape of murukku gets changed while shaking the mould. So I followed knife method.
  • The batter won’t coat the mould if the mould is not hot. So don’t forget to heat the mould every time before dipping in batter.

eggless rose cookies

Do try these yummy eggless rose cookies for this Christmas and have a great celebration !!
Eggless achu murukku recipe


Continue Reading...


December 21, 2014

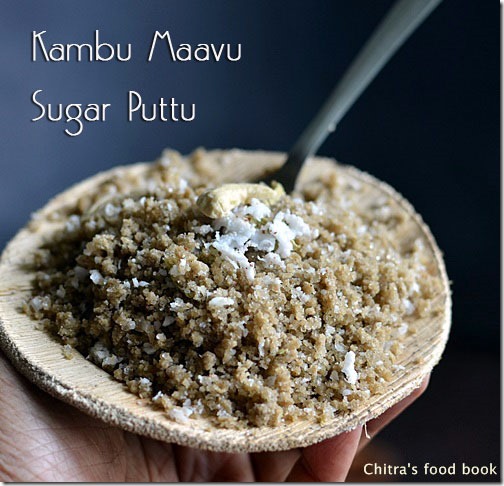
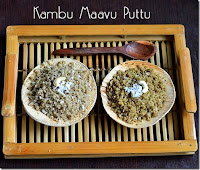
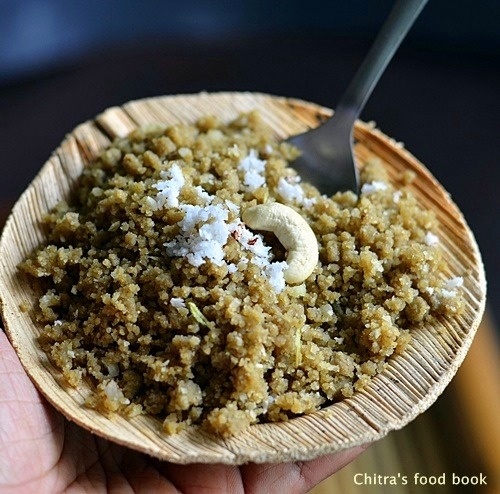
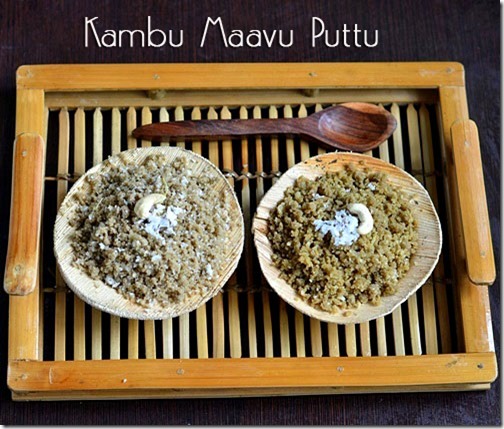
Kambu Maavu Puttu Recipe-Pearl Millet Recipes


Kambu maavu puttu recipe

Last week when i went to Salem,my MIL gave me dry roasted & ground kambu maavu/Pearl millet flour and mixed millet health mix powder/Sathu Maavu.My MIL suggested me to try this Kambu sweet puttu with the flour.I tried two versions adding Jaggery and sugar.Both came out very well n tasty.I also made Kambu kanji/pearl millet porridge( savoury version) along with it which i will post soon.We had a healthy,hearty breakfast yesterday.Here are some of the health benefits & names of pearl millet in other languages for your reference.Pearl millet is called as Kambu in Tamil , Bajra in Marathi,Gujarati,Rajasthani,Sindhi,Punjabi,Sajje in Kannada,Sajjalu in Telugu and Kambam in Malayalam.Coming to its health benefits,Pearl millet is a miracle millet which has iron that is 8 times of rice.It is very rich in Calcium,Protein,Iron & Magnesium.It helps to reduce the bad cholesterol level in our body. Its a great body coolant.Its consumed as porridge during summer.It helps to improve the digestion power & heals stomach ulcers too.It helps to improve bowel movements & prevents constipation.It makes our body strong.It helps to increase the secretion of milk for lactating mothers !.Do try this healthy kambu maavu puttu recipe for your breakfast or as evening snacks.U will love it like us.I preferred jaggery version more than sugar version.Try any based on ur liking !

Kambu maavu puttu sweet

Kambu maavu puttu recipe


Kambu maavu puttu recipe Kambu maavu puttu/Pearl millet powder puttu - Sweet version
Cuisine: Indian
Category: Sweet
Serves: Serves 4
Prep time: 10 Minutes
Cook time: 20 Minutes
Total time: 30 Minutes


INGREDIENTS

  • Kambu maavu/Pearl millet flour - 2 cups
  • Salt water - as needed ( we used around 1/2 cup)
  • Grated jaggery - 3/4 cup or sugar - 1/3 cup
  • Cardamom seeds – 2 nos crushed
  • Grated coconut - 1/4 cup
METHOD

  • Take the kambu maavu/Pearl millet flour in a wide bowl.Mix salt in little water and sprinkle it in kambu maavu.Mix well.Add water such that u should be able to shape it roughly as shown in the picture.
Kambu maavu puttu - 1
  • Now spread this kambu maavu in idli plate and steam it for 10-15 minutes till the color of flour is changed.Remove the idli plate and take the cooked kambu maavu in a mixie jar.Grind once or twice to powder it because as u steam the flour,there may be lumps formed.So we are grinding the steamed flour to break the lumps.
Kambu maavu puttu - 2
  • Take the ground flour in a bowl.Add sugar,cardamom powder & grated coconut.Mix well and serve.If u want to add jaggery,proceed to the next step.
  • Melt jaggery in a bowl adding little water.Strain the syrup and again boil till it starts to become thick n frothy.Switch off the flame.Add cardamom powder and mix this syrup with the cooked & ground kambu maavu.Add the required amount of syrup and mix well.Lastly add grated coconut,mix well and serve.
Kambu maavu puttu - 4


Enjoy !
    NB: I felt jaggery puttu was very soft than sugar puttu.So make it as per your taste.If serving immediately,u can try sugar puttu else make jaggery puttu because it stays soft n good even after an hour.You can also make spicy version by sauting onions,chillies,ginger & curry leaves in little oil.Temper and mix everything with the cooked flour.


Note


  • ** For making homemade kambu maavu – Dry roast kambu/Pearl millet in a wide kadai in medium flame till it starts to splutter and leaves a nice smell.Do it in batches if u want to make in large quantity.Roasting takes nearly 7-9 minutes.Do not burn them while roasting.so pls be careful.After roasting,switch off the flame and allow it to cool.Grind in a mill OR Mixie for small quantity.Sieve if necessary,spread in a news paper to cool down the flour and store in an air tight box.
  • Grinding the flour in mixie after steaming is very important.Else the flour will have too much of lumps.But do not over grind the cooked flour because they will stuck to the jar and becomes very thick.Run for small intervals to make it as a powder
  • Do not sprinkle too much of salt water.It also makes the puttu hard.At the same time,if u add less water,puttu will become dry.
  • Though sugar puttu is easy to make when compared to jaggery puttu,jaggery puttu was softer than sugar puttu.But taste wise both were very good.So make it according to your choice.
  • You can also try savory puttu.Just refer my ragi spicy puttu and follow the same directions.


Kambu maavu sweet puttu recipe

Try this healthy kambu puttu for breakfast or snacks.It tastes yum !

kambu maavu recipes

Continue Reading...


December 19, 2014

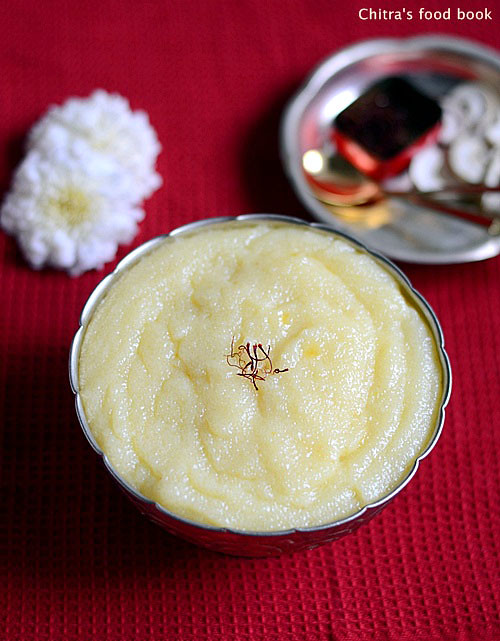
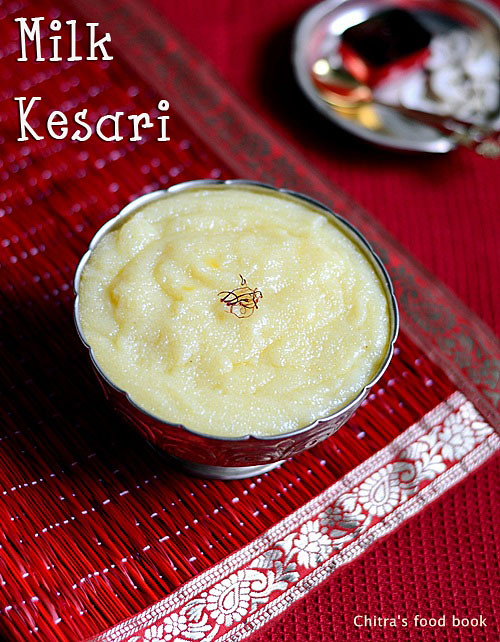
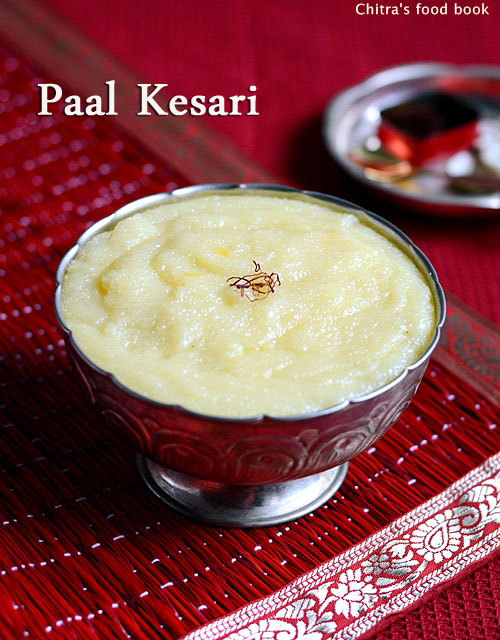
Milk Kesari/Paal Kesari Recipe-Rava Kesari Using Milk


Rava Kesari using milk aka Paal kesari ( in Tamil) is the one which i was struggling for years to make it perfect .Thanks to my MIL for teaching me Rava Kesari recipe using this method for beginners.With the help of that recipe,i tried this milk kesari yesterday.It came out really well and i was 100% happy with the result.Its a very simple recipe without condensed milk but tastes rich n flavourful.I have shared all the tips & tricks for beginners to make it easily.Try it n let me know your feedback friends.Ok,lets see how to prepare milk kesari with stepwise pictures.I wanted my paal kesari to be white in color.So i added less saffron.Please use more saffron threads or yellow food color to make colorful kesari Love Struck.


Milk kesari recipe/Paal kesari


Milk kesari recipe/Paal kesari Rava kesari using milk - Paal kesari recipe
Cuisine: Indian
Category: Sweet
Serves: Serves 4
Prep time: 10 Minutes
Cook time: 20 Minutes
Total time: 30 Minutes


INGREDIENTS

  • Rava/sooji/Semolina - 1/2 cup
  • Milk - 3 cups
  • Sugar - 1 cup
  • Cardamom - 2 nos
  • Saffron threads - 10 nos
  • Cashewnuts - 5 nos
  • Ghee - 2 tbsp
METHOD

  • Heat 2 tsp of ghee in a pan.When it is hot,add the rava.As soon as u add rava,it should sizzle.Keep the flame in medium high and roast the rava for 2 minutes staying nearby.Remove the roasted rava in a plate and set aside.
Milk kesari 1
  • In the same kadai,add milk and saffron threads, allow it to boil. When it starts to roll boil,keep the flame completely low and add the rava in one hand and stir the mixture using a ladle in the other hand.Now take a wire whisk and mix it thoroughly.Make sure there are no lumps.Keep the flame low till u mix it well.After mixing,increase the flame to medium and mix till the rava thickens slightly.
Milk kesari 2
  • Now close the kadai with a lid and cook till rava is done. It takes around 3-4 minutes in medium flame.Stir it once in the middle.
Milk kesari 3
  • After the rava is cooked well,add sugar by keeping the flame low.The mixture will turn slightly thin.
Milk kesari 4
  • Keep mixing till all the sugar is melted completely and the mixture becomes slightly thick.Lastly add the remaining ghee and remove the kadai.Transfer it to a bowl immediately.If u touch the kesari,it will be non-sticky.Do not over do & wait for kesari to leave the sides of kadai.Remove it as soon as all the sugar is mixed with rava and becomes slightly thick.The mixture will fall like a ribbon.Don’t panic.It will become thick once it cools down.So transfer it to a bowl and garnish with roasted cashews.( If u keep mixing till kesari leaves the sides,the sugar will crystallize & kesari becomes hard n chewy after it cools down.So pls be careful).
Milk kesari 5
  • Generally we don’t make pieces for milk kesari.We serve in bowls.If u want to make pieces,transfer the kesari to a ghee greased plate & wait till it becomes warm & thick.Draw lines using a greased knife & make shapes.
  • Keep the flame medium throughout the process.It takes maximum 3 minutes after adding sugar to finish the process.
Enjoy !


Note

  • The ratio of rava & milk should be 1:6.As we are adding more milk,there are less chances of lump formation.But make sure you mix it properly with a whisk.
  • You can add 1.5 cups of sugar if u want mild sweetness.
  • Add more saffron if u want nice yellow color.I wanted my kesari to be white.So i used less.
  • Do not over do & wait for kesari to leave the sides of kadai.Remove it as soon as all the sugar is mixed with rava and becomes slightly thick.The mixture will fall like a ribbon.Don’t panic.It will become thick once it cools down.So transfer it to a bowl and garnish with roasted cashews.


Try this milk kesari recipe for pooja or to celebrate occasions and make it special Smile


Continue Reading...


December 17, 2014

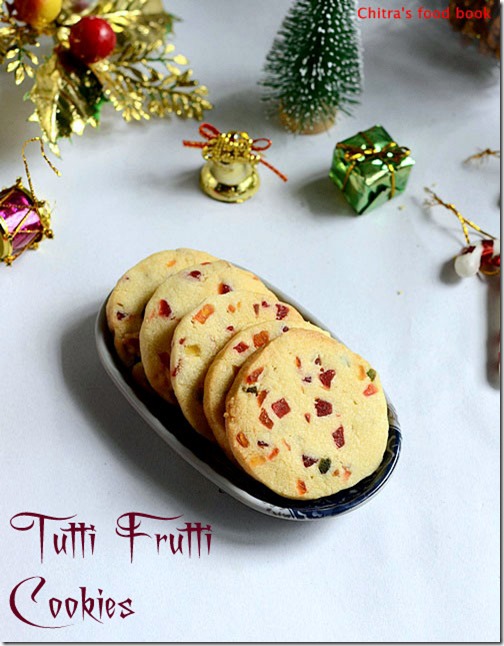
Eggless Tutti Frutti Cookies Recipe/Fruit Cookies-Christmas Recipes

eggless-tutti-frutti-cookies-1

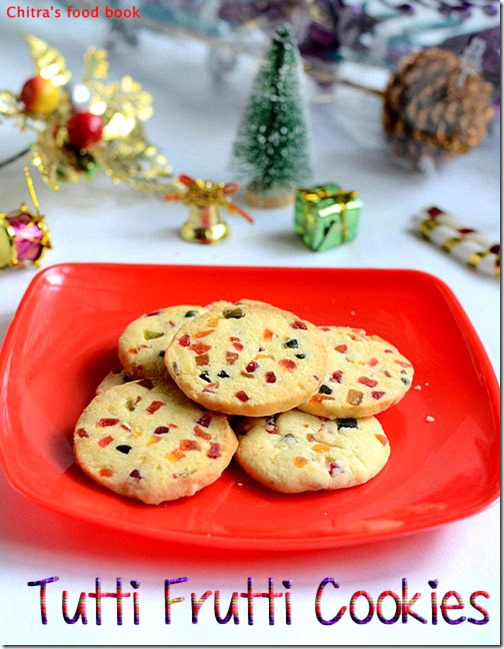
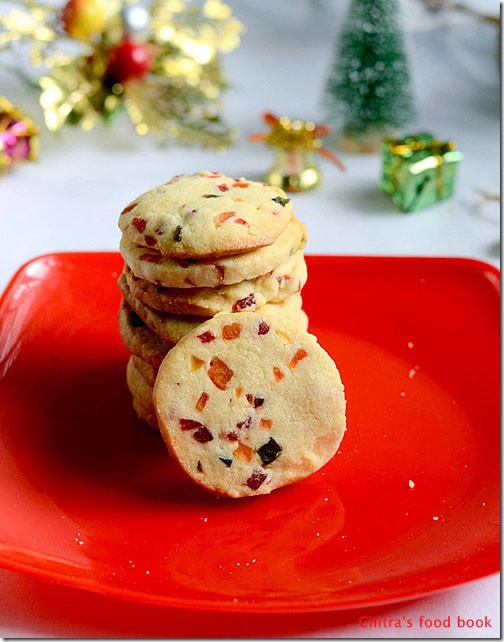
When I posted eggless tutti frutti cake recipe, I got request from some of my readers to post tutti frutti cookies too. Even I wanted to give it a shot for long time. So I tried it yesterday for the first time by searching the net. As most of the recipes were similar, I tried it confidently without any confusion. It came out really well and it was tasting more like butter cookies. I am happy to share this yummy, buttery cookies recipe for this Christmas and it is perfect for parties & other celebrations too. Try this for your kids. They will enjoy it !

eggless tutti frutti cookies recipe-1

Eggless tutti frutti cookies recipe


Eggless tutti frutti cookies recipe Eggless tutti frutti cookies for Christmas celebration
Cuisine: Indian
Category: Baking
Serves: 15
Prep time: 50 Minutes
Cook time: 15 Minutes
Total time: 65 Minutes


INGREDIENTS
1 cup - 240ml
  • Maida/All purpose flour - 1 cup
  • Unsalted Butter - 6 tbsp ( softened, at room temperature)
  • Tutti frutti – 1/2 cup
  • Powdered sugar - 1/2 cup
  • Milk powder - 1 tbsp ( optional)
  • Milk - 1/2 tbsp - 1tbsp
  • Vanilla essence - 1 tsp
HOW TO MAKE TUTTI FRUTTI COOKIES - METHOD

  • Take powdered sugar & softened butter in a bowl. Mix well with a whisk until creamy and soft peaks appear. Beat it well for 5 minutes.
tutti frutti cookies 1
  • In a bowl,mix maida, tutti frutti and milk powder(optional). Add this mixture to the beaten butter mixture. Mix well and make a crumbly dough. Add 1/2 or 1 tbsp of milk and knead a soft non-sticky dough.
tutti frutti cookies 2
tutti frutti cookies 3
  • Roll the dough to a log shape and wrap in a plastic sheet.Freeze it for 45 minutes.Remove and cut into 1/2 inch thick cookies. You can also roll the dough in a polythene sheet and cut in desired shapes.
tutti frutti cookies 4tutti frutti cookies 5
  • Preheat oven in convection mode for 180c. Arrange in the cookies in a butter greased baking tray. Bake it for 15 minutes.The sides of cookie will turn slightly brown. Remove the cookie tray and let it cool. Initially they look soft when hot but it becomes crunchy after cooling down completely.
  • The cookies will come out without sticking to the plate. Suppose if it sticks to the plate after it cools down, bake them again for 2 minutes & then remove, let it cool.You can find the actual taste of these cookies only after they cool down completely. Store in an air tight box. Hope it stays good for 3-4 days.
tutti frutti cookies 6
Enjoy !


Note

  • Adding milk powder is optional.
  • Adjust the quantity of tutti frutti as per your wish. But if you add more, cookie may turn soft and chewy. So take care. 
  • If you don’t have tutti frutti in hand, replace it with finely chopped dry fruits.
  • You should bake the cookies till the sides of cookie turn golden brown as you see in the picture.


Try this yummy, colorful tutti frutti cookies for this Christmas & let me know your feedback.
Merry Christmas !!
tutti-frutti-cookies-recipe-1

Continue Reading...