Search Chitra's Food Book

Showing posts with label NEIVEDYAM RECIPES. Show all posts

January 2, 2017

Sooji Halwa | Suji Ka Halwa Recipe | Rava Sheera Recipe

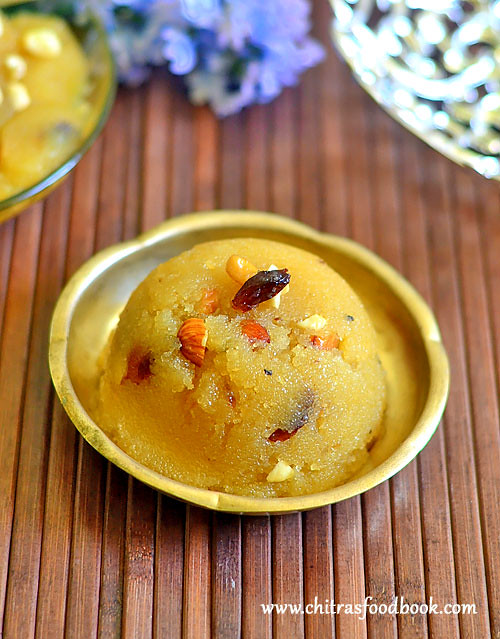
Suji ka halwa
Most of the time I make South Indian style Rava kesari  ( Rava = semolina in English) for functions, pooja and celebrations at home as it is our family favorite and the most comfortable sweet for me. I have already shared varieties of rava kesari recipes like rava kesari with milk/ Paal kesari, microwave rava kesari, semiya kesari, pineapple kesari, mango kesari etc. 

Its been my long time wish to try North Indian style Sooji ka halwa/ Rava sheera. So I tried it for New year celebration yesterday. In North India, Suji ka halwa is one of the most popular and easy halwa recipes that is made in all houses for all the festivals & occasions and is served in most of the temples as Prasad. This halwa is served along with Poori and Chole for breakfast. Halwa poori chole is one of the most popular breakfast combo in North India and Pakistan. 

In Karnataka, people call this sooji halwa as Kesari bath. Rava/sooji, Sugar and ghee forms the basic ingredients for this sweet recipe. But Rava kesari, suji ka halwa and kesari bath has its own variations in the quantity of ingredients, method of preparation, taste, color and texture. I watched few You tube videos and followed Food viva for the recipe. 

Though it tastes mildly sweeter than the South Indian rava kesari, it was dripping with ghee and finger licking good. We loved it very much. Its taste reminded me of the banana sheera I had in my friend’s house Satya Narayana pooja. Its very easy to prepare for special occasions and to treat your surprise guests. For variations, you can use milk instead of water. Lets see how to make North Indian special suji ka halwa/ Sooji halwa/Rava sheera recipe with step by step photos and a detailed video !!
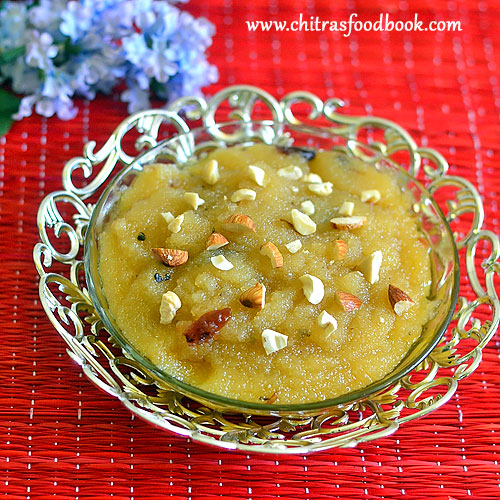
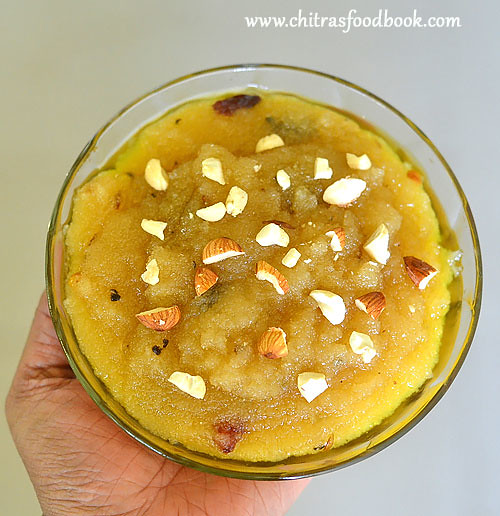
Suji ka halwa recipe

Suji Ka Halwa Recipe


Suji Ka Halwa Recipe Suji Ka Halwa - North Indian version of Rava kesari
Cuisine: North Indian
Category: Sweet
Serves: 3
Prep time: 10 Minutes
Cook time: 10 Minutes
Total time: 20 Minutes


INGREDIENTS
1 cup - 200ml or 250ml
  • Bombay Rava/ Sooji /semolina - 1/2 cup ( Do not use chiroti rava)
  • Ghee - 1/3 cup + 1 tbsp
  • Sugar - 1/2 cup
  • Water - 1.5 cups
  • Cardamom powder - 1/2 tsp or 2 pods crushed
  • Saffron threads - few
  • Milk - 1 tbsp ( to soak saffron thread)
  • Chopped cashews, badam and few raisins/dry grapes
METHOD - HOW TO MAKE SOOJI HALWA

  • Soak saffron threads in 1 tbsp hot milk.I din’t use saffron in this recipe. I used cardamom powder alone.
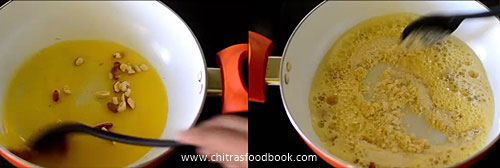
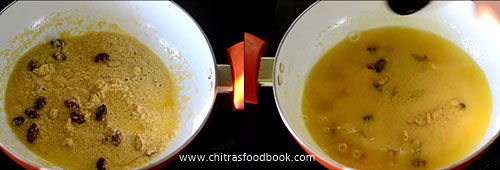
  • Heat 1/3 cup of ghee in a kadai.Roast the dry grapes, cashews and almonds till dry grapes bloat and nuts turns golden. Add rava and roast well for 4-5 minutes in medium flame. Rava turns light golden brown in color.
    Suji ka halwa recipe
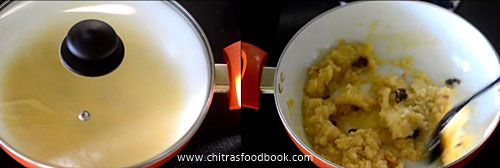
  • Add 1.5 cups of water to the rava and mix well till 3/4 th of the water is absorbed by the rava and becomes semi thick.Keep the flame low and cover the kadai with a lid. Cook the rava for 2-3 minutes.
    Suji ka halwa recipe
    Suji ka halwa recipe
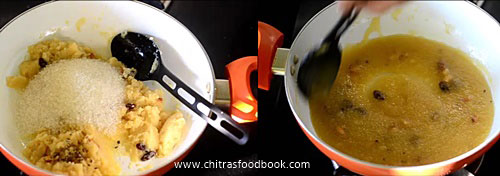
  • Open the lid and add sugar, cardamom powder and saffron milk ( if using). Mix well without lumps.Sugar melts and the mixture will become watery. Keep the flame medium and mix well. 
    Suji ka halwa recipe
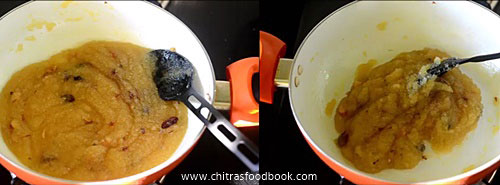
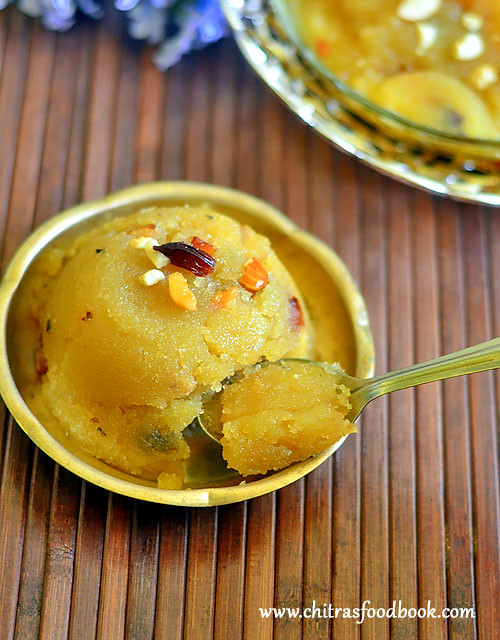
  • Halwa turns thick and starts to leave the sides of pan. Immediately add 1tbsp of ghee, mix well quickly and transfer the halwa to a bowl. Do not wait for the halwa to thicken completely. Remove it as soon as it becomes semi thick because this suji ka halwa becomes dry and hard when it cools down. So remove it at the right time. Garnish with few nuts and serve warm.
    Suji ka halwa recipe
Enjoy !

Note
  • Add more sugar ( Say 3/4 cup of sugar) if you need more sweetness.
  • You can use milk instead of water but cook the rava for more time if using milk.
  • Do not reduce the quantity of ghee. It helps to keep the halwa soft.
  • If you don’t want to add more ghee, use half the quantity of oil.

Sooji halwa recipe

Try this easy, yummy Suji Ka halwa/Rava sheera at home and enjoy !!
Sooji halwa
Continue Reading...


December 8, 2016

Karthigai Pori Recipe – Karthigai Vella Aval Pori–Karthigai Deepam Recipes

Karthigai Pori Recipe
Karthigai deepam festival 2020 is nearing. It falls on 29th November, Sunday. Every year on Karthigai Deepam festival day, we make pori urundai, appam, payasam and maa vilakku and offer God. Both MOM & MIL has the same practice.In Tamil nadu, during Karthigai deepam festival, we get a special mixture of aval pori ( Puffed Poha), pottukadalai( fried gram dal), Ellu ( roasted sesame seeds) in small packets. 

When I was young, I used to buy them from a small Chettiyar shop nearby my house. My mom used to roast them in ghee and add it to the boiled jaggery syrup. It tastes crispy and stays good for weeks together.  But in my MIL’s place, getting readymade aval pori is difficult. So she used to roast the thick poha until puffy and follows the same. Both of them do not make balls with aval pori (aval pori urundai )instead they just mix the roasted aval pori in jaggery syrup and keep it as such.

 Today, I have followed my MIL’s method and prepared this Karthigai pori using thick poha. In Bangalore, puffed rice( arisi pori in Tamil, Mandakki In Kannada) is mostly available in all the shops whereas puffed poha ( Aval pori) is not easy to get. For people like me, this recipe would be useful. 

Generally, beginners may feel difficult to make balls from the hot aval pori mixture. Do not worry, this post is specially for you. Here you do not have to shape balls. Its just a mix and serve method. But the only difficulty in this recipe is poha should be roasted patiently in batches. It takes nearly 15 –20 minutes for roasting. 

But this Karthigai aval pori tastes super crispy than the ready made aval pori you buy from the market. So the time you put in this recipe is worthwhile. Do try this method of making Karthigai pori, I am sure you will be very happy with the results. So lets see how to make Karthigai pori recipe with step by step pictures and a video !

Please check out my other Karthigai Deepam Recipes HERE


Aval pori recipe

Karthigai Pori Recipe


Karthigai Pori Recipe How to make Karthigai pori without making balls
Cuisine: South Indian
Category: Sweet
Serves: 3
Prep time: 5 Minutes
Cook time: 20 Minutes
Total time: 25 Minutes


INGREDIENTS
1 cup - 250ml
  • Thick Poha - 1 cup
  • Grated jaggery - 1/2 cup
  • Water - 1/4 cup
  • Cardamom powder - 1/4 tsp
  • Ghee - 4 tsp
  • Coconut bits - 2 tbsp
  • Fried gram dal/Pottukadalai - 2 tbsp
  • Black Sesame seeds / Ellu - 1/2 tbsp
  • Dry ginger powder – 1/4 tsp ( optional)
HOW TO MAKE KARTHIGAI PORI - METHOD

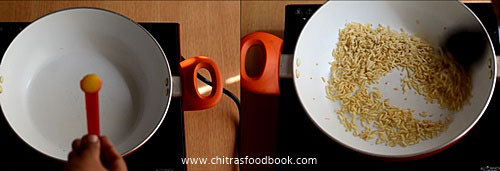
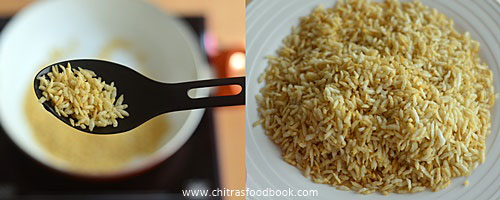
  • Take a kadai and heat 1 tsp of ghee. Add 1/3 cup of poha ( Poha should be roasted only in batches). Roast in medium flame till it becomes puffy and slightly turns golden in color.it takes nearly 5 minutes to finish roasting one batch of poha. Remove in a plate. Repeat the same for the remaining poha and collect everything in a plate. Let it cool down. You have roast 1 cup of poha in 3 batches ( 1/3 cup per batch). Stay nearby and roast them patiently.
    Aval pori recipe
    Aval pori recipe
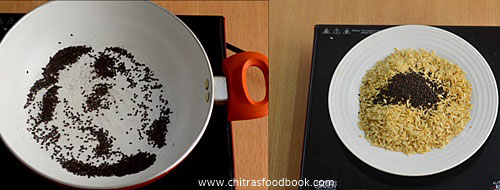
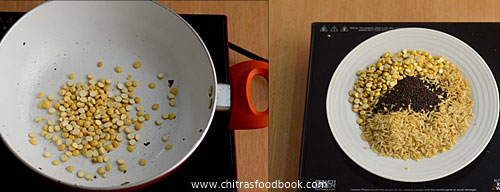
  • In the same kadai, dry roast the black sesame seeds till it crackles. It takes nearly 2-3 minutes. Remove them to the poha plate. In the hot kadai, put the fried gram dal and switch off the flame. It will become crispy in the heat of kadai. If your gram dal is fresh and crispy, you do not have to roast it, You can directly it mix with the roasted poha.
    Aval pori recipe
    Karthigai pori recipe
  • Chop coconut into small pieces.Heat 1 tsp of ghee and roast the coconut bits till golden in color. Stay nearby and roast till done. Remove in a separate bowl.
    Karthigai pori recipe
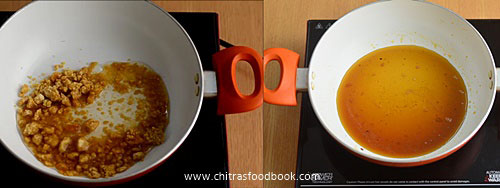
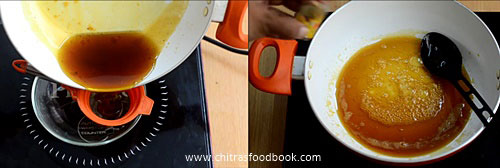
  • In a kadai, take 1/2 cup of jaggery and add 1/4 cup of water. Boil till the jaggery melts. Switch off the flame and strain the jaggery syrup using a metal strainer. Wash the kadai and add the strained syrup to it. Boil again till frothy and thick. Add cardamom powder( I used cardamom essence) and dry ginger powder( if using).
Karthigai pori recipe
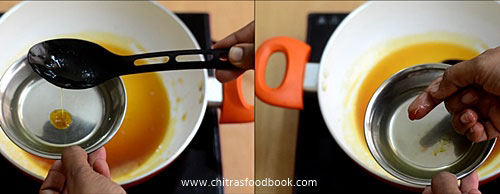
  • Keep the flame low to medium when the syrup starts to thicken. Now take little water in a small plate. Put few drops of jaggery syrup and try to gather them with your fingers. Syrup should not dissolve in water and you should be able to collect them and make a small ball with it. This is called soft ball consistency. Refer Video for clear understanding.
Karthigai pori recipe
  • NOTE : You cannot shape balls/urundai in this consistency. For making balls, you should boil jaggery syrup till it reaches hard ball consistency.
     
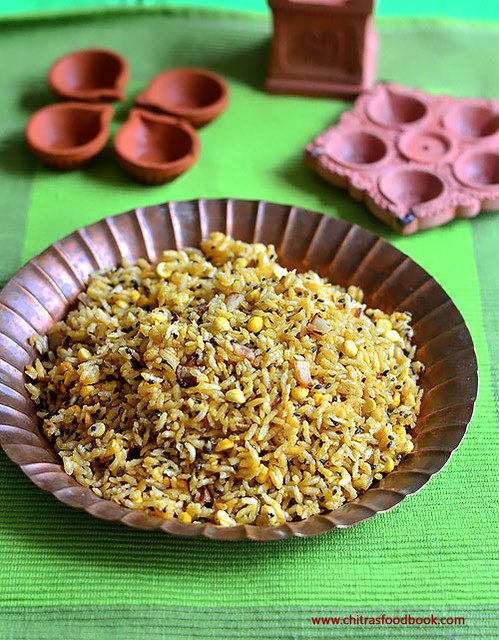
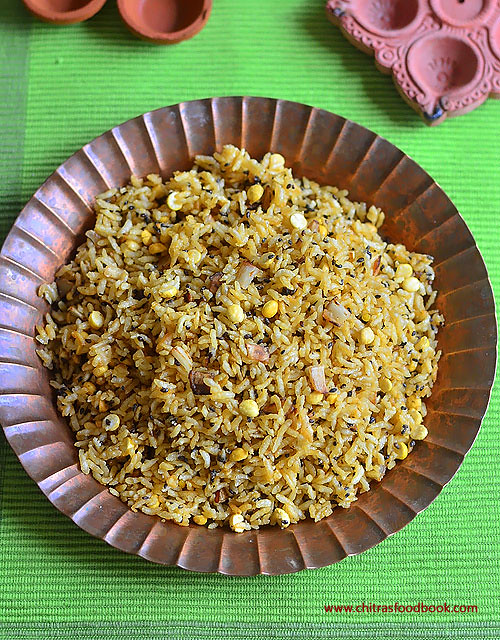
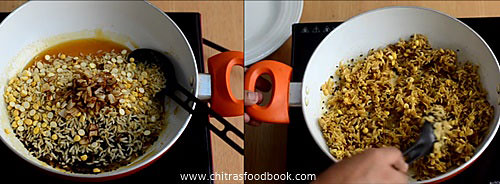
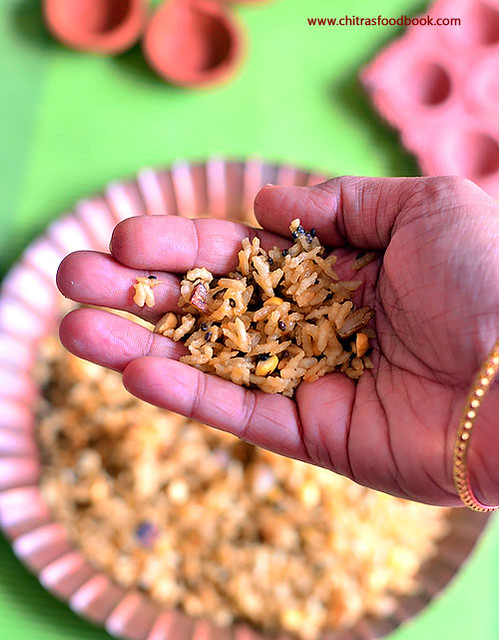
  • Once the consistency is reached, switch off the flame and add the roasted poha mixture, roasted coconut. Mix well and set aside. Initially the mixture may look sticky. But when it cools down, it will look separate and tastes crunchy. Offer God & Enjoy !
Karthigai pori recipe
  • You can store this in an air tight box and enjoy for weeks. 

Note
  • For me, 1/2 cup of jaggery was enough for 1 cup of aval/ Poha. If you need more sweetness, you can add 3/4 cup of jaggery,
  • The consistency of jaggery syrup is very important else the pori will stick to each other and becomes soggy after few hours.
  • Hard ball consistency is needed to shape balls. For soft ball, balls cannot be made.
  • Black sesame seeds gives nice flavor. You can use white sesame seeds as well but flavor must be missing.
  • If you like, you can add 1/4 tsp of dry ginger powder/Sukku podi.
Try this easy method of Karthigai pori for this festival and enjoy !
Continue Reading...


November 17, 2016

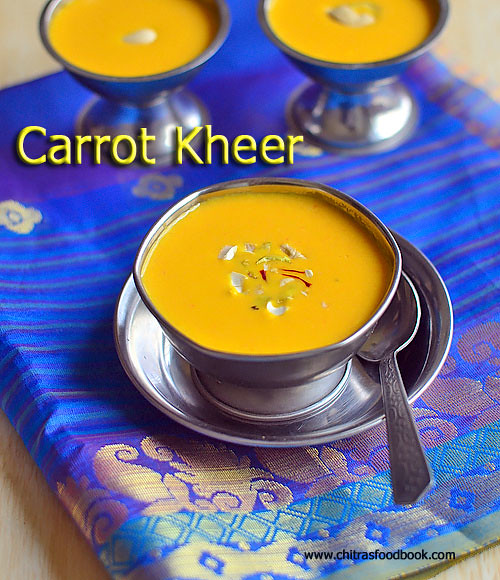
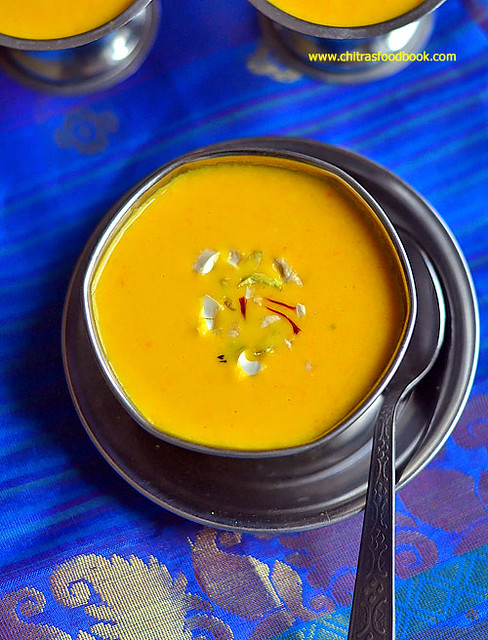
Carrot Kheer Recipe – Easy Carrot Payasam Recipe

Carrot kheer recipe
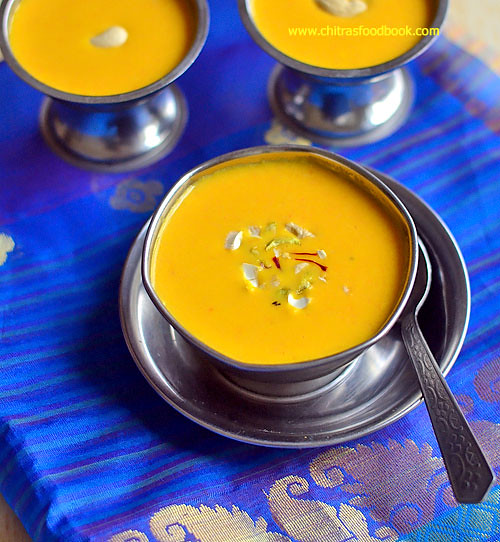
Every Thursday and Friday I do Guru Pooja and Vaibhava Lakshmi Pooja at home. So every week I make one or the other neivedyam recipes like Sweet pongal/ Sakkarai pongal, Payasam varieties or sweet appam to offer God. Sometimes I make Rava Kesari or other sweets as well. This week, I prepared carrot Kheer ( Carrot Payasam in Tamil, Gajar Ka Kheer in Hindi) for a change. Long back I had tasted carrot kheer in my Aunty’s house( Chithi). She served it chilled after lunch. I just loved its color and creamy texture. I asked her for the recipe and noted down in my diary. As I had more carrots in my pantry, I tried this today for my pooja. It came out very tasty and rich. We all loved it a lot. My daughter Raksha became a big fan of this dessert recipe and asked me to make it often. Carrot kheer is one of the best ways to include carrots in our kids diet. To made this kheer rich and creamy, I added cashews and condensed milk. But you can skip them if you don’t have it.To make Kerala style carrot payasam, add coconut milk instead of condensed milk. Carrot, Sugar, Milk and cardamom powder are the most important ingredients to make this yummy, easy Indian style dessert recipe in minutes. Its a crowd pleaser as well. So you can prepare this for small family functions or birthday parties. I am sure everyone will enjoy it.  Lets see how to make this simple and yummy carrot kheer / carrot payasam recipe with step by step pictures and a video !


Carrot kheer recipe

Carrot Kheer / Carrot Payasam Recipe


Carrot Kheer / Carrot Payasam Recipe How to make carrot kheer - Easy Indian Dessert Recipe
Cuisine: Indian
Category: Dessert Recipes
Serves: Serves 4
Prep time: 10 Minutes
Cook time: 15 Minutes
Total time: 25 Minutes


INGREDIENTS
1 cup - 250ml
  • Grated carrot - 1 cup OR Small sized carrot - 2 nos
  • Boiled milk - 2.5 cups ( Use full fat milk for best taste)
  • Sugar - 4 tbsp
  • Condensed milk - 2 tbsp
  • Cardamom powder - 1/2 tsp
  • Cashew nuts - 5 nos + 2 nos to roast
  • Ghee - 1 tbsp
METHOD

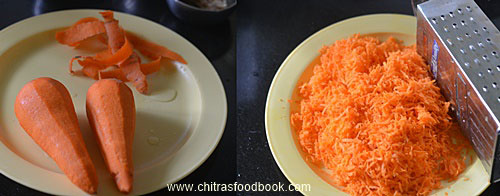
  • Wash and Peel the skin of carrot. Grate it using a fine grater and set aside.
    Carrot kheer recipe
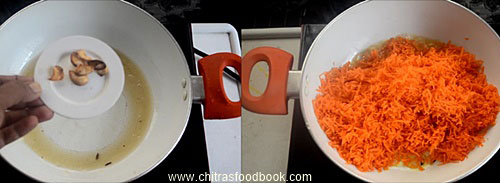
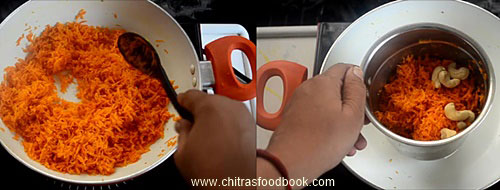
  • In a kadai, melt ghee and roast broken cashews. Remove in a plate when its golden brown. Now add the grated carrot and saute till its raw smell goes off and its color changes to pale orange.
    Carrot kheer recipe
    Carrot kheer recipe
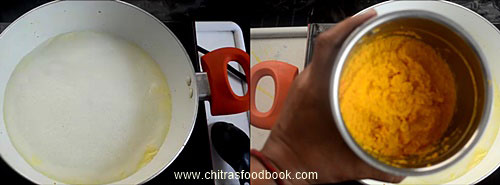
  • Add milk in the kadai and let it boil for few minutes. In the mean time, grind carrot along with cashews. Grind to a smooth thick paste adding enough water. I used 1/2 cup of milk to grind the carrot.So my paste became pale yellow after grinding. If you want orange shade for your kheer, use water instead of milk.
    Carrot kheer recipe
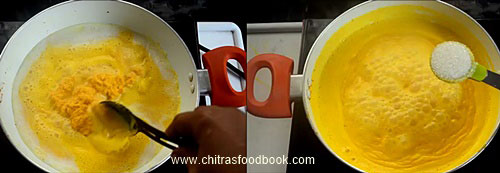
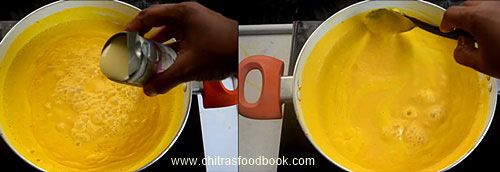
  • Add this paste to the boiling milk.Mix well and boil for 2-3 minutes in medium flame. Add sugar and condensed milk, Mix well and boil till sugar dissolves.Check for taste and add more sugar if needed. Lastly add the cardamom powder/ cardamom essence and switch off the flame. Add the roasted cashews. Mix well. If you like it thin, add more boiled milk, some sugar. Mix well, Refrigerate for an hour to serve chilled. Serve warm or chilled as you like.
    Carrot kheer recipe
    Carrot kheer
Enjoy !

Note
  • You can skip condensed milk in this recipe. In that case, you have to add more sugar.
  • You can also use de skinned almonds instead of cashew nuts.
  • Do not forget to add cardamom powder.It helps to suppress the raw smell of carrot.
  • Sauting carrot in ghee helps to remove its raw smell.
  • This kheer will thicken over time. So add more boiled milk if you like it watery.
  • If you add jaggery, kheer may curdle because of milk. So use water and coconut milk if using jaggery.

Enjoy this easy, creamy, rich carrot kheer at home for special occasions !
Carrot payasam recipe
Continue Reading...


October 9, 2016

Kadalai Paruppu Sundal Recipe – Bengal Gram Sundal–Sundal Varieties

Kadalai paruppu sundal
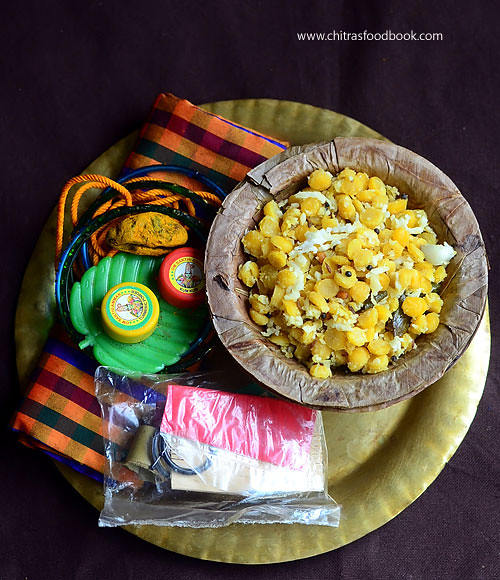
For this Navratri, I din’t  try any new sundal variety. As I have kept Golu in my house, I was busy in inviting guest, giving thamboolam and other household works. So I prepared Green gram sweet sundal, Green gram masala sundal, Badam burfi, Black chana sundal, sweet corn sundal, Rava kesari and Sweet pongal in these 7 days. This morning I prepared Kadalai paruppu Sundal keeping Saraswathi Pooja/Ayudha poojai celebration in mind. 

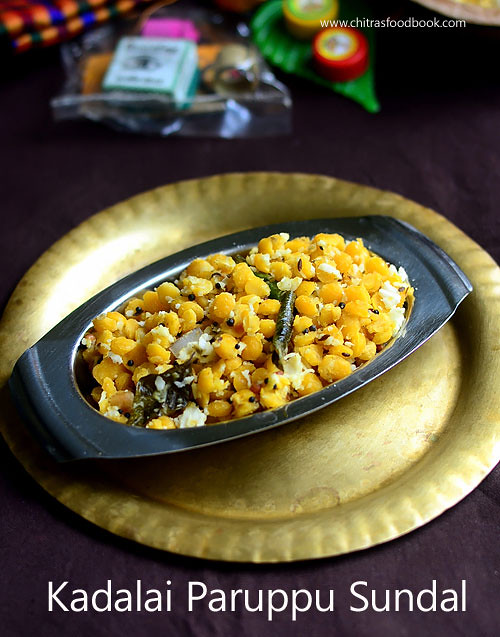
My MIL usually makes Chana sundal i.e Konda Kadalai sundal (In Tamil) along with 5 rice varieties and Vada whereas my mom makes Kadalai paruppu sundal / Bengal gram sundal adding more coconut. As my dad is not fond of chickpeas sundal, mom makes either Kadala paruppu sundal or paasi paruppu sundal(Moong dal sundal) for neivedyam.  Its a very easy, quick and no soaking sundal variety. When we forget to soak the legumes, this kadala paruppu sundal will come to rescue. Its healthy as well.You can use the cooked dal water to make rasam or drink it as a soup. Fine, lets see how to make South Indian style Kadalai paruppu sundal / Bengal gram sundal with coconut.

Do check out my other Sundal varieties in this link !

Bengal gram dal sundal

Kadalai paruppu sundal / Bengal gram dal sundal recipe


Kadalai paruppu sundal / Bengal gram dal sundal recipe How to make Kadalai paruppu/ Bengal gram dal sundal recipe - Easy, no soaking sundal variety for Navrarti !
Cuisine: South Indian
Category: Sundal varieties
Serves: Serves 2
Prep time: 5 Minutes
Cook time: 15 Minutes
Total time: 20 Minutes


INGREDIENTS
1 cup - 250ml
  • Bengal gram dal / Kadalai paruppu - 1/2 cup
  • Salt & water - as needed
  • Grated coconut – 3 tbsp
To temper
  • Coconut oil - 1 tbsp
  • Mustard seeds - 1/2 tsp
  • Urad dal - 1 tsp
  • Cumin seeds - 1/2 tsp
  • Curry leaves - few
  • Green chillies - 1 no ( slitted or finely chopped)
HOW TO MAKE KADALAI PARUPPU SUNDAL - METHOD

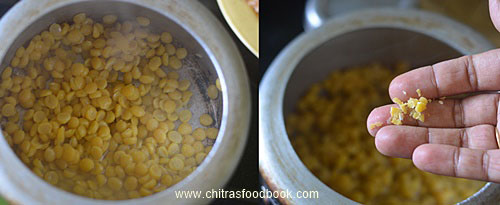
  • Wash and take the dal in the cooker base. Add enough water ( I used 2 cups) and pressure cook for 2-3 whistles in very low flame. Kadalai paruppu won’t become mushy very easily. So It would be perfectly cooked in low flame in just 2 whistles. Remove the lid after the steam is released. Check whether it mashes in your finger. Drain the excess water if any and use it for making rasam or dal soup. Make sure you keep 1 tbsp of water in the dal.
    Kadalai paruppu recipe
  • In a kadai, heat oil and splutter mustard seeds, urad dal, cumin seeds. Add slitted or finely chopped green chillies, curry leaves & hing. Saute for a minute. Add the cooked dal along with the little water in the cooker. Add the required salt, Mix well & boil till all the water evaporates. Mix it gently without mashing the dal. Lastly add the grated coconut, give a quick stir & switch off the flame. Remove from the kadai & transfer it to a vessel. Offer to God & serve ! This sundal will become grainy once it starts to cool down. So do not panic if it looks slightly mushy while hot.
    Kadalai paruppu recipe
    Kadalai paruppu recipe
  • Enjoy !
  • Do check out my other Sundal varieties in this link !

Note
  • Use finely chopped chillies for spicy taste. I use slit chillies.
  • You can also use finely chopped ginger if you like its flavor.
  • Optionally, you can garnish this sundal with coriander leaves.
  • Add more coconut for rich taste.
Easy, quick and healthy Kadalai paruppu sundal is ready to offer GOD and serve !
Kadalai paruppu sundal recipe
Continue Reading...


September 4, 2016

Ulundu Kozhukattai–Urad Dal Poornam Kozhukattai- Uppu Kolukattai

ulundu kozhukattai recipe
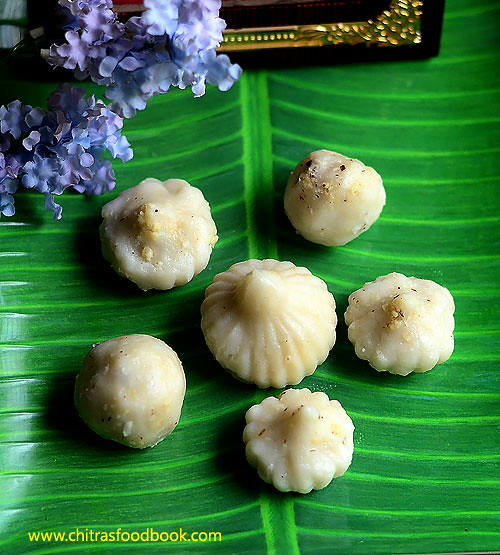
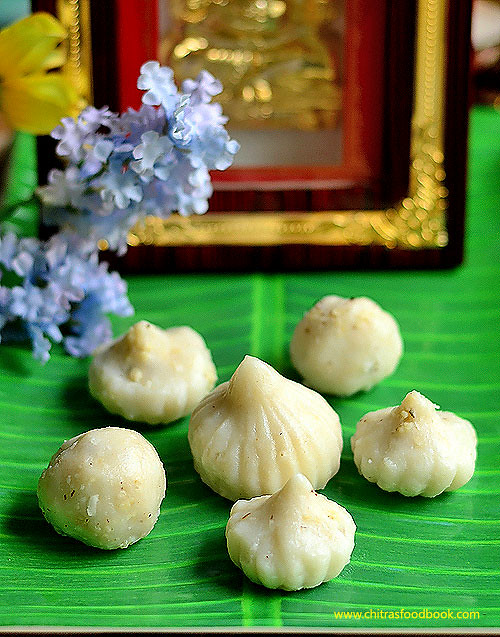
For Ganesh Chaturthi, we make Ulundu kozhukattai/ Ulutham paruppu kozhukattai / Urad dal poornam kozhukattai by making a spicy stuffing with urad dal. Traditionally we call it as Ulundu poornam Kozhukattai. Some people call it as uppu kozhukattai too. Chana dal pooranam or coconut poornam kozhukattai, Ellu kozhukattai and Urad dal kozhukattai should be in our naivedyam for Ganesh chaturthi festival. Apart from this, we make other kozhukattai varieties based on our personal choice.

I have already made a post about this ulundu kozhukattai under my “3 Kozhukattai varieties” post. Still I want to have a separate detailed post for this recipe. Sometimes we make this ulundu kozhukattai for dinner too.Its a healthy, protein packed dish. I have also shared an easy ulundu kozhukattai version for beginners. Do check it out. Now lets see how to make Ulundu kozhukattai with poornam with video.

Check out my easy ulundu kozhukattai too !


ulundu kozhukattai recipe

Ulundu kozhukattai - Urad dal poornam kozhukattai


Ulundu kozhukattai - Urad dal poornam kozhukattai Traditional ulundu kozhukattai - Dumplings made of stuffing with urad dal
Cuisine: Indian
Category: Festival recipes
Serves: 10 nos
Prep time: 30 Minutes
Cook time: 20 Minutes
Total time: 50 Minutes


INGREDIENTS
1 cup - 250ml
  • Rice flour - 1 cup ( I used Anil kozhukattai mavu)
  • Water - 1.5 cups (Water quantity may vary)
  • Cooking oil or ghee - 1 tsp
  • Salt - a pinch
For stuffing/Poornam
  • Urad dal – 1/4 cup
  • Green chillies – 2-3 nos
  • Ginger – 1/2 inch piece
  • Grated coconut - 1/4 cup
  • Asafetida / hing – 1/4 tsp
  • Salt – as needed
To temper
  • Coconut oil or cooking oil - 1 tbsp
  • Mustard seeds – 1/2 tsp
  • Urad dal – 1/2 tsp
  • curry leaves – few
  • Hing – a pinch
HOW TO MAKE ULUNDU KOZHUKATTAI - METHOD

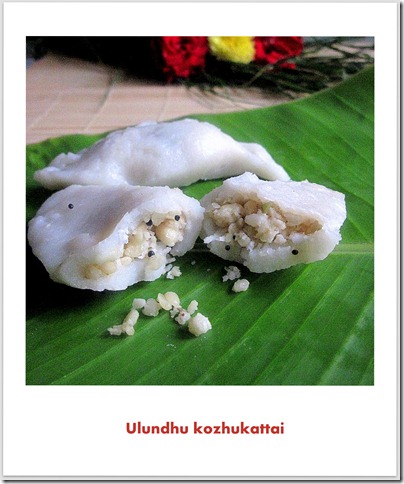
  • Always make the pooranam first & then make the outer covering. Wash and soak urad dal in water for 30 minutes. Drain the water completely and take the urad dal in a mixie jar. Put green chillies, hing, salt, ginger and pulse the mixture once or twice. Make a coarse paste. Do not grind for more time.
Ulundu kozhukttai
  • In a idli pot , grease the idly plate and spread the ground urad dal mixture. Make a hole in the center for uniform cooking. Steam it for 10 – 15 minutes.
Ulundu kozhukattai
  • After it cools down, crumble the mixture using your hands and run it in the mixie once or twice for easy perfect crumbling and keep it ready..
ulundu kozhukattai
  • Heat oil in a kadai, temper the mustard seeds, urad dal and curry leaves with a pinch of hing. Then add the crumbled urad dal mixture and mix well.
      Finally add the grated coconut , mix well and switch off the flame. Stuffing is ready.

ulundu kozhukattai
TO MAKE KOZHUKATTAI DOUGH
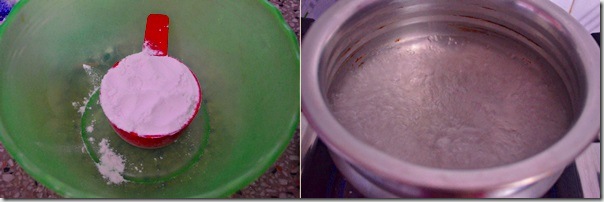
  • In a broad bowl , take the flour and add the salt. Mix well and set aside.
  • In a bowl, take the required water and add a tsp of sesame oil.
  • Let it boil for few seconds in high flame.When it starts to roll boil, switch off the flame and add the water to the flour little by little. Mix the flour with a wooden ladle. Kozhukattai maavu
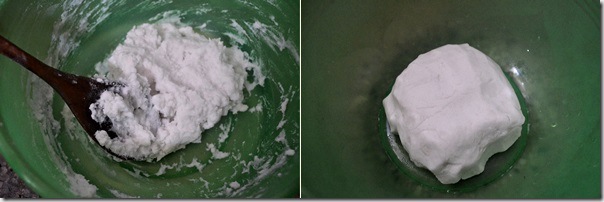
  • Add more water if required. Mix well and make a whole mass like chapatti dough. (initially u need a ladle to mix but when the dough becomes warm, mix it well with ur hands to make a soft , non- sticky dough.)
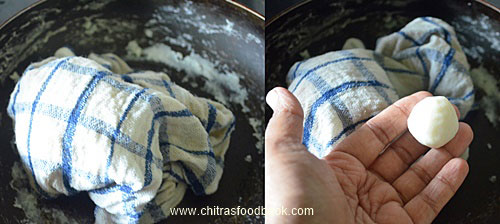
  • Apply a tsp of sesame oil over the dough to cover it. ( this prevents the dough from drying).Cover it with damp cloth and lid , set aside. Have a look at this VIDEO for more details. kozhukattai dough tile2
TO MAKE KOZHUKATTAI
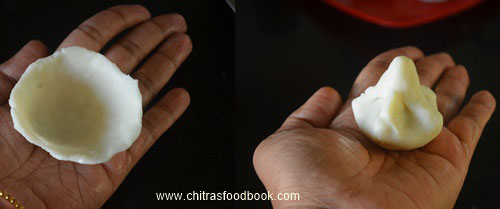
  • Make a ball from dough and press it to make a cup. Place a tbsp of stuffing & cover it as shown in the pictures.
Ulundu kozhukattai
Ulundu kozhukattai
Ulundu kozhukattai


ulundhu kozhukattai
TIPS FOR MAKING KOZHUKATTAI WITHOUT CRACKS
  1. Use good quality rice flour. If u r planning to make by grinding rice, buy raw rice ( in tamil nadu we call as “maavu arisi) ie. the rice used for making rice flour.Its a different quality , not the one we use for pongal.It is cheaper in cost too.
  2. I use store bought rice flour - Idiyappam flour or Anil kozhukattai maavu. I always add 1.5 cups of water adding a tsp of oil for making dough. For home made rice flour, water quantity may vary.
  3. Always add the required water while making the dough.If the dough becomes sticky or dry, u’ll get crack.
  4. Keep the unused dough covered with a wet cloth and then with a lid while u make modakam.
  5. Its always better to prepare the outer covering after making pooranam/ stuffings to prevent the dough sitting for long time.
  6. U can refrigerate the unused dough covered by wet cloth be keeping in an air tight box & use the next day or the same evening.
  7. Pooranam can be prepared the previous day and refrigerated.
  8. Apply sesame/gingely oil in ur hands every time when u make the shape.
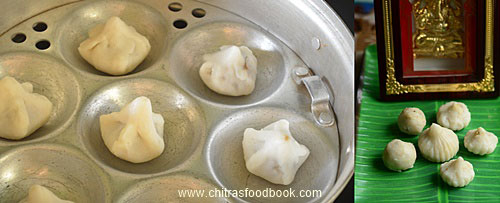
  9. Last but not the least , do not cook the kozhukattai in idli pot for long time which may lead to cracks.( maximum of 8-10 mins is enough)
  10. Always place the idli plate filled with kozhukattai after the water in the idli pot starts roll boiling. This helps for quick cooking & also the kozhukattai remains white in color and crack free.
  11. U can identify the cooked kozhukattai by its shining look.
  12. Always remove the kozhukattai after it becomes warm.Do not remove when it is hot. Kozhukattai may break.
Ulundu kozhukattai recipe
Continue Reading...