Kakarakaya ( Bitter Gourd in English, Pavakkai in Tamil, Karela in Hindi) is a very healthy and diabetic friendly vegetable. I make bitter gourd recipes at least once in a week. Usually I prepare bitter gourd curry, Chettinad puli kuzhambu or Pavakkai pitlai.
Kakarakaya Pulusu is an Andhra style bittergourd gravy made by frying bitter gourd pieces in oil and its added to a spicy gravy. But I came across an easy, one pot, Andhra style Kakarakaya Pulusu ( Pulusu means Kuzhambu/Gravy in Telugu) in a Youtube video. I tried it for lunch along with brinjal masala poriyal. It tasted very well without much bitterness.
Bitter gourd lovers like me must try this recipe. Addition of jaggery (Bellam), tamarind and thinly sliced bitter gourd sauted in oil helps to reduce the bitterness I feel. So friends, do try this Andhra special Kakarakaya Pulusu recipe for rice. I am sure you will enjoy it. Now lets see how to make it with step by step photos !
Ginger & Garlic paste - 1/2 tsp ( or use 1/2 tsp Ginger paste)
Red chilli powder - 1.5 tsp to 2 tsp
Dhania powder - 1 tbsp
Salt & water - as needed
Grated jaggery - 2 tsp
To temper
Cooking oil - 3 tbsp
Mustard seeds - 1/2 tsp
Urad dal - 1 tsp
Curry leaves - few
Hing - a pinch
Coriander leaves - to garnish
HOW TO MAKE KAKARAKAYA PULUSU - METHOD
Wash and cut the bitter gourd vertically. Remove the middle portion along with the seeds. Slice it thinly as shown in the picture below. These steps will help you to remove the bitterness to a certain extent.So slice it thinly.
In a pressure cooker base, heat oil and splutter mustard seeds, urad dal, cumin seeds, curry leaves. Add bitter gourd slices, saute till it becomes soft. Add onion, gg paste and saute till its raw smell goes off. Add slit green chillies and saute for few seconds. Bitter gourd turns dark green in color.
Now add the red chilli powder, turmeric powder, dhania powder and salt. Dhania powder helps to give thickness to the gravy. Mix well in low flame without burning them. Now add 1 cup of tamarind extract, raw pinched curry leaves. Let it boil for a minute. Add the grated jaggery, check for salt and spice. Add more chilli powder and salt if needed. Mix well and pressure cook in very low flame for 2 whistles. Bitter gourd cooks soft.
Open the cooker and see a layer of oil floating on top. Check if the gravy is too watery. If its too watery, boil for sometime till slightly thick. Mix well and serve hot with rice, papad ! ( Oil floats on top only if you cook this gravy in pressure cooker. If you make in kadai, you should boil the gravy till oil oozes out.)
Enjoy!
Note
Adjust the quantity of green chillies and red chilli powder as per your taste buds
Add the mentioned quantity of oil to get the oil floating on top.
Try this Andhra delicacy at home and enjoy your lunch !!
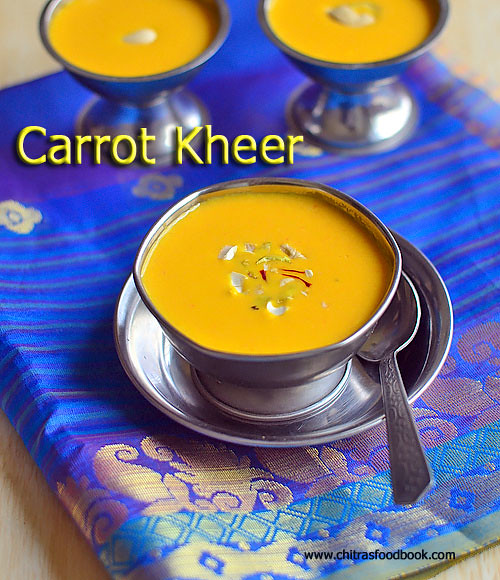
Every Thursday and Friday I do Guru Pooja and Vaibhava Lakshmi Pooja at home. So every week I make one or the other neivedyam recipes like Sweet pongal/ Sakkarai pongal, Payasam varieties or sweet appam to offer God. Sometimes I make Rava Kesari or other sweets as well. This week, I prepared carrot Kheer ( Carrot Payasam in Tamil, Gajar Ka Kheer in Hindi) for a change. Long back I had tasted carrot kheer in my Aunty’s house( Chithi). She served it chilled after lunch. I just loved its color and creamy texture. I asked her for the recipe and noted down in my diary. As I had more carrots in my pantry, I tried this today for my pooja. It came out very tasty and rich. We all loved it a lot. My daughter Raksha became a big fan of this dessert recipe and asked me to make it often. Carrot kheer is one of the best ways to include carrots in our kids diet. To made this kheer rich and creamy, I added cashews and condensed milk. But you can skip them if you don’t have it.To make Kerala style carrot payasam, add coconut milk instead of condensed milk. Carrot, Sugar, Milk and cardamom powder are the most important ingredients to make this yummy, easy Indian style dessert recipe in minutes. Its a crowd pleaser as well. So you can prepare this for small family functions or birthday parties. I am sure everyone will enjoy it. Lets see how to make this simple and yummy carrot kheer / carrot payasam recipe with step by step pictures and a video !
Carrot Kheer / Carrot Payasam Recipe
How to make carrot kheer - Easy Indian Dessert Recipe
Grated carrot - 1 cup OR Small sized carrot - 2 nos
Boiled milk - 2.5 cups ( Use full fat milk for best taste)
Sugar - 4 tbsp
Condensed milk - 2 tbsp
Cardamom powder - 1/2 tsp
Cashew nuts - 5 nos + 2 nos to roast
Ghee - 1 tbsp
METHOD
Wash and Peel the skin of carrot. Grate it using a fine grater and set aside.
In a kadai, melt ghee and roast broken cashews. Remove in a plate when its golden brown. Now add the grated carrot and saute till its raw smell goes off and its color changes to pale orange.
Add milk in the kadai and let it boil for few minutes. In the mean time, grind carrot along with cashews. Grind to a smooth thick paste adding enough water. I used 1/2 cup of milk to grind the carrot.So my paste became pale yellow after grinding. If you want orange shade for your kheer, use water instead of milk.
Add this paste to the boiling milk.Mix well and boil for 2-3 minutes in medium flame. Add sugar and condensed milk, Mix well and boil till sugar dissolves.Check for taste and add more sugar if needed. Lastly add the cardamom powder/ cardamom essence and switch off the flame. Add the roasted cashews. Mix well. If you like it thin, add more boiled milk, some sugar. Mix well, Refrigerate for an hour to serve chilled. Serve warm or chilled as you like.
Enjoy !
Note
You can skip condensed milk in this recipe. In that case, you have to add more sugar.
You can also use de skinned almonds instead of cashew nuts.
Do not forget to add cardamom powder.It helps to suppress the raw smell of carrot.
Sauting carrot in ghee helps to remove its raw smell.
This kheer will thicken over time. So add more boiled milk if you like it watery.
If you add jaggery, kheer may curdle because of milk. So use water and coconut milk if using jaggery.
Enjoy this easy, creamy, rich carrot kheer at home for special occasions !
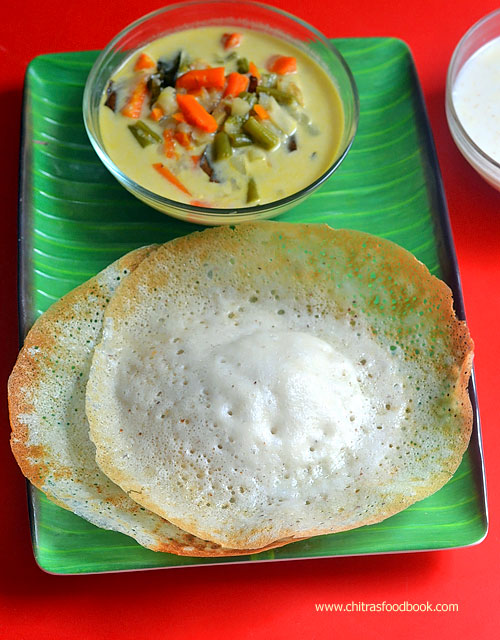
Appam is one of the most popular South Indian breakfast recipe. It is commonly found in Tamil nadu and Kerala hotels. Tamil nadu style appam can be prepared in many ways. In my family, everybody loves appam very much. So I make it at least twice in a month. I have experimented and shared different recipes for appam like appam with cooking soda, appam without soda adding ENO and have made appam recipe using idli, dosa batter as well. But I have never thought of trying Kerala’s traditional appam recipe popularly known as Palappam.
Recently when I was going through my Instagram feed, I got tempted by seeing a picture of Kerala Appam served with vegetable stew for breakfast. Since then, I was searching for traditional Kerala style appam and found many recipes with variations. I found it can be prepared with yeast , without yeast and even with rice flour. This time, I tried the traditional appam recipe using raw rice and yeast. Now I wish to try the easy appam recipe with rice flour and see the difference in texture.Soon I will share restaurant style vegetable stew recipe. Now lets see how to make Kerala Palappam recipe using raw rice and yeast !!
Salt & water - as needed (You can use coconut water for grinding the batter)
Cooking oil - to drizzle appam
HOW TO MAKE KERALA APPAM / PALAPPAM - METHOD
Wash and soak raw rice for 4 hours.Chop the coconut into small pieces and grind it coarsely. Instead you can grate the coconut and grind it along with rice. Grind the soaked rice adding grated coconut, cooked rice, salt, sugar and yeast till it becomes a smooth paste. You can grind in a grinder or in a mixie. You can use coconut water while grinding. But do not add more water and make the batter watery.
Transfer the batter to a big vessel and cover it with a lid.Let it ferment for 8 hours. I kept it for 12 hours as winter has started in my place.
After fermentation, the batter would have become frothy and almost doubled. Mix well with a ladle and add some water if the batter is too thick. The consistency of batter should be like regular dosa batter.
Heat an appam pan and pour 1.5 ladleful of batter. Swirl the pan and make a circle. The center part of appam should be thick and the sides should be thin and lacy. Drizzle a tsp of oil around the appam and cover it with a lid. Keep the flame low to medium. I cook till its bottom turns light golden brown and corners turn crispy. If you want soft, white colored appam, remove it before the corners turn crispy. Remove and serve hot with sweetened coconut milk and vegetable stew.
Enjoy !
Note
Traditionally yeast is added in Palappam/Kerala appam. But if you don’t like its smell, you can avoid it.
If you are not using instant dry yeast, you should proof it. For this, dissolve 1/2tsp of yeast in 1/2 cup of warm water, 1 tsp sugar. Mix it well and cover with a lid. Let it sit for 15 minutes. Check to see if the mixture turns frothy. If its active, add this mixture to the rice and grind it. If its not frothy, yeast is not alive/active. In that case, discard it and use a fresh yeast.
Cooking appam is medium flame patiently is more important else appam will burn in the bottom.
To make sweetened coconut milk, Grind 1cup of grated coconut adding 3/4 cup of warm water. Grind smooth and strain the coconut milk in a sieve. Collect them in a bowl and mix 1/4 cup of sugar and 1/2 tsp of cardamom powder to it. Mix well. Heat the coconut milk lightly till its warm and mix well for the sugar to dissolve completely. Do not boil the coconut milk. Serve warm with appam.
Enjoy this traditional Kerala Appam with sweetened coconut milk and Vegetable stew for a delicious breakfast !
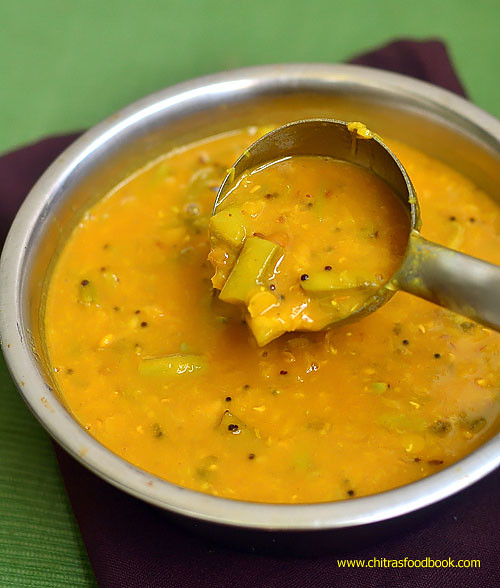
Cluster beans sambar ( Kothavarangai sambar in Tamil ) is my FIL’s favorite sambar recipe for rice. Today my in-laws visited my place.So I prepared this sambar and cauliflower poriyal for lunch. Even I love kothavarangai sambar more than kothavarangai poriyal or kothavarangai poricha kuzhambu. I learnt this recipe from my MIL. But I make a quick version in pressure cooker. It can be done easily in one pot. For variations, you can use green beans/ French beans as well. Do try this sambar with cluster beans for rice. I am sure you will love it. Lets see how to make cluster beans sambar with step by step photos !
Check out my 30 kuzhambu varieties recipes too !
Cluster beans sambar recipe
Cluster beans sambar recipe / Kothavarangai sambar for rice
Wash and chop the cluster beans of 2 inches size. Chop and Discard the tail portion of cluster beans. Peel the small onion, slit the green chillies. Soak tamarind in 1 cup of hot water for 10 minutes and take the extract. Set aside.
In a pressure cooker base, heat oil and splutter mustard seeds, methi seeds, cumin seeds and curry leaves.After the mustard seeds splutter, add the slit green chillies, curry leaves, chopped cluster beans and small onions. Saute until onions turn transparent and cluster beans turns dark green in color.
To this, add 2.5 cups of water, toor dal, turmeric powder and mix well. Pressure cook in very low flame for 1 whistle. It takes nearly 10-12 minutes. After the steam is released completely, open the cooker and mash the dal well with a whisk. After the dal turns mushy, add the tamarind extract, sambar powder, salt and hing. Roll boil well till the raw smell leaves. Lastly add the chopped coriander leaves, boil for a minute and switch off the flame.
Transfer the sambar to a serving bowl and add 2 tsp of ghee. Cover with a lid. Serve with hot rice, poriyal/curry and papad/appalam. Enjoy !
Note
Add more sambar powder if you want spicy sambar.
Sauting cluster beans gives a nice flavor to this sambar.
You can use French beans/green beans instead of cluster beans.
You can also add 1 chopped tomato along with onions for variation.
Delicious cluster beans sambar is ready to serve with rice !
Gujarati special snack Khaman Dhokla recipe was in my try list for years. Once I had tried steamed dhokla recipe using my pressure cooker but it was not up to the mark. Then I left the idea of trying dhokla at home.
Recently my friend Shalini took me to a chat shop in BDA complex, Banashankari where Khaman dhokla is very popular. After tasting there, I got tempted to try it again. But this time, I tried an easy Instant dhokla in microwave. Yes, I watched this 4 minutes microwave dhokla recipe in a YouTube video and prepared it for our teatime snack yesterday. I made green chutney as well.
Actually I halved the original recipe, made a slight change and tried it. Its so easy to make. It came out soft, porous, spongy and fluffy. This is really a good recipe for instant. Microwave dhokla under 5 minutes. I am very happy with the result.
In this recipe, ENO fruit salt is used to bring the softness. You can replace it with equal quantity of baking powder and baking soda if you want to make it without ENO. Friends do try this easy, microwave dhokla recipe at home and share your feedback with me. Ok, Now lets see microwave dhokla recipe with step by step photos and a detailed video!
Chilli+Ginger paste - 1 tsp OR Green chilli -1 no ( finely chopped) + Ginger - 1/2 inch piece ( finely chopped)
Plain ENO - 1/2 tsp (Use fresh, active ENO)
To Temper
Cooking oil - 1/2 tbsp
Mustard seeds - 1/2 tsp
Green chilli - 1 no ( small, finely chopped)
Curry leaves - few
Coriander leaves - 1 sprig
Sugar - 1 tsp
Water - 1/2 cup
Grated coconut - to garnish
METHOD
Keep all the ingredients ready before you start making. Take a microwave safe bowl ( Preferably square pan to make pieces) and grease it with oil. I used a thermal foil box as shown in the picture. Make sure the sides of box doesn’t touch the walls of microwave oven while cooking. Sparks may appear. So use any microwave safe dish if you have it or follow as I did.
In a wide bowl, add besan flour, curd, water, turmeric powder, chilli+ginger paste or finely chopped green chilli and ginger, salt, sugar and cooking oil. Mix everything well using a whisk. Batter should be of bajji batter consistency. So If needed add 1 tbsp water extra. Do not make the batter runny or too watery. Dhokla won’t cook properly. So add only the mentioned quantity of ingredients.
To the dhokla batter, add ENO fruit salt and mix well. Batter will become fluffy and becomes almost double in quantity. Pour the batter immediately to the greased microwave bowl. Microwave in high powder ( I Kept in 800W) for 4 minutes.(Check it once at 3 minutes). After 4 minutes, remove the dhokla and insert the back of a spoon. If it comes out clean, dhokla is done else keep it for another 30 seconds or 1 minute. Run a knife in the corners and invert the dhokla in a plate after it becomes warm. Cut into pieces.
Heat oil in a kadai and splutter mustard seeds, curry leaves and finely chopped green chillies and coriander leaves. Add water, sugar. Boil for 2 minutes. Add this water over the dhokla pieces and serve with green chutney. Garnish with grated coconut if you like !
For Green chutney : Grind a handful of coriander leaves, 1-2 green chilli, 3 garlic cloves, 1/2 tsp sugar, few drops of lemon juice and required salt to a smooth paste. You can add a tbsp of grated coconut of you wish. Make this chutney and serve it as a side dish for dhokla. Enjoy ! ( Once you get this recipe perfect, you can double the quantity of ingredients and try it. Please follow the mentioned quantity if you are a beginner)
Note
Use all the ingredients of mentioned quantity not less than that. It will give you perfect result.
Do not skip ENO. If you don’t have ENO, add 1/4 tsp baking powder + 1/4 tsp baking soda. Mix the batter and cook immediately.
Do not rest the batter for long time after adding ENO.
The quantity of water may vary slightly as per the thickness of curd. I used semi solid curd not thick.
You can use vinegar instead of lemon juice. But do not avoid it.
If your microwave high power is more than 800w, reduce the cooking time.
Try this easy, instant microwave dhokla recipe at home and enjoy your teatime ! In the chat shop, Dhokla with green chutney was served in a paper plate. So I too did the same.
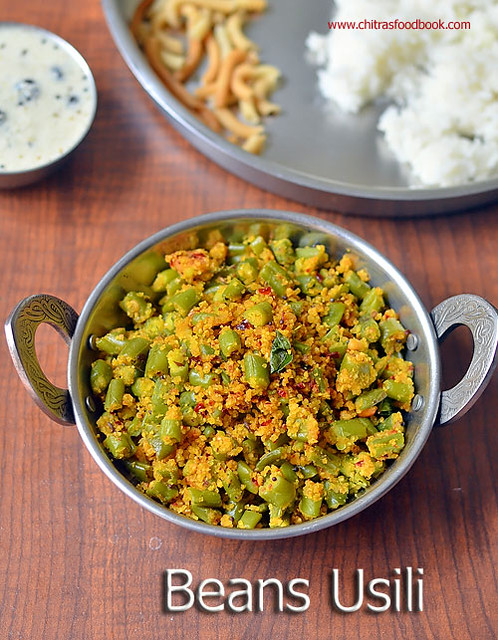
Beans usili is our family favorite side dish for mor kuzhambu. Basically paruppu usili is a popular, traditional side dish for sambar rice, mor kulambu that is made in all the South Indian households especially among Tamil Brahmins. Usili is nothing but the combination of cooked vegetable with spiced, ground dal. Its basically a healthy, protein packed side dish for vegetarians.
Traditionally paruppu usili is done by soaking chana dal + toor dal, ground to a coarse paste with chilli and then steamed to cook. This dal paste would be tempered and mixed with any one of these cooked vegetables like Cluster beans, green beans, Banana flower/Plantain flower or even cabbage. But today I have shared a very simple, easy to make and quick beans paruppu usili recipe without steaming process.
I found this easy recipe from Shanthi mam’s Instagram feed. This recipe is really a keeper for working women and for housewives who wants to do quick cooking. We are using Fried gram dal/Pottukadalai instead of chana dal & toor dal. So it can be made instantly and it tastes equally well to the traditional ones. I loved this recipe a lot and I am going to apply this easy method for other veggies like kothavarangai/cluster beans and plantain flower/vazhaipoo soon.
Do try this easy paruppu usili recipe and enjoy with morkuzhambu or sambar rice. You will love it for sure. Now lets see how to make easy green beans paruppu usili recipe with step by step photos !
How to make paruppu usili recipe in an easy way ! - You can use vegetables like green beans, cluster beans, plantain flower, cabbage or make as plain usili.
Red chilli - 2 to 3 nos ( Use bydagi chilli for nice color)
Salt & water - as needed
To temper
Cooking oil or coconut oil - 1 tbsp
Mustard seeds - 1/2 tsp
Cumin seeds - 1/2 tsp
Urad dal - 1 tsp
Curry leaves - few
Hing/Asafetida - a big pinch
Coconut oil - 1 tsp ( to garnish at the end)
HOW TO MAKE INSTANT PARUPPU USILI - METHOD
Wash and chop the head and tail part of beans ( use string less French beans for best taste). Chop the beans into small pieces or of 1/2 inch length as you wish. Take them in a pressure cooker. Add 1/2 cup of water, turmeric powder, required salt and mix well. Pressure cook for one whistle in low flame. Remove the lid after the steam is released. Drain the excess water in a bowl and set aside. Beans would be cooked soft.
Soak fried gram dal and pinched red chillies in a bowl with very little water for 5 minutes. Grind it to a coarse powder without adding water.
Heat oil in a kadai and splutter mustard seeds, urad dal, hing, cumin seeds and curry leaves.Add the cooked beans and ground dal. Stir in low flame for few minutes till it gets mixed well. Once its mixed well, sprinkle few tbsp of water and stir well.
Adding water helps to soften the usili and dals gets coated with the beans.Add salt if needed. Cook for a minute and switch off the flame. Add 1 tsp of coconut oil, mix well and serve with rice ! Usili tastes the best with morkuzhambu, sambar and keerai kuzhambu.
Enjoy with a papad !
Note
Add more chillies if you want to make spicy usili.
Use byadgi chillies to get nice color. I used the same.
Soaking the red chilli and fried gram dal helps for even grinding.
Try this easy usili recipe with your favorite vegetable. You will love it for sure !