Recently I started making javvarisi upma at home for breakfast and dinner. This is a South Indian style sabudana upma without using potato and peanuts. Actually I came to know about sago upma(Sabudana in Hindi, Saggubiyyam in Telugu) from my friend Shalini. She taught me a version with nylon javvarisi. I will share that recipe later.
Today I have shared javvarisi upma with big, white sago pearls. My MIL makes a similar upma without soaking sabudana. She roast it and make just like javvarisi payasam. I too follow this method for making kheer. But I couldn’t make upma as javvarisi becomes sticky. Once I make it perfect, I will share that version.
Last week I made this upma by soaking sabudana overnight. It came out very well, non-sticky and tasted great. I added vegetables like carrot and capsicum to make it colorful. Sendhil & Raksha loved it a lot. Now I am confident enough to try
North Indian sabudana khichdi too. Hope I will start to explore more sabudana recipes from now. Now lets see how to make South Indian style Javvarisi upma with step by step pictures.

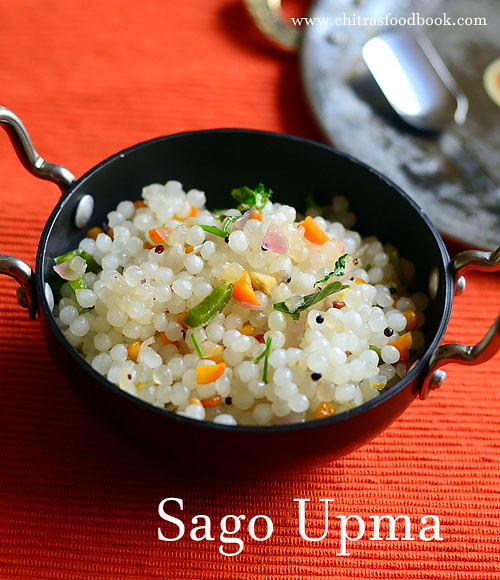
Javvarisi upma - Sago upma - Sabudana upma recipe

South Indian style Sabudana upma - Javvarisi upma recipe with step by step pictures
Cuisine: South Indian
Category: Main course
Serves: Serves 3
Prep time: 5 Hours
Cook time: 20 Minutes
Total time: 5H20 Minutes
To soak ( 1 cup - 240ml)
- Javvarisi / Sago / Sabudana - 2 cups ( White big )
- Water - to soak sago ( I used 1.5 to 2 cups )
To temper
- Cooking oil - 3 tbsp
- Mustard seeds - 1 tsp
- Urad dal - 1 tsp
- Chana dal - 2 tsp
- Big onion – 2 nos (medium sized)
- Green chillies – 2 to 3 nos (Finely chopped)
- Carrot - 1 no (Small sized, Finely chopped)
- Capsicum - 1/2 no
- Curry leaves – Few
- Ginger – 1 inch piece(Finely chopped)
- Coriander leaves - 2 tbsp (chopped finely)
- Lemon juice - 1 tsp
- Salt - as needed
|
HOW TO MAKE JAVVARISI UPMA
- Wash sabudana / javvarisi twice. Drain, Soak it overnight adding water.
- Temper mustard, urad and chana dal. Saute onion, chilli , curry leaves and vegetables.
- Saute till veggies turn soft and cooked. Add soaked sago and mix well adding salt.
- Cover cook in low to medium flame till sago becomes transparent.
- Lastly add lemon juice and coriander leaves. Serve hot !
METHOD - STEP BY STEP PICTURES
- Wash the sabudana twice or thrice. Drain the water completely. Soak in 1.5 to 2 cups of water over night or atleast for 5 hours minimum. The level of water should be 1/2 inch above sabudana. The next morning sabudana absorbs all the water and grows in quantity. If you take a sago and press it, it should be mushy. It shows sago is soaked well. Fluff it well without any water and keep aside.

- Wash and chop onion, chilli, carrot and capsicum finely. Set aside.

- Heat oil in a good non-stick kadai. Temper mustard seeds, urad dal and chana dal. When it turns golden, add finely chopped onion, green chillies, curry leaves, capsicum, carrot , required salt and mix well. Take care while adding salt because sago upma takes less salt unlike other upma recipes. Saute in low to medium flame till carrot becomes soft. No need to add water.

- Now add sabudana and mix well. Keep the flame low to medium. Cover cook till done. Open the lid once in 2 minutes and toss gently. No need to add water. Sabudana turns transparent. It takes nearly 10 to 12 minutes to become transparent completely. Make sure it is not sticking to the bottom of kadai.
- Sabudana tastes soft when its cooked completely. You can taste and find it. If you keep cooking for more than 10 minutes, javvarisi starts to become sticky. So cover cook in low flame, toss once in 2 minutes till done. Sometimes a layer of sabudana sticks to the bottom of kadai if you over cook it. Don’t worry. You can serve it as adai at the end. It tastes crispy.

- Switch off the flame. Sprinkle lemon juice and garnish with coriander leaves. Mix well and serve hot !

- Enjoy !
|
Note
- Use white big sago variety for this upma. Do not soak in excess water ( i.e more than 1/2 inch) to cover sago. It will turn mushy. For 2 cups of sago, I used 1.5 cups of water. You can use maximum 2 cups.
- You should cook the sago in low to medium flame without adding water. So you should keep tossing it once in 2 minutes.
- If you cover cook it for long time, sago may stick to the bottom. So keep stirring it in the middle.
- Be careful while adding salt because sago needs less salt.
|
Try this easy, yummy javvarisi upma for your breakfast or dinner and enjoy !
Continue Reading...