Search Chitra's Food Book

Showing posts with label BACHELOR'S COOKING. Show all posts

November 23, 2017

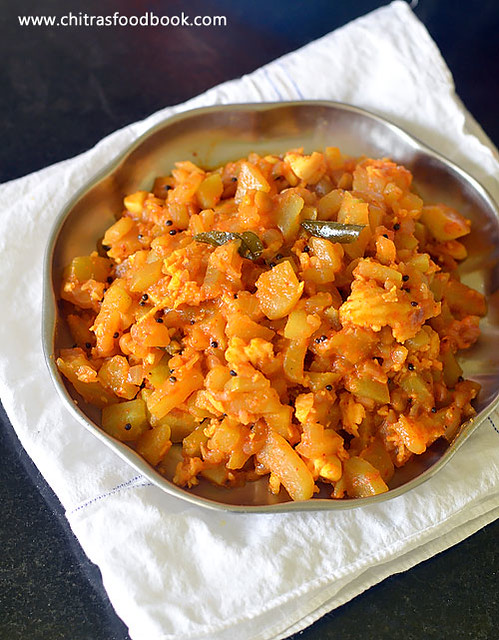
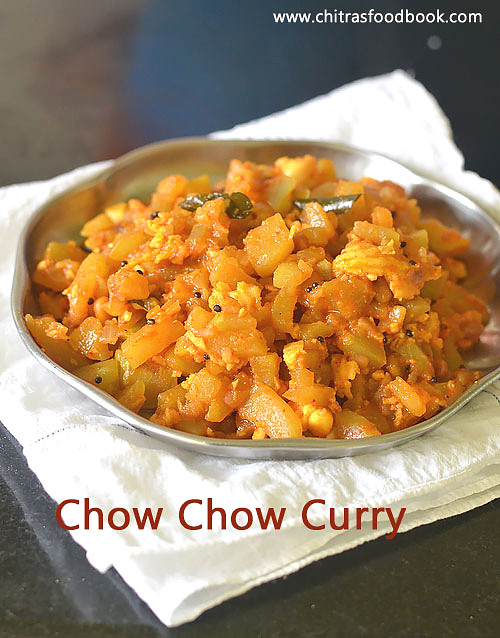
Chow Chow Poriyal – Spicy Chayote Curry Recipe

Chow chow poriyal
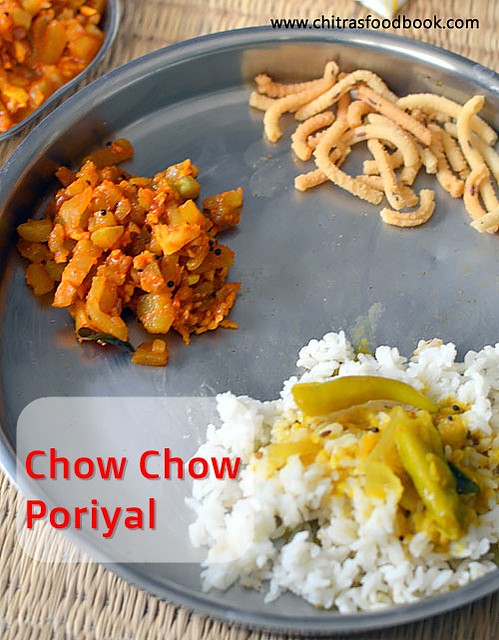
Chow Chow Vegetable( Chayote in English, Ishkus in Hindi, Seemai Kathirikai in Tamil, Seeme Badanekayi in Kannada, Seema vankaya in Telugu) makes its appearance in my kitchen at least twice a week. I make sambar, poricha kuzhambu and kootu with it. Chow chow poriyal was in my try list for long time as I have never seen my mom & MIL making poriyal with it. Here in Bangalore, most of the hotels serve this chow chow curry in their lunch thali. So I wanted to try that way. Its a very simple dry curry recipe but spicy in taste. People call it as Seeme Badanekayi Palya in Kannada. As chow chow vegetable is bland in taste, I have used spice powders to bring the masala flavor. I prepared this chow chow curry directly in a pressure cooker to ease my job. Yes it was done under 10 minutes. This recipe is ideal for bachelors and working women to whip up a quick side dish for sambar rice and curd rice. Do try this spicy chow chow curry for rice and enjoy. If you like, you can have it with roti a well.

Check out my other PORIYAL RECIPES too !

chayote curry

Chow Chow Poriyal / Chayote Curry Recipe


Chow Chow Poriyal / Chayote Curry Recipe

Chow chow poriyal for rice,roti - Chayote dry curry recipe, spicy in taste !


Cuisine: Indian
Category: Poriyal Recipes
Serves: Serves 2
Prep time: 10 Minutes
Cook time: 10 Minutes
Total time: 20 Minutes


INGREDIENTS


  • Chow Chow / Chayote - 1 no (Big)
  • Big onion - 1 no
  • Garlic cloves - 5 nos
  • Turmeric powder - 1/4 tsp
  • Red chilli powder - 3/4 tsp
  • Dhania powder - 1 tsp
  • Garam masala powder - 1/2 tsp
  • Grated coconut - 1/4 cup
  • Salt & water - as needed
To Temper
  • Coconut oil or cooking oil - 1.5 tbsp
  • Mustard seeds - 1/2 tsp
  • Urad dal - 1 tsp
  • Chana dal - 1 tsp
  • Curry leaves - Few

HOW TO MAKE CHOW CHOW PORIYAL

  1. Wash and peel the skin of chow chow/chayote. Slice the head and tail portion.
  2. Chop into small cubes.Chop onion and garlic finely.
  3. Heat oil in a pressure cooker base. Splutter mustard seeds, urad & chana dal.
  4. Saute onion, garlic and chayote. Add salt and spice powders. Mix well.
  5. Add very little water and pressure cook in high flame for 2 whistles.
  6. Boil if there is excess water. Let it become dry. Lastly add grated coconut, mix well and serve !

METHOD - STEP BY STEP PICTURES

  • Wash and slice the head and tail part of chow chow. Peel the skin completely and chop into cubes. Chop onion and garlic cloves finely and set aside.
    Chow chow poriyal
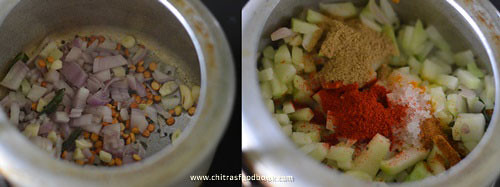
  • Heat oil in a pressure cooker base. Splutter mustard seeds, urad dal, chana dal and curry leaves. When dals turn golden, add chopped onion, garlic and chow chow cubes. Saute for a minute.
  • Add turmeric powder, red chilli powder, dhania powder, garam masala powder and salt. Mix well.
    Chow chow poriyal
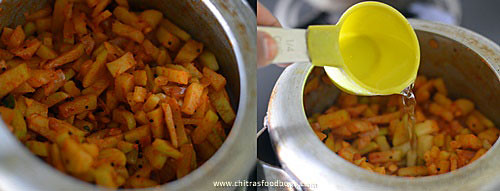
  • Add little water say 3 tbsp and mix well. Less water is needed because chow chow will release some water while cooking. Pressure cook in high flame for 2 whistles.
    Chow chow poriyal
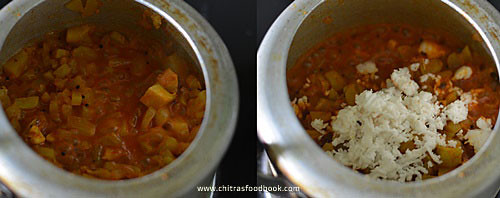
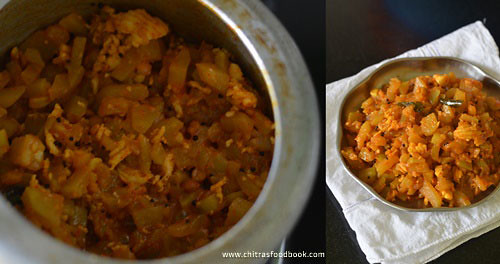
  • Open the lid after steam is released. Mix gently and check for excess water. If its there, boil in high flame for a minute to drain all the water.Do not mix often because poriyal may become mushy. Toss gently. Poriyal should be dry. Lastly add grated coconut, mix well and serve with rice or roti !
    Chow chow poriyal
    Chow chow poriyal
Enjoy !

Note

  • Chow chow needs less water and less time to cook. So do not add more water while pressure cooking.
  • Chow chow becomes mushy if you cook for more time in pressure cooker. So its better to cook in high flame for 2 whistles. It cooks in the steam itself.
  • Adjust the quantity of chilli powder to make it more spicy.
  • You can also skip garam masala powder but it adds a nice flavor to the curry.
  • You can follow the same recipe and use bottle gourd / sorakkai instead of chow chow.

Try this easy, yummy chow chow poriyal at home and enjoy with sambar rice, rasam rice & curd rice.
Chow chow curry

Continue Reading...


November 2, 2017

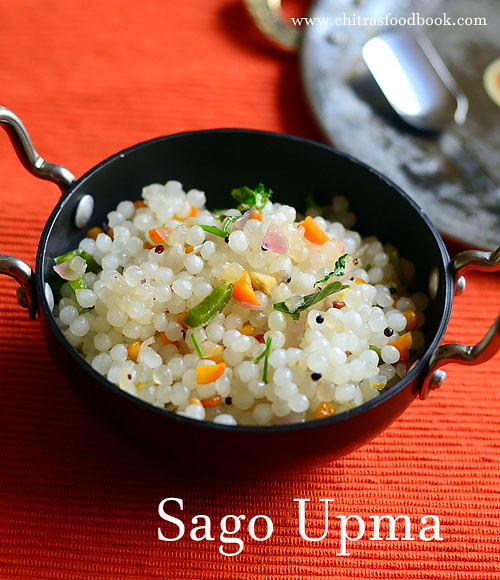
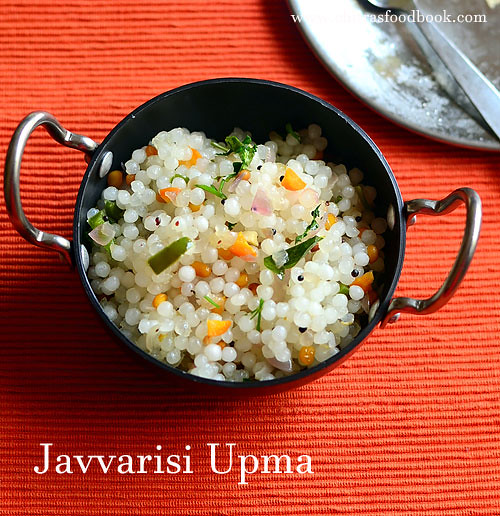
Javvarisi Upma – Sago Upma – Sabudana Upma Recipe

Sabudana upma
Recently I started making javvarisi upma at home for breakfast and dinner. This is a South Indian style sabudana upma without using potato and peanuts. Actually I came to know about sago upma(Sabudana in Hindi, Saggubiyyam in Telugu) from my friend Shalini. She taught me a version with nylon javvarisi. I will share that recipe later. 

Today I have shared javvarisi upma with big, white sago pearls. My MIL makes a similar upma without soaking sabudana. She roast it and make just like javvarisi payasam. I too follow this method for making kheer. But I couldn’t make upma as javvarisi becomes sticky. Once I make it perfect, I will share that version.

Last week I made this upma by soaking sabudana overnight. It came out very well, non-sticky and tasted great. I added vegetables like carrot and capsicum to make it colorful. Sendhil & Raksha loved it a lot. Now I am confident enough to try North Indian sabudana khichdi too. Hope I will start to explore more sabudana recipes from now. Now lets see how to make South Indian style Javvarisi upma with step by step pictures.
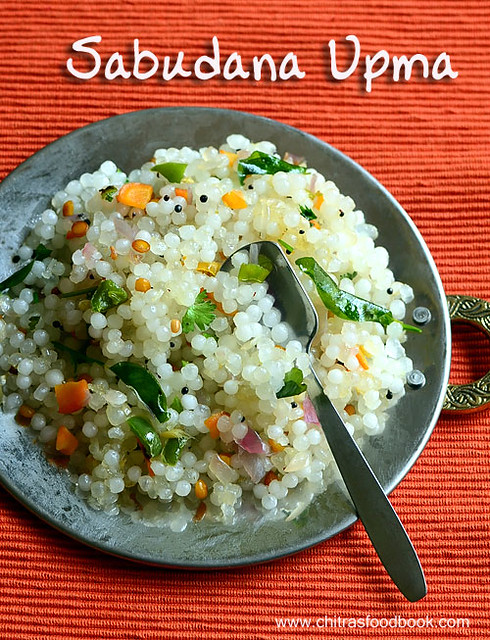
Sago upma

Javvarisi upma - Sago upma - Sabudana upma recipe

Javvarisi upma - Sago upma - Sabudana upma recipe

South Indian style Sabudana upma - Javvarisi upma recipe with step by step pictures


Cuisine: South Indian
Category: Main course
Serves: Serves 3
Prep time: 5 Hours
Cook time: 20 Minutes
Total time: 5H20 Minutes


INGREDIENTS

To soak ( 1 cup - 240ml)
  • Javvarisi / Sago / Sabudana - 2 cups ( White big )
  • Water - to soak sago ( I used 1.5 to 2 cups )
To temper
  • Cooking oil - 3 tbsp
  • Mustard seeds - 1 tsp
  • Urad dal - 1 tsp
  • Chana dal - 2 tsp
  • Big onion – 2 nos (medium sized)
  • Green chillies – 2 to 3 nos (Finely chopped)
  • Carrot - 1 no (Small sized, Finely chopped)
  • Capsicum - 1/2 no
  • Curry leaves – Few
  • Ginger – 1 inch piece(Finely chopped)
  • Coriander leaves - 2 tbsp (chopped finely)
  • Lemon juice - 1 tsp
  • Salt - as needed

HOW TO MAKE JAVVARISI UPMA

  1. Wash sabudana / javvarisi twice. Drain, Soak it overnight adding water.
  2. Temper mustard, urad and chana dal. Saute onion, chilli , curry leaves and vegetables.
  3. Saute till veggies turn soft and cooked. Add soaked sago and mix well adding salt.
  4.  Cover cook in low to medium flame till sago becomes transparent. 
  5. Lastly add lemon juice and coriander leaves. Serve hot !

METHOD - STEP BY STEP PICTURES


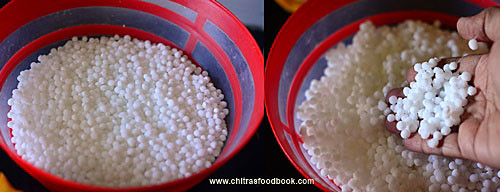
  • Wash the sabudana twice or thrice. Drain the water completely. Soak in 1.5 to 2 cups of water over night or atleast for 5 hours minimum. The level of water should be 1/2 inch above sabudana. The next morning sabudana absorbs all the water and grows in quantity. If you take a sago and press it, it should be mushy. It shows sago is soaked well. Fluff it well without any water and keep aside.
    Javvarisi upma
Javvarisi upma

  • Wash and chop onion, chilli, carrot and capsicum finely. Set aside.
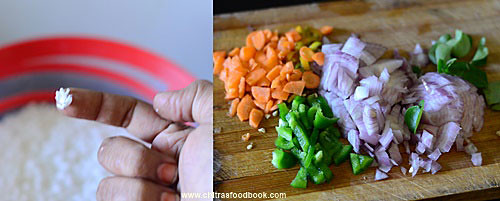
Javvarisi upma
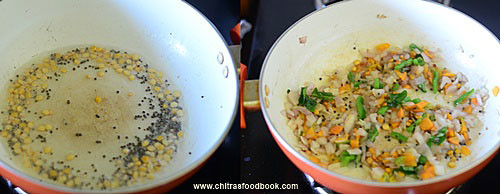
  • Heat oil in a good non-stick kadai. Temper mustard seeds, urad dal and chana dal. When it turns golden, add finely chopped onion, green chillies, curry leaves, capsicum, carrot , required salt and mix well. Take care while adding salt because sago upma takes less salt unlike other upma recipes. Saute in low to medium flame till carrot becomes soft. No need to add water.
    Javvarisi upma
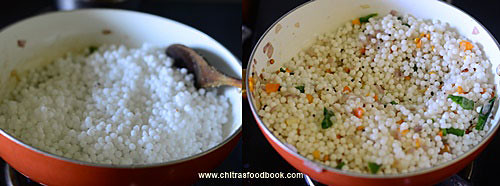
  • Now add sabudana and mix well. Keep the flame low to medium. Cover cook till done. Open the lid once in 2 minutes and toss gently. No need to add water. Sabudana turns transparent. It takes nearly 10 to 12 minutes to become transparent completely. Make sure it is not sticking to the bottom of kadai. 
  • Sabudana tastes soft when its cooked completely. You can taste and find it. If you keep cooking for more than 10 minutes, javvarisi starts to become sticky. So cover cook in low flame, toss once in 2 minutes till done. Sometimes a layer of sabudana sticks to the bottom of kadai if you over cook it. Don’t worry. You can serve it as adai at the end. It tastes crispy.
    Javvarisi upma
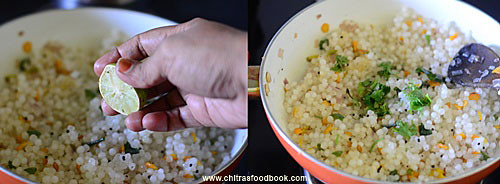
  • Switch off the flame. Sprinkle lemon juice and garnish with coriander leaves. Mix well and serve hot !
    Javvarisi upma
  • Enjoy !

Note

  • Use white big sago variety for this upma. Do not soak in excess water ( i.e more than 1/2 inch) to cover sago. It will turn mushy. For 2 cups of sago, I used 1.5 cups of water.  You can use maximum 2 cups.
  • You should cook the sago in low to medium flame without adding water. So you should keep tossing it once in 2 minutes.
  • If you cover cook it for long time, sago may stick to the bottom. So keep stirring it in the middle. 
  • Be careful while adding salt because sago needs less salt.

Try this easy, yummy javvarisi upma for your breakfast or dinner and enjoy  !

Javvarisi upma
Continue Reading...

October 31, 2017

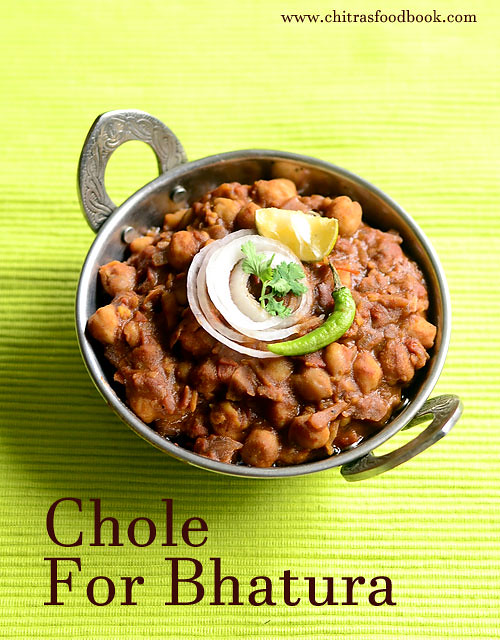
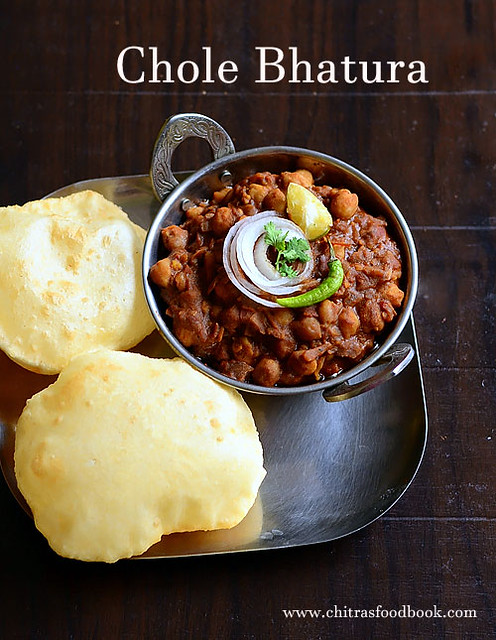
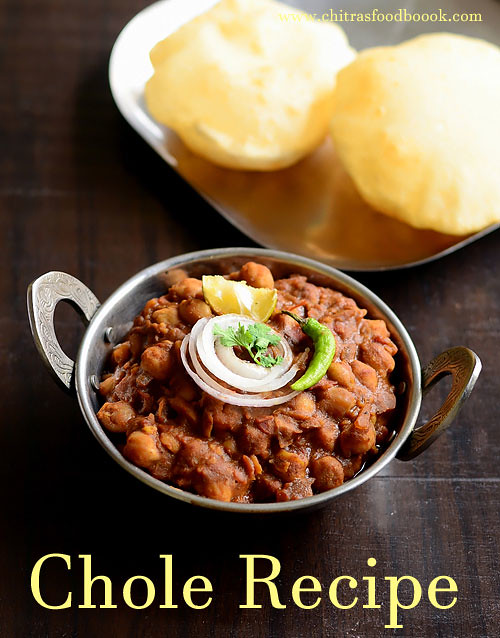
How To Make Chole For Bhature & Puri – Chole Recipe Video

Chole Recipe/ Chole ki sabji also known as Black chana masala is the perfect side dish for Bhature/ bhatura and puri. Chole bhatura is the one of the popular breakfast & lunch combo in North India. Its originated from Punjab. Authentic Punjabi chole recipe calls for using fresh Chole masala powder. Today I have shared an easy chole recipe I got from a cookbook by Nita Mehta.
Chole bhatura
In this recipe, I have used store bought chana masala powder. It came out really well and tasty. We enjoyed it with bhature for our weekend lunch. To make black colored chole, we need to add tea bags or dried amla powder while cooking kabuli chana. Also we have to use Anardhana powder ( Pomegranate seeds powder) , dhania powder, chole masala powder and roasted cumin powder in the masala. I was able to achieve its color to some extent as I used less tea powder. This is one of the easy chole recipe as it has no grinding works. If you are looking for chole recipe with homemade chole masala powder, please check my Punjabi lunch menu post in which I had shared an authentic chole recipe. Soon I will try to make a separate post. I will share the bhatura recipe in this week. Now lets see how to make Chole recipe for Bhatura with step by step pictures and video !


Chole recipe

Chole Recipe / How to make Chole for Bhatura


Chole Recipe / How to make Chole for Bhatura

Chole recipe - How to make chole for bhatura and puri.


Cuisine: North Indian
Category: Main course
Serves: Serves 4
Prep time: 10 hours
Cook time: 20 Minutes
Total time: 10H20 Minutes


INGREDIENTS

To pressure cook (1 cup - 250ml)
  • Kabuli chana/ White chana - 1 cup
  • Baking soda - 1/4 tsp
  • Tea powder - 2 tsp ( tie in a cloth ) OR 2 teabags
  • Cinnamom - 2 inch
  • Cardamom - 2 nos ( Use black cardamom if you have)
  • Cloves - 2 nos ( Optional)
  • Water - 2.5 to 3 cups
To Saute & Cook
  • Cooking oil - 4 tbsp
  • Big onion - 2 no ( finely chopped)
  • Ripe tomato - 5 nos ( Medium sized, finely chopped)
  • Green chilli - 2 nos ( finely chopped)
  • Ginger - 2 inch piece (Finely chopped or julienned)
  • Anardhana powder/ Dried Pomegranate seeds powder – 1.5 tsp
  • Red chilli powder - 1 tsp
  • Dhania powder - 1 tsp
  • Garam masala powder - 1 tsp
  • Cumin powder - 1/2 tsp
  • Chana masala powder - 2 tsp ( I used MDH brand)
  • Sugar - 1/4 tsp (Optional)
  • Salt - as needed

HOW TO MAKE CHOLE RECIPE


  1. Wash and soak Chana overnight or 10 hours in required water.
  2. Pressure cook Chana adding tea bags, whole spices and baking soda.
  3. Cook for 2 whistles in low flame. Remove the tea bag after its cooked.
  4. Heat oil in a kadai. Saute onion adding anardhana till brown. Add tomato,chilli & ginger.
  5. Saute till mushy. Add spice powders, cook till oil separates.
  6. Lastly add cooked chana with water, simmer gravy for 10 minutes. Serve with bhatura !

METHOD - STEP BY STEP PICTURES

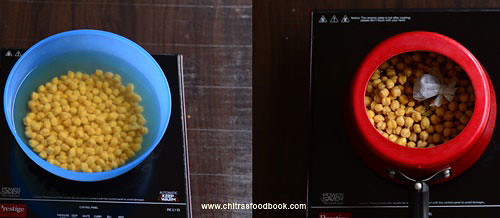
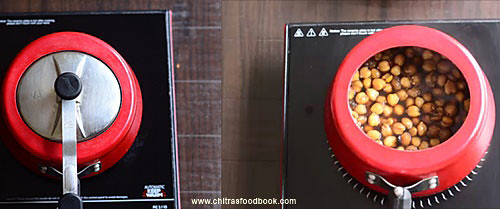
  • Wash and soak kabuli chana (white chana) for 10 hours or overnight. Chana becomes more than doubled in quantity after its soaked. I got around 2.5 cups. Drain the soaked water. In a pressure cooker base, take soaked chana, baking soda, 2 tea bags or 2 tsp tea powder tied in a thin cotton cloth, cinnamon, cloves and cardamom. Add 2.5 to 3 cups of water. Pressure cook in very low flame for 2 to 3 whistles.
    chole recipe
  • Chana cooks soft and becomes black in color. Remove and squeeze the tea bag slightly. Discard it. Keep the cooker aside.
    chole recipe
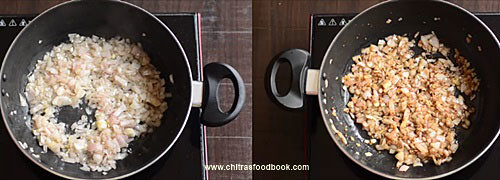
  • Heat oil in a kadai. Saute onions till transparent. Add anardhana powder and saute till onions turn brown in color without burning. 
    chole recipe
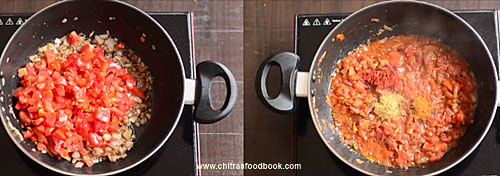
  • Now add finely chopped tomato, ginger and green chilli. Add required salt and saute till tomato becomes mushy
  • Then add red chilli powder, dhania powder, garam masala powder, sugar and cumin powder. Saute till onion separates from the gravy. It takes 5 to 7 minutes.
    chole recipe
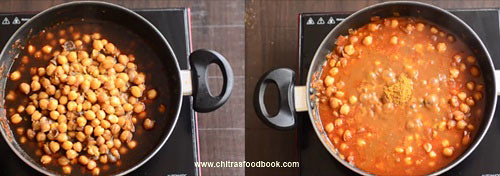
  • Add the cooked chana along with black water and whole spices added in the cooker. Mix well and add chana masala powder/chole masala powder. Mix well and check for taste. Add more salt & spice powders if needed.
    chole recipe
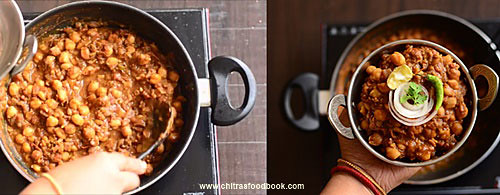
  • Boil the gravy for 10 minutes in medium flame till it comes to desired consistency. I made it thick. You can make it slightly watery if you like. Switch off the flame and serve hot with bhatura or puri.
    chole recipe
    Enjoy !

Note

  • Addition of tea bags is essential to get black colored chana after cooking. So do not skip it.
  • Adding Anardhana powder is for flavor and to get dark colored chole masala.
  • You can also use store bought chole masala powder instead of chana masala powder.
  • Adjust the quantity of spice powders as per your taste.

Try this easy, yummy Chole masala recipe at home. Enjoy with bhatura !

How to make chole for bhatura

Continue Reading...

October 17, 2017

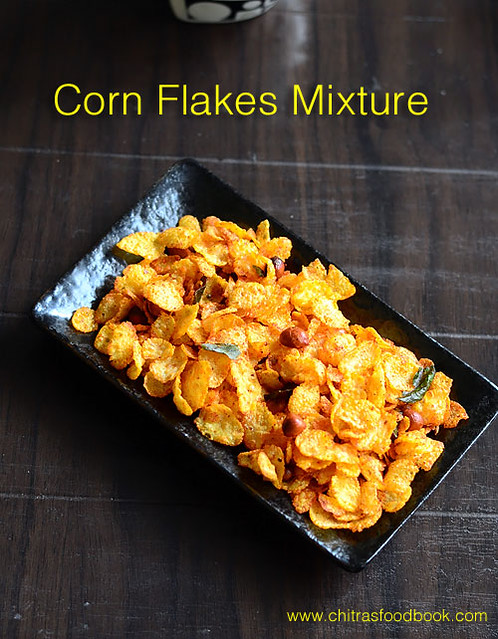
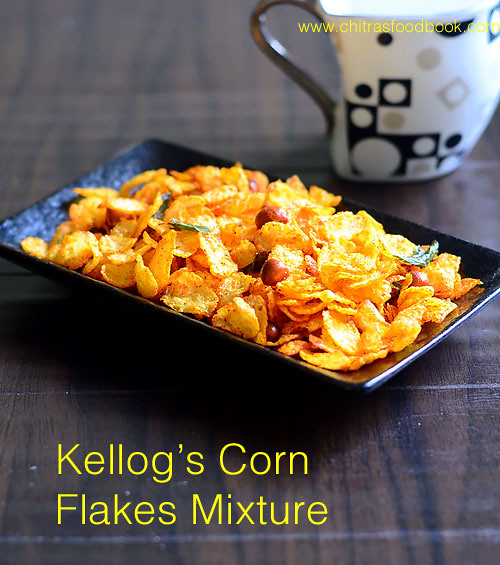
Cornflakes Mixture Without Oil – Kellogg's Corn Flakes Mixture / Chivda

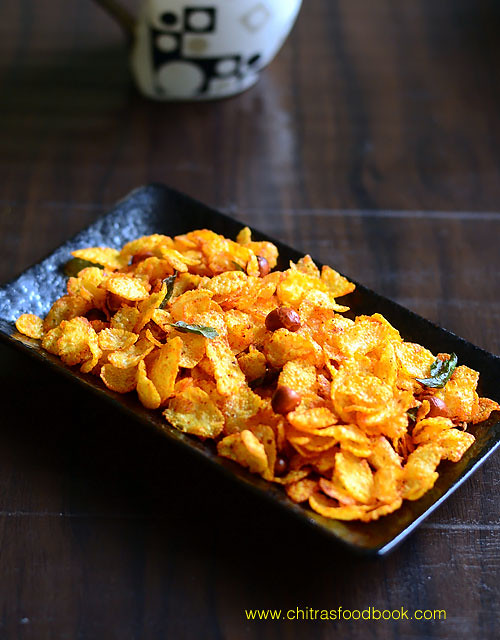
Cornflakes mixture using Kellogg’s corn flakes. It is made without deep frying in oil. Recently my daughter Raksha tasted this cornflakes chivda in her friend’s house. She told me to try it for Diwali. I asked her friend’s mom for the recipe and tried it today. Its a very easy, quick and healthy snack as it has very less oil. Kids & adults would love this for sure.Its quiet additive !
Kellogg's cornflakes mixture
Many of us buy corn flakes cereals (Kelloggs or Kwality brand) for breakfast. If you have it in hand, you can make this corn flakes mixture in the next 10 minutes. You can pack this for your kids snack box or for their teatime after coming back from school. It can be stored for 2 to 3 days without losing its crispness. Friends, diwali is incomplete without mixture recipe. If you have not done any mixture recipe, you can try it now. Try this easy, low calorie Kellog’s corn flakes mixture at home and surprise your family.Check out the video recipe below.

Cornflakes mixture recipe without oil

Cornflakes mixture


Cornflakes mixture Low calorie cornflakes mixture recipe using Kellogg's Cornflakes with less oil!
Cuisine: Indian
Category: Snacks
Serves: 4.5 cups
Prep time: 5 Minutes
Cook time: 5 Minutes
Total time: 10 Minutes


INGREDIENTS

  • Kellogg's corn flakes - 2 cups (Original, plain flavor)
  • Roasted peanuts – 2 tbsp
  • Curry leaves - few
  • Cashew nuts - 2 tbsp (broken, optional)

To temper
  • Cooking oil - 1 tbsp
  • Mustard seeds - 1/2 tsp
  • Cumin seeds - 1 /2 tsp
  • Urad dal - 1/2 tsp
  • Red chilli powder - 1 tsp ( add 1.5 tsp for more spiciness)
  • Turmeric powder - 1/8 tsp
  • Salt - as needed
  • Chat masala – 1/4 tsp(optional)
  • Sugar – 1/4 tsp
  • Dry grapes/Raisins – 1 tbsp (optional, add if your kids like it)
METHOD

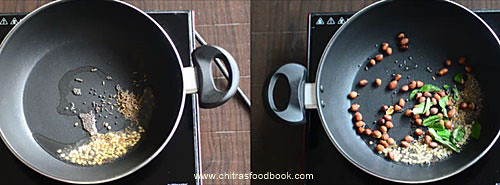
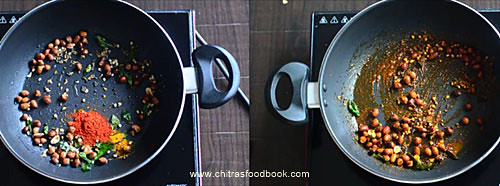
  • In a kadai, heat oil and splutter mustard seeds, urad dal and cumin seeds. Add roasted peanuts, curry leaves and mix well.
corn flakes mixture step1
  • Lower the flame completely and add turmeric powder, red chilli powder, salt and sugar. Mix well.
Corn flakes mixture
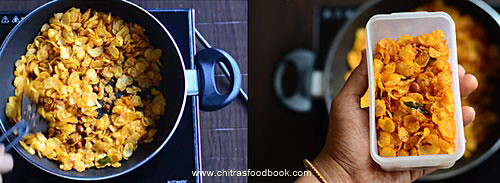
  • Lastly add the cornflakes and mix well in low flame till its coated with chilli ppowder. Check for taste and add 1/2 tsp more chilli powder at this stage, mix well and switch off the flame.
corn flakes mixture step2
  • Store in a box after the mixture cools down. Stays crispy and good for 2-3 days when stored in an air tight box.

    Note
    • Do not use raw corn flakes for this recipe. You should deep fry it or microwave before making mixture.
    • I used Kellogg’s brand corn flakes cereals,original flavor. 
    • Adjust the quantity of chilli powder as per taste. But keep the flame low while adding chilli powder else it will burn.
    • For variations, you can add raisins and cashews. Saute raisins till it bulges. I din’t use as my daughter doesn’t like it.
    • You can also add little chaat masala for more flavor.
    Try this easy, yummy, low calorie corn flakes mixture for this Diwali & kids lunch box. !
    Kellogg's corn flakes mixture
    Continue Reading...

    September 28, 2017

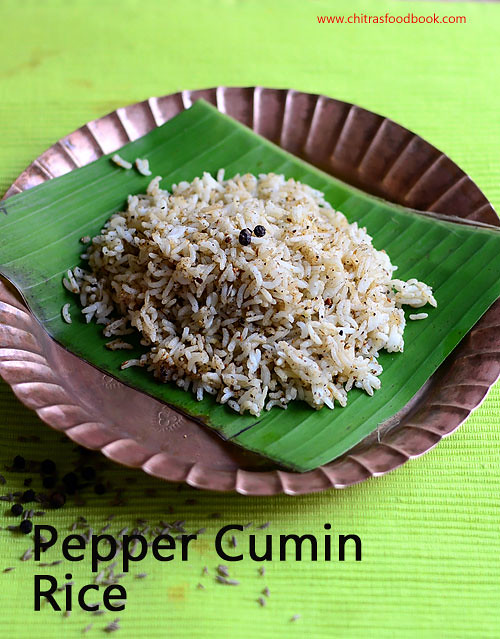
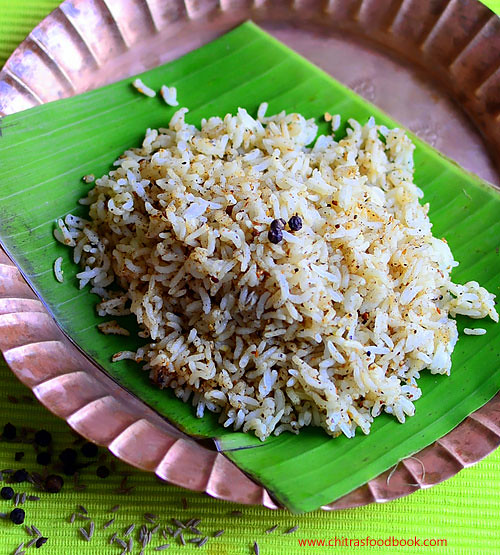
    Milagu Jeeraga Sadam – Pepper Cumin Rice Recipe

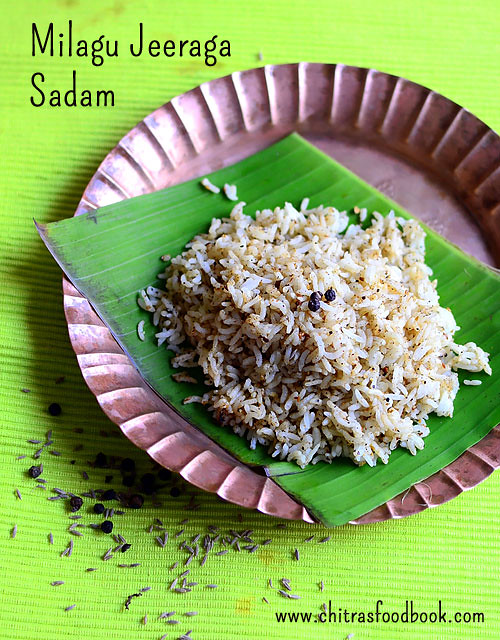
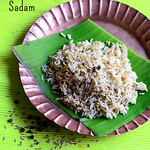
    Pepper cumin rice
    Pepper cumin rice / Milagu jeeraga sadam in Tamil is one of the yummy, South Indian rice recipes we make as prasadam for Navratri, Saraswathi pooja, Purattasi sani thaligai, aadi 18 etc. Yesterday I made this rice for navaratri afternoon neivedyam learning from my MIL. My MIL make this rice at least once in a week as pepper is a healthy Indian spice that helps to purify blood, improves appetite and digestion. Sendhil loves this rice variety a lot. So we make this pepper rice for his lunch box and  one day travel as well.

    Sometimes we used to combine Saraswathi pooja, Purattasi sani thaligai festivals and make 5 rice varieties, chana sundal and thullu maavu(rice flour mixed with jaggery) for Saraswathi pooja neivedyam. We make this milagu jeeraga sadam as one of the 5 rice varieties. As its so easy to make, I thought it would be useful for you all. I have already shared a video on how to make 5 rice varieties. You can replace sesame seeds rice/ ellu sadam with milagu jeeraga sadam and offer to God for tomorrow Saraswathi pooja festival. Lets see how to make this easy milagu sadam /pepper rice with step by step pictures !
    Milagu jeeraga sadam

    Milagu Jeeraga Sadam - Pepper Cumin Rice

    Pepper cumin rice recipe

    How to Pepper cumin rice

    South Indian
    Main course
    2

    Ingredients (1 cup - 250ml)

    • Cooked rice - 1 cup
    • Ghee - 1 tsp (to roast)
    • Pepper corns - 1 tbsp
    • Cumin seeds/Jeera - 1/2 tbsp
    • Salt - as needed
    • Ghee - to mix with rice

    How to make the recipe

    1. Heat ghee in a kadai.Roast pepper & cumin seeds till it starts to crackle.
    2. Remove and grind to powder adding salt.
    3. Mix this powder with cooked rice.
    4. Enjoy !

    Pepper cumin rice - Step by step photos

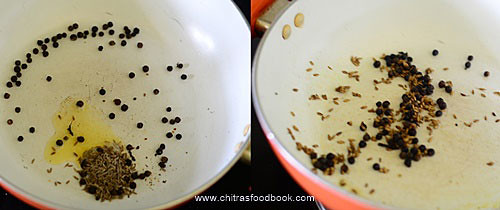
    • Heat ghee in a kadai and roast pepper & cumin seeds in medium flame till cumin seeds starts to splutter.
      Pepper cumin rice/ Milagu jeeraga sadam
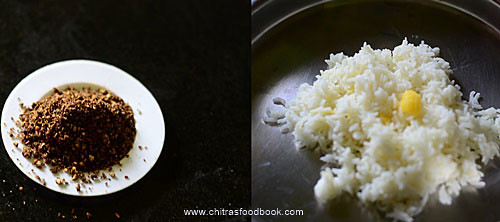
    • Remove in a plate and let it cool down. Grind to a slightly coarse powder adding salt.
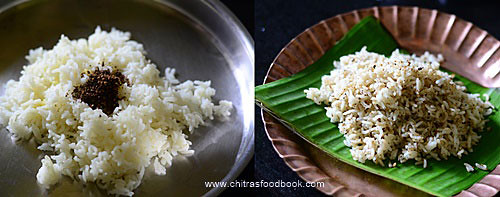
    • Take the required cooked rice. Add 2 tsp of ghee, ground powder, mix well and check for taste.
      Pepper cumin rice/ Milagu jeeraga sadam
    • Add more salt & powder if required. Serve !
      Pepper cumin rice/ Milagu jeeraga sadam
    • If you wish, you can temper mustard seeds, curry leaves in ghee and add to rice.

    Notes

    • Pepper alone gives spiciness to the rice. So you can add more pepper if you want spicy taste.
    • Do not add more cumin seeds. Its flavor will dominate.
    • Adding ghee helps to enhance the flavor and taste. If you don't want to add ghee, you can add sesame oil.

    Try this easy and flavorful pepper cumin rice and enjoy !
    Milagu sadam
    Continue Reading...

    September 19, 2017

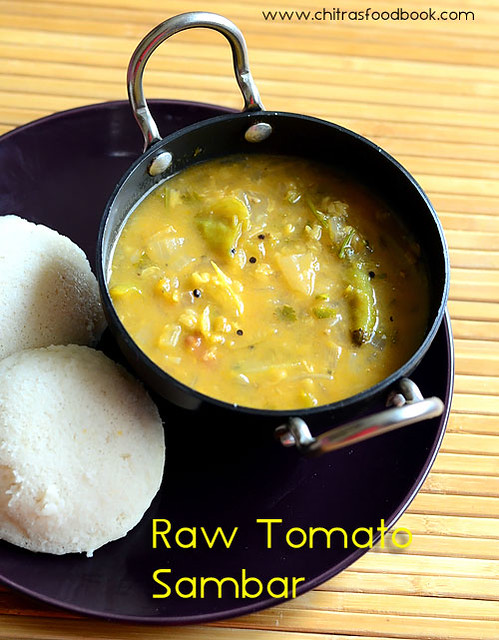
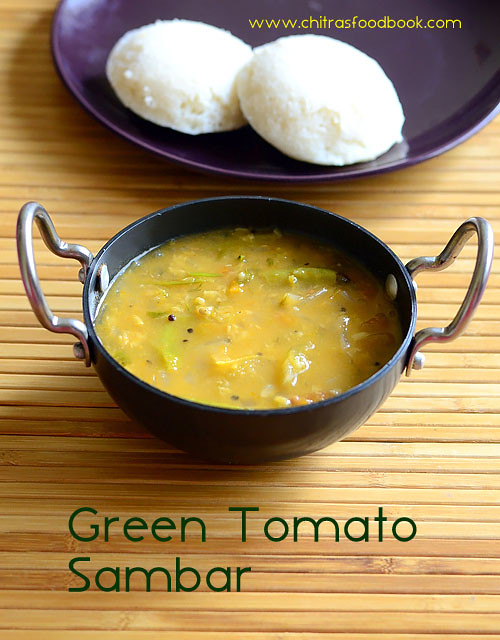
    Green Tomato Sambar For Idli – Thakkali Kai / Raw Tomato Gotsu Recipe

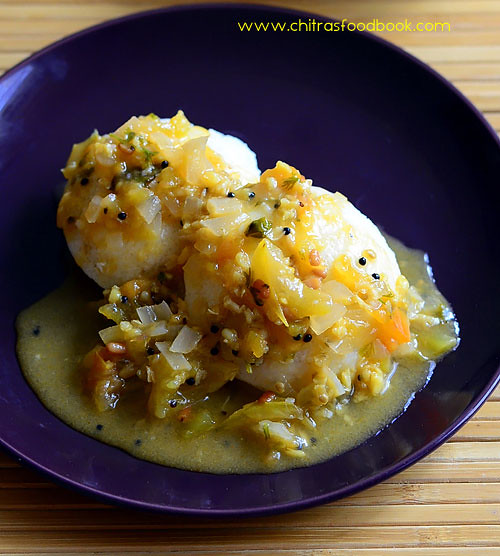
    Green tomato sambar for idli – We call it as Thakkali kai gotsu in Tamil. I started buying green tomato ( Raw tomato / thakkali kai / Pacha thakkali in Malayalam ) recently as I wanted to learn some yummy South Indian recipes with it. I have heard people make green tomato kootu, curry, thogayal for rice and chutney for idli, dosa. My MIL suggested to try this easy thakkali kai gotsu as the first step. Usually we make Thanjavur style tomato onion gosthu for idli but my MIL told her mom make gotsu only using raw tomato. But my MIL started making with ripe tomatoes. So I too followed the same.
    Green tomato sambar
    When she suggested this, I was very happy and tried it because thakkali gotsu is our family favorite side dish for idli. So this recipe would never fail. Its a very easy, one pot sambar recipe for idli / dosa.  Even though moong dal is added, we make it watery in consistency so that it tastes juicy with idli.Both adults & kids would love this recipe.  This thakkali kai gotsu is completely different from Chidambaram gosthu. You must try it know the difference Happy. Ok, lets see how to make green tomato sambar / Thakkali kai gotsu for idli with step by step pictures !
    Do check out my ripe tomato onion gotsu, Chidambaram brinjal gosthu recipes.

    Thakkali kai sambar

    Green Tomato Sambar/Thakkali kai Gotsu Recipe

    Green tomato sambar Recipe

    How to make Green tomato sambar Recipe

    South Indian
    Main Course
    3-4

    Ingredients (1 cup - 250ml)

    • Green tomato- 5 nos
    • Yellow moong dal - 1 tbsp
    • Big onion - 1 no (Finely chopped)
    • Tamarind - Berry size(Sundakkai alavu)
    • Green chilli - 3 nos (Use 5 for more spicy sambar)
    • Turmeric powder - 1/8 tsp
    • Idli batter - 1 tbsp
    • Coriander leaves - to garnish
    • Cooking oil or Sesame oil - 2 tbsp
    • Mustard seeds - 1/2 tsp
    • Urad dal - 1 tsp
    • Curry leaves - Few(Finely chopped)
    • Salt - as needed
    • Water - as needed (I used 2 to 2.5 cups)

    How to make the recipe

    1. Wash and chop tomato into small pieces.
    2. Heat oil in a cooker base.
    3. Temper mustard,urad dal,curry leaves.Saute the onion,green chilli adding salt.
    4. When onion becomes transparent, add tomato and saute till mushy.
    5. Add turmeric powder, moong dal and water.
    6. Pressure cook in low flame for 2 whistles.Remove & add idli batter. Boil for 2 minutes.
    7. Garnish & serve with Idli.

    Green tomato sambar / Thakkali Kai Gotsu - Step by step photos

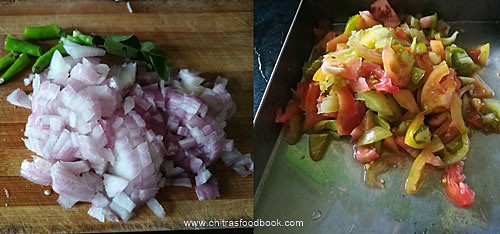
    • Wash and chop tomato into small pieces.Finely chop onion and slit green chillies, curry leaves and set aside.
      Green tomato sambar recipe
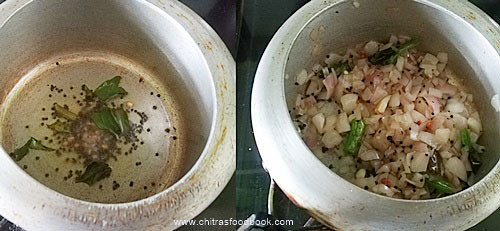
    • Heat oil in a cooker base.Splutter mustard seeds, urad dal, cumin seeds and curry leaves. Saute finely chopped onion, slit chilli.Saute till onion becomes transparent.
      Green tomato sambar recipe
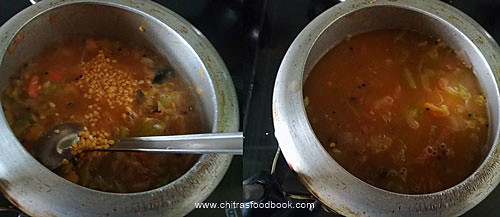
    • Add tomato pieces, saute till mushy.Add turmeric powder, tamarind extract and 2 cups of water. Add moong dal and Pressure cook in low flame for 2 whistles.
      Green tomato sambar recipe
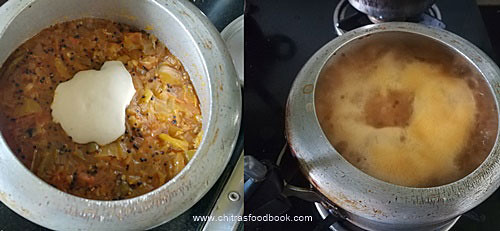
    • Remove after the steam is released. Add more water if the sambar is thick. Add idli batter, boil the gravy for 2 minutes and garnish with coriander leaves. Serve with idli drizzled with sesame oil.
      Green tomato sambar Recipe

    Notes

    • Adjust the quantity of chilli as per taste.
    • Do not skip tamarind extract. It helps to balance the taste.
    • No need to use jaggery.
    • As we are cooking directly in a pressure cooker, moong dal cooks perfectly.
    • If the sambar is too thick, add more water and boil.

    Hot idli topped with gotsu, drizzled with a tsp of sesame oil is divine ! Do try this combo !
    Green tomato sambar recipe

    Continue Reading...